Friday, February 11, 2022

15 Best WordPress Plugins for Marketers in 2022

Are you a marketer trying to make the most out of WordPress?

WordPress plugins can help marketers achieve their goals, like increasing sales and attracting more traffic to the website. You can also use plugins to automate marketing workflows and optimize your site for search engines.

In this article, we have hand-picked some of the best WordPress plugins for marketers.

WordPress plugins for marketers

Why Should Marketers Use WordPress Plugins?

WordPress is the most popular website builder in the world that powers over 43% of all websites on the internet.

A big reason for that is that marketers have access to over 59,000 WordPress plugins.

As a marketer, you can use these plugins to improve your workflow and grow your business.

For instance, some plugins help you optimize your website for search engines. Using them, you can improve your keyword rankings and attract more visitors from organic search.

Using the right WordPress plugins can also help improve your site’s conversions. You can create different campaigns to get people to buy your product or enter their emails.

WordPress plugins can also help you to automate different tasks. This helps save time so you can focus on other things to improve your business. For instance, you can automatically share WordPress blog posts on social media using the right plugin.

That said, let’s look at some of the best WordPress plugins for marketers.

1. OptinMonster

OptinMonster

OptinMonster is the best WordPress popup plugin and the #1 lead generation tool available in the market. It allows you to grow your email list, boost subscriptions, and get more conversions.

You can add beautiful signup forms without hiring developers. OptinMonster allows you to add signup forms in the sidebar, after content, slide-in forms, lightbox popups, display a floating bar, and add countdown timer widgets.

It also comes with built-in analytics and A/B testing to optimize your lead generation efforts. Its signature Exit-Intent technology helps you convert visitors just before they are about to leave your website.

2. All in One SEO (AIOSEO)

AIOSEO

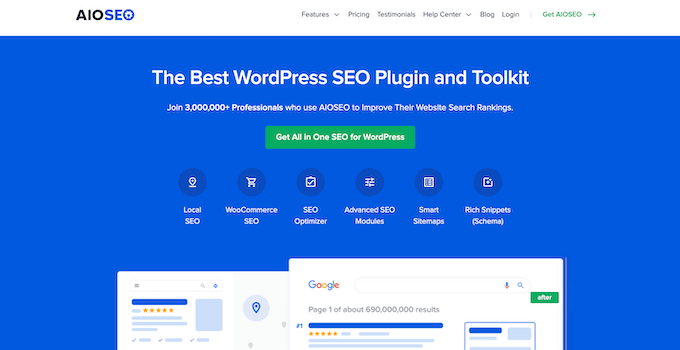
All in One SEO (AIOSEO) is the best SEO plugin for WordPress. Over 3 million websites use this plugin to improve their SEO rankings.

The plugin lets you optimize your site for search engines without technical knowledge or hiring an expert. It allows you to add meta tags, open graph tags, XML sitemaps, breadcrumb navigation, and more.

It also has all the advanced features like smart schema markup (featured snippets), local SEO module, image SEO module, news & video sitemaps, IndexNow integration for faster content indexing, smart link assistant, and more.

Besides that, AIOSEO provides a tool to conduct an SEO audit of your website and analyze your competitors. The plugin also offers a powerful redirection manager that you can use to fix broken links on your site and boost your SEO.

You can check out our guide on how to properly set up AIOSEO on your WordPress website.
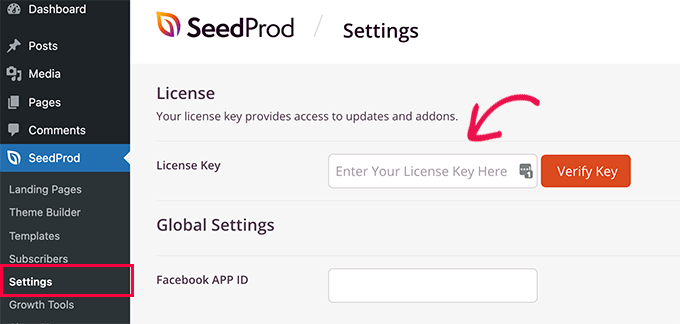
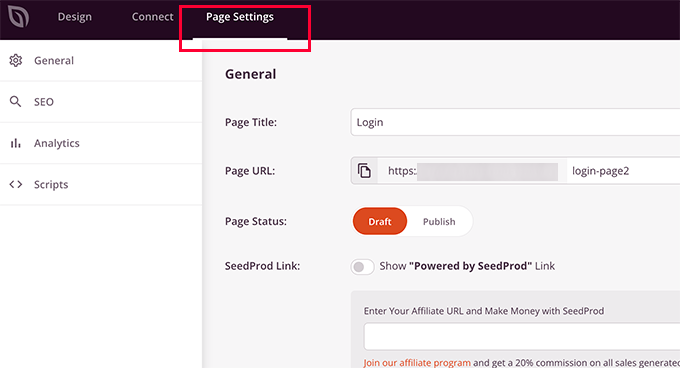
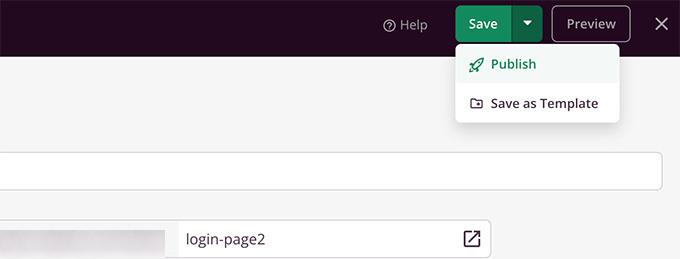
3. SeedProd

SeedProd landing page builder

SeedProd is the best landing page builder for WordPress. It’s used by over 1 million professionals and makes it super easy to create all kinds of landing pages for WordPress.

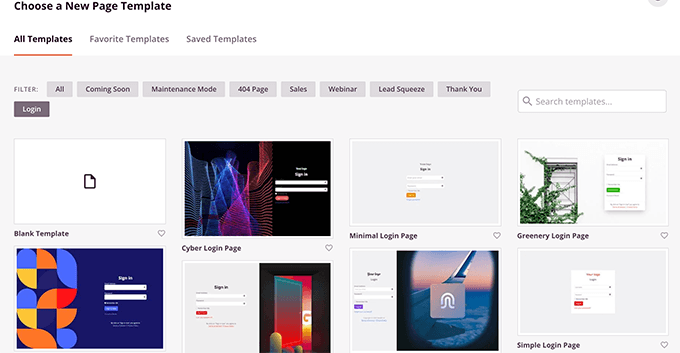
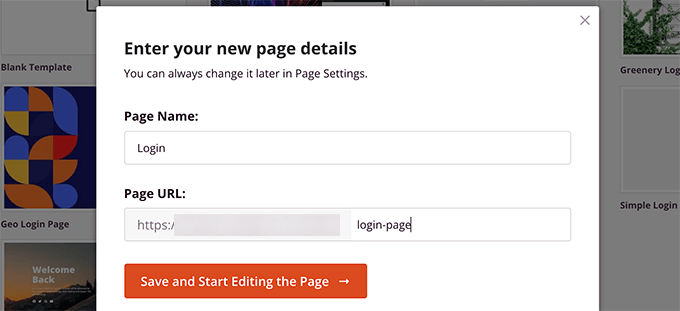
You can build a landing page for your marketing campaign in just a few clicks using the drag and drop builder. SeedProd also offers prebuilt landing page templates to get started and multiple customization options. It lets you add an optin form, countdown timer, images, videos, and more to the landing page.

SeedProd easily integrates with some of the best email marketing services. You can connect your favorite service to the landing page and grow your email list.

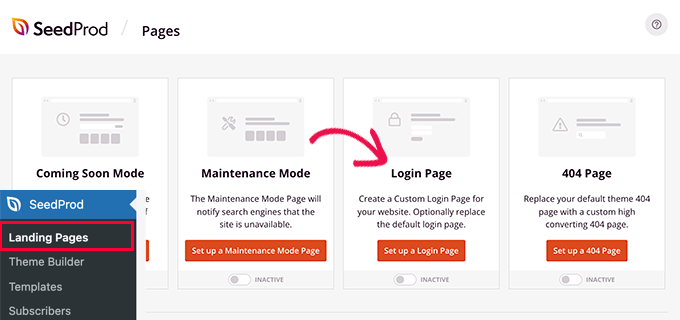
Besides, the plugin also lets you set up a coming soon page for a new website or a new product launch, maintenance mode page, 404 pages, and more.

With their new theme builder feature, you can now use SeedProd to create completely custom WordPress themes without any code.

4. PushEngage

PushEngage

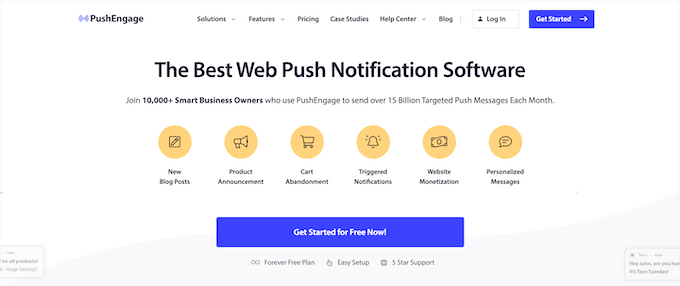
PushEngage is the best push notification software that helps you engage with your visitors and bring them back to your website.

You can send push notifications when a new blog post is published or a new product is launched. It also helps promote sales offers and get more conversions. If you have an eCommerce store, then PushEngage helps recover abandoned carts with personalized messages.

With PushEngage, it’s very easy to send targeted push notifications. You can create different audience segments and send marketing messages based on their action.

Other features offered by the software include A/B testing, automatic drip campaigns, custom campaigns, campaign tracking, and more.

5. ThirstyAffiliates

ThirstyAffiliates

ThirstyAffiliates is the best affiliate link management tool for WordPress. It allows you to manage your affiliate links inside WordPress, cloak links, and easily add them to your posts.

It also allows you to see how each affiliate link performs on your site. You can even organize your links into categories, so they’re easier to find.

For more details, see our guide on how to add affiliate links in WordPress using ThirstyAffiliates.
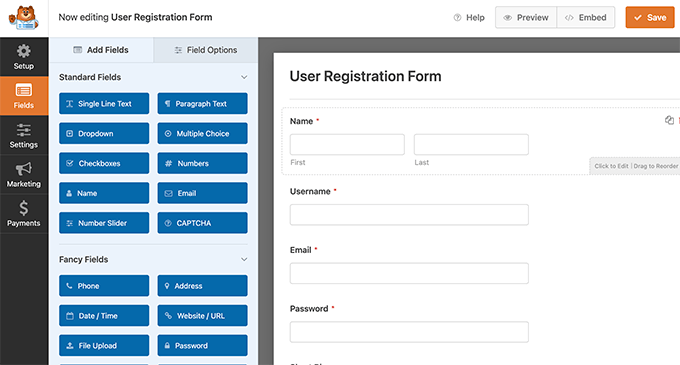
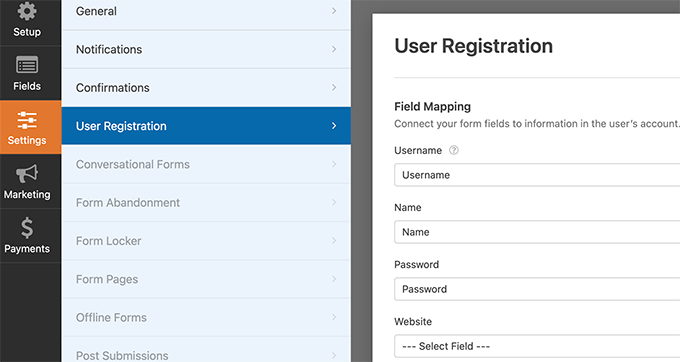
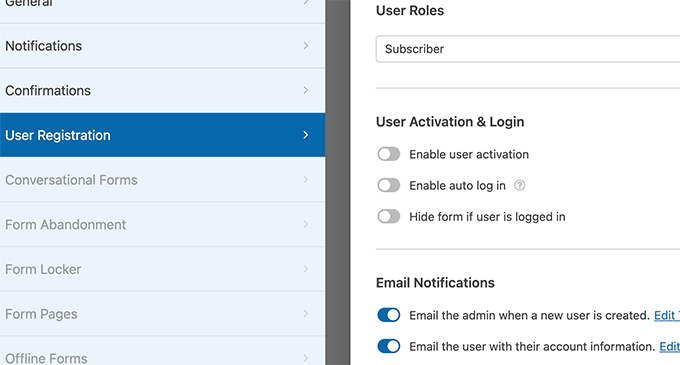
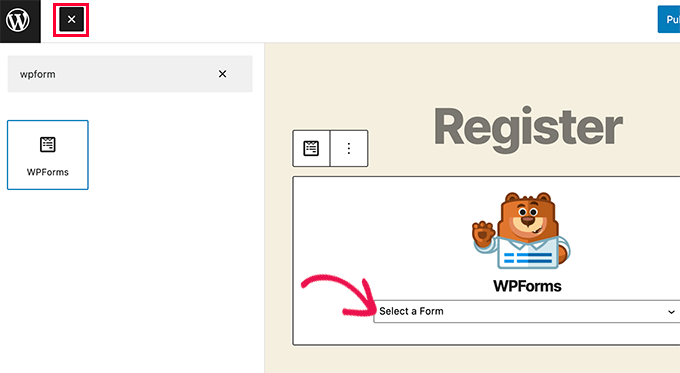
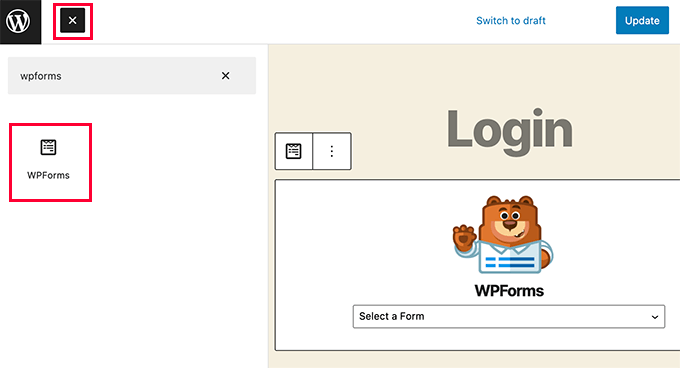
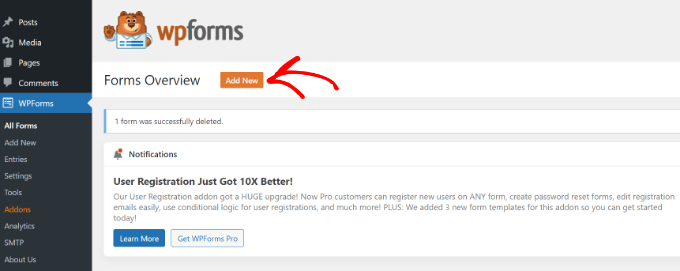
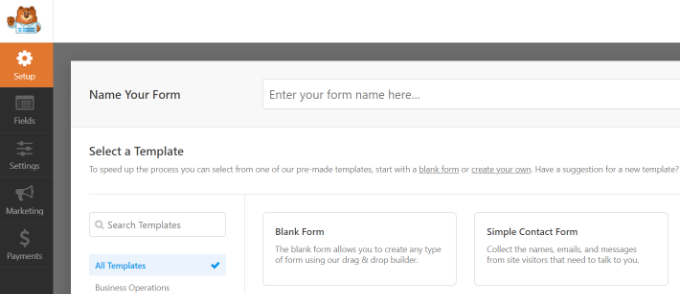
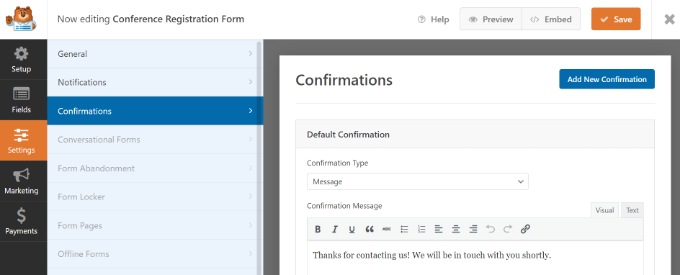
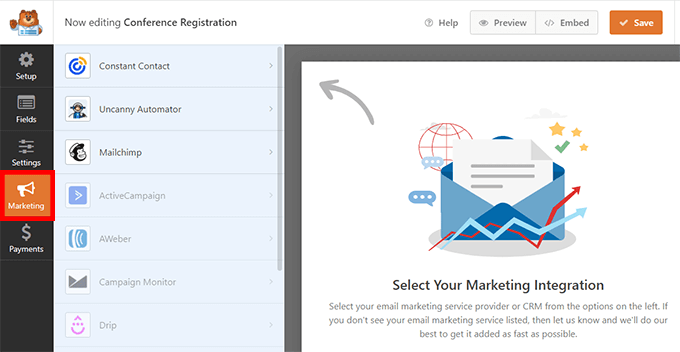
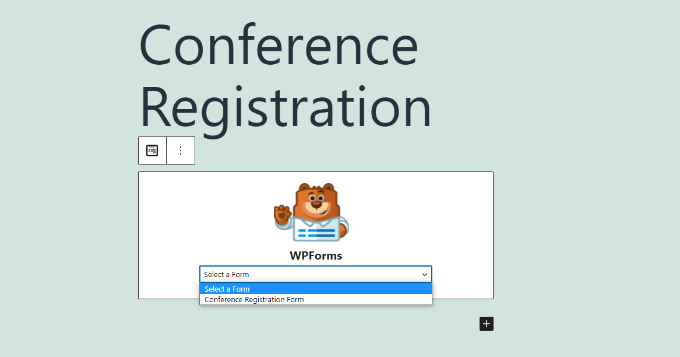
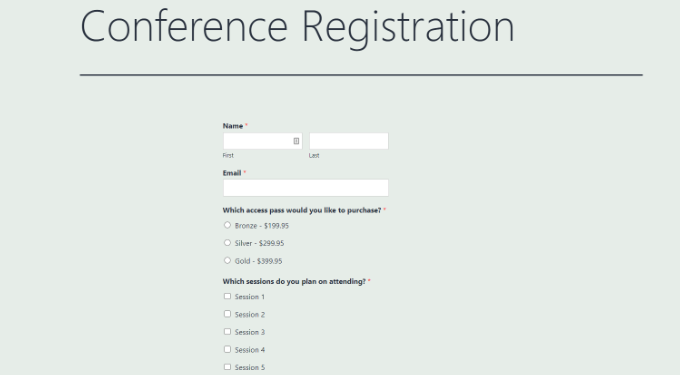
6. WPForms

WPForms

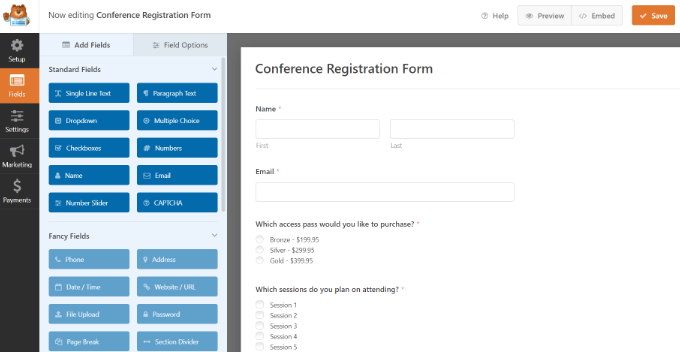
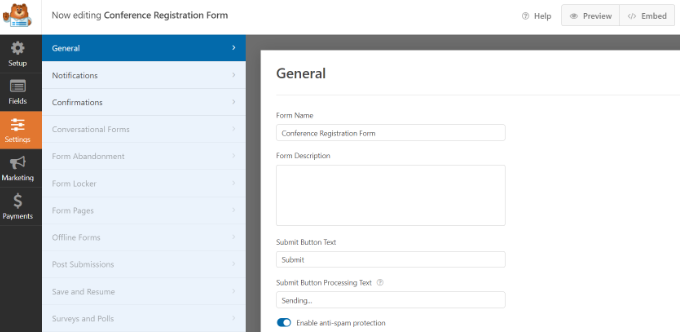
WPForms is the most beginner-friendly contact form plugin for WordPress. It allows you to quickly create beautiful forms and add them to your WordPress site.

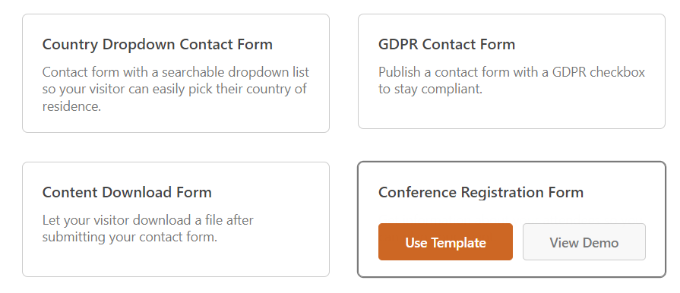
WPForms comes with an easy drag and drop form builder and ready-to-use templates. You can create any type of form with just a few clicks and don’t have to touch a single line of code.

Over 5 million websites use WPForms because it contains advanced features that marketers love such as form abandonment detection, conversational forms, user journey reports, geolocation insights, smart data routing, user segmentation, conditional logic, and more.

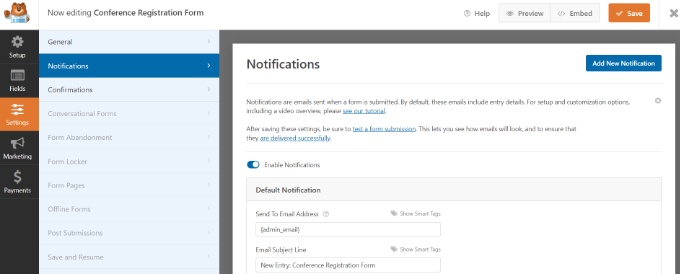
As a marketer, you can use WPForms to stay in touch with your visitors. You can create forms to get their feedback, conduct surveys, and help them resolve their queries.

Another benefit of using WPForms is that it’s mobile-friendly and highly optimized for speed. For more details, see our article on how to create a contact form in WordPress.

7. Uncanny Automator

Uncanny Automator

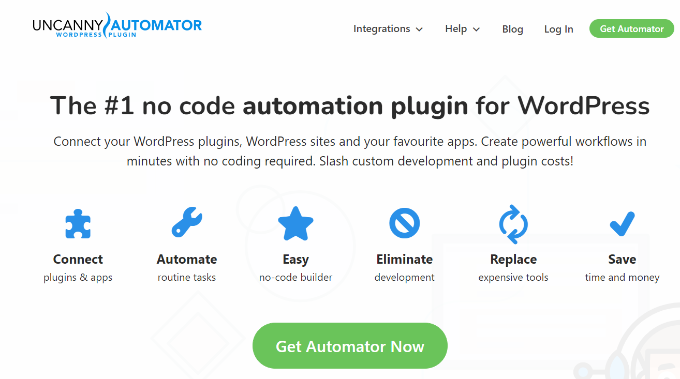
Uncanny Automator is the best automation plugin for WordPress that helps you automate different tasks without editing code. You can create powerful workflows to save time.

Uncanny Automator works seamlessly with over 70 different WordPress plugins and third-party tools. This allows you to create automation recipes on your WordPress website.

For instance, you can automatically tweet new blog posts, send SMS notifications from your WooCommerce store, integrate zoom meetings in WordPress, and more.

8. MonsterInsights

MonsterInsights

MonsterInsights is the best analytics solution for WordPress, and it helps you track your site’s performance. As a marketer, you can see which campaigns are working the best by finding out where your visitors are coming from.

You no longer have to rely on your best guess to see what’s working and what’s not. With MonsterInsights, you can uncover insights to grow your business by connecting Google Analytics with WordPress.

For instance, it automatically tracks outbound links clicks, affiliate link clicks, and file downloads. This shows how people are interacting with your website. Plus, it will also help track form conversions, eCommerce performance, and more.

Using the plugin, you can also see stats inside your WordPress dashboard. It helps in quickly glancing at your site’s performance without having to leave your website.

MonsterInsights also offers a Popular Post feature, which lets you display your best content and top products within your content, in the sidebar, or at the end of an article.

9. Revive Old Post

Revive old posts

Revive Old Posts allows you to engage users on social media by sharing your old content. Social media is an important source of traffic for any website.

The plugin automatically shares links to your old posts on your social profiles. You can choose a time interval between posts, use hashtags, exclude specific categories or posts, and more.

For detailed instructions, see our guide on how to automatically share your old WordPress posts.

10. Subscribe To Comments Reloaded

Subscribe to comments reloaded

Subscribe to Comments Reloaded allows your users to subscribe to comments on your posts. Comments are probably the most powerful user engagement tool on any WordPress site.

But by default, once a user has added their comment, there is no way to remind them to come back and check out any replies or future discussion.

Using the plugin, users will get notification emails whenever there is a new comment on the post. It not only helps you gain more page views, but it also helps users keep up with the conversation.

See our guide on how to allow users to subscribe to comments in WordPress for detailed instructions.

11. AdSanity

AdSanity

AdSanity is one of the best ad management plugins for WordPress, and it offers an easier way to manage ads on your WordPress site.

You can create as many ad units as you want and then rotate them, group them, or schedule them to maximize your earning potential. You can use it with advertising programs like Google AdSense or sell your own ads directly.

Check out our guide on how to manage ads in WordPress with Adsanity plugin for more details.

12. Smash Balloon

Smash Balloon

Smash Balloon is the best social media plugin for WordPress. You can use it to display content from your social media profiles on your WordPress website.

The plugin helps create Facebook, Twitter, YouTube, and Instagram feeds in WordPress. This way, you get to showcase your social media posts on your website and boost your followers. The plugin also lets you create a social wall and display content from multiple social platforms in one place.

Smash Balloon offers multiple options for customizing the social feed to match your WordPress theme. Besides that, the plugin is SEO-friendly and ensures that your site’s speed isn’t compromised.

13. Envira Gallery

Envira Gallery

Envira Gallery is the best WordPress photo gallery plugin in the market. It allows you to create mobile responsive, SEO friendly, and faster loading image galleries in minutes. You can open up gallery images in beautiful lightbox popups with thumbnail navigations.

Images are the most engaging form of content on the web. You can easily add images to your WordPress posts without any plugin. However, if you are going to share a lot of photos, then you need Envira Gallery. Its drag and drop builder lets you create stunning photo galleries.

The plugin also lets you add watermark to your image galleries and helps prevent image theft. For details, check our article on how to create responsive WordPress image galleries with Envira.

14. WP Call Button

WP call button

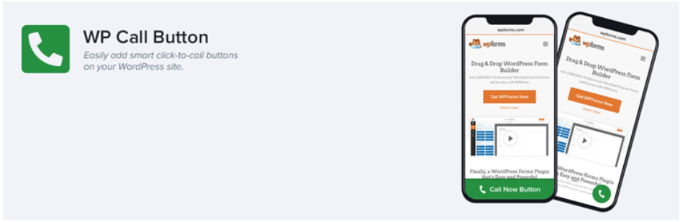
WP Call Button is a free WordPress plugin that lets you add a click to call button on your website without hiring a developer.

If your business requires customers to contact you for quotes, information, or support, then adding a click to call button is beneficial. With rising mobile traffic, users can simply click on the button and instantly reach out to your business phone number.

WP Call Button is a user-friendly plugin and all you have to do is enable the plugin, enter your phone number, and that’s it. The plugin also offers options to change the button text, color, call button position, and more.

15. TrustPulse

TrustPulse

TrustPulse is the best social proof plugin for WordPress. It helps you boost your site’s conversions by leveraging social proof.

You can display the latest customer interactions on your website as social proof, like buying a product or subscribing to your newsletter. This helps you leverage FOMO (fear of missing out) and get more sales.

The plugin is super easy to use, and you can customize the notifications for your audience. It also comes with smart targeting, which allows you to control when and to whom the notifications will be shown.

We hope this article helped you find the best WordPress plugins for marketers. You may also want to see our guide on how to start a podcast and the best WooCommerce plugins.

If you liked this article, then please subscribe to our YouTube Channel for WordPress video tutorials. You can also find us on Twitter and Facebook.

The post 15 Best WordPress Plugins for Marketers in 2022 first appeared on WPBeginner.


February 11, 2022 at 05:00PM

Thursday, February 10, 2022

How to Allow User Registration on Your WordPress Site

Do you want to allow users to register on your site?

You can enable user registration in WordPress to allow users to add posts, comment, or perform other actions on your website.

In this article, we’ll show you how to easily allow user registration on your WordPress site and how to manage users.

Allowing user registration in WordPress

Here is the list of topics we will cover in this tutorial:

Note: This guide focuses on adding users to your WordPress site with default user roles and capabilities. If you’re looking to make money online by allowing users to pay for premium content and access to a community, then you should see our ultimate guide to creating a WordPress membership site instead.

Enabling User Registration in WordPress

WordPress comes with built-in functionality to manage user registrations. It is turned off by default, but you can easily turn it on.

Simply head over to the Settings » General page in your WordPress admin area. Scroll down to the ‘Membership’ section and check the box next to ‘Anyone can register’ option.

Open user registration in WordPress

Next you need to select the default user role. This is the user role assigned to each new user who registers on your website.

Each user role in WordPress comes with its own permissions and capabilities. See our guide on WordPress user roles and permissions to learn more about user roles in WordPress.

The default user role is ‘Subscriber’, which you can change to any other user role available.

For example, if you want users to write posts on your website then you can change the default user role to Contributor or Author.

Important: Never use ‘Administrator’ as the default user role for user registrations, or a new user may be able to take over your website and lock you out.

Don’t forget to click on the Save Changes button to store your settings.

Now your WordPress site is open to user registrations. You can visit your WordPress login page, and you’ll see an option to register as a new user.

Register for new account

After opening your website for user registration, you would want to let users know that they can sign up and login to their account.

There are multiple ways to do that.

You can simply add links in your WordPress sidebar to your login and registration page, or you can create custom login and registration pages for your website.

We’ll show you 3 different methods, so you can choose the one that best suits your needs.

Method 1: Adding The Meta Widget to WordPress Sidebar

The simplest way to add a login link is by adding the meta widget to your sidebar.

Simply go to the Appearance » Widgets page and add the ‘Meta’ widget to a sidebar. You can see our guide on how to add and use widgets in WordPress for detailed instructions.

Add meta widget to your WordPress sidebar

The meta widget includes links to register, log in / log out, RSS feed, comments feed, and WordPress.org website.

This is how it appears on our example website:

Meta widget preview

Method 2: Creating Custom Login Pages Using WPForms

The problem with the first method is that there is no way to customize the registration or login forms. You can’t add form fields or change the design of the forms, and they wouldn’t match the design of your website.

By using your own custom login pages, you can offer a much better user experience. You can embed your forms on any page on your website, and add form fields to collect any information you want.

We’ll show you different ways to create your own custom login pages. The easiest one is by using the WPForms plugin.

WPForms is the best WordPress contact form plugin on the market. It comes with a user registration addon that allows you to easily add login and registration forms anywhere on your website.

WPForms website

First thing you need to do is install and activate the WPForms plugin. For more details, see our step by step guide on how to install a WordPress plugin.

Note: You will need at least Pro license to access user registration addon.

Upon activation, you need to visit WPForms » Settings page to enter your license key. You can get this license key from your account on WPForms website.

WPForms license key

After verification, you need to head over to WPForms » Addons page.

On this page, scroll down to ‘User Registration Addon’ and click on the Install Addon button next to it.

User registration addon

WPForms will install the addon, and then you will need to click on the activate button to start using it.

You are now ready to create custom registration and login forms using WPForms.

Creating a Custom Registration Form

Simply visit the WPForms » Add New page to launch the WPForms’ form builder.

First you need to enter a form name and then search for user registration template under the ‘Select a Template’ section.

Select user registration template

Click on the ‘Use Template’ button to continue, and WPForms will create a simple WordPress user registration form for you.

You can now add new fields from the left panel as well as customize the order of existing fields by using a simple drag and drop interface.

Edit user registration form

Once you are done adding the fields, click on the ‘Settings’ menu on the left.

Then select the ‘User Registration’ tab.

Map form fields

Here you can map each form field to information in the user’s profile, select the user role, enable notifications, select the confirmation page, and enable user activation.

The user activation feature helps you reduce spam user registration in WordPress.

If you select the manual method, then all users must be approved by an admin before they can login to your site.

user activation options

If you select the email method, then the user must click on an activation link before they can login to your website.

Besides adding form fields, you can also connect your form with other WPForms addons.

For instance, you can connect to your email marketing service provider and automatically add new users to your email list. Similarly, you can connect WPForms to payment services like PayPal and Stripe to receive online payments.

When you’re finished, don’t forget to click on the Save button at the top right corner of the screen to save your form settings.

You can now exit the form builder by clicking on the close button.

Your user registration form is ready to be added to your WordPress site.

Simply create a new WordPress page or edit an existing page that you would like to use as the registration page.

On the page edit screen, you need to add WPForms blocks to your content area.

Add WPForms block

From the WPForms block, simply click on the drop down menu and select the ‘User registration form’ you created earlier.

You can now save or publish your page, and then visit the page to see your custom user registration page in action.

User registration page preview

Creating a Custom Login Form

Now that your custom user registration page is active, let’s add a custom login form to your WordPress site.

To get started, visit WPForms » Add New. This will launch the form builder interface of WPForms.

You need to provide a name for your custom login form and then select ‘User Login Form’ as your template.

Login form template

WPForms will now create a new login form.

By default, it only has the username and password fields.

Edit login form

You can add additional fields to the form by adding them from the left panel.

Next, you need to click on the settings tab and then click on the ‘Confirmation’ tab. This is where you can define what to do after a successful login.

You can show users a message, redirect them to the page they came from, or redirect them to any other page on your site.

Login form confirmation

Click on the Save button on the top right corner of the screen to store your form settings.

You can now exit the form builder interface by clicking on the close button.

Your custom login form is ready to be added into your WordPress site.

You can add your custom login form to a page by creating a new page and then adding the WPForms block to the content area.

Adding login form to a page

You can also add your custom login form to a sidebar.

Simply head over to Appearance » Widgets page and add the WPForms block or the legacy widget to a sidebar.

Add login form to your sidebar

Select the custom login form you just created from the drop-down menu, and then click on the Update button to store your widget settings.

You can now visit your website to see your custom login form in action.

Login form preview

For more on this topic, see our guide on how to create a custom login page for WordPress.

Method 3. Create a Custom Login Page using SeedProd

Now if you use WPForms alone to create a custom login page, then the design of your login page will still depend on your WordPress theme.

What if you wanted to design a custom login page that looks more professional and sleek?

SeedProd allows you to easily create a beautiful custom login page for your website.

It is the most powerful WordPress page builder plugin on the market. You can use it to create any type of page without writing any code or learning any special design skills.

First, you need to install and activate the SeedProd plugin. For more details, see our step by step guide on how to install a WordPress plugin.

Upon activation, you’ll be asked to enter your SeedProd license key. You can find this information under your account on the SeedProd website.

Enter your SeedProd license key

Next, you need to visit the SeedProd » Landing Pages page and click on the Set up a Login Page button.

Set up a login page

Next, you will be asked to choose a template for your login page.

SeedProd comes with several professionally designed templates to choose from, or you can also start with a blank canvas.

Choose login page template

Next, you need to provide a name and URL for your custom login page.

Then click on Save and Start Editing button to continue.

Login page settings

This will launch the SeedProd’s page builder interface.

You’ll see a live preview of your login page where you can point and click to edit any item.

Editing your login page in SeedProd

You can also add new blocks to your login page from the left column.

Once you are satisfied with the design, switch to the Page Settings tab.

Login page configuration

From here, you can redirect users from the default WordPress login page to your custom login page. You can also run your login page under isolation mode, which disables any WordPress header and footer scripts from loading.

Once you are satisfied with your changes, you can simply click on the Save button and publish your login page.

Publish your custom login page

You can now open a new browser tab in the Incognito mode and visit your login page to see it in action.

SeedProd login page preview

For more details, see our ultimate guide on how to create a custom login page in WordPress.

Managing Users in WordPress

You can view all registered users on your website by clicking on Users in the WordPress admin. WordPress will show you a list of users with their usernames, names, role, and email addresses.

Managing users in WordPress

As an administrator, you can delete any user at any time you want.

You can also edit user profiles, change their roles, and you can even change their passwords.

This gives you full control over what users can or cannot do on your WordPress site.

That’s all! We hope this article helped you learn how to allow user registration on your WordPress site. You may also want to learn how to choose the best web design software, or see our expert pick of the best email marketing services for small business.

If you liked this article, then please subscribe to our YouTube Channel for WordPress video tutorials. You can also find us on Twitter and Facebook.

The post How to Allow User Registration on Your WordPress Site first appeared on WPBeginner.


February 10, 2022 at 05:00PM

Wednesday, February 9, 2022

What is a Paperless Business Form? (+ How to Make One)

Do you want to create digital forms for your business to reduce paper use?

Paperless business forms are digital forms that help save money and time. You can reach a larger audience with online forms and waste less paper.

In this article, we’ll show you what is a paperless business form and how to make it.

What is paperless business form

What are Paperless Business Forms?

A paperless business form is a digital form that your users can fill out on your WordPress website. Users can use their computers, smartphones, or tablets to fill out the form at anytime and from anywhere.

Business these days are ditching the use of paper forms and instead opting for digital forms. This helps them create a paperless environment.

Going paperless has many benefits:

  • Reach a Larger Audience: Digital forms can help you reach audiences from different locations. There are no geographic restrictions or delays in getting responses from people in different countries.
  • Easy to Access: People can access your paperless business form using any device and fill out the details from anywhere.
  • Get Instant Responses & Save Time: Paperless forms help you save time and you get to see instant responses. Unlike paper forms where you’d have to wait for responses to arrive by mail, digital forms make the process faster.
  • Cost Saving: Using digital forms also helps you save tons of money on paper, printing equipment, and mailing fees.
  • Good for the Environment: Going paperless has a positive impact on the environment. You can help conserve trees, prevent deforestation, and reduce waste.

Now, what are some of the ways you use paperless forms?

When Can You Use Paperless Forms for Your Business?

There are multiple ways you can turn your paper based forms into digital forms.

If you need to get in touch with your consumers, then you can create an online contact form and add it to your website. This way, you can get suggestions, feedback, and resolve your users’ queries.

Another way to use paperless business forms is by accepting job applications online. Instead of asking applicants to submit physical copies of their resumes, they can simply upload them using your digital form. It also helps in streamlining your hiring process and removes unnecessary paperwork.

If you’re running an online store, then you can create paperless order forms. Customers can fill out the details in the order form, place their orders, and pay online.

You can also create digital registration forms for an upcoming event like a webinar or conference.

That said, let’s look at how you can easily create a paperless digital form in WordPress.

Creating a Paperless Business Form in WordPress

The best way to add paperless forms business forms in WordPress is by using WPForms. It’s the best contact form plugin for WordPress and used by over 5 million professionals.

With WPForms, you get a drag and drop form builder that makes it super easy to customize your form. Plus, the plugin offers different templates so you can quickly get started and create all kinds of forms.

For this tutorial, let’s create a digital conference registration form. We’ll be using the WPForms Lite version because it’s 100% free. There is also WPForms Pro version that offers more customization options, templates, and powerful addons.

First, you’ll need to install and activate the WPForms plugin. If you need help, then please see our guide on how to install a WordPress plugin.

Upon activation, you can head over to WPForms from the WordPress admin panel and then click the ‘Add New’ button.

Add a new form

On the next screen, you’ll see the form builder.

To start, go ahead and enter a name for your form at the top.

Enter a name for your form

After that, scroll down and select the ‘Conference Registration Form’ template.

Simply hover over the template and click the ‘Use Template’ button.

Choose conference registration form template

Next, you can customize your form using the drag and drop builder. WPForms offers different fields that you can add to your form.

Simply drag a field from the given options on your left and drop them where you’d like to add it to the form.

Add fields to your form

In the Lite version, you get can add line text, paragraph text, dropdown menu, multiple choice, checkboxes, and more.

However, if you require fancy fields like phone number, password, address, or a file upload option, then we recommend using the WPForms Pro version.

Besides that, you can further customize existing fields in the template. For example, if you click the ‘Name’ field, you’ll see more options in the menu on your left. For instance, you can edit the label, format, and more.

Edit each field in the form

Next, you can go to the ‘Settings’ tab from the menu.

Here, you can change the settings for your form. Under the General settings, you can edit the form name, add a description, change the submit button text, and more.

Change general settings

After that, you can go to the Notifications settings and edit the send to email address on which you’ll receive an email when someone submits a form.

There are also settings for changing the subject line, from name, from email, and more.

Edit email notifications

Lastly, you can also change the Confirmation settings in WPForms. This is the message that people will see when they submit a form.

You can show a message, show a landing page, or direct users to another URL.

Change confirmation settings

For more details, check out our guide on how to send confirmation emails after WordPress form submission.

Optionally, you can also click on the Marketing tab on the left to connect your form to different marketing services, such as your email service provider.

WPForms Marketing tab

You can even integrate your form with meeting or webinar software such as Zoom, or create other automated workflows to save time.

Once you’re done with the settings, don’t forget to click the ‘Save’ button at the top and exit the form builder.

Next, you can add your form to any WordPress post or page.

To start, simply edit or add a new page or post. When you’re in the WordPress content editor, click the ‘+’ button and add the ‘WPForms’ block.

Add WPForms block

After that, you’ll see a dropdown menu in the WPForms block.

Here you can select your conference registration form.

Choose your form

Now, publish or update your page.

Then you can visit your website to see the paperless conference registration form in action.

Conference registration form preview

We hope this article helped you learn what is a paperless business form and how to make it. You may also want to see our guide on how much it costs to build a WordPress website, or our expert pick of the best HR payroll software for small business.

If you liked this article, then please subscribe to our YouTube Channel for WordPress video tutorials. You can also find us on Twitter and Facebook.

The post What is a Paperless Business Form? (+ How to Make One) first appeared on WPBeginner.


February 09, 2022 at 05:10PM

Tuesday, February 8, 2022

How to Hide Unnecessary Menu Items From WordPress Admin

Do you ever wonder if it was possible to clean up the WordPress admin area for your users?

There are lots of things in the WordPress admin area that your users, authors, or clients don’t need to see or use. Cleaning up the admin area helps to keep them focused on only the options they need, without distracting clutter.

In this article, we will show you how to hide unnecessary items from WordPress admin.

How to hide items from WordPress admin

Why Hide Unnecessary Items for WordPress Admin?

In the WordPress admin area, there are a lot of menus, submenus, options and plugin settings that you can change anytime. Some of these menu items include dashboard widgets, post edit area, plugins, appearance, tools, and more.

However, most of these menus and settings are not used on a daily basis and they end up cluttering the admin area. If you run a multi-author website or have clients visiting the admin area, then it’s a good practice to clean up the WordPress admin panel.

You can only keep menus and options that are useful for your authors and clients, and hide the rest of the submenus.

You may also want to deactivate items based on user roles by creating different admin interfaces for users with different roles and capabilities on your WordPress site.

That said, let’s look at how you can remove and hide unnecessary items from WordPress admin.

Note: This guide is about the admin menu that a registered user on your site sees when they log in. If you’re wanting to customize the navigation menus that all your website visitors see, then you should see our beginner’s guide on navigation menus in WordPress.

Hiding Menu Items from WordPress Admin

The easiest way to hide menus and items from WordPress admin panel is by using the Admin Menu Editor plugin. It’s a free WordPress plugin that lets you change the menu titles, URLs, icons, and more.

You can also hide menu items from the admin area, set user role permissions, and drag and drop menu items to organize your WordPress admin.

First, you’ll need to install and active the Admin Menu Editor plugin. For more details, please see our guide on how to install a WordPress plugin.

Upon activation, you can head over to Settings » Menu Editor from your WordPress dashboard. Next, you’ll see all your menu and submenu items under the ‘Admin Menu’ tab.

Rearrange admin menu items

You can simply drag and drop your menu items to rearrange their order. There are also options to remove or add new menu items.

Next, go ahead and click the downwards arrow for any menu item to see more options. You can rename the menu title, change the target page, and more.

Change menu item settings

To hide a menu item for specific user, simply click the ‘Extra capability’ dropdown menu. After that, you can choose the user role who can view the menu item from the given options.

For example, let’s say you want to hide the Media menu and its submenus for all user roles except the administrator. To do that, simply click on the Extra capabilities dropdown menu and choose ‘Administrator’ under Roles.

Choose user role to hide menu item

Once you’re done, go ahead and save your changes.

Now the Media menu item will be visible to only the Administrator role and will be hidden to other user roles.

If someone still tries to access the hidden menu item by typing in the URL, then they’ll see the error message ‘You do not have sufficient permissions to access this admin page.’

Restricted error message

You can now repeat these steps for hiding other menu items and plugins from the WordPress admin menu for different users.

We hope this article helped you hide unnecessary items from WordPress admin area. You may also want to check out our guide on how to get a free SSL certificate in WordPress and the best WooCommerce plugins.

If you liked this article, then please subscribe to our YouTube Channel for WordPress video tutorials. You can also find us on Twitter and Facebook.

The post How to Hide Unnecessary Menu Items From WordPress Admin first appeared on WPBeginner.


February 08, 2022 at 03:00PM