Friday, March 11, 2022

18+ Best ClickFunnels Alternatives in 2022 (Better Features + Free)

Are you looking for the best ClickFunnels alternatives?

ClickFunnels is a powerful sales funnel builder you can use to convert website visitors into leads and customers. However, it might not be the best choice for your WordPress site. 

In this article, we’ll show you the best ClickFunnels alternatives you can use with WordPress. 

18 Best ClickFunnels Alternatives (Better Features + Free)

Is ClickFunnels Right for Your WordPress Business?

ClickFunnels is website builder software that makes it easy to generate leads, sell products, host webinars, and grow your email list.

While ClickFunnels might simplify the process of building a sales funnel, it can be very expensive and doesn’t offer the same level of flexibility that WordPress provides.

For example, WordPress makes it easy to build a complete online store, create sales funnels, grow your WordPress blog, and more. 

That being said, let’s take a look at some of the best ClickFunnels alternatives that you can use to create your own sales funnels using WordPress. 

We’ve created a table of contents to make it easier to find the best ClickFunnels alternatives for specific features you need.

Alternatives for Building Landing Pages and Funnels

One of the main features of ClickFunnels is the ability to create high converting sales funnels. Sales funnels lead a user on a path from a visitor to a customer. 

The entire process starts with building your own landing page. Some of the most popular landing page solutions include SeedProd, WooFunnels, and Leadpages.

1. SeedProd

SeedProd

SeedProd is the best alternative to Clickfunnel’s drag and drop landing page builder. It’s the best WordPress landing page plugin in the market used by over 1 million websites. 

It lets you easily create landing pages, sales pages, product pages, and more. Plus, you can even create a custom WordPress theme without writing any code. 

SeedProd comes with dozens of professional templates that are optimized for higher conversions. Every template can be completely customized with the intuitive drag and drop builder. 

SeedProd template library

For more details, see our guide on how to create a landing page with WordPress.

To increase your conversions even further, see our proven tips on how to increase your landing page conversions by 300%.

2. WooFunnels

WooFunnels homepage

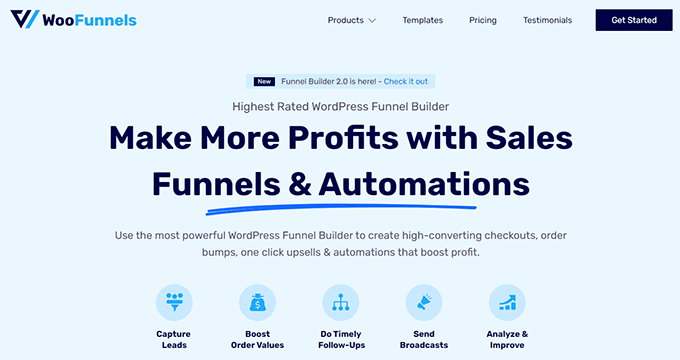
WooFunnels is a powerful page builder that lets you create full sales funnels from start to finish. It comes with ready-to-use templates for checkout pages, order forms, opt-in pages, and more.

Besides the page builder, it also includes tools for abandoned cart tracking, automations, customer segmentation, lead capture forms, and even email marketing.

Plus, there are built-in A/B testing and analytics features, so you can make data-driven decisions to optimize your landing pages.

3. Leadpages

Leadpages

Leadpages is another easy to use page builder that helps you create lead generation pages and landing pages.

It includes a large template library that you can use to quickly create a landing page. Every page template can be fully customized with the drag and drop builder.

Leadpages template library

Leadpages also has built-in optimization tools and unique lead generation features like popups, alert bars, and more. 

Once you collect your leads, you can use the included payment tools to sell your services and products. 

To learn more, see our comparison of Instapage vs Leadpages vs Unbounce vs SeedProd.

Alternatives for Managing Leads

Once you start to generate leads through your landing page, you need a way to manage those leads and start to make sales. 

Here are some of the best alternatives to Clickfunnel’s email marketing, CRM, and marketing automation features. 

4. Constant Contact

Constant Contact

Constant Contact is the best email marketing service for small businesses. It’s one of the largest and fastest-growing email marketing services in the world. It lets you easily manage your email list, contacts, and more. 

Every account gives you access to unlimited emails, tracking and reporting, a free image library, list segmentation, integration with Facebook ads, and more.

It’s very easy to set up and create your own email newsletters using the drag and drop email creator.

Plus, if you opt for one of the higher Email Plus plans, you’ll get access to even more powerful features like email automation, surveys & polls, and more

Some other great choices for getting started with email marketing include Sendinblue, which offers a basic free plan, and Drip, which is great for more advanced email automations for eCommerce sites.

5. HubSpot CRM

HubSpot CRM

HubSpot is one of the best CRMs for small businesses who are looking for a cost-effective solution to manage leads.

There are multiple free plans you can choose from in the CRM, Marketing, Sales, and Service hubs. So, if you’re a growing business, then it can be a great cost effective solution. 

Plus, the free plan offers support for unlimited users and unlimited contacts.

It offers you a view of your entire sales pipeline, so you can monitor your sales, contact activity, team performance, and more. 

For more details, see our guide on how to add a CRM on your WordPress site and get more leads.

6. Uncanny Automator

Uncanny Automator

Uncanny Automator is the best WordPress automation plugin in the market. It lets you create powerful workflows to save time without writing any code.

It seamlessly integrates with the most popular WordPress plugins and third-party tools to create custom automations in a couple of clicks. 

Think of it like Zapier, but for WordPress websites. 

For example, you can integrate Slack with WordPress, send WordPress forms data to Google Sheets, and much more.

If you need to share marketing data with your team or want to automate any other task related to your WordPress site, then Uncanny Automater is a great choice. 

Plus, there’s a free version of the plugin you can use to get started, which supports all kinds of WordPress plugins and actions. 

To learn more, see our guide on how to create automated workflows in WordPress with Uncanny Automator.

Alternatives for Generating Leads

One of the main reasons to use ClickFunnels is to generate leads to sell your products and services. 

Here are some of the best alternatives you can use to generate leads using WordPress.
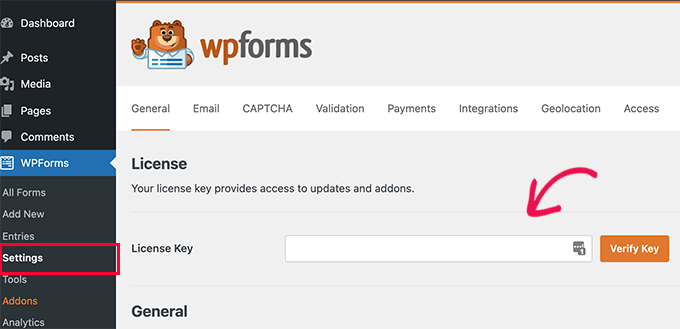
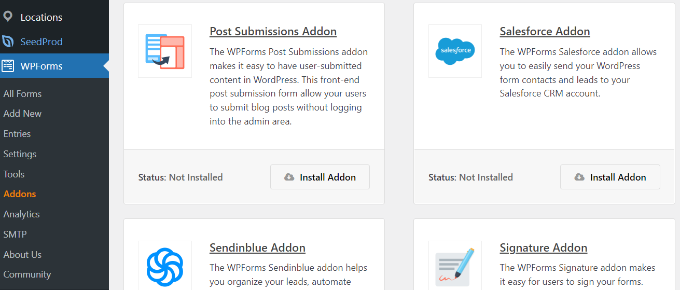
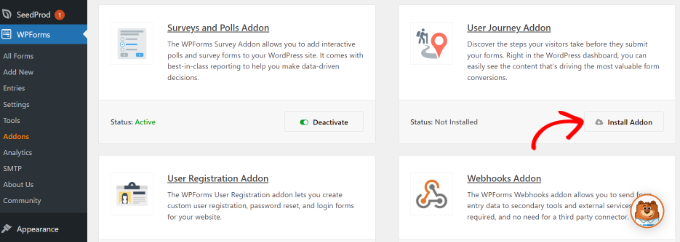
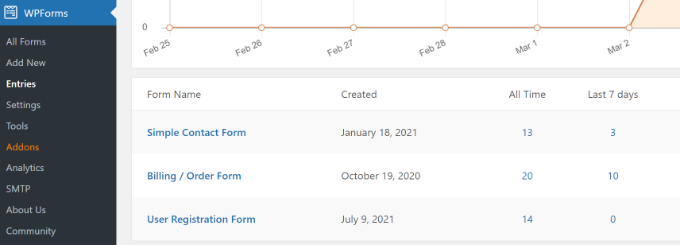
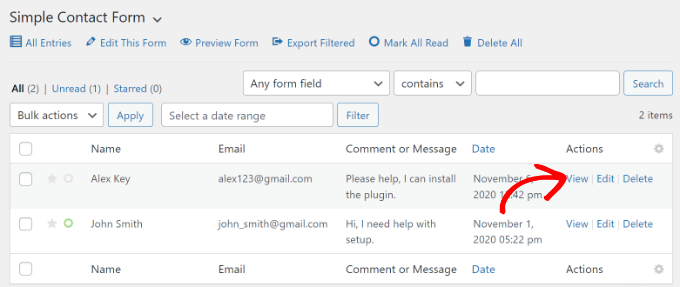
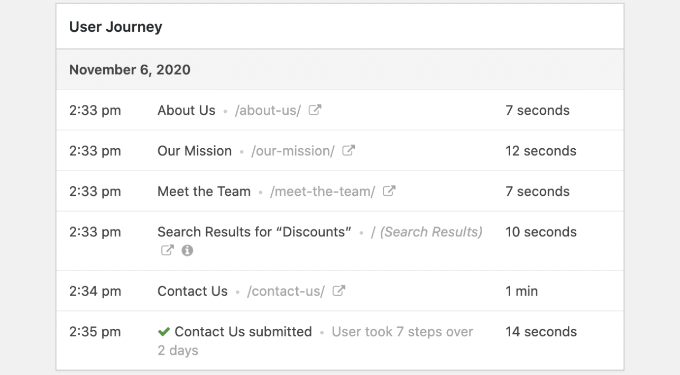
7. WPForms

WPForms

WPForms is the best lead generation WordPress plugin in the market used by over 5 million websites.

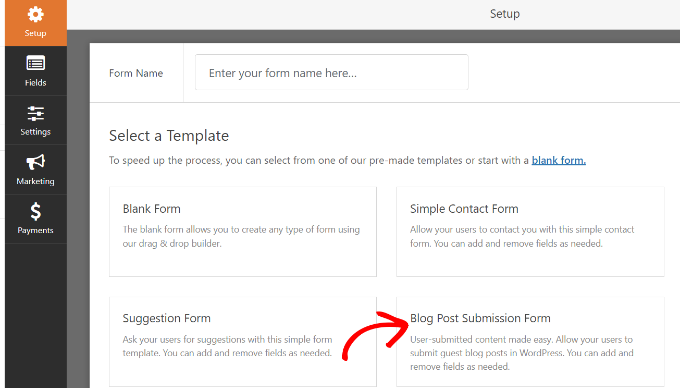
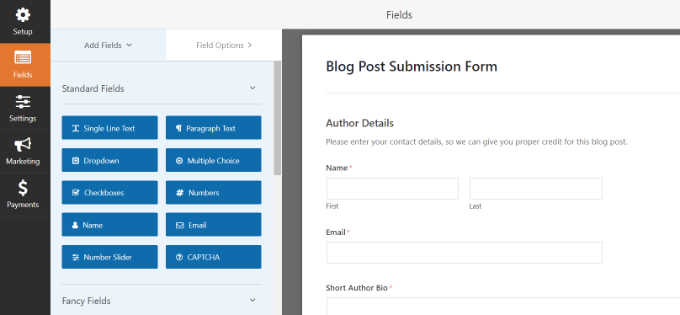
It includes a library of over 300 pre-built form templates you can use as a starting point for your lead generation form. Then, you can easily customize the form to match your needs by using the drag and drop builder interface.

WPForms also integrates with many other popular plugins like OptinMonster and SeedProd, to help simplify the lead generation process. 

You can even use the free version of the plugin, which lets you create a simple form and connect it with your Constant Contact account. 

For more details, see our step by step guide on how to create an email newsletter the right way.

8. OptinMonster

OptinMonster

OptinMonster is an incredibly powerful lead generation tool and WordPress popup plugin that you can use on your WordPress site.

It lets you simply create high converting popups and email sign up forms that you can use to turn abandoning website visitors into subscribers and customers. 

There’s a library of over 400+ templates you can fully customize with the drag and drop editor.

It’s the best tool for creating high converting alert bars, slide-in scroll boxes, spin to win optins, and more.

Spin to win popup example

Plus, you can combine this with the page targeting features to show customized popup messages for different pages on your site, which has been proven to increase conversions. 

You can even use OptinMonster to generate leads in other ways. For example, you can use the content locking feature to offer visitors a preview of your content before signing up. 

For more details, see our guide on how to grow your email list in WordPress with OptinMonster.

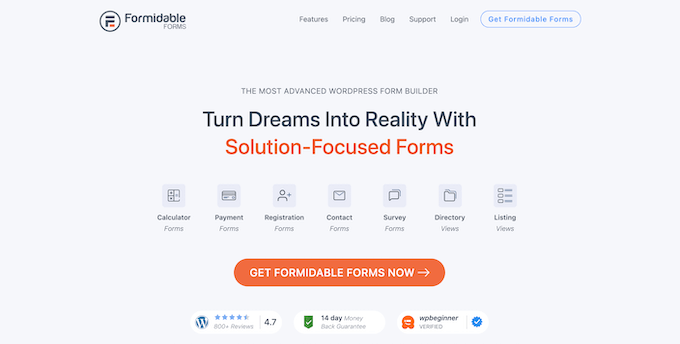
9. Formidable Forms Calculator

Formidable Forms Calculator

Formidable Forms is an advanced drag and drop form builder with a wide variety of calculator templates that you can use to generate leads. 

Calculators are a popular type of lead magnet used by some of the best blogs in the world.

Most calculators will help fill a need, solve a problem, or answer a question for your readers. To get their results, your readers will enter their email addresses.

There are all kinds of unique calculators you can build with this plugin, including a mortgage calculator, a BMI calculator, paycheck calculator, fitness tracker, and more. 

Formidable Forms calculator example

To learn more, see our guide on how to generate more leads with free online calculators.

10. RafflePress

RafflePress

RafflePress is the best WordPress giveaway and contest plugin in the market. It lets you easily create viral giveaways to increase your traffic and help grow your email list.

RafflePress comes with a drag and drop builder you can use to create your campaigns quickly. Plus, it includes a template library to make the giveaway creation process even faster. 

There are all kinds of advanced features like social media sharing, success tracking, fraud protection, email verification, giveaway landing pages, and more. 

All of this ensures you can run a successful contest or giveaway to help you generate more traffic, leads, and customers. 

To learn more, see our guide on how to create a giveaway to grow your email list by 150%.

Alternatives for Selling Products

ClickFunnels has built-in features that let you sell a variety of different products.

Here are some of the top WordPress plugins that add eCommerce and shopping cart functionality to your site. 

11. WP Simple Pay

WP Simple Pay

WP Simple Pay makes it easy to accept one-time and recurring payments in WordPress without setting up a shopping cart.

It also includes an easy to use drag and drop payment form builder and all the tools you need to accept payments on your site securely. 

WP Simple Pay checkout form

It also easily integrates with pricing table plugins, so you can create beautiful pricing pages for your website. 

For more details, see our guide on how to accept payments with Stripe in WordPress.

There’s also a free version of the plugin available that offers a free Stripe integration for WordPress. 

12. Easy Digital Downloads

Easy Digital Downloads

Easy Digital Downloads lets you easily sell digital downloads using WordPress.

It’s beginner friendly and comes with all the features you need to create a beautiful and functional digital goods store. It allows you to sell eBooks, PDF files, plugins, and much more. 

It also has features to easily manage your records, offer discount codes, view your product and sales data, and more.

Easy Digital Downloads shopping cart

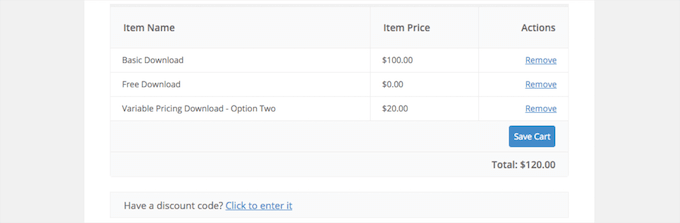
We use Easy Digital Downloads to sell our software MonsterInsights and WPForms.

13. WooCommerce

WooCommerce

WooCommerce is one of the best WordPress eCommerce plugins in the market. It’s completely free and open-source and has all the features you need to build a fully functional online store.

There’s also a large library of addons and WooCommerce themes you can use to add new features to your WooCommerce store.

It can be used to sell both digital and physical goods, has built in inventory management, support for multiple payment gateways, and more.

You can also fully customize your product pages, checkout page, thank you pages, and more, to improve your conversions.

Alternatives for Creating Premium Content & Courses

ClickFunnels offers online course management features, so you can sell, create, and manage your paid content.

Here are the best ClickFunnels alternatives for course creation and premium content features.
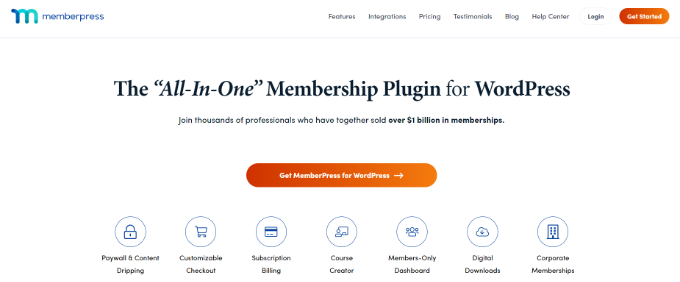
14. MemberPress

MemberPress

MemberPress is the best WordPress membership plugin in the market that’s helped online creators earn over $1 billion dollars.

It’s very beginner friendly and be used to create membership sites, content paywalls, online courses, sell eBooks and digital downloads, and much more.

Basically, MemberPress makes it simple to restrict access to any kind of premium content on your WordPress website.

It uses a course builder built on top of the WordPress block editor, so it’s easy to add lessons, manage access controls, and more. 

To learn more, see our ultimate guide on creating a WordPress membership site.

15. LearnDash

LearnDash

LearnDash is a very flexible and easy to use WordPress LMS plugin

It’s built with teachers in mind and lets you easily create online courses with the drag and drop course builder. You can create multi-layer courses with lessons, quizzes, topics, and categories. 

Plus, it integrates with popular payment services, forum plugins like bbPress, and even MemberPress, to more easily manage subscriptions. 

Alternatives for Website & Store Analytics

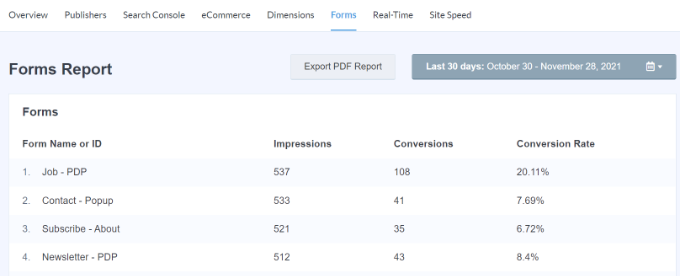
ClickFunnels provides users with analytics data to better understand their traffic, conversions, and sales. 

With the right WordPress plugin, you can do all of this and more. 
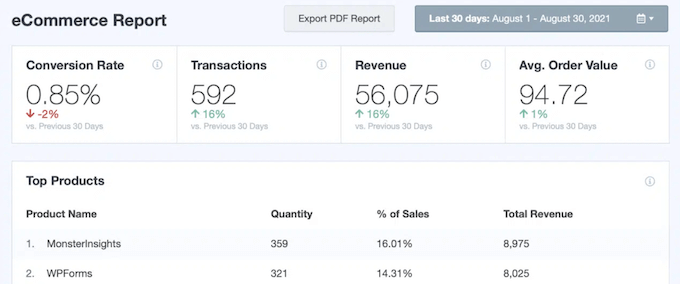
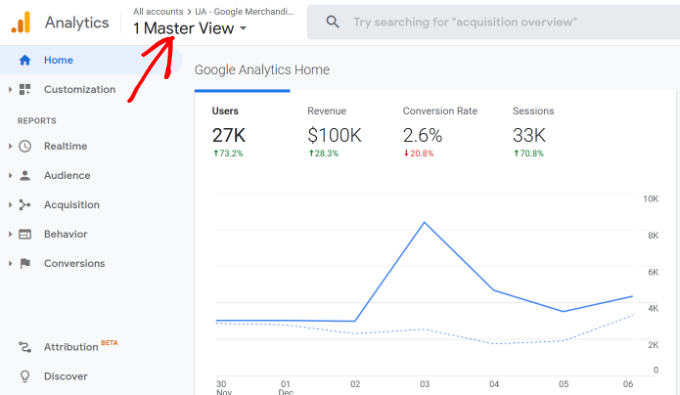
16. MonsterInsights

MonsterInsights

MonsterInsights is the best WordPress analytics plugin used by over 3 million websites.

It allows you to easily install Google Analytics in WordPress and shows reports with the most useful data right in your WordPress dashboard.

You can see your most important metrics like, your top posts and pages, audience demographics, main sources of traffic, income reports, and more.

MonsterInsights ecommerce report example

All of this data helps you better understand your users, reduce abandoned carts, and make more sales. 

For more details, see our guide on how to track user engagement in WordPress with Google Analytics

Alternatives for Managing Affiliates

ClickFunnels includes affiliate management features that let you create and manage your very own affiliate program. Affiliate marketing is a great way to increase awareness about your business and make money online.

Let’s take a look at the WordPress plugins that offer alternatives to ClickFunnels affiliate management software. 

17. AffiliateWP

AffiliateWP

AffiliateWP is the best affiliate tracking and management software for WordPress

It lets you easily create your own affiliate program and build your network of affiliates to help you sell your products and services.

There’s real-time reporting, integration with popular eCommerce plugins, and more. It includes everything you need to manage your affiliate program within your WordPress dashboard. 

18. Easy Affiliate

Easy Affiliate

Easy Affiliate is another popular all-in-one affiliate program plugin for WordPress. It’s very easy to use and includes many helpful features to track and manage your affiliates.

This solution makes it easy to create your own self-hosted affiliate program, along with real-time reports to track the performance of your affiliates. 

It also includes built-in fraud detection and integrates with other popular plugins on this list like MemberPress, WooCommerce, and more.

Bonus: Additional Tools to Improve Sales Funnel Conversions

Beyond the ClickFunnels alternatives highlighted above, there are some additional ways you can improve your sales and conversions.

The following tools will help you make more money from your website and build trust with your visitors. 

19. TrustPulse

TrustPulse

TrustPulse is the best social proof plugin for WordPress in the market. It lets you simply display real-time notifications of user actions on your site.

You can use it to display recent purchases, free trial sign-ups, email newsletter sign-ups, and more. These notification popups are highly effective and won’t detract from the user experience on your site. 

TrustPulse social proof example

TrustPulse can be set up on your website in a few minutes and is proven to increase your conversions by as much as 15%.

It also includes powerful features like smart targeting, which will show your social proof messages to the right people at the right time. 

For more details, see our guide on how to use FOMO on your WordPress site to increase conversions.

20. PushEngage

PushEngage

PushEngage is the best web push notification software in the market. 

It lets you send targeted messages to your visitors after they leave your site to help bring users back to complete their purchase.

You can use these for product announcements, coupons, abandoned cart reminders, and more. 

Push notification coupon example

Push notifications go directly to your user’s web browser or mobile device, which means they have a very high engagement rate. 

PushEngage is easy to set up and comes with powerful features to help you optimize your campaigns, including A/B testing, custom triggered campaigns, smart opt-in reminders, and much more.

For more details, see our guide on how to add web push notifications to your WordPress site.

We hope this article helped you find some of the best ClickFunnels alternatives for your WordPress site. You may also want to see our guide on how to choose the best web design software and our expert picks of the best free website hosting.

If you liked this article, then please subscribe to our YouTube Channel for WordPress video tutorials. You can also find us on Twitter and Facebook.

The post 18+ Best ClickFunnels Alternatives in 2022 (Better Features + Free) first appeared on WPBeginner.


March 11, 2022 at 05:00PM

Thursday, March 10, 2022

How to Add RSS Sitemap in WordPress (The Easy Way)

Are you looking to add a RSS sitemap in WordPress?

RSS sitemap helps Google index your new website content and updates faster. Google recommends using RSS sitemap in combination with XML sitemap for maximum SEO results.

In this article, we will cover how to easily add RSS sitemap in WordPress without any code.

How to Add RSS Sitemap in WordPress

What is RSS Sitemap?

Unlike a traditional XML sitemap which are usually large, RSS sitemap are small because they only contain the most recent updates to your site.

Google crawls RSS sitemaps more frequently which helps your content updates get indexed faster and improves your WordPress SEO rankings.

A good way to think about it is that your XML sitemaps give Google information about all of the posts and pages on your website. Whereas RSS sitemap update Google on the content that has been recently updated.

For optimal crawling, Google recommends using both XML sitemaps and RSS sitemap.

WordPress RSS Sitemap Example - Generated by All in One SEO

Depending on the type of website you have, you may also want to take add a video sitemap and news sitemap alongside the RSS sitemap for maximum SEO benefits.

With that said, let’s take a look at how to add RSS sitemap in WordPress.

How to Add RSS Sitemap in WordPress

The easiest way to add RSS sitemap in WordPress is by using the All in One SEO plugin. It is the best WordPress SEO plugin used by over 3 million websites.

We’re using the premium version of AIOSEO on WPBeginner to improve our SEO rankings, but the RSS sitemap feature is available in the free version as well.

AIOSEO

First thing you need to do is install and activate the

All in One SEO plugin. For more details, see our step by step guide on how to install a WordPress plugin.

Once activated, you will be prompted to go through the guided set up wizard. It’s very beginner friendly, and it will help you setup all the right settings.

To enable the RSS sitemap in WordPress, you need to go to AIOSEO » Sitemaps settings page and click on the RSS Sitemap tab.

Simply toggle the enable Sitemap option, and that’s it.

WordPress RSS Sitemap Setting in AIOSEO

You have successfully added RSS sitemap in WordPress. You can click on the Open RSS Sitemap button to see how your RSS sitemap looks.

Alternatively, you can also go to the following link:

https://ift.tt/HsjwuOM

Once you have enabled it, you will need to submit the RSS sitemap in Google Search Console.

The process of submitting a RSS sitemap is similar to how you would add any other sitemap. Here’s a detailed tutorial on how to submit your sitemap in Google search console.

Google Search Console RSS Sitemap Read Date
As you can see in the screenshot above, Google reads the RSS sitemap faster than it reads the general XML sitemap.

This is why we strongly recommend enabling this feature to get a competitive SEO advantage.

AIOSEO is a powerful WordPress SEO plugin with all the features that you need to improve your search engine rankings. You can see our ultimate guide on how to properly setup All in One SEO for maximum benefits.

Final Thoughts on WordPress RSS Sitemap

RSS sitemap technology has been around for a long time, but many website owners don’t know how to leverage it. That’s because most website builders and WordPress SEO plugins don’t have this feature.

AIOSEO short for All in One SEO is the most comprehensive SEO toolkit, so it comes built-in with RSS sitemap feature along with dozens of other features.

When we switched WPBeginner from Yoast plugin to AIOSEO plugin, we saw a boost in our SEO rankings and website traffic. We believe a big reason for that is the RSS sitemap feature because it helped our content updates get indexed faster.

In the recent months, Microsoft has launched the IndexNow protocol to further boost SEO speed. Currently that’s only being used by Bing and Yandex, so we’re using both IndexNow and RSS sitemap to speed up our SEO results.

The good news is that AIOSEO was the first WordPress SEO plugin to add IndexNow support as well because they’re staying at the forefront of SEO changes.

We hope this article helped you learn how to add RSS sitemap in WordPress. You may also want to see our ultimate WooCommerce SEO guide to improve your SEO rankings, and our comparison of the best email marketing services to connect with readers after they leave your website.

If you liked this article, then please subscribe to our YouTube Channel for WordPress video tutorials. You can also find us on Twitter and Facebook.

The post How to Add RSS Sitemap in WordPress (The Easy Way) first appeared on WPBeginner.


March 10, 2022 at 05:00PM

Wednesday, March 9, 2022

How to Set Up WordPress Form Tracking in Google Analytics

Are you wondering how your WordPress forms are performing?

Tracking forms in Google Analytics helps you uncover insights about how people interact with your forms, where your leads are coming from, which marketing campaigns are performing the best, and more.

In this article, we’ll show you how to set up WordPress form tracking in Google Analytics.

How to Set up WordPress from tracking in Google Analytics

Why Track WordPress Forms in Google Analytics?

Forms are an essential part of a WordPress website. They help you stay connected with your audience, build an email list, boost eCommerce conversions, and grow your business.

By setting up form tracking in Google Analytics, you get to see how different forms are performing on your website. This way, you can promote high converting forms on your most important page while optimizing low converting forms.

Another benefit of form tracking is that it helps you better understand your audience. You can find out which channel they’re using to find your website and submit a form. Plus, you can also track and reduce form abandonment by tracking them in Google Analytics.

Similarly, it also helps identify how your lead generation campaigns are performing or which referral website is driving the most leads on your site.

That said, let’s look at how you can track WordPress forms in Google Analytics.

Setting Up WordPress Form Tracking in Google Analytics

The best way to set up WordPress form tracking in Google Analytics is by using MonsterInsights. It’s the best Google Analytics plugin for WordPress, and over 3 million professionals use it to uncover insights and use data to grow their business.

Google Analytics doesn’t track WordPress forms by default. You would have to edit code to track your forms. This can be tricky for beginners, as the slightest mistake can mess up your tracking and break your website.

MonsterInsights removes the need for writing code or hiring a developer. It allows you to set up Google Analytics and track WordPress forms without editing code.

MonsterInsights

You can also track website traffic, uncover top referral traffic sources, find out your top-performing posts and pages, and more.

The plugin easily integrates with all of the most popular WordPress form plugins like WPForms, Formidable Forms, Contact Form 7, and more.

For this tutorial, we’ll be using the MonsterInsights Pro plan because it includes the Forms addon, dashboard reports, and other advanced tracking features. There is also a MonsterInsights Lite version that you can use to get started.

First, you’ll need to install and activate the MonsterInsights plugin. Please see our guide on how to install a WordPress plugin for more details.

Upon activation, you’ll be taken to Insights in your WordPress dashboard and see MonsterInsights welcome screen. Go ahead and click the ‘Launch the Wizard’ button to configure the plugin and connect it with Google Analytics.

Launch setup wizard

If you need help, then please follow our guide on how to install Google Analytics in WordPress.

After that, you can head over to the Insights » Addons page from your WordPress admin panel. Next, scroll down to the ‘Forms’ addon and click the ‘Install’ button.

Install forms addon

Once the plugin is installed, you should see the ‘Status’ change from Not Installed to Active.

MonsterInsights will now automatically detect your WordPress form plugin and track your forms in Google Analytics.

To check the settings, you can head over to Insights » Settings from your WordPress dashboard and go to the ‘Conversions’ tab.

MonsterInsights settings - conversions tab

You’ll see that the toggle for Form Conversion Tracking option is already enabled.

Now, are you ready to see how your forms are performing?

See How Your WordPress Forms Are Performing

MonsterInsights makes it super simple to see the data by showing stats inside your WordPress dashboard. This helps save time, as you can quickly find the data you need to make decisions.

To view the report, head over to Insights » Reports from the WordPress dashboard and then click the ‘Forms’ tab.

Forms report

In the report, you’ll see impressions, which is the number of people who have viewed your form. You can also see the conversions, which is the number of people who completed the form, and conversion rates for each form on your website.

Now you can also see WordPress form tracking data in Google Analytics.

First, you’ll need to log in to your Google Analytics account and select your website property from the menu at the top.

Choose a website property

After that, you’ll need to go to Behavior » Events » Top Events from the menu on your left.

You can see different event categories in this section. Go ahead and click on the ‘form’ event category.

Click on form event category

On the next screen, you’ll see the total impressions and conversions for your WordPress form.

You can select the ‘impression’ event action if you’d like to see the number of people who viewed your form or select ‘conversion’ if you want how many visitors submitted your forms.

Select event action for forms

For example, let’s select the ‘impression’ event action.

Next, you’ll see which WordPress forms get the most views on your website.

See event label for form tracking

Besides Google Analytics, there’s another way to see how people interact with your forms. Let’s take a look.

Bonus: Track User Journey in WPForms

If you’re using the WPForms plugin for adding a contact form or any other type of form, then you can see what each user did on your site before submitting a form.

WPForms is the best contact form plugin for WordPress. It offers a User Journey addon that shows the steps your visitors took before submitting a form, such as the pages they viewed or optin campaigns they clicked.

You’ll need the WPForms Pro version because it includes the User Journey addon.

First, you’ll have to install and active the WPForms plugin. For more details, please see our tutorial on how to install a WordPress plugin.

Next, you can head over to WPForms » Addons from your WordPress dashboard. Then navigate to the User Journey Addon and click the ‘Install Addon’ button.

Install user journey addon

Once the addon is installed, you can go to WPForms » Entries from your WordPress dashboard.

After that, select a WordPress form to see the user journey.

Select form entries

For the sake of this tutorial, we’ll view the Simple Contact Form entries.

Next, you can click the ‘View’ button under Actions for any entry and see the user’s steps before submitting the form.

View the action of each user

On the next screen, you’ll see details of your user.

Simply scroll down to the ‘User Journey’ section and see their path before arriving on the contact form and submitting it.

View user journey in WPForms

Using the data, you can better understand your users and see which pages or campaigns they visit before converting into leads.

This way, you can promote your forms on pages that people view the most and increase your marketing campaigns’ visibility to get more leads.

For more details, please see our tutorial on how to track user journey on WordPress lead forms.

We hope our article helped you learn how to set up WordPress form tracking in Google Analytics. You can also see our guide on how to create a free business email address, or check out our expert comparison of the best managed WordPress hosting compared.

If you liked this article, then please subscribe to our YouTube Channel for WordPress video tutorials. You can also find us on Twitter and Facebook.

The post How to Set Up WordPress Form Tracking in Google Analytics first appeared on WPBeginner.


March 09, 2022 at 05:00PM

Tuesday, March 8, 2022

How to Make an Online Quiz Website (Step by Step)

Do you want to create your own online quiz website?

A website with interactive quizzes can be a fun project and a great way to earn passive income. By creating your quiz website with WordPress, you have complete control over the features, design, and monetization of your quiz site.

In this article, we’ll show you how to easily build an online quiz website step by step, with no technical skills needed.

How to Make an Online Quiz Website (Step by Step)

What Do You Need to Build an Online Quiz Website Using WordPress?

To create a quiz website like Buzzfeed or others, there are a few requirements:

  • A domain name (such as example.com or wpbeginner.com)
  • A web hosting account (this is storage space for all your website files)
  • A WordPress theme (this controls the design of your quiz website)
  • The right WordPress plugins (plugins are like apps and add features like quizzes to your website)
  • 1 hour of your undivided attention

Depending on how many quizzes you want to start with, it’s possible to create your entire quiz site from scratch to launch in under an hour. We’ll walk you through each step.

In this tutorial, we’ll cover the following:

  • How to get a free domain name
  • How to choose the best hosting
  • How to pick a WordPress theme
  • Which online quiz tool to use
  • How to monetize your quiz site
  • Bonus tools and resources to grow your quiz website

Ready? Let’s get started!

Step 1: Choosing the Right Website Platform

To create a website, first you need to choose a website builder platform.

It is very important to choose the right one to start with, since moving platforms later on can be a huge hassle.

Since you’re here reading this, you’re on the right track. We strongly recommend WordPress because it’s 100% free and allows you complete freedom to create any type of site you want. Over 43% of all websites on the internet are powered by WordPress.

However, there are two types of WordPress software, so you’ll need to make sure you’re using the right one. First there is WordPress.com, which is a blog hosting platform. The second is WordPress.org, which is the free software we recommend.

We will be using the second option (WordPress.org) because it’s more powerful. For a detailed comparison, you can see our guide on the difference between WordPress.com and WordPress.org.

To create your online quiz website, you’ll also need a domain and web hosting. Choosing the right web hosting is important because it supports your whole website. You want to find fast, reliable hosting that can grow with you as your website grows.

Typically a domain name can cost $14.99 per year, and hosting usually starts around $7.99 a month. This can be a big cost if you’re just getting started.

That’s why we recommend Bluehost.

Getting started with personal website on Bluehost

Bluehost is officially recommended by WordPress, and they have agreed to offer our readers a free domain and a big discount on web hosting.

Best of all, Bluehost automatically installs WordPress for you, so you can get started building your quiz website right away.

Pro Tip: It’s smart to choose a niche, or specific topic, for your quiz website. Instead of creating a general quiz website which would have to compete against big sites like Buzzfeed, you can become known for specializing in a certain topic, like video games, geography, or pop music.

Once you’ve purchased your hosting and chosen a domain name, you’ll be able to access your new WordPress site by clicking the ‘Log in to WordPress’ button from the hosting dashboard.

Bluehost Dashboard - log in to WordPress

You can follow our guide on how to make a website for details on how to set up WordPress and start adding content to your site.

Step 2: Picking the Perfect WordPress Theme

When using WordPress, the theme you choose is what determines the layout and design of your website.

There are thousands of free and premium themes available, which can make it hard to choose.

Although there are quiz themes available, we recommend looking for a simple theme instead.

You don’t need to buy a fancy theme with quiz features included, because they’re often slow and bloated and will lock you into using their design forever. Instead, it’s better to use plugins to add quizzes to your website. We’ll show you how to do that below.

By using a simple theme, you’ll have the option to change your design in the future without breaking any quizzes or other features.

That said, we have an in-depth article that will help you select the perfect WordPress theme.

If you want a quick pick, our top recommended theme for an online quiz website is Astra.

You can get started with Astra for free, and it includes dozens of professionally-designed templates to choose from.

If you want to build a completely custom WordPress theme, then we recommend using SeedProd.

SeedProd is a drag & drop website builder for WordPress that lets you build completely custom websites without writing any code.

SeedProd Website Builder Coupon Code

For more theme options, you can see our list of the best simple themes to focus the design on your quizzes, or see our pick of the best magazine themes for more image-heavy designs.

Once you’ve chosen a theme, you can see our guide on how to install a WordPress theme to set it up.

Step 3: Installing the Right Online Quiz Plugins

After you set up your theme, the next step is to add quizzes to your new website.

The best way to do that is with a quiz plugin.

Plugins are like apps for your WordPress site. They allow you to add all kinds of different features to your site.

There are a few different quiz plugins we recommend:

1. Formidable Forms

Formidable Forms

Formidable Forms is an advanced form builder that lets you create custom forms with a powerful drag and drop builder, including contact forms, online calculators, and more.

It comes with dozens of form templates, or you can create your own from scratch.

You can use Formidable Forms to create quizzes that are automatically scored for the user. After they submit the quiz, you can email them the score, which makes this plugin a great tool to grow your email list.

Note: You’ll need to get at least the Business plan, which includes the Quiz Maker addon.

For more details, see our guide on how to easily create a quiz in WordPress.

2. Interact Quiz Maker

Interact Quiz Maker

Interact Quiz Maker is a powerful app for creating viral quizzes so you can generate leads.

It offers a drag and drop quiz builder with features to customize the design, style, and colors of your quizzes. Plus, they include over 800 pre-built quiz templates that you can use out of the box or customize.

One standout feature of Interact is that you can create branching quizzes which show questions based on the user’s answers to previous questions. They also have social sharing features so your quizzes can go viral when people share their results.

Interact also integrates with email marketing services so you can grow your list.

3. MemberPress

MemberPress homepage

MemberPress is the best LMS (learning management system) plugin for WordPress.

If you’re wanting to create an online quiz site with courses, scoring, and grades, then MemberPress is the best option. It’s a full course solution that lets you create lesson plans and subscriptions levels, manage user access and payments, and so much more.

For more details, you can see our complete guide on how to create and sell online courses in WordPress.

Once you’ve created the quizzes on your website, you may want to start monetizing your website. We’ll cover that next.

Step 4: Monetizing Your Online Quiz Website

If you want to make money from your quiz website, there are several ways to do it.

Build an Email List

Firstly, we always recommend starting an email list.

Quizzes are a smart way to get email subscribers because people are often happy to enter their email address to receive their quiz results.

Email marketing is important because most website visitors don’t return. Once they’re on your email list, you can send them fun newsletters to get them to return to your website.

You can even get paid sponsors for your email newsletters once you have built up a good number of subscribers.

To get started, see our guide on how to start an email list the right way and our comparison of best email marketing services.

Display Ads

An easy way to get started monetizing your quiz website is to sell ads.

You can see our guide on how to monetize a WordPress blog with Google AdSense to get started, and this tutorial on how to optimize your AdSense revenue for more tips.

While Google AdSense is popular and easy to set up, the money you can earn is limited and Google takes a big cut.

Another option is to sell ad space on your website directly, so you can negotiate the price yourself. To learn more, you can see our guide on how to sell ads on your WordPress blog.

For more ideas on monetizing your online quiz website, you can check out our guide on proven ways to make money online.

Bonus: Best Tools & Resources to Grow Your Quiz Website

WordPress is a super powerful platform and has all the tools you need to grow your traffic and take your website to the next level.

We recommend the following plugins to help grow your website more quickly:

AIOSEO – It’s the best WordPress SEO plugin and will help you rank higher in the search engines.

MonsterInsights – It allows you to easily install Google Analytics in WordPress, so you can understand where your visitors are coming from and what content on your site is the most valuable.

PushEngage – With PushEngage you can send push notifications to your site visitors, encouraging them to return to your website.

Looking for more? See our list of must-have WordPress plugins.

To help you learn WordPress, here are some useful resources:

  • WPBeginner Blog – This is where we publish our WordPress tutorials, how tos, and step by step guides.
  • WPBeginner Videos – These step by step videos will help you learn WordPress FAST.
  • WPBeginner on YouTube – Need more video instructions? Subscribe to our YouTube channel with more than 260,000 subscribers and 28 Million+ views.
  • WPBeginner Blueprint – Check out plugins, tools, and services we use on WPBeginner.
  • WPBeginner Deals – Exclusive discounts on WordPress products and services for WPBeginner users.

We also have some must-follow guides that you should bookmark for when you need them:

If you need more help with WordPress, we also have an active WordPress Facebook group with over 80,000 members where you can get answers to any WordPress question.

That’s it! We hope this article helped you to create an online quiz website, step by step. You may also want to see our guide on how much does it cost to build a WordPress website, or our expert pick of the best AI chatbot software.

If you liked this article, then please subscribe to our YouTube Channel for WordPress video tutorials. You can also find us on Twitter and Facebook.

The post How to Make an Online Quiz Website (Step by Step) first appeared on WPBeginner.


March 08, 2022 at 03:00PM

Monday, March 7, 2022

How to Create a User-Submitted Events Calendar in WordPress

Do you want to allow users to submit calendar events on your WordPress website?

Adding user-submitted events is a great way to build a community and boost engagement on your website.

In this article, we’ll show you how to create a user-submitted events calendar in WordPress without giving visitors access to your admin area.

Create a user submitted events calendar in WordPress

Why Create a User-Submitted Events Calendar?

Crowdsourcing events for your WordPress calendar is a great way to build a community, attract new visitors, and keep your calendar updated with the latest events. It also helps save time since you don’t have to search the internet for upcoming events.

When your community members can add events to your calendar, they’ll get free promotion for their events, and your website visitors and other community members can easily learn about events happening in their area.

For example, let’s say you’re running a charity or non-profit membership website. You can allow members to add different fundraisers, seminars, and other charity events to your site’s calendar.

The problem is that WordPress doesn’t allow users to submit calendar events or upload files on the front end by default. You will have to create an account for each user and allow access to the admin area. This method is time-consuming and could be risky.

Thankfully, there’s an easier way. Let’s see how you can let people add calendar events in WordPress.

Creating a User-Submitted Events Calendar in WordPress

The best way to allow users to add calendar events without giving them access to your WordPress admin panel is by using WPForms. It’s the best contact form plugin for WordPress and is trusted by over 5 million businesses.

The plugin lets you create a file upload form and offers a Post Submissions addon that allows you to accept event listings, PDFs, articles, quotations, and other content on the front end of your website.

WPForms

Note: You’ll need the WPForms Pro version because it includes the Post Submission addon, premium integrations, and other customization features.

First, you’ll need to install and activate the WPForms plugin. If you need help, then please see our guide on how to install a WordPress plugin.

Upon activation, simply head over to WPForms » Settings from your WordPress dashboard and enter your license key. You can find the license key in the WPForms account area.

WPForms license key

Next, click the ‘Verify Key’ button to continue.

After verifying the license key, you’ll need to go to WPForms » Addons and then scroll down to the Post Submissions Addon.

Go ahead and click the ‘Install Addon’ button.

Post submission addon by WPForms

Once the addon is installed, you’ll notice the Status change from ‘Not Installed’ to ‘Active.’

Setting Up The Events Calendar Plugin

Next, you’ll need a WordPress events calendar plugin to create an events calendar on your website.

We’ll use The Events Calendar plugin for our tutorial. It is a powerful event management system for WordPress and offers lots of features. You can easily use it to add events and manage organizers and venues.

Plus, The Event Calendar offers a free version and easily integrates with WPForms.

First, you’ll need to install and activate The Event Calendar plugin. For more details, check out our guide on how to install a WordPress plugin.

Upon activation, you’ll be redirected to Events » Settings in the WordPress admin panel. The plugin will ask you to join its community. You can simply click the ‘Skip’ button for now.

Set up the event calendar plugin

After that, you can go through different settings for your events calendar.

There are settings in the ‘General’ tab to change the number of events to show per page, activate the block editor for events, show comments, edit the event URL slug, and more.

General settings tab

You can also set the time zone settings for your events calendar if you scroll down. The plugin lets you use your site’s time zone everywhere or manually set the time zone for each event.

We suggest using the ‘Use the site-wide time zone everywhere’ option. This will help match the events times that users submit with your site’s time zone.

When you’ve made the changes, click the ‘Save Changes’ button.

Change time zone settings

After that, you can go to the ‘Display’ tab and edit the appearance of your events calendar.

For instance, there are options to turn off the default style, choose a template, enable event views, and more.

Edit display settings

Once you’ve made the changes, let’s see how you can create a form to accept calendar events.

Creating a User Submitted Events Form

In the next step, you’ll need to set up a form using WPForms to allow users to submit events.

To start, you can go to WPForms » Add New from your WordPress dashboard. This will launch the drag and drop form builder.

Simply enter a name for your form at the top and then select the ‘Blog Post Submission Form’ template.

We’re using this template because when you use The Events Calendar plugin, each event is a custom post type. Using WPForms, you can edit the blog post submission form template to submit an event custom post type instead of a regular blog post.

Choose blog post submission form template

Next, you can customize your post submission form.

Using the drag and drop form builder, WPForms lets you add different form fields. You can add a dropdown menu, checkboxes, phone number, address, website URL, and more.

Plus, it also lets you rearrange the order of each form field and remove fields you don’t need.

Drag and drop form fields

For example, we’ll add the ‘Date / Time’ fields to our form template to show the ‘Event Start Date / Time’ and ‘Event Finish Date / Time’.

Pro Tip: When you add the Date / Time field, make sure to click the checkbox for ‘Disable Past Dates.’ You can find this option under the Advanced Options tab.

This will ensure that all your new events have a future date. It also helps catch mistakes if someone accidentally enters the wrong year.

Disable past dates

When creating your form, you can rename different form fields. To do that, simply click on them and then change the ‘Label’ under Field Options in the menu on your left.

For our tutorial, we changed the label for Post Title to Event Title and Post Excerpt to Event Description.

Edit form field labels

After that, you’ll need to go to the Settings » Post Submissions tab in the form builder.

Now, make sure that the ‘Post Submissions’ option is On.

Ensure post submission is on and match metadata

Besides that, you’ll need to match your form fields with the fields that The Events Calendar plugin will look for.

For example, this is how we mapped our demo form fields:

  • Post Title to Event Title
  • Post Excerpt to Event Description
  • Post Featured Image to Featured Image
  • Post Type to Events
  • Post Status to Pending Review
  • Post Author to Current User

The Pending Review status allows you to moderate each event submission. Plus, if you’re accepting online payments, then you can check if the payments were successful before approving the event.

Next, you’ll also need to map the event start and end date/time. For that, scroll down to the ‘Custom Post Meta’ section and enter a code to map the respective fields in your form.

To start, add _EventStartDate code and select your event start time field (like Event Start Date / Time) from the dropdown menu.

Then click the ‘+’ button to add another Custom Post Meta and enter the _EventEndDate code to map the event finish form field (like Event Finish Date / Time).

Enter custom post meta

Next, you can also change other settings of your form.

If you go to the ‘Confirmations’ tab, you’ll see settings for showing the thank you page that will appear when users submit a calendar event.

You can show a message, a page or redirect people to another URL when they submit the form.

Confirmation settings

Other than that, you can also change the ‘Notifications’ settings.

Here, the plugin lets you choose different settings for receiving a notification when someone submits a form. For instance, you can change the send to email address, subject line, from name, and more.

Edit notification settings

Don’t forget to click the ‘Save’ button at the top when you’ve made the changes.

Publishing Your User-Submitted Events Form

Now that you’ve created a user-submitted events form, it’s time to publish it on your WordPress website.

WPForms offers multiple options to embed your form in WordPress. You can use the WPForms block in the block editor, use a shortcode, add a sidebar widget, and more.

For this tutorial, we’ll use the Embed wizard offered by WPForms.

To start, simply click the ‘Embed’ button at the top right corner.

Edit notification settings

When you click the button, a popup window will appear.

Go ahead and click the ‘Create New Page’ button, and WPForms will automatically create a new page for your form.

Create a new page

You can also click the ‘Select Existing Page’ to add the form to a published page.

Next, you’ll need to enter a name for your page. Once that’s done, simply click the ‘Let’s Go!’ button.

Enter name for page

On the next screen, you can see your user-submitted events form on the new WordPress page.

Go ahead and preview the page and then click the ‘Publish’ button.

Publish your page

You can now visit your website to see the form in action.

Here’s what it will look like on the front end of your website.

Form preview

Next, you can review the calendar events your users submit by going to Events from your WordPress dashboard.

All the user-submitted events will be listed here as pending. You can click the ‘Edit’ button under each event to review them.

View your event

When reviewing the event, ensure that the user has filled out all the details. If any information is missing, you can add it or reject the calendar event if it doesn’t meet your website requirements.

After that, simply Publish the user-submitted event. You can then view your events by visiting the URL created by The Events Calendar: https://www.example.com/events

Events page preview

We hope this article helped you learn how to create a user-submitted events calendar in WordPress. You may also want to check out our guides on how to move a website from HTTP to HTTPS and the best WordPress SEO plugins and tools to improve your website’s ranking.

If you liked this article, then please subscribe to our YouTube Channel for WordPress video tutorials. You can also find us on Twitter and Facebook.

The post How to Create a User-Submitted Events Calendar in WordPress first appeared on WPBeginner.


March 07, 2022 at 05:00PM