Wednesday, May 4, 2022

How to Easily Add a Download Link in WordPress (3 Ways)

Do you want to learn how to add a download link in WordPress for your PDFs and other files?

Adding a download link to WordPress makes it easy for your readers to download guides, videos, images, and even paid products.

In this article, we’ll show you how to add a download link to your WordPress site, step by step.

How to easily add a download link in WordPress (2 ways)

Why Add a Download Link for Files in WordPress?

By adding a download link for your WordPress files, you make it easy for your visitors to download eBooks, videos, images, plugins, and other media and documents you upload to your site.

This makes it easy to create exclusive content for your visitors to help build your email list.

You can also offer some of these downloads as a bonus for your most valued readers to help improve your relationship and strengthen your brand.

Plus, you can even create a simple membership site, where you can put your members-only guides and other content behind a paywall.

That being said, let’s show you how to easily add a download link in WordPress. Simply use the quick links below to jump straight to the method you want to use.

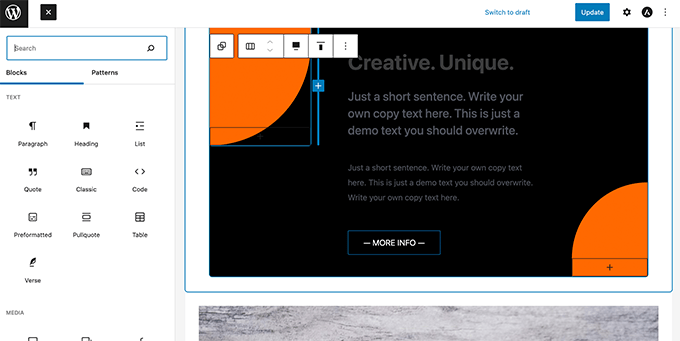
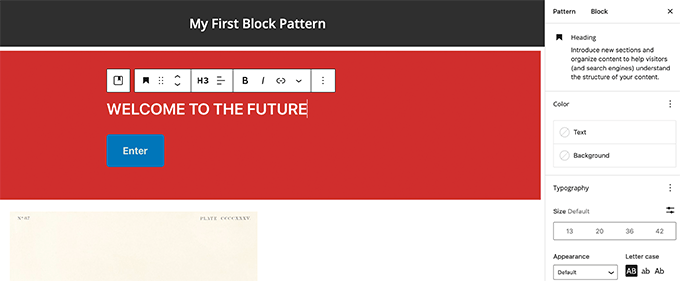
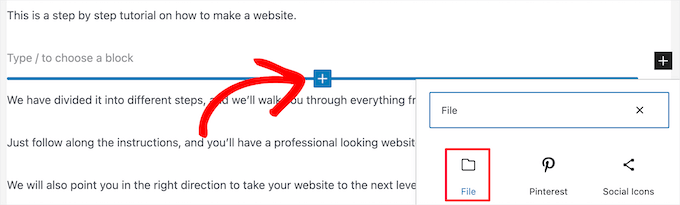
The easiest way to add a download link in WordPress is by using the block editor. Simply open up a page or post where you want to add a download link and then click the ‘Plus’ add block button.

After that, search for ‘File’ and then click the block.

Add file block in posts or pages

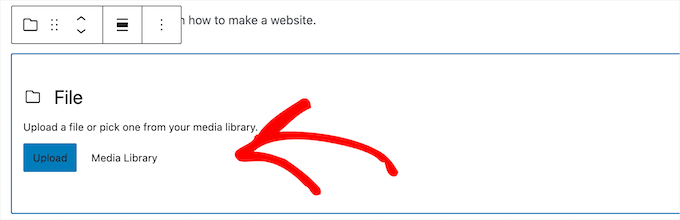
Then, you can upload a file by clicking the ‘Upload’ button or choose one you’ve already uploaded to your media library.

Upload file or select from media library

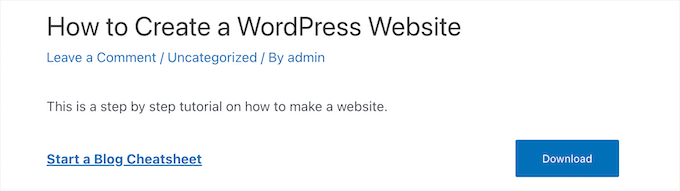
Once you add the file, it will automatically display with the download link. When your users click this, it will download the file.

To change the name of the link, simply click on the text and edit it. 

Edit download link text

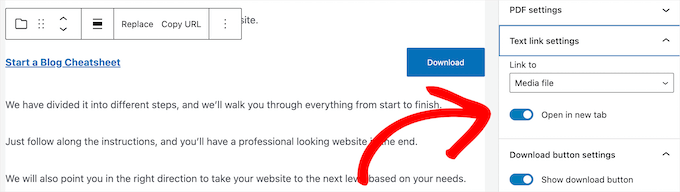
There are different display options that you can customize in the right hand panel depending on the type of file you added.

For example, if you upload a PDF file, then you can choose for the link to go directly to the media file, or open it on a separate attachment page.

You can also make the download open in a new tab by clicking the toggle.

Below that, you can also add a download button next to your link by clicking the ‘Show download button’ toggle.

Change download link display settings

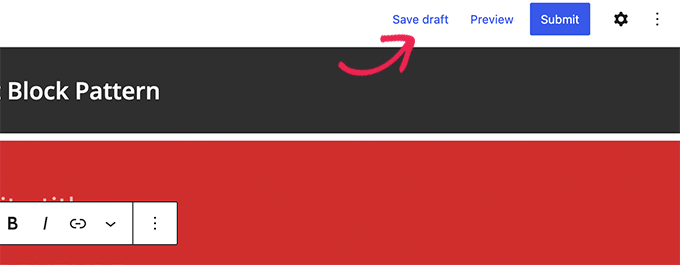
Once you’re finished making changes, click the ‘Save’ or ‘Publish’ button to make your download link live.

Now, you can visit your WordPress website to see your download link in action.

Download link plus button example

Add a Simple Download Link by Uploading Files to Media Library

Another way to add a download link to a file is to first upload it to your media library by navigating to Media » Add New and then upload your file.

Add new media files

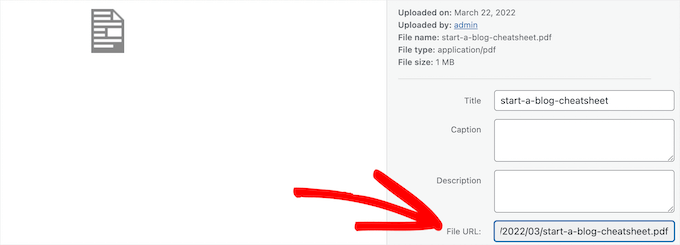
Next, you need to click on the file to open it.

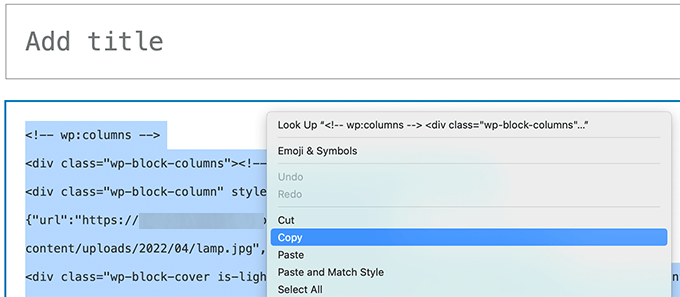
Then, copy the URL in the ‘File URL’ box.

Copy file URL

Now, you can navigate to the post or page where you want to add the download link.

Then, add some text, click the ‘Link’ icon and paste the URL you just copied into the box.

Add link for download

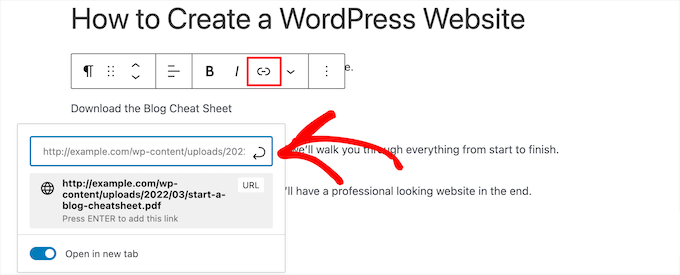
You can also make the link open in the new tab by clicking the ‘Open in new tab’ toggle.

The right-hand side of the screen lets you change the link color, size, typography, and more.

Edit download link display settings

When you’re finished making changes, click the ‘Update’ or ‘Publish’ button to make your download link live.

Now, you can go to your WordPress blog to see your new download link.

Download link example

Another way you can add download links to your site is by using the OptinMonster plugin. It’s one of the best popup plugins and best lead generation plugins for WordPress used by over 1.2 million websites.

OptinMonster

It has a unique technology that lets you create on-click popups that open when a user clicks a link. These can be used to deliver content upgrades, digital downloads, email required downloads, and more. 

This style of popup relies on the powerful Zeigarnik effect. This psychological principle states that users who start an action are more likely to finish it.

Since your users are already showing interest, they’re more likely to use your download or enter their email addresses. 

Link click popup download example

To learn more, see our guide on how to open a WordPress popup form on click of link or image.

You can also manage and track your file downloads to see what your users click on and download the most. To learn more, see our guide on how to manage, track, and control file downloads in WordPress.

If you’re looking to sell downloadable files on your WordPress site or looking to create a members only area, then you have few different options.

For creating a membership site or selling courses online, you can use the MemberPress plugin. It’s the best WordPress membership plugin that lets you setup membership levels, add members-only protected downloads, create courses, add lessons, and more.

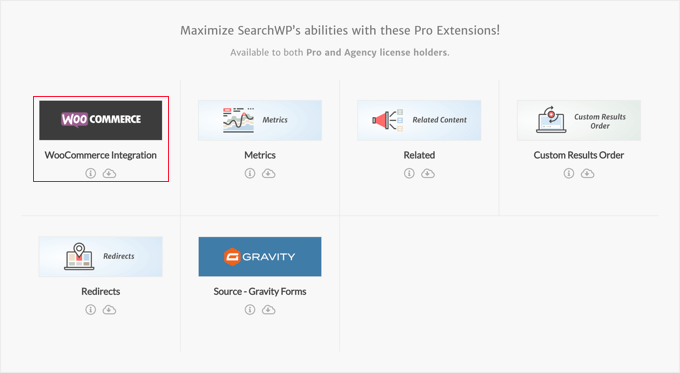
Alternatively, you can use the popular Easy Digital Downloads plugin. This plugin is focused on selling premium downloads like eBooks, music, software, and more. It comes with recurring subscriptions, licensing support, protected downloads, and more. This is what we use to sell our plugins.

To get started, use the SiteGround EDD hosting plan which makes set up easy, or download the plugin from Easy Digital Downloads website.

Easy Digital Downloads

After that, you can set up downloads as individual products that people can purchase, or download for free in exchange for an email address.

We hope this article helped you learn how to add a download link in WordPress. You may also want to see our guide on how to register a domain name and our expert picks of the best virtual business phone number apps with free options.

If you liked this article, then please subscribe to our YouTube Channel for WordPress video tutorials. You can also find us on Twitter and Facebook.

The post How to Easily Add a Download Link in WordPress (3 Ways) first appeared on WPBeginner.


May 04, 2022 at 04:00PM

Tuesday, May 3, 2022

Beginner’s Guide: How to Use WordPress Block Patterns

Do you want to learn how to use WordPress block patterns on your website?

Block patterns allow you to quickly add commonly used design elements to your post or page layouts.

In this article, we’ll show you how to use WordPress block patterns and find more patterns to use on your website.

Using block patterns in WordPress

Here are the topics we’ll cover in this guide.

What are WordPress Block Patterns?

WordPress block patterns are a collection of pre-made design elements that you can use for creating custom content layouts faster.

WordPress comes with an intuitive editor commonly known as the block editor. It allows users to create beautiful layouts for their posts and pages using blocks for common content elements.

WordPress block editor

However, not all WordPress users are designers or want to spend time creating layouts each time they need to create a post or page.

Block patterns provide an easy solution to that problem. WordPress now comes with a bunch of useful block patterns by default.

Block patterns in WordPress

Popular WordPress themes also provide their own patterns that you can use when writing content.

These patterns include items like pre-built multi-column layouts, media and text patterns, call-to-action patterns, headers, buttons, and more.

You can find even more patterns on the WordPress.org website, and you can even create and share your own patterns as well.

That being said, let’s take a look at how to easily use block patterns in WordPress to create beautiful content for your website.

How to Use Block Patterns in WordPress

By default, WordPress comes with a bunch of useful block patterns that you can use on your website. Your WordPress theme and some plugins may also add their own patterns.

To use block patterns, you need to edit the WordPress post or page where you want to use the block pattern.

On the post edit screen, click on the Add Block button to open the block inserter. From here, switch to the Patterns tab to view available block patterns.

Add block pattern

You can scroll down to see available block patterns.

You can also view block patterns in different categories like featured, buttons, columns, header, and more.

Sort block patterns by category

Alternatively, you can also click on the Explore button to view block patterns.

Here you can see larger previews in a popup.

Block patterns preview

Once you find a pattern you want to try, you can simply click to insert it to the content area of your post or page.

Edit block pattern

After that, you can simply point and click on any block inside the pattern to edit and change its contents to your own requirements.

You’ll still have all the options you normally have for each block. For instance, if it is a cover block, then you can change the cover color or background image.

You can add as many patterns as you need for your blog post or page. You can also simply delete a pattern to remove it from a post or page like you would delete any WordPress block.

Remove cover block

By using block patterns, you can quickly make beautiful layouts for your articles and WordPress site.

Ultimately, block patterns help save you time that you would otherwise spend on manually arranging blocks each time you need to add a header, gallery, buttons, and more.

Finding More Block Patterns to Use on Your Website

By default, WordPress comes with a few commonly used block patterns. WordPress themes may also add their own patterns to your website.

However, you can find a lot more block patterns than the ones available under the block inserter on your website.

Simply go to the WordPress Patterns Directory website to view many more block patterns.

Block pattern directory

Here you’ll find many more block patterns submitted by the WordPress community.

To use one of these block patterns, simply take your mouse over to the block pattern and click on the Copy button.

Copy block pattern

Next, you need to go back to your WordPress blog and edit the post or page where you want to insert this block pattern.

On the post edit screen, simply right-click and select Paste in the browser menu or press CTRL+V (Command + V on Mac).

Paste block pattern

How to Create and Share Your Own Block Patterns

Want to create and share your own WordPress block patterns and share them with the world?

WordPress makes it super easy to create block patterns and use them on your own websites or share them with all WordPress users across the globe.

Simply visit the WordPress Pattern Directory website and click on the ‘Create New Pattern’ link.

Create block pattern

Note: You’ll need to sign in or create a free WordPress.org account to save your patterns.

Once signed in, you’ll reach the block pattern editor page. It is identical to the default WordPress block editor, and you can use it to create your pattern.

Block pattern creator

Simply add blocks to create your pattern layout.

You can use layout blocks like group, cover, gallery, and more to organize your layout.

Editing block pattern layout

There are also royalty-free images available to use in your media blocks. The WordPress media library will allow you to easily find and use these images in your patterns.

Once you are satisfied with your block pattern, you can save it as a draft or submit it to the pattern directory.

Before you can submit your block pattern for the pattern directory, make sure that you have read block pattern directory guidelines.

You can manage all your block patterns by clicking on the My Patterns link. It will show all block patterns you have shared, draft patterns, and patterns you have favorited.

Your patterns

If you only want to create block patterns for your own use, then you can save them as drafts. After that, you can simply copy and paste them from My Patterns page to your WordPress website.

Creating WordPress Block Patterns Manually

You can also create block patterns manually and add them to your WordPress theme or custom snippets plugin.

Simply create a new post or page in WordPress. In the content area, use blocks to create a custom layout or block collection that you want to save as a pattern.

Switch to the code editor

After that, switch to the Code Editor mode and copy all content you see in the code editor.

Copy raw code blocks

Next, open a plain text editor like Notepad and paste that code in there. You’ll need it in the next step.

Now you are ready to register your blocks as a pattern.

To do that, simply copy and paste the following code into your theme’s functions.php file or a site-specific plugin.

function wpb_my_block_patterns() {
    register_block_pattern(
        'my-plugin/my-awesome-pattern',
        array(
            'title'       => __( 'Two column magazine layout', 'my-theme'),
            'description' => _x( 'A simple magazine style two-column layout with large image and stylized text', 'my-theme' ),
            'categories'  => array( 'columns' ),
            'content'     => ' Your block content code goes here'
            )
    );
}
add_action( 'init', 'wpb_my_block_patterns' );

Now copy and paste the raw blocks data you copied earlier as the value for the content parameter. In other words, you’ll need to replace the text that says ‘Your block content code goes here’ with your block code. Be sure to leave the single quotes surrounding the text in place.

Lastly, don’t forget to change the title and description to your own and save your changes.

You can now visit your website and edit and post or page. You’ll now be able to see your newly registered block pattern in the block inserter.

Add custom block pattern to your post

Remove a Block Pattern in WordPress

You can easily remove or unregister any block pattern in WordPress. Let’s say you want to remove the block pattern you created in the above example.

All you need to do is copy paste the following code to your theme’s functions.php file or a site-specific plugin.

function wpb_unregister_my_patterns() {
  unregister_block_pattern( 'my-plugin/my-awesome-pattern' );
}
add_action( 'init', 'wpb_unregister_my_patterns' );

In this example, 'my-plugin/my-awesome-pattern' is the name of the pattern we used when registering it.

You can use this code to unregister any block pattern created by your theme or a plugin. All you need to know is the name used to register the pattern.

Remove Core WordPress Patterns

The core WordPress patterns are available to all WordPress users. This means they may be over used and might not even match rest of your WordPress theme.

If you don’t want to use a pattern, then you can simply avoid adding it to your content. However, if you run a multi author WordPress site, then you may want to prevent all users from using these core patterns.

To remove all core WordPress patterns, you need to add the following code to your theme’s functions file or a site-specific plugin.

remove_theme_support( 'core-block-patterns' );

What’s The Difference Between Reusable Blocks and Block Patterns?

Block patterns and reusable blocks both intend to solve a similar problem: provide users with options to easily add commonly used blocks.

However, they are quite different from each other.

For instance, reusable blocks can be edited and saved right inside the post editor, but they are not as flexible as block patterns.

One big difference is that if you make a change to a reusable block, it changes the block on every post or page you’ve used it on.

Reusable block in WordPress

For more details, see our tutorial on how to use reusable blocks in WordPress.

On the other hand, if you insert a pattern and edit it, then those changes only apply to the post or page where you have added that pattern.

Block patterns can also be registered by your WordPress theme or plugins such as block plugins. This allows those developers to offer you a lot more design options to create your post and page layouts.

We hope this guide helped you learn how to use WordPress block patterns on your website. You may also want to see our guide on how to choose the best web design software, or our expert pick of the best email marketing services for small business.

If you liked this article, then please subscribe to our YouTube Channel for WordPress video tutorials. You can also find us on Twitter and Facebook.

The post Beginner’s Guide: How to Use WordPress Block Patterns first appeared on WPBeginner.


May 03, 2022 at 04:00PM

Monday, May 2, 2022

How to Customize WooCommerce Product Search Results Page

Would you like to customize your WooCommerce product search results page?

By default, WordPress and WooCommerce have limited search capabilities. By customizing your product search results, you’ll be able to increase sales and grow your business.

In this article, we’ll show a few easy ways you can customize your WooCommerce product search results page to provide a better user experience.

How to Customize WooCommerce Product Search Results Page

Why Customize WooCommerce Product Search Results Page?

By default, WooCommerce comes with a built in product search feature. However, it has serious limitations. This could mean that your customers won’t be able to find the products they’re looking for.

As a result, you may be losing potential sales. If your customers can’t find what they’re looking for, then they may not come back to your online store.

How does this happen? The default WooCommerce search only indexes the title, content, and excerpt of posts and pages. It doesn’t consider any content within custom fields while performing a search.

That’s a problem because a great deal of your WooCommerce product data is stored in custom fields. As a result, none of your WooCommerce product categories, tags, reviews, and other special attributes will be indexed.

Luckily, you can solve this problem using a WooCommerce product search plugin.

That being said, let’s take a look at some examples of how you might improve your WooCommerce product search results page.

Here is what you will learn from this guide. You can click the link to skip ahead to the section you’re interested in.

Making WooCommerce Product Data Searchable

The first thing you need to do is install and activate the SearchWP plugin. For more details, see our step by step guide on how to install a WordPress plugin.

SearchWP is the best custom search plugin for WordPress, and is used by over 30,000 websites. It’s also one of the best plugins for WooCommerce because it delivers more relevant product results to your customers.

Note: You’ll need at least the Pro plan to access WooCommerce integration.

Upon activation, you need to visit the SearchWP » Settings page and switch to the ‘Support’ tab to enter your license key. You can find it in your account area on the SearchWP site.

Paste Your SearchWP License Key

Next, you need to install and activate the WooCommerce Integration extension.

You can download it from your account area on the SearchWP website and install it as you would install any other WordPress plugin.

Install the WooCommerce Integration Extension

Now you are ready to set up your SearchWP custom search engine.

Simply go to the SearchWP » Settings page and make sure you’re on the ‘Engines’ tab. Once there, you need to click the ‘Sources & Settings’ button.

Click on the 'Sources & Settings' Button

This will bring up a popup where you should make sure the checkbox next to ‘Products’ is checked. This will allow SearchWP to index your WooCommerce products.

WooCommerce product reviews are stored as comments. If you want to make reviews searchable, then you should also check the ‘Comments’ box.

Check the Products and Comments Boxes

Once you’ve done that, click on the ‘Done’ button to close the popup.

Now you need to scroll down to the ‘Products’ section. Notice that by default, the plugin will only look at the product title, content (description), slug, and excerpt (short description).

Click the 'Add/Remove Attributes' Button in the Products Section

You can extend SearchWP’s reach by clicking on the ‘Add/Remove Attributes’ button.

This will bring up a popup where you can include specific custom fields and taxonomies in searches. For this tutorial, we’ve added the ‘color’ and ‘size’ custom fields, and the taxonomies ‘product categories’ and ‘product tags’.

Add Custom Fields and Taxonomies to the Search Engine

You can now click the ‘Done’ button, and you should notice that those custom fields and taxonomies have been added to the products section of SearchWP.

After that, you can adjust the weight of each attribute. If you’d like to make a specific attribute more important in search results, then simply move the slider to the right.

Adjust the Importance of Each Attribute

When you’re done, go ahead and click on the ‘Save Engines’ button at the top of the screen to save your settings.

SearchWP will then start rebuilding your search index in the background. After that, the plugin will be ready to start delivering more relevant search results to your WooCommerce store.

Click the 'Save Engine' Button

SearchWP will automatically use any search forms on your online store. However, if you need to add a search form, then see our step by step guide on how to create a custom WordPress search form. This will also teach you how to style the results page using custom CSS.

Now you can go to your WooCommerce store to try out the search feature. We’ll search for the product category ‘hoodies’, and all products in that category will be displayed.

Product Search Results Page Preview

To learn more, see our guide on how to make a smart WooCommerce product search.

Customizing Which Products Will Be Shown on Search Results Pages

By default, SearchWP will include all of the products in your online store in the search results. However, you may wish to specify which products should or should not be displayed.

For example, you can automatically exclude products if they fall under certain conditions, like if they are discontinued or out of stock. Or you might only display products that are on sale or come with free shipping.

For example, the AeroPress WooCommerce store lets you search for products with free shipping. This is a great incentive for customers to make a purchase.

AeroPress Product Search Results Page

To get started, you should click the ‘Edit Rules’ button in SearchWP’s Products section.

Click the 'Edit Rules' Button

Right now there are no rules. You can create as many rules as you need.

To create your first rule, you need to click the ‘Add Rule’ button.

Click the 'Add Rule' Button

Now you can specify the conditions for which products should be shown or excluded from search results. For this tutorial, we’ll exclude all out of stock products.

First, you should select ‘Exclude entries if’ from the first drop down menu. Then select the ‘Product visibility’ taxonomy and type ‘outofstock’ in the field next to it.

Creating a Rule to Exclude Out of Stock Products

If you like, you can add additional conditions that should be excluded by clicking the ‘OR’ button. Once you’re finished adding rules, click the ‘Done’ button.

Now all you need to do is press the ‘Save Engines’ button at the top to store your changes.

Click the 'Save Engine' Button

To learn about more ways you can make use of SearchWP’s rules, see our guide on how to exclude specific pages, authors, and more from WordPress search.

Displaying Product Search Results in Live Mode

Live search will improve the search experience on your WooCommerce store by automatically showing search results as your customers type their queries.

For example, Good Dye Young offers live search results on their hair and makeup products.

Relevant products and articles are immediately displayed while the customer types their search query, providing a better user experience.

Good Dye Young Product Search Results Page

To add this to your own store, all you need to do is install and activate the free SearchWP Live Ajax Lite Search plugin. For more details, see our step by step guide on how to install a WordPress plugin.

Upon activation, your WooCommerce search forms will automatically provide live search.

Live Search Preview

For more details, see our guide on how to add live search to your WordPress site.

Finding Partial Matches and Other Advanced Features

Partial matching will help your customers to find what they are searching for, even if they don’t type the whole word or use the correct spelling.

For example, the Magna-Tiles online store has partial matching enabled. Customers only need to type part of a product name to find it in the search results.

Magna-Tiles Product Search Results Page

To enable partial matching in SearchWP, you should navigate to SearchWP » Settings and click on the Advanced tab.

On this page, you can enable some settings that will make it easier for your users to find what they are looking for.

SearchWP Advanced Settings

Check any of these options that you would like:

  • Partial matches will also display results that don’t quite match the term that is being searched for.
  • Automatic “Did you mean?” corrections will suggest a slightly different search term that will match more products in your online store.
  • Supporting “quoted/phrase searches” will allow your users to use quotes when searching for exact phrases.
  • Highlighting terms in results will make it easier for your customers to find what they are looking for in the search results.

We hope this tutorial helped you learn how to customize the WooCommerce product search results page. You may also want to learn how to add wholesale pricing in WooCommerce, or check out our list of the best email marketing services.

If you liked this article, then please subscribe to our YouTube Channel for WordPress video tutorials. You can also find us on Twitter and Facebook.

The post How to Customize WooCommerce Product Search Results Page first appeared on WPBeginner.


May 02, 2022 at 04:00PM