Monday, July 4, 2022

WPBeginner Turns 13 Years Old – Reflections and Updates

Today, WPBeginner turns 13 years old, and it seems we have a teenager on our hand.

It feels pretty unreal to type this.

Like every year, I want to take a few minutes and do a quick recap of all the major things happening in business as well as my personal life.

WPBeginner 13th Birthday - Reflection and Updates

WPBeginner Story

I started using WordPress when I was 16 years old and started WPBeginner at age 19 with a single mission: make WordPress easy for beginners.

Since then WPBeginner has become the largest free WordPress resource site for beginners.

For those of you who’re new, you can read the full WPBeginner story on our about page and use the Start Here page to get the most out of WPBeginner.

Personal Updates

My son, Solomon, is now 5.5 years old, and he will be starting school in August. Time is flying by so fast.

We’re taking advantage of our flexible schedule right now and maximizing our international travel trips. Not to mention, I felt I had a bit of catching up to do considering all the COVID lockdowns.

This year we have taken several trips, but two of my absolute favorites were the Arctic Circle in Finland and the beautiful Serengeti National Park in Tanzania.

Syed Balkhi and Family 2022

If all goes according to plan between work travel and family trips, I will visit 8 countries this year. It’s pretty exciting to be traveling again without restrictions, but at times I have felt overwhelmed depending on what’s going on in the business.

If you didn’t get a chance to read my 2021 recap, I highly recommend checking it out on my personal blog where I share lessons learned from last year.

WPBeginner Updates

Thanks to our awesome community, WPBeginner has continued to grow year over year. Aside from tons of amazing WordPress tutorials on our blog, there have been several notable updates from last year, that I’d like to highlight.

But before I do that, I want to share a huge milestone that I’m super proud of. We got featured on the NASDAQ billboard in Time Square for passing 20 million active installs of our products.

Awesome Motive NASDAQ Billboard - WPBeginner

This was a pretty huge moment for our entire team — going from a blog to being on Time Square in New York City!!!

This was a dream come true moment, and it’s proof that hard work does pay off.

Talking about hard work, here are some big WPBeginner updates that happened in the last 12 months:

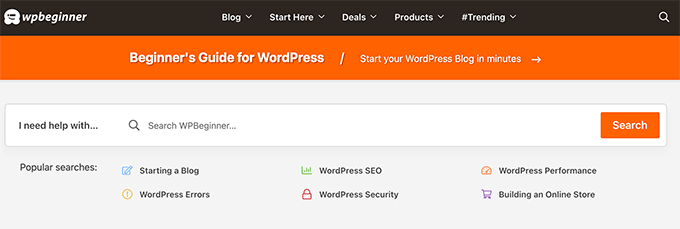
1. New WPBeginner Website Design

After 5 long years, we finally did a design refresh for WPBeginner site, and our big focus was content discoverability.

WPBeginner started out as a simple tutorial blog, but over the years it has truly become the Wikipedia for WordPress.

Now when you arrive at the website, you’ll see a big search bar on the homepage.

WPBeginner homepage search

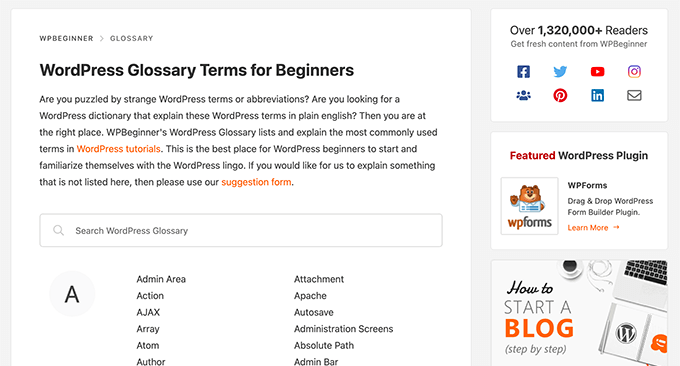
If you visit our WordPress glossary section or best WordPress discounts section, then you will also see a live search feature to quickly find what you’re looking for.

WPBeginner WordPress Glossary Live Search

Aside from that, we also added mega menus, switched from Yoast to AIOSEO, started using the block editor for everything, and a whole lot more.

Not to mention, we made the site super fast and our Google Core Web Vitals score is nearly perfect.

WPBeginner Google Page Speed Test Results

I wrote a full behind the scenes case study with helpful links and tutorials, so you can learn and improve your website.

2. Larger Community + More Content

Our community has continued to grow on all social media networks. Our WPBeginner Engage Facebook group now has over 86,000 members.

And the WPBeginner YouTube channel has passed 274,000 subscribers.

To keep up with growth, we’re doubling down on our video content strategy. This is part of the bigger plan that I can’t wait to share with you in the coming months.

Aside from our video, we have also launched the WPBeginner Podcast. This is an experiment that we’re trying out, so please send us your feedback by leaving comments and sending us your ideas on what topics you want us to cover in future episodes.

You can listen to the WPBeginner podcast on your favorite networks including YouTube, Apple Podcast, Google Play, Spotify, Amazon Audible, etc.

3. Contributing to WordPress and Open Source

As I mentioned last year, we have continued to ramp up our contribution to various free open source projects including WordPress core.

As part of our Five for the Future commitment, we hired John James Jacoby, one of the most well-respected WordPress core contributors, so he can spend 100% of his time on making WordPress and BuddyPress better.

Aside from the contributions that are visible on WordPress.org, we’re offering over 1200 hours of free WordPress support each month through our various support channels including our contact form, Facebook group, etc.

We also invested in creating a free migration tool to help users switch from Shopify to WordPress. This is in addition maintaining several other platform migration tools like Weebly to WordPress and Medium to WordPress.

At WPBeginner, we maintain dozens of free small business tools, and we added few new ones to the mix including:

4. New Acquisitions & Investments

In 2018, I created the WPBeginner Growth Fund to invest in WordPress focused companies that are solving important problems that you, our readers, want me to help out with.

In the past 12 months, we have made several big acquisitions and investments in the ecosystem.

  • We acquired SearchWP to help website owners improve their WordPress search results by giving them more control over the search algorithm. Here’s the full background story.
  • We acquired Easy Digital Downloads which helps you sell digital downloads like eBooks, software, music, etc. This is the exact software that we use to sell all of our WordPress plugins and SaaS. Here’s the full background story.
  • As part of the above deal, we also acquired WP Simple Pay plugin which helps website owners accept credit card payments without a full shopping cart. It lets you add Apple Pay, Google Pay, Buy Now Pay Later, and more powerful payment features.
  • And the deal also included the #1 affiliate management plugin for WordPress called AffiliateWP. This lets you create your own affiliate program for your online store without the middle man fees.
  • Last month, we announced our acquisition of WP Charitable, a top-rated WordPress donation and fundraising plugin. See the full story here.

Aside from the full acquisitions, we also invested in WooFunnels, the leading funnel building software for WooCommerce. Simply put, it helps you make more money from your website visitors. See more details here.

We also took an investment stake in ConvertKit which is one of popular email marketing services for creators.

I’m really proud of how far we’ve come with the Growth Fund, and it’s really amazing to see the impact our companies are making in the WordPress ecosystem and the larger open web.

Want me to invest in your business? Learn more about the WPBeginner growth fund.

Product / Company Updates

One of the questions that I often get asked via our contact form is what is WPBeginner’s income, and how does WPBeginner make money by giving away all WordPress tutorials for free.

Well, we make money indirectly through our suite of premium WordPress plugins that are now running on over 20 million websites. Aside from that, we also have investments in a suite of other WordPress companies through our growth fund that I mentioned above.

Our team at Awesome Motive continued to set new records this year, and all of our products saw tremendous growth.

Here’s a list of our plugins that you should check out:

  • OptinMonster – #1 conversion optimization software that helps you convert abandoning website visitors into subscribers and customers. There’s also a free version here.
  • WPForms – the most beginner friendly WordPress form builder used by over 5 million websites. There’s also a free version – WPForms Lite.
  • MonsterInsights – the most popular WordPress Analytics plugin that helps you grow your business with confidence. I use this on all of my websites. Free version available: MonsterInsights Lite.
  • AIOSEO – the original WordPress SEO plugin to help you get more traffic. Used by over 3 million websites. There’s also a free version of AIOSEO.
  • WP Mail SMTP – the #1 plugin that helps improve your WordPress email deliverability. The free version: WP Mail SMTP Lite is sufficient for most website owners.
  • SeedProd – the best drag & drop website builder for WordPress. You can use it to create custom WordPress themes, landing pages, and website layouts without any code. Try the free version of SeedProd.
  • RafflePress – powerful WordPress giveaway and contest plugin to grow your website traffic.
  • Smash Balloon – most popular social media feeds plugin for WordPress. Free version available for InstagramFacebookTwitter, and YouTube feeds.
  • PushEngage – leading web push notification software for small businesses – helps send over 9 billion push notifications each month.
  • SearchWP – The most advanced WordPress search plugin. Completely customize your WordPress search form and search results algorithm to improve your content discoverability and increase sales. Trusted by over 30,000+ website owners.
  • Easy Digital Downloads – Top rated WordPress plugin for selling digital products and subscriptions. Easily sell eBooks, software, music, and more, protect digital downloads, accept payments, and more. Trusted by over 50,000+ website owners.
  • AffiliateWP – The most popular affiliate management plugin for WordPress. Easily launch an affiliate program for your store. One-click integration with WooCommerce, WPForms, and 20 other payment plugins. Unlock a new growth channel without the middleman fees.
  • WP Simple Pay – Easily accept payments online without a complex shopping cart setup. Great for simple one-time or recurring payments. Built-in support for credit card payments, ACH bank debit, Apple Pay, Google Pay, and more.
  • Sugar Calendar – An event calendar management plugin for WordPress. Create events, sell tickets, sync with Google Calendar, and more. Great for churches, conferences, paid webinars, and more.
  • TrustPulse – Leverage the power of social proof to instantly increase site conversions by up to 15%. Automatically show real-time purchase notification and other website activity notifications to increase trust, conversions, and sales.
  • WP Charitable – Top-rated donation and fundraising plugin for WordPress. Over 10,000+ non-profit organizations and website owners across the world use Charitable to create fundraising campaigns and raise more money online.

We’re a fully remote team of over 215+ people across 45 countries. Want to join our team and work alongside me in helping small businesses grow and compete with the big guys? We’re hiring.

Thank You Everyone

I want to say thank you to everyone who has supported us in this journey. I really do appreciate all of your retweets, personal emails, content suggestions, and the interactions at the events.

I also want to say special thank you to everyone who’s using our plugins because that enables us to keep bringing more free tutorials on WPBeginner.

You all are AMAZING and without you, there is no WPBeginner.

I look forward to another solid year ahead of us.

Syed Balkhi
Founder of WPBeginner

The post WPBeginner Turns 13 Years Old – Reflections and Updates first appeared on WPBeginner.


July 04, 2022 at 05:00PM

Sunday, July 3, 2022

How to Show Different Menus to Logged in Users in WordPress

Do you want to show different menus to logged-in users in WordPress?

By default, WordPress allows you to show the same navigation menu in a specific location in your theme. But what if you wanted to show a different menu to logged-in users on your website?

In this article, we’ll show you how to easily show different menus to logged-in users in WordPress.

Showing different navigtion menus to logged in and non-logged in users in WordPress

Why Show Different Menus to Logged in Users in WordPress?

Changing different areas of your WordPress website based on your visitors and their activity makes your site feel personalized for each user.

This personalized content helps you improve the user experience on your WordPress website.

Now, if you run a website where users don’t need to register or log in, then you can probably use the same navigation menus across your website.

However, other websites may greatly benefit from showing custom menus to logged-in users.

For instance, websites like an online store, a WordPress membership site community, or an online learning platform, can all benefit from personalized navigation menus.

A personalized navigation menu for logged-in users helps them more easily find things they signed up for.

For instance, a user on an online store can manage their account, or a member of a paid community can easily renew their subscription or view the online courses they purchased.

By default, WordPress does let you create as many navigation menus as you want. However, you can only choose to show one menu at a particular location in your WordPress theme.

That being said, let’s take a look at how to easily change this behavior and show different menus to logged-in users in WordPress.

Creating Menus for Logged in and Non Logged in Users in WordPress

No matter which method you use, you’ll first need to create both of the navigation menus that you want to show to your logged-in and logged-out users.

Simply head over to the Appearance » Menus page in the WordPress dashboard. If you already have a navigation menu that you use on your website for all users, then this can be your default menu.

Main menu

After that, click on the ‘create a new menu’ link to create a new custom menu for your logged-in users.

Here you can add menu items that you want to show to registered or logged-in users. For example, you might want to add a logout link to your menu.

On the left-hand side of the screen, you can see a list of your website pages. Simply check the box next to any page you want to add to your menu and click the ‘Add to Menu’ button.

Logged in menu

You can also drag and drop the menu items on the right side of the screen to rearrange them.

Further down the page, you can choose a location to display your menu. But, you don’t need to assign a location to this menu now. We’ll do that later in the article.

Don’t forget to click on the ‘Save Menu’ button to store your changes.

For more details on creating menus, take a look at our beginner’s guide to WordPress navigation menus.

Method 1. Show Different Menus to Logged in Users in WordPress Using a Plugin

This method is easier and recommended for all WordPress users.

First, you need to install and activate the Conditional Menus plugin. For more details, see our step-by-step guide on how to install a WordPress plugin.

Upon activation, you need to visit the Appearance » Menus page and switch to the ‘Manage Locations’ tab.

From here, you’ll see the list of available menu locations defined in your WordPress theme and the menus that are currently displaying.

Manage menu locations

For instance, it is showing that our Primary Menu location is showing a navigation menu titled ‘Main Menu’.

Now, we need to tell the plugin to show a different menu when a certain condition is matched.

To do that, click on the ‘+ Conditional Menu’ link, and then select the navigation menu you want to show to the logged-in users from the drop-down menu.

Select logged in menu

Next, you need to click on the ‘+ Conditions’ link.

This will bring up a popup where you’ll see a bunch of conditions to choose from.

Select logged in user aa the condition

Simply check the box next to the ‘User logged in’ option, and then click on the Save button.

You can now visit your website to see the logged-in user menu in action. You can also log out of your WordPress admin to view the navigation menu that’ll be shown to all other users.

Different menu for logged in users

Method 2. Manually Select Logged in Menu in WordPress Using Code

This method requires you to add code to your WordPress website. If you haven’t done this before, then take a look at our guide on how to copy and paste code snippets in WordPress.

First, you need to add the following code to your theme’s functions.php file or a site-specific plugin.

function my_wp_nav_menu_args( $args = '' ) {
if( is_user_logged_in() ) {
// Logged in menu to display
$args['menu'] = 43;

} else {
// Non-logged-in menu to display
$args['menu'] = 35;
}
return $args;
}
add_filter( 'wp_nav_menu_args', 'my_wp_nav_menu_args' );

Make sure that you replace 43 and 35 with the IDs for navigation menus you created earlier.

You can find the ID of a navigation menu by selecting it on the Menus page. You will see the menu ID number in your browser’s address bar.

Find navigation menu ID

We hope this article helped you learn how to easily show different navigation menus to logged-in users in WordPress.

You may also want to see our guide on how to get a free email domain, or see our expert roundup of the best business phone services for small business.

If you liked this article, then please subscribe to our YouTube Channel for WordPress video tutorials. You can also find us on Twitter and Facebook.

The post How to Show Different Menus to Logged in Users in WordPress first appeared on WPBeginner.


July 04, 2022 at 10:01AM

Saturday, July 2, 2022

How to Disable RSS Feeds in WordPress

Do you want to disable RSS feeds on your WordPress site?

RSS feeds allow users to subscribe to your blog posts. However, you may want to turn off the RSS feeds when building small static websites. By default, there is no option to remove RSS feeds in WordPress.

In this article, we will show you how to disable RSS feeds in WordPress.

How to disable RSS feeds in WordPress

What are RSS Feeds and Why Disable Them?

RSS is a type of web feed that helps users get real-time updates and content from your website. RSS stands for Really Simple Syndication or Rich Site Summary. It allows your readers to automatically get new content in email newsletters, RSS feed readers, and other devices.

While RSS feeds are useful for your website, WordPress can add multiple feeds that might not be useful. For instance, there are taxonomy feeds, author feeds, individual post and page feeds, and more.

You can disable these RSS feeds and save search engines like Google from exhausting their website crawl quota. This way, search engine bots won’t crawl feeds that aren’t relevant to your site and instead index more important pages.

Plus, disabling RSS feeds makes sense if you’re not running a WordPress blog, but using WordPress more as a CMS (content management system) or simple website builder. It’s also perfect for eCommerce stores that don’t have a blog.

At WPBeginner, we have disabled several of the RSS feeds to help improve our SEO rankings.

That being said, let’s see how you can disable RSS feeds in WordPress.

Method 1: Disable RSS Feeds Using a Plugin

The easiest way of disabling RSS feeds is by using a WordPress plugin like All in One SEO (AIOSEO).

It’s the best SEO plugin for WordPress and lets you optimize your site for search engines without requiring technical knowledge or hiring an expert.

All In One SEO - AIOSEO

This method is easier and is recommended for beginners. We’ll use the AIOSEO Lite version for this tutorial because it allows you to disable RSS feeds in WordPress.

However, if you want to boost your search rankings, then you can use the AIOSEO Pro version to unlock more powerful features like XML sitemaps and redirection manager.

The first thing you need to do is install and activate the AIOSEO plugin. For more details, see our step-by-step guide on how to install a WordPress plugin.

Upon activation, you’ll see the AIOSEO setup wizard. Simply click the ‘Let’s Get Started’ button and follow the onscreen instructions. For more details, please see our guide on how to set up All in One SEO in WordPress.

Click let's get started AIOSEO setup wizard

Next, you can go to All in One SEO » Search Appearance from your WordPress dashboard and head to the ‘Advanced’ tab.

After that, you can scroll to the ‘Crawl Cleanup’ option and click the toggle to enable it.

Go to AIOSEO advanced settings in search appearance

Once you’ve enabled the Crawl Cleanup option, simply scroll down to the RSS feeds you want to disable.

We recommend keeping the Global RSS Feed enabled because it allows your subscribed users to get the latest updates. Disabling this would mean people won’t be able to subscribe to your website, which could hurt your WordPress SEO.

Disable RSS feeds

On the other hand, you can disable other types of RSS feeds.

For example, you can switch off RSS feeds for authors, search, attachments, taxonomy, and more.

Save changes to RSS feed

Don’t forget to click the ‘Save Changes’ button when you’re done.

Method 2: Manually Disable RSS Feeds in WordPress

Another way of disabling RSS feeds in WordPress is by adding code to your website theme’s functions.php file.

This method requires you to edit WordPress files, and you can use this method if you are comfortable pasting snippets from web into WordPress.

Note: We don’t recommend editing the functions.php file directly on your website because the slightest mistake can break your site.

You can also add this code in a site-specific plugin or in a code snippets plugin:

function wpb_disable_feed() {
wp_die( __('No feed available,please visit our <a href="'. get_bloginfo('url') .'">homepage</a>!') );
}

add_action('do_feed', 'wpb_disable_feed', 1);
add_action('do_feed_rdf', 'wpb_disable_feed', 1);
add_action('do_feed_rss', 'wpb_disable_feed', 1);
add_action('do_feed_rss2', 'wpb_disable_feed', 1);
add_action('do_feed_atom', 'wpb_disable_feed', 1);
add_action('do_feed_rss2_comments', 'wpb_disable_feed', 1);
add_action('do_feed_atom_comments', 'wpb_disable_feed', 1);

Once the code is uploaded on your WordPress hosting server, you can try to request any RSS feed page.

To check, you can enter https://example.com/feed/ URL in your browser. Just make sure to replace ‘example.com’ with your website URL.

Preview of disabled RSS feed

We hope this article helped you learn how to disable RSS feeds in WordPress. You may also want to see our guide on WooCommerce made simple and how to start a podcast using WordPress.

If you liked this article, then please subscribe to our YouTube Channel for WordPress video tutorials. You can also find us on Twitter and Facebook.

The post How to Disable RSS Feeds in WordPress first appeared on WPBeginner.


July 02, 2022 at 03:00PM

Friday, July 1, 2022

8 Best Wedding Website Builder and Templates of 2022 (Compared)

Are you looking for the best wedding site builder and templates to create the perfect wedding website?

The good news is that there are plenty of ways to create a beautiful website that has everything you need for your special day.

In this guide, we’re going to compare the best wedding website builders that you can use to build a wedding website without writing any code.

9 best wedding builder and templates (compared)

How to Find the Best Wedding Website Builder for You?

Creating a wedding website helps your guests find all the information they need to prepare for your big day.

For instance, you can inform them about the travel information, accommodation details, gift registry, seating chart, and other wedding details. Plus, it also helps share your love story, wedding party details, engagement photos and videos, and send guests digital Save the Date option.

When considering which wedding website builder you should use, you’ll want to look for features that make the following tasks easy.

RSVP management: You’ll need a way for wedding guests to register for your wedding and manage these easily. 

Calendar for events: If you have an eventful wedding planned, then you’ll need a way for guests to keep up with the timeline for your wedding. 

Design and templates: You’ll want to pick a site builder with a wide range of wedding templates and design options. You’ll also want the builder to be easy to use and customize so that you can create a wedding site just as beautiful as your wedding. 

Content management features: Beyond building a website, you’ll need an easy way to add pages like an FAQ page, your story, venue directions, and more. 

Gift registry: It’s not a requirement, but many website builders and platforms let you embed your gift registry or easily add links.

With that said, let’s take a look at some of the pros and cons of the most popular wedding website builders, so you can choose the right software for your needs. 

1. WordPress.org

WordPress Website Builder

WordPress.org is the most popular platform for creating websites. It powers over 43% of all the websites on the internet, and it is 100% free to use. WordPress.org is open source software, and you can easily use it to create a wedding website.

There are multiple WordPress plugins, themes, and website builders that give you complete freedom and flexibility when it comes to creating a website. To start, all you need is a web hosting service and a domain name.

Wedding themes in WordPress

Normally the domain name costs $15 per year, and web hosting can cost you upwards of $7.99 per month.

Luckily, the folks at Bluehost have agreed to offer our readers a 60% discount + free domain name which means you start your wedding website for $2.75 per month.

Bluehost is an official WordPress recommended hosting partner.

After getting a website hosting, you can then use a website builder like SeedProd. It is the best drag and drop WordPress page builder and custom theme builder in the market that’s used by over 1 million sites.

It lets you create completely custom WordPress themes without writing a single line of code. This means you can build the wedding website of your dreams with all the features you need. You can use the pre-built collection of themes and customize every element.

SeedProd Example

You can add multiple pages to your WordPress wedding website, like a custom RSVP page, rehearsal dinner page, bridal shower page, and a section for engagement photos and videos.

Pros

  • It’s open-source software that is 100% free and super easy to use.
  • You get complete control over your website design, functionality, and data.
  • There are numerous free and paid WordPress plugins and themes for customizing your WordPress wedding website.
  • You can create an eCommerce store section, sell digital products, accept online payments, and make money from your website.
  • WordPress.org websites easily integrate with Google Analytics and help you track their performance and see which strategies are working.

Cons

  • To run a WordPress.org website, you’ll need website hosting. The initial cost isn’t expensive and could cost you around $3 to $10 per month. However, as your website grows, the cost of hosting will also increase since you’ll need more space to store website files and deliver fast performance.
  • With WordPress.org, you’ll have to make sure of website backups. Luckily there are many WordPress backup plugins you can use.
  • Similarly, you’ll also have to ensure that your site, plugins, and themes are up to date.

Pricing

WordPress is free, but you’ll need to pay for a domain name and web hosting. A domain name costs typically around $15 per year, and web hosting costs $7.99 per month.

Luckily, Bluehost, one of the largest hosting providers, has agreed to offer WPBeginner readers a 60% discount on hosting, plus a free domain name and SSL certificate.

You can get started for as low as $2.75 per month.

If you need help setting up your website, then see our ultimate guide on how to make a website.

2. Web.com

Web.com Website Builder

Web.com is another popular website builder for small businesses that offers a user-friendly tool. You can easily create a wedding website of your choice in no time using their website builder.

It comes with a DIY builder which lets you drag and drop different elements for your website. Plus, there are over 150 different templates, including wedding themes that you can use to get started.

Wedding templates for web.com

With Web.com, you can also create a WordPress website. It offers its own web hosting service and automatically installs WordPress. You also get 1-year domain registration, unmetered bandwidth, automatic WordPress updates, and more.

Pros

  • Web.com offers an easy-to-use drag and drop website builder that makes it effortless to create any type of website.
  • There are over 150 different website templates to choose from, so you can get started quickly and customize the web design according to your needs.
  • The builder also offers powerful features like photo galleries, testimonial sliders, social media buttons, and more.
  • You easily create an online store using the website builder, accept credit card payments online, manage your products and inventory, and more.
  • With Web.com, you get different customer support options, including detailed documentation, phone call support, email support, and live chat.

Cons

  • Web.com is a great solution for small businesses, but as your site grows, it lacks some powerful features that you might need to grow your business.
  • The online store builder is relatively new and doesn’t offer as many features as you would get in WooCommerce.
  • If you’re looking to start a blog using Web.com, then you will get limited features.

Pricing

Web.com prices start from $4.95 per month with the Website Essentials plan, and you get free SSL, free domain, secure web hosting, and more. If you want different marketing tools and basic analytics, then you can choose the Business Essentials plan, which will cost you $7.95 per month.

Besides that, Web.com also offers an eCommerce Essentials plan for $13.95 per month and an eCommerce Premium plan for $19.95 per month.

3. Wix

Wix

Wix is a drag-and-drop website builder that makes it easy to create a website without writing code. The best part is that you can create a free wedding website in no time.

The template library includes hundreds of beautiful wedding templates you can use as a starting point for your website. 

Wix wedding templates

These templates also include standard wedding website features like an online RSVP system, a location map, links to your gift registry, and a calendar for your wedding events. 

Beyond the selection of wedding themes, there’s an included Wix logo maker to create a wedding couple logo and a wedding playlist creator. 

Pros

  • The drag and drop builder makes it very easy to customize your beautiful wedding template.
  • It supports all kinds of integrations if you need to add more features to your website.

Cons

  • The Free and Connect plans will show branded ads on your site.
  • It’s a difficult process if you ever want to move your website away from Wix.
  • Once you choose a template for your website, you won’t be able to change it.

Pricing

You can get the basic Wix website builder for free. However, with the free account, your wedding website will be on a subdomain, have ads, and a Wix logo.

If you want access to a free custom domain and remove the Wix ads, then paid plans start at $14 per month.

4. WordPress.com

WordPress.com

WordPress.com is an all-in-one website hosting platform with the same underlying code as WordPress.org.

It’s easy to get confused about the difference between WordPress.com and WordPress.org. To learn more, see our comparison of WordPress.com and WordPress.org and which is best.

It does offer a free plan, but it’s quite limited, and there are restrictions on what you can do with your website compared to WordPress.org. 

However, you will find a few wedding-specific free themes that give you features like a guestbook template, large featured images, and guest RSVP to create a free wedding website.

WordPress.com wedding theme

If you’re looking to quickly build a simple wedding website with limited features, then it might be the right choice. 

Pros

Cons

  • You won’t have the same level of customization as you would with other website builders. 
  • You’re limited in storage size, so you won’t be able to add many high-resolution photos.

Pricing

You can use the free plan with a subdomain (such as yourname.wordpress.com), but it’s very limited in features and storage space, and they will show ads on your website.

Paid plans start at $15 per month when billed annually and include a custom domain name. 

5. Joy

Joy

Joy is a free wedding website builder app. Instead of simply being a website builder, it includes additional features to help you manage and even organize your wedding. 

For example, you’ll find features for managing your guest registry, creating a guest list, sending out save the dates, storing photos, and more. There’s also a unique feature that creates your own wedding app for you and your guests. 

You can choose between hundreds of different wedding website templates. They aren’t highly customizable, but you can control the fonts, colors, and more. 

Joy wedding templates

You can create a guest FAQ section for common questions, provide travel and flight information, create wedding bios for your guests, and more. 

Pros

  • There’s an easy-to-use dashboard for managing all of your website and wedding planning features, so you only need to keep track of one tool.
  • It’s almost impossible to find all of the features this platform offers at such an affordable price.

Cons

  • The themes are beautiful, but they may be too simplistic for some users.
  • You don’t have many options for creating a unique site with custom features. It will look very similar to other websites using the same platform.
  • Once you build your website, you won’t be able to migrate it away from the platform.

Pricing

Joy is completely free. You don’t have to pay a dime to use the service or build a wedding website. 

Instead, they earn a commission on any item that gets sold through the wedding registry. However, if you want a custom URL, then you’ll need a custom domain name and it will cost you $19.99.

6. Squarespace

Squarespace

Squarespace is a popular drag and drop website builder that helps you create a website for your wedding day. The design has always been at the core focus, so you’ll find a template library filled with beautiful modern templates.

There are currently dozens of different wedding templates available you can customize using the drag and drop builder.

Squarespace wedding templates

Plus, when you choose a wedding template, it includes other helpful features like a wedding gift registry, RSVP pages, wedding invitations, and creating and sharing photos with friends and family. 

Pros

  • The platform is easy to use and built for beginners.
  • The theme templates are beautiful and focus on high-quality images, videos, and font choices.

Cons

  • There are limited integrations built into the platform, so you can only add the included tools and features.
  • The price point can be a limiting factor, especially if you want to accept cash donations instead of gifts.

Pricing

Squarespace offers a variety of different pricing plans depending on your needs.

Pricing for the Personal plan starts at $14 per month when paid annually and includes all the features you need to build your wedding website.

However, if you want to accept cash donations as a cash gift registry, then you’ll need at least the Business plan that starts at $23 per month when paid annually. 

7. The Knot

The Knot

The Knot is another free option and a wedding planner platform you can use to create a website quickly. 

The website builder offers hundreds of different wedding templates that can be customized with a simple drag and drop editor. 

The Knot wedding templates

You have control over your site images, color scheme, page layouts, and more. 

If you’re ordering wedding invitations and other paper goods through their service, then it’s really simple to have these match the design of your website. 

Beyond quickly building a wedding website, it offers different wedding planning tools like you can integrate your registries, view an event timeline, manage and track RSVPs, and more. 

Pros

  • It’s truly an all-in-one platform, so you can manage your website, send wedding invitations, buy gifts, use budgeting tools, and even find vendor recommendations during the planning stage.
  • There are unique live chat, and live streaming features integrated into the tool to keep all of your guests updated.

Cons

  • Although the website builder is free, most of the wedding websige designs are quite simple and don’t offer a lot of customization options compared to other tools.
  • The platform might be too complex for users looking to simply build a wedding website.

Pricing

The Knot is entirely free to build a wedding website and access the wedding planning features. However, if you want to use a custom domain name, then you’ll need to purchase a custom domain name for $20. 

8. Appy Couple

Appy Couple

Appy Couple is an all-in-one wedding platform and wedding website builder that includes over 500 different wedding templates you can choose from. 

When you choose a wedding template, it also includes a mobile app with a similar design.

Appy Couple wedding templates

As you customize your site, you can choose from pre-set sections like save the date, RSVP forms, and more. You can also use drag and drop widgets to add image galleries, highlight hotel reservations and travel deals, and more. 

There’s also a helpful guest list manager that lets you manage your guest list from both the website and mobile app. 

Pros

  • You can use the Android and iOS apps to build your site on your mobile device.
  • The platform includes advanced features to take care of everything related to your wedding, even helping your guests get reservations.
  • The template library is smaller, but they offer unique designs from artists you can’t find anywhere else.

Cons

  • Some users may find the back and forth between the website and mobile app confusing.
  • You can’t purchase a custom domain elsewhere, and you’ll have to buy it through the platform for an added fee.

Pricing

Appy Couple is either $49 per year or $12 per month, giving you access to all the platform features. 

You can also add a custom domain name (such as www.mywedding.com) for $20 per year. Otherwise, you’ll get a free subdomain (mywedding.appycouple.com) when you sign up. 

Expert Pick: What is the Best Wedding Website Builder?

WordPress.org is the best solution to build a wedding website. It offers lots of freedom and flexibility in how your website will look and function. Plus, you have complete control over your data as you own the website.

With WordPress.org, you get free and paid WordPress plugins, themes, and page builders to get started and customize every element of your wedding website.

For example, you can use SeedProd to create a website. The builder comes with a theme and template library and can be used to create an entire WordPress site perfect for your wedding without writing any code.

You can even create a simple one-page site with all the details about your wedding.

SeedProd wedding site example

It’s also very affordable since you can use the Bluehost web hosting deal to get a free domain name and discount hosting. 

If you need to add any other wedding-related features like a gift registry, RSVP management system, email notifications for wedding updates, and more, then you can always use a popular WordPress plugin.

We hope this article helped you learn about the best wedding website builders and templates. You may also want to take a look at our guide on how to create a free business email address and how to create an email newsletter for your website.

If you liked this article, then please subscribe to our YouTube Channel for WordPress video tutorials. You can also find us on Twitter and Facebook.

The post 8 Best Wedding Website Builder and Templates of 2022 (Compared) first appeared on WPBeginner.


July 01, 2022 at 04:00PM

How to Moderate New User Registrations in WordPress

Do you want to moderate new user registrations in WordPress?

When you run a WordPress membership site, or allow users to register on your site, unfortunately it can often lead to spam user registrations.

In this article, we’ll show you how to easily moderate new user registrations in WordPress, so you can manually approve and deny new users.

Moderate user registrations in WordPress

Why Moderate New User Registrations in WordPress

WordPress allows you to open your website for new user registration. This allows users to create an account on your website.

Open user registration in WordPress

Often website owners require user registration to see premium content, download files, purchase product from your online store, and more.

By default, you can choose a user role to assign for all new user registrations such as the Subscriber role. This gives them certain permissions and capabilities on your website.

To have more granular control over what users can see and do on your website, you will need the MemberPress plugin. It is the best WordPress membership plugin that allows you to easily sell memberships and subscriptions on your website.

MemberPress Website

You can use MemberPress to sell courses, create a paid newsletter, and other premium content memberships.

If you’re looking to sell digital downloads like eBooks, music, software, and more, then you can use the Easy Digital Downloads plugin.

Alternatively, if you’re selling physical products on your site, then you would also want to require user registration as part of your WooCommerce online store, so you can store their shipping details.

Now the problem with opening your website for new user registrations is spam sign-ups.

Similar to spam comments, there are automated bots that just look around for registration forms and fill them up.

You can use ReCaptcha and other methods to block spam user registrations, but they also affect user experience.

Luckily, there are ways to prevent spam user registration through user moderation queue.

That being said, let’s take a look at how to easily moderate new user registrations in WordPress and simply approve or deny sign-ups on your website.

Method 1. Moderate User Registrations in WordPress with Custom Registration Form

Most website owners like to use a custom user registration form in WordPress. This allows them to customize the styling to match their brand needs, automatically add users to their email newsletter, and more.

WPForms is the best drag & drop WordPress form builder used by over 5 million websites, and it comes with a powerful User Registration addon.

Note: We use WPForms on our sites and recommend it to all users.

WPForms
The user registration addon allows you to create completely custom WordPress user registration form as well as a custom WordPress login forms.

It also lets you turn on Admin approval for new user registration.

Enable Admin Approval for User Registration in WPForms

Since WPForms integrates with all the popular email marketing services, you can use it to automatically add all users to your email list.

Their free Uncanny Automator integration also enables further no-code workflow automation to help you save time.

If you’re not using WPForms custom user registration form, then don’t worry. Our next method will cover how to moderate user registration for WooCommerce, MemberPress, and basically every other plugin.

Method 2. Moderating User Registrations in WordPress with New User Approve

First, you need to install and activate the free New User Approve plugin. For more details, see our step-by-step guide on how to install a WordPress plugin.

Upon activation, this plugin enables moderation for all WordPress user registrations, and it is compatible with WooCommerce, MemberPress, LearnDash, BuddyPress, Easy Digital Downloads, and all other user registration plugins.

If you are using the default WordPress user registration, then users will see the following message on the registration form.

New user registration form

After they fill out the user registration form and submit it, they will be informed that their account is pending review.

Awaiting moderation

You will also receive an email notification on your admin email address to approve or deny this user registration.

Users will also get an email on their account informing them that their registration is awaiting approval.

Tip: If you or the users on your site don’t receive email notifications, then you need to set up WP Mail SMTP. For more details, please follow the instructions in our guide on how to fix the WordPress not sending email issue.

Approve or Deny User Registration in WordPress

The New User Approve plugin makes it super easy to manage the moderation queue for user registrations.

Simply login to your WordPress admin area, and click on the New User Approve menu item in the admin sidebar.

Moderate user registration

You’ll see the list of user registrations awaiting moderation. You can then go ahead and Approve or Deny the user registration.

Users will then receive an email informing them whether their registration was approved or denied.

They can then go ahead and log in to their account on your WordPress website.

Allow Specific Users to Bypass User Regisration Moderation

New User Approve allows you to create invitation codes that users can use to register on your website and bypass the moderation queue.

Simply go to the New User Approve » Invitation Code page and enter a code in the Add codes box.

Create invitation codes to bypass new user moderation

You can also set a usage limit for the invitation code and choose an expiry date.

Don’t forget to save your changes.

Next, you need to switch to the Settings tab and turn on the toggle to allow user registration using the invitation link without moderation.

Enable invites

Don’t forget to click on the save changes button to store your settings.

You can now give these invitation codes to users that you trust. They will be able to bypass the moderation queue and instantly register on your website.

Register with invitation code

Using User Moderation with Other Plugins

The New User Approve plugin works with popular WordPress plugins used for user registration and memberships.

However, it will not show the custom notices on the user registration form. You’ll have to do that manually in your plugin settings.

For instance, if you are using WPForms, then you’ll need to edit your user registration form. Inside the form builder, switch to the Confirmations tab.

Edit user registration form confirmation message

Here, you can write a custom message informing users that their account is pending review and they will receive an email when it is approved.

Similarly, if you are using MemberPress, then you can go to Memberships page and edit one of your memberships.

Edit membership

Next, scroll down to the Membership Options section and check the box next to the  ‘Enable custom thank you page message’.

Add a custom thank you message for MemberPress

From here, you can add your own custom message informing users that their account is pending approval.

You may need to repeat the process for other membership plans if needed.

We hope this article helped you learn how to moderate new user registrations in WordPress. You may also want to see our guide on how to which website marketing data you must track or see our tutorial on how to show personalized content to users in WordPress.

If you liked this article, then please subscribe to our YouTube Channel for WordPress video tutorials. You can also find us on Twitter and Facebook.

The post How to Moderate New User Registrations in WordPress first appeared on WPBeginner.


July 01, 2022 at 12:00PM