Friday, September 9, 2022

6 Best WooCommerce Email Customizer Plugins (Free + Paid)

Are you looking for an easy way to customize your WooCommerce store emails?

A WooCommerce email customizer allows you to easily adjust and personalize the emails your website send to your customers. This includes receipt emails, subscription renewal emails, and more.

In this article, we’ll show you the best WooCommerce email customizer plugins to help you improve your website emails.

Best WooCommerce email customizer plugin

Why Use a WooCommerce Email Customizer Plugin?

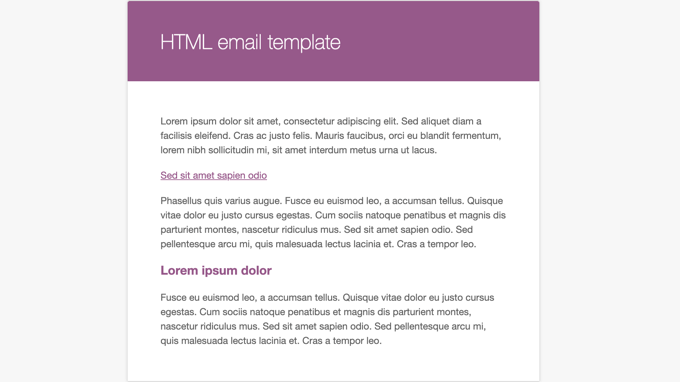
WooCommerce is the #1 most popular eCommerce platform for WordPress, and it comes with built-in settings to edit the emails that you send to your customers. However, these customization options are very limited and basic.

For instance, you can only change the font and background colors, edit the email content, and add a logo. These minimal customization options make your emails look generic and unattractive.

Here’s what default WooCommerce emails will look like:

WooCommerce Allows You to Preview the Email Template Containing Dummy Text

A WooCommerce email customizer gives you more options and flexibility to customize your email notifications.

You can upsell products, offer coupons, or even direct users to relevant posts on your WordPress blog. A plugin can also help you to customize the email notifications that are sent when a customer creates a new account, resets a password, and more.

Some tools even let you create automation workflows for your online store. For instance, you can automatically send pre-written emails when a customer buys a new product, subscribes to your newsletter, books an appointment, or abandons a cart.

That said, let’s look at some of the best WooCommerce email customizer plugins in the market.

1. Autonami

Autonami

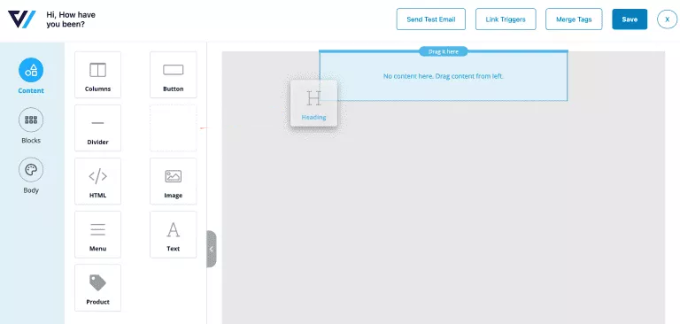
Autonami is the best WooCommerce email customizer plugin that’s very easy to use.

It comes with a drag-and-drop email builder with lots of customization options. You can add different elements by dragging them from the menu on your left and dropping it onto the template to customize your WooCommerce emails.

Plus, you get to further customize each element, like changing its color, font, alignment, and more. This gives you complete control over the appearance of your WooCommerce emails.

Add a heading block to email template

Autonami also offers a pre-built WooCommerce email library. You can create an email sequence for your eCommerce store with a single click.

Autonami Email Library for WooCommerce

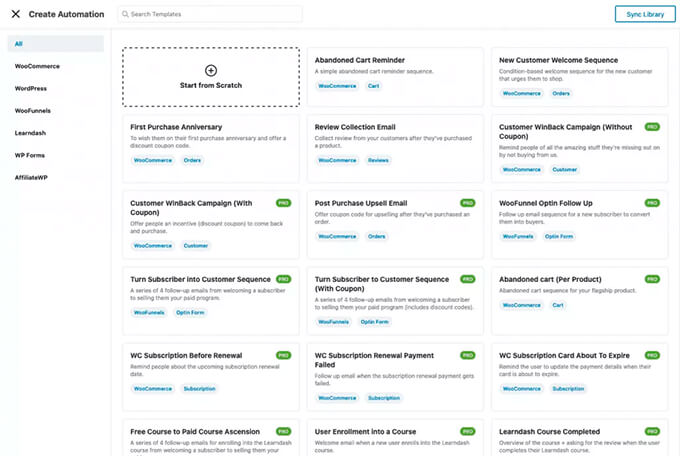
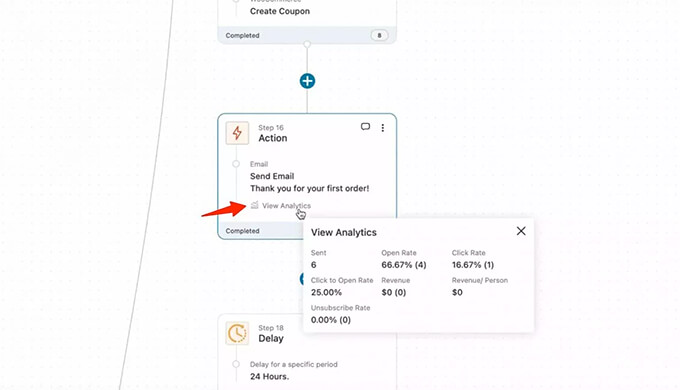
Besides that, it also offers a visual email automation builder, where you get to customize your workflows. This makes it effortless to set up automated emails, as you can choose which emails to show based on the user’s action and when to show them.

Autonami Marketing Automation Email Analytics for WooCommerce

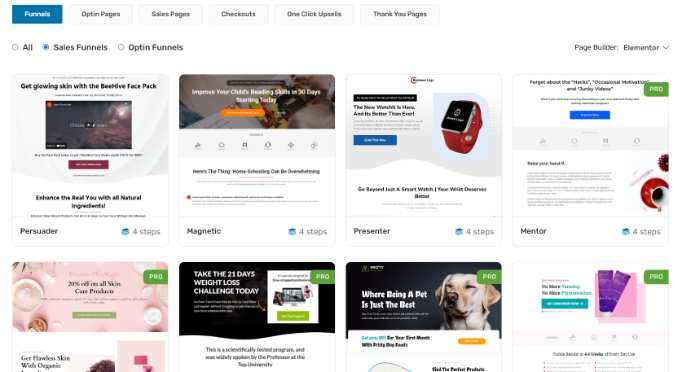
Autonami is a sister product to WooFunnels, which is a powerful sale funnel builder for WooCommerce. You can set up a complete sales funnel and use pre-built templates for custom checkout pages, upsells, discount offers, and more.

Funnel templates in Woofunnels

Pricing: To use Autonami, you’ll need to purchase the Funnel Builder + Autonami plan, which will cost you $249 per year. That said, there is also a free version of Autonami with limited features that you can get started with.

2. Email Customizer for WooCommerce

Email customizer for WooCommerce

Email Customizer for WooCommerce by ThemeHigh is a WordPress plugin that offers a beginner-friendly email builder.

You can drag and drop different elements into your transactional emails. For instance, you can add text, images, social icons, buttons, GIFs, billing information, shipping details, and more.

When customizing the emails, the builder shows a live preview of your changes. This way, you can see what your emails will look like on the customer’s screen.

The plugin also offers 11 pre-built custom email templates, so you can quickly select any email type and customize it according to your needs.

It also offers WPML compatibility, allowing you to create emails in multiple languages. You can also integrate it with other plugins like WooCommerce Order Status Manager and YITH WooCommerce Gift Cards.

On the downside, you don’t get any automation features like Autonami offers. The plugin doesn’t offer a workflow builder or an option to set up automated email series.

Pricing: Email Customizer for WooCommerce pricing starts from $39 per year. There is also a free version of Email Customizer for WooCommerce available.

3. YayMail

YayMail

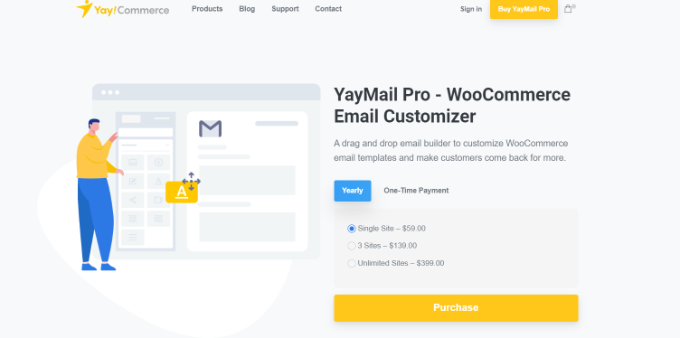
YayMail is another popular WooCommerce email customizer plugin. You can easily design and edit your emails in its drag-and-drop builder. Its interface is easy to use and is similar to Elementor or the WordPress block editor.

The plugin comes with different widgets and dynamic blocks that you can use to add elements to the WooCommerce transactional email template. The visual builder also gives a real-time preview of your changes.

Besides that, the premium version of YayMail offers features like shipment tracking, custom order status, checkout field editor, and more. You also get powerful add-ons and WooCommerce extension support with YayMail Pro.

Pricing: YayMail is a premium email customizer plugin for WooCommerce, with prices starting from $59 per year for a single WordPress site.

4. Flycart Email Customizer Plus for WooCommerce

Flycart email customizer plus

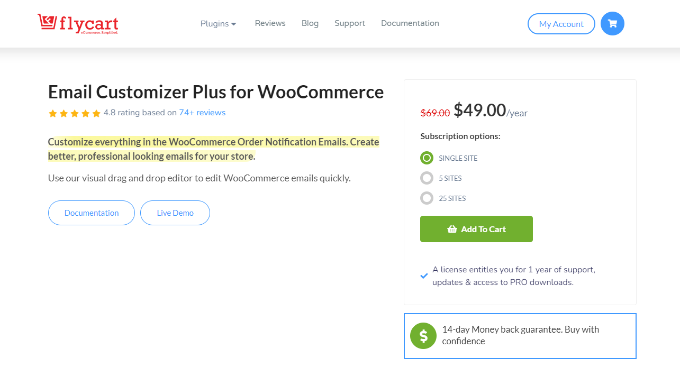
Flycart Email Customizer Plus for WooCommerce is a premium WooCommerce plugin that you can use to create custom transactional emails.

Its drag-and-drop builder allows you to change the layout and customize your emails the way you want. You can add a logo, edit email content, add social icons, and more.

There’s no need to manually edit HTML, CSS, or PHP code to change the look and feel of your emails. The plugin offers basic elements and WooCommerce elements that you can add to the template.

The plugin comes with pre-built templates, so you don’t have to start from scratch. There is also an option to send test emails and make sure they are delivered to your customers.

Pricing: Flycart Email Customizer Plus for WooCommerce prices start from $49 per year for a single site. You also get a 14-day money-back guarantee with each plan.

5. Decorator

Decorator

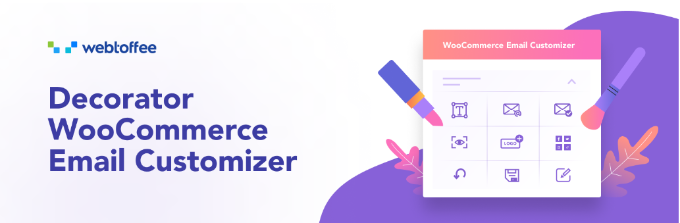
Decorator is a WooCommerce plugin that lets you customize your emails using the WordPress theme customizer.

The plugin offers different options to edit the look and style of your emails. For instance, you can edit the email content, heading, color, email header and footer, add a logo, enter social media links to your Facebook, Twitter, or LinkedIn pages, and more.

The Decorator plugin also lets you add shortcodes and placeholders to show additional information in the emails, like customer name, order details, company name, order date, and more.

While the theme customizer offers a real-time preview of your changes, it doesn’t provide the flexibility of a drag-and-drop builder like you’d get in Autonami and other plugins on our list. There are also no pre-built WooCommerce email templates you can use to get started quickly.

Pricing: Decorator is a free plugin that you can use on your WooCommerce store.

6. Kadence WooCommerce Email Designer

Kadence WooCommerce Email Designer

Kadence WooCommerce Email Designer is a free plugin that also uses the WordPress customizer to create custom emails for your online store.

The plugin shows a live preview of your WooCommerce emails in the theme customizer and offers different options for customization. For example, you can easily customize headings, subtitles, and body text using the plugin.

However, Kadence WooCommerce Email Designer lets you import pre-built email templates, which isn’t possible in the Decorator plugin. On the downside, you don’t get the flexibility or customization options that other drag-and-drop email builders provide, like Autonami.

Pricing: You can use Kadence WooCommerce Email Designer for free.

Bonus: WP Mail SMTP

WP Mail SMTP

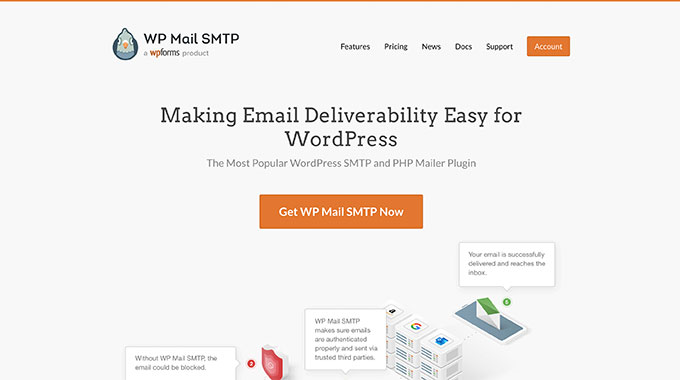
WP Mail SMTP is the best WordPress SMTP plugin in the market. It ensures that your WordPress emails are delivered to your customer’s email inbox and don’t end up in spam.

Many WordPress hosting companies don’t support the default method WordPress uses for sending emails from your site. As a result, you’ll notice that many emails simply vanish and never reach your customers. WP Mail SMTP solves the issue of WooCommerce not sending emails and improves deliverability.

The best part is that WP Mail SMTP easily integrates with WooFunnels and offers multiple mailers, including Gmail, Outlook, Sendinblue, Amazon SES, and more.

For more details, you can see our detailed guide on how to set up WP Mail SMTP with any host.

Pricing: WP Mail SMTP prices start from $49 per year. There is also WP Mail SMTP free version you can use for your site.

Which is the Best WooCommerce Email Customizer?

If you’re looking for a complete tool that offers WooCommerce email customization and automation, then we highly recommend using Autonami.

The plugin is super easy to use and offers a drag-and-drop email builder along with different email templates. You can create stunning WooCommerce emails in just a few clicks and don’t need coding knowledge.

Autonami also lets you set up automated email workflows for your WooCommerce site. It helps save time, as you can automatically send an email series to new customers, recover abandoned carts, send promotional emails to selected audiences, and more.

You can even combine Autonami with an SMTP service like WP Mail SMTP. Doing so will ensure that your emails are delivered to your customers and won’t get lost or end up in the spam folder.

We hope that this article helped you learn about the best WooCommerce email customizer plugins. You may also want to see our guide on the best free business name generators and how to move WordPress from HTTP to HTTPS.

If you liked this article, then please subscribe to our YouTube Channel for WordPress video tutorials. You can also find us on Twitter and Facebook.

The post 6 Best WooCommerce Email Customizer Plugins (Free + Paid) first appeared on WPBeginner.


September 09, 2022 at 04:00PM

Thursday, September 8, 2022

How to Add an Admin User to the WordPress Database via MySQL

Have you been locked out of your WordPress website?

Sometimes hackers will lock you out of your own website by deleting your admin account from the database.

In this article, we’ll show you how to add an admin user to the WordPress database via MySQL, so you can get your access back.

How to Add an Admin User to the WordPress Database via MySQL

Why Add an Admin User to the WordPress Database via MySQL?

We once ran into an issue where a user’s site was hacked, and their admin account was deleted from the database. This locked them out of their WordPress website without any other entry.

We were able to help them get access to their website by creating a new admin user directly to the WordPress website. We did that using phpMyAdmin, a web-based tool that allows you to manage MySQL databases using your web browser.

If you find yourself locked out of your WordPress admin area due to hackers, or simply because you forgot your password, then you can do the same.

However, you should always make a backup of your database before performing any MySQL edits. Then once you can log back into your website, you may need to follow our beginner’s guide to fixing your hacked WordPress site.

With that being said, let’s take a look at how to add an admin user to the WordPress database via MySQL.

Adding an Admin User to the WordPress Database With phpMyAdmin

PhpMyAdmin comes pre-installed with most top WordPress hosting companies. You can find it under the Databases section of your hosting account’s cPanel dashboard.

Here is a screenshot from the Bluehost control panel:

Opening phpMyAdmin from CPanel

Clicking on the icon will open the phpMyAdmin interface. You need to select your WordPress database from the left column.

After, that phpMyAdmin will display all tables in your WordPress database. You will be making changes to the wp_users and wp_usermeta tables.

You Will Be Making Changes to the wp_users and wp_usermeta Tables

Adding a User to the wp_users Table

First, you need to find the wp_users table and click it. This will show the users currently listed in the table.

Notice in the screenshot below that there are two user IDs in our demo website’s table, 1 and 2. When we create a new user for our demo site, we’ll give it the ID 3.

You need to click the ‘Insert’ tab at the top of the screen so you can insert the information for a new admin user.

Click the Insert Tab

Add the following information to the fields on the Insert form:

  • ID: pick a unique number (in our example, we’ll use 3)
  • user_login: the username that will be used when logging in
  • user_pass: add a password, and make sure to select MD5 in the function menu (see the screenshot below)
  • user_nicename: the user’s full name or nickname
  • user_email: the user’s email address
  • user_url: your website address
  • user_registered: select the date and time the user was registered using the calendar
  • user_activation_key: leave blank
  • user_status: set this to 0
  • display_name: the user’s full name or display name
Fill In the Fields for the New User

Once you have finished, make sure you click on the ‘Go’ button to store the new user.

Adding a User to the wp_usermeta Table

Now you need to find the wp_usermeta table and click it. After that, you should click on the ‘Insert’ tab as you did in the previous step.

Next, you need to add the following information to the Insert form:

  • unmeta_id: leave this blank (it will be auto-generated)
  • user_id: the user ID you used in the previous step
  • meta_key: this should be wp_capabilities
  • meta_value: insert this: a:1:{s:13:"administrator";s:1:"1";}
Fill In the Fields for the New User

After that, when you scroll down you should find fields for a second row. You need to add the following information:

  • unmeta_id: leave this blank (it will be auto-generated)
  • user_id: the user ID you used in the previous steps
  • meta_key: you need to enter wp_user_level
  • meta_value: 10
Fill In the Fields for the New User

When you have finished entering the information into the fields, you need to click the ‘Go’ button. Congratulations, you have created a new admin username.

Now you should be able to log in to your WordPress admin area using the username and password you specified for this user.

As soon as you log in, you need to navigate to Users » All Users, then click on the username you just created.

Navigate to Users » All Users and Edit the New User

Now, without changing anything, scroll to the bottom of the page and click the ‘Save’ button.

This will allow WordPress to clean up the user you just created and add some needed information.

Adding an Admin User to the WordPress Database Using a SQL Query

If you are a developer, then you can speed up the process using code.

Simply drop this SQL query into your database:

INSERT INTO `databasename`.`wp_users` (`ID`, `user_login`, `user_pass`, `user_nicename`, `user_email`, `user_url`, `user_registered`, `user_activation_key`, `user_status`, `display_name`) VALUES ('3', 'demo', MD5('demo'), 'Your Name', 'test@example.com', 'http://www.example.com/', '2022-09-01 00:00:00', '', '0', 'Your Name');
 
 
INSERT INTO `databasename`.`wp_usermeta` (`umeta_id`, `user_id`, `meta_key`, `meta_value`) VALUES (NULL, '3', 'wp_capabilities', 'a:1:{s:13:"administrator";s:1:"1";}');
 
 
INSERT INTO `databasename`.`wp_usermeta` (`umeta_id`, `user_id`, `meta_key`, `meta_value`) VALUES (NULL, '3', 'wp_user_level', '10');

Make sure you change ‘databasename’ to the database you are working with. Also, don’t forget to change the other values to those you want for the new user, as we explained in the first method.

Drop This SQL Query Into Your Database

We hope this tutorial helped you learn how to add an admin user to the WordPress database via MySQL. You may also want to see our ultimate WordPress security guide, or check out our list of common WordPress errors and how to fix them.

If you liked this article, then please subscribe to our YouTube Channel for WordPress video tutorials. You can also find us on Twitter and Facebook.

The post How to Add an Admin User to the WordPress Database via MySQL first appeared on WPBeginner.


September 08, 2022 at 02:12PM

Wednesday, September 7, 2022

How to Properly Use the More Block in WordPress

Do you want to use the More block on your WordPress website?

WordPress gives you several different ways to show a preview of your posts on the archive and homepage. This can help catch the visitor’s attention and get them to read the full post.

In this article, we will show you how you can properly use the More block in WordPress. We’ll also show you how to create an excerpt, just in case you’re using a theme that ignores the More block.

How to properly use the More block in WordPress

When to Use the More Block in WordPress

Many websites use post previews to encourage visitors to check out the full version.

As a WordPress user, you can create post previews in a few different ways. For example, you might use a WordPress accordion plugin or show and hide content using the toggle effect.

By default, most modern WordPress themes automatically show a preview of your posts on the homepage and blog archives instead of the full post. For example, on our blog page we show a few words and then a ‘Read More’ link to see the full blog post.

A WordPress blog archive with Read More buttons

This preview text helps visitors to see more of what topics are available on your blog without having to scroll through every post. It also helps to increase pageviews since your visitors will have to click through to finish reading a post.

You can control exactly what WordPress shows in these previews by using either the More block or an excerpt.

The best choice for your site will vary depending on your WordPress theme. Some themes will ignore any More blocks you create, so you’ll need to use an excerpt instead.

To help you show an engaging preview no matter what theme you’re using, we’ll be covering both More blocks and excerpts.

If you prefer to jump straight to a particular method then you can use the links below.

How to Properly Use the More Block in WordPress

The WordPress block editor has a built-in More block that allows you to specify the exact cut off point for the preview text of any WordPress post. In the classic editor, it was previously known as the More tag.

You can add the More block anywhere in the post, including mid sentence or in the middle of a paragraph.

All of the content above the More block will appear on your blog archive pages and wherever else your posts are listed on your WordPress site. WordPress will also add a ‘Read More’ link to the preview, so visitors can click to read the full version of the post.

The WordPress More block

Note: Every WordPress theme is different and some may override the default ‘Read More’ label. With that in mind, you may see different text on your ‘Read More’ button.

Before you add a More block to your post, it’s important to check that your site is set up to show the latest posts on the homepage. If you are using a static page as your custom homepage, then your theme may ignore the More blocks and use its own settings instead.

Not sure if you’re using a static front page as your homepage? To check, simply go to Settings » Reading in the WordPress dashboard.

The WordPress Settings page

At the top of this screen, you’ll see a ‘Your homepage displays’ section. If ‘Your latest posts’ is selected, then you should have no problems using the More block.

To get started, simply open the post where you want to add a More block. Then, find the spot where you want to create the cut off point for your preview, and click on the + icon to add a new block.

You can then type in ‘More’ and select the right block to add it to your page.

The WordPress More block, formerly the More tag

Some themes have a limit on how many words they will show on their homepage and archive pages. There’s a chance your theme may override the More block if you try to include a very large number of words in your preview. With that in mind, it’s a good idea to create the cut off point early in the post.

You can now carry on writing the rest of your post as normal.

You’ll be able to see the More block when editing your post in the block editor, but your visitors won’t see it when they’re reading the post on your WordPress blog.

Just like any other block, WordPress has some settings that you can use to configure the More block. To see these settings, simply click to select your More block.

In the right-hand menu, you can now choose whether to hide or show the excerpt on the full content page, which is the page you’re currently looking at.

By default, all of the content above the More block will appear on the full content page, as you can see in the following image.

Customizing the WordPress More block

However, you may want to write a custom excerpt that will only appear on your homepage and archive page, and not in the full post itself.

To do this, simply click the ‘Hide the excerpt….’ slider to turn it from white to blue.

Hide the WordPress More block content

Now, everything above the More block will appear on the archive page and homepage only.

Once you’re finished, you can go ahead and save your changes by clicking on the Update or Publish button.

Now if you visit your homepage or blog archive page, you’ll see the preview you just created for this post.

Are you seeing something different?

Then your WordPress theme may be ignoring your More blocks.

Some themes are designed to show excerpts and will override all of your More blocks. If your homepage and blog archives aren’t showing the preview you created using the More block, then you may need to use excerpts instead.

How to Change the More Block’s ‘Read More’ text

By default, the More block will show a Read More link on your archive and homepage.

There are a few different ways to change this text, but you may get slightly different results depending on your WordPress theme. Some themes will override your changes with their own default settings.

To start, it’s worth checking whether you can change the Read More text using the WordPress post editor.

To do this, simply open any post that has a More block. You can then click on the default ‘READ MORE’ text and type in the text that you want to use instead.

Changing the text on the Read More label

After that, either update or publish the page as normal. You can then visit your homepage or blog archive to see whether the Read More text has changed.

If you’re still seeing the original Read More link, then you may need to override your theme’s settings using code.

You can either create a site-specific plugin or use a code snippets plugin like WPCode, and then add the following code to your site:

function modify_read_more_link() {
    return '<a class="more-link" href="' . get_permalink() . '">Check out the full post</a>';
}
add_filter( 'the_content_more_link', 'modify_read_more_link', 999 );

This replaces the default ‘Read More’ text with ‘Check out the full post,’ as you can see in the following image.

You can use any text you want by replacing ‘Check out the full post’ in the code snippet.

An example of a More block with custom text

How to Properly Use Excerpts in WordPress

WordPress has two different ways to show a post preview. We’ve already covered the More block, but you can also create a preview using excerpts.

For the people who visit your WordPress blog or website, previews created using excerpts and the More block look exactly the same. However, some themes are coded to use excerpts, which means they will ignore your More blocks and show an excerpt instead.

If you don’t add an excerpt to a post manually, then WordPress will create one automatically based on the excerpt length defined by your theme. This can lead to previews that cut off mid sentence.

With that in mind, you can choose to create an excerpt manually instead. To do this, simply open a post and then click to expand the ‘Excerpt’ section in the right-hand menu.

Adding an excerpt to a WordPress post

In the ‘Write an excerpt box’ you can then either type in or paste the excerpt that you want to use for the post.

Don’t see an ‘Excerpt’ box in the right-hand menu? Then you can enable this setting by clicking on the three-dotted icon in the upper-right corner.

Once you’ve done that, click on Preferences.

Enabling the WordPress excerpt settings

In the popup that appears, simply click on ‘Panels.’

You’ll now see all the settings that you can add to the right-hand menu. Simply find ‘Excerpt’ and give it a click to turn it from white (disabled) to blue (enabled).

Activating the WordPress excerpts feature

Then, simply close this popup. You should now have access to the ‘Excerpt’ settings in your right-hand menu.

Now, you can create an excerpt following the same process described above.

Once you’ve done that, simply save your changes and visit your site. You will now see your custom excerpt on the homepage and blog archive.

We hope this article helped you learn how to properly use the More tag in WordPress. You may also want to check out our ultimate SEO guide for beginners and the best WordPress landing page plugins.

If you liked this article, then please subscribe to our YouTube Channel for WordPress video tutorials. You can also find us on Twitter and Facebook.

The post How to Properly Use the More Block in WordPress first appeared on WPBeginner.


September 08, 2022

Should I Update WordPress or Plugins First? (Proper Update Order)

Not sure about whether to update WordPress core, or your plugins first?

Often beginners don’t install updates because they are afraid of breaking their site. Updating your WordPress site in the correct order will help you prevent common errors and troubleshoot more easily.

In this article, we’ll show you the proper order for updating WordPress core, plugins, and themes.

Should You Update WordPress or Plugins First? Proper Update Order

Why Keep WordPress Up to Date?

It’s important to always use the latest version of WordPress. This will make sure your website has the latest security patches, newest features, and the best speed and performance.

Unfortunately, on rare occasions, updating WordPress or a plugin can break your website. This can happen if there’s a bug in the code or if the update introduces some kind of conflict with a theme or plugin.

That’s why we always recommend that you create a complete WordPress backup before performing any updates. You can also create a staging site where you can test the updates and catch any errors without risking your live website.

It’s also helpful to use the proper WordPress update order. You may be wondering whether it’s best to update WordPress core or your plugins first.

Our expert team recommends updating WordPress in this order:

  1. First, update WordPress core
  2. Then update your plugins
  3. Finally, update your theme last

Let’s take a look at the best order to update your WordPress website.

Before You Start, Make a Complete WordPress Backup

Before you update anything, it’s important to perform a full backup of your WordPress website. You should store the backup on your computer or in cloud storage, not just on your hosting server.

That’s because there is always some risk that an update may break your site, no matter how careful you are or which order you perform the updates.

A complete WordPress backup includes everything:

  • Your WordPress database
  • All your images and media uploads
  • Your WordPress plugins and themes
  • Core WordPress files

UpdraftPlus is the best WordPress backup plugin and is used by more than 3 million websites. You can use it to create a complete backup of your WordPress site and store it on the cloud or download it to your computer.

Back Up Your Website With UpdraftPlus

You can learn the best way to use UpdraftPlus to back up your website step by step by visiting our guide on how to back up and restore your WordPress site.

First, Update WordPress Core

If a new version of WordPress core is available, then you should update that first. This follows the update order as it is listed on the Dashboard » Updates page and helps minimize the risk to your site.

Because plugin and theme updates are tested to work with the latest WordPress version, you are less likely to have conflicts by updating your plugins and themes after the latest version of WordPress is installed.

The simplest way to update WordPress core is to navigate to the Dashboard » Updates page and then click the ‘Update Now’ button.

Updating WordPress Core From the Dashboard

When you press ‘Update Now,’ WordPress will automatically put your site in maintenance mode, then fetch the latest version of the software and install it for you. You will see the update progress on your screen.

Advanced users can also update WordPress manually by downloading the latest version from the WordPress download page, and then logging into their WordPress hosting account and using FTP to upload the new WordPress files.

To learn how to update WordPress core using either of these methods, see our beginner’s guide and infographic on how to safely update WordPress.

WordPress Update Flowchart

Troubleshooting a WordPress Core Update

Before you move on to update your plugins, you should first make sure that there are no problems with your website now that it is running the latest version of WordPress.

Simply visit your website in a new browser window to see if anything isn’t working or looks out of place. You should also review the settings in your WordPress admin area.

If you come across any issues, then take a look at our list of common WordPress errors and how to fix them.

If the problem you are facing is not listed there, then you should follow the steps in our WordPress troubleshooting guide to figure out the problem and apply a solution.

After That, Update Your Plugins

Once you have upgraded WordPress on your website, then you can update your plugins.

An easy way to do that is to scroll further down the Dashboard » Updates page to the ‘Plugins’ section.

Simply select the specific plugins you wish to update and click the ‘Update Plugins’ button. You can select all of the plugins listed by checking the ‘Select All’ box at the top of the list.

Updating WordPress Plugins From the Updates Page

You may also notice a red number beside Plugins in the admin dashboard. Clicking inside will show you a yellow notice under each plugin that needs to be updated.

Then, all you have to do is click the ‘Update now’ link under any plugin you want to update without having to leave the page.

How to update plugins in WordPress

For more detailed information, see our step-by-step guide on how to properly update WordPress plugins.

Troubleshooting a Plugin Update

As you did after updating WordPress core, you should visit your website in a new browser window to see if you encounter any error messages or other problems.

You may sometimes discover that one of your plugins is not compatible with the latest WordPress version.

When that happens, you should follow the steps in our WordPress troubleshooting guide to see if you can find a solution to the problem.

If you can’t, then reach out to the developer and see if they plan to release an update. If the plugin is from the WordPress Plugin Directory, then you can contact the developer using the site’s support forum. Otherwise, check the official website for support information.

How to get WordPress support in the official support forums

If no further development is planned, then you will need to look for a different plugin that performs the same task. You might like to take a look at our beginner’s guide on how to choose the best WordPress plugin.

If you’re not ready to move on to a different plugin, or if there are other issues with the update that you can’t resolve, then you may need to restore your WordPress site from the backup you made before you began the update process.

Alternatively, you can roll back WordPress to the previous version.

Finally, Update Your Theme

After you have updated WordPress core and your plugins, and you have checked that your website is working, you can update your theme, if an update is available.

However, when you update a theme, you will overwrite the existing theme files with new ones and lose any changes you made. If you added any code to your theme, then you should carefully check our guide on how to update a WordPress theme without losing customization.

Once you are ready to update your theme, you can simply scroll to the ‘Themes’ section at the bottom of the Dashboard » Updates page.

Once there, you can select the themes you want to update, then click the ‘Update Themes’ button. The ‘Select All’ checkbox will automatically select all available theme updates.

Updating Themes From the Dashboard » Updates Page

Alternatively, you can navigate to Appearance » Themes in your admin area. If any updates are available, you will notice a red number next to ‘Themes’ in the admin sidebar.

Updating Themes From the Appearance » Themes Page

Simply click the ‘Update now’ link above any theme you wish to update.

Troubleshooting Your Theme Update

Troubleshooting a theme update is similar to troubleshooting a plugin update. You should start by visiting your website in a new browser window to see if there are error messages or other problems.

If there are, you can follow our WordPress troubleshooting guide to find a solution, or reach out to the developer for help.

If the theme is from the WordPress Theme Directory, then you can contact the developer using the support forum for that theme. Otherwise, check the official website for support information.

What Is the Proper WordPress Update Order?

In conclusion, let’s summarize the proper order to update your WordPress website:

  • First, you should back up your website
  • Then, update the core WordPress files
  • Next, update your plugins
  • Finally, update your theme

Always make sure your website is working properly before moving on to the next step.

Of course, if there is no update for WordPress core, then you can update your plugins or theme whenever new versions become available.

We hope this tutorial helped you learn the correct order to use when updating WordPress core and plugins. You may also want to learn how to properly install Google analytics in WordPress, or check out our list of must-have WordPress plugins to grow your site.

If you liked this article, then please subscribe to our YouTube Channel for WordPress video tutorials. You can also find us on Twitter and Facebook.

The post Should I Update WordPress or Plugins First? (Proper Update Order) first appeared on WPBeginner.


September 07, 2022 at 04:01PM

Tuesday, September 6, 2022

How to Add an External Link Icon on Your WordPress Site

Do you want to add an external link icon to your WordPress site?

By clearly marking your external URLs, you can keep people on your site for longer, and make it clear that clicking on a particular link will open a new window or tab.

In this article, we will show you how you can add an external link icon to WordPress.

How to add an external link icon on your WordPress site

Why Add an External Link Icon on Your WordPress Site?

An external link icon is a small picture that appears next to a link that will take the user to a different website.

For example, you can scroll to the bottom of any Wikipedia post and see that most links in the References section have an external link icon.

An example of external link icons

By using external link icons on your WordPress blog, your visitors will easily be able to tell the difference between outbound links and internal links. Many sites also use external link icons to make it clear that the link will open in a new window or tab.

These icons can keep visitors on your site for longer and increase your pageviews since there’s less risk of them clicking on an external link and leaving your website by accident.

With that being said, let’s see how you can add an external link icon to your WordPress site.

How to Add an External Link Icon on Your WordPress Site

The easiest way to add an external link icon to your website is by using WP External Links.

You can use this plugin to add different images, Dashicons, and Font Awesome icons to your external links automatically.

An external link icon created in WordPress

First, you’ll need to install and activate the

WP External Links plugin. If you need help, then please see our guide on how to install a WordPress plugin.

After that, just click on the new WP External Links setting in the left-hand menu.

The WP External Links WordPress plugin

If you get a popup asking you to upgrade, then you can simply click anywhere outside the popup to close it.

As you can see, the plugin can do a lot more than just add an external link icon to your site. For example, it can automatically add nofollow to all external links in WordPress.

WP External Links can also keep people on your site by opening all external links in a new window or tab. We recommend enabling this feature since many users assume links with an external link icon will open in a new window or tab, anyway.

To open all external URLs in a new window or tab, open the ‘Open external links’ dropdown and click on ‘each in a separate new window or tab.’

Open external links in a new tab or window

By default, WP External Links will apply this rule to every new external link that you create.

However, it can also scan your site and change any external URLs that you’ve previously added to your website. This will provide a more consistent experience for your users, so it’s a good idea to go ahead and click on the ‘Overwrite existing values’ box.

Overwrite the previous external link settings

Once you’ve done that, you’re ready to create an icon for your external links. To start, scroll to the ‘Choose icon type’ section.

Now you can click where it says ‘no icon’ to open the dropdown.

Selecting an icon type for your external URL

Your options are Image, Font Awesome, or Dashicon.

Both Font Awesome and Dashicon come with a single box-with-arrow icon that you can use as your external link icon. This icon will always appear blue on your site, as you can see in the following image.

An example of an external link dashicon

This is the exact icon that many websites use for their external links, so most visitors will understand what the box-with-arrow icon means.

However, ‘Image’ lets you choose between several box-with-arrow icons including some that have a slightly different style and color.

In the following image, you can see an example of how a colorful box-with-arrow icon will look on your WordPress website.

An Image-based external link icon

If you want to add a colorful icon to your site, then you’ll need to select ‘Image’ from the ‘Choose icon type’ dropdown.

You can then click on the one that you want to use for your external links.

Choosing an arrow icon for your external links

Once you’ve done that, open the ‘Icon position’ dropdown.

Here, choose whether the icon will appear on the ‘Right side of the link’ or the ‘Left side of the link.’ Most websites show the external icon to the right of the link.

Changing the position of your external URL icon

Do you want to use the standard blue box-with-arrow icon instead?

Then you can open the ‘Choose icon type’ dropdown and click on either ‘Font Awesome’ or ‘Dashicon’ instead.

Next, open the dropdown menu beside ‘Choose Dashicon’ or ‘Choose FA,’ and then click on the box-with-arrow icon.

Using a dashicon as an external link icon

Note: Both Font Awesome and Dashicons give you access to dozens of other icons. However, we recommend using the box-with-arrow icon as more people will recognize this as an external link icon.

After clicking on the Font Awesome or Dashicon that you want to use, you can specify whether it should appear to the right or left of the link following the exact same process described above.

When you’re happy with the external link icon you’ve chosen, simply click on ‘Save changes.’

The plugin will then add the icon to all the external URLs on your site automatically.

We hope this article helped you learn how to add an external link icon to your WordPress site. You can also go through our guide on proven ways to make money online blogging and how to track website visitors to your WordPress site.

If you liked this article, then please subscribe to our YouTube Channel for WordPress video tutorials. You can also find us on Twitter and Facebook.

The post How to Add an External Link Icon on Your WordPress Site first appeared on WPBeginner.


September 06, 2022 at 02:14PM