Wednesday, October 5, 2022

What Happens When You Switch Your WordPress Theme?

Do you want to know what happens when you switch WordPress themes?

With so many great WordPress themes available, it can be tempting to switch to a new theme. However, there are a few things to keep in mind before you switch. 

In this article, we’ll answer what happens when you switch your WordPress theme, so you know what to expect. 

What happens when you switch your WordPress theme?

What Happens if You Change Themes in WordPress?

When you’re considering changing your the theme on your WordPress site, it can be hard to know what features and functions your theme is responsible for.

That’s because some WordPress themes are simple and minimalist, and don’t include many features beyond a basic design. Other WordPress themes are multipurpose, and include many different templates, customization options, and features to help you customize your website.

Depending on the features that come with your theme, you may be afraid that changing it would cause you to lose content or even delete everything on your site.

Luckily, that’s not the case. You won’t lose all your site content if you switch themes.

Still, you might lose more than you think. That’s why it’s important to understand what happens when you switch themes, and how to change WordPress themes without losing content.

With that said, let’s walk you through what will happen when you switch your WordPress theme.

Theme Menus Will Change with New WordPress Theme

WordPress has a built in navigation menu system. Each WordPress theme will have a different way of displaying and using these menus. 

WordPress navigation menu example

That’s why there will be new menu locations when you switch your WordPress theme. 

If you’ve previously assigned a menu to a certain theme location, then it will need to be reassigned after your theme changes.

To change your menu locations, simply go to Appearance » Menus and select your menu from the drop down.

Select WordPress navigation menu

Then, check the box for the location where you want the menu to display.

You can select multiple locations for a single menu. 

Select navigation menu location

For more details, see our beginner’s guide on how to add a navigation menu in WordPress.

WordPress Widget Settings Will be Different

Widgets let you add different elements to your WordPress theme sidebars, footers, and other widget-ready areas.

When you change your WordPress themes, these widget areas will be replaced, and your active widgets will be deactivated.

You can add these back to your site by going to Appearance » Widgets and going to the ‘Inactive Widgets’ section.

Inactive widgets section

For more details, see our guide on how to add and use widgets in WordPress.

If the theme you’re using comes with its own widgets, then these will be unavailable when you switch themes. 

WordPress Theme Settings Will Disappear

All WordPress themes have different customization options. Some themes will simply rely on the WordPress theme customizer, but others will be controlled with a theme options panel.

A theme options panel can control a lot of aspects of your site like:

  • Website logo
  • Favicon image
  • Header and footers
  • Background image
  • Font choice
  • And more

Here’s an example of the Astra theme options panel.

Astra theme options panel example

It can also include any WordPress analytics, advertising, and other tracking codes you’ve added directly to the options panel. 

All of these settings done through your theme’s options panel will be gone.

If you made a list of WordPress theme changes before switching themes, then you can try to set up the same settings with your new theme. However, your new theme may have a different set of features.

In most cases, losing design settings shouldn’t impact your website speed and performance or search engine rankings.

However, if your theme bundles analytics or SEO settings in the theme options panel, then you’ll need to use a plugin to install Google Analytics and optimize your WordPress SEO.

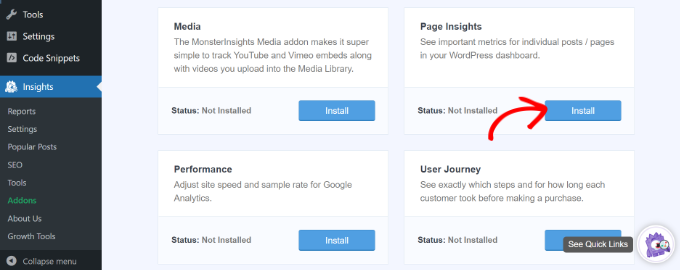
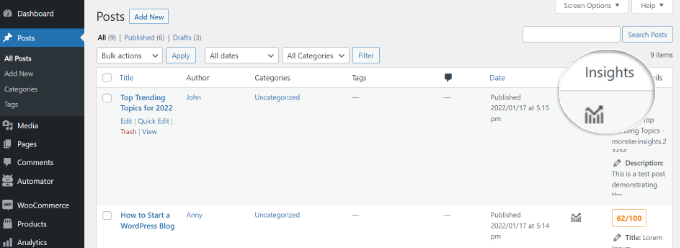
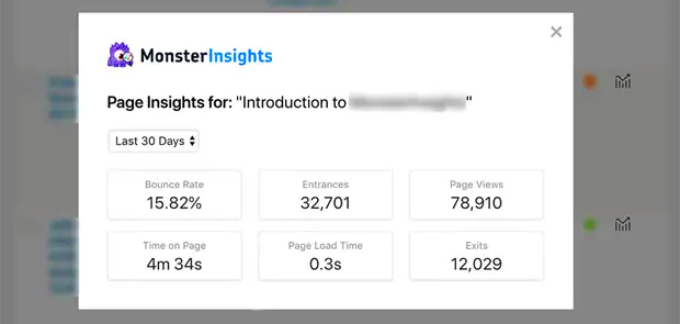
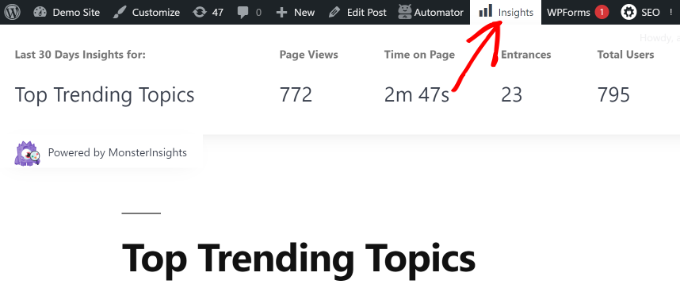
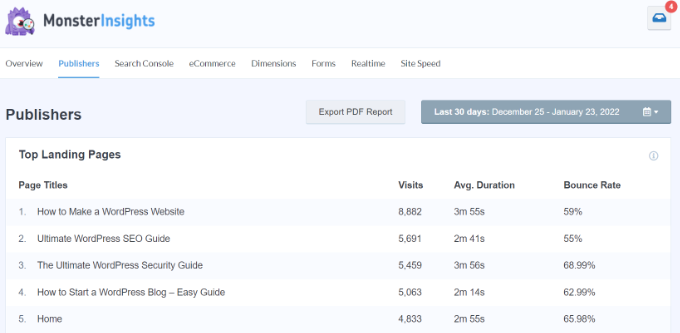
For analytics, we recommend using MonsterInsights, the best analytics plugin for WordPress. By using a plugin instead of your theme settings, you won’t lose any data when you switch themes.

For search engine optimization, we recommend using AIOSEO since it’s the best WordPress SEO plugin in the market used by over 3 million websites.

AIOSEO

It lets you easily optimize your website for the search engines without learning any complex technical skills.

For more details, see our guide on how to setup All in One SEO for WordPress correctly.

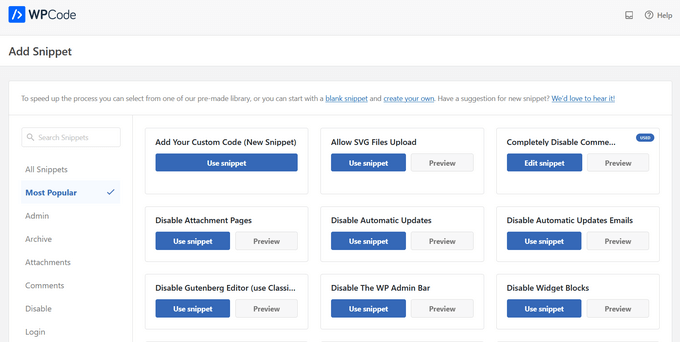
Code Snippets in functions.php Won’t Work

Many website owners customize the functionality of their themes by adding code to WordPress.

If you’ve added code directly to your functions.php file or other theme files, then this code won’t be used when you switch themes.

Make sure you take note of any code snippets you’ve added to these theme files, so you can add them to your new theme.

A better way to add snippets to your site is by using a code snippets plugin like WPCode.

WPCode Code Snippets Plugin

See our guide on pasting snippets from the web into WordPress for step-by-step instructions.

Theme-Specific Post Types and Taxonomies Will Disappear

Beyond changing the design of your website, some WordPress themes also come with their own custom post types and taxonomies.

This is usually done to display content like portfolios, books, testimonials, and more. 

Custom post types example

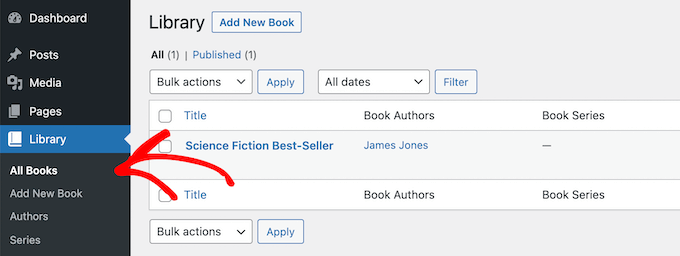
If your theme uses custom post types and taxonomies, then these will become inaccessible when you change themes.

They’ll still be stored in the WordPress database, but you’ll need to do additional customization to display them with your new theme.

That’s why we recommend using a WordPress plugin to add those features instead of a theme. That way, you can continue to use them easily when you switch WordPress themes.

To find a plugin for the feature you need, you can see our expert pick of the best WordPress plugins, or simply search Google and add “WPBeginner” to your search to find our tried and tested recommendations.

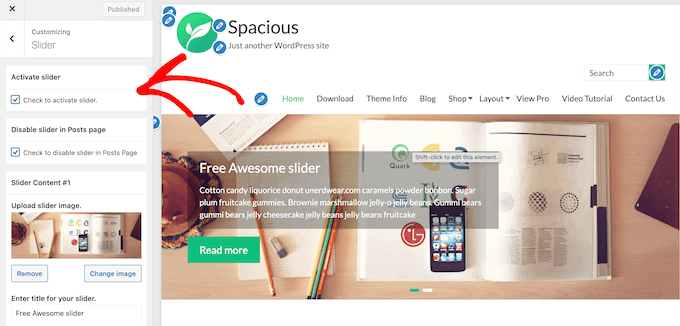
WordPress Theme Specific Sliders Will Disappear

A lot of WordPress themes have built-in slider settings for adding a full-screen home page slider. When you switch themes, these sliders will disappear. 

Built-in WordPress slider example

If you want to add sliders anywhere on your website, we recommend using a WordPress slider plugin. For more details, take a look at our comparison of the best WordPress slider plugins.

WordPress Theme Specific Shortcodes Will Disappear

Shortcodes give you a way to add new functionality to your posts, pages, and widget areas.

Many popular WordPress themes comes with their own shortcodes to add functionality like:

  • Buttons
  • Image galleries
  • Sliders
  • Column layouts
  • And more

When you switch WordPress themes, these shortcodes will no longer work. As a result, the shortcode will simply appear as text inside your content areas. 

If you want to future proof theme shortcodes, then you can add the code using a site-specific plugin instead. This lets you add customizations with a plugin that won’t change, even when you switch themes. 

For more details, see our guide on how to create a site-specific WordPress plugin.

What Stays the Same When Switching WordPress Themes?

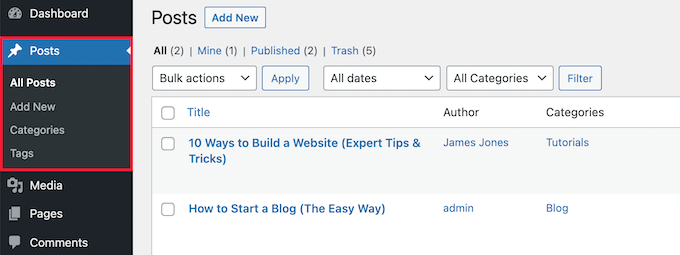
Some parts of your WordPress blog will stay the same when you switch WordPress themes. For example, your WordPress posts and pages will be unaffected by the theme switch.

WordPress posts and pages stay the same

However, depending on how your old theme displayed posts, images, attachments, and pages, they might look slightly different.

Your media library will also remain the same. However, your WordPress theme might have different image sizes for featured images and thumbnails.

If this is the case, then you may need to regenerate thumbnails to display the proper image size. 

All of your general WordPress settings like permalinks, display settings, and more will remain the same.

Same with other WordPress plugins you’ve installed, although they may function differently with your new theme. 

How to Prepare to Switch WordPress Themes?

Before you switch WordPress themes, there are a few things you should do to make sure it’s a smooth and error free experience. 

First, it’s very important you create a complete website backup using a WordPress backup plugin. This saves a copy of your posts, pages, plugins, media, and databases.

For more details, see our guide on how to backup your WordPress site with UpdraftPlus.

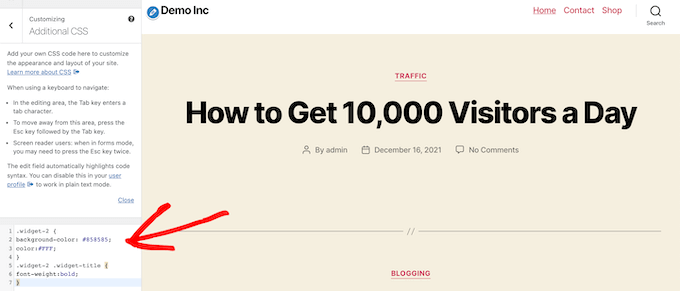
Once your site is backed up, you should spend time reviewing your current theme. You can make note of any customizations you’ve made like custom CSS, widgets, and more that can be added to your new theme.

Review WordPress theme customizations

For more details, see our checklist of things you must do before changing WordPress themes.

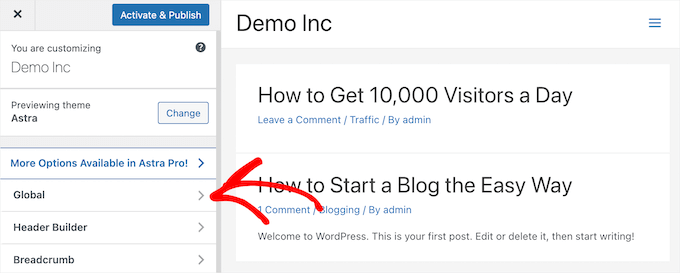
Before activating your new WordPress theme, you can use the built-in preview feature to see how it will look. WordPress lets you install and preview themes in real-time without activating them on the front end

Simply go to Appearance » Themes and then hover over the theme and click the ‘Live Preview’ button to see what it will look like.

WordPress theme preview

When previewing your theme, take note of any visual changes that will take effect. 

You can browse your website’s home page, posts, other pages, archives, and more with the menu on the left.

Preview and test new WordPress theme

After that, you can determine if you can adjust the new theme settings and layout to match the features of your old site worth keeping.

For more details, check out our guide on how to properly change a WordPress theme

We hope this article helped you learn what will change when you switch WordPress themes. You may also want to see our guide on how to choose the best web design software and our picks of the best business phone services for small business.

If you liked this article, then please subscribe to our YouTube Channel for WordPress video tutorials. You can also find us on Twitter and Facebook.

The post What Happens When You Switch Your WordPress Theme? first appeared on WPBeginner.


October 05, 2022 at 11:30PM

How to Speed up WooCommerce Performance (12 Tips)

Do you want to speed up WooCommerce performance for your online store?

A faster loading WooCommerce store improves user experience and helps you boost sales and conversions.

In this article, we’ll show you how to speed up WooCommerce performance with easy and practical tips.

Improving WooCommerce performance and speed

Why Is WooCommerce Speed Important?

WooCommerce speed is important because it helps improve user experience on your online store.

Recent research has found that a 1-second drop in page speed causes a 7% loss in conversions and a 16% decrease in customer satisfaction.

Strangeloop case study

More than 73% of users switch to a competitor if they come across a slower website. Basically, a slow WooCommerce store causes lower conversions and decreased sales.

It also affects your WooCommerce SEO rankings. Page speed is one of the crucial factors that search engines like Google use to rank websites.

Optimizing WooCommerce for speed and performance can help you recover these losses and improve your overall conversions, sales, and customer satisfaction score.

That being said, let’s look at how to speed up WooCommerce with the following tips.

1. Upgrade Your WooCommerce Hosting

Choosing the right hosting provider is the first step in improving WooCommerce speed.

Hosting is where all your WooCommerce files are stored. If your hosting provider doesn’t have a good platform, then it degrades your customers’ WooCommerce performance.

Without good WooCommerce hosting, all other tips for improving speed and performance will not work.

If you are just getting started, then we recommend using SiteGround. They are a WooCommerce-recommended hosting provider and one of the top companies in the hosting market.

SiteGround web hosting

They are offering WPBeginner users a generous discount when you use our SiteGround coupon, and the hosting comes with powerful features for eCommerce such as Ultrafast PHP, Ecommerce caching, and more.

For those who are looking for alternative options, we recommend using WP Engine or Hostinger.

Need help moving your WooCommerce store?

Follow our step-by-step tutorial on how to move WordPress to a new host for detailed instructions.

2. Set up Caching for Your WooCommerce Store

WooCommerce runs on top of WordPress. It automatically generates pages when a user visits your website.

This means more people visiting your website will keep your hosting server busier for longer.

Caching helps you solve this issue.

Instead of generating pages on the fly, it serves your users a static copy it has stored.

How caching works

This frees up your website server resources, making it faster and more responsive.

The best way to add caching to your WooCommerce store is by using WP Rocket. It is the best WooCommerce caching plugin on the market that is incredibly powerful yet totally beginner friendly.

Simply install and activate WP Rocket plugin.

Once installed, it will automatically generate cache and apply WooCommerce-related settings.

WP Rocket dashboard

For more details, check out our tutorial on how to set up WP Rocket in WordPress.

3. Keep WooCommerce Updated

WooCommerce releases new versions frequently. These new versions not only fix bugs and introduce new features, but they also improve performance.

Make sure that your WooCommerce version is always up to date.

Update WooCommerce

However, WooCommerce relies on WordPress and the whole ecosystem of your theme and plugins. Updating WooCommerce alone doesn’t mean that you are using the latest software for your online store.

You’ll also need to ensure that you are using the latest version of WordPress and have installed all plugins and theme updates.

It is always necessary to ensure that you have made a complete backup of your WooCommerce store before installing updates in the correct order.

4. Optimize Product Images in WooCommerce

For a WooCommerce store, you need product images to grow your business. However, images take longer to load and impact your page speed.

By optimizing your product images, you can reduce their filesize significantly without losing quality. This makes all your store pages, product categories, and product pages load faster.

Now, there are several ways to optimize images. The most reliable one is to optimize images before uploading them to your WooCommerce product.

Most image editing software like Adobe Photoshop allow you to export images for the web.

Export image for the web

During the export dialog, you can choose an image file format (JPG, PNG, GIF) that gives you the smallest filesize.

Then you can reduce quality, colors, and other options to further decrease filesize.

Optimize image before saving

Using your image editing tool to reduce filesize is the most efficient way to improve images on your WooCommerce store.

However, you can also use an image compression plugin to automatically adjust image filesize. This allows you to optimize product images that you have already uploaded to your website.

For more details, see our tutorial on optimizing images for the web.

5. Choose a Faster Loading WooCommerce Theme

When choosing themes for their WooCommerce stores, many beginners end up choosing the fanciest theme with a ton of bells and whistles.

We understand the reason behind that. Beginners feel that they should get a theme that has all the features they want to see in their store.

That’s not how themes are supposed to work.

WordPress themes

WordPress themes are meant to control only the appearance of your website and WooCommerce store, not add features.

When choosing a theme, you should look for options like layout choices, color schemes, WooCommerce support, etc. For functionality, you should use plugins and extensions.

Choosing a theme with tons of plugin-like features can slow down your website. The theme would load a lot of extra code you are probably not even using.

To learn more, see our article on choosing the perfect theme for your website.

If you need quick theme recommendations, then we recommend Astra or simply use SeedProd to create a custom WooCommerce theme without any code (drag & drop builder).

Need more ideas? Check out our expert pick of the best WooCommerce themes to find a faster theme for your online store.

6. Replace Poorly Coded Plugins & Extensions

The best part about using WooCommerce is that you can access thousands of extensions and WordPress plugins.

As long as they are well-coded, you can install as many plugins as you need, and it won’t cause any noticeable performance impact.

However, some poorly coded WordPress plugins can slow down your website. These plugins typically run database-intensive queries or load unnecessary JavaScript and CSS.

You can use plugins like Query Monitor to see the number of queries run on each page load.

Query Monitor

Query Monitor allows you to see the following activity:

  • Database queries triggered by a page on your WooCommerce store
  • HTTP requests made by scripts in your themes or plugins
  • Hooks and actions triggered on a page
  • Language, user role checks, and template files used to display the page
  • Your hosting environment like PHP and MySQL versions, memory limits, and more.

For more details and step by step instructions, see our tutorial on how to add query monitor in WordPress.

If this doesn’t help, then you can simply test your website after deactivating all plugins.

Deactivate all WordPress plugins

If deactivating plugins suddenly improves WooCommerce performance, then you can activate them one by one to figure out which one is the culprit.

You can then reach out to that plugin’s support and let them know about the issue. Meanwhile, you can replace the plugin with an alternate option.

For essential features, take a look at our expert pick of the best WooCommerce plugins that every online store should install.

7. Use The Latest PHP Version

WooCommerce and WordPress are both written using PHP as the main programming language.

PHP is an open source programming language just like WordPress. It is regularly maintained by a very active community of developers who frequently release new versions.

For each new release, they spend a large amount of time and resources on improving PHP performance by making it faster.

However, WordPress hosting companies are often not as quick to switch to the latest PHP version. They often run several versions behind to ensure software compatibility.

You can see which PHP version is used by your website by visiting  Tools » Site Health page and switching to the Info tab.

Find PHP version

At the time of writing this article, the latest PHP version is 8.0.22.

All top WordPress hosting providers easy tools to select which PHP version you want to use on your website.

For instance, on Bluehost, you can go to your hosting control panel and click on the Advanced tab in the left column.

MultiPHP Manager

Then, you need to click on the MultiPHP Manager app to choose your PHP version.

For more information on this topic, you may want to see our article on updating PHP version for your WordPress website.

8. Turn on a DNS Level Firewall

A DNS-level firewall protects your WooCommerce store against malicious activity. It blocks suspicious requests to your website even before they reach your server.

Hacking attempts, suspicious crawlers, and DDoS attacks can eat up your hosting resources and make your website slow.

A DNS firewall blocks them, which frees up your server resources to do other things.

How website firewall blocks attacks

We recommend using Sucuri. It is the best WordPress security plugin and website firewall.

It also comes with a super-fast CDN to serve your static content.

A CDN is a content delivery network that allows you to serve non-dynamic parts of your website through a global network of servers.

These networks are usually strategically located at different geographic points around the globe. This means your users will load the static files from a server closer to their own location.

For more details, see our guide on why do you need a CDN for your WordPress website.

9. Use an SMTP Service to Send WooCommerce Emails

Your WooCommerce store sends email notifications for account management, order confirmation, and administrative notices.

By default, WordPress uses the PHP mail() function to send emails. This function can be misused by spammers and many hosting companies deliberately limit or block it.

That’s why you need to use an SMTP server to send your WooCommerce emails.

SMTP is the standard protocol for sending emails.

Now your hosting company may provide free business email address that you can use to send emails via SMTP.

However, hosting companies typically host the mail server on the same computer as their web hosting server.

This means sending many emails at once can impact your website. Even when the email is processed, it may end up in spam.

To fix this problem, you’ll need to use an SMTP service provider.

We recommend using SendLayer, which is the best SMTP service provider on the market. They also have a free trial where you can send up to 200 emails.

SendLayer best SMTP service provider

Alternatives: SMTP.com and Sendinblue

Once you have signed up, you can use WP Mail SMTP to start sending emails via your SMTP service provider.

Having issues with WooCommerce emails? See this tutorial to fix WooCommerce not sending emails issue.

10. Upgrade Conversion Optimization Tools

Conversion optimization is the combination of techniques store owners use to nudge website visitors into making a purchase or signing up.

To do that, they use a bunch of tools to display popups, promote coupons, display targeted offers, and more.

The problem is that some of these tools are often not optimized for speed. They may load too many unnecessary files, prevent page rendering, not display correctly on mobile devices, and basically destroy user experience on your store.

We recommend using conversion optimization software that are fast, optimized for user experience, and work beautifully on mobile devices.

This is where OptinMonster comes in. It is the industry leader among conversion optimization software and allows you to convert website visitors into customers.

The OptinMonster popup plugin

It comes with smart popups, slide in widgets, header and footer tools, countdown timers, and other tools to grow your business.

It also includes powerful targeting options that allow you to display your campaigns at the right time to the right users.

Most importantly, your OptinMonster campaigns are highly optimized for speed, performance, and user experience across all screen sizes.

For more tools and tips see our expert tips on recovering abandoned carts in WooCommerce.

11. Optimize WooCommerce Database

WooCommerce uses the same database as your WordPress installation. They both save a lot of data that becomes useless after a while. For instance, old revisions, transients, spam comments, and more will stay in your database for a long time.

Now, this means that your WordPress backup plugin will take longer to prepare a backup. It will also take more time if you have to download or upload it.

Luckily, there are excellent tools to optimize your WordPress database.

If you are using WP Rocket, then you can go to Settings » WP Rocket page and switch to the Database tab.

Optimize database

From here you can clean up your WordPress database. Simply select the unnecessary items you want to remove and click on the Save Changes and Optimize button.

Alternately, you can use WP-Optimize plugin. Simply install and activate the plugin and go to the plugin’s settings page by clicking on WP-Optimize in the admin sidebar.

WP Optimize

Select the items you want to delete or optimize and then click on the ‘Run all selected optimizations’ button.

For more details, see our tutorial on how to optimize your WordPress database.

12. Optimize JavaScript and CSS Files

JavaScript and CSS files send individual HTTP requests and increase the time it takes for a page to load. Some of these files may block rendering which means the page will not be displayed until the browser has downloaded those files.

There are multiple ways you can optimize JavaScript and CSS file delivery. We have talked about using CDN and caching already.

More advanced users can minify or combine those files.

Minification removes white spaces from JavaScript and CSS files which reduces their download size.

Combining all your JavaScript and CSS files allows you to serve users all the JavaScript and CSS with one file.

You can do that using the WP Rocket plugin. Simply go to the File Optimization tab and turn on minify and combine options for CSS and JavaScript.

WP Rocket File Optimization

For alternate methods and more details, you may want to check out our tutorial on how to minify CSS and JavaScript in WordPress.

Note: Minifying and combining these files may result in unexpected issues n your website. If it causes issues, then you can simply turn it off.

We hope this article helped you improve WooCommerce speed and boost performance for your online store. You may also want to see our guide on how to track WooCommerce conversions or see these tips for improving your organic click rates in WooCommerce.

If you liked this article, then please subscribe to our YouTube Channel for WordPress video tutorials. You can also find us on Twitter and Facebook.

The post How to Speed up WooCommerce Performance (12 Tips) first appeared on WPBeginner.


October 05, 2022 at 03:34PM

Tuesday, October 4, 2022

How to Add a Stats Dashboard On Your WordPress Site

Do you want to add a stats dashboard on your WordPress site?

Analytics helps you discover how people find and use your website, so you can keep them coming back.

In this article, we will show you how to easily add a stats dashboard on your WordPress site.

How to add a stats dashboard on your WordPress site

Why You Need a Stats Dashboard in WordPress

Usually, you can install Google Analytics and view your reports by logging into your Google account. This sounds great, but many people forget to check their blog stats on a regular basis.

The two biggest reasons for that are:

  1. You have to log in to a separate website like Google Analytics to check the stats.
  2. You have to dig around in the Google Analytics dashboard to find what you’re looking for.

While GA is a powerful tool, it often takes a lot of time and clicking around to get to the data you want to view. Most beginners never make it this far.

Adding a stats dashboard to your WordPress website solves this problem. You will be able to quickly view the stats that matter without leaving your WordPress admin area.

That said, let’s take a look at how to easily add a stats dashboard on your WordPress site.

Adding a Stats Dashboard in WordPress

The best way to add a stats dashboard in WordPress is by using MonsterInsights. It’s the best Analytics solution for WordPress, and it helps you set up Google Analytics in WordPress without editing code.

For this tutorial, we will use the MonsterInsights Pro version because it includes powerful addons and advanced tracking features such as affiliate link tracking, eCommerce tracking, and dashboard reports.

There is also a MonsterInsights Lite version you use for free. It helps you configure Google Analytics in WordPress and shows a quick overview report in the dashboard.

The first thing you need to do is install and activate the MonsterInsights plugin. For more details, see our step-by-step guide on how to install a WordPress plugin.

Upon activation, you’ll be taken to the MonsterInsights welcome screen. Simply click the ‘Launch the Wizard’ button and follow the onscreen instructions to set up Google Analytics.

Launch setup wizard

For more details, please see our guide on how to install Google Analytics in WordPress.

Now, let’s look at the stats dashboard MonsterInsights adds on your site.

How to Add Stats to WordPress Dashboard

On your main WordPress dashboard screen, MonsterInsights adds a widget that shows stats about your site’s performance. You can quickly view your website traffic and identify top posts and pages.

Simply log in to your WordPress admin panel. On the home screen, you’ll see the MonsterInsights dashboard widget.

Dashboard widget stats

You can also click the expand icon at the top and view the dashboard widget report in full-width mode to get more details.

The expanded widget displays the number of sessions, pageviews, average session duration, and bounce rate in the last 30 days.

Additionally, it also shows your top-performing posts and pages, new vs. returning visitors, and a device breakdown.

Expand dashboard widget report

Next, let’s see how MonsterInsights helps you view statistics for each blog post and landing page in the WordPress dashboard.

See Page and Post Stats in WordPress Dashboard

To see how individual articles and pages perform, you can use the MonsterInsights Page Insights addon.

First, you can head to Insights » Addons from the WordPress admin panel and navigate to the ‘Page Insights’ box. Go ahead and click the ‘Install’ button.

Install page insights addon

The addon will now automatically install and activate on your site.

Next, you can go to Posts » All Posts from your admin panel to see the stats of individual posts.

You’ll see an ‘Insights’ column added to your WordPress posts and pages screen.

View insights column in dashboard

A small window will open if you click the ‘Insights’ icon for any blog post.

You can then view stats for a specific post or page. For instance, the plugin shows stats for only that post, including bounce rate, entrances, page views, time on page, page load time, and exits.

MonsterInsights page insights reports

Using these stats, you can find out how your content is performing without having to leave your WordPress dashboard.

On top of that, MonsterInsights also lets you see stats for any post or page from the front end of your site. When viewing any post or page, you can simply click the ‘Insights’ button in the admin bar to see 30 days of performance stats for that post.

View insights stats on frontend

Viewing More WordPress Stats with MonsterInsights

With MonsterInsights, you get easy-to-understand dashboard reports. It neatly organizes data from Google Analytics and helps you make data-driven decisions.

Here’s a quick rundown of the reports you can see in MonsterInsights and how you can use them.

Overview Report

To view your WordPress stats dashboard, simply go to the Insights » Reports page.

First, you’ll see the ‘Overview Report.’ At the top, you will see two tabs, each giving you a graph of your WordPress visitor sessions or pageviews. This gives you a quick overview of incoming traffic to your website.

Overview report in MonsterInsights

Below that, you will see a comparison of your website stats against the previous 30 days. These boxes will show the number of sessions, page views counter, session duration, and bounce rate.

Below that, you will see a chart showing new vs. returning visitors. You can use these stats to see how many people return to your site. Similarly, there is a device breakdown chart, which helps you optimize your site for different devices.

Device breakdown and top countries report

This is followed by a list of the top countries people visit your website from, as well as the top websites that send the most traffic your way. You can use the top countries report to set up geolocation targeting, create personalized messages, and boost conversions.

MonsterInsights also acts as a pageview counter and shows your most popular WordPress posts and pages. This helps you find your top-performing content so that you can plan your content strategy accordingly.

Top posts and page report

Publishers Report

In the Publishers report, you get more details about the performance of your content. It’s great for content-rich websites like blogs, news, or magazine sites.

The report shows your top landing pages and the number of visits, average duration, and bounce rate they got in the last 30 days.

Top landing pages report

You can also view the top exit pages and see from where people leave your website. It helps optimize any WordPress blog a high exit rate. For example, you can show a popup and offer a free ebook to leaving visitors in exchange for their email addresses.

If you scroll down, then you’ll see reports on top outbound links and top affiliate links. With the help of these 2 reports, you get to track link clicks on your site.

Outbound and affiliate links report

For example, you can see which affiliate is performing the best, so you can promote it more on your site. Similarly, outbound link tracking helps create new partnership opportunities where you can get more backlinks, sign up for an affiliate program, and more.

MonsterInsights also helps track file downloads on your site. It shows which download links are getting the most clicks. This way, you can uncover the type of downloadable content your audience prefers.

Lastly, you get to see your visitor’s demographics and interests in the Publishers report. MonsterInsights will show the age and gender of your audience and their interests.

Demographics and interest reports

The plugin also enables scroll tracking on your site. It shows how far people scroll your content before exiting. You can use this information to improve conversions and placement of call-to-action (CTA) buttons and ads.

Search Console

If you’ve connected Google Search Console with Google Analytics, then MonsterInsights will show the top 50 search terms in your WordPress dashboard.

Simply visit the search console report and find out which keywords people use to find your website on the internet. You also get to see the number of clicks, impressions, CTR, and average position for each search term.

Search console report

Using the report, you can optimize keywords close to reaching the top 10 positions in Google search and increase your organic traffic. Plus, the report helps perform keyword research and uncover new search term ideas for your site.

eCommerce Report

If you run an online store or a membership website, then you’ll love MonsterInsights eCommerce tracking features.

MonsterInsights offers an eCommerce addon that helps track your online store’s performance in Google Analytics. The best part is that MonsterInsights works with popular eCommerce plugins like WooCommerce, MemberPress, Easy Digital Downloads, GiveWP, and more.

For more details, please see our guide on how to set up eCommerce tracking in WordPress.

To view stats about your online store, you can head to the eCommerce tab.

eCommerce reports

In the reports, you will see a breakdown of conversion rate, transactions, revenue, and average order value. This gives you a quick overview of your store’s performance.

Besides that, MonsterInsights also shows top products on your website. For instance, if you have a WooCommere store, then you can see which product your customers like to buy the most. This way, you could find similar products or bundle different items together to boost sales.

MonsterInsights also shows your top conversion sources. These are sites that send the most sales to your store. You can partner with these sources and offer exclusive discounts to visitors from these websites.

Top conversion sources

Dimensions Report

With MonsterInsights, you can easily track additional information in Google Analytics that’s not possible by default and view them in the dimensions report.

For example, you can set up author tracking and see which writer’s posts attract the most visitors. Similarly, you can also track categories and tags using custom dimensions.

It also helps test the best publication time for your blog posts. This way, you can publish articles to get more engagement, comments, and shares.

Best publication time report

Forms Report

Do you want to see stats on how your online forms are performing?

MonsterInsights helps you track form conversions in Google Analytics and shows a report in your WordPress dashboard.

Simply view the Forms report and see which form gets the most impressions and conversions. This way, you can optimize low-performing forms and increase the visibility of forms that are converting well.

Forms report

Real-Time Report

A real-time report is great for getting up-to-the-minute stats about your website.

For example, a real-time report comes in handy if you’re running a flash sale and want to know how your campaign is performing. You get to monitor your website activities as they happen.

View real-time report in MonsterInsights

For more details, please see our guide on how to show real-time online users in WordPress.

Site Speed Report

The last report you’ll see in MonsterInsights is the Site Speed report. Although the report doesn’t relate to the website traffic, but it is crucial for your WordPress SEO and user experience.

Using the report, you can see an overall score of your site’s load time on mobile and desktop.

Site speed report

There are other metrics as well that you can use to improve your site’s user experience. MonsterInsights also provides recommendations for enhancing the score for these metrics and reducing the page load time.

You can see our guide on how to boost WordPress speed and performance for more tips and tricks.

We hope this article helped you learn how to easily add a stats dashboard in WordPress. You may also want to see our guide on how to start your own podcast or our expert pick of the best business phone services.

If you liked this article, then please subscribe to our YouTube Channel for WordPress video tutorials. You can also find us on Twitter and Facebook.

The post How to Add a Stats Dashboard On Your WordPress Site first appeared on WPBeginner.


October 04, 2022 at 11:20PM