Wednesday, October 12, 2022

How to Add YouTube Subscribe Button in WordPress

Do you want to add a YouTube subscribe button in WordPress?

Having a YouTube subscribe button on your blog makes it easy for visitors to find your videos and subscribe to your YouTube channel.

In this article, we will show you how you can add a YouTube subscribe button to your WordPress website.

How to add YouTube subscribe button in WordPress

Why Add YouTube Subscribe Button in WordPress?

A YouTube channel is a great way to reach a new audience, boost your website engagement, and increase your blog traffic.

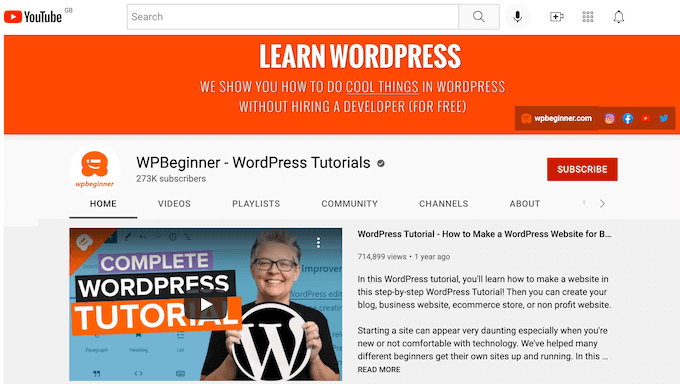
In fact, many websites also have a YouTube channel including WPBeginner.

The WPBeginner YouTube channel

If you’ve launched a YouTube channel to support your WordPress blog, then you should make it easy for visitors to subscribe to your YouTube channel.

That’s where a YouTube subscribe button comes in.

This button lets visitors subscribe to your channel within seconds. A subscribe button can also promote your YouTube channel to visitors who may not have heard of it yet.

In this post we have two different ways to add a YouTube subscribe button in WordPress. If you prefer to jump straight to a particular method, then you can use the links below.

Method 1: Manually Adding YouTube Subscribe Button Code

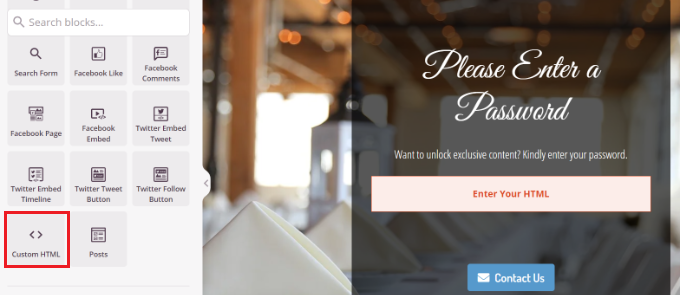
One method is to create a YouTube subscribe button on the Google Developer website. You can then add this button to any widget, post or page using shortcode.

The first thing you need to do is visit the YouTube subscribe button page.

The YouTube configure button page

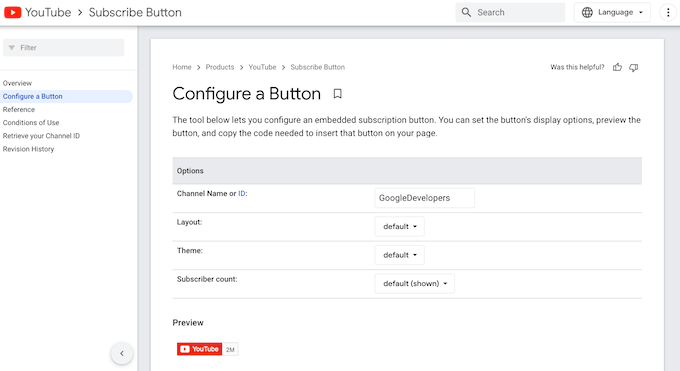
Here, you’ll need to type in your YouTube channel name or ID into the ‘Channel Name or ID’ field. To get this information, open a new tab in your browser and then head over to the YouTube homepage.

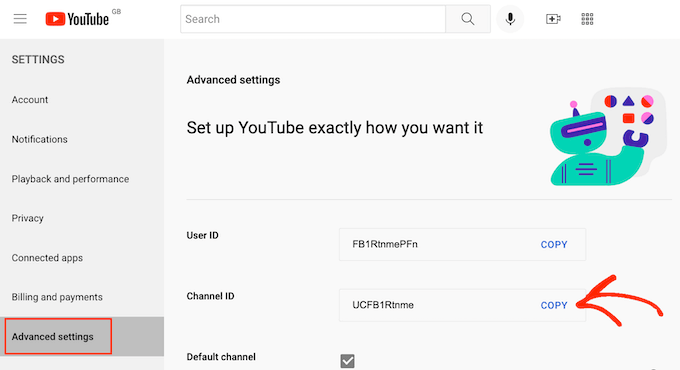
You can then click on your profile picture in the top right corner, and select ‘Settings.’

Adding a YouTube subscribe button to WordPress

In the left-hand menu, go ahead and click on Advanced Settings.

Once you’ve done that, simply find the ‘Channel ID’ field and click on its ‘Copy’ button.

A YouTube channel ID

Now, switch back to the YouTube subscribe button page and paste the Channel ID into the ‘Channel Name or ID’ field.

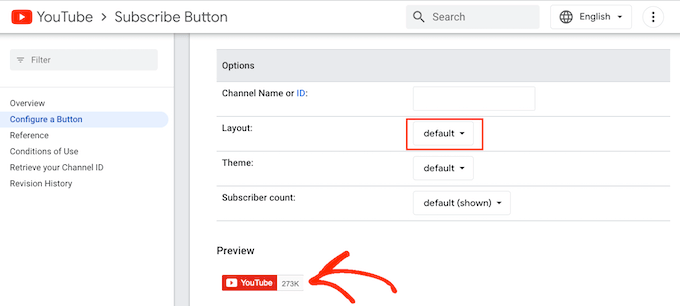
The preview will now update to show the total number of YouTube subscribers you have.

There are two different layouts that you can use for your YouTube subscribe button. The ‘default’ layout shows the subscribe button and your total number of YouTube subscribers.

A YouTube subscribe button

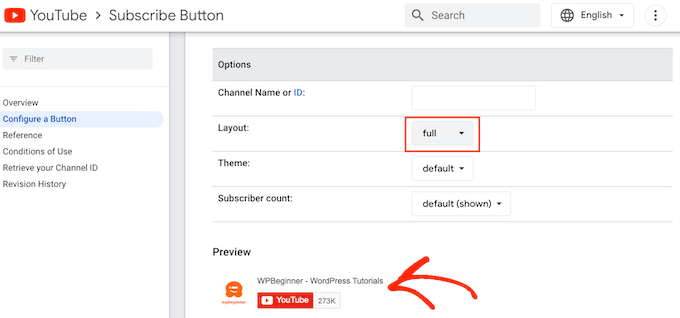
The other option is ‘full layout.’ This shows the YouTube subscribe button, your subscriber count, plus your channel’s profile picture and the title of your YouTube channel.

To see how your YouTube subscribe button will look with the full layout, simply open the ‘Layout’ dropdown and then click on ‘full.’

The preview will now update to show how your YouTube subscribe button will look with the full layout applied.

A YouTube subscribe button with the full layout

After choosing between the default and full layouts, you can choose a theme for your YouTube subscribe button.

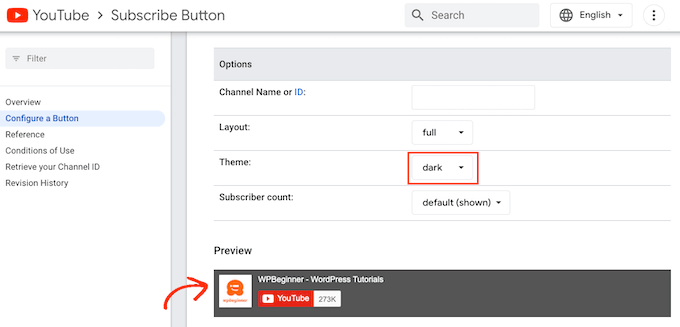
The default theme is a white background, but you can switch to a dark theme if you prefer. This adds a darker background to your YouTube subscribe button.

To see how your subscribe button will look with the different themes, open the ‘Theme’ dropdown. You can now switch between ‘default’ and ‘dark,’ to see which theme you like the best for your website.

In the following image, you can see a YouTube subscribe button with the dark theme.

Adding a YouTube subscribe button to WordPress with the 'dark' theme

By default, the YouTube subscribe button shows your total number of YouTube followers. Showing how many people follow you on YouTube is a powerful form of social proof.

If visitors see that lots of people are following your YouTube channel, they’re more likely to see your website as an authority in your blogging niche. This can also convince more people to subscribe to your channel.

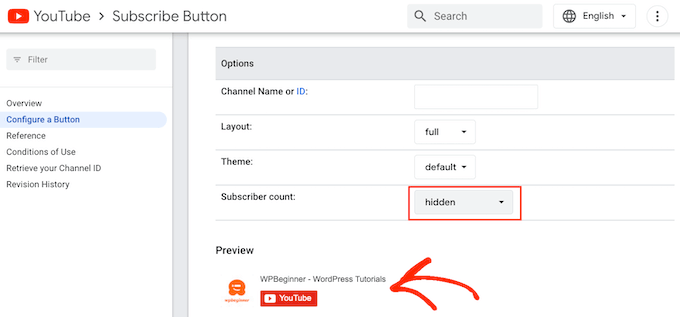
However, sometimes you may want to hide your total number of YouTube subscribers. For example, if you’re a new channel, then you may want to build your following before showing the total subscriber count on your WordPress website.

To hide how many people are subscribed to your YouTube channel, simply open the ‘Subscriber count’ dropdown and then click on ‘hidden.’

Hiding the subscriber count in a YouTube subscriber button

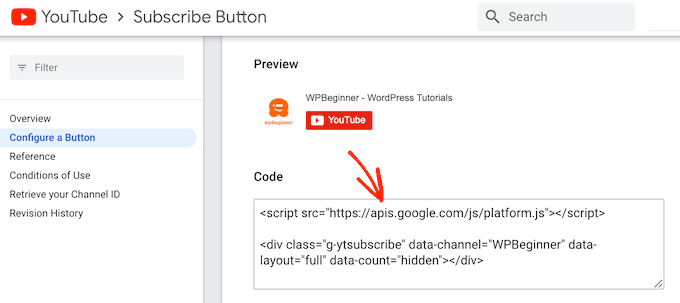
As you customize the subscribe button, Google will update the button’s embed code.

When you’re happy with how your button looks, you can go ahead and copy all of the code in the ‘Code’ section.

The YouTube subscriber button embed code

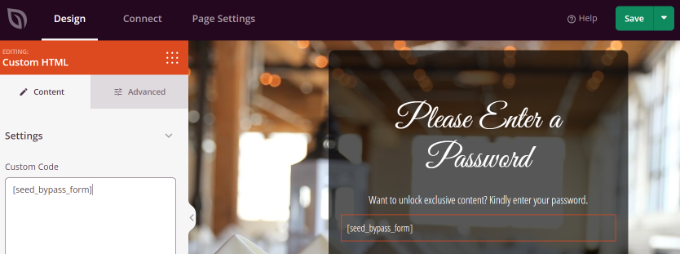
Now, you can simply paste the code into any widget, post or page on your WordPress site. For more details on how to place the code, you can see our guide on how to add a shortcode in WordPress.

Once you’re done, don’t forget to save your changes. You can now visit your WordPress website to see the YouTube subscribe button live.

Method 2: Using Plugin to Add a YouTube Subscribe Bar

Another way to add a YouTube subscribe button on your website is by using the YouTube Subscribe Bar plugin. Once set up, this free plugin automatically adds a ‘Subscribe to YouTube channel’ bar to every YouTube video that you embed on your website.

Adding a YouTube subscribe button to WordPress

This subscribe bar will appear on your own YouTube videos, but also videos that you embed from other channels. This is perfect for sharing useful third-party YouTube videos on your site, while still encouraging people to subscribe to your channel.

Just be aware that this plugin only works for YouTube videos that you embed using the oEmbed format. The easiest way to embed a YouTube video using oEmbed is to head over to the YouTube video, and then click on its ‘Share’ button.

Embedding a YouTube video in your WordPress website

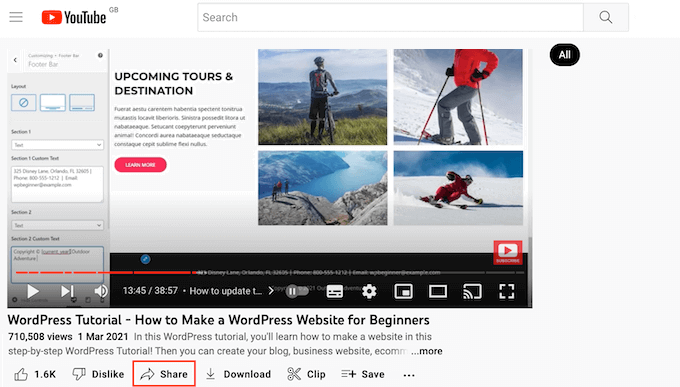
This opens a popup with various different ways that you can embed the video. To learn more about the different options, please see our guide on how to easily embed videos in WordPress blog posts.

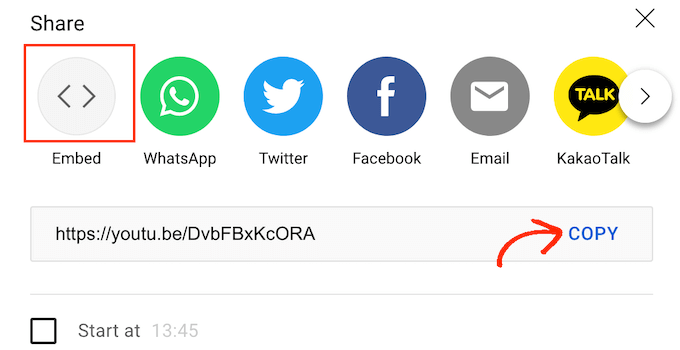
Since we want to use oEmbed, make sure you select the ‘Embed’ option. Then, go ahead and click on ‘Copy.’

How to add a YouTube subscribe button to WordPress

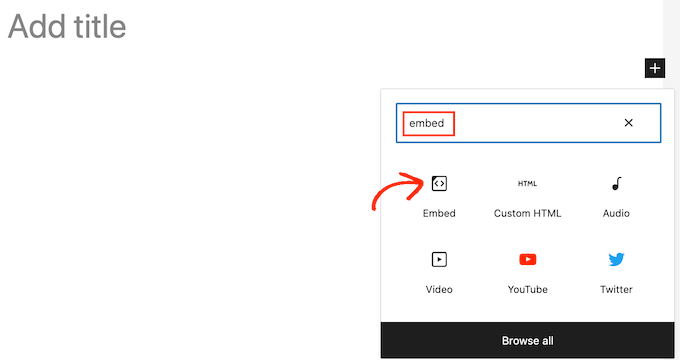
Once you’ve done that, simply open the page or post where you want to embed the video. Then, click on the + icon and search for ‘Embed.’

When you see the ‘Embed’ block, give it a click to add this block to your page or post.

The WordPress embed block

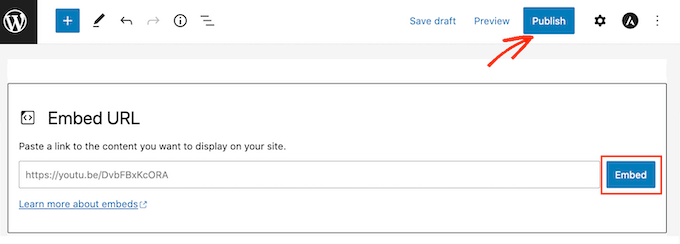
You can then paste the YouTube embed link into the block.

Once you’ve done that, click on the ‘Embed’ button to embed the video. You can then save or publish the page as normal.

Embedding a YouTube video in your WordPress website

You will need to follow this process for every YouTube video where you want to show the subscribe bar.

Once you’ve embedded at least one video, you can go ahead and install and activate the YouTube Subscribe Bar plugin. To learn more, see our step by step guide on how to install a WordPress plugin.

Upon activating the YouTube Subscribe Bar plugin, head over to Settings » YouTube Subscribe Bar.

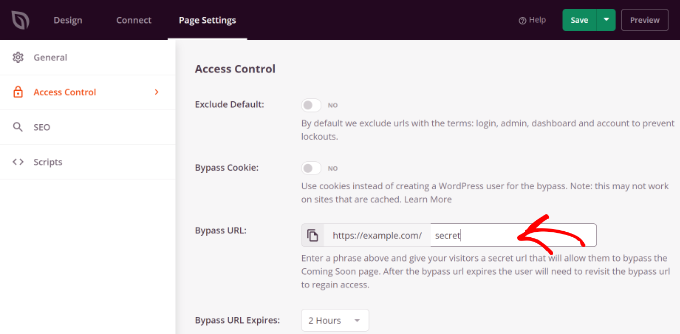
In the ‘YouTube Channel ID’ field, type in or paste your channel ID. You can get this ID by following the same process described above.

The YouTube Subscribe Bar WordPress plugin

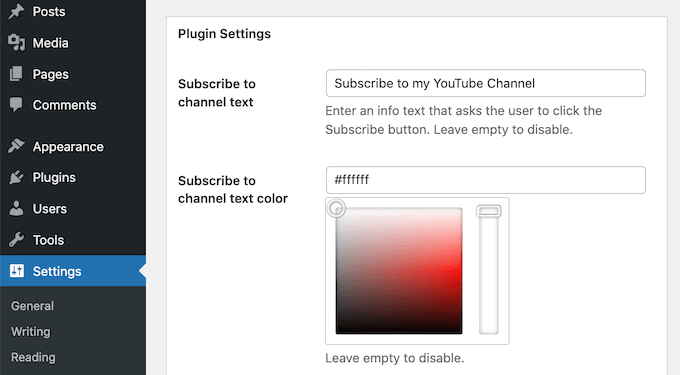
In the ‘Subscribe to channel text’ field, simply type in the text that you want to show in your subscribe bar.

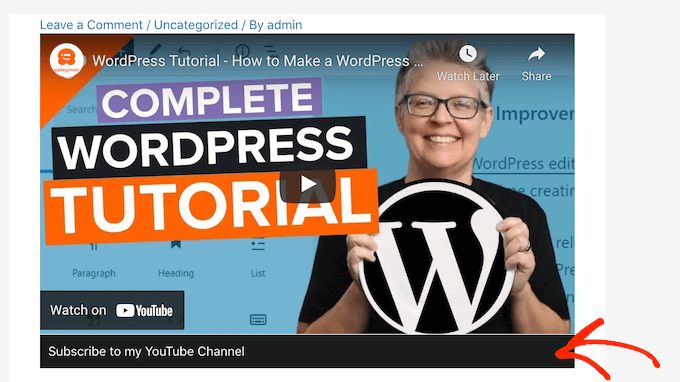
By default, this plugin uses ‘Subscribe to my YouTube Channel’ but you can use anything that you want.

Creating a YouTube subscribe bar for WordPress

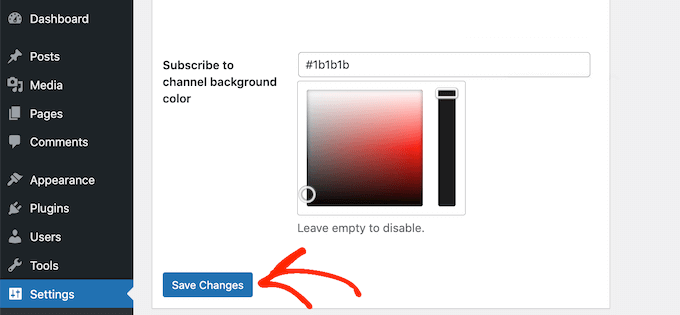
After that, you can change the color of the bar’s background and text using the color settings towards the bottom of the page. You can also change the bar’s layout, and choose between light and dark themes.

The settings that work best will vary depending on your WordPress theme. With that in mind, you may want to try different settings to see what looks the best on your WordPress website.

When you’re happy with your changes, you can publish your subscribe bar by clicking on the ‘Save Changes’ button.

Styling your YouTube subscribe button in WordPress

You can now visit any page or post where you’ve embedded a YouTube video, to see the subscribe bar in action.

How to Turn Website Visitors Into YouTube Subscribers

Adding a YouTube subscribe button to your WordPress site is a great way to get more subscribers. However, there are lots more ways to encourage your website’s visitors to become YouTube subscribers.

If you blog and create videos about similar topics, then you can easily embed YouTube videos in your WordPress blog posts.

If the visitor is interested in the blog post, then they may also be interested in the related YouTube video. This means there’s a good chance they’ll watch the video, and then subscribe to your YouTube channel.

Even better, if you have lots of related videos then you can organize these videos into YouTube playlists. You can then embed the YouTube playlist on your WordPress website.

An effective playlist will guide your visitors from one video to the next one in order, keeping them engaged in your content. If a visitor watches and enjoys an entire YouTube playlist, then it’s likely they’ll subscribe to your channel.

If you regularly post YouTube videos to your channel, then you may want to show the latest videos from your YouTube channel in WordPress.

This is an easy way to show visitors that you run an active YouTube channel. If the visitor likes what they see on your website, they may decide to subscribe to your channel so they never miss another video.

We hope this article helped you learn how to add a YouTube subscribe button in WordPress. You may also want to check out our guide on how to embed a Facebook video in WordPress and the best YouTube video gallery plugins for WordPress.

If you liked this article, then please subscribe to our YouTube Channel for WordPress video tutorials. You can also find us on Twitter and Facebook.

The post How to Add YouTube Subscribe Button in WordPress first appeared on WPBeginner.


October 12, 2022 at 11:40PM

How to Customize a Password Protected Page in WordPress

Do you want to create a custom password-protected page on your website?

You can hide content and restrict access to certain pages using WordPress password protection. However, the default login and password-entry layout is plain and not appealing.

In this article, we’ll show you how to customize password-protected pages in WordPress.

How to Customize password protected page in WordPress

Why Customize Password Protected Pages in WordPress?

If you want to create a page or a post on your WordPress blog that should only be visible to selected clients or members, then you can use the password protection feature to lock the content.

Similarly, if you’re creating a new WordPress website and don’t want everyone to view it, then using a password-protected page makes sense.

However, the default password-protected page design is very basic and not attractive. Here’s a preview of what it looks like:

A basic password protected page

Customizing the password-protected page allows you to change its design and layout the way you want. It helps make your page more engaging, and you can match it to your brand for a more professional look and better user experience.

That said, we’ll show you how to enable password protection in WordPress and different ways to customize a specific page, your entire site, and different sections.

You can click the links below to jump ahead to your preferred section:

How to Password Protect a Page in WordPress

Before we show you how to customize a WordPress page, you should know that WordPress comes with built-in settings to password-protect your pages and posts.

All you have to do is edit a page or add a new one. Once you’re in the WordPress content editor, go ahead and click the ‘Public’ option under ‘Status & visibility’ in the settings panel on your right.

Change visibility settings in content editor

Next, you’ll see different Post Visibility options.

Simply select the ‘Password Protected’ option and enter a password for your page.

Select password protected option

Now, go ahead and click ‘Update’ or ‘Publish,’ and the live page will be protected by a password.

You can now visit your website and see the page in action.

Password protected page preview using content editor

Now, let’s see how you can customize your default password-protected page.

Customize Default Password Protected Design Using CSS Hero

When you enable password protection from your WordPress content editor, the page uses your site’s theme for styling.

To customize the page, you can simply use a tool like CSS Hero. It lets you edit the design and layout of your page without editing code.

First, you’ll need to install and activate the CSS Hero plugin. For more details, please see our guide on how to install a WordPress plugin.

Upon activation, the CSS hero option will be added to the WordPress admin bar at the top. Go ahead and click the ‘Customize with CSS Hero’ option.

Customize with CSS hero

This will launch the CSS Hero visual builder, where you can edit and customize your page.

To start, simply click on any element on the page.

Click an element to start editing

Next, you can change the background colors, add a background image, use a different font, edit spacing, and more from the panel on your left.

For example, let’s add a background color with a gradient effect by going to the ‘Background’ tab. We’ll also change the color of the box where users need to type in the password, as well as the color of the ‘Enter’ button.

Change the background color

Besides that, you can add a border around the main heading on the page by going to the Borders tab.

Simply choose a border width, color, style, and any other changes you like.

Edit the borders and save your changes

When you’ve made the change, don’t forget to click the ‘Save & Publish’ button at the bottom.

You can now visit your website to see the customized default password-protected page.

Preview of customized password protected page with CSS hero

The drawback of using CSS Hero is that you don’t get the flexibility and advanced customization options that a landing page builder offers.

For instance, you can’t add elements like contact forms, social media buttons, optin forms, countdown timers, and more using CSS Hero.

That said, let’s see how you can use a landing page builder to customize specific pages in WordPress.

Customize a Specific Password Protected Page Using SeedProd

The easiest way of customizing a specific password-protected page is by using SeedProd. It’s the best WordPress website and page builder.

For this tutorial, we’ll use the SeedProd Pro version because it includes premium templates and more customization features. You can also use the SeedProd Lite version for free and create a coming soon page.

First, you’ll need to install and activate the SeedProd plugin. If you need help, then please see our guide on how to install a WordPress plugin.

Upon activation, you’ll be taken to SeedProd’s welcome screen in your WordPress dashboard. Next, you’ll need to enter the license key and click the ‘Verify Key’ button. You can find the license key in your SeedProd account area.

Enter SeedProd license key

After that, head to SeedProd » Landing Pages from your WordPress dashboard and add a new custom password-protected landing page.

Later in this article, we’ll show you how to choose which pages are password-protected. You can password-protect your entire site or only specific pages.

For this tutorial, we’ll create a coming soon page for a website launch with password protection. However, you can customize your design easily if you only use it to password-protect specific pages.

To start, simply click the ‘Set up a Coming Soon Page’ button.

Create a new coming soon page

On the next screen, SeedProd will show you different page templates, so you can quickly customize them.

Go ahead and hover over any template you want to use and click the orange checkmark button.

Choose a template

After selecting a template, SeedProd will open a popup window titled ‘Enter your new page details.’

You just need to select a page name and URL slug, and then simply click the ‘Save and Start Editing the Page’ button.

Enter a page template name

This will launch the SeedProd drag-and-drop page builder.

Here you can customize your password-protected landing page and add different elements like text, images, buttons, and more. SeedProd offers advanced blocks like optin form, contact form, countdown timer, progress bar, social sharing options, and more.

To add an element, you can simply drag any block from the menu on your left and drop it onto the template to the right. Then you can customize the element simply by clicking on it and adjusting the options that appear.

Add blocks to your template

This is also how SeedProd lets you add a password form on the front end of your page to protect your content.

First, you can add a ‘Custom HTML’ block in the SeedProd builder. Simply drag and drop the Custom HTML block onto the template.

Add custom HTML block

Next, you can click on the Custom HTML block.

From here, enter the [seed_bypass_form] shortcode in the ‘Custom Code’ field. That’s it! Don’t forget to click the ‘Save’ button when you’re done.

Enter shortcode

SeedProd also integrates with different email marketing services. You can add a contact form to your landing page and connect an email marketing tool to build your email list and stay in touch with users.

Simply go to the ‘Connect’ tab in the landing page builder and select your email marketing service.

Connect email marketing service

Setting Up Password Protection For Specific Pages in SeedProd

After creating a custom coming soon page that uses [seed_bypass_form] shortcode, the next step is to set up password protection on specific pages using SeedProd.

To start, you’ll need to go to the ‘Page Settings’ tab in the SeedProd builder and then click on ‘Access Control’ settings.

After that, you can enter a password in the ‘Bypass URL’ field that people can use to access your restricted content.

Access control settings

Do note that the text you write in the ‘Bypass URL’ field will act as the password and also a link that clients and team members can use to detour the password protection and access the page.

SeedProd lets you exclude specific URLs from your sites like admin, login, dashboard, and account. This ensures that site owners don’t get locked out of their sites.

Now, you’ll need to choose which URLs will be password-protected.

Simply scroll down to the ‘Include/Exclude URLs’ section under the ‘Access Control’ settings. After that, select the ‘Include URLs’ option and then enter the specific pages you’d like to restrict.

Include pages to password protect

When you’re done, simply click the ‘Save’ button at the top.

Next, you can go to the ‘General’ settings under the ‘Page Settings’ tab and change the Page Status from ‘Draft’ to ‘Publish’.

Publish your landing page

After that, you can close the landing page builder and head to SeedProd » Landing Pages from your WordPress admin panel.

From here, click the toggle under ‘Coming Soon Mode’ to activate your custom password-protected page.

Activate coming soon page

That’s all! You’ve successfully created a custom password-protected landing page that will only appear on specific pages in WordPress.

Simply visit those pages on your website to see the customized password-protected page in action.

Custom password protected page preview

Create Custom Password Protected Page for Entire Website

Using SeedProd, you can also display your password-protected page on every page of your website. This way, users will need to enter a password to gain access to any of your content.

First, you can go to SeedProd » Landing Pages from your WordPress dashboard. Then, click the ‘Edit Page’ button in the ‘Coming Soon Mode’ panel.

Edit coming soon page

Next, you can head to the ‘Page Settings’ tab at the top and go to ‘Access Control’ settings.

After that, scroll down to the ‘Include/Exclude URLs’ section and select the ‘Show on the Entire Website’ option.

Show on entire website option

Once you’ve made the changes, go ahead and click the ‘Save’ button at the top.

SeedProd will show the custom password-protected page on your entire website.

Create Custom Password Protected Sections in WordPress

You can also password-protect different website sections in WordPress from different sets of users. This is useful if you’re running a membership website and want to control access to your content, plugins, apps, and other downloadable files.

The best way to restrict different parts of your website is by using MemberPress. It’s the best WordPress membership plugin that lets you create multiple membership levels to password-protect your content.

You can use MemberPress to set up different rules, so users can only access content based on their membership level. For more details, please see our guide on creating a WordPress membership site.

To start, you’ll first need to add memberships to your website. Simply go to MemberPress » Memberships from your WordPress dashboard and click the ‘Add New’ button.

Add new membership plan

After that, you can enter a name for your membership level, add a description, and set a price.

You can also change the billing type from one-time to recurring, as well as edit the membership to be lifetime or expire after a certain time period.

Add a membership level

Don’t forget to click the ‘Publish’ button when you’re done.

Next, you can go to MemberPress » Rules from your WordPress dashboard and click the ‘Add New’ button.

Add new membership rule

From here, you can click the dropdown menu under the ‘Protected Content’ option. MemberPress offers lots of options to protect your content, whether that is a single page or all of your WordPress pages.

For this tutorial, we’ll password-protect a single page. Simply choose the ‘A Single Page’ option from the dropdown menu and enter the title of the page.

Set up rules for password protection

Next, you’ll need to set up the Access Conditions and configure who can view the restricted page. MemberPress lets you protect content based on membership level, WordPress user role, capability, and individual members.

Let’s set ‘Membership’ is ‘Premium’ from the dropdown menus for this tutorial. This way, only premium members will be able to access the page. You can add more conditions and allow more than 1 membership level to view the page.

When you’re done, don’t forget to click the ‘Save Rule’ button.

You can then visit your website to see the password-protected page in action. Members will have to sign in to their account to view the contents of the page.

View membership password protected page

You can set up passwords for your videos, or you can offer group memberships for corporate teams. Additionally, you can create a password to give subscribers access to a paid newsletter and more.

We also have a guide on how to password-protect your forms in WordPress.

We hope this article helped you learn how to customize a password-protected page in WordPress. You may also want to see our guide on how to create a completely custom WordPress theme without writing any code, or our comparison of the best WordPress SEO plugins.

If you liked this article, then please subscribe to our YouTube Channel for WordPress video tutorials. You can also find us on Twitter and Facebook.

The post How to Customize a Password Protected Page in WordPress first appeared on WPBeginner.


October 12, 2022 at 03:12PM

Tuesday, October 11, 2022

How to Add a Login Form in Your WordPress Sidebar

Do you want to add a login form to your WordPress sidebar?

A login form in the WordPress sidebar allows users to quickly log in from anywhere on your website. Having easy access to a login form can increase sales for ecommerce sites, boost retention for online courses, and more.

In this article, we will show you how to easily add a custom login form to your WordPress sidebar.

How to add a login form in your WordPress

When and Why Do You Need a Custom Login Form in WordPress?

If you run membership websites, online stores, or sell online courses, then you likely need your users to login to perform certain actions.

Since the sidebar appears throughout a website, it makes the login form more noticeable and easily accessible from every page on the site.

Adding a login form to your WordPress sidebar makes it easy for users to sign in to their accounts quickly. This boosts engagement, provides a better user experience, and increases form conversions.

That said, let’s look at how to add a login form to your WordPress sidebar easily. We’ll show you how to add the default login form in the sidebar and create a custom login form.

You can click the links below to jump ahead to your preferred section.

Method 1: Adding Default WordPress Login Form in Sidebar

You can show the default WordPress login form in the sidebar of your website. This makes it super easy for users to enter their username and password to access the WordPress admin area.

For this tutorial, we’ll use the Astra theme. Do note that the options may vary depending on the WordPress theme you’re using.

To start, you need to go to Appearance » Widgets from your WordPress dashboard.

From here, you can click the ‘+’ button and scroll under the ‘Theme’ heading and click on the ‘Login/out’ widget block to add it to your sidebar.

Add a login out widget block

Next, you’ll see the ‘Login/out’ block in your widgets area. You can then enable the options to display login as a form.

When you’ve made the changes, click the ‘Update’ button at the top.

See a logout option and update widgets area

After that, you can visit your website to see the default WordPress login form in action.

Do note that you’ll be logged in if you immediately go check the form. Simply log out of your site to see how the form will appear to your members.

Default login form preview

Method 2: Adding a Custom Login Form Using WPForms Plugin

The default WordPress login form only offers a username and password field. However, you can create a custom user registration form with more fields and customization options.

The best way to do that is by using WPForms. It is the most popular WordPress form plugin, and the premium version of WPForms allows you to easily create WordPress login and registration forms with custom fields.

WPBeginner users can use the WPForms Coupon: SAVE50 to get 50% off on their purchases.

The first thing you need to do is install and activate the WPForms plugin. For more details, see our step-by-step guide on how to install a WordPress plugin.

Upon activation, you need to visit WPForms » Settings page to enter your license key. You can get your license key from your WPForms account on their website.

Entering the WPForms license key

After verification, you need to go to WPForms » Addons page.

From here, you need to scroll down to the ‘User Registration Addon’ and click on the ‘Install Addon’ button.

The WPForms user registration addon

The addon will now automatically install and activate on your website.

You are now ready to create a custom WordPress login form. Simply visit WPForms » Add New page to launch the WPForms builder.

First, you need to enter a form name at the top and then select the built-in ‘User Login Form’ template. Simply hover over it and click the ‘Use Template’ button.

Select the user login form template

It will display the login fields pre-loaded in your form. You can click on a field to edit it or add new fields from the left column.

WPForms offers multiple form fields you can add using the drag-and-drop builder. For example, you can add a name or CAPTCHA form fields to the login form.

Customize your user login form

Afterward, head to the ‘Settings’ tab and click on the Confirmation section.

This is where you need to define what to do once a user successfully logs in to your site.

Go to confirmation settings

The options include a message, a custom page, or a redirect URL to any page on your site.

Ideally, you would want to redirect users to a page once they are logged in. This could be your homepage, WordPress admin panel, or any other page on your website such as their membership dashboard or client portal.

Next, you can click the ‘Save’ button at the top and exit the form builder.

Your login form is now ready. From here, you can add it to your WordPress sidebar.

Simply visit the Appearance » Widgets page in your WordPress admin area. On this page, add the ‘WPForms’ widget block in the sidebar widget area of your site.

Add WPForms widget block

Next, you can select your user login form from the dropdown menu.

You can view more options in the settings panel on your right. For instance, there are options to show the form title and description.

Edit form settings and update

Don’t forget to click the ‘Update’ button when you’re done.

You can now visit your website to see the custom login form.

Custom login form preview

You can also use WPForms to create a custom user registration form with anti-spam features.

We hope this article helped you learn how to add a login form in your WordPress sidebar. You may also want to see our step-by-step guide on how to start a WordPress blog and the best email marketing services for small businesses.

If you liked this article, then please subscribe to our YouTube Channel for WordPress video tutorials. You can also find us on Twitter and Facebook.

The post How to Add a Login Form in Your WordPress Sidebar first appeared on WPBeginner.


October 11, 2022 at 11:45PM