Monday, October 31, 2022

How to Add Google Web Stories to Your WordPress Site

Do you want to add Google Web Stories to your WordPress website?

Stories are a popular publishing format used by Instagram stories, Facebook stories, Snapchat, YouTube shorts, and more. Google Web Stories allows you to create and host this kind of content stories on your own website.

In this article, we’ll show you how to easily add Google Web Stories to your WordPress website.

Adding Google Web Stories in WordPress

What is Google Web Stories?

Stories are a popular short-form content style used by social media platforms like Instagram, Facebook, Snapchat, and even YouTube. They might not always be called the same thing, but they all do the same thing.

They are tappable interactive slides with rich media content like images, music, and videos. All these elements make them highly engaging.

Google Web Stories

Engaged users are more likely to convert and spend more time on your WordPress website, which means more sales, conversions, and growth for your business and brand.

However, creating stories on third-party social platforms limits your ability to reach more audiences.

Google Web Stories allows you to bring the same story format to your own website. Enabling you to create highly engaging stories from your WordPress dashboard and publish them on your site.

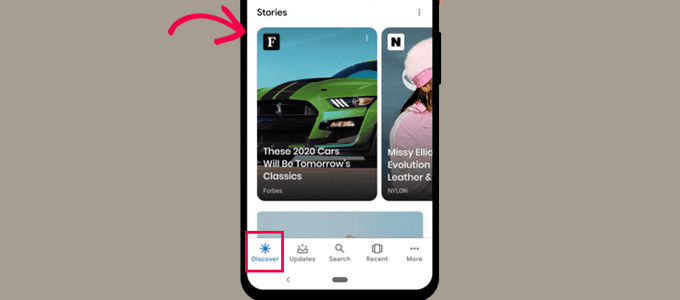
Google Web Stories can be indexed and may appear in Google search results and Discover.

Stories in Google Discover

They use the AMP format, support structured data, and can even be monetized using Google AdSense.

That being said, let’s take a look at how to easily add Google Web Stories to your WordPress site.

Adding Google Web Stories in WordPress

First, you need to install and activate the Web Stories plugin. For more details, see our step-by-step guide on how to install a WordPress plugin.

Web Stories is a free plugin developed and maintained by Google. It aims to popularize the web stories format and bring it to self-hosted, independent websites.

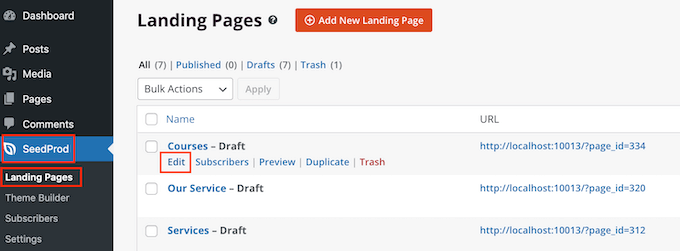
Upon plugin activation, head over to the Stories » Dashboard page to create your first story.

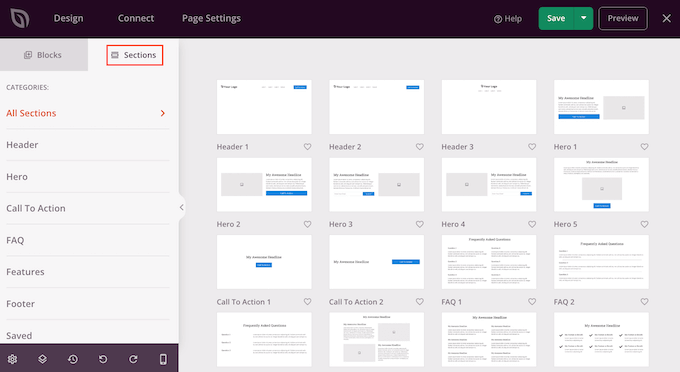
You can get started by selecting one of the templates as a starting point for your story or clicking on the ‘Create New Story’ button to start from scratch.

Create new story

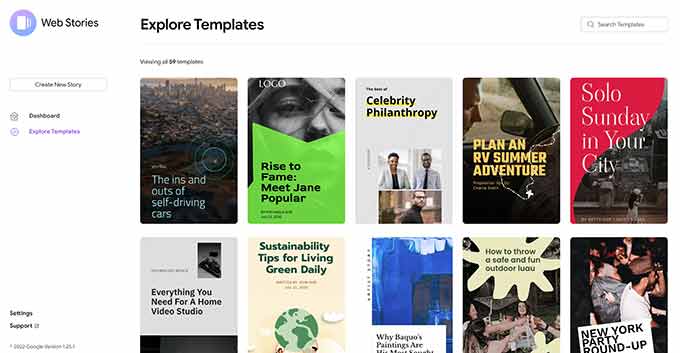
We recommend starting with a template as it gives you a good head start and is much easier for beginners.

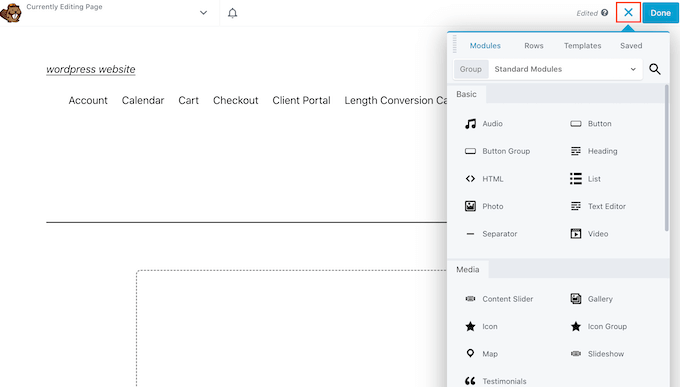
Once you choose a template, the plugin will launch the story builder interface. It is similar to the popular drag-and-drop page builder plugins for WordPress.

story builder

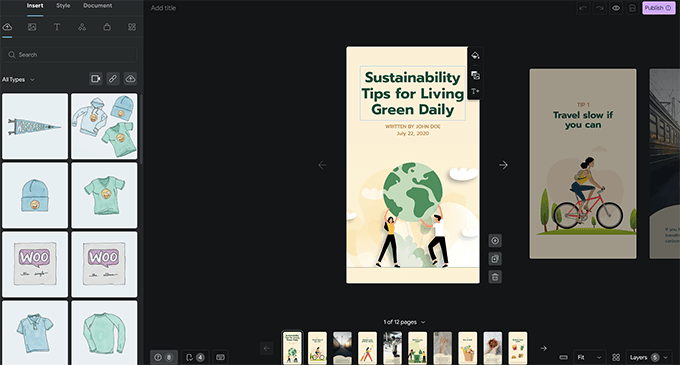
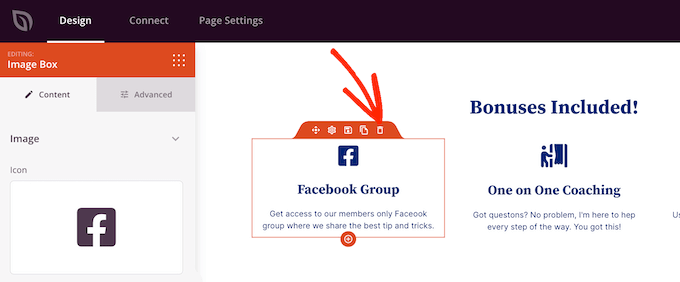
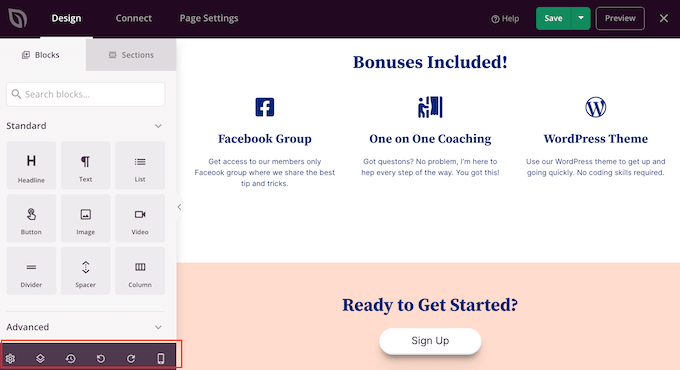
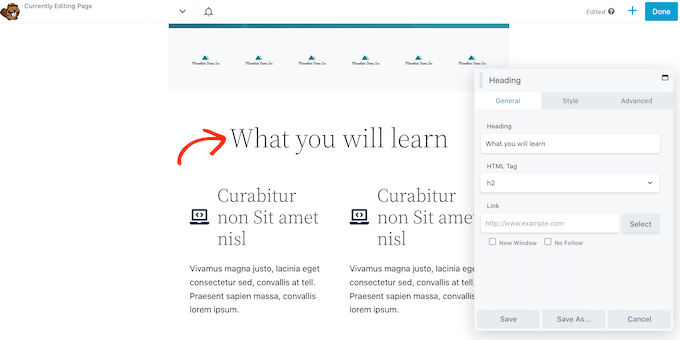
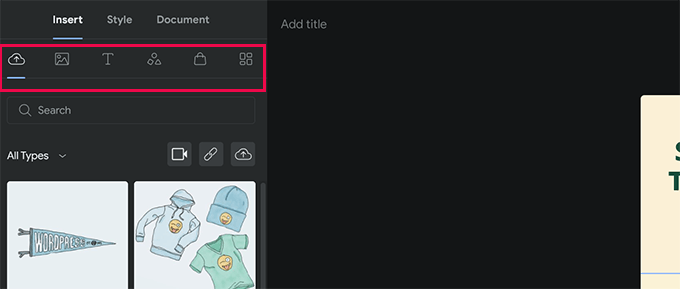
You can simply point and click on any element to edit it, or add new elements from the left column.

You can add audio, video, images, text, headings, stickers, emojis, and more.

Add elements to your web story

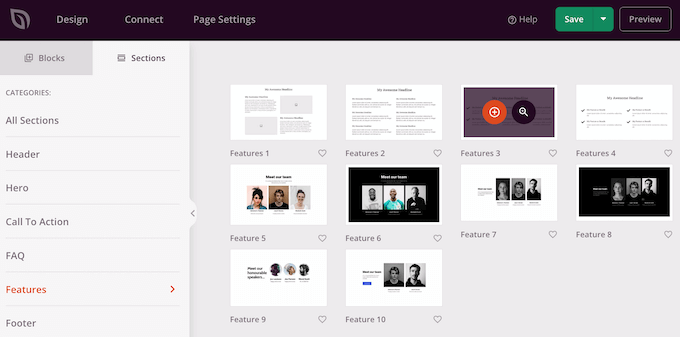
If you are using a template, you’ll see additional pages generated by the template at the bottom.

You can move between pages by clicking on them. You can also delete a page or add a new page if needed.

Manage pages in your story

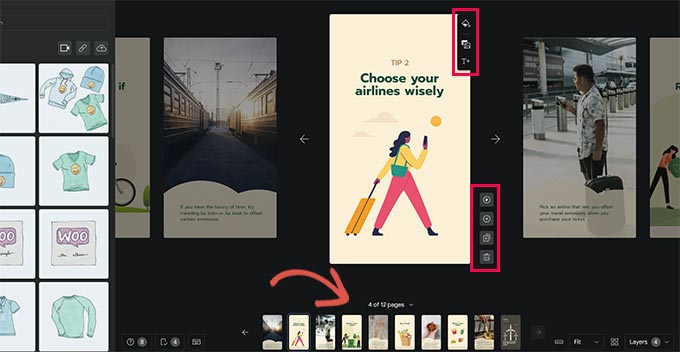
You can also click on a page to set a background color or media.

When choosing a background color for your page, you’ll also find the option to add a call to action button.

Background color and call to action button

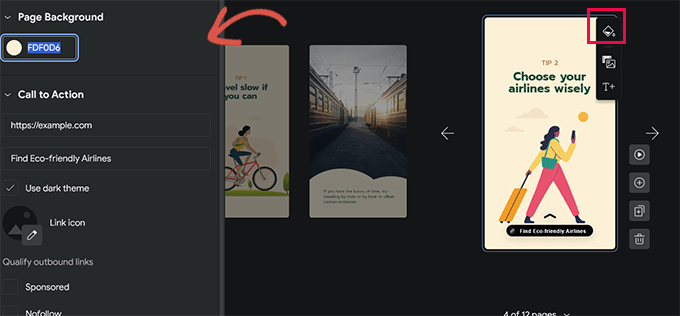
Simply add a URL and choose between the dark or light themes.

Optionally, you can also add an icon to your call to action button and make the link sponsored / nofollow.

Similarly, if you have WooCommerce installed, then you can also display products.

Adding products in web story

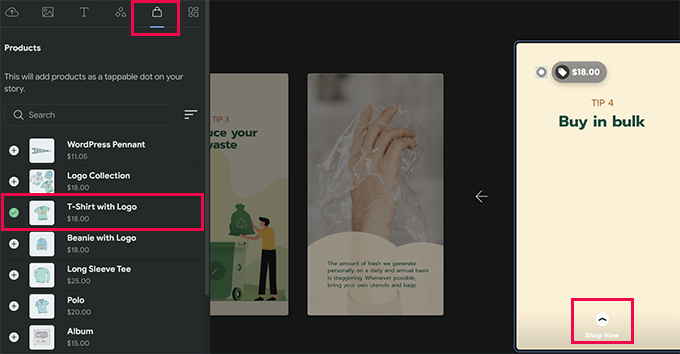
However, you’ll first need to turn on the WooCommerce integration in plugin settings (we show you how to do this later in our article).

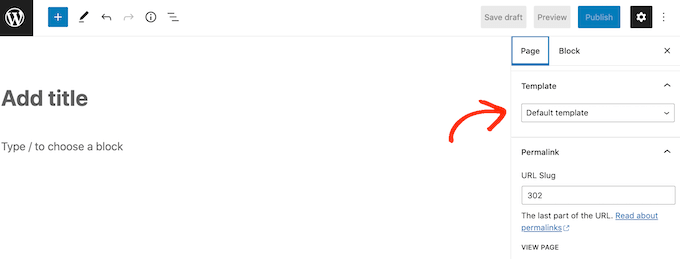
Once you are satisfied with the story, you can switch to the ‘Document’ tab in the left column to configure publish settings.

From here, you need to upload a publisher logo (your website logo or site icon would work fine here) and a poster image for your story.

Document settings

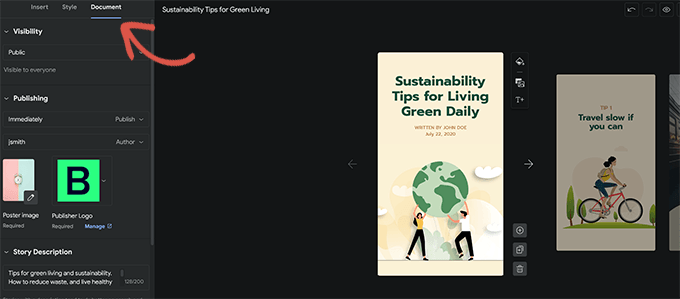
Ideally, a poster image should be in a 3:4 ratio and a minimum of 640 x 853 pixels.

Don’t forget to provide a title for your story and a description. This will help optimize your story for SEO and improve its discoverability.

Below that, you can choose how you want pages to be advanced. By default, pages will change in 7 seconds, you can change that or let users manually tap to change the page.

Additional story settings

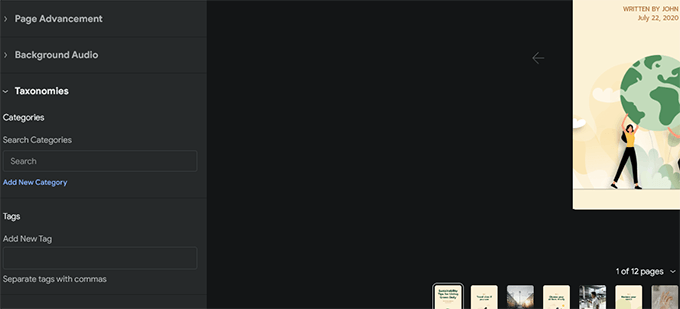
Finally, you can choose categories and tags for your story. This step is optional, but assigning your story to a category and adding some tags will help with SEO.

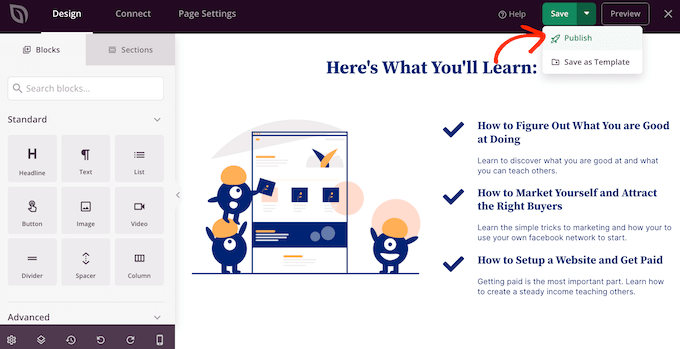
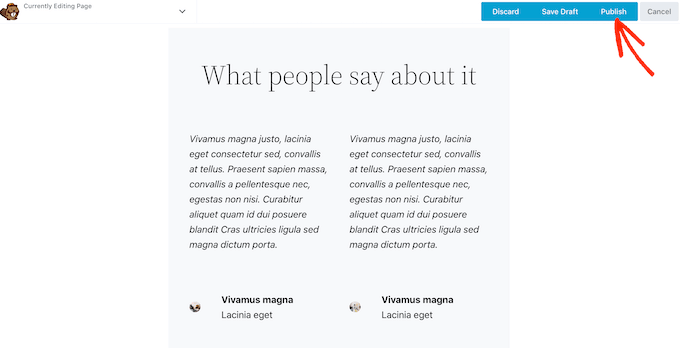
You are now ready to publish your web story. Simply click on the ‘Publish’ button at the top right corner of the screen.

Publish story

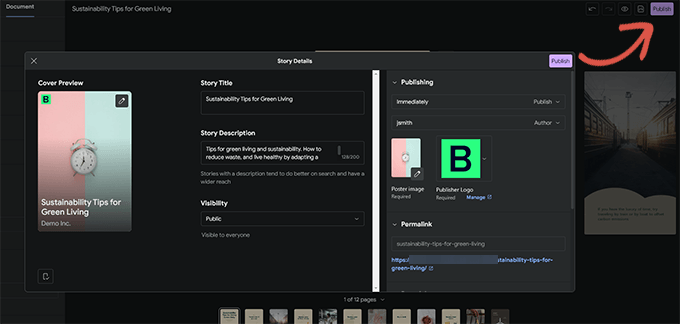
You will be shown a pre-publish checklist. If everything looks good, then click on the publish button to put your story live.

Displaying a Web Story in WordPress

The plugin will show you an option to add your story to a new blog post when you publish it.

Add story to a post or page

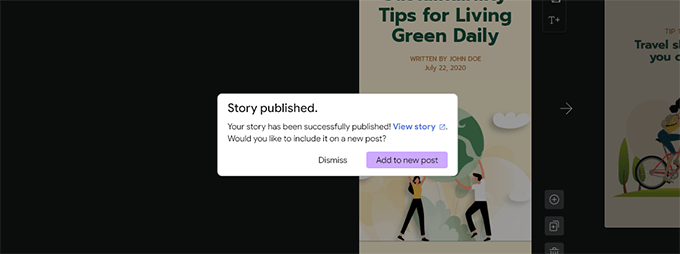
However, you can also add your story to any existing post, page, or sidebar.

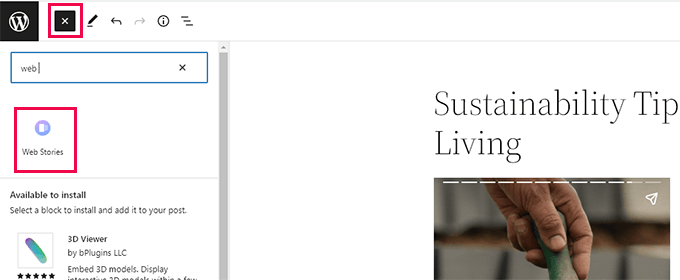
Simply edit the post or page where you want to display the story and add the Web Stories block to the post editor.

Web stories block

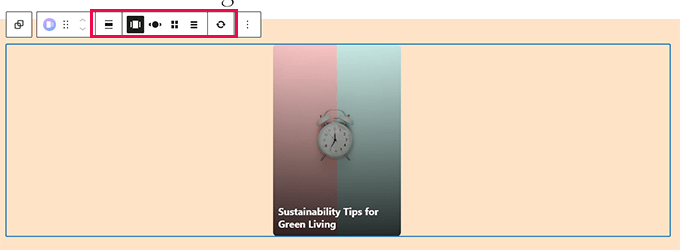
Under the block settings, you will be able to choose multiple stories, latest stories, or a single story.

If you select the latest stories or multiple stories options, then you will also see additional display options to display stories in a circle, carousel, list, or grid options.

Stories block settings

Once you are satisfied with the post, click on the ‘Update’ or ‘Publish’ button to save your changes.

You can now visit your website to see your web stories in action.

Here is how it looked on the homepage of our test site in the multiple-story carousel format.

Web stories mobile preview

The web stories are their own custom post type within WordPress, which means you can display them just as you would any other page or post in WordPress, too.

For instance, they have their own archive page that you can use as a landing page for visitors, or you could highlight them individually as you would a WooCommerce product (which is also displayed using a custom post type).

Adding Integrations to Google Web Stories

The Web Stories plugin comes with a few built-in integrations that you can turn on.

You can find these integrations on the Stories » Settings page.

Adding Google Analytics to Web Stories

First, you can add your Google Analytics profile ID here. This will allow you to track your story views in your Google Analytics reports.

Web stories Google Analytics

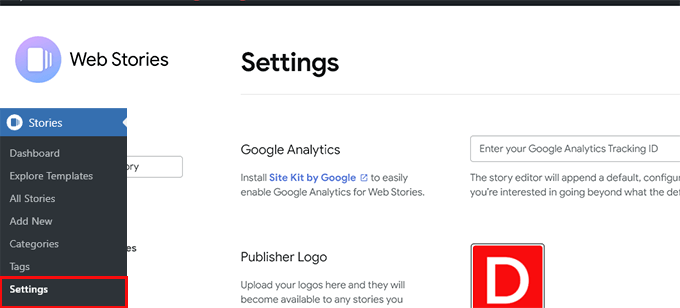
Note: Web stories don’t support the newer GA4 Google Analytics tracking. It only supports Universal Analytics tracking ID which starts with ‘UA.’

If you are using MonsterInsights, then you can find your Google Analytics tracking ID under the Insights » Settings page.

GA profile ID

If you are not using MonsterInsights, then you can find the tracking ID in Google Analytics.

Just head to the ‘Admin’ tab and click on ‘Property Settings.’

Google Analytics tracking ID in GA dashboard

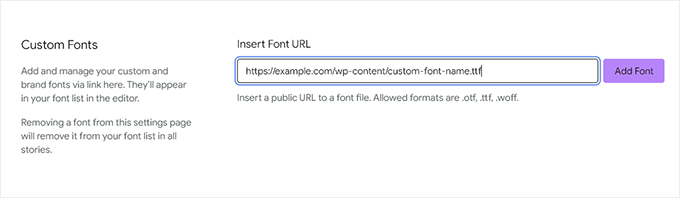
Adding Custom Fonts to Web Stories

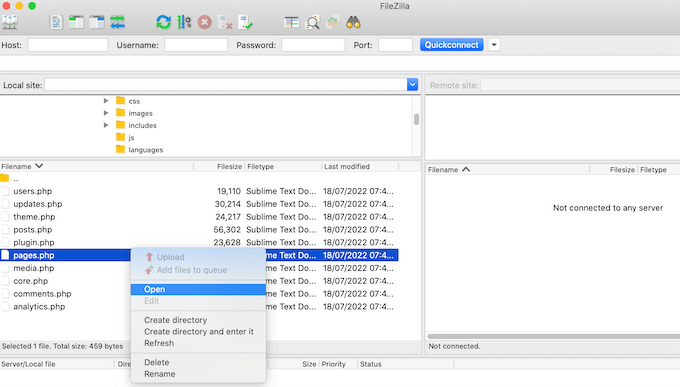
If you want to use a specific font in Web Stories, then you will need to manually upload it to your website using FTP.

Simply upload the font file to /wp-content/ folder on your website. Once uploaded, your uploaded font location would be:

http://example.com/wp-content/font-file-name.ttf

Don’t forget to replace example.com with your own domain name and font-file-name.ttf with the actual font file name.

After that, you can copy and paste this URL in Stories » Settings under the custom fonts section.

Add custom fonts

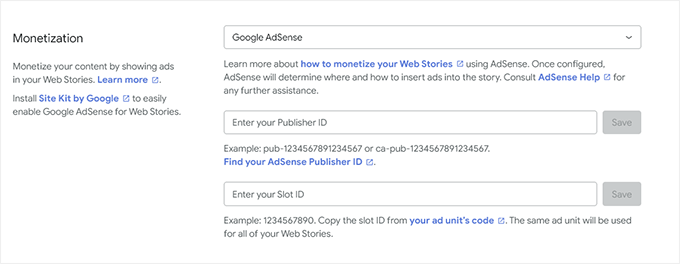
Adding Monetization Integrations in Web Stories

Web Stories supports Google AdSense and Google Ad Manager for monetization options.

Select your monetization option and enter the required information. For instance, you will need Publisher ID and Ad Slot ID for the ad unit.

Monetization options

Enable Ecommerce Integration for Web Stories

If you are using WooCommerce or Shopify to run your online store, then you can enable eCommerce support for Web Stories.

This will allow you to add products to your web stories.

Simply scroll down to the Shopping section under Stories » Settings page and select your eCommerce platform from the drop-down menu.

eCommerce integration for WooCommerce

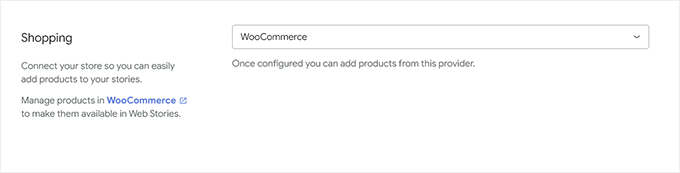
For WooCommerce, the plugin will automatically start showing your products.

For Shopify, you will need to provide your store address and generate an API access token.

Shopify integration

If you don’t have one yet, just click the link that says ‘learn how to get one,’ and you will be taken to instructions on how to generate your Shopify API token.

We hope this article helped you add Google Web Stories to your WordPress site. You may also want to see our guide on getting more traffic to your website or see our tips on tracking conversions in WordPress.

If you liked this article, then please subscribe to our YouTube Channel for WordPress video tutorials. You can also find us on Twitter and Facebook.

The post How to Add Google Web Stories to Your WordPress Site first appeared on WPBeginner.


October 31, 2022 at 03:06PM

Friday, October 28, 2022

How to Create a Custom Page in WordPress

Do you want to create a custom page in WordPress?

A custom page lets you use a different layout from the rest of your website. Many WordPress sites use custom page layouts for their sales pages, landing pages, webinar pages, and more.

In this article, we will show you how to easily create a custom page in WordPress.

How to create a custom page in WordPress

Why Create a Custom Page in WordPress?

Every time you create a new page, your WordPress theme controls how that page looks using a template file.

This page.php template affects all single pages that you create in WordPress. However, you may not want to use the same design every single time.

Landing pages often have different content compared to regular pages, such as a large hero image or a call to action (CTA). This means they often look completely different from the rest of your website. 

Trying to create unique designs using the standard page template can take a lot of time.

You’re also limited by the template, and may not be able to achieve the exact design you want. This can make it difficult to get good results. For example, if you’re building a sales page then you may not get many conversions.

With that being said, let’s see how you can create a custom page in WordPress, with the exact design, layout, and content you want. Simply use the quick links below to jump straight to the method you want to use.

Method 1. How to Create a Custom Page in WordPress Using the Block Editor (No Plugin Required) 

The block editor makes it easy to design your own templates using the tools you’re already familiar with.

However, this method only works with block-enabled themes. If this method doesn’t work with your theme, then we recommend using a page builder instead.

To start, simply open any page or post. Then, click on the ‘Page’ tab in the right-hand menu and click to expand the ‘Template’ section.

Go ahead and create a custom template by clicking on the ‘New’ link. 

Adding a template in the WordPress editor

In the popup that appears, type in a name for your template and then click on ‘Create.’

The name is just for your reference so you can use anything you want.

Creating a new template in the WordPress block editor

This launches the template editor, which works similarly to the standard block editor.

To add blocks to your custom page design, simply click on the blue ‘+’ button. You can then drag and drop to add blocks.

Editing a WordPress template using the block-based editor

You can add content to a block or change its formatting using the familiar WordPress post editing tools. For example, you can type text into a ‘Heading’ block and apply bold formatting or change it from H2 to H3.

You can also create a custom page using patterns. Patterns are collections of blocks that are often used together, such as a list of events, an image with a caption, or a pricing table.

The patterns you see will vary depending on your WordPress theme, but you can see which patterns are available by clicking on the ‘Patterns’ tab.

A selection of patterns in the WordPress editor

 You can either drag and drop a block pattern onto your layout or click on the pattern to add it to the bottom of your template. When you’re happy with how the template looks, click on the ‘Publish’ button and then click on ‘Save.’

You can now apply this template to any page. Opening that page in the editor, and then in the right-hand menu open the ‘Template’ dropdown and choose the custom template you just created.

You can now add content to the page just like any other WordPress page, to create a completely custom page in WordPress. When you save the page, you can visit your site to see the new template in action. 

Method 2. How to Create a Custom Page in WordPress using SeedProd (Recommended) 

In the past, you created a custom page by writing code, which wasn’t very beginner-friendly. If you made a mistake with your HTML, CSS, or PHP code then it might even cause common WordPress errors or completely break your site. 

With that in mind, we recommend using a page builder instead.

SeedProd is the best drag-and-drop page builder for WordPress. It comes with more than 180 templates that allow you to create custom pages without writing any code. 

If you’re using a custom page to get more conversions, then SeedProd works with many popular third-party tools you may already be using to manage conversions. This includes top email marketing services, WooCommerce, Google Analytics, and more.

First, you need to install and activate SeedProd. For more details, see our step-by-step guide on how to install a WordPress plugin.

Note: There’s also a free version of SeedProd that allows you to create custom pages if you’re on a tight budget and just getting started. However, for this guide, we’ll be using SeedProd Pro since it has lots more templates and integrates with all of the best email marketing services.

After activating the plugin, SeedProd will ask for your license key.

SeedProd license key

You can find this information under your account on the SeedProd website. After entering the key, click on the ‘Verify Key’ button.

Once you’ve done that, go to SeedProd » Landing Pages and click on the ‘Add New Landing Page’ button.

SeedProd's page design templates

You can now choose a template for your custom page.

SeedProd’s templates are organized into different campaign types such as ‘lead,’ ‘squeeze,’ and ‘coming soon.’ You can click on the tabs at the top of the screen to filter templates based on campaign type. 

The SeedProd template library

If you want to start from scratch, then SeedProd also has a blank template that you can use.

To take a closer look at any design, simply hover your mouse over that template and then click on the magnifying glass icon.

Previewing a ready-made template

When you find a design that you like, click on ‘Choose This Template.’ We’re using the ‘Course Sales Page’ template in all our images, but you can use any template you want.

Next, go ahead and type in a name for the custom page. SeedProd will automatically create a URL based on the page’s title, but you can change this URL to anything you want.

A descriptive URL will help search engines understand what the page is about, so they can show it to the right users.

When you’re happy with the information you’ve entered, click on the ‘Save and Start Editing the Page’ button.

Creating a custom page for your WordPress website

To give your custom page the best chance of appearing in relevant search results, you may want to add any keywords that are missing from the URL. For more details, please see our guide on how to do keyword research.

This will load the SeedProd page builder interface. It is a simple drag-and-drop builder and shows a live preview of your page to the right. You will also see block settings on the left.

The SeedProd courses template

To customize a block, simply click to select it in the page editor. The left-hand toolbar will then show all the settings for that block.

For example, here we’re changing the text inside a ‘Headline’ block.  

Editing the headline for your custom page

You can format the text, change its alignment, add links, and more using the settings in the left-hand menu.

It’s also easy to edit images using the SeedProd page builder. Simply click on any ‘Image’ block and use the settings to add alt text, upload a new image, or make any other changes. 

Editing images in a custom page design

If you want to remove a block from your custom page, then simply click to select that block.

Then, you can click on the trash can icon in the mini toolbar. 

Removing a block from a SeedProd custom page

To add new blocks to your design, just find a block in the left-hand menu and then drag it onto the editor.

You can then click to select the block and make any changes in the left-hand menu. 

Adding a social sharing block to WordPress

SeedProd also comes with ‘Sections,’ which are rows and block templates that can help you create a custom page, fast. For example, if you were designing a Google Ad landing page, then you might use SeedProd’s ready-made Hero, Call To Action, or Features sections.

To see all of the available sections, simply click on the ‘Sections’ tab.

SeedProd's ready-made sections

To take a closer look at a section, hover your mouse over it and then click on the magnifying glass icon.

When you find a section that you want to add to your design, simply move the mouse over it and then click on the little ‘+’ icon.

Adding a section to a custom page

This adds the section to the bottom of your page. You can move both sections and blocks around your design using drag and drop.

If you make a mistake or change your mind, then don’t worry. You can reverse your last change by clicking on the ‘Undo’ button at the bottom of the left-hand toolbar.

Here, you’ll also find a redo button, revision history, layout navigation, and global settings.

The SeedProd global settings bar

These extra buttons make it easy to create a custom page in WordPress. 

At the bottom of the toolbar, you’ll also find a mobile preview button that allows you to view the mobile version of the custom page. 

Previewing a custom page on mobile

This can help you design a custom page that looks just as good on mobile devices as it does on your computer.

When you’re happy with the custom page, it’s time to publish it by clicking the dropdown arrow next to ‘Save’ and then select the ‘Publish’ option. 

Publishing a custom page

Your custom page will now go live on your WordPress blog.

If you want to edit the custom page at any point, then just go to SeedProd » Landing Pages in your WordPress dashboard. You can then find the page that you want to change and click on its ‘Edit’ link.

Fine-tuning a custom page in WordPress

This will open the design in SeedProd’s editor, ready for you to make your changes.

Method 3. Using Beaver Builder to Create a Custom Page in WordPress

You can also create a custom page using Beaver Builder. We recommend using the professional version, but there’s also a free version of Beaver Builder that has limited features.

First, you need to install and activate the plugin. For more details, see our step-by-step guide on how to install a WordPress plugin.

Upon activation, go to Settings » Beaver Builder. Then, click on the ‘License’ tab.

Adding a license key in Beaver Builder

Here, simply enter the license key, which you’ll find in your account on the Beaver Builder website. You can then go ahead and click on ‘Save License Key.’

To create a custom page, simply head to Pages » Add New in your WordPress admin dashboard. Then, click the ‘Launch Beaver Builder’ button.

Launching the Beaver Builder page editor

This will open the Beaver Builder editor.

If the right-hand menu doesn’t open automatically, then click on the ‘+’ in the top-right corner to open it.

Adding blocks and modules in the Beaver Builder page builder

This menu has all the different modules and rows that you can add to your custom page. Similar to SeedProd’s blocks, these are the core parts of any Beaver Builder page.

When you find a block or module that you want to use, drag and drop it onto the page editor. 

Another option is to start with a template. To see all the different Beaver Builder designs, just click on the ‘Templates’ tab.

You can then click on any template to add it to the page. 

Beaver Builder's pre-built templates

To edit any part of a template, simply click on it. For example, you can change the text, images, colors, and more.

In the following image, we’re editing the page heading. Beaver Builder’s editing process isn’t quite so smooth as SeedProd’s, so you’ll need to make your changes in the separate popup box that appears.

Creating a custom page with Beaver Builder

When you’re happy with how the custom page looks, click on the ‘Done’ button.

You can then save the post as a draft, or publish it so it shows up on your WordPress website.

Publishing a custom page design

Method 4. Creating a Custom Page Template Manually

You can also create a custom page template manually in WordPress. Similar to the page.php file, this template allows you to control how the page looks.

This method does require you to write some code, so it’s not the most beginner friendly option. However, it does allow you to create a custom page without having to install a new plugin.

If you only want to create a small number of custom pages, then you may prefer to write code rather than set up a page builder plugin.

To start, open a plain text editor like Notepad on your computer. In the blank file, add this line of code at the top:

<?php /* Template Name: CustomPageT1 */ ?>

This code simply tells WordPress that this is a template file called ‘CustomPageT1.’ You can name the template anything you want.

Now, add all the code for the custom page layout. This template is exactly the same as any other theme file in WordPress so you can add HTML, template tags, and PHP code.

To help you code the template file, you may want to copy the existing page.php template provided by your theme. This can save you time and helps the custom page blend in with the rest of your WordPress website.

The easiest way to copy the page.php code, is by connecting to your server using an FTP client such as FileZilla, or you can use the file manager of your WordPress hosting platform such as cPanel or SiteGround‘s Site Tools. 

If this is your first time using FTP, then you can see our complete guide on how to connect to your site using FTP

Once you’re connected, go to /wp-content/themes/ and open the folder for your current theme. Inside this folder, find the page.php file and open it in any text editor.

The FileZilla FTP client

You can use this code as the basis of your custom template, and can even paste the code into your new template file.

If you do paste the code, then don’t copy the page.php header text, which is the part that’s commented out at the top of the file.

You can create any layout you want, but here’s an example of a simple custom page layout that we’re going to use on our site: 

<?php /* Template Name: CustomPageT1 */ ?>
 
<?php get_header(); ?>
 
<div id="primary" class="content-area">
    <main id="main" class="site-main" role="main">
        <?php
        // Start the loop.
        while ( have_posts() ) : the_post();
 
            // Include the page content template.
            get_template_part( 'template-parts/content', 'page' );
 
            // If comments are open or we have at least one comment, load up the comment template.
            if ( comments_open() || get_comments_number() ) {
                comments_template();
            }
 
            // End of the loop.
        endwhile;
        ?>
 
    </main><!-- .site-main -->
 
    <?php get_sidebar( 'content-bottom' ); ?>
 
</div><!-- .content-area -->
 
<?php get_sidebar(); ?>
<?php get_footer(); ?>

You can now save the file. You can use any name you want, but make sure you end the file with the .php extension.

Although you can add this file to any WordPress theme, it’s a good idea to create a child theme based on your current theme. In this way, you can update your WordPress theme without losing customization

In your FTP client or file manager, simply upload the custom template to your current theme’s directory. Once you’ve done that, it’s time to create a new page in the WordPress dashboard or open any page where you want to use the template.

In the right-hand menu, click on the ‘Page’ tab and then click to expand the ‘Templates’ section, if it isn’t already expanded.

Changing the WordPress page template

You can then open the dropdown menu and select the template you created.

To add actual content to your custom page, simply edit the page as normal. When you’re happy with how everything looks, you can either click ‘Update’ or ‘Publish’ to push it live to your site. 

We hope this article helped you learn how to create a custom page in WordPress. You can also go through our guide on the must have WordPress plugins for your website and how to increase your blog traffic.

If you liked this article, then please subscribe to our YouTube Channel for WordPress video tutorials. You can also find us on Twitter and Facebook.

The post How to Create a Custom Page in WordPress first appeared on WPBeginner.


October 29, 2022 at 04:00AM

7 Best Table of Contents Plugins for WordPress (Expert Pick)

Are you looking for a plugin to add a table of contents to your WordPress website?

A table of contents can improve readability and make it easier for users to digest lengthy content by letting them jump ahead to any section of a post or page. Google will also use your table of contents to index and rank your pages and posts in search results.

In this article, we’ll show you the best table of contents plugins for WordPress.

Best table of content plugins for WordPress

Why Use a Table Content Plugin in WordPress?

Adding a table of contents (ToC) to your WordPress website is a great way to help visitors navigate longer blog posts and pages.

You can easily organize and structure your content so it’s easier for people to scan through the article and jump to any section they’re interested in.

It also helps with your WordPress SEO, since search engines like Google can add jump-to-section links next to your website in the search results. Google can also display your table of contents list in featured snippets.

You can manually add a table of contents in WordPress by writing HTML code and CSS or by using advanced settings in the block editor. However, this is time-consuming and can be tricky for beginners because the slightest mistake would mean your table of contents won’t work.

An easier way to create a table of contents is using a WordPress plugin. You won’t have to edit HTML code, and there are more customization options.

Let’s look at some of the best table of contents plugins for WordPress.

1. All in One SEO (AIOSEO)

All In One SEO - AIOSEO

All in One SEO (AIOSEO) is the best WordPress SEO plugin. It helps you optimize your website for search engines without technical knowledge or having to hiring a professional.

AIOSEO makes it super easy to add a table of contents to your WordPress site. It offers a table of contents block in the WordPress content editor that you can add anywhere in your blog post.

AIOSEO table of content block

The AIOSEO block will automatically generate a table of contents using your heading levels from H1 to H6.

Unlike other automatic table of content plugin though, AIOSEO actually lets you hide an individual heading or even completely customize the title as needed in the table of content. You can also reorder the headings and change the style from bullet format to numbers.

AIOSEO table of content block settings

Aside from that, AIOSEO helps you create XML sitemaps for your site, so search engines can easily discover new content. It also helps add schema markup and increase the visibility of your content in rich snippets.

You can also use the plugin to conduct an SEO audit and see if everything is optimized correctly. AIOSEO will suggest fixing different issues that might stop your site from ranking higher in search results.

AIOSEO premium plans start from $49.60 per year. There is also an AIOSEO Lite version you can try for free.

2. Easy Table of Contents

Easy table of contents

Easy Table of Contents is a popular plugin that you can use to add a table of contents to your blog posts, landing pages, sidebar, and custom post types.

The plugin is user-friendly and automatically generates a listing using content from the headings in the article. It works seamlessly with the WordPress block editor, classic editor, Divi and Elementor page builders, and more.

Using the plugin, you also get an auto-insert functionality for adding the table of contents in different post types.

Plus, you get other customization options like changing the table’s width, editing the font size, choosing a theme, and selecting the number of headings to use when creating a table of contents.

3. LuckyWP Table of Contents

LuckyWP table of content

LuckyWP Table of Contents is the next WordPress ToC plugin on our list. It has multiple customization options to change the look and feel of your table of contents.

For instance, you can pre-built color schemes to match your brand. You also get options to edit the appearance by changing the width, font size, item font size, and colors.

The plugin lets you choose bullets or numbers to show items in the table contents. You can also use decimals and roman numerals in the listing.

Besides that, the plugin offers 3 options to add the table of contents anywhere on your site. For example, you can use a shortcode, widget, or WordPress content editor block.

4. Joli Table Of Contents

Joli table of contents

Joli Table of Contents is an SEO-friendly table of contents plugin for WordPress.

It’s lightweight and doesn’t hinder the performance of your website. The table of contents only loads when it’s supposed to display. Plus, the table is fully responsive, so you don’t have to worry about optimizing it for different devices.

With the Joli Table of Contents plugin, you get many options to customize the appearance of the table of contents. It comes with 2 themes for the table and 4 free icons for the expanding and collapsing buttons.

Besides that, the plugin lets you choose a numbering prefix, change the font size, adjust the table’s width, add a shadow, and more.

5. CM Table Of Contents

CM table of contents

CM Table of Contents by CreativeMindsSolutions is a super easy-to-use plugin for creating a table of contents.

In the plugin, you can choose which post types you’d like the table of contents to appear on, including blog posts, specific pages, sidebar widget areas, and custom pages. You also get to make the table collapse and expand in your content.

The best part about using the CM Table of Contents plugin is that you get different performance settings. This helps you ensure that are no delays when the table of contents loads.

Besides that, there are many styling options for your table of contents. You can change the size, color, weight, and style for each level in the table. The plugin also lets you show the TOC in one or two columns.

6. SimpleTOC – Table of Contents Block

SimpleTOC

SimpleTOC is the basic WordPress table of contents plugin. It’s beginner friendly and offers standard features.

You can easily add TOC to your blog posts using the SimpleTOC block in the WordPress content editor. The plugin doesn’t require additional configuration, and you can control all the settings from the content editor.

SimpleTOC lets you select the maximum and minimum heading levels it should include in the table of contents, show/hide the table’s heading, and more.

On the downside, you don’t get any customization options compared to other plugins on our list, like AIOSEO. To style the table of contents, you’ll need to use the native styling options in the WordPress theme customizer or full site editor.

7. Heroic Table of Contents

Heroic table of contents

Heroic Table of Contents is another table of contents WordPress plugin that you can use to provide better navigation of your blog posts. The best part is that it’s 100% free.

The plugin offers a WordPress block that you can use to add a table of contents to your post and pages. It provides 4 pre-built table styles to choose from, including outlined, rounded, contrasted, and gray.

Additionally, you can show a collapse or expand icon for your TOC, use bullets, numbers, or plain text in the table, and more formats. Heroic Table of Contents is SEO friendly and mobile responsive, so you don’t have to worry about your site’s load time and user experience.

Which is the Best Table of Contents WordPress Plugin?

If you’re looking for the best plugin to help you optimize your content for search engines and easily add a table of contents, then we recommend All in One SEO (AIOSEO).

You can use the AIOSEO block to add a table of contents, customize it, and hide headings inside the WordPress content editor. Besides that, AIOSEO helps you create sitemaps, optimize your content for SEO, and so much more.

On the other hand, if you’re looking for a dedicated table of contents WordPress plugin, then check out Easy Table of Contents. It is beginner friendly and offers multiple customization options.

We hope that this article helped you learn about the best table of contents plugins for WordPress. You may also want to see our guide on how to start a WordPress blog and the best web design software.

If you liked this article, then please subscribe to our YouTube Channel for WordPress video tutorials. You can also find us on Twitter and Facebook.

The post 7 Best Table of Contents Plugins for WordPress (Expert Pick) first appeared on WPBeginner.


October 28, 2022 at 02:54PM

Thursday, October 27, 2022

Push Notifications vs Email: Which Is Better? (Pros and Cons)

Are you comparing push notifications vs email to figure out which is better?

Push notifications and email marketing are two of the most effective marketing tools to increase conversions and sales. But how are they different and which one should you focus on?

In this article, we will compare push notifications vs email marketing with pros and cons to find out which one is better.

Push Notifications vs Email: Which Is Better? (Pros and Cons)

Push Notifications vs Email: Which One is Better?

Push notifications and email marketing are two different marketing channels that each have their own advantages and disadvantages.

Both can help you achieve similar goals like increasing conversions, recovering cart abandonment, boosting sales, and getting more user engagement.

When used properly, they can help you significantly grow your online business.

Due to the difference in the delivery platform, one method could be better suited over the other. For instance, in some places email will be less effective than a push notification and vice versa.

That being said, let’s take a look at push notifications and email and see what are their pros and cons and when one of them is more effective than the other.

Email Marketing – Pros and Cons Explained

Email Marketing Stats

Email marketing is the most effective marketing tool available on the market. However, what most people are unclear about is what makes email so effective and when they are using it wrong.

Pros of Email Marketing

Following are some of the advantages of using email marketing in your business strategy.

1. High ROI with Low Costs

As a business, one factor in your decision-making is the costs and what kind of return you should expect.

For every $1 spent on email marketing, $44 is made in return. That’s an ROI of 4400% (source). 

Email marketing has a very high ROI due to low-cost email marketing platforms. These services allow you to send thousands of emails to your customers for a very low cost.

2. Wider Availability to All Customers

Most internet users today have 24/7 access to their email inbox via a variety of devices laptops, mobile, and even smartwatches.

An average internet user checks their email several times a day and due to cheaper unlimited storage, many people don’t bother deleting emails.

This increases the chances of your subject line and a snippet been seen by users even if they don’t open the email.

3. Perfect for Longer Content

Emails can be as long as you need, so you have plenty of room to create an effective copy for your email.

We generally do recommend keeping it short and sweet. However, sometimes you may need to add more information to your email.

You can place multiple calls to action if needed, add several products, provide users instructions on how to do something on the website, and more.

4. Emails Are More Customizable

Emails can be in plain text, or you can use HTML and CSS to create beautiful newsletter templates. You can also add images, link to YouTube videos, create buttons, and more.

Emails are more customizable

Most email service providers allow you to use smart tags to personalize your emails. Plus, you can segment your email list into different user groups.

For instance, you can segment your email list into users who have already made at least one purchase and users who have never bought from you.

You can also set up automated drip notifications that send a sequence of emails with a set frequency to users.

All of this allows you to make your emails look more personalized, professional, and persuasive.

5. Email Isn’t Time Limited

Unlike push notifications, which demand the user’s urgent attention, emails are more relaxed and users can decide to read them later.

Once the email arrives in a user’s inbox, it will sit there until the user takes an action.

Most users check email several times a day, so even if they don’t open it right away, they will scan through your subject line multiple times.

Cons of Email Marketing

Email is cheap and highly effective. There is no doubt that it will remain one of the most efficient marketing tools for businesses in the future.

However, there are certain areas where email puts you at a slight disadvantage.

1. Too Frequent Blog Post Emails

Sending users an email for every blog post doesn’t work very well. Specially if you publish daily or several times a day.

Longer emails

That’s why you see a ton of blogs (including WPBeginner) sending weekly emails with a recap of all the blog posts they published this week.

2. Competition in Your Customer’s Inbox

An average internet user gets a lot of marketing emails each day. Each one of them tries to come up with a creative subject line to get their attention.

You are competing with many other businesses for users’ attention, and this affects your open rates. You have to learn how to write better emails that users actually open and take action.

3. Email Apps like Gmail Assigning Low Priority Labels

Marketing emails

Due to huge volume of marketing emails, popular email clients like Gmail may not display any notification for new emails to your users.

Your email may be labeled low priority promotional email among hundreds of other marketing emails. This may reduce the visibility, open rates, and CTR for your email campaigns.

Push Notifications – Pros and Cons Explained

Push notifications pros and cons

Push notifications are a highly effective marketing tool with higher click-through and open rates. Let’s compare how they stack up against email marketing.

Pros of using Push Notifications

Following are some of the advantages of using push notifications over emails in your marketing strategy.

1. Easy to Subscribe

Push notifications are very easy to subscribe to. Users simply need to click a button to subscribe for notifications.

Whereas in a traditional email sign-up forms, users will have to first go through popups and opt-in forms to fill in their email address, submit the form, and then confirm their subscription via double opt-in.

This easy subscription option in push notification works very well for users as it instantly gets out of their way once they click subscribe. Most push notification software offer 1-click subscription options.

2. Messages Are Delivered to Users Instantly

Push notifications appear on users’ screens as soon as they receive them. Unlike emails, they don’t need to open them separately.

They work on all platforms and are particularly more effective on mobile phones. Basically, users will get the message instantly as a notification regardless of which device they are using.

This increases the visibility of push notifications and makes them much more effective than email marketing.

3. Push Notifications Add Urgency and FOMO

Push notifications appear as mobile notifications, which adds urgency to them.

Users feel that they will not see the notification if they dismiss it, so they don’t want to miss out on anything important.

Urgency example

4. Users Cannot Provide Fake Signup

Push notifications work on users’ browsers, so users cannot provide fake sign-up information.

This is far more effective when comparing to email sign-ups. Many users now enter disposable email addresses that they have made particularly for subscriptions.

Users may also provide wrong email addresses or makeup fake ones to signup. As marketers, this affects the open and CTR rates of your email campaigns.

5. Highly Effective Personalization

Push notifications can be customized for individual users and triggered based on user activity.

You can do this with emails too. However, it becomes more effective when combined with the urgency and FOMO effects of push notifications.

For instance, a user added a product to the cart, you can use push notifications to nudge them into completing the purchase.

You can also add drip push notifications which work very well for blog post alerts and many publishers / bloggers send targeted push notifications based on user’s interest.

Cons of Using Push Notifications

Push notifications work great for most websites. However, to avoid misusing them, you need to keep in mind the following disadvantages.

1. No Lengthy Content

Push notifications have a character limit which varies on different platforms and browsers.

For instance, you can use 30-70 characters for titles and 65 to 200 characters for descriptions.

You’ll have to keep your messages short and persuasive with in these limits.

2. Limited Media Options

Platforms like PushEngage allow you to create rich push notifications with hero images, Gifs, videos, and emojis.

There is still a limit on what you can use to make your notifications more interactive.

3. Can Easily Get Excessive

Push notifications have a much higher CTR, which may compel some website owners to use them more frequently.

This could ruin user experience as they may start getting more than usual notifications.

On the other hand, if the user has signed up for too many notifications, their notification panels may get too many messages from different websites which may affect how they feel about web push notifications.

Which is Better, Push Notifications vs Email?

Push notifications are better than email due to the higher click-through rates, urgency, personalization, and easy subscription options.

However, email is still highly effective for transactional emails, upsells, newsletters, and other campaigns.

We believe that they are two separate tools. While one of them can be more efficient in particular scenarios, the other one may excel in other areas.

Combining email and push notifications is ultimately the best win-win strategy for most businesses.

This is why we use both push notifications and email marketing in our business to get maximum results.

How to Get Started with Push Notifications

To send push notifications, you’ll need to sign up for a push notification service.

We recommend PushEngage because it is the best push notification service on the market.

PushEngage

PushEngage comes with powerful customization options, triggered notifications, automatic drip campaigns, A/B testing, and more features to grow your business.

Plus, it is extremely beginner friendly and much easier to set up without any special technical skills.

For more details, see our tutorial on adding web push notifications to your WordPress site.

How to Get Started with Email Marketing

You’ll need to sign up for an email marketing service to get started.

We recommend using Constant Contact, which is the best email marketing service for small businesses and bloggers.

Constant Contact website

Constant Contact comes with easier setup, beautiful email templates for every type of campaign, engagement reporting, and dynamic personalization.

For more detailed instructions, see our article on how to start an email newsletter in WordPress.

We hope this article helpes you compare push noticiations vs email and which one is better for your business. You may also want to see our practical tips to grow your email list quickly or see our complete conversion tracking guide.

If you liked this article, then please subscribe to our YouTube Channel for WordPress video tutorials. You can also find us on Twitter and Facebook.

The post Push Notifications vs Email: Which Is Better? (Pros and Cons) first appeared on WPBeginner.


October 27, 2022 at 03:23PM