Tuesday, December 6, 2022

How to Create a Thank You Page in WordPress

Do you want to create a thank you page for your WordPress website?

Showing a customized thank you page can help you build a strong relationship with your audience. You can keep people engaged, bring them back to your site, and boost sales.

In this article, we will show you how to create a thank you page in WordPress, step by step. Plus, we’ll also show you when to display your thank you page such as after someone submits a form, makes a purchase on your site, and more.

How to create a Thank You page in WordPress

Why Create a Thank You Page in WordPress?

A thank you page is a web page you can show to your users when they perform an action or complete a task on your WordPress website.

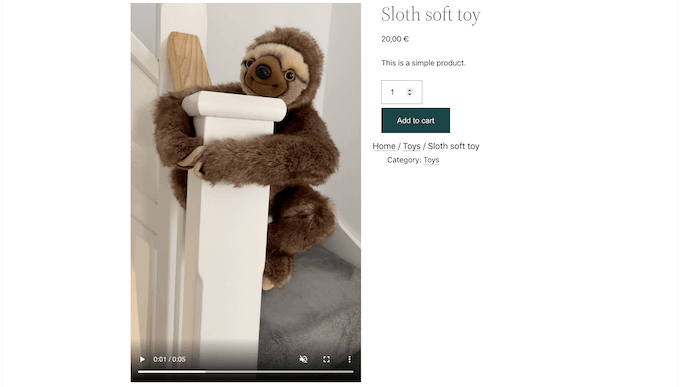
For example, you can show a custom thank you page on your online store after a customer purchases a product. This allows you to cross-sell and upsell your best products and offer exclusive discounts on subsequent purchases.

Similarly, a thank you page can help build an email list and grow your social audience. You can show social sharing buttons to promote your Facebook, Twitter, LinkedIn, and other social media channels.

Another situation where a thank you page is helpful is when a user submits a form or leaves a comment on your site. You can show your most popular posts on the thank you page and drive more traffic to your important blog posts.

That said, let’s look at how you can easily create a thank you page in WordPress and how to trigger it in different situations.

Simply click the links below to jump ahead to your preferred section:

Creating a Thank You Page in WordPress

The best way to create a thank you page in WordPress is by using SeedProd. It is the best website builder and landing page builder plugin for WordPress.

The plugin offers drag-and-drop functionality and lots of customization options. Plus, you get to choose from pre-built templates to edit the thank you page according to your liking.

For this tutorial, we will use the SeedProd Pro version because it offers pre-built templates, email integrations, WooCommerce blocks, and more. You can also use the SeedProd Lite version for free.

First, you’ll need to install and activate the SeedProd plugin. If you need help, then please see our guide on how to install a WordPress plugin.

Upon activation, you can go to SeedProd » Settings from your WordPress admin panel. From here, enter the license key and click the ‘Verify key’ button.

Entering the SeedProd license key

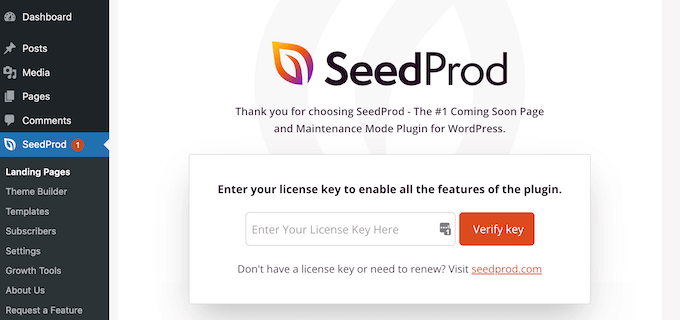
You can find the license key in your SeedProd account area.

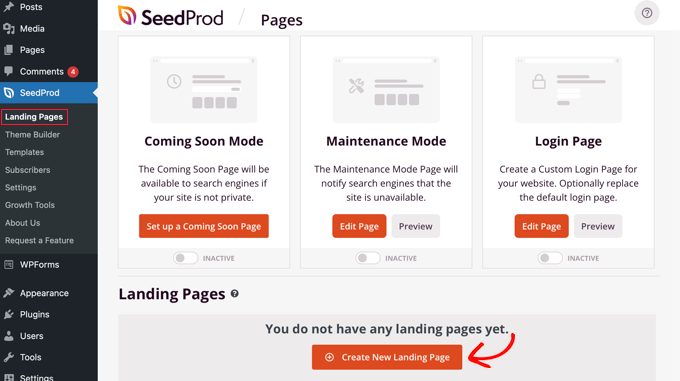
After the verification, you’ll need to head to SeedProd » Landing Pages from the WordPress dashboard and click the ‘Create New Landing Page’ button.

Add a New SeedProd Landing Page

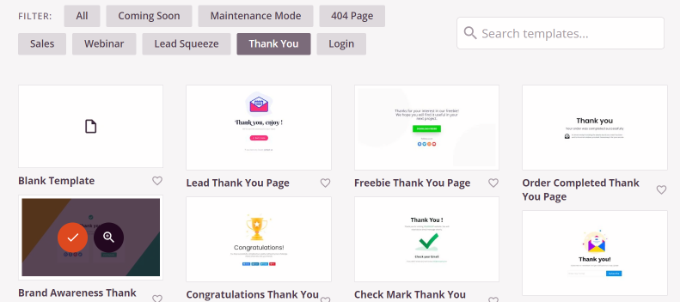
Next, SeedProd will show you different page templates.

You can filter them from the top to view thank you page templates. From here, simply hover over a design you’d like to use and click the orange tick button.

Select a thank you page template

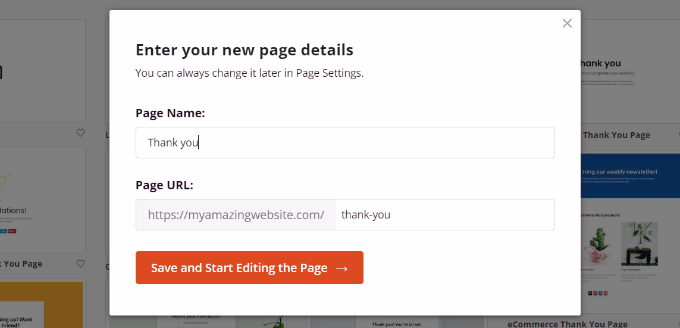
A popup window will now open. Go ahead and enter a name and URL for your thank you page.

Once that’s done, you can click the ‘Save and Start Editing the Page’ button.

Enter a name for your thank you page

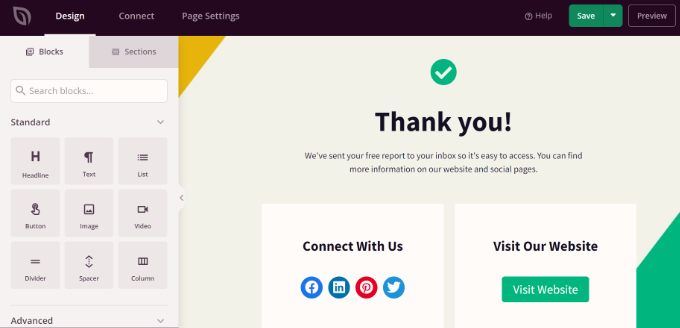
This will launch the SeedProd drag-and-drop page builder.

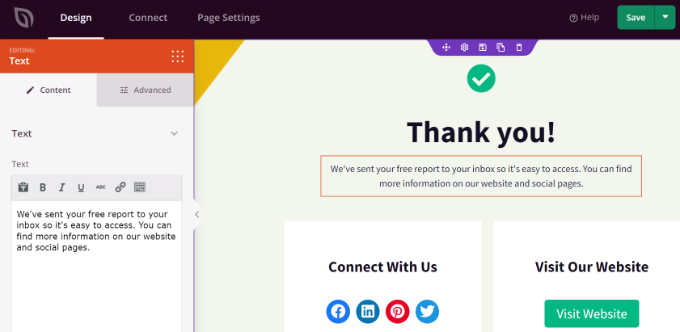
You can now customize your thank you page by adding new blocks from the menu on the left or rearranging the existing blocks.

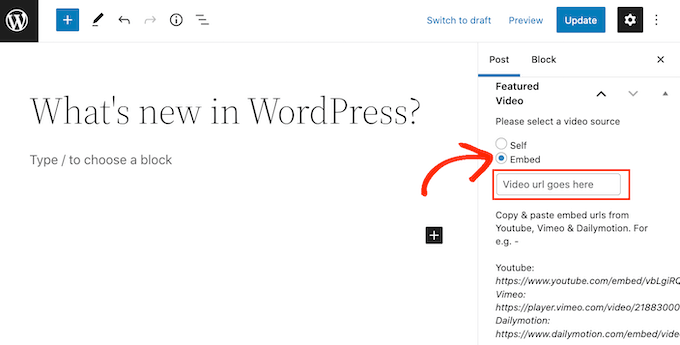
For instance, there are blocks for images, text, headlines, videos, contact forms, social profiles, and more.

Customize your thank you page

If you click on a block in the template, then you’ll see more options for customization.

For example, you can edit the text, changing its font, size, spacing, color, and more.

You can edit existing blocks in SeedProd

When you’ve made the changes, don’t forget to click the ‘Save’ button at the top.

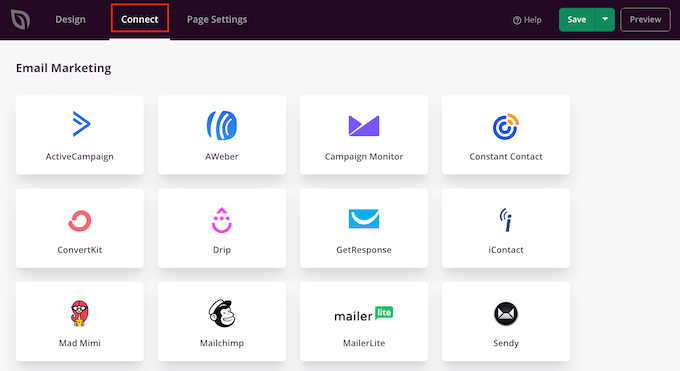
Next, you can click the ‘Connect’ tab and integrate email marketing services. This is useful if you’ve added a contact form to your thank you and would like to collect leads from customers.

Connecting email marketing services to SeedProd

After that, you’ll need to head to the ‘Page Settings’ tab at the top.

Here, click the Page Status toggle to change it from ‘Draft’ to ‘Publish.’

Publish your thank you page

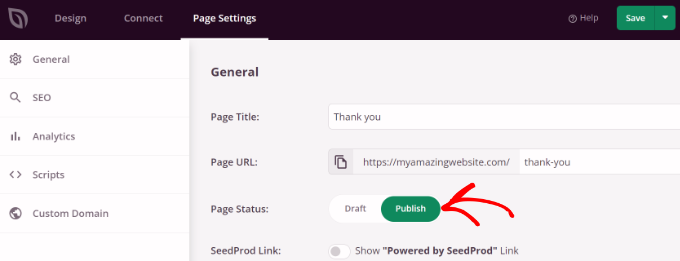
Don’t forget to click the ‘Save’ button at the top when you’re done.

You can now visit your website to see the thank you page in action.

Visit website to see thank you page preview

Now, let’s look at different situations when you can trigger the thank you page so that your visitors see it.

Show a Thank You Page After Form Submission in WordPress

After creating a custom thank you page, you can display it when a user submits a form.

For example, you can show social media icons when a visitor signs up for an email newsletter using a form. This way, they can also follow you on different social platforms and help grow your followers.

Similarly, if a user fills out a feedback form, then you can show useful guides, videos, or promote your best content on the thank you page.

With WPForms, you can easily create all types of forms on your website and show a custom thank you page. It is the best WordPress contact form plugin that offers pre-built templates and lots of customization options.

For more details, please see our guide on how to create a contact form in WordPress.

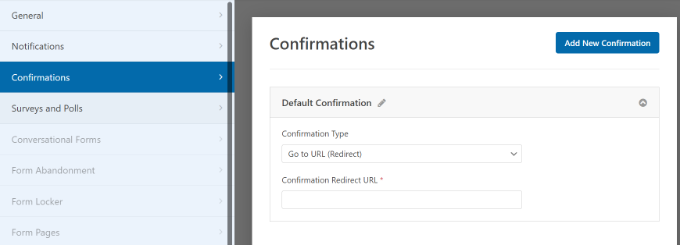
To display your custom thank you page, go ahead and edit a form in WPForms. When you’re in the form builder, simply go to the Settings » Confirmations tab.

Edit form confirmation settings

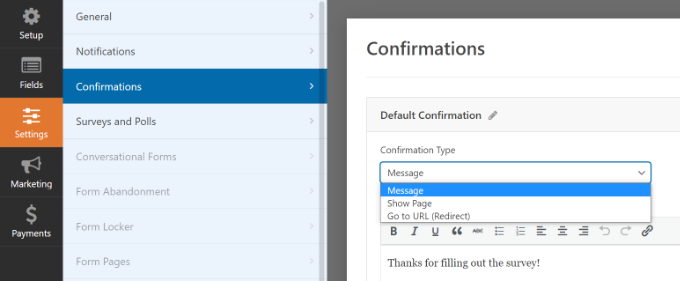
Under the Confirmation Type dropdown menu, simply select the ‘Go to URL (Redirect)’ option.

After that, enter the URL for your thank you page in the ‘Confirmation Redirect URL’ field.

Enter your thank you page URL

Whenever a user fills out and submits a form on your website, they’ll see the custom thank you page you created.

Show a Thank You Page Upon Product Purchase in WooCommerce

If you have a WooCommerce store, then you can show your custom thank you page when a customer purchases your product.

WooCommerce has a default thank you page, but it’s not optimized for conversions. However, you can replace it with your own to get more sales.

For example, you can upsell products on a thank you page, offer exclusive discounts, display the latest promotional campaigns, and more.

Thank you page preview

We have a full guide on how to easily create custom WooCommerce thank you pages that will walk you through the entire process, step-by-step.

Show a Custom Thank You Page on Your Membership Site

You can also display your thank you page on a membership website when someone purchases a subscription to access exclusive content or enrolls in an online course.

With MemberPress, you can easily set up a membership site. It is the best WordPress membership plugin, and you can use it to sell premium content, subscriptions, digital downloads, and more.

You can learn more by following our ultimate guide to creating a WordPress membership site.

Once you’ve set up memberships, all you have to do is head to MemberPress » Settings from your WordPress dashboard and select the ‘Pages’ tab.

Choose custom thank you page for membership site

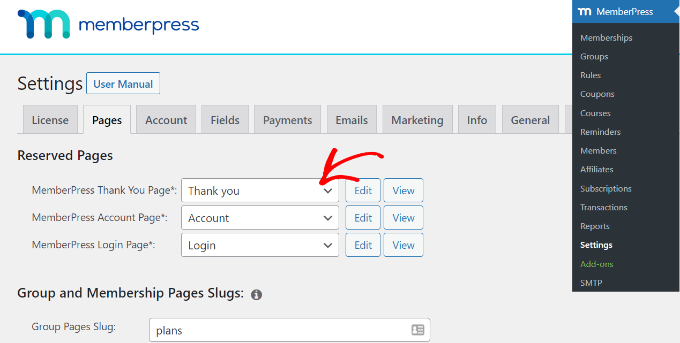
From here, you can click the ‘MemberPress Thank You Page’ dropdown menu and select the custom thank you page.

This way, customers will be redirected to your thank you page whenever they complete the registration or subscription process.

Show a Thank You Page After Comment Submission

Another situation where displaying a custom thank you page is beneficial is after comment submission.

When a visitor submits a comment on your WordPress blog, you can take this opportunity to show your most popular articles or evergreen content through a thank you page.

First, you’ll need to install and activate the Yoast Comment Hacks plugin. For more details, please see our guide on how to install a WordPress plugin.

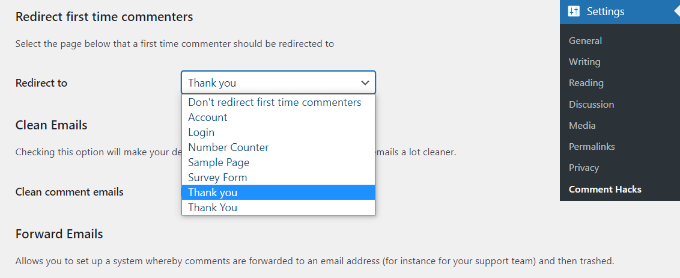
Upon activation, you can go to Settings » Comment Hacks from your WordPress dashboard.

Next, scroll down to the ‘Redirect first time commenters’ section. Now, click the ‘Redirect to’ dropdown menu and select your custom thank you page.

Redirect users to thank you page on comment submission

Save your settings, and the thank you page that you selected will appear any time a visitor leaves a comment for the first time.

You can see our detailed guide on how to redirect users after form submissions in WordPress for more information.

We hope this article helped you learn how to create a thank you page in WordPress. You may also want to see our ultimate WordPress SEO guide for beginners and the must-have WordPress plugins for business websites.

If you liked this article, then please subscribe to our YouTube Channel for WordPress video tutorials. You can also find us on Twitter and Facebook.

The post How to Create a Thank You Page in WordPress first appeared on WPBeginner.


December 06, 2022 at 04:26PM

Monday, December 5, 2022

How to Add Featured Video Thumbnails in WordPress

Do you want to use video for featured thumbnails in WordPress?

By replacing a post or product’s featured image with a featured video, you can make your website much more vibrant and dynamic. Visitors can view these videos from nearly anywhere including your blog archives, homepage, and WooCommerce product pages.

In this article, we will show you how you can add featured video thumbnails in WordPress.

How to add featured video thumbnails in WordPress

Why Add Featured Video Thumbnails in WordPress?

All popular WordPress themes allow you to add featured images to your posts and products.

These are the primary images, and they often appear at the top of the page and other areas of your site such as your website’s archive pages. Search engines and social media sites may also display a page’s featured image.

A good featured image can get you a lot of user engagement. However, you may be able to get more clicks, pageviews, and even sales by using a featured video thumbnail instead.

If you’ve created an online store, then showing a video at the top of the product page is a great way to make shoppers want to scroll and learn more about that product.

An example of a featured video thumbnail

With that being said, let’s see how you can add featured video thumbnails in WordPress.

How to Add Featured Video Thumbnails in WordPress

The easiest way to use videos as featured thumbnails is by using Really Simple Featured Video. This plugin lets you embed videos from popular video hosting websites such as YouTube or Vimeo and use them as featured video thumbnails.

It also works perfectly with WooCommerce and will show the featured video at the top of the product page.

However, just be aware that WooCommerce will show the featured video on the product page only. The featured image thumbnail will still be used in other places, including your WooCommerce store page.

First, you’ll need to install and activate the plugin. If you need help, then please see our guide on how to install a WordPress plugin.

After activation, there are a few settings to configure. To get started, go to Settings » Really Simple Featured Video.

The Simple Featured Video settings

On this screen, you can select whether you want to add featured video thumbnails to pages, posts, or WooCommerce products.

To do this, simply click on the ‘Posts,‘ ‘Pages’ or ‘Products’ switches to turn them from grey (disabled) to purple (active). In the following image, we’ve enabled the featured video feature for products, plus posts and pages.

Enabling featured video thumbnails for posts, pages, and products

After that, click on the ‘Save changes’ button.

Next, click on the ‘Controls’ tab. Here, you’ll find a ‘Self-hosted videos’ section where you can configure the settings for the videos in your WordPress media library.

Changing the featured video thumbnail settings

While the plugin does support self-hosted videos, this can take up a lot of storage space and bandwidth so we don’t recommend it. To learn more, check out why you should never upload a video to WordPress.

Instead, scroll to the ‘Embed Videos’ section. This is where you will find settings for any videos you embed from third-party video platforms such as YouTube.

When you embed videos from YouTube or Vimeo, Really Simple Featured Video will show the playback controls for that platform.

For example, if you’re embedding a YouTube video then visitors will have access to YouTube’s specific playback features.

However, the ‘Embed videos’ section does have an ‘Autoplay’ switch that you can click to enable, too.

Enabling autoplay for WordPress featured thumbnail images

By default, the plugin will play videos with sound turned on. To mute your videos by default, click on the ‘Mute sound’ toggle.

You can also set the featured video thumbnails to play on loop.

Looping videos can be annoying to many visitors, particularly if the video is short and has sound. It’s a good idea to only activate the ‘Loop’ switch if replaying the video over and over improves the visitor experience in some way. For example, you might create a video showing a 360 degree view of a product and then set that clip to loop.

Embedding a video

After working your way through the different settings, make sure you click on the ‘Save Changes’ button.

Adding Featured Video Thumbnails to Posts, Pages, and WooCommerce Products

Once you’ve configured how the plugin will show embedded videos, you’re ready to add featured video thumbnails to your WordPress website.

To do this, simply open the post, page, or WooCommerce product where you want to add a featured video thumbnail.

If you’re adding a featured video to a page or post, then you’ll find the ‘Featured Video’ section in the right-hand menu underneath the ‘Discussion’ section.

Adding a featured video to a WordPress post

Want to add a featured video to a WooCommerce product instead?

Then you’ll find the ‘Featured Video’ section underneath the ‘Product gallery‘ section.

The Featured Video settings on the product screen

To use a video from a video hosting site, simply click on ‘Embed.’

In the new field, you’ll need to paste the URL of the video that you want to embed.

Adding a featured video thumbnail in the WordPress post editor

Just make sure that you add the video’s URL in the right format. In the right-hand menu, you’ll see some examples for YouTube, Vimeo, and Dailymotion.

For YouTube, the plugin gives us the following example URL: https://www.youtube.com/embed/vbLgiRQ0Moo

This means you’ll need to use https://www.youtube.com/embed/ as the first part of your URL and then add the ID of the video that you want to embed.

To find the video ID, simply open a new tab in your browser, then go to the YouTube video that you want to embed. Now, take a look at the browser’s address bar.

The video ID is the value that comes after v=. In the following image, we can see that the video ID is DvbFBxKcORA.

The WPBeginner YouTube channel

After adding the video ID to the first part of the URL, we get the following: https://www.youtube.com/embed/DvbFBxKcORA

You can now go back to the tab with the WordPress block editor and just paste the URL into the ‘Embed’ field. That will add a featured video thumbnail to the post, and then you’re ready to click on either the ‘Update’ or ‘Publish’ button.

You can now add featured video thumbnails to more posts, pages, and WooCommerce products by following the same process described above.

On your blog archive or similar page you’ll see that WordPress is now using the videos as the featured thumbnail for your posts and pages.

If you open any page, post, or WooCommerce product, then you’ll see that the featured video also appears at the top of the page, just like a featured image would.

An example of a WooCommerce featured video

We hope this article helped you learn how to add featured video thumbnails in WordPress. You can also go through our guide on the best YouTube video gallery plugins for WordPress and how to embed a Facebook video.

If you liked this article, then please subscribe to our YouTube Channel for WordPress video tutorials. You can also find us on Twitter and Facebook.

The post How to Add Featured Video Thumbnails in WordPress first appeared on WPBeginner.


December 06, 2022 at 01:11AM

How to Use WordPress Recovery Mode (2 Ways)

Do you want to use WordPress recovery mode to fix an error on your website?

The recovery mode feature was introduced in WordPress 5.2, and it allows you to easily to fix fatal errors on your site that can make WordPress’s backend or frontend inaccessible.

In this article, we will show you how to use recovery mode in WordPress.

How to Use Recovery Mode in WordPress

What is WordPress Recovery Mode

If you’re encountering a WordPress error that’s preventing you from logging into your website, then WordPress will automatically shift into recovery mode.

Recovery mode allows you to access your WordPress admin dashboard by sending a link to your administration email. This email contains details about the error that’s preventing users from accessing their WordPress website.

You can use the link to access your admin dashboard and fix the issue.

For example, your WordPress site may show you a critical error and blocks you from logging into your dashboard.

This is when you can use the WordPress recovery mode feature to regain access. Let’s see how you can use the WordPress recovery mode.

Note: Keep in mind to always back up your WordPress site before attempting to enter recovery mode. If you cannot access your admin area, then check out our guide on how to create a WordPress database backup manually.

Method 1. Using Recovery Mode Through The Email Link

If a WordPress plugin or theme causes an error, then recovery mode can be used to fix it.

You might see a plain white screen when trying to access your account. Sometimes, a message is also shown on the screen.

Site is experiencing technical difficulties

If that is the case, immediately log in to your administrator email account. Keep in mind to check the inbox of the email address that you provided as the administrator email address to WordPress.

You will receive an email to your WordPress email address that will inform you about the specific error on your website. If WordPress can determine the cause of the outage, this email will have that information.

For example, if there is a file corrupted in your theme directory or a plugin incompatibility, WordPress may be able to tell.

The email will also give you a link to access your WordPress admin dashboard.

Email from WordPress about technical problem in your site

Simply click the provided link, and you will be taken to the WordPress admin area. Here, you will see a banner telling you that Recover Mode has been initalized.

You can then log in as normal.

log into your account

Once in your admin panel, you can deactivate the theme or plugin that’s causing the issue.

Simply go to Plugins » All Plugins and then click the ‘Deactivate’ link under the right one.

Deactivate the faulty plugin

If the email sent by WordPress did not specify the plugin or theme that’s causing the error, then you should deactivate all the plugins. After that, try logging into your account.

You can figure out the faulty plugin by then activating the plugins one by one. Once you find the faulty plugin that’s causing the issue, you can find an alternative plugin for it or get support from the plugin developers.

Recovery mode dashboard

If for some reason your website is showing a plain white screen but you haven’t received any email from WordPress, then you can try method 2 to use recovery mode.

You can use this method to access recovery mode without any email link. You can simply create a WordPress recovery mode link by following the link below to access recovery mode.

example.com/wp-login.php?action=entered_recovery_mode

All you have to do is replace example.com with your own site’s domain name.

Recovery mode URL

This URL will take you to your WordPress admin area where you’ll be asked to log in.

Here you will see an alert that you are logging into Recovery Mode.

log into your account

Now you can fix any error on your site.

Keep in mind that if you use this method to manually access the Recovery Mode login page, WordPress won’t locate the plugin or theme that’s causing the error itself. You will need to do some work to figure that out on your own.

You can start by simply changing your theme or deactivating all your plugins. This should fix whatever error was occurring and you will be able to access your WordPress website.

From there, you can reactivate plugins one by one to find the issue, or you can even roll back your theme or WordPress version to an earlier one that wasn’t incompatible.

Bonus: Additional Recovery Mode Options

If you’re not clear about the error on your website that’s preventing you from logging in, then you can also try these two options in recovery mode to solve your problem:

  • Download a site health plugin to diagnose issues
  • Run a malware scan to be sure your site or server hasn’t been compromised

For example, you can install and activate the Health Check & Troubleshooting plugin. For more instructions, see our guide on how to install a plugin in WordPress.

Download a plugin in recovery mode

Once you activate this plugin, it will perform a number of checks on your WordPress site and will detect common errors that may be causing the fluctuation.

Sometimes, malware on your website may be causing the error. You can use recovery mode to scan your website for malicious code and create a completely secure website. For help, you can check out our ultimate WordPress security guide.

You can also ask your WordPress hosting provider for support. If you’re using a top WordPress hosting company like Hostinger, Bluehost, WPEngine, and SiteGround, then their support team will be able to help you resolve the issue.

That’s it! We hoped you learned how to use recovery mode in WordPress. You may also want t check out our pick of the best WordPress SEO plugins and our tutorial on how to fix the critical error in WordPress.

If you liked this article, then please subscribe to our YouTube Channel for WordPress video tutorials. You can also find us on Twitter and Facebook.

The post How to Use WordPress Recovery Mode (2 Ways) first appeared on WPBeginner.


December 05, 2022 at 04:34PM

Friday, December 2, 2022

11 Best WordPress Login Page Plugins (Secure & Customizable)

Are you looking for the best WordPress login page plugins?

Your WordPress login page is the door to your website’s admin area. You need to make it secure, but you also need to let authorized users log in easily.

In this article, we will share some of the best WordPress login page plugins you can use.

Best WordPress Login Page Plugins

Improving the Security and Appearance of the WordPress Login Page

The default WordPress login page looks the same on all WordPress sites. It is very plain and doesn’t have any of your site’s styling or branding:

The WordPress default login page

Maybe you run a membership site. Perhaps you have multiple people who log in to your WordPress site. In either case, it’s best practice to customize the login page. This lets you make it look good and create a better user experience.

Plus, you may want to make logging in as seamless as possible without compromising WordPress security.

Let’s take a look at some of the best WordPress login page plugins. These can improve the login experience and security of your website.

1. SeedProd

SeedProd website builder

SeedProd is the best WordPress theme and landing page builder. It allows you to create completely custom website pages without writing any code.

SeedProd comes with a login landing page template that lets you change your default WordPress login page into a personalized login page designed to boost conversions.

Here’s a custom WordPress login page template from SeedProd:

Custom Login Page for WordPress

You can also use SeedProd to create custom login pages that cross promotes your other products, show existing users loyalty discounts, introduce new products, and more.

Login pages are a hidden revenue opportunity that many businesses do not utilize. If you have an online store or a membership site, then this plugin is a must for your site.

2. WPForms

The WPForms form builder plugin and signature addon

WPForms is the best WordPress form builder plugin. And it comes with powerful user registration and login addon.

WPForms allows you to create custom user registration and login forms with just a few clicks.

It’s easy to add these forms anywhere on your WordPress site. Plus, you can use them as payment forms so that users need to pay to register.

For detailed instructions, see our guide on how to create a custom login page in WordPress

3. Theme My Login

Theme My Login

Theme My Login is a popular plugin for creating custom WordPress login pages. You can also use it to let users register on your WordPress site without them accessing the admin area.

You can use any page on your site as the login, registration, and ‘forgot my password pages.

For more details, see our guide on how to create a custom login page using Theme My Login.

4. Temporary Login Without Password

Temporary Login Without Password

Temporary Login Without Password lets you give users access without creating an account. You can set an expiry date or time for the temporary login or delete it at any time.

This is a good option if you need to give WordPress developers access to your site. You don’t need to create a permanent account for them.

For detailed instructions, see our guide on how to create a temporary login for WordPress.

5. Shield Security

Shield Security

Shield Security is a multipurpose plugin. It can perform a number of useful security features for your site.

By default, WordPress does not lock users out if they try the wrong password multiple times. Shield Security lets you limit login attempts and block brute force bots automatically.

It also has features to stop comment spam, help you control automated WordPress updates, and more.

6. Nextend Social Login

Nextend Social Login

Nextend Social Login lets users log in to your WordPress site using Facebook, Google, or Twitter. That way, they can log in more quickly. They don’t need to create a separate password for your site.

The plugin is easy to set up and use. You can set a custom redirection URL to send users to a specific page after registering. You could also use their Facebook, Google, or Twitter profile picture as their avatar on your site.

7. WordPress Persistent Login

WordPress Persistent Login

WordPress Persistent Login automatically checks the ‘Remember Me’ checkbox on your WordPress login page. Normally, if you don’t check this box during login, WordPress will forget your login as soon as you close the browser window.

The plugin also extends the default login status for one year whenever you visit the login page. If you’re running a membership site, then these settings will also apply to your users.

It lets you force log out users from your WordPress admin in a single click. You can monitor the total number of users logged in on your site.

8. Custom Login Page Customizer

Custom Login Page

Custom Login Page Customizer lets you design your own custom login page using the WordPress theme customizer.

You could change the login page using other methods. However, many of them require you to add code. Custom Login Page Customizer makes it much easier for you.

9. Simple History

Simple History

Simple History makes it easy to track user activity on your WordPress site, including user logins. It keeps a simple and easy-to-understand log of basic user activity, which comes in handy to protect your website.

The plugin lets you see when a user logged in and what they did during their session. You can also see when they logged out.

For more details, see our guide on how to monitor user activity in WordPress.

10. Password Protected

Password Protected

Password Protected allows you to easily make your whole WordPress site password protected. You can allow admins and logged-in users to view it. You can also create a master password to share with others.

For step-by-step instructions, see our guide on how to password protect your WordPress site without user registration.

11. LoginWP

LoginWP

LoginWP allows you to redirect users to any page on your website after they log in. You can set up these redirects based on user roles and capabilities.

It can also be used to set up a redirect for individual users. This could be useful if you have several people working on different parts of your site.

The plugin also allows you to set up redirects for user registration forms as well. This enables you to properly greet newly registered users, give them instructions about the next step, or simply show them a thank you note.

For more details, see our article on how to redirect users after successful login in WordPress.

Which is the Best WordPress Login Page Plugin? (Expert Pick)

We believe SeedProd is the best WordPress login page plugin. It lets you set up your custom login page in just a few clicks and is easy for beginners.

WPForms is another great option if you’re looking for an overall form builder because it comes with user registration forms, login forms, and more.

We hope this article helped you find the best WordPress login page plugins for your website. You may also want to see our list of the top WordPress plugins for business websites and our comparison of the best business phone services for entrepreneurs.

If you liked this article, then please subscribe to our YouTube Channel for WordPress video tutorials. You can also find us on Twitter and Facebook.

The post 11 Best WordPress Login Page Plugins (Secure & Customizable) first appeared on WPBeginner.


December 03, 2022 at 12:56AM