Do you want to create a viral TikTok giveaway in WordPress?
Giveaways can help grow your TikTok channel and get you more views. They’re also a great way to engage with the people who already watch your TikToks and encourage them to watch even more of your videos.
In this article, we’ll show you how to create a viral TikTok giveaway in WordPress.

Set Your Giveaway Goals
First, you need to decide what you want to achieve with your giveaway. For TikTok, you’ll typically either want to gain more followers or get more views on a particular video.
After choosing a goal, you can plan how to get the best value from your giveaway.
If you want to get more views on a particular video, then it’s important to choose the video carefully. For example, if you have a new product, then you might ask visitors to watch a TikTok promoting that product.
If a big TikTok influencer has recently praised your company, then you might ask people to watch their video.
If you’re planning to use ‘Follow us on TikTok’ as an entry method, then it’s smart to review your TikTok profile before launching the contest. New followers may watch your most recent TikToks, so you’ll want to make sure they’re interesting, entertaining, and recent.
You should also add any missing information to your TikTok bio so new followers can learn more about your company. It’s also a good idea to add a link to your website, or you might even make a special ‘link in bio’ page.
By fine-tuning your TikTok page now, your new followers will be more likely to stick around long after the contest is over.
Choose a Prize for your TikTok giveaway
The next step is choosing a prize that will make your target audience want to take part in your TikTok giveaway.
The prize doesn’t have to be expensive, but it should reflect your business niche and your target audience. This will attract relevant followers to your TikTok page, which means they’ll be more likely to engage with your company in the future.
For example, if you run a restaurant, then a discounted or free meal could be a great prize. If you run a skincare blog, then you might offer a bundle of your favorite products.

Once you’ve planned your giveaway, it’s time to set it all up in WordPress.
Install a WordPress Giveaway Plugin
The easiest way to create a viral TikTok is by using RafflePress. It’s the best WordPress giveaway plugin that lets you create all kinds of contests using a simple drag-and-drop editor.
There is a free version of RafflePress that allows you to run giveaways and competitions no matter your budget. However, in this guide, we’ll be using RafflePress pro because it has a ready-made template for running a viral TikTok giveaway.
First, you’ll need to install and activate the RafflePress plugin. If you need help, then please see our guide on how to install a WordPress plugin.
Upon activation, you’ll see the RafflePress welcome screen in the WordPress dashboard. You can now go ahead and enter your license key.
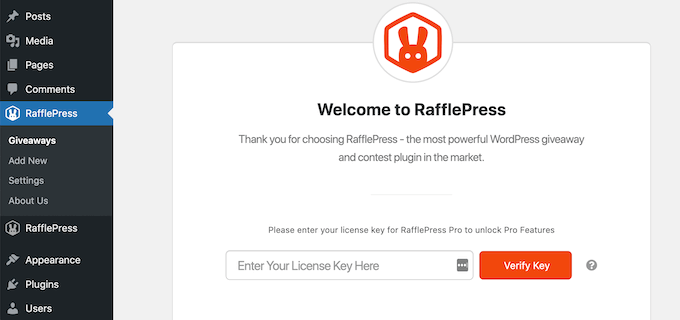
You’ll find this information in your account on the RafflePress website. Once you’ve done that, click on the ‘Verify Key’ button.
Create a Viral TikTok Giveaway in WordPress
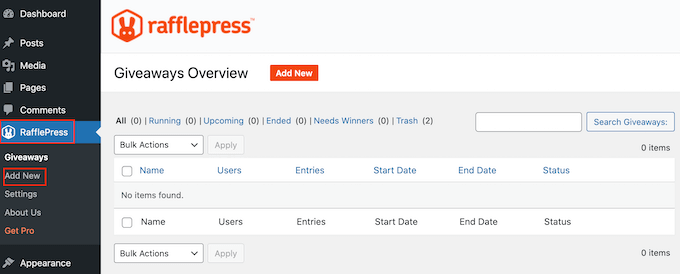
Now you’re ready to create a TikTok giveaway by going to RafflePress » Add New.
On the next screen, give your TikTok contest a name by typing into the ‘Giveaway Name’ field.
This is just for your reference so you can use anything you want.
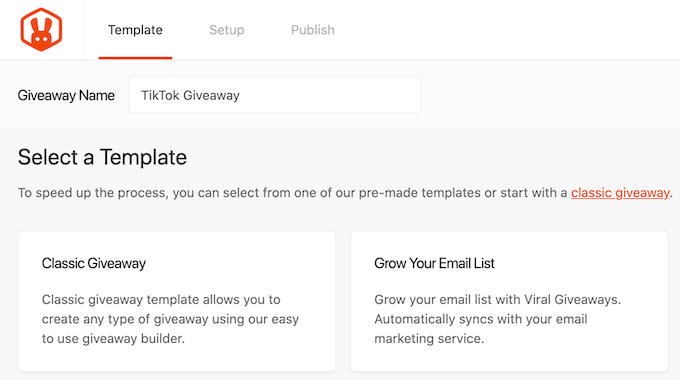
Now you’re ready to choose the template that you want to use. RafflePress has templates for specific goals such as creating a giveaway to grow your email list and adding a Facebook giveaway to boost engagement.
We’ll be using the Grow Your TikTok template since it already comes with two TikTok entry methods. Simply hover your mouse over the template and then click on ‘Use This Template’ when it appears.

This opens the template in RafflePress’ drag-and-drop builder.
Since it’s so important, let’s start by adding some information about the prize. Just click to select the headline area, which shows ‘My Awesome Prize’ by default.
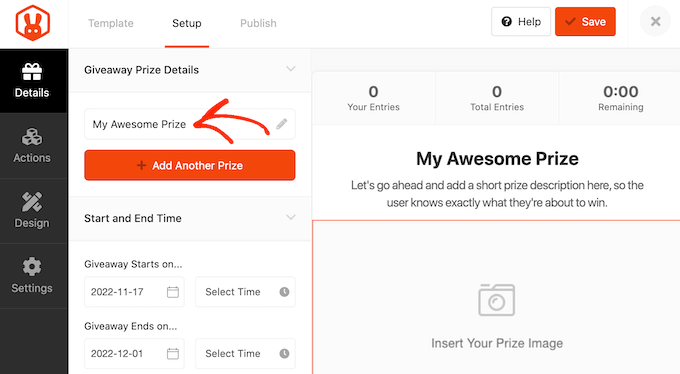
You can now go ahead and type a title into the ‘Name’ field.
To encourage visitors to enter, you may want to talk about how much the prize is worth, its benefits, and why people will want it.
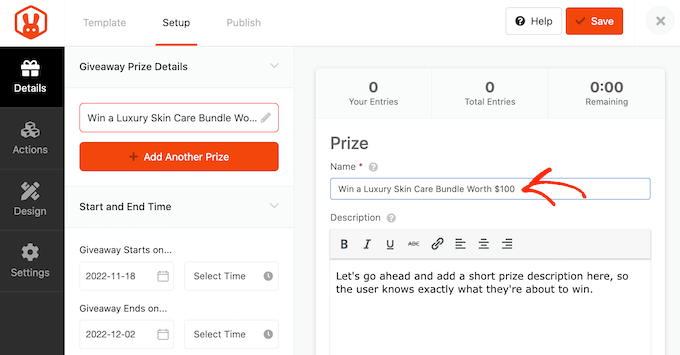
Once you’ve done that, type in a description, which will appear below the headline.
Here, you may want to add some more information about the TikTok giveaway such as why you’re running the contest, and how people can enter.
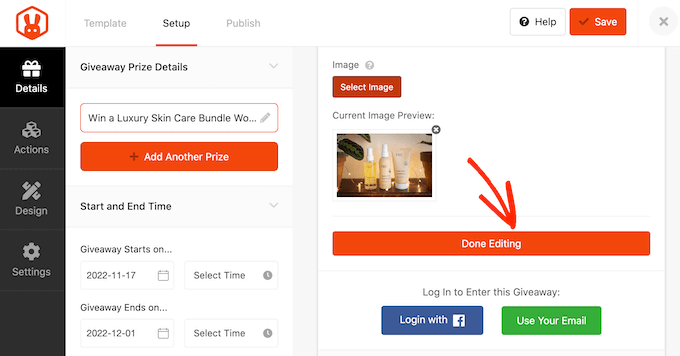
It’s also a good idea to add a photo of the prize, so visitors can see exactly what’s at stake. If the product is digital, then you can show the product’s logo instead or create a picture using web design software such as Canva.
To add a picture, simply click on ‘Select Image.’
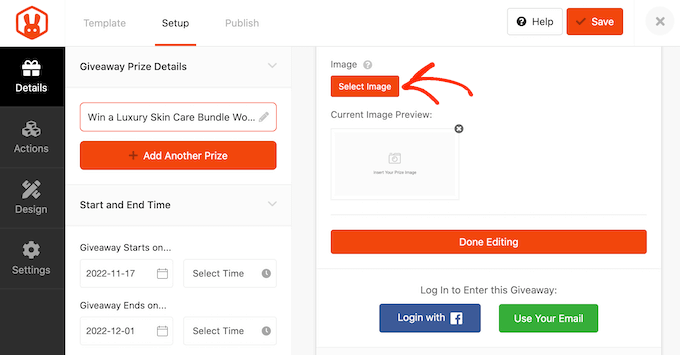
Then, either choose an image from the media library or upload a new file from your computer.
When you’re happy with how the section looks, click on ‘Done Editing.’
You can close your TikTok giveaway manually at any point, or you can set a date and time when the contest will end automatically.
If you have lots of giveaways planned, then it’s smart to schedule them in advance so your contests always start on time, no matter how busy you get. Scheduling contests in advance also gives you plenty of time to promote and market the contest.
To schedule your TikTok competition, simply enter a date and time into the ‘Giveaway starts…’ and ‘Giveaway ends…’ sections.
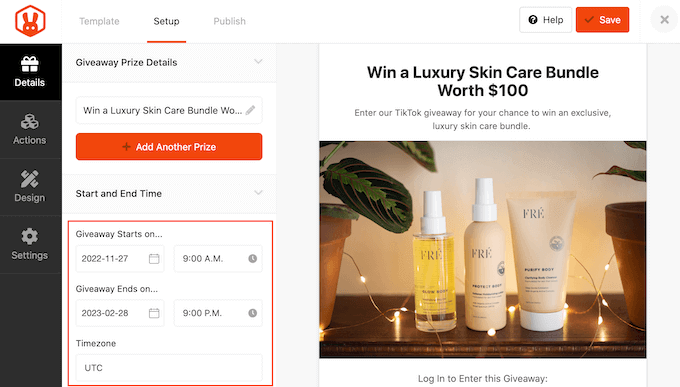
By default, RafflePress uses the UTC timezone, but you can change this using the ‘Timezone’ dropdown menu.
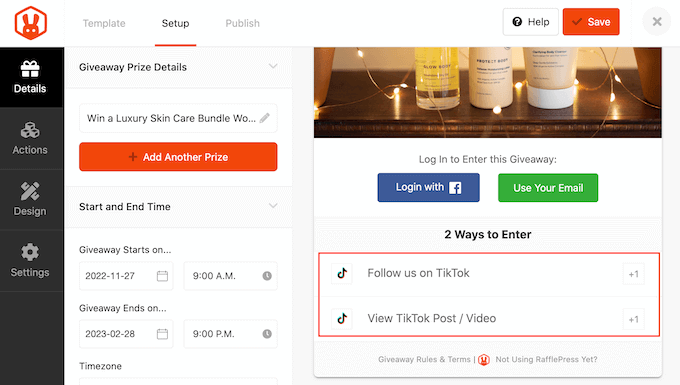
Set up your TikTok Giveaway Entry Actions
Your next task is choosing how visitors will enter the giveaway.
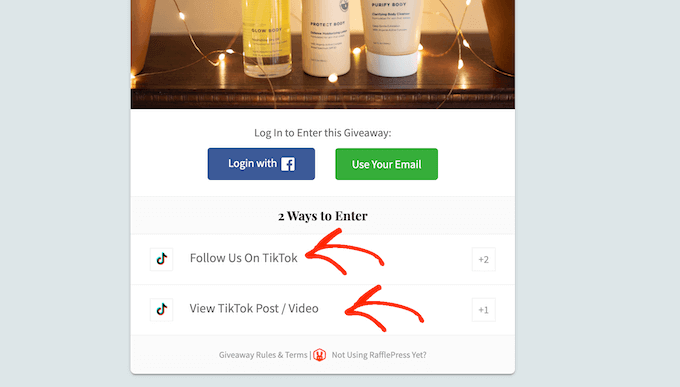
The TikTok template already has the ‘Follow us on TikTok’ and ‘View TikTok Post/Video’ actions, so let’s start by configuring these entry methods.
First, click to select the ‘Follow us on TikTok’ action. In the left-hand menu, you’ll see all the settings for this action.
By default, the action uses a ‘Follow us on TikTok’ label but you can change this to anything you want by typing into the ‘Title’ field.
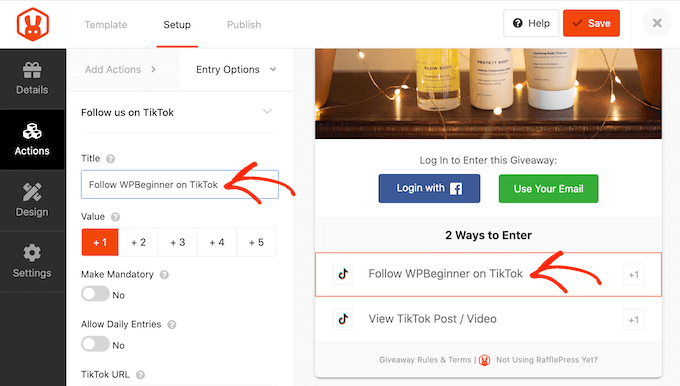
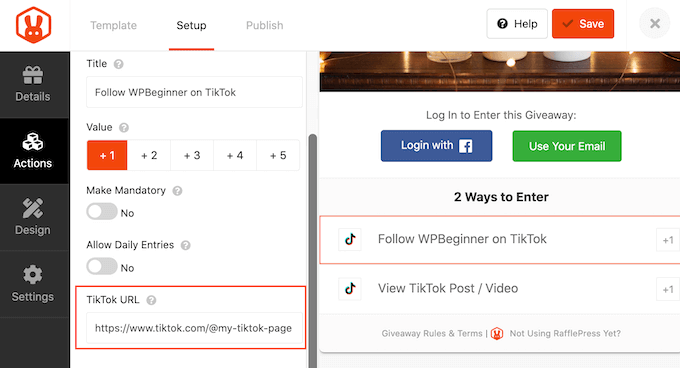
Next, find the ‘TikTok URL’ field and add the link to your own TikTok profile.
Every time someone clicks on this action, they’ll see a ‘Follow us on TikTok’ button and a field where they can type in their TikTok username.
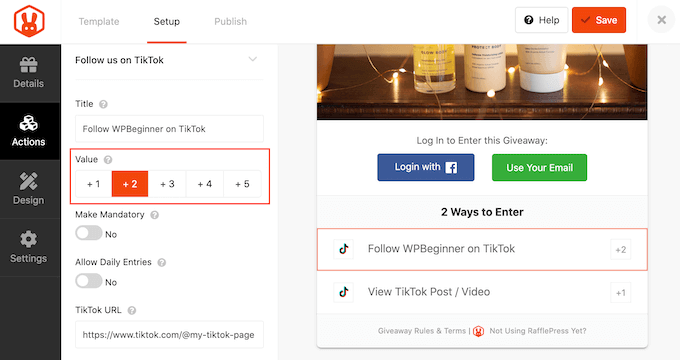
By default, every action is worth one entry. However, you can encourage visitors to choose one entry method over all the others by changing its value. For example, if you want to get more followers, then you might make the ‘Follow us on TikTok’ action worth multiple entries.
To make this change, simply select a new number in the ‘Value’ section.
You can also make the ‘Follow us on TikTok’ action mandatory so visitors can only enter the contest if they follow you on TikTok.
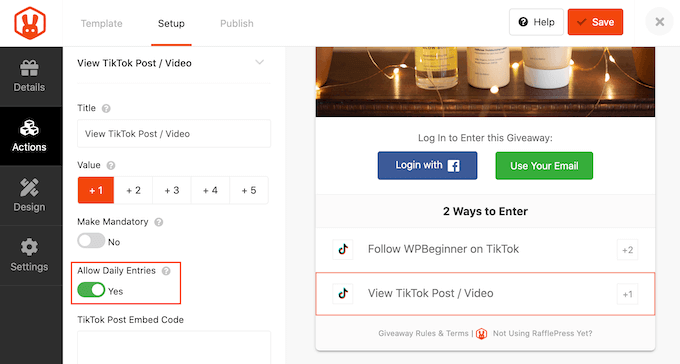
When you’re happy with how the ‘Follow us on TikTok’ action is set up, click to select the ‘View TikTok Post / Video’ action.
You can now change the action’s title and value, and then make it mandatory by following the same process described above.
To get as many views as possible, you may want to enable the ‘Allow Daily Entries’ toggle. This will allow users to earn extra entries by watching your TikTok video multiple times.
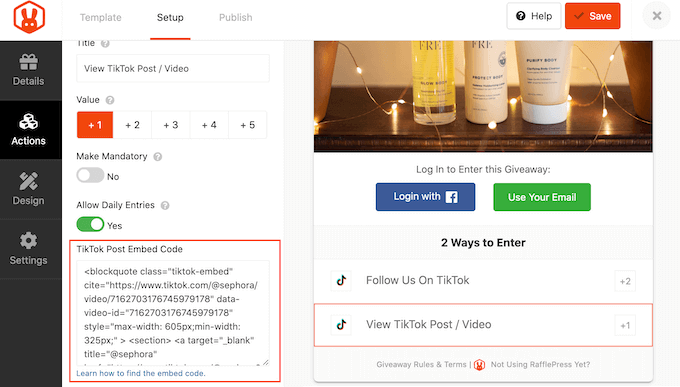
After that, it’s time to specify the TikTok video that you want visitors to watch.
RafflePress will embed this video inside the contest, as you can see in the following image.

In a new browser tab, simply visit the TikTok video that you want to add, and then click on the ‘Embed’ button.
In the popup that appears, click on ‘Copy Code.’

After that, switch back to your WordPress dashboard.
You can now paste the code into the ‘TikTok Post Embed Code’ field.
At this point, you’ve configured both of your TikTok entry methods. However, not everyone has a TikTok account or is familiar with the TikTok platform.
Currently, these people can’t enter your competition, so you may want to add some additional entry methods that aren’t related to TikTok.
For example, visitors might enter your competition by joining your email newsletter or following you on Instagram.
Giving visitors multiple choices for entries can get you more participants. Some people may also try to improve their chances of winning by completing several actions. This allows you to achieve multiple goals with a single competition.
To add more entry methods, simply click on the ‘Add Actions’ tab. Then, just click on any action to add it to the competition.
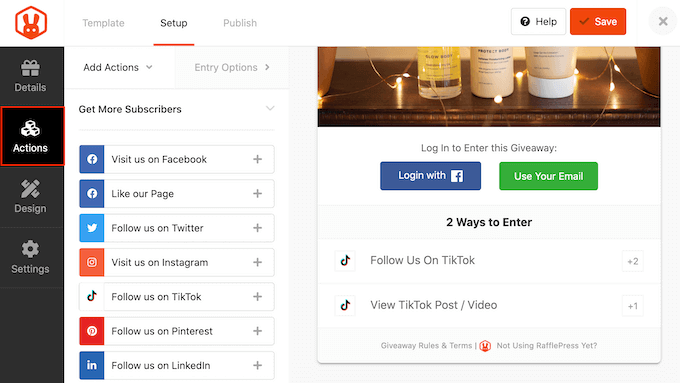
Once you’ve done that, just click on the action in the giveaway editor and then use the settings in the left-hand menu to configure that entry method.
For example, if you add ‘Join an Email Newsletter’ as an entry method then you’ll need to select an email marketing service.

You can add as many actions as you want. However, since our main aim is to create a viral TikTok giveaway you’ll typically want to show your TikTok actions at the top of the entry method list.
To move an action, just hover over that action in the editor and then grab the dotted button when it appears.
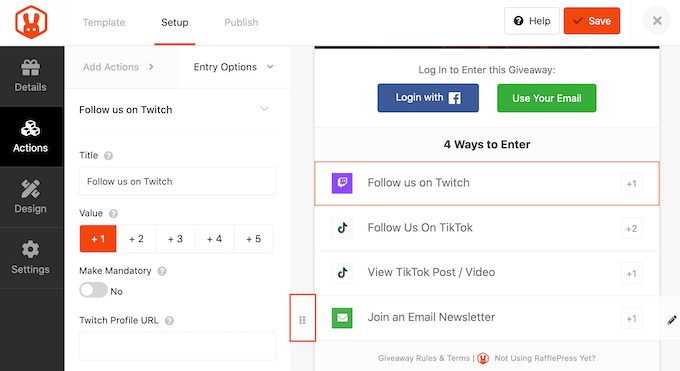
You’re now ready to move the entry method using drag and drop.
How to Customize your TikTok Giveaway
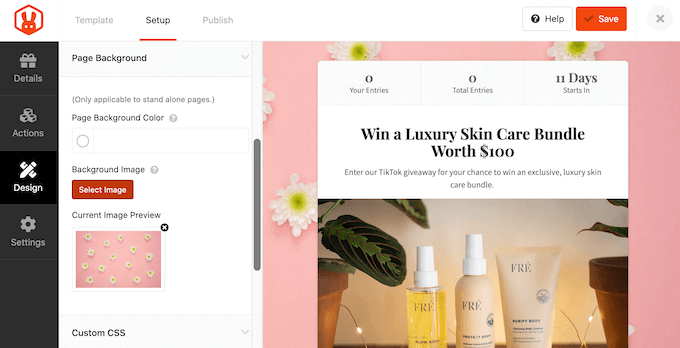
When you’re happy with how the giveaway is set up, it’s time to change how it looks by clicking on the ‘Design’ tab.

Here, you can change the fonts, select a new button color, change the layout, add a background image, and more.
By changing these settings you can create a beautiful TikTok giveaway that perfectly compliments your WordPress theme and the rest of your website.
You can even change the TikTok template using custom CSS.
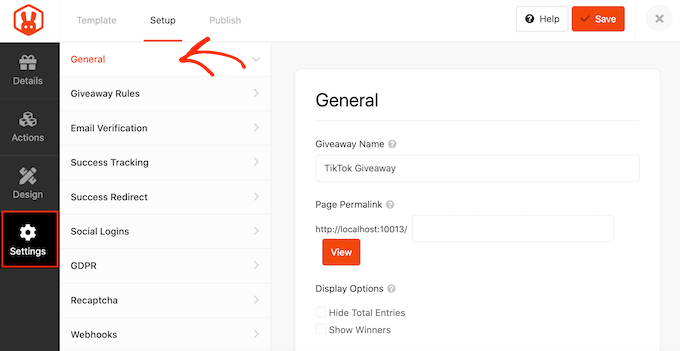
When you’re happy with how the competition looks, click on the ‘Settings’ tab.
Configure the TikTok Contest Settings
RafflePress has lots of settings that you can use to fine-tune how the giveaway runs, including showing and hiding options, setting up tracking, and more.
Most of these settings are self-explanatory, but we’ll quickly cover each section.
In ‘General’ you can set the basic options for the giveaway including showing the contest’s winners, the total number of entries, limiting signups based on IP address, and more.
You can also make money from your TikTok giveaway by joining the RafflePress affiliate marketing program.
Next up, click on the ‘Giveaway rules’ tab.
RafflePress comes with a Rules Generator that you can use to quickly and easily create giveaway rules for your TikTok campaign.
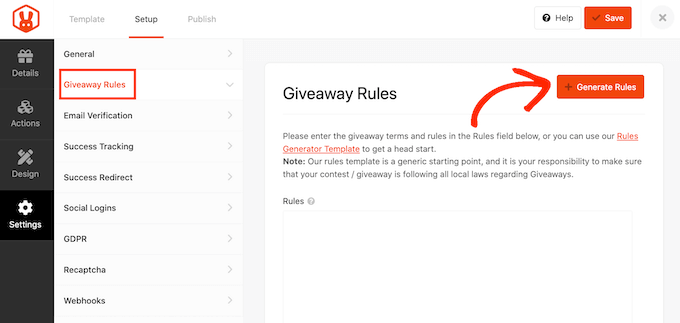
Clicking the ‘Generate Rules’ button will bring up a form where you can enter information about the giveaway.
In most cases, you or your company will be the contest’s sponsor. This means you’ll need to type in the company name, business email address, country, and eligible locations.
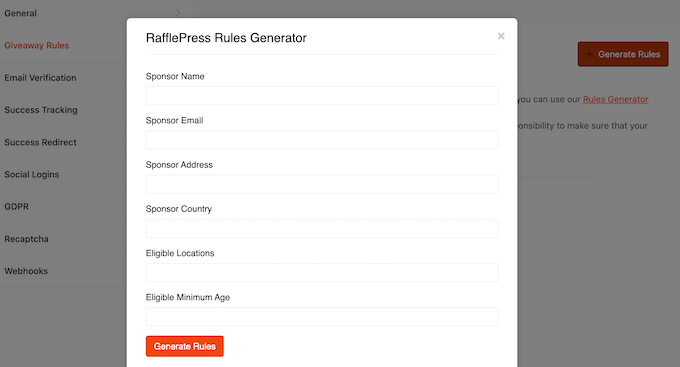
RafflePress will then use this information to create some basic rules for your giveaway.
Just be aware that this is a starting point. You’ll still need to make sure your giveaway is following all local laws and TikTok’s advertising guidelines. For example, you shouldn’t ask visitors to watch any videos featuring products that TikTok doesn’t allow on their platform.
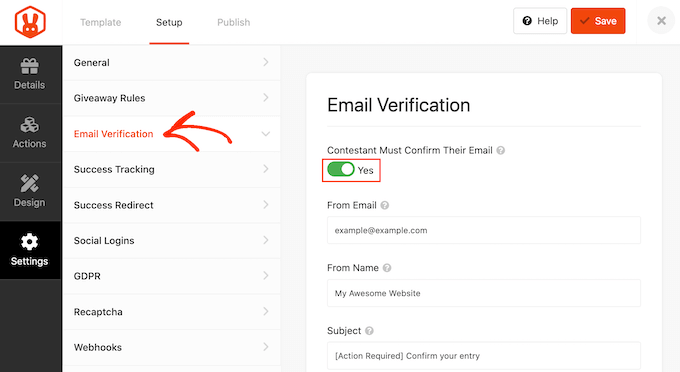
If you’re also using the TikTok contest to grow your mailing list or generate leads, then you may want to verify each participant’s email address by selecting the ‘Email Verification’ tab. It’s also a good idea to enable verification if you plan to email the giveaway’s winner.
To make this change, simply click on the ‘Contestant Must Confirm Their Email’ toggle to turn it from ‘No’ to ‘Yes.’
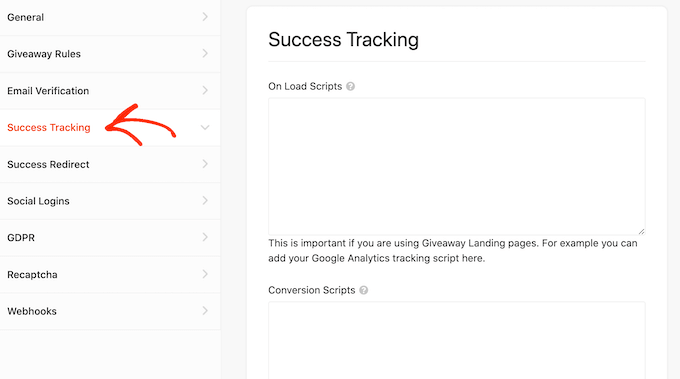
If you’re using Google Analytics to track user engagement, then you can select the ‘Success Tracking’ tab.
Here, you can add tracking scripts to record when the page loads or the visitor converts. In this example, conversion happens when the visitor successfully enters the TikTok giveaway.
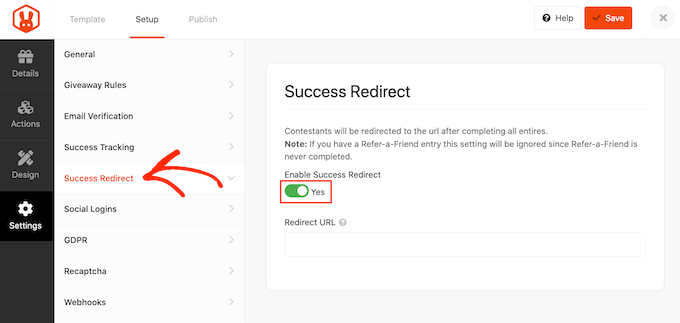
After entering the contest, you may want to redirect visitors to a specific page such as a custom thank you page or your top-performing TikTok.
To set up a redirect, select the ‘Success Redirect’ tab and then click to activate the ‘Enable Success Redirect’ toggle. You can then add the page to the ‘Redirect URL’ field.
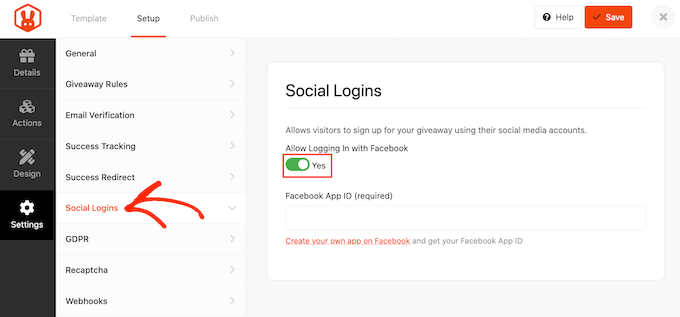
You may want to allow visitors to sign into your giveaway using their Facebook accounts. This will make it easier for people to enter your giveaway, which can get you more participants.
To allow logging in with Facebook, simply select the ‘Social Logins’ tab and then click to activate the ‘Allow logging…’ toggle.
The General Data Protection Regulation (GDPR) is a European Union (EU) law that aims to give EU citizens more control over their personal information. If you break GDPR then you could get a fine or even jail time, so you’ll want to make sure you’re GDPR compliant.
Thankfully, RafflePress has a checkbox that gets visitors to consent before entering your TikTok giveaway. To add the checkbox, simply select the ‘GDPR’ tab and then click to enable the ‘GDPR Consent’ toggle.

RafflePress has some default text that it’ll show next to the checkbox, but you can change this if you want.
For a closer look at this important privacy law, please see our ultimate guide to WordPress and GDRP compliance.
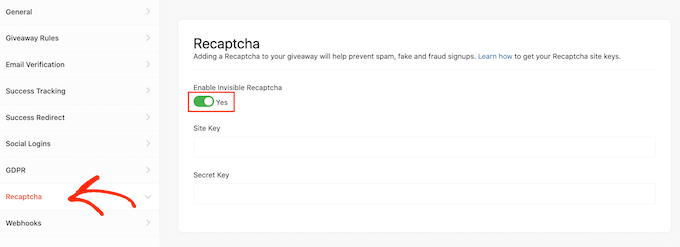
Spam and fake entries can stop you from reaching your goals. With that being said, you may want to protect the giveaway form using an invisible recaptcha.
Unlike standard captchas that ask visitors to complete a puzzle, invisible recaptchas run in the background. This allows them to block spam without hurting the user experience.
To add an invisible recaptcha to your TikTok contest, select the ‘Recaptcha’ tab. Then, click to activate the ‘Enable Invisible Recaptcha’ toggle.
For more on this topic, please see our guide on how to add recaptcha to WordPress.
When you’re happy with how your TikTok competition is set up, click on the ‘Save’ button.
Publish and Add the Giveaway to Your WordPress Website
After you’ve done all that, it’s time to make your giveaway live by clicking on the ‘Publish’ tab.
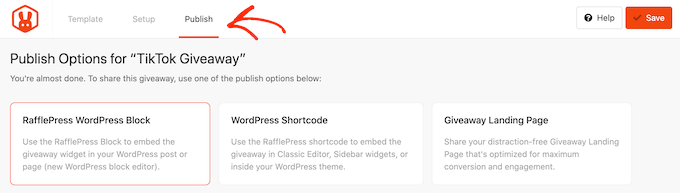
You can add the contest to your site using a shortcode, the RafflePress WordPress block, or by creating a landing page.
We’ll cover each method, but if you want to get as many entities as possible, then we recommend choosing the ‘Giveaway Landing Page’ option. This creates a separate page that you can easily share on social media, which can help your TikTok giveaway go viral.
To get started, click on ‘Giveaway Landing Page’ and then select the ‘Click here’ link.
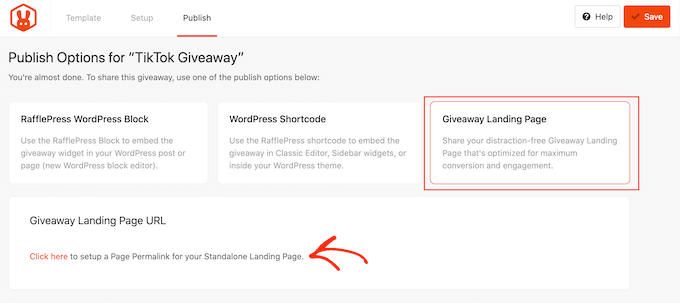
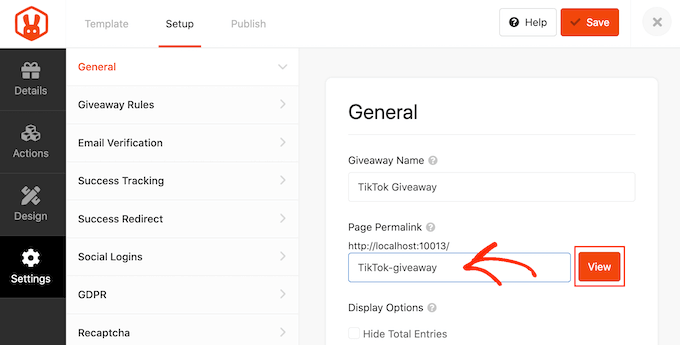
In ‘Page Permalink,’ type in the URL where you want to publish the giveaway landing page.
Then, go ahead and click on ‘View.’
RafflePress will now publish your giveaway as a landing page.
If you visit the URL, then you’ll see the giveaway live.

Another option is to add the giveaway to a post or page using the RafflePress block.
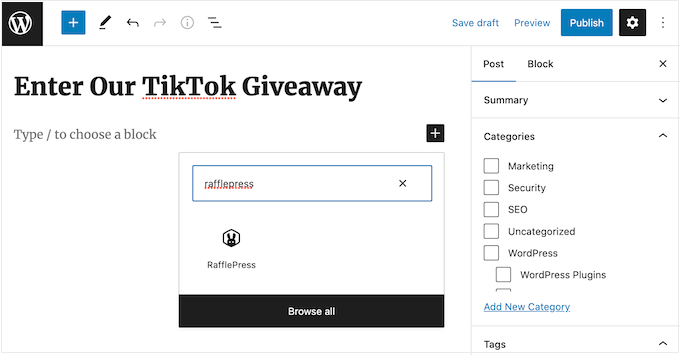
Simply open the post or page where you want to show your TikTok giveaway in the content editor. Then just click on the ‘+’ button and type in ‘RafflePress.’
When it appears, select the ‘RafflePress’ block.
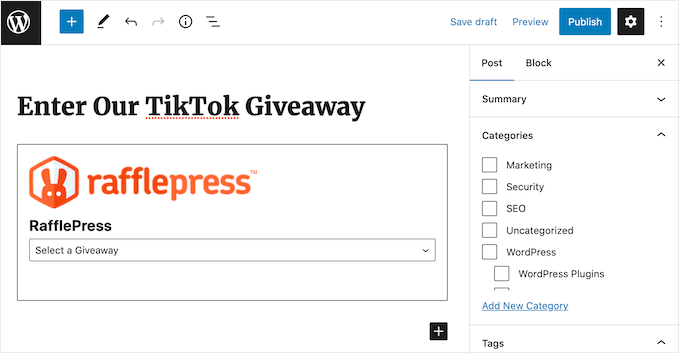
After adding the block, open the dropdown and choose your TikTok giveaway.
You can then either publish or update the page to make the contest live on your WordPress website or blog.
Another option is to add the contest to any page, post, or widget-ready area.
In the giveaway editor, click on ‘WordPress Shortcode’ and RafflePress will show the shortcode that you can use.
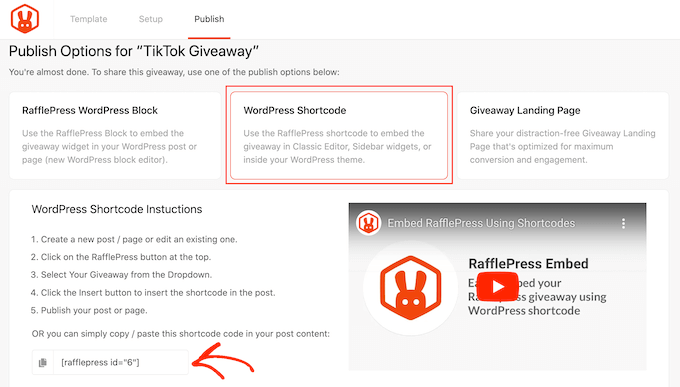
Simply copy the shortcode and then add it to your WordPress blog or website. For more information on how to place the shortcode, please see our guide on how to add a shortcode in WordPress.
How to Make Your TikTok Giveaway Go Viral
To help your TikTok giveaway go viral, it’s important to promote it so more people can enter.
Wherever possible, it’s a good idea to promote your giveaway before publishing it, so you can create a sense of anticipation and excitement around your contest. Then, when your giveaway goes live you should get a ton of entries straight away.
You’ll want to help visitors find your giveaway by promoting it on your site’s most important pages. To start, we recommend adding the giveaway to your navigation menu or sidebar.
You can also create a floating bar with a link to the giveaway landing page using a plugin such as OptinMonster.
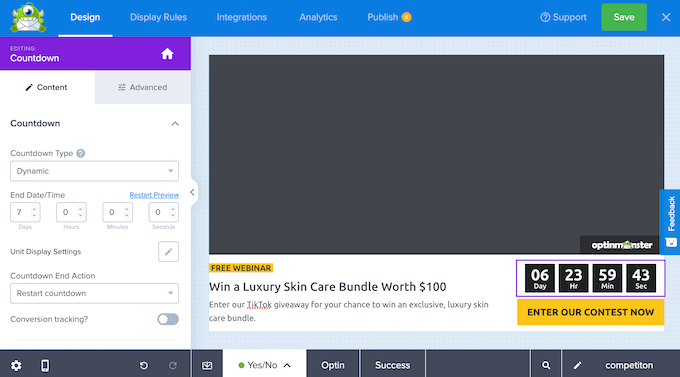
To create a sense of urgency, we recommend adding a countdown timer to the floating bar. In this way, you can use FOMO on your WordPress site to get more entries and TikTok followers.
You can ask your push notification subscribers to follow you on TikTok if they haven’t already, or to refer any friends or family members who might want to enter the competition. To learn more, please see our guide on how to add push notifications to your WordPress site.
Another option is to send an email newsletter with a link to your TikTok giveaway.
Promoting the giveaway on your social media profiles is also a great way to get more participants. Since these people already follow you on social media, they may be interested in watching your TikToks and following your account, so this is a great way to get more engagement and grow your channel.
It’s also important to promote the contest to your TikTok audience. They may already be following your TikTok, but contests are a great way to create content and engage with your existing audience. For example, you might create a video announcing the contest or showing off the prize.
RafflePress also has a ‘View TikTok Post / Video’ action, which is perfect for re-engaging your TikTok followers. If you’re using this entry method, then it’s even more important to promote the contest to your existing TikTok audience.
If you’ve enabled daily entries, then you might even create multiple TikTok videos encouraging your followers to enter every single day.
You can also reach out to TikTok influencers and ask them to mention your giveaway to their followers. To help your giveaway go viral, think about the influencer’s fan base and whether they’ll be interested in the prize. For example, if you’re offering a skin care bundle then you might partner with beauty influencers.
How to Choose a TikTok Giveaway Winner
Once your giveaway closes, it’s time to choose a lucky winner at random.
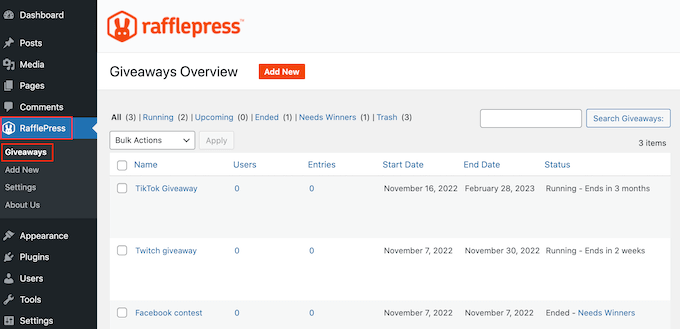
To pick a winner, just go to RafflePress » Giveaways in your WordPress dashboard.
If you didn’t schedule an end date for the contest, then you’ll need to close it manually.
Simply hover over the giveaway and then click on the ‘End Now’ link.
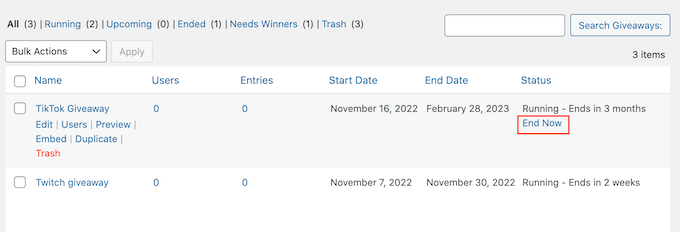
To choose a winner, click on ‘Needs Winners.’
On the following page, RafflePress will show all the people who entered your TikTok giveaway, along with how they entered, their total entries, and more.
Here, just type in the number of winners that you want to pick and then click on ‘Choose Winners Now.’

RafflePress will then show the winner highlighted at the top of the list. Now, you simply need to contact the winner and let them know the good news.
You may also want to announce the winner in a TikTok video. If you’re shipping a physical prize, then you might ask the winner to create their own TikTok showing them receiving or unboxing the prize. This is great content for your followers and also proves that your contests are genuine.
It’s also a good idea to create a TikTok thanking everyone for taking part and encouraging them to join your giveaways in the future.
Wherever possible, we recommend you email all participants as this will help you build a relationship with these new leads and gives you another chance to mention your brand.
We hope this article helped you learn how to create a viral giveaway in WordPress. You may also want to check out our guide on how to allow user registration on your WordPress site, or see our list of best social media plugins for WordPress.
If you liked this article, then please subscribe to our YouTube Channel for WordPress video tutorials. You can also find us on Twitter and Facebook.
The post How to Create a Viral TikTok Giveaway in WordPress first appeared on WPBeginner.
December 13, 2022 at 03:56PM