Tuesday, August 10, 2021

How to Change or Remove ‘Howdy Admin’ in WordPress (Easy Way)

Do you want to change or remove the ‘Howdy’ greeting that is displayed on the WordPress admin bar after logging in?

Many people never use that word in real life. You might like to change it to a greeting that sounds more familiar.

In this article, we’ll show you how to change or remove ‘Howdy Admin’ with 3 easy solutions.

How to Change or Remove Howdy Admin in WordPress

Why Change or Remove ‘Howdy Admin’?

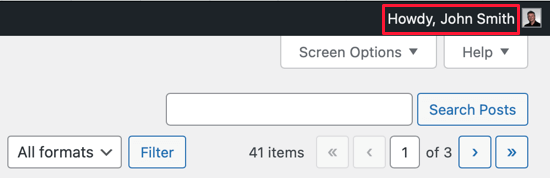
Whenever a user logs into the dashboard of their WordPress website, they are greeted by the word ‘Howdy’ followed by their display name.

For example, if John Smith logged in, then he’d see the words ‘Howdy, John Smith’ near the top right of the screen.

Howdy, John Smith

That greeting might not sound natural to some users. ‘Howdy’ is short for ‘How do you do?’, but many English speakers never use the word. It may sound out of place, outdated, or even a bit annoying.

Luckily, you can change the greeting to something that sounds more familiar, like Welcome, Hello, Hey, or Hi. You can also leave it out entirely, so you’ll just see the user’s display name.

There are a few ways to change or remove ‘Howdy Admin’ and we’ll show you three. The first two methods are easiest and use a plugin.

You only need to use one of these methods. Simply click the link below to skip to the method that best suits your needs:

Method 1: Removing ‘Howdy Admin’ Using a Plugin

First, you need to install and activate the Admin Trim Interface plugin. For more details, see our step by step guide on how to install a WordPress plugin.

The Admin Trim Interface plugin lets you remove features you don’t need from the WordPress admin area, including the ‘Howdy’ greeting. Once you remove it, you’ll just see the username with no greeting.

Once you activate the plugin, go to the Appearance » Admin Trim Interface page in your WordPress dashboard. Here you will see the list of ten interface elements that can be hidden.

Admin Trim Interface Page

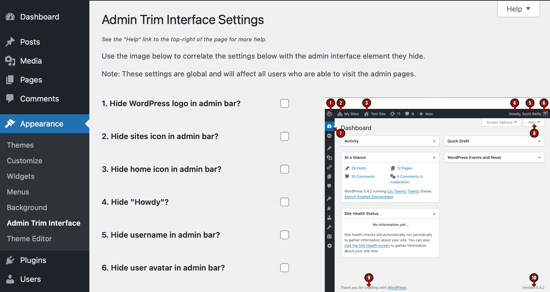
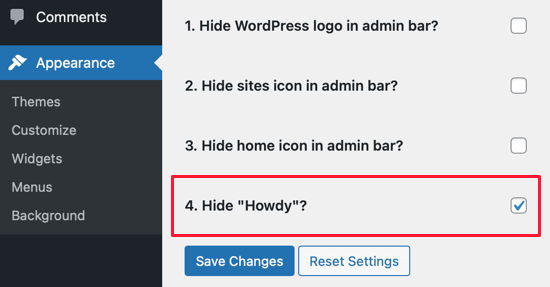
All you need to do now is click the Hide “Howdy” checkbox, and then click the Save Changes button.

Click the Hide Howdy Checkbox

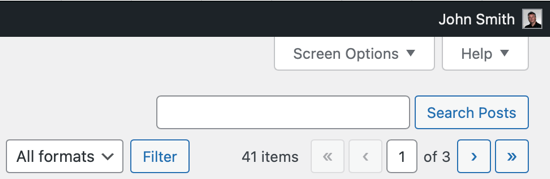
When you look at the top of the screen now, you’ll notice that the ‘Howdy’ greeting has been removed.

Howdy Is Removed

Method 2: Changing ‘Howdy Admin’ Using a Plugin

For the second method, you need to install and activate the Admin Customizer plugin. For more details, see our step by step guide on how to install a WordPress plugin.

Admin Customizer lets you customize your WordPress login screen and admin area, including changing the word ‘Howdy’ to something else.

Once you activate the plugin, go to the Settings » AS Admin Customizer page in your WordPress dashboard. To change the greeting, you’ll need to click on the Dashboard Section button.

Click on the Dashboard Section Button

Next, type your preferred greeting in the Update the Howdy Text text box and make sure you click the Save Changes button. We’ll type the word ‘Welcome’.

Type Welcome in the Update the Howdy Text Box

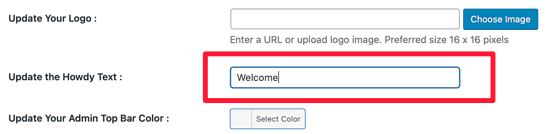
Tip: You don’t need to type a comma. That will be added automatically.

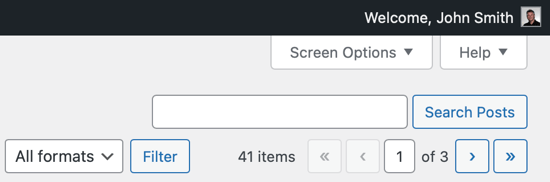
Now you can see in your dashboard that the ‘Howdy’ greeting has been changed to ‘Welcome’.

The Howdy Greeting Has Been Changed to Welcome

Method 3: Change or Remove ‘Howdy Admin’ Using Code

You can also change or remove ‘Howdy Admin’ without using a plugin by adding a custom code snippet to your theme’s functions.php file. We don’t recommend this method to inexperienced users, because even a small mistake could break your website.

If this is your first time adding code to your WordPress files, then you should check out our guide on how to copy and paste code snippets in WordPress.

We’ll use the Code Snippets plugin mentioned in that guide, so you’ll need to install that first. For more details, see our step by step guide on how to install a WordPress plugin.

Upon activation, the plugin will add a new menu item labeled Snippets to your WordPress admin bar. When you click it, you’ll see a list of example custom code snippets.

Go ahead and click on the Add New button to add your first custom code snippet in WordPress.

Click the Add New Button to Add a Custom Code Snippet

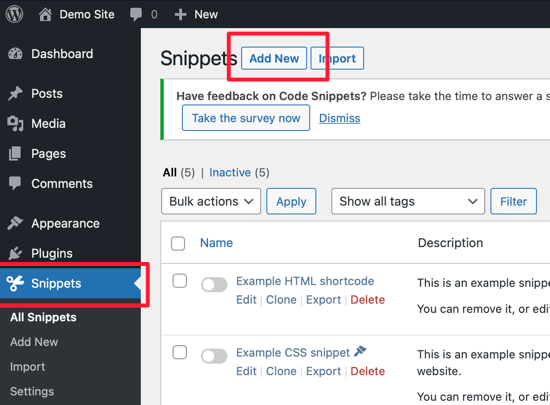
This will bring you to the ‘Add New Snippet’ page.

You need to start by entering a title for your custom code snippet. Let’s call it Howdy Admin. After that, copy and paste the code snippet below into the code box.

add_filter( 'admin_bar_menu', 'replace_wordpress_howdy', 25 );
function replace_wordpress_howdy( $wp_admin_bar ) {
$my_account = $wp_admin_bar->get_node('my-account');
$newtext = str_replace( 'Howdy,', 'Welcome,', $my_account->title );
$wp_admin_bar->add_node( array(
'id' => 'my-account',
'title' => $newtext,
) );
}</code>

Paste the Code Snippet Into the Code Box

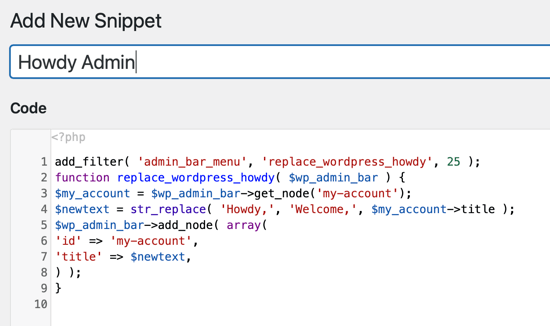
Notice that Line 4 replaces the word ‘Howdy’ with ‘Welcome’.

When you come across this snippet in the future, you may not remember what it’s for. So it’s a good idea to type something helpful in the description as a reminder.

Type Something Helpful in the Description

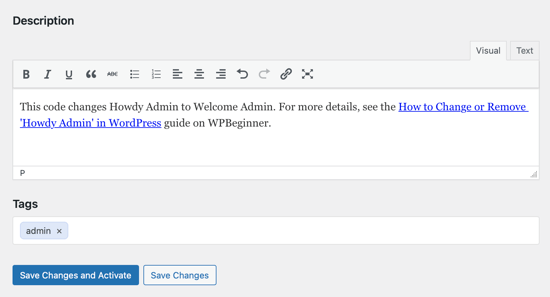
You can also assign tags to your code snippet. This will help you sort your code snippets by topic and functionality.

Finally, you can click on the ‘Save Changes and Activate’ button. Once the snippet is activated, the ‘Howdy’ greeting will be replaced with ‘Welcome’.

The Howdy Greeting Will Be Replaced with Welcome

To use a different greeting, just replace the word ‘Welcome’ on Line 4 with something else, such as ‘Hello’. To remove the greeting altogether, delete the word ‘Welcome’ and the comma so there is nothing between the second set of quotes on Line 4, like this.

add_filter( 'admin_bar_menu', 'replace_wordpress_howdy', 25 );
function replace_wordpress_howdy( $wp_admin_bar ) {
$my_account = $wp_admin_bar->get_node('my-account');
$newtext = str_replace( 'Howdy,', '', $my_account->title );
$wp_admin_bar->add_node( array(
'id' => 'my-account',
'title' => $newtext,
) );
}

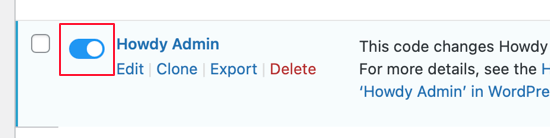
If you’d like to return to the ‘Howdy’ greeting, then just turn off the switch on the Snippets page.

Return to Howdy by Turning off the Switch

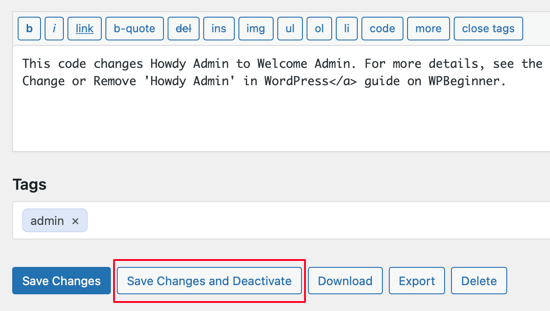
Alternatively, you can click the Save Changes and Deactivate button at the bottom of the Edit Snippet page.

Return to Howdy by Deactivating the Code Snippet

We hope this article helped you learn how to customize the greeting in the WordPress backend. Next, see our guide on how to choose the best WordPress hosting, or check out our list of must have WordPress plugins to grow your website.

If you liked this article, then please subscribe to our YouTube Channel for WordPress video tutorials. You can also find us on Twitter and Facebook.

The post How to Change or Remove ‘Howdy Admin’ in WordPress (Easy Way) appeared first on WPBeginner.


August 10, 2021 at 04:00PM

Monday, August 9, 2021

How to Add Live Ajax Search to Your WordPress Site (The Easy Way)

Do you want to add live Ajax search to your WordPress site?

Adding instant search to WordPress improves the default site search and makes it easier for your visitors to find the pages and posts they’re looking for.

In this article, we’ll show you how to add live Ajax search to your WordPress site, step by step.

How to add live Ajax search to your WordPress site (the easy way)

Why Add Live Ajax Search to WordPress?

Live Ajax search, also called instant search, improves the default WordPress search experience by adding the drop down and autocomplete feature that’s common in search engines like Google.

Here’s an example of this in action:

Google search live example

Live search guesses what users are searching for as they type and helps them find relevant content faster. This is a huge improvement from the default WordPress search.

By helping users find what they’re looking for quickly, live search will help them stay on your site longer, which can increase pageviews and reduce bounce rate.

That being said, let’s take a look at how you can simply add live Ajax search to your WordPress blog or website.

Adding Ajax Search to WordPress with a WordPress Plugin

The easiest way to add Ajax live search to WordPress is using the SearchWP plugin. It’s the best WordPress search plugin on the market used by over 30,000 websites.

SearchWP

This plugin goes beyond indexing post content and will index everything on your website, like custom fields, PDF documents, text files, WooCommerce products, and more.

For this tutorial, you can use the free SearchWP Live Ajax Lite Search plugin, since it automatically enables Ajax live search.

First thing you need to do is install and activate the plugin. For more details, see our step by step guide on how to install a WordPress plugin.

Upon activation, the default WordPress search form will now automatically include the Ajax live search feature.

Displaying Ajax Live Search on Your WordPress Site

Since any active search bar now has live search, all you have to do is decide where you want them to display.

Below you’ll learn how to add the live search bar to common locations on your WordPress website.

Adding Live Ajax Search to WordPress Sidebar

One of the most popular areas to add a search bar is the WordPress sidebar. This makes it easy for your visitors to do a search no matter where they are on your website.

To add the search widget to WordPress, simply go to Appearance » Widgets to bring up the blocks based widget editor.

Customize widget blocks

Each widget area of your WordPress theme will have a separate tab in the block editor.

On our test site, our sidebar widget area is called ‘Right Sidebar,’ but yours may have a different name depending on your theme.

Simply click the ‘+’ icon underneath the sidebar section.

Add sidebar widget block

Then, type ‘SearchWP’ into the search bar and click the ‘SearchWP Live Search’ icon.

This will automatically insert the live Ajax search widget into your sidebar.

Add SearchWP live search widget

You can customize the Title section to change the heading for the search box. When you’re finished, click the Update button to save your changes and make the search bar live.

Customize and save live search widget

Now your live search bar will be usable by all of your website visitors.

Live widget search example

You can follow the same process to add the live search bar to any other widget area of your website. To add it to your navigation menu area, see our guide on how to add a search bar to your WordPress menu.

Adding Live Ajax Search to WordPress Pages

You may also want to add a live Ajax search box to other pages of your website. For example, you could have an archive page that lets your visitors search through your content.

To do this, you’ll need to navigate to the post or page you want to edit. For this example, we’ll show you how to add the live search bar to a WordPress page.

First, go to Pages » All Pages and then click on the page you want to edit.

Open up WordPress page

Once the page is open, click the ‘+’ icon on the page editor screen.

This will bring up the blocks menu.

Add new page block

Next, type ‘Search’ into the box and then click on the ‘Search’ icon to add it to your page.

It will automatically place the search bar for you.

Select search block

You can also customize the search title and the placeholder text inside the search box.

After that, make sure to click the ‘Update’ button in the upper right corner of your page.

Save live search block on page

Now, your visitors can use the live search bar on your website to quickly find what they’re looking for.

You can use the same process to add a search bar to any post or page.

Live search page example

Customizing Instant WordPress Search Results

SearchWP is a very versatile search plugin and goes beyond just the post content and indexes everything on your site including custom fields, ACF fields, text files, PDF document content, custom tables, custom taxonomies, WooCommerce product attributes, and more.

The pro version of the SearchWP plugin lets you completely customize your search results by creating your own relevance scale and adjust the algorithm without writing any code.

SearchWP Custom Engines

You also get the Metrics feature that lets you see what your visitors are searching for, and many other powerful features to further improve your on-site search feature.

We hope this article helped you learn how to add live Ajax search to your WordPress site. You may also want to see our guide on how to choose the best domain name registrar, and our expert picks of the best webinar software for small businesses.

If you liked this article, then please subscribe to our YouTube Channel for WordPress video tutorials. You can also find us on Twitter and Facebook.

The post How to Add Live Ajax Search to Your WordPress Site (The Easy Way) appeared first on WPBeginner.


August 09, 2021 at 04:18PM

Friday, August 6, 2021

16 Best Plugins to Improve WordPress Comments (2021)

Are you looking for the best plugins to improve WordPress comments?

Comments are an effective way to engage readers and build a community. The default WordPress commenting system is good, but it’s quite plain and basic. Luckily, there are tons of plugins that can help you improve that.

In this article, we’ll show you some of the best plugins to improve WordPress comments and boost engagement on your website.

WordPress plugins to improve comments

1. Comment Moderation Role by WPBeginner

Comment Moderator by WPBeginner

Comment Moderation Role by WPBeginner is a simple plugin that creates a comment moderator user role in WordPress.

These users can then log in to your website and moderate comments without getting access to any other area of your site. This comes in handy if you have a support team or staff members responsible for answering comments.

For detailed instructions, see our tutorial on how to let blog users moderate comments in WordPress.

2. Uncanny Automator

Uncanny Automator

Uncanny Automator is the best automation plugin for WordPress. It allows you to easily create automated workflows on your WordPress site. These workflows save you time and offer your users a better on-site experience.

Uncanny Automator allows you to choose triggers and actions. The actions will be performed when the recipe is triggered.

For example, a trigger could be a when a user submits a comment. You can then choose an action such as sending the comment author an email, redirecting them to a thank you page, or adding them to your email newsletter.

It works with all top WordPress plugins including WooCommerce, MemberPress, LearnDash, and more. You can even connect it to more than 3000+ third-party apps through Zapier.

For more information, see our tutorial on how to create automated workflows in WordPress.

3. Yoast Comment Hacks

Yoast Comment Hacks

Yoast Comment Hacks is a suite of tools that help make comment management easier.

You can email comment authors or users who commented on a specific post, customize your comment notification emails, redirect first-time commenters to a thank you page, assign comments to a specific thread, and more.

For more details, take a look at our guide on how to install and setup Yoast Comment Hacks for WordPress.

4. Simple Comment Editing

Simple Comment Editing

Simple Comment Editing allow users to easily edit their own comments on your site. Sometimes when a user submits a comment, they immediately realize they have made a spelling mistake or some other error.

This plugins gives a flexible time during which users can edit their own comments on your site. For more details, take a look at our tutorial on how to allow users to edit comments in WordPress.

5. Subscribe to Comments Reloaded

Subscribe to Comments Reloaded

Subscribe to Comments Reloaded allows users to sign up for email notifications when there is a new comment on an article.

Comments are a powerful way to build communities. But how would people know if there is a new comment after they read your post? This plugin lets them get new comment notifications and brings them back to your website.

Users can unsubscribe at any time and manage their own subscriptions on your site. We have a detailed tutorial on how to allow users to subscribe to comments in WordPress with more details.

6. WP Mail SMTP

WP Mail SMTP

WP Mail SMTP makes sure that all your WordPress emails are delivered to the inbox successfully.

WordPress sends many important emails including password resets, new user accounts, comment notifications, and more. Some comment plugins on this list may also send emails to your users.

By default, the way WordPress sends emails is unreliable and your emails may never reach their destination. WP Mail SMTP allows you to use a proper SMTP server to securely send all your WordPress emails.

For more details, see our guide on how to fix the WordPress emails not sending issue.

Note: There is also a free version called WP Mail SMTP Lite that would fix email deliverability. However, the free plugin does not include email logs, notification management, analytics, and a few other features.

7. WordPress Comments Fields

Comment Form Custom Fields

WordPress Comments Fields allows you to add your own custom fields to WordPress comment form.

By default, the comment area shows 4 fields (name, email, website address, and message). This plugin allows you to add more fields to your WordPress comment form such as twitter handle, business phone number, and anything else that you need.

The plugin will then display the data submitted through custom fields as comment meta. See our step by step tutorial on how to add custom fields to comments form in WordPress.

8. Better Notifications for WordPress

Better notifications for WordPress

Better Notifications for WordPress allows you to edit the default WordPress notification emails and customize them to meet your own requirements.

There are a bunch of triggers available that you can use to create your own custom WordPress notification emails.

For instance, you can send a notification to the author when a comment is approved. You can also customize new comment notifications and send them to the author or a moderator instead of the site administrator.

For more details, see our tutorial on how to create custom WordPress notification emails.

9. Remoji Reactions

Remoji Reactions

Remoji Reactions allows you to add Facebook like reactions to your WordPress blog posts and comments. This provides an easier and interactive way for users to engage on your website.

The plugin also provides widgets to display recently reacted posts or most viewed content. You can also disable reactions for unregistered users.

10. One Click Close Comments

One click close comments

One Click Close Comments makes it super easy to close comments on any WordPress post. Simply go to the ‘Posts’ page in the WordPress admin area and you’ll see a green comment icon next to posts where comments are open.

Clicking on the icon will close comments for that post and turn the icon red without reloading the page. This comes in handy if you need to quickly disable comments on multiple posts.

11. Disable Comments

Disable Comments

Disable Comments plugin does exactly what it says. It allows you to easily disable comments on your WordPress posts, pages, and custom post types.

You can also choose to completely disable comments on your website, and the plugin even lets you delete all comments at once.

For more details, you can see our article on how to completely disable comments in WordPress.

12. YITH WooCommerce Advanced Reviews

YITH WooCommerce Advanced Reviews

YITH WooCommerce Advanced Reviews takes your WooCommerce reviews to the next level. More than 77% of online shoppers refer to reviews before making a purchase.

YITH WooCommerce Reviews allows you to create a beautiful review section for your products. Users can customize their reviews by giving them a title, upload images, thumbs up or down, and more.

As the store owner, you’ll be able to feature certain reviews, display ratings bars, remove inappropriate reviews, and more.

13. Ark-commenteditor

Ark commenteditor

Ark-commenteditor allows you to add a nice and simple WYSIWYG editor to your WordPress comment form.

By default, WordPress allows users to use some basic HTML formatting in their comments. However, most people don’t use it because they don’t know how to add HTML.

The plugin allows you to create a basic editor with formatting buttons to your comment form. You can choose which formatting buttons you want to add.

14. Comment Link Removal & Other Tools

Comment link removal and other tools

Comment Link Removal & Other Tools plugin allows you to easily remove links from comments on your website. Spam comments are a big nuisance, but they can be easily managed with plugins like Akismet.

However, manual spam comments are harder to catch with automated tools like Akismet. Leaving links in WordPress comments is the main reason people leave spam comments.

The plugin completely removes links from WordPress comments, discouraging spammers from commenting on your site.

15. DCO Comment Attachment

DCO comment attachment

DCO Comment Attachment lets you add a file attachment field to your WordPress comment form, which allows users to upload images and other files with their comments.

You can set which file types users can upload, and set a limit to the file size. You can also choose to embed the attachment along with comment itself, or display it as a link.

16. WPForms

WPForms

WPForms is the best WordPress contact form plugin on the market. Not all your users may want to leave a public comment on your website. Using WPForms, you can easily add a feedback form to your website. This allows users to privately reach out and leave their feedback.

You can also use WPForms to create surveys and quizzes, login and user registration forms, email newsletter forms, and more.

We hope this article helped you find some great plugins to improve WordPress comments on your site. You may also want to learn why WordPress is free, or see our expert comparison of the best live chat software for small business.

If you liked this article, then please subscribe to our YouTube Channel for WordPress video tutorials. You can also find us on Twitter and Facebook.

The post 16 Best Plugins to Improve WordPress Comments (2021) appeared first on WPBeginner.


August 06, 2021 at 05:00PM

Thursday, August 5, 2021

How to Allow Blog Users to Moderate Comments in WordPress

Do you want to allow blog users to moderate comments in WordPress?

It can be difficult for large blogs with many comments to keep up with the volume. A lot of blogs solve this by creating a separate user role just to manage all the comments.

In this article, we’ll show you how to allow blog users to easily moderate comments in WordPress.

How to allow blog users to moderate comments in WordPress

Why Allow Blog Users to Moderate Comments in WordPress?

Comment moderation can be a challenging task for larger blogs. By having blog users dedicated to moderating comments, you can respond to questions more quickly, combat spam, and deliver a better experience for your visitors.

This blog user can be an active commmentor on your WordPress blog, or a member of your customer support team.

WordPress has a built-in commenting system, but there’s no way to create user accounts that are only responsible for comment moderation. In order to moderate comments, the user would need Editor access to all your content.

The best way to allow users to moderate comments is by using a WordPress plugin. This lets you create a separate comment moderation user role, while keeping your WordPress website secure.

That being said, let’s take a look at how you can easily allow blog users to moderate comments in WordPress.

How to Add a Blog Comment Moderator Role to WordPress

To add blog user comment moderation, we’ll be using the Comment Moderation Role plugin. It lets you easily add a comment moderation role to WordPress with a couple of clicks.

The plugin is built for larger teams that need an entirely separate user account to handle comment moderation. Best of all, it’s completely free and maintained by our team of expert WordPress developers.

The first thing you need to do is install and activate the plugin. For more details, see our step by step guide on how to install a WordPress plugin.

Upon activation, you’ll have a new user role called ‘WPB Comment Moderator’ available to assign to users.

To assign the comment moderation role to an existing user, simply navigate to Users » All Users.

Then, click the checkbox for the user you want to change the role for.

Select user to change role

After that, simply select the new ‘WPB Comment Moderator’ role from the drop down box that says ‘Change role to…’, and then click the ‘Change’ button.

The user role change will automatically apply.

Select WPB Comment Moderator role

Now, when the user logs in, they’ll only have access to the comment moderation panel.

You can also create a new user and assign the comment moderation role to the user when creating the profile.

To do this, navigate to Users » Add New and enter the new user information.

Add new comment moderator user

Then, select the ‘WPB Comment Moderator’ role from the ‘Role’ drop down.

Make sure you click the ‘Add New User’ button to save your changes and create your new user.

Save new user comment moderator role

Now, when your new user logs into their account, they’ll see a comment moderation dashboard similar to the example below.

Notice how the dashboard only allows the user to moderate comments and edit their profile. All other WordPress admin dashboard features are hidden.

User comment dashboard

For more details on user roles and permissions, see our beginner’s guide to WordPress user roles and permissions.

We hope this article helped you learn how to allow blog users to moderate comments in WordPress. You may also want to see our expert picks of the best email marketing services for small business and our guide to creating a business email address.

If you liked this article, then please subscribe to our YouTube Channel for WordPress video tutorials. You can also find us on Twitter and Facebook.

The post How to Allow Blog Users to Moderate Comments in WordPress appeared first on WPBeginner.


August 05, 2021 at 03:57PM