Tuesday, November 2, 2021

How to Setup WordPress Email Tracking (Opens, Clicks, and More)

Do you want to set up WordPress email tracking on your site?

WordPress email tracking will help you see whether your users receive, open, and click your emails.

In this article, we’ll show you how you can easily set up WordPress email tracking to gain new insights.

How to setup WordPress email tracking (opens, clicks, and more)

Note: This article is specifically for emails sent from your WordPress site such as order receipts, password reset emails, contact form follow-ups, and more. These are not marketing emails that you send with your email marketing service because those already have open and click tracking built-in.

Why Set Up Email Tracking in WordPress?

By tracking your WordPress site emails, you’ll be able to see who opens and clicks your emails. Plus, get detailed reports about email deliverability.

This helps to make sure that all of your website emails are reaching your users. You can even resend emails that didn’t get delivered to improve the overall user experience.

There are all kinds of reasons to track your WordPress emails:

  • See which links in your emails are clicked
  • Make sure important membership site and online course emails are sent
  • Check if emails being sent by a certain plugin are delivered
  • Ensure online store order and confirmation emails get to your users

Whether you’re running a WordPress blog or small business website, WordPress will send all kinds of automatic email notifications to your users.

This can be new user registration information, password reset emails, comments, WordPress updates, and much more.

You need to make sure all of the emails sent from your website go to your user’s email inbox and not to the spam folder.

The best way to do this is by using an SMTP service provider to improve email deliverability. For more details, see our guide on how to fix WordPress not sending email issue.

With that said, let’s take a look at how to set up WordPress email tracking, step by step.

Setting up Email Tracking in WordPress

For this tutorial, we’ll be using the WP Mail SMTP plugin. It’s the best WordPress SMTP plugin in the market used by over 2 million websites.

It lets you easily send all of your WordPress emails using an SMTP server and improve email deliverability for your WordPress website.

How WP Mail SMTP works

Step 1. Install and Setup WP Mail SMTP

First thing you need to do is install and activate the WP Mail SMTP plugin. For more details, see our beginner’s guide on how to install a WordPress plugin.

Upon activation, you need to go to WP Mail SMTP » Settings to configure your plugin settings.

Then, you need to enter your license key and click the ‘Verify Key’ button.

Enter WP Mail SMTP license key

You can find this information under your account on the WP Mail SMTP website.

Once you’ve done that, you need to scroll down the page to the ‘Mailer’ section. Here you will choose how you want to send your WordPress emails.

The WP Mail SMTP plugin works with any SMTP service. There are easy setup options for the most popular providers, including Gmail, Outlook, SendInBlue, SendGrid, Amazon SES, and more.

Select SMTP mailer

Simply click on the mailer you want to use, and there will be detailed instructions on how you can set it up properly.

The default option is using the PHP mailer. However, we don’t recommend this method since it’s not reliable.

Most WordPress hosting servers aren’t configured to send emails. So, your WordPress emails may never even reach your users or end up in their spam folder.

For more details on setting up your SMTP server, see our guide on how to use a free SMTP server to send WordPress emails.

Step 2. Enable WordPress Email Tracking

Now that you’ve set up the plugin, it’s time to turn on the email logging and email tracking features.

Once activated, the plugin will automatically add a tracking pixel to every email that you send from WordPress.

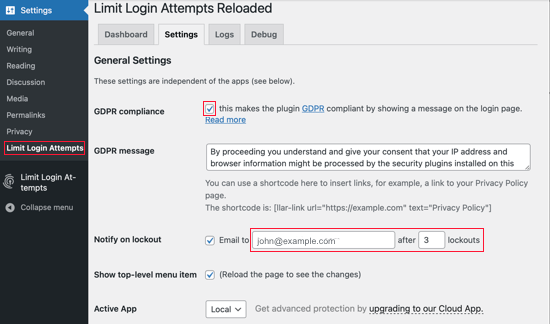
To do this go to WP Mail SMTP » Settings and then click the ‘Email Log’ menu option.

After that, you’ll want to make sure that the ‘Enable Log’ box is checked for email records.

If it isn’t, then check the box now. This will keep a record of basic details about your emails and store them in your WordPress database.

Enable email log tracking

You’ll also need this enabled if you want to resend emails in WordPress.

Next, you’ll see a few more checkboxes that let you turn on additional email tracking options. We recommend checking every box so you have more email tracking data available.

First, you can choose to save a copy of the email body. This lets you search the content of emails and also resend the entire email if it doesn’t send.

Simply check the ‘Log Email Content’ box to enable this.

Check log email content box

Next, you can save a copy of the attachments that are sent from your site. This can be helpful if an email doesn’t send and you need to resend the attachment.

To enable this, you need to check the ‘Save Attachments’ box.

Check save email attachments box

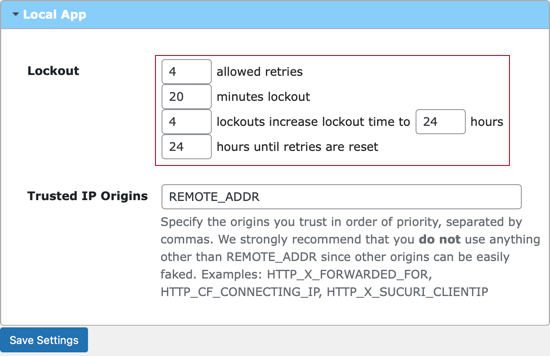
After that, you can track when an email is opened and which links get clicked by checking the ‘Open Email Tracking’ and ‘Click Link Tracking’ boxes.

Enable email opens and click tracking

Then, you can set the time period for how long you’ll save your email logs. If you’re concerned about disk space, then you can change the setting here.

Simply select the time period from the ‘Log Retention Period’ drop down.

Choose log retention period

Make sure to click the ‘Save Settings’ button before you leave the page.

Step 3. Check Email Tracking Analytics Data in WordPress

Once you’ve set up the plugin and sent out WordPress emails, you can view your email tracking and analytics data.

To do this head over to WP Mail SMTP » Email Log in your WordPress admin panel.

View email log opens and clicks

This screen will show you basic email data like opens and clicks, so you get a quick overview of your audience engagement.

Next, you can open up individual email logs to see in depth email information.

Simply hover over an email and click the ‘View Log’ link, and the email details will open in a new screen.

View individual email log

This shows you when the email was sent, the subject, if it was opened, and more.

Resend New User Emails in WordPress

Another great feature of WP Mail SMTP is the ability to resend emails.

To do this, go to back to WP Mail SMTP » Email Log to bring up your email logs.

This page shows you every email you’ve sent and whether or not it was delivered. The red dot means not sent and the green dot means delivered.

To resend an email, simply click the ‘View Log’ link on the email that didn’t send.

View email logs for resend

This brings you to the email log screen for that individual email.

Then, click the ‘Resend’ button in the ‘Actions’ tab.

Click resend button

This brings up a popup that will confirm the email address.

Simply click the ‘Yes’ button to resend the email.

Click yes to resend email

If there are multiple failed emails, then you can use the bulk resend feature from the email log screen.

Simply check the box next to the emails that didn’t send, then select ‘Resend’ from the drop down list, and click the ‘Apply’ button.

Resend multiple emails

This brings up a similar popup as above.

Simply click the ‘Yes’ button to resend the email to multiple users.

Click yes to resend multiple emails

View WordPress Email Engagement Statistics

You can also view your full email tracking and reporting data by going to WP Mail SMTP » Email Reports.

This brings you to a screen with detailed statistics about your open rates and email deliverability.

View WordPress email reports

Under the main graph you’ll find a breakdown of how your individual emails are performing.

You’ll see open rates, click through rates, deliverability breakdown, and more.

View WordPress email stats

We hope this article helped you learn how to set up WordPress email tracking. You may also want to see our guide on how to create an email newsletter and our picks of the best business phone services for small business.

If you liked this article, then please subscribe to our YouTube Channel for WordPress video tutorials. You can also find us on Twitter and Facebook.

The post How to Setup WordPress Email Tracking (Opens, Clicks, and More) appeared first on WPBeginner.


November 02, 2021 at 04:00PM

Monday, November 1, 2021

How to Do Live Blogging in WordPress (Step by Step)

Do you want to learn how to do live blogging in WordPress?

Live blogging is a form of blogging that lets you cover live events and provide updates to your readers in real time.

In this article, we’ll show you how you can add live blogging to your WordPress site, step by step.

How to do live blogging in WordPress (step by step)

Why Do Live Blogging in WordPress?

Live blogging is when you create a single blog post and add real time updates during an event. This lets you add new content as the event unfolds, while keeping all the updates in a central place.

Bloggers and news sites commonly use it to broadcast real time updates from technology conferences, sports events, and across other blogging niches.

For example, if you run a crossfit gym you could provide real time live blogging coverage of the crossfit games.

Or, if you run a gaming website, you could provide real time blogging for eSports matches and other events.

Live blogging is a fun way to engage your readers and keep them coming back to your website for updates.

That being said, let’s show you how you can do live blogging on your WordPress site, step by step.

Install and Setup the Live Blogging Plugin

You could do live blogging in WordPress by manually editing a blog post every time you want to add an update.

However, if you live blog often, we recommend using the 24liveblog plugin. This free plugin lets you add real-time live blogging to your site easily.

24liveblog free plugin

24liveblog offers a forever-free plan that includes features like social media integration, real-time statistics, audio and video recording, and much more.

First thing you need to do is install and activate the 24liveblog plugin. For more details, see our beginner’s guide on how to install a WordPress plugin.

After that, navigate to Settings » 24liveblog and then click the ’24liveblog’ link at the bottom of the sign up box.

24liveblog plugin settings

This brings you to the sign in page on 24liveblog’s website.

You need to click the ‘Get started’ link at the bottom of the screen to create an account.

Click get started link

Next, you need to enter a user name, email address, and password.

Then, click the ‘Sign Up’ button.

Enter account information and sign up

Once you’ve done that, you need to activate your account.

Simply enter the code from your email and then click the ‘Confirm’ button.

Activate 24liveblog account

After that, you can go back to Settings » 24liveblog in your WordPress dashboard and enter your email and password.

Then, click the ‘Log in’ button.

Sign into 24liveblog account in WordPress

Now you’ve successfully connected your WordPress blog and the 24liveblog platform.

Add a New WordPress Blog Post for Live Blogging

Next, you need to create a blog post where you’ll embed your live blog.

To do this, go to Posts » Add New and then enter the name of your blog post.

add new live blogging blog post

Click the ‘Save Draft’ link at the top right.

Then, under the Permalink tab in the right-hand menu, make note of the blog post URL. You’ll need to enter this later in your live blog event details.

Create Your First Live Blog Event

Now head over to your account page on the 24liveblog website and click the ‘Create Event’ button.

Create new 24liveblog event

This brings you to a screen where you can choose the type of event.

Simply click on the ‘Live Blog’ box.

Select live blog event

Here you can enter your event details.

You need to give your event a title, select the time, and choose a category.

Enter event details

You can also add a description for your event and enter the URL for the blog post you created earlier.

Then, add a cover image for the event and click the ‘Next’ button.

Add event cover image and click next

On the next screen, you’ll find all kinds of options for visitor interaction.

For example, you can enable a countdown timer, real time sports score updates, and more.

You can choose to customize these as you like to suit your event, and then click the ‘Next’ button to continue.

Configure additional event display settings

On the next screen, you can choose to turn on live streaming and popups to grow your email list, but we’ll leave the default settings.

Then, click the ‘Next’ button at the bottom.

Advanced live blog settings

After that, you can choose a theme. This changes the style of your live blogging stream on your website.

We’ll use the ‘Default’ time. However, you can choose the theme that works best with your event.

To choose a new theme, all you have to do is click on it.

Select live blogging theme

Then, click the ‘Next’ button at the bottom of the page. On the next screen, simply click ‘Next’ one more time.

After that, you’ll be taken to the final screen, where you need to click the ‘Create Event’ button.

Finalize event creation

Add the Live Blogging Feature to Your WordPress Blog Post

Now, you need to add the 24liveblog block to the blog post you created earlier.

Simply open up the blog post, then click the ‘Plus’ add block button.

Add new block for live blogging

Next, type ’24liveblog’ into the search bar.

Then, click the ’24liveblog’ block.

Select 24liveblog block

This will automatically add live blogging functionality into your blog post.

After that, click the ‘Select Liveblog’ button.

Select liveblog event

This brings up a popup that will list all of the events you have created.

Simply find your event and then click the ‘Add’ button.

Add liveblogging event

You can continue to add more text and other elements to your post.

Once you’re finished, click the ‘Update’ or ‘Publish’ button to make your post live.

Update live blog post

You can view your post even when the live blogging event hasn’t started.

If you enabled a countdown timer when setting up your event, then you’ll see the timer now.

Countdown timer example

When it’s time for your event to begin, simply open up your blog post in your post editor.

Then, click the ‘View’ button.

Click view to start live blogging

This will take you to your account on the 24liveblog website.

Here you can blog in real time, and your content will automatically be added to the live blogging post on your website.

Simply enter your post content and then click the ‘Add Post’ button.

Publish new post update

You can also record live audio and add video and images to your post.

Your visitors can comment on each event update you publish and also chat with each other in the live chat window.

Live blogging example

If you want to add an events calendar to your site that shows all of the live blogging events you’re hosting, then see our guide on how to create a simple event calendar with Sugar Calendar.

We hope this article helped you learn how to do live blogging in WordPress. You may also want to see our guide on how to get a free email domain and our comparison of the best AI chatbots software for your website.

If you liked this article, then please subscribe to our YouTube Channel for WordPress video tutorials. You can also find us on Twitter and Facebook.

The post How to Do Live Blogging in WordPress (Step by Step) appeared first on WPBeginner.


November 01, 2021 at 03:30PM

Sunday, October 31, 2021

How to Set oEmbed Max Width in WordPress (4 Easy Methods)

Do you want to limit the width of oEmbeds in WordPress?

WordPress automatically embeds third-party content like YouTube videos, Tweets, or Facebook posts. However, sometimes the embeds may get too wide and mess up your page layouts.

In this article, we’ll show you how to set oEmbed max-width in WordPress so you can have more control over your site layout.

Setting oEmbed maximum width in WordPress

Why Fix the OEmbed Maximum Width in WordPress?

WordPress allows you to automatically embed content from select third-party websites into your posts and pages using a technology called oEmbed.

This allows you to easily embed YouTube videos, Facebook posts, tweets, and many other types of content on your website. This content is not hosted on your WordPress website. Instead, it’s displayed directly from these third-party sites.

WordPress is quite good at automatically adjusting the width of the embedded content to your website’s content or sidebar areas.

However, sometimes these embedded content may be too wide and overlap your website’s content areas, like in the example below.

A WordPress embed overflowing the content width

To fix this, you’ll need to explicitly tell WordPress to use a maximum width limit for third-party embeds. Unfortunately, there is no option in WordPress settings to do that.

That being said, let’s take a look at how to easily set oEmbed max width in WordPress without breaking anything.

We’ll cover 4 different methods, and you can choose the one that best suits your needs:

  1. Set oEmbed width with WordPress shortcode
  2. Set oEmbed width with WordPress Embed Block
  3. Set oEmbed max width with CSS
  4. Set oEmbed max width with WordPress filter (Code Method)

Method 1. Use the Embed Shortcode in WordPress

This method is easier and works really well for setting a max width for video embeds in WordPress.

Instead of pasting the URL or using the YouTube block, you’ll use the shortcode block. Inside it, you need to use the embed shortcode and include width and height parameters.

[embed width="900" height="600"]https://youtu.be/6LwWumPeues[/embed]

Feel free to change the values of the width and height to your own requirements, and replace the embed URL to your own embed.

Embed shortcode width

You can now preview your post or page and see the embed in action.

oEmbed width adjusted

The embed shortcode and its width and height parameters don’t work for all oEmbed providers. For instance, you cannot use it to set the height and width of a Giphy embed in WordPress.

In that case, you can try one of the alternative methods mentioned below.

Method 2. Use Embed Blocks in WordPress

The default WordPress editor comes with several embed blocks for different oEmbed service providers. You can use them to embed content in different areas of your posts and pages.

Embed blocks in WordPress

Some of these blocks also allow you to change the alignment of the embed and set the content width to wide or full width.

Block width and alignment

You can try using these options to see if it fixes the maximum width issue for the embed.

Method 3. Use CSS to Set Max Width for Embeds in WordPress

By default, WordPress automatically adds CSS classes to different areas of your posts and pages.

It also adds several CSS classes to embed blocks. These CSS classes can be used to set a maximum width for embeds on your WordPress website.

To find out which CSS classes you need to target, simply embed content in a post or page, and then preview it in your browser. Right-click by taking the mouse over to the embedded content and then select the Inspect tool.

Finding CSS classes for embed blocks

You’ll be able to see all the CSS classes added to the embedded element. You can use these classes to set a maximum width for this type of embed.

For instance, if you wanted to set a maximum width for all embeds, then you can use the following custom CSS.

.wp-block-embed {
    max-width: 900px!important;
}

You can also target specific oEmbed providers by using the .wp-block-embed-providername class. For instance, if you wanted to set a maximum width for only Pinterest embeds, then you can use the following custom CSS.

.wp-block-embed-pinterest {
    max-width: 900px!important;
}

Method 4. Set oEmbed Max Width Using WordPress Filter

This last method requires you to add custom code to your WordPress website. If you haven’t done this before, then take a look at our guide on how to easily add custom code snippets in WordPress.

For this method, we will add our own code into WordPress to set the default width for oEmbeds. Simply add the following code to your theme’s functions.php file or the Code Snippets plugin.

add_filter( 'embed_defaults', 'wpbeginner_embed_defaults' );
 
function wpbeginner_embed_defaults() {
    return array(
        'width'  => 400, 
        'height' => 280
    );
}

Don’t forget to adjust the height and width attributes to your own requirement.

The problem with this method is that it only applies the width attribute if the embedded content doesn’t have ‘width’ defined. If the embed code already includes width, then this method may not work.

Bonus Tip

If you regularly embed content from social media platforms to your WordPress website, then you should start using Smash Balloon.

Smash Balloon

It is the best social media plugin for WordPress and allows you to easily embed custom social media feeds in WordPress.

It supports popular social media embeds like YouTube, Twitter, and more. It also allows you to embed Facebook and Instagram content, which is not supported by WordPress.

More importantly, all social media feeds are mobile responsive and work with any WordPress theme.

We hope this article helped you learn how to set an oEmbed max width in WordPress. You may also want to see our complete social media cheat sheet or our expert comparison of the best live chat software for small business.

If you liked this article, then please subscribe to our YouTube Channel for WordPress video tutorials. You can also find us on Twitter and Facebook.

The post How to Set oEmbed Max Width in WordPress (4 Easy Methods) appeared first on WPBeginner.


October 31, 2021 at 04:00PM

Saturday, October 30, 2021

How and Why You Should Limit Login Attempts in WordPress

Would you like to limit login attempts in WordPress?

Hackers may use a brute force attack to try to guess your admin password. If you limit the number of times they can attempt to log in, then you significantly reduce their chances of success.

In this article, we will show you how and why you should limit login attempts on your WordPress site.

How and Why You Should Limit Login Attempts in WordPress

Why Should You Limit Login Attempts in WordPress?

A brute force attack is a method that uses trial and error to hack into your WordPress website.

The most common type of brute force attack is password guessing. Hackers use automated software to keeping guessing your login information so they can gain access to your website.

By default, WordPress allows users to enter passwords as many times as they want. Hackers may try to exploit this by using scripts that enter different combinations until they guess the right login.

You can prevent brute force attacks by limiting the number of failed login attempts per user. For example, you could temporarily lock a user out after 5 failed login attempts.

Temporarily Lock Out a User After Failed Login Attempts

Unfortunately, some users find themselves locked out of their own WordPress website after typing their password incorrectly a number of times. If you find yourself in that situation, then you should follow the steps in our guide on how to unblock limit login attempts in WordPress.

With that being said, let’s take a look at how to limit login attempts on your WordPress website.

How to Limit Login Attempts in WordPress

The first thing you need to do is install and activate the Limit Login Attempts Reloaded plugin. For more details, see our step by step guide on how to install a WordPress plugin.

The free version is all you need for this tutorial. Upon activation, you should visit the Settings » Limit Login Attempts page, and then click on the Settings tab at the top.

The default settings will work for most websites, but we’ll walk you through how you can customize the plugin settings for your site.

Limit Login Attempts Reloaded Settings

To be compliant with GDPR laws, you can click the ‘GDPR compliance’ checkbox to show a message on your login page. You can learn more about the GDPR in our guide on WordPress and GDPR compliance.

Next, you’ll choose whether to be notified when someone has been locked out. You can change the email address the notification is sent to if you wish. By default, you will be notified the third time the user is locked out.

After that, you should scroll down to the Local App section where you can define how many login attempts can be made and how long a user will have to wait before they can try again.

Limit Login Attempts Reloaded Settings

First, you need to define how many login attempts can be made. After that, choose how many minutes a user will have to wait if they exceed that number of failed attempts. The default value is 20 minutes.

You can also increase the wait time once the user has been locked out a specified number of times. For example, the default settings will not allow the user to attempt to log in for 24 hours once they have been locked out 4 times.

It’s recommended that you do not change the ‘Trusted IP Origins’ setting for security reasons.

Don’t forget to click the Save Settings button at the bottom of the screen to store your changes.

Pro Tips on How to Protect Your WordPress Website

Limiting login attempts is just one way to keep your WordPress site secure.

The first layer of protection to your WordPress sites is your passwords. You should always use strong passwords on your WordPress site.

Strong passwords can be difficult to remember, but you can use a password manager to make it easy. If you run a multi-author WordPress site, then see how you can force strong passwords on users in WordPress.

If your WordPress login page is still being attacked, then another layer of protection you can add is Google reCAPTCHA for WordPress login. This will further help reduce the DDoS attacks.

No website is 100% safe because hackers always find new ways to get around the system. That’s why it’s crucial that you keep complete backups of your WordPress site at all times. We recommend using the UpdraftPlus or another popular WordPress backup plugins.

If your website is a business, then we strongly recommend that you add a firewall that takes care of the brute force attacks and so much more. We use Sucuri, which guarantees our safety and if anything happens to our site, then their team is responsible to fix it at no additional charge.

For more security tips, be sure to see our ultimate WordPress security guide.

We hope this tutorial helped you learn how to limit login attempts in WordPress. You may also want to learn how to choose the best WordPress hosting or check out our list of must have plugins to grow your website.

If you liked this article, then please subscribe to our YouTube Channel for WordPress video tutorials. You can also find us on Twitter and Facebook.

The post How and Why You Should Limit Login Attempts in WordPress appeared first on WPBeginner.


October 30, 2021 at 04:00PM

Friday, October 29, 2021

12 Tips to Optimize Your WordPress RSS Feed (Quick & Easy)

Do you want to optimize your RSS feed in WordPress?

Every WordPress site has an RSS feed by default. You can optimize this feed to protect your content, send more traffic to your site, and more.

In this article, we’ll show you how to optimize and customize your RSS feeds the right way.

12 tips to optimize your WordPress RSS feed

Why Optimize Your WordPress RSS Feeds?

RSS feeds offer a way for your readers to subscribe and read your blog posts in their favorite feed reader apps like Feedly.

Even though feed readers aren’t as popular as they once were, there are still many readers who prefer to read WordPress blog content this way.

By optimizing your RSS feed you can also prevent content scraping, get more backlinks, send traffic to your site, and more.

With that said, let’s get into our expert tips for optimizing your RSS feed.

1. Create an RSS Feed Sitemap

An RSS sitemap is different from an XML sitemap. RSS sitemaps only contain your most recent content, which helps Google to keep your content fresher in search results.

If you publish content frequently, then this can lead to a boost in your search engine rankings.

All in One SEO allows you to add an RSS sitemap to your website easily, without having to code.

The first thing you need to do is install and activate the All in One SEO plugin. For more details, see our step by step guide on how to install a WordPress plugin.

Upon activation, you’ll be prompted to set up the plugin. You can follow the guided steps in the setup wizard, or see our guide on how to set up All in One SEO for WordPress.

AIOSEO enables RSS sitemaps automatically, so there’s nothing else you need to do.

If you’d like to double check, simply go to All in One SEO » Sitemap and then click on the ‘RSS Sitemap’ tab.

You can see that the ‘Enable Sitemap’ toggle in the ‘RSS Sitemap’ box is already enabled.

Enable RSS sitemap

You can also set the number of posts and the post types you want to include in the ‘Sitemap Settings’ box.

We’ll leave the default settings, but you can include more posts or only include certain post types.

Edit RSS sitemap settings

Before you leave the screen, make sure to click the ‘Save Changes’ button.

Now you’ve enabled your RSS sitemap for your website.

To submit your new RSS sitemap to Google, you can see our guide on how to add your WordPress site to Google Search Console. It’s the same process as submitting an XML sitemap.

2. Edit Your RSS Feed Before and After Content

By default, WordPress RSS feeds will show your recent post content, and there’s no built-in option to customize that content for your readers.

Luckily you can use the All in One SEO plugin to easily customize your RSS feed before and after content.

Simply follow the same steps as above to install, activate, and set up the plugin.

After that, navigate to All in One SEO » General Settings and then click the ‘RSS Content’ menu option.

Edit RSS content

On this screen, you can add any content you want to display before and after each post in your RSS feed.

You can add HTML, smart tags for links, and other metadata to each section.

Edit header and footer RSS content

Once you’re satisfied with your changes, make sure to click the ‘Save Changes’ button to save your RSS feed.

3. Protect Your RSS Feed From Content Scrapers

Content scraping is when content is taken your site, usually via your RSS feed, and republished on someone else’s site as their own.

It can be very frustrating to see someone stealing your content, monetizing it, and even outranking your website in the search results.

Luckily, you can customize your RSS feed to actually benefit your site if someone steals your content via your RSS feed.

For more details, see our beginner’s guide to preventing blog content scraping in WordPress.

4. Show Excerpt Instead of Full Article in RSS Feed

Showing your full article in the RSS feed lets your users read the entire article in their feed reader. This can negatively affect your page views, advertising revenue, and conversion rates.

By showing the article summary instead of the full article in your RSS feed, you require readers to come to your WordPress website to read the full post.

WordPress comes with a built-in solution. Simply go to Settings » Reading in your WordPress admin dashboard.

Then, scroll down to the section titled ‘For each post in a feed, include’ and select the ‘Excerpt’ radio button.

Show article excerpt in RSS feed

You can also control the number of posts that display in your RSS feed as well.

In the ‘Syndication feeds show the most recent’ box, simply enter a number into the box.

Before you leave this screen, make sure to click the ‘Save Changes’ button to update your RSS feed settings.

5. Add a Featured Image to Posts in RSS Feed

By default, WordPress doesn’t add your post featured images to your RSS feed. When your users read your post in a feed reader, it’ll often pull the first image in your post.

You can change this by adding code to your WordPress files. If you haven’t done this before, then see our beginner’s guide to pasting snippets from the web into WordPress.

All you need to do is add the following code to your functions.php file, in a site specific plugin, or by using a code snippets plugin.

function wpb_rsstutorial_featuredimage($content) {
global $post;
if(has_post_thumbnail($post->ID)) {
$content = '<p>' . get_the_post_thumbnail($post->ID) .
'</p>' . get_the_content();
}
return $content;
}
add_filter('the_excerpt_rss', 'wpb_rsstutorial_featuredimage');
add_filter('the_content_feed', 'wpb_rsstutorial_featuredimage');

This code simply adds your featured image inside a paragraph just before the post content.

6. Add Custom Post Types to Your RSS Feed

Many WordPress sites use custom post types to create separate sections from regular blog articles.

For example, here at WPBeginner, we created separate custom post types for our Deals and Glossary sections.

If you publish a lot of content using different custom post types, then you’ll want to add these to your main feed.

To do this, you’ll need to add the following code to your functions.php file, in a site specific plugin, or by using a code snippets plugin.

function myfeed_request($qv) {
        if (isset($qv['feed']) && !isset($qv['post_type']))
                $qv['post_type'] = array('post', 'books', 'movies');
        return $qv;
}
add_filter('request', 'myfeed_request');

This code adds two custom post types, ‘books’ and ‘movies’, to the main RSS feed. Make sure you replace these with your own custom post types.

7. Add Additional Text to Post Titles in RSS

Adding additional text to your post titles in RSS can be helpful if you create multiple kinds of post content.

For example, this can help your readers distinguish between guest posts, regular blog content, and sponsored content.

Here’s a code snippet you can use to display the post category in the title:

function wpb_rsstutorial_titlecat($content) {
$postcat = "";
foreach((get_the_category()) as $cat) {
$postcat .= ' ('.$cat->cat_name . ')';
}
$content = $content.$postcat;
return $content;
}
add_filter('the_title_rss', 'wpb_rsstutorial_titlecat');

For more details and examples, see our guide on how to completely customize your WordPress RSS feeds.

8. Allow Users to Subscribe to RSS Feed via Email

Not all your users want to use a feed reader to subscribe to your posts. A lot of people will prefer to subscribe by email instead. That’s one reason why having an email newsletter is important.

To send RSS emails automatically, we recommend using Sendinblue. It’s a popular email marketing service provider that has a forever free plan to send up to 300 emails a day.

Sendinblue

Once your email list is set up, you can automatically send RSS emails when you publish a new blog post.

For more details, see our guide on how to notify subscribers of new posts in WordPress.

9. Allow Users to Subscribe to Categories in RSS Feed

Each category on your WordPress site will automatically have its own RSS feed. If you run a massive blog with many diverse categories, then this lets your readers only subscribe to categories that interest them.

However, a lot of users don’t realize they can easily subscribe to specific categories. You can make this easier on your readers by highlighting this on your website.

Subscribe to category RSS

For more details, see our guide on how to make separate RSS feed for each category in WordPress.

10. Add Custom Field Data to Your RSS Feed

Custom fields let you add extra metadata to your WordPress posts and pages. However, this metadata isn’t included in your default RSS feed.

To display custom fields in your RSS feed, simply add the following code snippet to your functions.php file, in a site-specific plugin, or by using a code snippets plugin.

function wpb_rsstutorial_customfield($content) {
global $wp_query;
$postid = $wp_query->post->ID;
$custom_metadata = get_post_meta($postid, 'my_custom_field', true);
if(is_feed()) {
if($custom_metadata !== '') {
// Display custom field data below content
$content = $content."<br /><br /><div>".$custom_metadata."</div>
";
}
else {
$content = $content;
}
}
return $content;
}
add_filter('the_excerpt_rss', 'wpb_rsstutorial_customfield');
add_filter('the_content', 'wpb_rsstutorial_customfield');

This code checks if the custom field is being used and if the RSS feed is being displayed. After that, it will add the custom field data below the post content.

11. Delay Posts From Appearing in RSS Feed

Delaying posts from appearing in your RSS feed can save you from accidental publishing and can help you beat content scrapers, if that’s an issue you regularly face.

When you delay posts from appearing in your RSS feed, you give the search engines time to crawl and index your content before it appears elsewhere.

Plus, you can check for any typos before it gets sent out to RSS subscribers.

To do this, you’ll need to add the following code to your functions.php file, in a site-specific plugin, or by using a code snippets plugin.

function publish_later_on_feed($where) {

        global $wpdb;

        if ( is_feed() ) {
                // timestamp in WP-format
                $now = gmdate('Y-m-d H:i:s');

                // value for wait; + device
                $wait = '10'; // integer

                // http://dev.mysql.com/doc/refman/5.0/en/date-and-time-functions.html#function_timestampdiff
                $device = 'MINUTE'; //MINUTE, HOUR, DAY, WEEK, MONTH, YEAR

                // add SQL-sytax to default $where
                $where .= " AND TIMESTAMPDIFF($device, $wpdb->posts.post_date_gmt, '$now') > $wait ";
        }
        return $where;
}

add_filter('posts_where', 'publish_later_on_feed');

This code will add a 10 minute delay before posts appear in your RSS feed. You can change it to your own needs by changing the 10 and MINUTE values.

12. Add Social Buttons to Your WordPress RSS Feeds

Most RSS feed readers don’t have social sharing features, or they’re not very noticeable. However, you can add your own social media icons to your RSS feed to encourage sharing.

First, you’ll need to create image icons for the social media networks you want to add. For this tutorial, we created images for Facebook and Twitter and uploaded them by going to Media » Add New.

After you upload your image files, you need to copy the ‘File URL’ and paste it into your favorite text editor to save it for the next step.

For more details, see our guide on how to get the URL of images you upload in WordPress.

Upload social media icons copy URL

Next, you need to add the following code snippet to your functions.php file, in a site-specific plugin, or by using a code snippets plugin.

// add custom feed content
function wpb_add_feed_content($content) {

// Check if a feed is requested
if(is_feed()) {

// Encoding post link for sharing
$permalink_encoded = urlencode(get_permalink());

// Getting post title for the tweet
$post_title = get_the_title(); 

// Content you want to display below each post
// This is where we will add our icons

$content .= '<p>
<a href="http://www.facebook.com/sharer/sharer.php?u=' . $permalink_encoded . '" title="Share on Facebook"><img src="Facebook icon file url goes here" title="Share on Facebook" alt="Share on Facebook" width="64px" height="64px" /></a>

<a href="http://www.twitter.com/share?&text='. $post_title . '&amp;url=' . $permalink_encoded . '" title="Share on Twitter"><img src="Facebook icon file url goes here" title="Share on Twitter" alt="Share on Twitter" width="64px" height="64px" /></a>
</p>';
}

return $content;
}

add_filter('the_excerpt_rss', 'wpb_add_feed_content');
add_filter('the_content', 'wpb_add_feed_content');

This code above will simply add the social sharing buttons for Twitter and Facebook. You need to replace the src= attribute in the image tag with your own image URLs that you pasted into your text editor earlier.

If you’ve optimized your RSS feed and are seeing errors, then see our guide on how to fix RSS feed errors.

We hope this article helped you learn how to optimize your WordPress RSS feed. You may also want to see our expert picks on the best email marketing services for small businesses and our guide on how to choose the best website builder.

If you liked this article, then please subscribe to our YouTube Channel for WordPress video tutorials. You can also find us on Twitter and Facebook.

The post 12 Tips to Optimize Your WordPress RSS Feed (Quick & Easy) appeared first on WPBeginner.


October 29, 2021 at 02:30PM