Monday, April 25, 2022

What’s Coming in WordPress 6.0 (Features and Screenshots)

WordPress 6.0 Beta arrived a few days ago, and it is expected to be released on May 24th, 2022. It will be the second major release of 2022 and will come with many new features and improvements.

We have been closely monitoring the development and trying out new features on our test sites.

In this article, we’ll give you a sneak peek into what’s coming in WordPress 6.0 with features and screenshots.

Features and screenshots of upcoming WordPress 6.0 (Features and Screenshots)

Note: You can try out the beta version on your computer or on a staging environment by using the WordPress Beta Tester plugin. Please keep in mind that some of the features in beta may not make it into the final release.

Improvements to Full Site Editing

WordPress has been gradually releasing the new full site editing experience.

Basically, with full site editing, you can customize your WordPress themes using the same block editor that you use to create posts and pages.

You can make site wide changes to your theme templates and edit them visually with blocks.

Note: You’ll need a block enabled theme that supports this feature.

WordPress 6.0 is bringing a ton of enhancements and new features to the Theme Editor. Here are some of them.

Effortlessly Switch Theme Styles

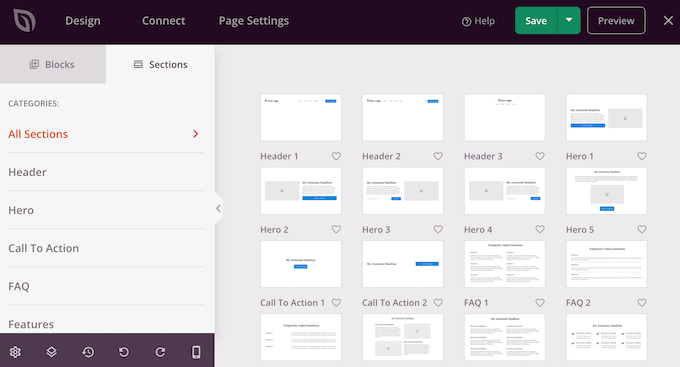
WordPress 6.0 will allow users to easily switch theme styles with one click.

Simply click on the Style button at the top right corner and then switch to Browse Styles tab to see available styles in your theme.

Easily browse and switch styles

This allows theme developers to add multiple style presets to their themes that users can easily switch.

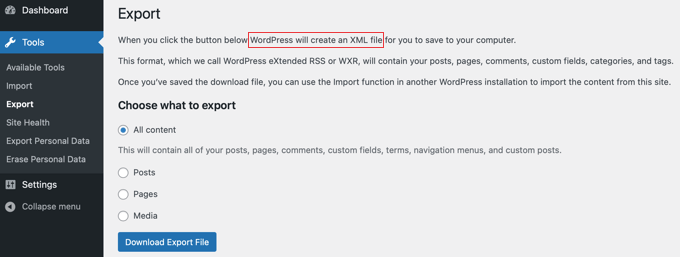
Export Your WordPress Block Theme

The new Theme Editor (Full Site Editor) allows you to create your own templates, customize styles, create beautiful layouts. But what if you wanted to copy all of them to another WordPress site?

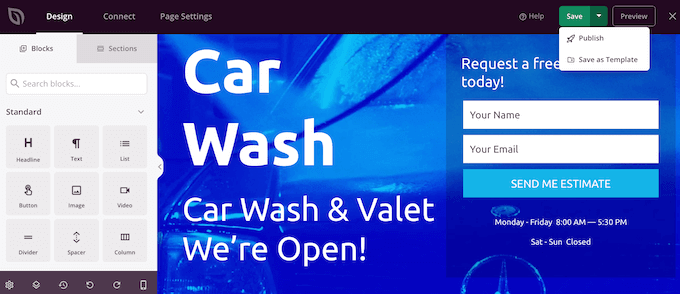
WordPress 6.0 will allow you to easily export your theme with all the changes you made.

Export block theme

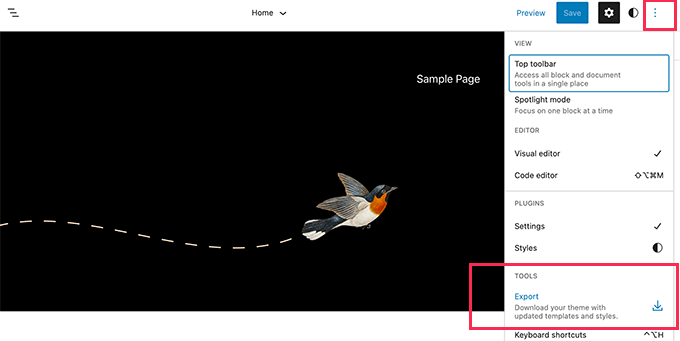
You can then simply install this theme on any other WordPress website and it will include all the changes you made to the original theme.

New Blocks in Block Theme Editor

WordPress 6.0 will introduce the following new blocks that you can use in your theme and templates.
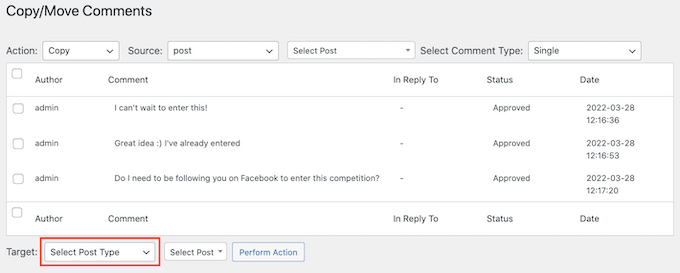
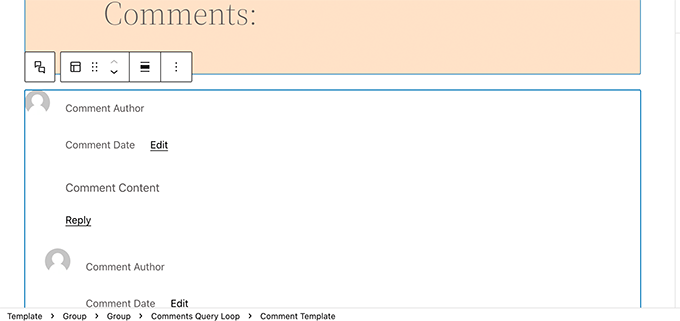
1. Comments

You can now add comments query loop block. It comes with sub-blocks like comment author name, avatar, comment content, edit link, and more. You can edit them individually to make your comments standout.
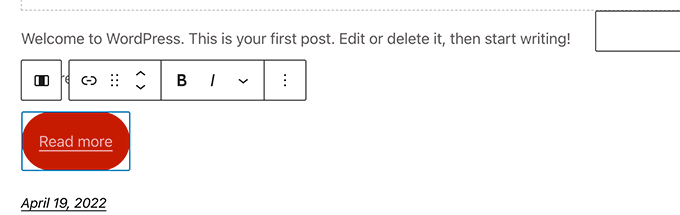
Comment Query Loop block

2. Read More

While the Excerpt block in WordPress 5.9 allowed you to just enter the text you want to use for ‘Read more’.

WordPress 6.0 will come with a separate block as well. This way you can choose different text, background, and border for the link to make it more prominent.

Read more block

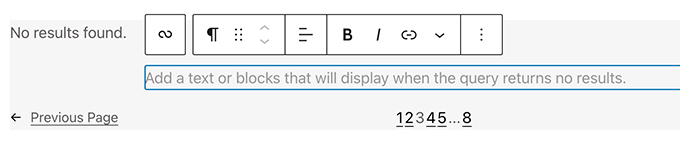
3. No results in Query Loop

When adding a Query Loop block, you can now insert the No Results block inside it. However, the block will only be available if your selected query doesn’t have any results.

No Results block

4. Post Author biography

New post author biography block can now be used along with Post Author and Avatar blocks.

Add post author biography

5. Avatar

The avatar block allows you to display a user’s Avatar (profile photo). You can choose if you want to display Avatar for a specific user or display current post/page author’s avatar.

Avatar block

While the default theme editor continues to see improvements, it still needs more work to compete with custom theme builder solutions that come as part of the WordPress page builder.

Block Editor Changes in WordPress 6.0

The block editor is where most website owners spend most of their time creating content and pages for their website.

Each WordPress release comes with significant improvements and new features to the content editor. Following are some of the most noticeable changes coming in WordPress 6.0 for the block editor.

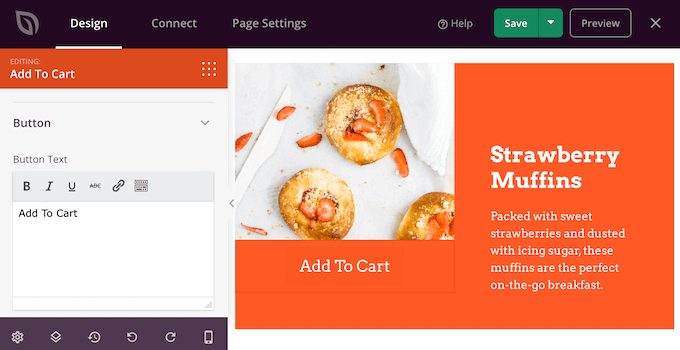
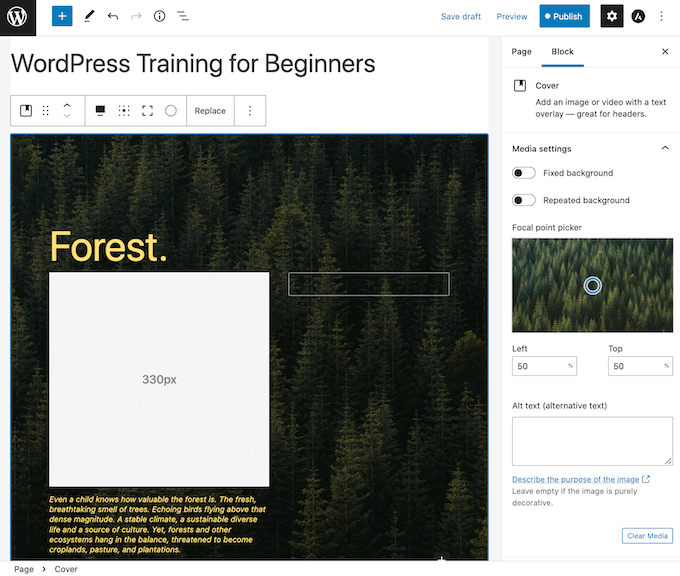
Featured Image in Cover Block

Want to use the featured image for a post in the cover block? With WordPress 6.0. You’ll be able to choose featured image for a cover block and it will automatically display current post/page’s featured image.

Featured image in cover block

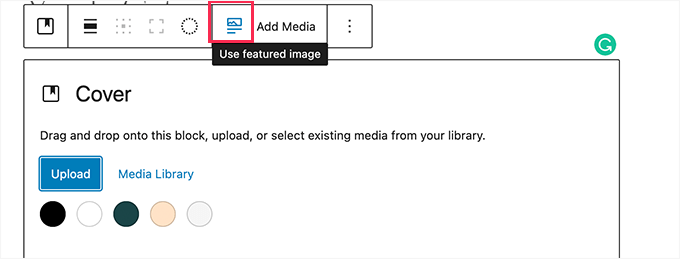
Changing featured image will automatically change the image displayed in this cover block.

Easier Text Selection in Multiple Blocks

Currently, selecting text across multiple blocks is difficult. Often the block editor ends up selecting all text in the block.

Selecting text across multiple blocks in WordPress 5.9

WordPress 6.0 will make it easier to simply select only the text you want to select.

Selecting text across multiple blocks in WordPress 6.0

Lock Reusable Blocks

A major pain point with the reusable blocks is that if any user makes changes to them, then those changes are saved.

To fix this there are already plugins that you can use to lock the reusable block and prevent users from editing it.

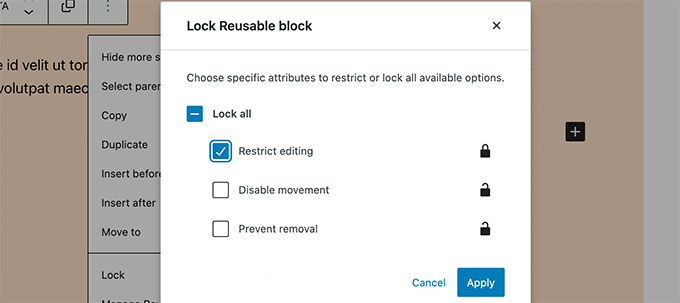
WordPress 6.0 is expected to bring that feature to the core. You’ll be able to simply select Lock Reusable Block option to prevent users from directly editing it.

Lock reusable block

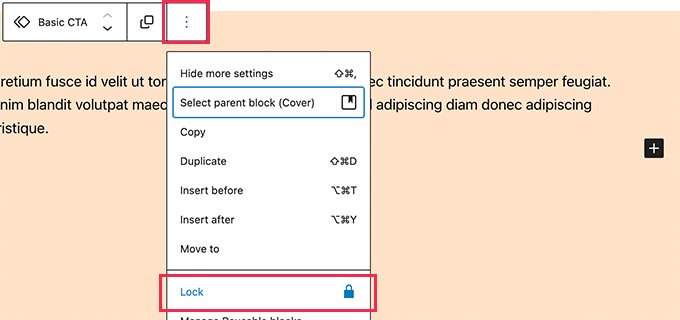
This will bring up a popup where you’ll be able to choose lock restrictions.
You can lock edit, move, or removal of the block.

Lock options for reusable blocks in WordPress

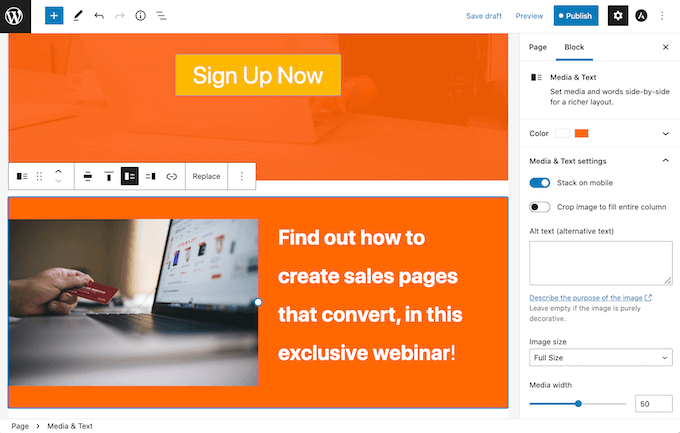
Responsive Group and Row Blocks

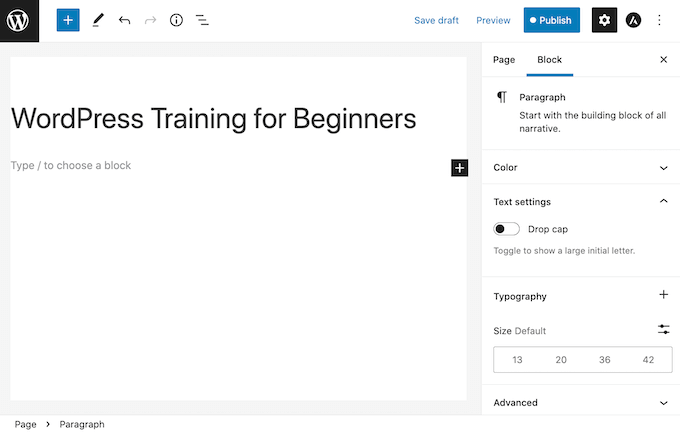
With WordPress 6.0 you’ll be able to choose how you would want blocks to behave on different screen sizes.

For group block, you’ll see the option to display the blocks inside as a row or a stack.

Responsive group blocks

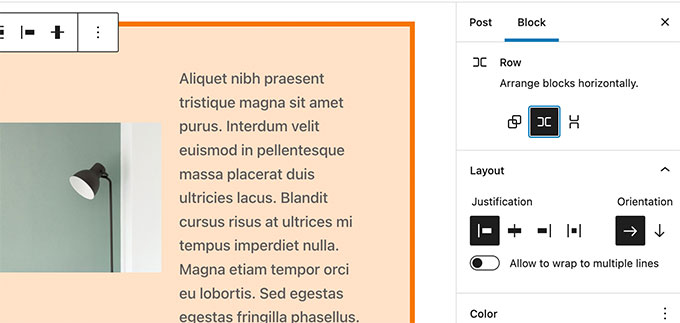
You can also select multiple blocks and then choose between a row or a stack layout.

Multi block row or stack layout

Miscellaneous Block Editor Enhancements

Following are a few more notable enhancements to the block editor in WordPress 6.0.

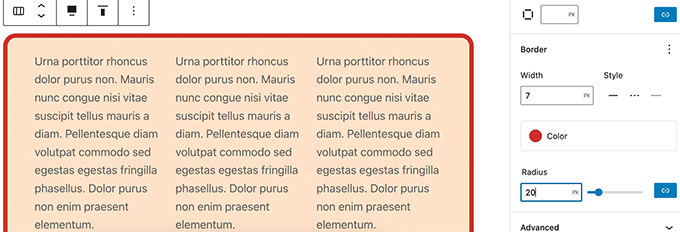
1. Border for Columns Block

You can now add a border around the columns block.

Border around columns block

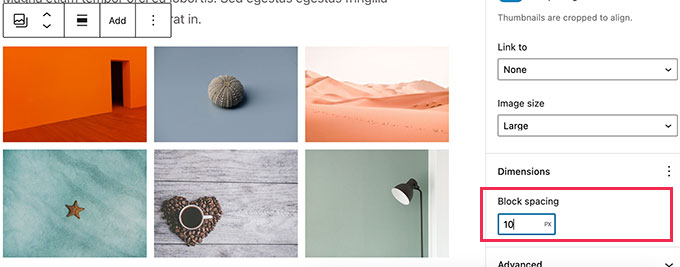
3. Spacing for Gallery Images

You can now adjust the spacing between individual images inside a gallery block.

Gallery spacing

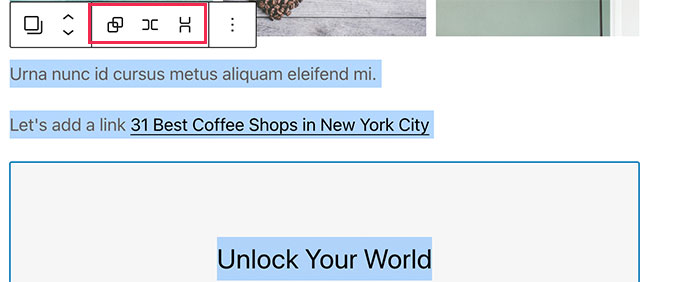
4. Quick Shortcut to Add Internal Links

You can now quickly add links by adding two square brackets followed by the post or page title.

Add link shortcut

5. Select Multiple Blocks in List View

Users will be able to use SHIFT+Click or Shift+Up+Down keys to select multiple adjacent blocks in the list view. They can then move them up or down or perform other actions.

Move multiple blocks

See a full list of helpful WordPress keyboard shortcuts.

Accessibility Improvements in WordPress 6.0

Each WordPress release continues to improve usability by making it more accessible for users.

WordPress 6.0 will come with a ton of improvements that would improve user experience for users with accessibility needs.

Following are some of the more notable accessibility improvements.

  • Post title will be used as ALT text for featured images if no other ALT text is provided.
  • Better tabbing in blocks with placeholder elements.
  • Search announcement in block search.
  • Read description for blocks with a placeholder setup.
  • Admin bar text labels will be readable by screenreaders on smaller screens.

For a detailed roundup, see accessibility improvements in WordPress 6.0.

Under The Hood Changes

WordPress 6.0 will also bring many changes for developers to explore and use in their own themes, plugins, and projects.

Following are some of these under the hood changes:

  • Webfonts API will provide theme authors a more efficient way to manage local fonts via PHP or theme.json. (See details)
  • An API to prevent blocks from appearing on Widgets screen. (#55301)
  • Make get_the_author_link pluggable. (#51859)
  • Improved sticky post query. (#36907)

We hope this article gave you a glimpse into what’s coming in WordPress 6.0.

Comment below to let us know what features you find interesting and what you’d look to see in a future WordPress release!

If you liked this article, then please subscribe to our YouTube Channel for WordPress video tutorials. You can also find us on Twitter and Facebook.

The post What’s Coming in WordPress 6.0 (Features and Screenshots) first appeared on WPBeginner.


April 25, 2022 at 05:06PM

Friday, April 22, 2022

6 Best WordPress Event Plugins Compared (2022)

Are you looking for the best WordPress event plugins for your site?

Event plugins are a must-have for all kinds of businesses. They help you display event calendars, let users RSVP to events, sell tickets, add and manage venues, and much more. 

In this article, we’ve hand-picked some of the best WordPress event plugins for your site. 

8 best WordPress event plugins compared

How to Choose the Right Event Plugin for WordPress?

There are a wide variety of WordPress event plugins that cater to different needs. Some users will need a plugin to manage large scale concerts, while others simply need a plugin for a local writing workshop.

The goal of using a WordPress event plugin is to help make running events easier.

These are some of the most common things to look for in an event plugin:

  • An event calendar that’s easy to set up and manage
  • Built-in RSVP and ticketing systems
  • Integrated payment options for fast payments
  • Email notifications to stay in touch with your attendees

Overall, you need to find the best plugin for your small business website that caters to the types of events you’ll be running.

That being said, let’s take a look at the best WordPress event plugins you can use with your WordPress site. 

1. Sugar Calendar

Sugar Calendar

Sugar Calendar is one of the best WordPress calendar plugins in the market. The plugin is very feature rich but still very easy to use. 

Plus, it’s lightweight, so it won’t impact your website’s speed and performance.

It includes all of the event management features you need like recurring events, start and end times, single and multi-day events, event categories, and more.

There’s even a built-in ticketing system, so you can sell tickets through WooCommerce or Stripe.

All of your events are easy to create and manage from the backend of your site through an easy to use editor. The event calendars you display on the front end integrate with your existing WordPress theme.

Sugar Calendar events example

You’ll also find advanced addons that let you integrate your events calendar with Google Calendar, WPForms, Google Maps, and more. 

To learn more, see our guide on how to create a simple event calendar with Sugar Calendar.

2. WPForms

WPForms

WPForms is the best form builder for WordPress used by over 5 million websites. It comes with an intuitive drag and drop builder that lets you easily create any kind of form.

It includes a template library of over 300+ premade templates to quickly build out your forms, including event planner forms, vendor forms, RSVP forms, and more.

All of these can be customized with the drag and drop builder. You have full control over the form fields, so you can collect all of the information you need from your attendees.

WPForms registration form example

There’s even an event registration form template you can use to sell tickets, and you can accept payments with Stripe or PayPal.

WPForms also integrates with top email marketing providers like Constant Contact, Sendinblue, Drip, and more. This makes it easy to send emails to those who have RSVP’d or registered for an event. 

For more details, see our guide on how to create an event registration page in WordPress.

3. Formidable Forms

Formidable Forms

Formidable Forms is the most advanced WordPress form builder in the market. It allows you to create nearly any kind of form with the drag and drop builder.

The plugin has a unique feature called Views, which lets you take any form data you’ve collected or entered yourself and display it visually.

This makes it easy to create your own events in your WordPress dashboard. You can also set it to automatically create everything you need on the front end of your site, including event information and event calendars.

There’s also a library of over 175+ templates you can use to quickly create event registration forms. It includes online event registration forms, RSVP forms, event planner forms, and much more.

Formidable Forms RSVP form example

You also have complete access to your data within the plugin dashboard, so it’s very easy to manage all of your attendees.

4. The Events Calendar

The Events Calendar

The Events Calendar is a feature rich event management system to help you manage nearly every aspect of your events.

The beginner-friendly interface makes it easy to add all your event details, including a separate page for venues and organizers.

You have multiple different views for displaying your event calendar on the front end, including day, week, or month. You can even spotlight events to increase engagement on the events you want the most attention on. 

Plus, you can add filtering, so your users can find the exact events they’re looking for. 

The Events Calendar example

You can quickly import data from other calendars to speed up the event creation process. Your users can also subscribe to updates in iCal or Google Calendar.

The Events Calendar has many advanced features, but the pricing adds up quickly since you’ll need to pay more for every addon and website you use it on.

5. Smash Balloon Facebook Feed Pro

Smash Balloon Facebook Feed Pro

Smash Balloon Facebook Feed Pro is one of the best Facebook plugins for WordPress in the market.

It makes it easy to connect your WordPress site to Facebook with the click of a button. If you have a large Facebook community and regularly promote and organize events, then this plugin will help you integrate them with your site.

Instead of using multiple plugins, you can simply create a Facebook event, and it will automatically display on your website.

Facebook event example

Beyond the event automation and management features, you can use the plugin to display your Facebook feed, posts, and more on your WordPress website. You have full control over how it looks and what information you want to display. 

For more details, see our guide on how to display Facebook events on your WordPress site.

6. Event Organiser

Events Organiser

Event Organiser is a simple WordPress event plugin that makes it easy to create and manage events.

This plugin uses custom post types, so creating a new event is as simple as writing a blog post. You can also create recurring events, assign events to different venues, and more. 

You can view your events within your WordPress dashboard in a list view or calendar format.

Event Organiser example

It also includes a few widgets to display a calendar of events, event agendas, or the standard WordPress calendar with events added. 

If you’re mostly using your website to run events, then you may want to check out our picks of the best WordPress themes for events and conferences.

We hope this article helped you learn about some of the best WordPress event plugins you can use with your WordPress site. You may also want to see our guide on how to register a domain name and our expert picks of the best live chat software for small businesses.

If you liked this article, then please subscribe to our YouTube Channel for WordPress video tutorials. You can also find us on Twitter and Facebook.

The post 6 Best WordPress Event Plugins Compared (2022) first appeared on WPBeginner.


April 22, 2022 at 04:00PM

Thursday, April 21, 2022

How to Move Comments Between WordPress Posts

Are you looking for an easy way to move comments between WordPress posts?

You might be writing a new version of a post and plan to redirect from the original post. Redirects are great for avoiding broken links and preserving your WordPress SEO, but the original comments won’t be moved to the new post.

In this article, we will show you how to easily move comments between WordPress posts.

How to move comments between WordPress posts

Why Move Comments Between WordPress Posts?

By default, any comments you get on your WordPress site are attached to a specific post or page and can’t be moved.

However, sometimes you might need to keep comments but move them to another post or page. For example, you might decide to combine multiple posts together in a new post and delete the individual ones. Or, you might decide that a post would work better recreated as a page, or vice versa.

Redirecting those deleted posts is good for your website’s search engine optimization, but it won’t save the comments.

In those cases, it would be helpful to move comments from one post or page to the new one, instead of losing them or having to recreate them all manually.

How to Move Comments Between WordPress Posts

You can easily move comments between WordPress posts using the free Copy or Move Comments plugin. 

Note: It’s recommended to create a backup of your site before moving the comments, since it can’t be reversed. See our expert pick of the best backup plugins for WordPress to get started.

First, you’ll need to install and activate the plugin. If you need help, then please see our guide on how to install a WordPress plugin.

Upon activation, click on Copy/Move Comments in the WordPress sidebar. 

How to move comments between WordPress posts

This WordPress plugin lets you choose between moving or copying comments.

If you choose ‘Copy,’ then it will duplicate all of the original comments and then add them to the new page or post.

When you copy the comments, the original comments won’t be deleted. This means you’ll end up with duplicate comments on your WordPress blog

If you choose ‘Move,’ then the plugin will delete the original ‘source’ comments and then add them to the new ‘target’ page or post. This helps you avoid duplicate content.

Once you’ve made your decision, open the Action dropdown. You can now select either ‘Copy’ or ‘Move.’

Choosing whether to copy or move comments between WordPress posts

Your next task is choosing the Source. This is the location where you want to copy your comments from.

To get started, click on the Source dropdown. 

You can now choose the post type. For example, if you wanted to copy comments from a specific WordPress post, then you would choose ‘post.’ 

Choosing a source page or post

Next, click on the Select Post dropdown. Depending on your selection, this will show all of your pages, or all of your posts. 

You can now simply click to select the page or post that you want to use as your source. 

Selecting a source WordPress page or post

The next step is opening the Select Comment Type dropdown.

You can choose whether you want to see comments that have replies, or ‘Single’ comments. These are comments that have no replies.

How to choose a WordPress comment type

The plugin will show all of the comments that fit your criteria.

Now, you can simply click to select every comment that you want to move or copy. If you want to move all of the comments, then you can click on the checkbox at the top of the column to select them all at once.

A list of WordPress comments

Your next task is telling the plugin where it should move these comments to.

To do this, scroll down to the Target section at the bottom. After that, open the Select Post Type dropdown, and choose the destination’s post type. 

How to choose a target WordPress post

Next, click on the Select Post dropdown. 

Here, you can choose your target which is the post or page where you want to move these comments to. 

How to move comments between WordPress posts

After choosing your target, click on the Perform Action button. 

The plugin will now move or copy all of the selected comments on this page.

If you check out the target page or post, you’ll see that all of your comments have been added to this page.

It’s also worth checking the source page or post. If you chose ‘Copy’, then you should still see all of your original comments. If you chose ‘Move’, then all of the original comments should have vanished from this page or post. 

After moving your comments, you may want to change the order that WordPress displays these comments. By showing newer comments first, you can keep the conversation fresh and get more comments on your WordPress blog. You can learn how to do this in our step by step guide on how to display the most recent comments first in WordPress

We hope this article helped you learn how to move comments between WordPress posts. You may also want to check out our guide on how to allow user registration on your WordPress website, or see our expert pick of the best WordPress membership plugins

If you liked this article, then please subscribe to our YouTube Channel for WordPress video tutorials. You can also find us on Twitter and Facebook.

The post How to Move Comments Between WordPress Posts first appeared on WPBeginner.


April 21, 2022 at 12:30PM

Wednesday, April 20, 2022

How to Create a Sales Page in WordPress (That Converts)

Do you want to increase sales from your website? 

A good sales page can be the key to converting more website visitors into paying customers thus boosting your profits. 

In this article, we’ll show you how to create a high converting sales page in WordPress.

How to Create a Sales Page in WordPress (That Converts)

What Is a Sales Page?

A sales page has a single purpose: get people to buy your products or services.

You might create a sales page for your new ebook, upcoming conference, subscription box, eCommerce product, or consultancy services. But the goal is always the same: to get more sales for your business.

Every sales page is unique. However, most high-converting pages pitch a product or service, and then follow it with a call to action (CTA)

For example, the OptinMonster sales page below has a clear CTA. This CTA button uses a contrasting color to stand out from the rest of the page. It also draws attention to the CTA by using an arrow.

An example of a sales page with a clear CTA.

People are more likely to purchase things that they see other people buying, using, or recommending. Many sale pages tap into this urge by displaying social proof such as testimonials or reviews. 

This may all sound very familiar. In fact, at this point you may be wondering: isn’t this just a landing page

Sales pages and landing pages have lots of things in common. Sometimes, landing pages are created to sell products and services.

But not always. You might create a landing page to increase newsletter signups, or to promote your upcoming webinar.

However, a sales page is always about making a sale.

That said, let’s take a look at how you can create a sales page in WordPress that converts. We’ll show you 2 methods, so simply click the links below to jump to the method you prefer:

Method 1. Creating a WordPress Sales Page Using SeedProd (Recommended) 

This method is the easiest and recommended for all WordPress users.

For this method, we’ll be using SeedProd. It is the best landing page builder for WordPress. SeedProd allows you to easily create beautiful page layouts that will help you get more sales.

SeedProd Website Builder Coupon Code

SeedProd works with many popular third-party tools that you may already be using to drive sales. This includes top email marketing services, WooCommerce, Google Analytics, and more.

The first thing you need to do is install and activate the SeedProd plugin. For more details, see our step by step guide on how to install a WordPress plugin.

Note: There is a free version of SeedProd plugin available on WordPress.org, but we will be using the Pro version since it offers more powerful features. This includes a wide selection of professionally-designed sales page templates. 

After activating the plugin, SeedProd will ask for your license key.

The SeedProd page builder for WordPress.

You can find this information under your account on the SeedProd website. After entering your license key, go to SeedProd » Landing Pages in your WordPress dashboard.

Here, click on the ‘Add New Landing Page’ button. 

How to create a new landing page, using SeedProd.

SeedProd comes with 150 professionally designed templates for different campaign types, such as lead squeeze and coming soon campaigns. Since we want to boost our sales, go ahead and click on the Sales filter.

You can now check out all of SeedProd’s templates. To take a closer look at any design, simply hover your mouse over that template. Then, click on the magnifying glass icon.  

SeedProd's wide selection of templates.

When you find a design that you want to use, click on ‘Choose This Template.’ You can now give your sales page a catchy title and enter its URL. This is the web address where your sales page will appear. 

A descriptive URL can help the search engines understand your page’s contents. This can make it easier for them to deliver your page to the right users. With that said, it’s a good idea to include relevant keywords in your URL.

Next, click on ‘Save and Start Editing the Page.’ This will load the SeedProd page builder interface. 

This simple drag and drop builder shows a live preview of your page to the right, and a toolbar on the left.

An example of a SeedProd sales template.

Blocks are the core components of all SeedProd layouts. You can build an entire sales page simply by adding these ready-made blocks to your layout, including headlines, buttons, and images.

You can also use SeedProd blocks like spacers, columns, and dividers to help organize and structure your sales page. 

It’s easy to customize any SeedProd block. Simply click on the block, and the toolbar will display all of the settings for that block. 

A sales page, created using SeedProd.

SeedProd comes with many blocks that are perfect for building a sales page that converts.

For example, you can add testimonials, pricing tables, star ratings, and countdown blocks.

SeedProd's countdown block.

You can also move blocks around your layout by dragging and dropping them. This makes it easy to create a beautiful and engaging sales page with a totally custom layout.

SeedProd comes with ‘Sections’ too. These are rows and block templates that can help you quickly create a sales page. To boost your sales, you may want to take a look at sections such as Hero, Call To Action, Features, and FAQ.

You can see all of these sections by clicking on the Sections tab.

SeedProd's selection of Section designs.

From here, you can preview any section by hovering over it. When the magnifying glass icon appears, give it a click. 

To add this section to your page, click on ‘Choose This Section.’ SeedProd will now create the section at the very bottom of your sales page. 

SeedProd even provides a number of WooCommerce blocks. This includes a handy Add To Cart block, plus blocks where you can showcase your Top Rated Products and Best Selling Products. 

SeedProd's WooCommerce blocks.

This makes it easy to create a sales page that promotes your WooCommerce products, services, or events. By choosing SeedProd, you can also design a sales page without being restricted by your WooCommerce theme

While you’re working on your sales page, you can preview your design by clicking on the Preview button. This launches your sales page in a new tab. 

When you’re happy with your design, you can click on the Save button and then choose Publish.

How to publish a sales page, using the SeedProd page builder.

Your sales page will now go live on your WordPress website.

You can use the SeedProd drag & drop builder to even create completely custom WordPress themes without writing any code.

Method 2. Creating a WordPress Sales Page Using the Block Editor

WordPress has a built-in block editor that makes it easy to create unique designs using ready-made blocks.

If you want professionally-designed templates, plus blocks that are optimized for conversions, then we still recommend using a page builder. Having said that, it is possible to create a sales page using only the WordPress block editor if you’re on a tight budget and just getting started.

When working with the block editor, a flexible and user-friendly WordPress theme is a must-have. In this post we’ll be using the multipurpose free Astra theme. Since it’s multipurpose, Astra is the perfect theme for a wide range of websites.

First, create a new page by going to Pages » Add New in your WordPress dashboard. You can now give your sales page a title.

The WordPress Gutenberg editor.

We’ll start at the top with our page’s header. In the header, you’ll typically want to establish your brand identity using elements like your company logo and your color scheme.

Let’s get started by adding a logo. Simply click on the black + icon and then search for Site Logo. 

The WordPress block editor.

After adding the Site Logo block to your design, either upload a new image or select a graphic from your WordPress Media Library.

The Cover block is another good choice for the top of your sales page. This block lets you add a background image and an overlay, or wash of color that you add to your background image. An overlay can be an easy way to add your brand colors to an image.

The Cover block also has space where you can add some text. This is perfect for pitching your brand to potential customers.

To add a Cover block to your design, click on the black + icon. Then, search for Cover. When this block appears, add it to your sales page.

A WordPress Cover block.

You can now customize the Cover block using the Block sidebar. This is your chance to add a background image and optional colored overlay, plus some text. To make your words stand out, you may want to try different colors and sizing.

Most sales pages contain a pitch for the product or service. You’ll also often want to include an image, such as a photo of your product.

WordPress has a block where you can display both text and images in a nice layout. This Media & Text block creates a two-column layout with an image on one side, and text on the other. 

WordPress' Media & Text bock.

For a sales page, you’ll typically need a way to accept payments. By default, WordPress does not support credit card payments, but there are plenty of plugins and tools that can help solve that.

You can create a payment button using WP Simple Pay. This plugin gives you an easy way to accept credit card payments, bank transfers, and more.

Another option is to create an order form using WPForms and embed it on your sales page. WPForms is the simplest way to accept payments in WordPress. You can also use it to create other useful forms, including forms that can help you capture leads.

You can now keep adding blocks to build your perfect sales page.

When you’re happy with your design, click on the Publish button. Your sales page is now live, and ready to start converting your traffic into paying customers. 

Taking Your Sales Page to The Next Level

A beautiful, professionally-designed sales page can boost your sales. However, there is always room to improve your conversion rates

With that in mind, here are some other useful WordPress plugins that can help you get even more sales: 

  • All in One SEO (AIOSEO). This beginner friendly search engine optimization toolkit can help you drive more people to your sales page from search engines. More traffic means more chances to convert visitors into customers.
  • MonsterInsights. Monitoring your page’s stats can help you find out what’s working and not working. You can then tweak your content, and optimize your design to get even more sales. The easiest way to measure important metrics in WordPress is using MonsterInsights. It’s the best WordPress analytics plugin and is used by over 3 million websites.
  • OptinMonster. OptinMonster’s exit-intent popups can convert abandoning visitors into paying customers. This popup plugin tracks the visitor’s mouse movements as they browse your sales page. This allows the plugin to detect the precise moment the visitor is about to leave, and prompts them with a personalized campaign.
  • TrustPulse. TrustPulse is the best WordPress social proof plugin on the market. It uses the FOMO effect by displaying real-time notifications of activities that users are taking on your sales page. It also comes with built-in analytics that let you monitor and improve your page’s conversion rates. 

We hope this article helped you learn how to create a sales in WordPress that converts. You can also go through our guide on how to add push notifications on your website, or our expert picks of the must have WordPress plugins for business websites.

If you liked this article, then please subscribe to our YouTube Channel for WordPress video tutorials. You can also find us on Twitter and Facebook.

The post How to Create a Sales Page in WordPress (That Converts) first appeared on WPBeginner.


April 20, 2022 at 04:06PM

Tuesday, April 19, 2022

How to Split Large XML Files in WordPress (Free Tool)

Is your WordPress export file too large to import into your new website?

WordPress comes with built in import and export functionality that uses the XML file format. Sometimes the exported XML file is larger than your web host’s upload limit.

In this article, we’ll show you how to split large XML files in WordPress.

How to Split Large XML Files in WordPress

Why Split Large XML Files in WordPress?

When moving your blog

from WordPress.com to WordPress.org or moving content from a self-hosted WordPress website to a to a new host or server, you will need to export your WordPress content.

WordPress allows you to export your entire WordPress website as a single XML file that contains all of your posts, pages, comments, custom fields, categories, and tags.

This is known as a WXR file and stands for WordPress Extended RSS.

You Can Export Your Website to an XML File

However, sometimes you may find that this file size is larger than the upload limit allowed by your WordPress hosting provider. If the file size is too large, then you will see an error message, and you will not be able to import your website data into the new WordPress installation.

This limit can vary, depending on your hosting provider and plan.

There Is a Limit to the Size of XML File That Can Be Imported

While you can ask your web hosting company to temporarily increase the file size limit, most shared hosting companies will not allow it.

So the only other option you have is to split the XML file into smaller files manually which is hard work.

Luckily, there’s an easy free online tool that can help you automatically split large WordPress XML files.

With that being said, let’s take a look at how to split large XML files in WordPress.

Bonus Free Offer

Need help? Our free WordPress blog setup service can help you migrate from WordPress.com to WordPress.org without any risk. During this guided transfer, one of our expert team members will do the entire migration from WordPress.com for you (100% free).

How to Split Large XML Files in WordPress

Once you have exported your WordPress site to a single XML file, you need to go to the Free WXR File Splitter Tool website. This is a free online tool that is designed to divide a large WordPress export file into small chunks.

Once there, you can upload your XML file by dragging it onto the area labeled ‘Click or drag a file to this area to upload’. Alternatively, you can click the ‘WXR File’ button and then select the XML file.

Upload the XML File to the Free WXR File Splitter Tool

After that, you need to move the ‘New file size’ slider to your website’s maximum upload size or smaller. The goal is to create multiple files that are small enough to be uploaded to your host without surpassing the limits.

When you are ready, you need to press the ‘Submit’ button. Your large XML file will be split into smaller files of the correct size.

Download the Split Files in a Zip File to Your Computer

Finally, you’ll need to press the ‘Download’ button to download the files to the default download location on your computer. The files will be contained in a single file which will need to be unzipped so that you can import them into your new website.

We hope this tutorial helped you learn how to split large XML files in WordPress. You may also want to learn how to create a free business email, or check out our list of the best drag and drop WordPress page builder plugins.

If you liked this article, then please subscribe to our YouTube Channel for WordPress video tutorials. You can also find us on Twitter and Facebook.

The post How to Split Large XML Files in WordPress (Free Tool) first appeared on WPBeginner.


April 19, 2022 at 03:37PM