Wednesday, June 1, 2022

How to Add Text on Top of an Image in WordPress (3 Methods)

Do you want to add text on top of an image in WordPress?

A text overlay is a great way to provide some extra information about an image. It’s also a quick and easy way to create banners, headers, and even online advertisements.

In this article, we will show you how you can add text on top of an image in WordPress.

How to add text on top of an image in WordPress

Adding Text Over Images in WordPress

Images can make your WordPress website look more interesting and help to break up large paragraphs of text.

However, sometimes your images may need more explanation. For example, you might add text on top of an image to explain what the image shows and why you’ve added it to your post.

Many WordPress blogs also add text on top of an image to create eye-catching and informative banners and headers.

In this post we have three different ways to add text on top of an image in WordPress. If you prefer to jump straight to a particular method, then you can use the links below.

One way to add text on top of an image in WordPress is by using the Cover block. You can use this block to show any image, and then type text over the image. This makes the Cover block perfect for creating hero images, headers, and banners.

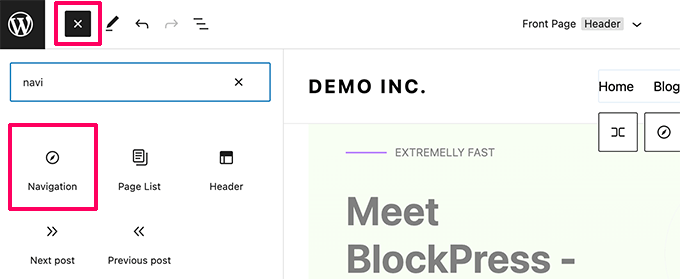
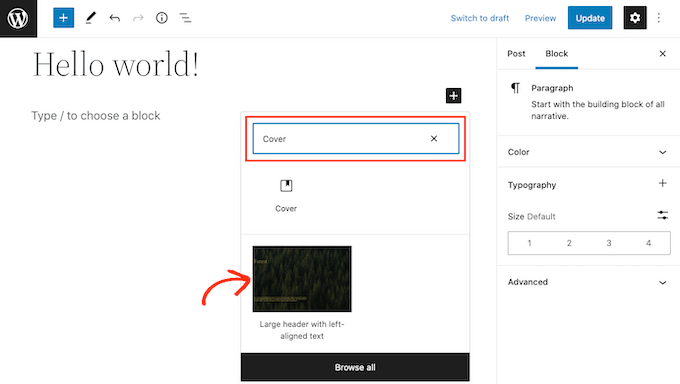
To add a Cover block to a page or post, simply click the plus (+) sign in the WordPress block editor.

You can now type in ‘Cover’ and select the right block when it appears.

The WordPress Cover block

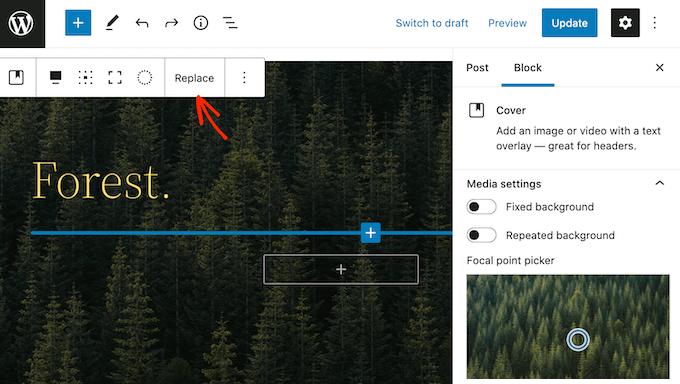
By default, the Cover block has a placeholder image and some placeholder text.

To replace the default image, simply click to select the image. Once you’ve done that, click on the ‘Replace’ button.

How to add text on top of an image in WordPress

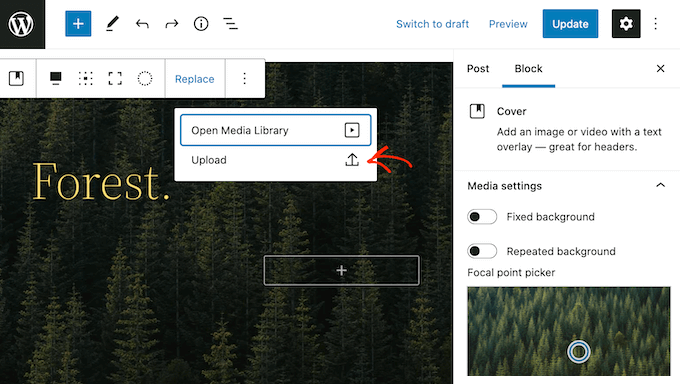
If you want to use an image that’s already in your WordPress media library, then simply click on ‘Open Media Library.’ You can then choose an existing image.

If you want to upload a new image, then click on ‘Upload’ instead.

Uploading an image to the WordPress Cover block

This opens a window where you can choose any file from your computer.

After you choose an image, you can use the block settings to create some interesting and eye-catching effects. For example, you can make the image fixed in place as the visitor scrolls the page, or add a color overlay to the image.

A colored cover overlay

If you do use an overlay, then you can change its opacity by using the ‘Opacity’ slider. Opacity setting control the transparency of the background image.

When you’re happy with how the image looks, you’re ready to add some text.

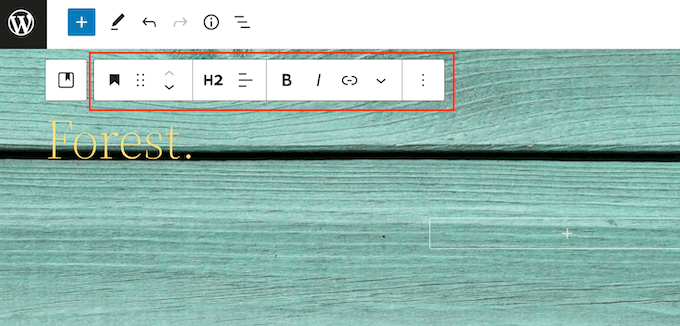
By default, the Cover block has a Heading and a Paragraph block where you can add text on top of the image.

How to add text on top of an image in WordPress

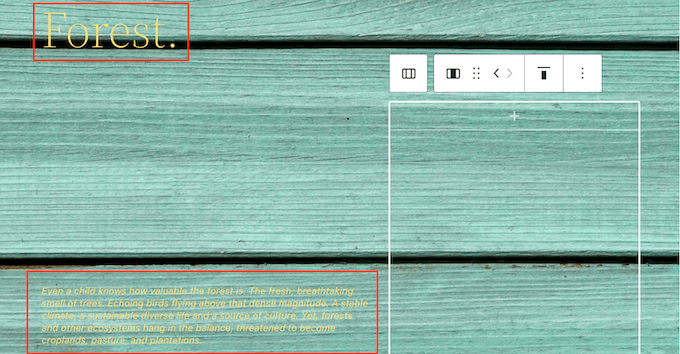
To add some text, simply click to select either the Heading or Paragraph block. Then, go ahead and type in the text that you want to use.

When you add text on top of an image, that text can sometimes be difficult to read. This is particularly true for any visitors who have poor vision. To learn more, please see our guide on how to improve accessibility on your WordPress site.

That being said, you may want to style your text so it’s easier to read.

If you’re working with a Heading block, then you can also try the different heading styles to see which one is easiest to read.

Styling the text on top of a WordPress image

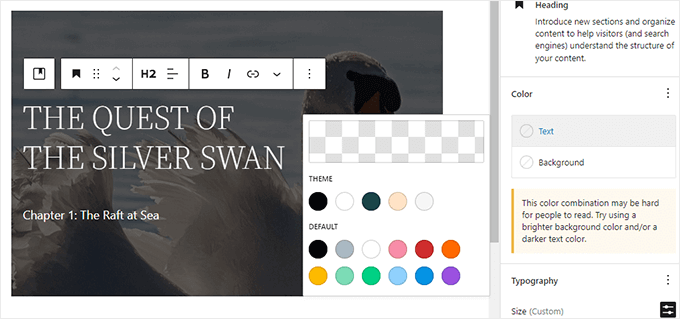
You can also help your text stand out by using a contrasting color.

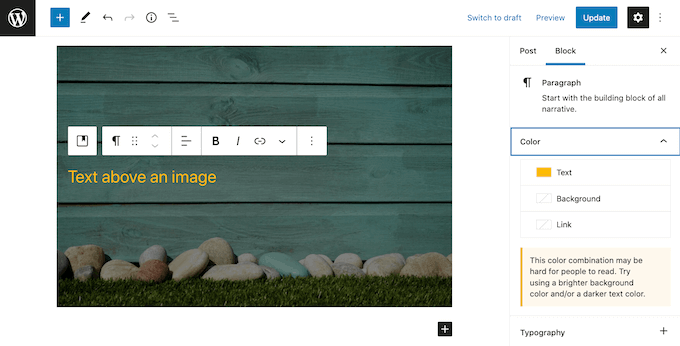
To choose a different color, select the ‘Block’ tab in the right-hand menu. Then, go ahead and click on ‘Color’ to expand this section.

Once you’ve done that, click on ‘Text.’ This opens a popup where you can choose a new color for all the text in the block.

Changing the color of text on top of an image

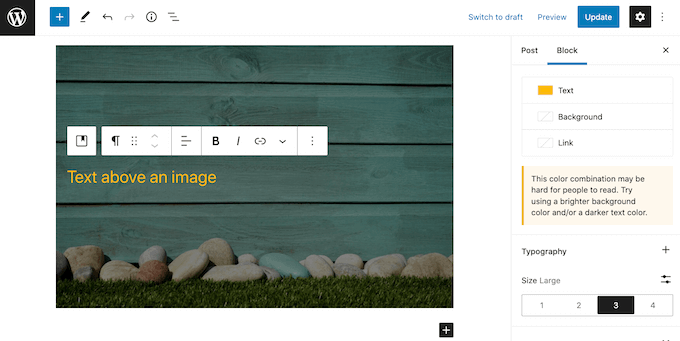
Typically, larger text is easier to read.

To make your text bigger, go ahead and click on the field next to ‘Size’ and then type a larger number into this field.

Adding text on top of an image in WordPress

Once you’re happy with how your Cover block looks, you can publish or update your page as normal. Now if you visit your website you’ll see your text on top of the image.

Method 2. How to Add Text on Top of an Image Using the Image Block

The Cover block is great for creating banners and headers. However, you can also add text on top of a standard WordPress Image block.

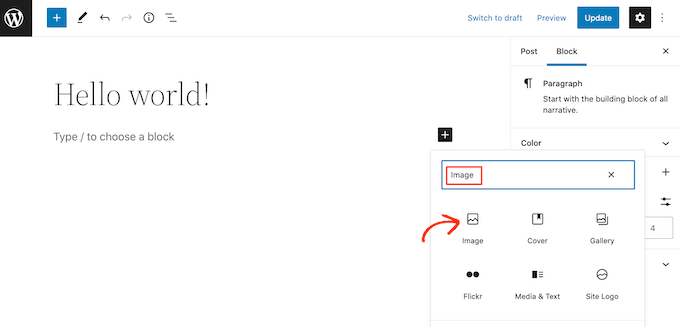
To start, you’ll need to add an Image block to your page or post. To do this, simply click on the plus (+) sign in the WordPress block editor.

You can then type in ‘Image’ and select the right block to add it to your post.

The WordPress Image block

You can then either upload an image from your computer, or click on Media Library to choose an image from the WordPress media library.

After choosing your image, you can change its focal point, add an overlay, and change the opacity following the same process described above.

You can also try the different ‘Fixed background’ and ‘Repeated background’ sliders to see what works best for your Image block.

When you’re happy with how your image looks, click on the ‘Add text over image’ button.

Adding text on top of an image in WordPress

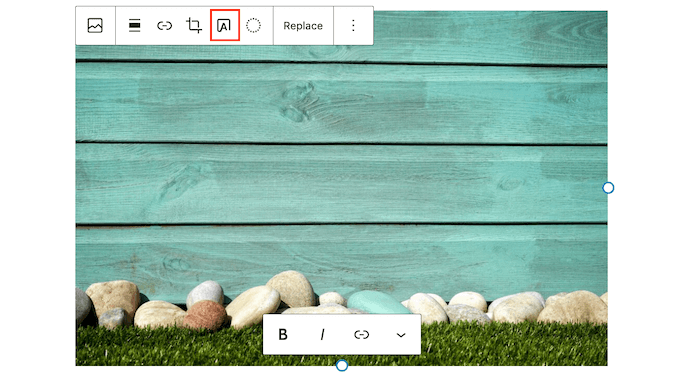
This adds an area where you can type in your text.

Depending on your image, visitors may struggle to read your text. Here, it may help to make the text bold or change its color following the same process described above.

Changing the text color in WordPress

You can also make your text bigger.

To do this, find the ‘Size’ section in the right-hand menu. You can then go ahead and click on the different numbers to make your text larger, or smaller.

Increasing the text size

When you’re happy with how your text and image look, click on Save Draft, Update, or Publish to save your changes.

Method 3. How to Create a Custom Page Layout with Text on Top of an Image

The built-in WordPress blocks are a quick and easy way to add text on top of an image in WordPress. However, if you want the freedom to create completely custom page designs, then you’ll need a page builder plugin.

SeedProd is the best WordPress page builder plugin on the market. It allows you to add text on top of any image across your entire website.

Note: There is a free version of SeedProd, but for this guide we’ll use the Pro version since it has more features.

First, you need to install and activate the SeedProd plugin. For more details, see our step by step guide on how to install a WordPress plugin.

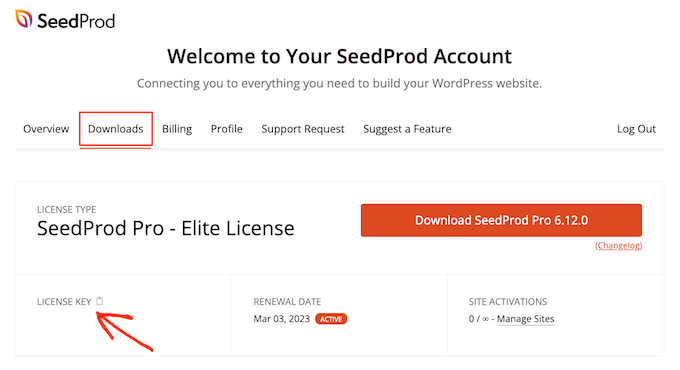
Upon activation, you’ll need to enter your SeedProd license key. You can get this key by logging into your SeedProd account. Then, click on the ‘Downloads’ tab.

Once you’ve done that, you can copy the key in the ‘License key’ section.

The SeedProd Downloads page

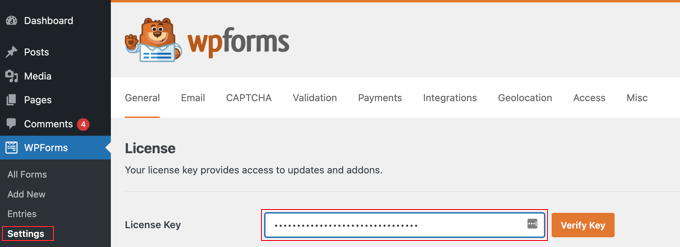
You can now paste this key into your WordPress admin area by going to the SeedProd » Settings page.

Once you’re here, go ahead and paste your key into the ‘License key’ field.

Verifying your SeedProd license

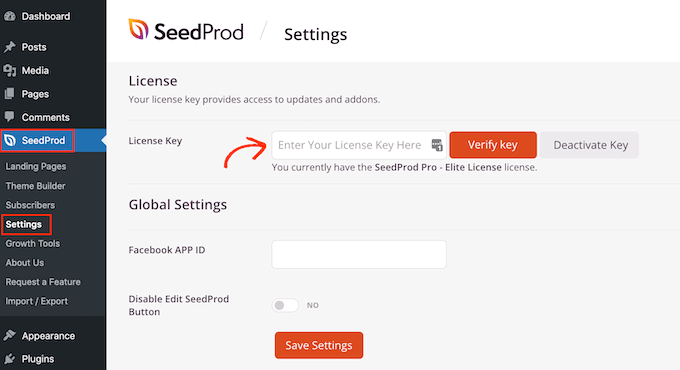
Then you simply need to click on ‘Verify Key.’

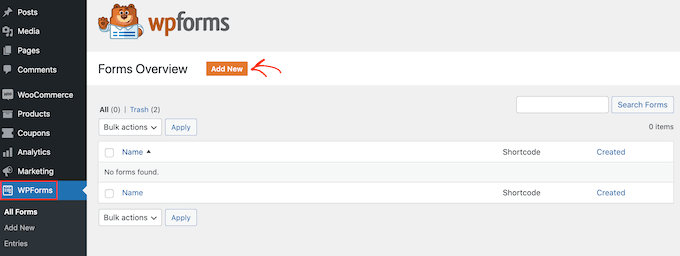
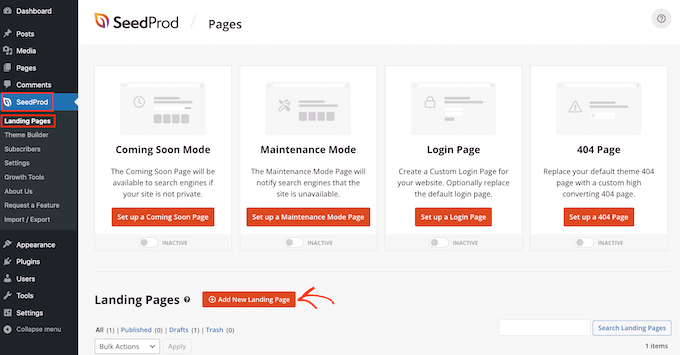
After that, we’re going to head over to SeedProd » Landing Pages, and click on Add New Landing Page.

SeedProd's page design templates

Your next task is choosing a template, which will be your page’s starting point. No matter what SeedProd template you choose, you can customize every part of the template to perfectly suit your website and branding.

If you prefer to start with a blank canvas, then you can click on Blank Template.

The SeedProd ready-made templates

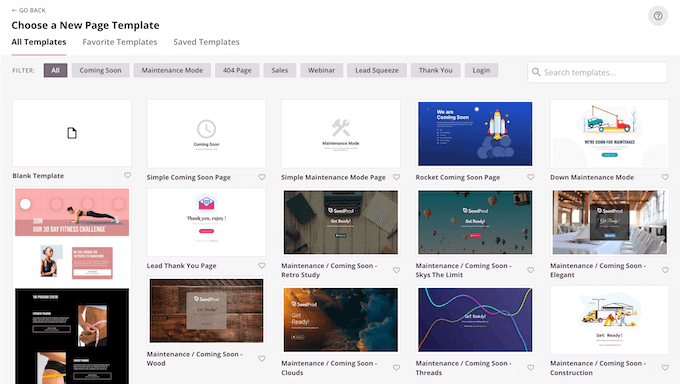
In all our images we’re using the Tasty Squeeze Page template, which is perfect for getting more subscriber campaigns.

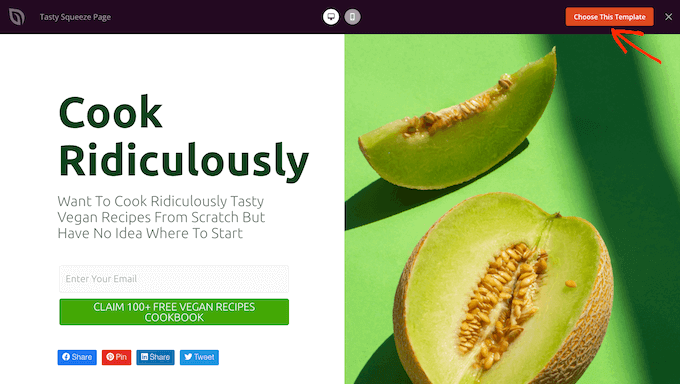
Once you’ve found a template that you may want to use, hover your mouse over it. You can then click on the ‘Preview’ icon.

SeedProd's professionally-designed templates

This will show a preview of the template.

If you’re happy with how this template looks, then go ahead and click on the ‘Choose This Template’ button.

A lead generation and squeeze template

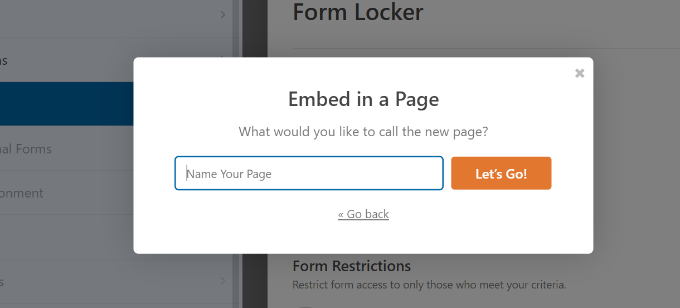
In the ‘Page Name’ field, type in a name for the page.

By default, SeedProd will use this name as the page’s URL. If you want to change this automatically-created URL, then simply edit the text in the ‘Page URL’ field.

Creating a custom page layout with SeedProd

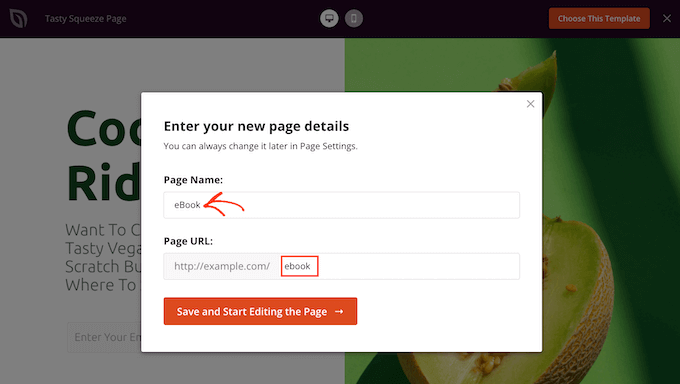
When you’re happy with the information you’ve entered, click on the ‘Save and Start Editing the Page’ button. This will open the template in SeedProd’s drag and drop editor.

In the left-hand menu, you’ll see all the blocks and sections that you can add to your page using drag and drop.

Adding blocks to your SeedProd design

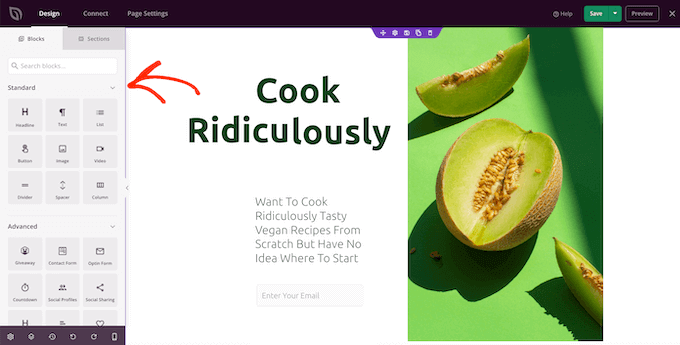
Unless you’re using the Blank Template, your SeedProd page will already have some blocks and sections. To edit any of this content, simply click to select the block or section.

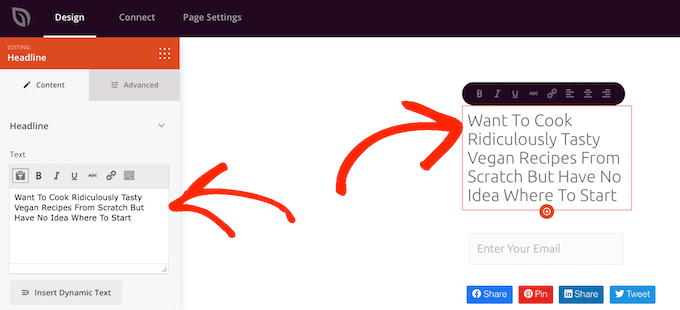
SeedProd’s left-hand menu will now show all the settings you can use to customize this block or section. As you can see in the following image, if you click on a Headline block, then you can change the text that shows up in this block.

Customizing a ready-made SeedProd page design

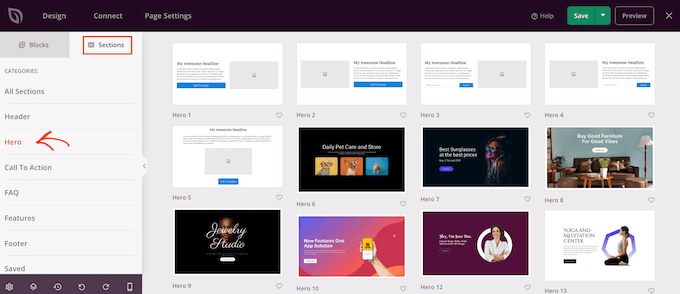
The easiest way to add text on top of an image is by using one of SeedProd’s ready-made Hero sections.

These sections have a placeholder background image, with some placeholder text added on top. You can simply replace the default background image and text with your own content.

To get started, click on the ‘Sections’ tab in SeedProd’s left-hand menu.

You can then click on ‘Hero’ to see all of the ready-made hero sections that you can add to your page.

A SeedProd section template

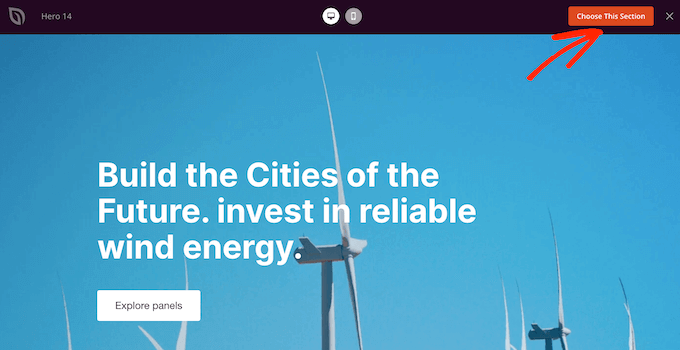
To preview any of these section templates, simply hover over the template and then click on the magnifying glass icon.

To go ahead and add this hero section to your design, just click on ‘Choose This Section.’

A SeedProd hero template

Next, you’ll want to replace the template’s stock image with your own image. To do that, simply click on the stock image to select it.

Then, in SeedProd’s left-hand menu hover over the ‘Background Image’ preview until a trash can icon appears.

You can then go ahead and click on this icon to delete the placeholder image.

Deleting a background image in SeedProd

Next, click on ‘Use Your Own Image.’ You can then either choose an image from the WordPress media library, or use a stock image.

SeedProd gives you easy access to thousands of royalty free stock images. To take a look through SeedProd’s stock image library, click on ‘Use a Stock Image.’

In the search bar, type in a word or phase that describes the image you’re looking for and click on the ‘Search’ button.

Choosing a SeedProd stock image

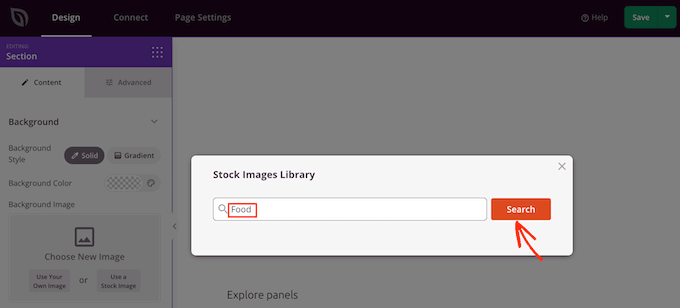
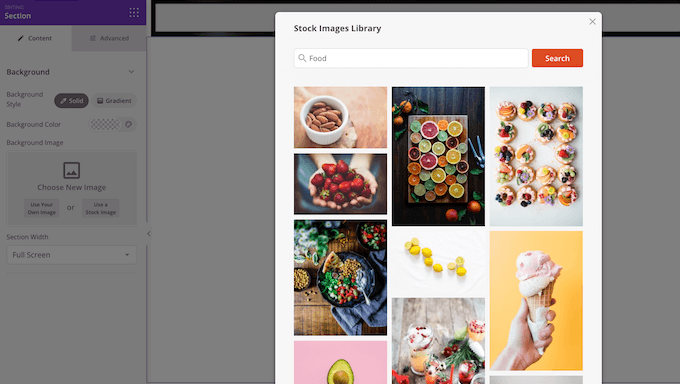
SeedProd will now show all the stock images that match your search term.

When you find an image that you want to add to your design, simply give it a click.

SeedProd's stock image library

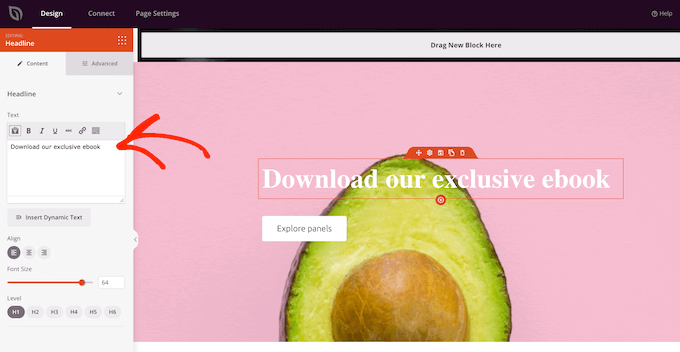
Once you’ve added an image, you’re ready to replace the placeholder text.

To do this, click to select the text block. Then in the ‘Text’ area, simply type in the text that you want to use.

Add text on top of an image using SeedProd

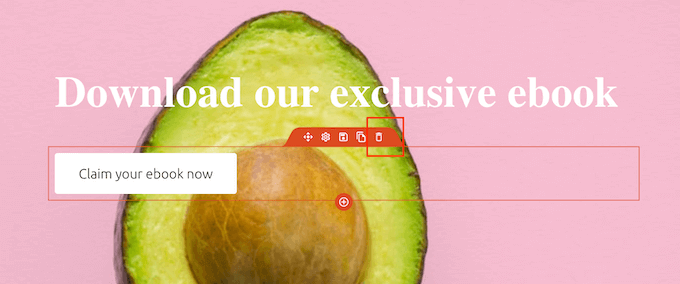
Some of SeedProd’s hero templates have extra content, such as call to action buttons.

Want to change this content? Then simply click to select the block and then make your changes in SeedProd’s left-hand menu.

Editing your SeedProd text

Another option is to delete the block from the hero template.

To do this, simply click to select the block and then click on the trash can icon.

Deleting SeedProd sections and blocks

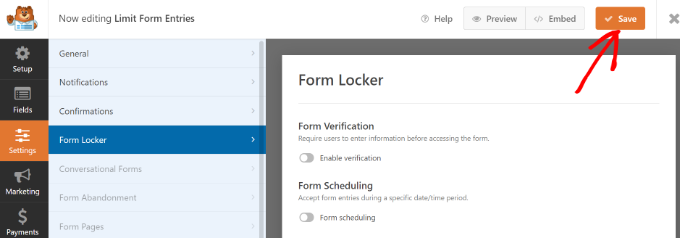
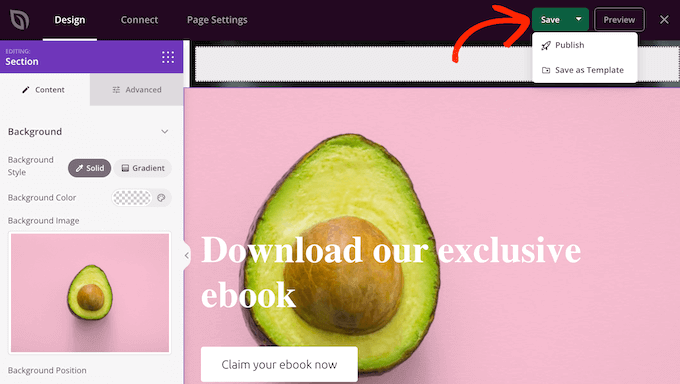
When you’re happy with your page design, you can click on the ‘Save’ button.

From here, you can choose to publish the page or save it as a template.

Publishing a SeedProd design

For more details on creating custom page layouts with SeedProd, you can see our guide on how to create a landing page in WordPress.

We hope this article helped you learn how to add text on top of an image in WordPress. You can also go through our guide on how to choose the best web design software or see our expert pick of the best SEO plugins and tools you should use.

If you liked this article, then please subscribe to our YouTube Channel for WordPress video tutorials. You can also find us on Twitter and Facebook.

The post How to Add Text on Top of an Image in WordPress (3 Methods) first appeared on WPBeginner.


June 01, 2022 at 04:00PM

Tuesday, May 31, 2022

How to Limit the Number of WordPress Form Entries

Do you want to limit the number of form entries on your WordPress website?

Limiting form entries is useful if you’re running a contest or event that have a cap on the number of participants, want form entries from a specific region, or can’t accept more forms after a particular date.

In this article, we’ll show you how to limit the number of WordPress form entries.

How to limit the number of WordPress form entries

When Should You Limit WordPress Form Entries?

There are many situations where limiting the number of form entries on your WordPress site can be beneficial.

Whether you need to create an event RSVP form with limited seats, to restricting feedback form for registered members only, WordPress forms have the flexibility to limit form entries based on your needs.

Here are few ways that you can restrict WordPress form entries:

  • Limit total number of form entries allowed – great for RSVP forms or contests / giveaways.
  • Restrict form submissions by a deadline date – great for scholarship forms, event RSVPs, job application forms, and more.
  • Restrict form entries to logged-in users only – great for those who have a membership sites or online store.
  • Limit one WordPress form entry per person – really helpful when creating a feedback form to ensure double feedback aren’t submitted.
  • Limit WordPress form entries by age verification – really helpful when you need to be in compliance with local laws.
  • Restrict WordPress form entries by user location or IP address – great for blocking out specific regions or preventing spam.

Depending on your needs, WordPress form plugins give you the flexibility to customize your workflows to save you time.

That said, let’s look at how you can limit form entries in WordPress.

Limiting the Number of WordPress Form Entries

The best way to limit form entries is by using WPForms. It’s the best WordPress contact form plugin, and over 5 million websites use it to create smarter forms.

WPForms offers a Form Locker addon that allows you to manage permissions and control who can access your forms. Plus, it lets you set up different types of form entry limits on your website.

Note: you’ll need WPForms Pro because it includes the Form Locker addon. There’s also a WPForms Lite version that you can try for free.

First, you’ll need to download and install the WPForms plugin. If you need help, then please see our guide on how to install a WordPress plugin.

Upon activation, you’ll need to go to WPForms » Settings from your WordPress admin panel and then enter the license key. You can easily find the key in your WPForms account area.

Visit the WPForms » Settings Page to Enter Your License Key

Next, you need to activate the Form Locker addon in WPForms.

Simply head to WPForms » Addons and navigate to the ‘Form Locker Addon.’ Then click the ‘Install Addon’ button.

Enable the form locker addon in WPForms

After that, you’ll need to create a WordPress form.

Simply head over to WPForms » Add New from the WordPress dashboard.

Add a new form in WPForms

On the next screen, you’ll see the WPForms form builder. Go ahead and enter a name for your form at the top.

Next, you can select from pre-built form templates to get started quickly or use a blank template to start from scratch. For this tutorial, we’ll use the ‘Contest Registration Form’ template.

Select form template

After that, you can edit your form using the drag and drop form builder.

The form template will have default form fields already in place. However, you can add more fields by simply dragging them from the menu on your left and dropping them onto the template. There are plenty of fields available, including checkboxes, dropdowns, address, phone number, and much more.

Edit form template

You can further edit any form field and set up form entry limits.

For example, let’s say you don’t want the same user to submit multiple forms on your WordPress blog. To create this form limit, simply click the Email field in the form template.

After that, you can click the ‘Advanced’ tab from the menu panel on your left and enable the ‘Require unique answer’ option.

Make a form field require unique answer

You can do the same for other form fields like name and username. This way, people will be limited to one entry and cannot use the same email or name to submit a form.

Next, go to the ‘Setting’ tab in the form builder and select the ‘Form Locker’ settings.

Go to form locker settings

You’ll see different settings under Form Locker that you can use to limit the number of form entries.

You can enable all of the options if you want. However, we’d recommend enabling 1 or 2 options to limit form entries so it doesn’t hurt the user experience and improves engagement.

Let’s see each of these settings in detail.

1. Limit WordPress Form Entries through Verification

If you enable the ‘Form Verification’ option in the Form Locker settings, you’ll see more options appear.

You can limit form entries by requiring users to enter a password, email, or age. Simply click the Type dropdown menu and select an option.

Limit form entries based on verification

For example, if you select ‘Age,’ then you can specify how old a user has to be to access the form.

You can set a minimum, maximum, or an exact age verification for your form entries.

Set age based form entry limits

2. Add a Start and End Time and Date for Form Entries

Next, you can enable the ‘Form Scheduling’ option.

This will let you add a start time and date along with an end time and date for your form entries.

It’s really helpful if you’re running a time-sensitive campaign.

Enable form scheduling

You can also add a Closed Message that will appear when someone tries to submit a form after the end date and time.

3. Only Allow Logged-In Users to Submit Forms

WPForms also lets you limit form entries to only logged-in users.

Simply enable the ‘Logged in users only’ option. Then add a message that will appear for logged-out users that try to submit the form.

Only allow logged in users

4. Set Total Form Entry Limits and Restrictions

You can limit the total number of forms that can be submitted by enabling the ‘Enable total entry limit’ option.

For example, let’s say you have an order form for your online store and only have 1,000 of an item in stock. Simply enter the number in the Limit field and add a message when the form closes.

Set form entry limits

Similarly, you can also set up restrictions on your form entries by clicking the ‘Enable user entry limit’ option.

WPForms lets you restrict form entries based on IP address and email address. To set it up, go ahead and click the checkbox for ‘Restrict by IP address’ and ‘Restrict by email address’ options.

Then select an option from the dropdown menu and enter the number of form entries you want to limit.

Set up form entry restrictions

In our example, we’ve set the limit to 1 per day. You can change this to per week, month, or year.

After you’ve enabled the options you want to use to limit the number of form entries in WordPress, simply click the ‘Save’ button at the top.

Save your form settings

Adding Your Form to Your WordPress Website

Now that you’ve created a form, the next step is to add the form to your WordPress website.

The easiest way to do that is to click the ‘Embed’ button in the WPForms form builder. You can also add the form using a shortcode or the WPForms block.

Once you click the button, a popup window will appear asking you to select an existing page or create a new one.

Embed your form in WordPress

For this tutorial, we’ll click on the ‘Create New Page’ option.

Next, you’ll need to enter a name for your page and click the ‘Let’s Go!’ button.

Enter name for your new page

Next, you’ll see the form in the WordPress content editor, and you can make any final changes you’d like to your form.

After that, preview your page and publish it.

Preview your form and publish

You can also test the WordPress form entry limits you’ve set.

For example, if you’ve set an age restriction on your form and someone doesn’t meet the age limit, then they won’t be able to submit the form.

Set age limit example

On the other hand, let’s say you get the total number of form entries that are needed, or it’s past the end date and time for filling out the form.

In such situations, a user will be shown a message when they visit the form landing page.

Contest is closed message

WPForms allows you to have full control over your form workflows. You can add conditional logic, choose to send form entries to multiple recipients, or even connect your form with your favorite email marketing services.

This is the form builder plugin that we use on WPBeginner, and there’s a reason why over 5 million websites use it to build smarter forms.

We hope this article helped you learn how to limit the number of WordPress form entries. You can also see our guide on how to start your own podcast and our ultimate WordPress SEO guide for beginners.

If you liked this article, then please subscribe to our YouTube Channel for WordPress video tutorials. You can also find us on Twitter and Facebook.

The post How to Limit the Number of WordPress Form Entries first appeared on WPBeginner.


May 31, 2022 at 04:00PM

Monday, May 30, 2022

How to Fix Missing Appearance Menu in WordPress Admin

Do you want to fix the missing Appearance Menu option in the WordPress admin area?

Some WordPress themes may come with support for the full-site editing experience, which changes the options under the Appearance Menu in WordPress admin area.

In this article, we’ll show you how to easily fix the missing appearance menu in WordPress admin area.

Fixing the missing appearance menu in WordPress

What Happened to ‘Appearance Menu’ in WordPress?

WordPress is gradually releasing the full site editing experience which uses blocks to edit all aspects of a WordPress website.

Full site editing allows you to use blocks for theme editing and customization. You can add and edit any part of a theme using blocks, including widgets and menus.

This makes certain items under the Appearance menu redundant, so they’re hidden by default.

Missing items from Appearance menu

This only happens with themes offering the support for the full-site editing. These themes are also called block based themes.

If you are using one such theme, or a default WordPress theme like Twenty Twenty-Two, then your Appearance menu would look different.

How to Fix Missing Menus in WordPress Admin

There are two ways to fix the missing appearance menu in WordPress, so you can create and edit your menus again.

We’ll go through them one by one and you can choose the one that suits you.

1. Use the Navigation Block in Full Site Editor

If you are using a block based WordPress theme with full site editing support, then you cannot access the classic navigation menus screen.

Even if you manually entered the URL for the navigation menu page (e.g. https://ift.tt/u8fQYm4), then you’ll see the following error message.

No support for menus

When using a full site editing theme, you can add, create, and edit navigation menus using the Navigation block under the site editor.

Simply launch the full site editor by visiting Appearance » Editor page.

This will bring you to the site editor interface. You can insert a new Navigation block by clicking on the (+) add block button.

Navigation block

If you already have a navigation block added by your theme, then you can click to select it.

Then simply choose a menu or create a new one.

Create and manage menus in navigation block

You can even select previous menus that you have created for your website under the Classic Menus section.

If you are starting with a new empty menu, then you can add items to your navigation menu. You can add links like you normally do in the block editor when writing posts and pages.

Adding menu items

Once you are finished, don’t forget to click on the Update button to save your menu and apply it across your WordPress blog.

For more details, you can see our step-by-step guide on how to add a navigation menu in WordPress.

2. Fix Appearance Menu by Switching Theme

Full site editing feature is still in the early phases even in WordPress 6.0.

This means that it may behave unexpectedly with different WordPress themes. It may also feel a bit clunky and unfamiliar to many users.

If you want to keep using the classic navigation menus, then you’ll need to switch your WordPress theme to one that doesn’t include the full site editing feature.

Themes that don't support full site editing

Currently many popular WordPress themes don’t support full site editing. However, there is always a chance that they may start using it as it improves over time.

Alternately, you can create a custom WordPress theme of your own without writing any code.

Fix Other Missing Appearance Menus in WordPress

Navigation menus are not the only items disappearing from the Appearance menu. Here are is how you can fix other missing items under the Appearance Menu.

1. Customize

The Customize menu under Appearance used to launch the Theme Customizer. You can still access a limited version of it by visiting the customize.php URL directly:

https://ift.tt/K5xVmD4

Simply enter that URL into your browser and change “example.com” to your own site’s domain name.

You’ll see a notification that your theme supports full site editing. Below that, you’ll find a few basic customization options.

Minimum options in customize page

2. Widgets

If your WordPress theme doesn’t have any sidebars or widget areas defined, then you will not see the Widgets menu under Appearance.

Manually accessing the widgets page (e.g. https://ift.tt/bQlEk3M) will show you an error message that your theme is not widget-aware.

Your theme is not widget-aware

On the other hand, if your theme does have widget areas, then you will see a widgets menu, but it will still use the block based widget editor.

Block based widgets

You can switch to the legacy widgets screen by using the Classic Widgets plugin.

3. Theme File Editor

WordPress came with a basic file editor that allowed you to edit theme files directly from the WordPress admin area.

We don’t recommend using that editor, but it often came in handy for many beginners when they needed to quickly add a code snippet to their theme’s functions.php file.

The good news is that it is still available, but it is moved under the Tools menu if you are using a full site editing theme.

Theme file editor

We hope this article helped you fix the missing Appearance Menus in the WordPress admin area. You may also want to take a look at how to add a search bar to your menu, or our expert pick of the best WordPress plugins for small business.

If you liked this article, then please subscribe to our YouTube Channel for WordPress video tutorials. You can also find us on Twitter and Facebook.

The post How to Fix Missing Appearance Menu in WordPress Admin first appeared on WPBeginner.


May 30, 2022 at 05:00PM