Friday, June 17, 2022

7 Best Call Center Software For 2022 (Expert Pick)

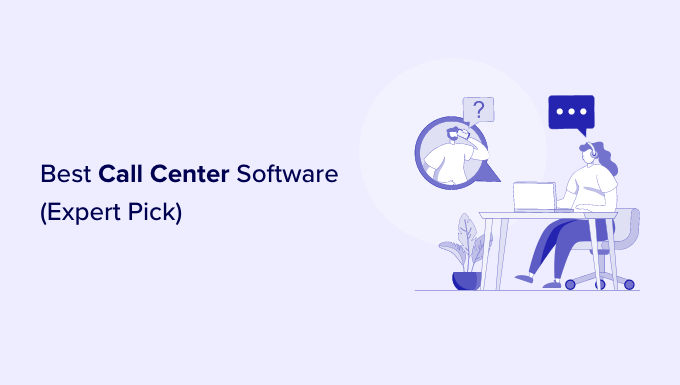
Are you looking for call center software for your business?

Many customers like to reach out to businesses by phone to get information or help. Having a call center service for your business can streamline your customer support and provide a better user experience.

In this article, we’ll share the top call center software so that you can select the best option for your business.

Best call center software expert pick

How to Find the Best Call Center Software

Offering customer support through phone calls is a great way of helping your users. However, it can be hard for small businesses that are quickly growing to handle a large volume of phone calls.

With the help of a call center software, you can respond to multiple phone calls at once, answer customers questions more quickly, help your sales team reach a larger audience, improve the overall support process, and increase customer satisfaction.

There are a few features you should look for when selecting a call center software for your business, such as:

  • Interactive Voice Responses (IRV) – You should choose a software solution that offers automated responses through IRVs, greets a customer when they call, and helps to direct them to the right department.
  • Cloud Contact Center – A cloud-based call center allows your remote team to attend to customers from anywhere in the world without having to be on-premises.
  • Multichannel Support – Also called omnichannel routing, this lets your support staff respond to customers from social, live chat, email, phone calls, and other channels, all using the same software.
  • Call Routing & Voicemail Option – You should look for software that allows voicemail and call routing features, so customers can share their queries even when the call center agents aren’t available.
  • CRM Integrations – By integrating customer relationship management (CRM) software, you can make the best use of your customer information and get a complete picture of how often they call, their support tickets, and more. Some tools also offer CTI (computer telephony integration) to identify customers through phone numbers.
  • Reporting and Analytics Tools – Your call center software should provide additional reporting and analytics tools to see how well your customer support is performing.
  • Call Recording – You can perform quality management checks and training by listening to recent call recordings.

That said, let’s take a look at some of the best call center software you can choose for your business.

1. Nextiva

Nextiva

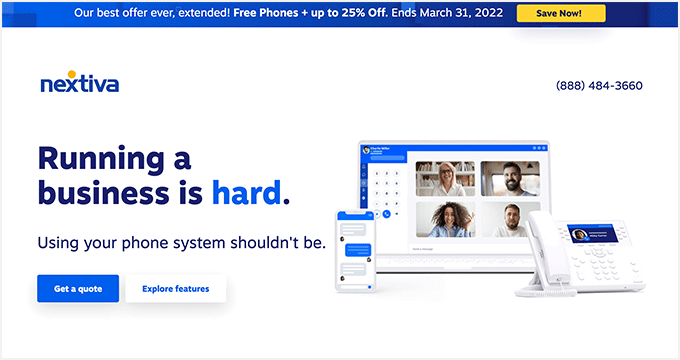
Nextiva is the best virtual business phone number service in the market. It’s the perfect solution for remote teams, since Nextiva is completely cloud-based.

Your support agents can simply log in to the Nextiva desktop or mobile app to handle all incoming calls. Plus, it includes complete help desk software as well. It lets you talk with customers across multiple communication channels, be it phone, voice, SMS, live chat, video, or social media.

With the Nextiva contact center solution, you also get screen popups that can be tailored according to your brand. There’s also a speech-enabled IVR feature that helps customers when they contact you.

You can take IVR a step further and automate routine tasks. This way, you can reduce the cost of hiring more agents and efficiently handle high call volumes. It also allows support agents to focus on attending important calls while IVR solves repetitive problems.

Besides that, Nextiva offers affordable cell phone plans and more features like a toll-free number, voicemail to email option, call recording, HD video conferencing, auto-attendant, and more.

You can also easily integrate it with different CRMs and communication tools like Salesforce, Oracle Sales Cloud, Microsoft, and more. It even offers APIs and SDKs for specific uses and allows you to set up workflow automation.

Note: At WPBeginner, we use Nextiva for all our business phone needs because the software offers robust features and affordable pricing plans. As a small business, it helps our team attend to incoming customer calls from anywhere in the world without having to share their personal cell phone numbers.

Besides that, Nextiva also allows us to send text messages and connect with customers through its video conferencing features.

Expert Review: In our experience, Nextiva helps provide exceptional customer experience and offers a complete cloud-based business phone service, which makes it the best call center software.

2. RingCentral

RingCentral

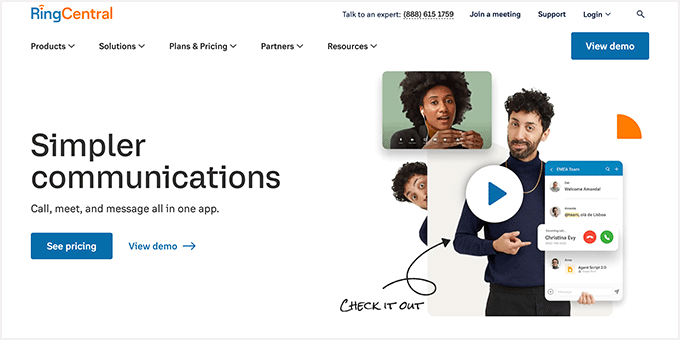
RingCentral is a popular business VoIP service provider and lets you set up a cloud call center solution for your business. You can quickly provide customer support from anywhere in the world and at any time.

It offers an omnichannel solution where you can define rules to route calls based on capacity, availability, and more. This way, you can speed up your customer support and easily have customer interactions on multiple channels at once.

With RingCentral, you can also boost your support agent’s productivity. The software offers gamification options that can be used to provide incentives to agents. Besides that, it’s a complete workforce management software that makes it super easy to handle your team’s schedule and plan inbound calls based on traffic volumes.

Another advantage of using RingCentral is that it provides detailed analytics about your customer support performance. You can monitor key performance indicators (KPIs) in real-time, track agent performance, set up call monitoring, self-service resources, and more.

Plus, there are data visualization and root cause analysis tools that help you build custom stats dashboards for reporting. Other than that, you get an automated IVR system, seamless integrations, a predictive dialer, and more with RingCentral.

Expert Review: RingCentral offers tailored solutions based on your audience or industry. Whether you’re in the financial, healthcare, education, government, or have an eCommerce store, RingCentral is a great call center software to have.

3. Ooma

Ooma

Ooma is an all-in-one virtual phone solution for businesses of all sizes. Whether you have a startup, small business, or running an enterprise, Ooma offers lots of features to keep your remote teams and customers connected.

Ooma makes it very easy for you to set up a cloud call center and provide exceptional customer support. It provides intelligent call routing functionality and lowers long call queues by helping customers find the right agent without going through repetitive or redundant steps.

You can also create customized call flows for your support team. The service offers a drag and drop call flow designer that helps you build a call sequence in a few minutes.

Other than that, Ooma also offers features like multi-level IVR and automatic call distribution based on caller data, business hours, and agent skills. You can even match callers to the right agent with intelligent reconnect, where the customer is automatically connected with the person they were speaking to before the call dropped.

Ooma also lets you monitor your customer support performance. However, it doesn’t match the 45 different reporting features and reports that Nextiva has to offer for measuring your VoIP call center efficiency.

Expert Review: Ooma is a great solution for small to medium-sized businesses looking to add a call center solution.

4. FreshDesk

FreshDesk

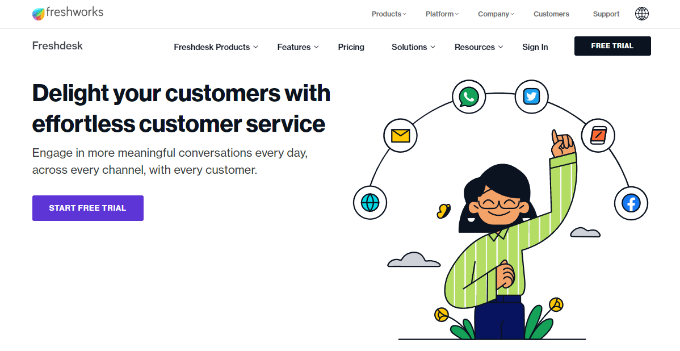
FreshDesk is a famous software that offers a complete contact center solution for businesses. Over 50,000 companies use FreshDesk to provide customer support.

FreshDesk Contact Center software, previously known as Freshcaller, is easy to use and helps you set up the software in just a few clicks. It also offers many features like setting up automated voice responses using artificial intelligence.

With FreshDesk, there’s an option to create a global contact center. You can use bring your own phone (BYOC) or purchase phone numbers from over 90 countries. Plus, it offers affordable pricing plans that you can scale as your business grows.

Other than that, it’s a complete omnichannel solution for your customer support. You can convert a call to a ticket and offer support to users from multiple channels in a single place while lowering wait time.

More features offered by FreshDesk include call recordings, call transcripts, call lifecycle information, voice bots, speech-enabled IVR, reporting tools to monitor agent performance and improve customer support, and more.

Expert Review: FreshDesk is a beginner-friendly call center solution. However, if you’re looking for more powerful features, then we recommend checking out Nextiva.

5. LiveAgent

LiveAgent

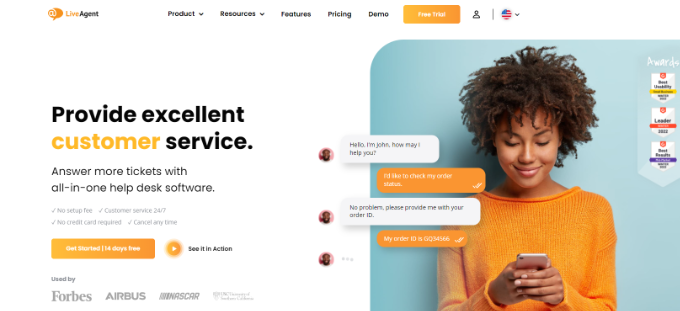
LiveAgent is the next call center software on our list, and it offers a lot of features like other services we’ve covered. However, what makes this service different is that you get a 14-day free trial to try the software before committing to a premium plan.

With LiveAgent, you get a cloud-based call center solution. The VoIP phone system helps your support agents to connect with customers from anywhere.

Plus, you get features like IVR, call back requests, call transfers, unlimited call recording, smart call routing, video conference calling functionality, in-app push notifications, chatbot, and automatic call distribution (ACD).

The software also integrates with popular CRMs like Salesforce and HubSpot. It also works seamlessly with email marketing tools like AWeber and Mailchimp. You can even integrate it with your WordPress website and add a live chat button.

Expert Review: If you’re looking for affordable pricing plans along with a free trial to test the software, then LiveAgent is the perfect tool for you.

6. 8×8

8x8

8×8 is a cloud communication platform that offers a secure call center solution. The service is loaded with features and offers 99.99% uptime across UCaaS and CCaaS.

What this means is that the service is reliable and guarantees faster performance without any delays or downtime. Besides, it has 35 data centers located globally to provide great quality of service.

It has a simple user interface and offers a detailed knowledge base, expert connect, and a complete communication hub to help you get started.

8×8 call center also provides features to handle inbound and outbound calls. For instance, you get easy call routing, call recording, speed and text analytics, omnichannel support, IVR, agent workspace management, click to call option, and more. However, you’ll find more features in other software we’ve covered, like Nextiva and RingCentral.

The service also easily integrates with CRMs such as Salesforce, Microsoft Dynamics 365, Azure, and Zendesk. You can also improve your customer support through contact center analytics and even conduct surveys to get customer feedback.

8×8 call center pricing plans are on the expensive side, as they start from $85 per user per month. If you want a more affordable solution, then you’ll get more value for money using Nextiva.

Expert Review: 8×8 is a powerful virtual phone platform that offers a robust call center solution. It is great for SaaS enterprises and large organizations.

7. CloudTalk

CloudTalk

CloudTalk is the last call center solution on our list. It’s a popular virtual call center platform and powers over 2,500 call centers, including companies like DHL, Mercedes Benz, Fujitsu, and GoStudent.

The service offers 140 national phone numbers that you can use for your business or select a toll-free number. CloudTalk has also partnered with multiple telcos across the globe to provide a strong network and ensure crystal clear calls and reliable performance.

Other features offered by CloudTalk include call queuing, call recording, voicemail, adding extensions, fax to email, business hours, conference calls, call masking, 3-way calling, smart outbound auto dialer, and more.

You also get intelligent routing features like a complete call flow designer to create automated workflows, IVR, ACD, skill-based call routing, set a preferred agent for clients, call forwarding, VIP queues, auto-answer functionality, and more.

Expert Review: CloudTalk is a dedicated call center software. You can use it to provide inbound support, outbound sales, and easily collaborate with remote teams.

Which is the Best Call Center Software?

If you’re looking for a complete cloud-based call center, then we highly recommend Nextiva. The software ticks all the boxes for what you should look for in a call center solution.

It offers powerful features that go beyond simply creating a call center. Nextiva is a complete virtual phone solution for businesses that want to take their customer support to the next level.

You get IVR, call recording, video conferencing, mobile and desktop apps, detailed reports and metrics to track performance, and so much more with Nextiva. Plus, it easily integrates different CRMs and marketing tools.

We hope this article helped you find the best call center software. You may also want to see our guide on how to choose the best blogging platform and the best WordPress plugins.

If you liked this article, then please subscribe to our YouTube Channel for WordPress video tutorials. You can also find us on Twitter and Facebook.

The post 7 Best Call Center Software For 2022 (Expert Pick) first appeared on WPBeginner.


June 17, 2022 at 04:00PM

Thursday, June 16, 2022

How to Embed Medium Blog Posts in WordPress

Do you want to embed Medium article posts on WordPress?

Medium is a popular blogging platform that allows you to easily publish articles on the internet. However, you may want to display those posts on your WordPress website as well.

In this article, we’ll show how to easily embed Medium article posts in WordPress.

Easily add Medium articles in WordPress

Why Embed Medium Article Posts in WordPress?

Medium is a popular blogging platform that allows you to easily publish articles on the internet.

However, one downside of using Medium is that it doesn’t give you the same flexibility as a WordPress website.

For this reason, you may want to embed your Medium articles on WordPress.

WordPress is more flexible, you can use it to make any type of website and monetize your content any way you see fit.

How to Embed Medium Articles in WordPress

Normally, WordPress uses the oEmbed format to embed third party content from supported websites like YouTube, Twitter, and more.

Unfortunately, Medium doesn’t support oEmbed format, which makes it difficult to embed Medium articles in WordPress. There used to be plugins that allowed users to display their Medium articles on a WordPress blog, but they either don’t work, or they’re no longer maintained due to low demand.

So now, the only way to embed your Medium articles in WordPress is by using the RSS block or widget.

First, you need to find your Medium publication’s RSS feed. Usually, it is located at a URL like this:

https://ift.tt/lh9Mcpf

If you are using a custom domain for your Medium publication, then your RSS feed would be located at:

https://ift.tt/WhBGsL0

Next, you need to edit the WordPress post or page where you want to embed Medium posts and add the RSS block to the content area.

RSS block

After that, add your Medium RSS feed URL in the block settings.

WordPress will then fetch your recent Medium articles and display them. Under the block settings, you can choose to show excerpt, featured image, author, and date options.

Medium feed display

The problem with this method is that you can’t embed a specific Medium article by itself. The block will automatically show you the latest Medium posts only.

If you would like more flexibility and freedom, then perhaps you should consider migrating your Medium articles to WordPress.

How to Migrate Medium Articles to WordPress

Migrating your Medium articles to WordPress would allow you to take advantage of all the flexibility and features of WordPress.

WordPress is the most popular website builder on the market. It powers more than 43% of all websites on the internet.

For more details, see our article on why you should use WordPress to make your website.

Step 1. Set Up Your WordPress Website

If you haven’t already done so, then you’ll need to set up a WordPress website first.

There are two types of WordPress websites: WordPress.com which is a blogging platform, and WordPress. org which is also called self-hosted WordPress. For more details, see our article on the difference between WordPress.com vs WordPress.org.

We recommend using self-hosted WordPress as it gives you complete freedom to build your website however you choose.

To get started, you’ll need a domain name and a WordPress hosting account.

Fortunately, Bluehost has agreed to offer WPBeginner users a free domain name and a generous discount on hosting. Basically, you can get started for $2.75 per month.

After signup, Bluehost will send login details to your email address which will allow you to login to your Bluehost dashboard.

Bluehost Dashboard - log in to WordPress

You’ll notice that Bluehost has already installed WordPress for you.

You can now go ahead and simply login to your new WordPress website.

The WordPress dashboard

Step 2. Import Your Medium Articles to WordPress

Before you can import your Medium articles to WordPress, you’ll need them in the format supported by WordPress.

Medium doesn’t provide a tool to do that by default. But it does allow you to export your content in an unsupported format.

Simply login to your Medium account and click on your profile photo. From here, click on the Settings link.

Medium settings

This will take you to the settings page where you need to scroll down to the ‘Download Your Information’ section.

Click on the ‘Download zip’ button to export your Medium data.

Download export file

On the next page, you need to click on the export button. Medium will then prepare your download and send a link to you via email.

After you have downloaded the export file, you need to visit the Medium to WordPress Importer tool. It is a free online tool that converts your medium export file into a WordPress-compatible format.

First, you need to provide your Medium profile URL, your name, and email address.

Enter your Medium profile URL

If your blog is using a custom domain on Medium, then you need to enter your custom domain URL.

Now, if you are using your Medium profile URL, then you’ll be asked to upload the Medium export file you downloaded in the earlier step.

Next, click on the ‘Export My Medium Website’ button to continue.

The Medium to WordPress Importer will now prepare your export file. Once finished, it will show you a success message with a button to download your WordPress-ready Medium export file.

Download your WordPress compatible import file

You can now download the file to your computer.

After that, switch to your WordPress website and go to the Tools » Import page.

You will see a list of importers available for different platforms. You need to scroll down to WordPress and then click on the ‘Install Now’ link.

Install WordPress importer

WordPress will now fetch and install the importer plugin.

Once finished, you need to click on ‘Run Importer’ to launch it.

Run importer

On the next screen, click on the ‘Upload file and import’ button to continue.

Choose import file to upload

The WordPress importer will now upload your Medium export file and analyze it.

On the next screen, it will ask you to assign authors.

Assign user to articles

You can import the author from your Medium website, create a new author, or assign all content to your existing WordPress user.

Don’t forget to check the box next to ‘Download and import file attachments’ option. It will attempt to get images from your Medium website into your WordPress media library.

You can now click on the Submit button to run the importer. Upon completion, you will see a success message.

Success message

Congratulations, you have successfully imported content from Medium to WordPress!

You can now go to the posts page in your WordPress admin area to double check if all your content is there.

Step 3. Import Images from Medium to WordPress

The WordPress importer tries to import images from your Medium articles to the WordPress media library. However, it may fail due to the way Medium displays images in your articles.

To see all the images that have been imported successfully, simply go to the Media » Library page.

Media library

If some or all of your images failed to import, then you will need to import them again.

To do that, you first need to install and activate the Auto Upload Images plugin. For more details, see our step by step guide on how to install a WordPress plugin.

Upon activation, you need to update the posts containing the external images. This update will trigger the plugin to fetch and store the external images in the article.

You can also bulk update all articles at once to quickly import all images. For detailed instructions, see our step by step tutorial on how to import external images in WordPress.

Step 4. Setting up Redirects for Medium Articles

If your Medium publication uses a medium.com URL, then you cannot setup redirects.

However, if you were using a custom domain for your Medium publication, then you can set up custom redirects in WordPress.

First, you will need to get all URLs of your Medium articles and save them in a text file. After that, you need to start setting up redirects for all your articles.

There are multiple ways to set up redirects in WordPress. You can follow the instructions in our beginner’s guide to creating redirects in WordPress for detailed instructions.

Step 5. Deciding What to Do With Your Medium Articles

Now, having the same articles on two different websites will affect their search engine optimization (SEO) since Google will consider them duplicate content. That means that your new WordPress site may not get any search engine traffic.

To avoid this, you can simply deactivate your Medium account. Deactivating an account keeps all your data on Medium, but it becomes publicly unavailable.

Simply click on your Profile icon under your Medium account and then select Settings.

Account settings

From settings page, scroll down to the Security section.

Then, click on the Deactivate Account link at the bottom of the page.

Deactivate medium account

Bonus Step: Promoting Your Medium Articles on WordPress

Now that you have migrated your articles from Medium to WordPress, here are a few tools to promote your articles.

1. All in One SEO – The best WordPress SEO plugin to easily optimize your blog posts for search engines.

2. SeedProd – Enjoy the endless design options with the best WordPress page builder. It allows you to easily create beautiful landing pages for your website.

3. WPForms – Make your website interactive by adding beautiful contact forms. WPForms is the best WordPress contact form plugin with a drag and drop interface to create any kind of form you need.

4. OptinMonster – The best conversion optimization software on the market. OptinMonster allows you to easily convert website visitors into subscribers and customers.

5. MonsterInsights – Start tracking your website visitors from day one. MonsterInsights is the best Google Analytics plugin for WordPress. It allows you to see your most popular content and where your users are coming from.

For more, see our expert pick of the must have WordPress plugins for all websites.

We hope this article helped you learn how to embed Medium article posts on WordPress. You may also want to see our guide on how to get a free email domain, or our expert pick of the best business phone services for small business.

If you liked this article, then please subscribe to our YouTube Channel for WordPress video tutorials. You can also find us on Twitter and Facebook.

The post How to Embed Medium Blog Posts in WordPress first appeared on WPBeginner.


June 16, 2022 at 04:00PM

Wednesday, June 15, 2022

How to Fix a Slow Loading WordPress Dashboard (Step by Step)

Is your WordPress dashboard loading too slow?

Having a slow loading WordPress dashboard is annoying, and it hurts overall productivity when it comes to creating content and managing your website. Also the underlying cause of a slow WordPress dashboard can also impact your website conversions.

In this article, we’ll show you how to easily fix a slow loading WordPress dashboard, step by step.

Fixing a slow loading WordPress admin area

What Causes a Slow Loading WordPress Dashboard?

A slow loading WordPress dashboard can be caused by a number of reasons, but the most common one is limited server resources.

Most WordPress hosting providers offer a set number of resources for each hosting plan. These resources are enough to run most websites.

However, as your WordPress website grows, you may notice slight performance degradation or slower loading across the board. That’s because more people are now accessing your website and consuming server resources.

For the front end section of your website which is what your visitors likely see, you can easily install a WordPress caching plugin to overcome WordPress speed and performance issues.

However, the WordPress admin area is uncached, so it requires more resources to run at the optimal level.

If your WordPress dashboard has become annoyingly slow, then this means a WordPress plugin, a default setting, or something else on the site is consuming too many resources.

That being said, let’s take a look at how to troubleshoot and fix the slow loading WordPress admin dashboard.

Here is an overview of the steps we’ll cover in this article.

1. How to Test Performance of WordPress admin area

Before making any changes, it’s important to measure the speed of your WordPress admin area, so you can get an objective measurement of any improvement.

Normally, you can use website speed test tools to check your website’s speed and performance.

However, the WordPress admin area is behind a login screen, so you cannot use the same tools to test it.

Luckily, many modern desktop browsers come with built-in tools to test the performance of any web page you want.

For example, if you’re using Google Chrome, then you can simply go to the WordPress dashboard and open the Inspect tool by right-clicking anywhere on the page.

Lighthouse to test performance

This will split your browser screen and you will see the Inspect area in the other window either at the bottom or side of your browser window.

Inside the Inspect tool, switch to the Lighthouse tab and click on the Generate Report button.

This will generate a report similar to the Web Vitals report generated by Page Speed Insights.

Performance results

From here, you can see what’s slowing down your WordPress admin area. For instance, you can see which JavaScript files are taking up more resources and affecting your server’s initial response time.

2. Install WordPress Updates

The core WordPress team works hard on improving performance with each WordPress release.

For instance, the block editor team tests and improves performance in each release. The performance team works on improving speed and performance across the board.

If you are not installing WordPress updates, then you are missing out on these performance improvements.

Similarly, all top WordPress themes and plugins release updates that not only fix bugs but also address performance issues.

To install updates, simply go to Dashboard » Updates page to install any available updates.

WordPress updates

For more details, see our guide on how to properly update WordPress (infographic).

3. Update the PHP Version Used by Your Hosting Company

WordPress is developed using an open-source programming language called PHP. At the time of writing this article, WordPress requires at least PHP version 7.4 or greater. The current stable version available for PHP is 8.1.6.

Most WordPress hosting companies maintain the minimum requirements to run WordPress, which means they may not be using the latest PHP version out of the box.

Now, just like WordPress, PHP also releases new versions with significant performance improvements. By using an older version, you are missing that performance boost.

You can view which PHP version is used by your hosting provider by visiting the Tools » Site Health page from your WordPress dashboard and switching to the ‘Info’ tab.

Check PHP version

Luckily, all reliable WordPress hosting providers offer an easy way for customers to upgrade their PHP version.

For instance, if you are on Bluehost, then you can simply login to your hosting control panel and click on the Advanced tab in the left column.

Multi PHP in Bluehost

From here, you need to click on the MultiPHP Manager icon under the Software section.

On the next page, you need to select your WordPress blog and then select the PHP version that you want to use.

Change PHP version

For other hosting companies, see our complete guide on how to update your PHP version in WordPress.

4. Increase PHP Memory Limit

Your web hosting server is like any other computer. It needs memory to efficiently run multiple applications at the same time.

If there is not enough memory available for PHP on your server, then it would slow down your website and may even cause it to crash.

You can check the PHP memory limit by visiting Tools » Site Health page and switching to the Info tab.

Check PHP memory limit

You’ll find PHP memory limit under the Server section. If it is less than 500M, then you need to increase it.

You can increase PHP memory limit by simply entering the following line in your wp-config.php file.

define( 'WP_MEMORY_LIMIT', '512M' );

For more details, see our article on increasing the PHP memory limit in WordPress.

5. Monitor WordPress Plugins for Performance

Some WordPress plugins may run inside the WordPress admin area. If plugin authors are not careful, their plugins can easily consume too many resources and slow down your WordPress admin area.

One way to find out about such plugins is by installing and activating the Query Monitor plugin. For more details, see our step by step guide on how to install a WordPress plugin.

Upon activation, the plugin will add a new menu item to your WordPress toolbar.

Query Monitor tab

Clicking on it will show performance results for the page you are currently viewing on your website.

This will bring up the Query Monitor console.

Here you need to switch to ‘Queries by Component’ tab on the left side. From here, you can see the performance impact of plugins and find out which one is taking up too many resources.

Query Monitor results

You can now temporarily disable the slow plugins and see if that improves performance.

If it does, then you can reach out to plugin author and seek support or find an alternative plugin.

6. Install a WordPress Caching Plugin

WordPress caching plugins not only improve your website speed, but they can also help you fix a slow loading admin dashboard.

A good WordPress caching plugin helps you optimize page load speed, CSS and JavaScript delivery, your WordPress database, and more.

This frees up resources on your WordPress hosting server that your WordPress admin area can utilize for improved performance.

We recommend using WP Rocket. It is the best WordPress caching plugin on the market. It works out of the box and makes it super easy to optimize your WordPress performance.

WP Rocket dashboard

For more details, see our guide on how to properly install and setup WP Rocket in WordPress.

7. Tweak Admin Screens & Disable WordPress Dashboard Widgets

WordPress automatically loads some widgets on the dashboard screen. This includes Quick Draft, Events and News, Site Health, and more.

Some WordPress plugins add their own widgets to the dashboard screen as well. If you have a lot of these widgets loading on your dashboard, it could slow things down.

You can turn off these widgets by simply clicking on the Screen Options button and unchecking the box next to the widgets.

Screen Options to remove unnecessary widgets

Similarly, you can use the Screen Options menu to show and hide sections on different admin screens.

For instance, you can choose the columns you want to see on the posts screen.

Clean up posts screen

8. Fix Slow WooCommerce Admin Dashboard

If you run an online store using WooCommerce, then there are some specific WooCommerce features that can affect the performance of your WordPress admin area.

For instance, you can turn off the WooCommerce dashboard widget by clicking on the Screen Options menu.

Similarly, you can change the information displayed on the Products page.

Products page

After a while, your WooCommerce store may add unnecessary data to your WordPress database.

If you are already using WP Rocket, then you can simply switch to the Database tab under plugin settings. From here, you can delete transients and optimize your WordPress database with a click.

Database optimize

9. Lock WordPress Admin Area and Login Pages

Random hackers and DDoS attacks are common internet nuisances that can affect WordPress websites.

These automated scripts access WordPress login pages and attempt to login hundreds of times in a short amount of time.

They may not be able to gain access to your WordPress website, but they would still be able to slow it down.

One easy way to block these scripts is by locking your WordPress admin directory and login pages.

If you are on Bluehost, then you can simply go to your hosting control panel and switch to the Advanced Tab. From here, you need to click on the Directory Privacy icon.

Directory Privacy

Next, you need to locate wp-admin directory (usually found inside public_html folder).

Then simply click on the Edit button next to it.

WordPress admin folder

Next, you will be asked to provide a name for your protected directory.

Name folder

Click on the Save button to continue. The control panel will save your options and you’ll need to click on the Go Back button to continue.

After that, you will need to create username and password for the protected folder.

Create username and password

Now, when you visit your WordPress admin area, you will be prompted to enter username and password.

Login prompt

For more details, see our tutorial on how to password protect the WordPress admin directory.

Password Protect WordPress Login Page

Next, you would want to block access to WordPress login page. For this, you’ll need to manually edit .htaccess file on your website and generate a password file.

First, connect to your WordPress website using an FTP client or the File Manager app inside your hosting control panel.

After that, go to the root folder of your website (the root folder is where you can see the wp-admin, wp-includes, and wp-content folders).

Here you need to create a new file and name it .htpasswd.

Create htpasswd file

Next, you need to visit this online tool to generate a .htpasswd string.

You need to use the same username and password that you used for the WordPress admin directory.

Then click on the Generate button.

Generate password

The tool will generate a username and password string under the output box.

You need to copy and paste this string inside the .htpasswd file you created earlier.

Next, you need to edit the .htaccess file and copy and paste the following code inside it.

### BEGIN BASIC BLOCK
<Files wp-login.php>
AuthType Basic
AuthName "Protected Folder"
AuthUserFile /home/username/public_html/yourwebsite/.htpasswd
Require user jsmith
Satisfy All
</Files>
### END BASIC BLOCK

Don’t forget to replace jsmith with your own username and change AuthUserFile value with the path to your .htpasswd file. You can find it inside the File Manager app.

You can now visit your WordPress login page to see the password protection in action.

10. Manage WordPress Autosave Intervals

The WordPress block editor comes with built-in autosave feature. It allows you to easily restore your content in case you close the editor without saving your changes.

However, if multiple users are working on your website during peak traffic, then all those autosave requests will slow down WordPress admin area.

Now autosave is a crucial feature and we don’t recommend turning it off. However, you can slow it down to reduce the performance impact.

Simply add the following line to your wp-config.php file.

define( 'AUTOSAVE_INTERVAL', 120 )

This line simply tells WordPress to run autosave once every 2 minutes (120 seconds) instead of 1.

Reduce Heartbeat API Calls

WordPress uses something called the heartbeat API to send Ajax calls to a server without reloading a page. This allows WordPress to show other authors that a post is being edited by another user, and it enables plugin developers to show you notifications in real-time.

By default, the API pings back every 60 seconds. If multiple authors are working on your website at the same time, then these server calls can become resource-intensive.

If you are already using WP Rocket, then it will automatically reduce heartbeat API activity to pingback every 120 seconds.

Reduce Heartbeat API activity using WP Rocket

Alternately, you can also use their standalone plugin called Heartbeat Control to reduce Heartbeat API calls.

We recommend reducing them to at least 120 seconds or more.

Heartbeat API calls

11. Upgrade or Switch to Better WordPress Hosting

All WordPress performance issues depend on the infrastructure provided by your WordPress hosting providers.

This limits your ability to improve performance to the resources offered by your hosting provider.

The above tips will certainly help you reduce load on your WordPress server, but it may not be enough for your hosting environment.

To improve performance even more, you can move your WordPress site to a new host and sign up with a different hosting provider.

We recommend using Bluehost, as one of the top WordPress hosting companies. Their shared hosting plans come with built-in caching which improves WordPress performance.

Bluehost Coupon Code

However, as your website grows you may need to upgrade your hosting plan.

High traffic sites would benefit from moving to a managed WordPress hosting platform like WP Engine or SiteGround.

At WPBeginner, we use SiteGround to host our website.

We hope this article helped you learn how to fix a slow loading WordPress dashboard. You may also want to see our complete WordPress security handbook or see our pick of the best WordPress plugins to grow your business.

If you liked this article, then please subscribe to our YouTube Channel for WordPress video tutorials. You can also find us on Twitter and Facebook.

The post How to Fix a Slow Loading WordPress Dashboard (Step by Step) first appeared on WPBeginner.


June 15, 2022 at 04:00PM