Are you managing a local business website that have multiple physical locations?
In that case, you would need to add local business schema markup for multiple locations on your site, so Google and other search engines can display detailed information about your various business locations.
In this article, we’ll show you
how to properly add local business schema markup for multiple locations in WordPress to improve your SEO.
Why Create Local Business Schema Markup for Multiple Locations?
Schema markup or structured data is HTML code that provides more details about your content to search engines.
By adding schema markup to the source code of your WordPress website, search engines can easily find the extra information and display it in the search results as featured snippets. For instance, you can show FAQs in search results, add Google Maps in WordPress, display recipes, and more.
If you have multiple business locations like retail outlets, restaurants, or regional offices, then you can display them on Google and Bing search results through schema markup.
For example, if you search for McDonald’s locations in Florida, Google will show you a featured snippet with the different destinations and a map with pinned locations.
Creating multiple local business locations with schema markup helps improve your website SEO rankings.
Since the featured snippets are placed right at the top of the search results, it helps you to increase your click rate in search. That means more organic traffic and more conversions.
That being said, let’s take a look at how you can create local business schema for multiple business locations in WordPress.
Creating Multiple Locations Using Schema Markup
The easiest way of setting up local business schema markup in WordPress is by using the All in One SEO (AIOSEO) plugin. It’s the best SEO tool for WordPress that’s used by over 3 million website owners and professionals.
AIOSEO removes the need for any technical knowledge or hiring an expert to boost your search engine visibility.
For this tutorial, we’ll be using the AIOSEO Pro license because it includes the Local SEO addon which is what you need to dominate local business SEO. It also other powerful features like the redirection manager, advanced sitemap, link assistant, and more. If you’re on a budget, then you can use the free version of AIOSEO to get started with SEO optimization.
The first thing you’ll need to do is install and activate the AIOSEO plugin. For more details, please see our guide on how to install a WordPress plugin.
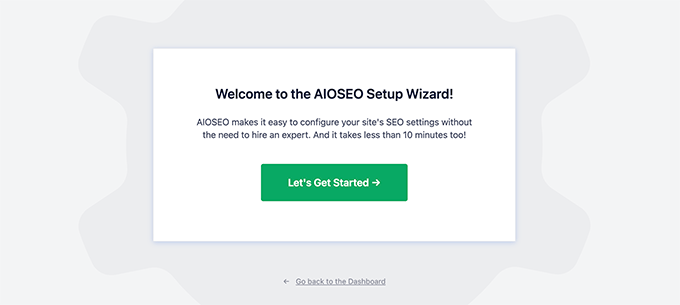
Upon activation, you’ll see the setup wizard. Go ahead and click the ‘Let’s Get Started’ button.
After that, follow the onscreen instructions in the setup wizard to configure the plugin. If you need help, then please see our guide on how to properly setup AIOSEO in WordPress.
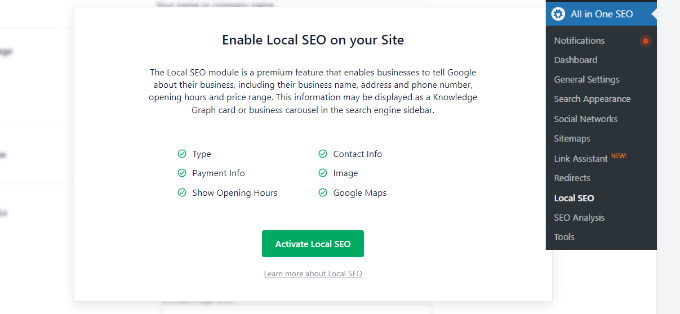
Next, you’ll need to head over to All in One SEO » Local SEO from your WordPress dashboard and click the ‘Activate Local SEO’ button.
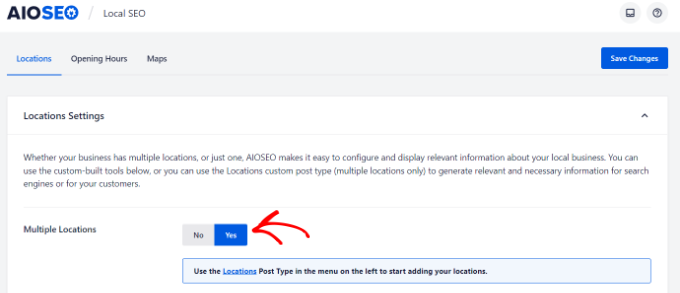
Once the Local SEO addon is active, you’ll see different Location Settings.
Go ahead and click the ‘Multiple Locations’ toggle to enable the option. This will add a new menu in your WordPress admin panel called Locations.
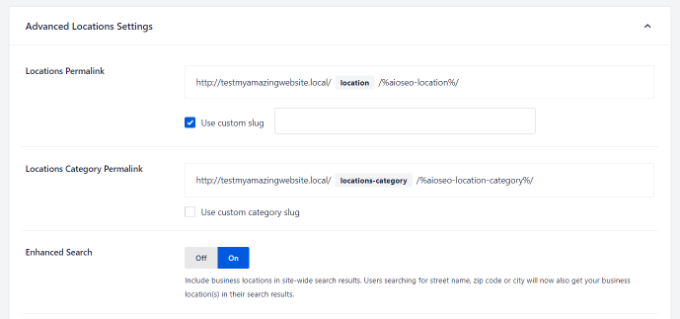
After that, you can scroll down to the ‘Advanced Settings’ section.
Here you can see the permalink AIOSEO will use to show your multiple business locations and location category. If you wish to use a custom link, then simply check the ‘Use custom slug’ box and enter your permalink url structure.
Next, you can also switch on the ‘Enhanced Search’ option, which will include your business locations in your WordPress site search results.
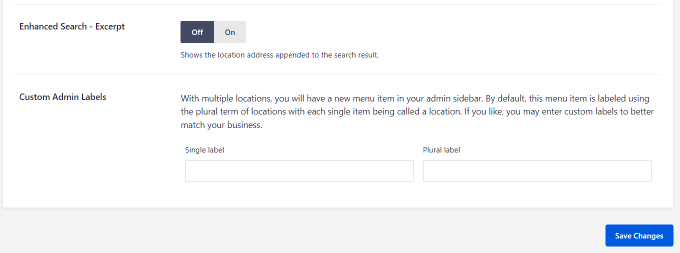
When you’re done, don’t forget to click the ‘Save Changes’ button.
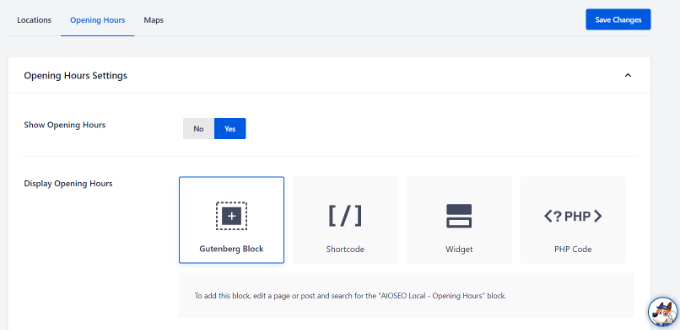
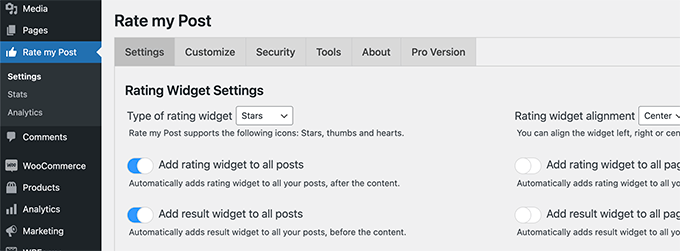
Next, you can go to the ‘Opening Hours’ tab and configure the times for your local businesses.
By default, the ‘Show Opening Hours’ option will be set to Yes. If you don’t want to show opening hours, then simply click the toggle to No.
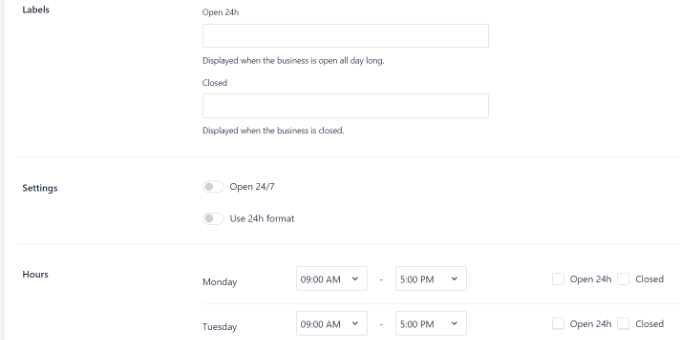
After that, you can scroll down and change the labels for when your business is open or closed.
There are also options to change the opening and closing timings for specific days or set it to open 24/7.
Note: The opening hours will be used across all the locations you add in WordPress. However, you can disable them for specific locations in the content editor.
AIOSEO also lets you integrate Google Maps with your WordPress website which helps show your local business on Google Maps. For more details, you can see our guide on how to add Google Maps in WordPress.
Next, you’ll need to add your multiple business locations in WordPress.
Adding Multiple Business Locations in WordPress
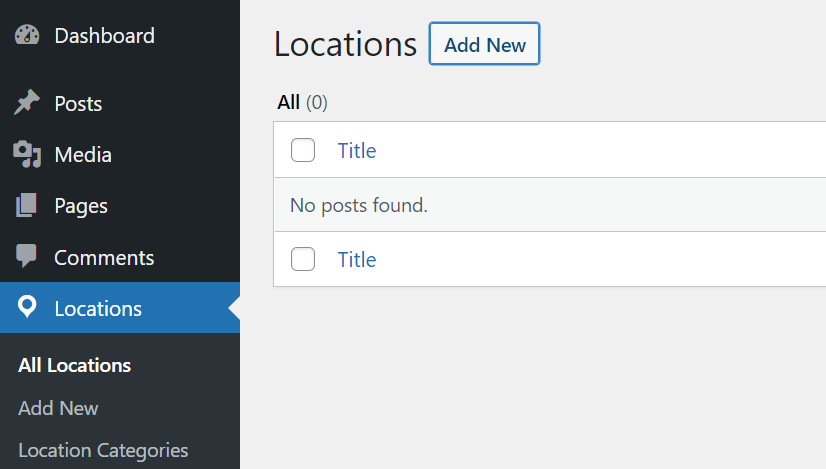
When you enable the Multiple Locations option in AIOSEO, a new ‘Locations’ option will appear in your WordPress admin panel.
To add your local business locations, simply go to Locations » Add New from your WordPress dashboard.
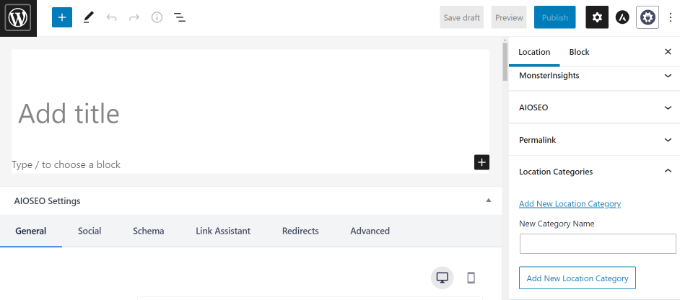
Next, you’ll need to add your location details in the WordPress content editor. Here you can add a title for your business location, which can be the location name.
Under the title, you can add more details or description about your location. You can also create location categories from the settings panel on your right.
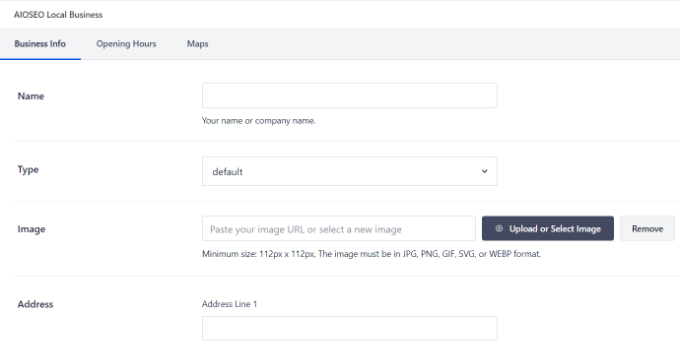
After that, simply scroll down to the AIOSEO Local Business metabox.
In the ‘Business Info’ section, you can add your business name, select a business type (industry), add an image, enter the address for your location, business phone, payment info, area served, and more.
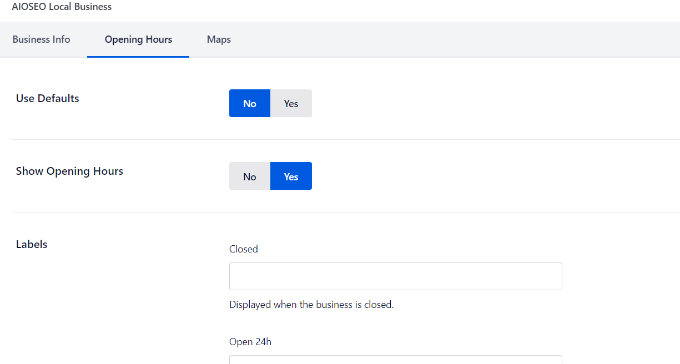
Next, you can switch to the ‘Opening Hours’ tab under the AIOSEO Local Business metabox.
AIOSEO will use the default settings automatically. However, you can disable the ‘Use Defaults’ option and then configure the opening and closing hours for your local business.
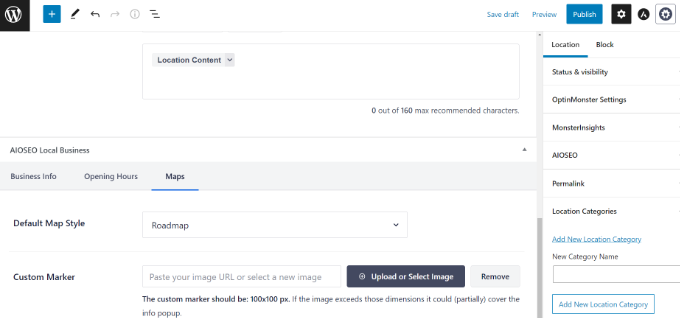
Next, you can go to the ‘Maps’ tab and configure how your local business will appear on Google Maps.
For instance, you can change map style and upload a custom marker to pin your location on the map.
When you’re done, go ahead and publish your location page.
Now you can simply repeat this process for other locations you want to add to your WordPress website.
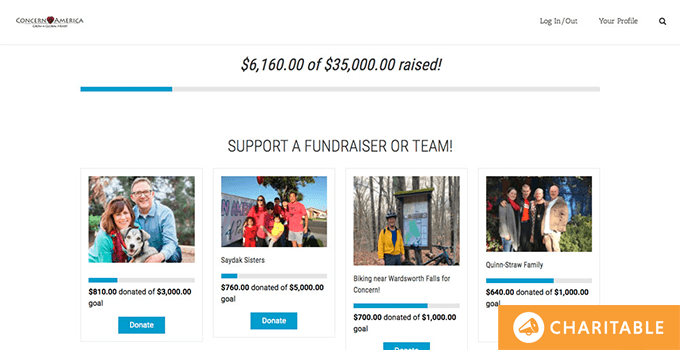
WP Charitable is a top-rated WordPress donation and fundraising plugin. Over 10,000+ non-profit organizations and website owners across the world use Charitable to create fundraising campaigns and raise more money online.
Introduction to WP Charitable – Quick Overview
WP Charitable makes it easy for non-profits and fundraisers to collect more donations worldwide.
Unlike other non-profit donation platforms, Charitable does not charge any transaction fees, so more money can go towards supporting your great cause.
Charitable is a top-rated WordPress donation and fundraising plugin because it’s both easy and powerful. It comes with all the features you need including fully customizable donation forms, ability to accept one-time or recurring donations, easy donation management dashboard, GDPR compliance, annual donor receipts, gift giving in honor of someone else, fee relief which allows donors to cover payment process fees, and more.
You can also use Charitable for peer-to-peer fundraising campaigns, and it even lets you create your own crowdfunding platform like GoFundMe or Indiegogo.
Charitable supports multiple currency and payment gateways, so you can accept donations from anywhere in the world.
The plugin has built-in payment integrations for Stripe, PayPal, Authorize.net, Braintree, Mollie, GoCardless, Paystack, Payfast, Payrexx, Windcave, and more.
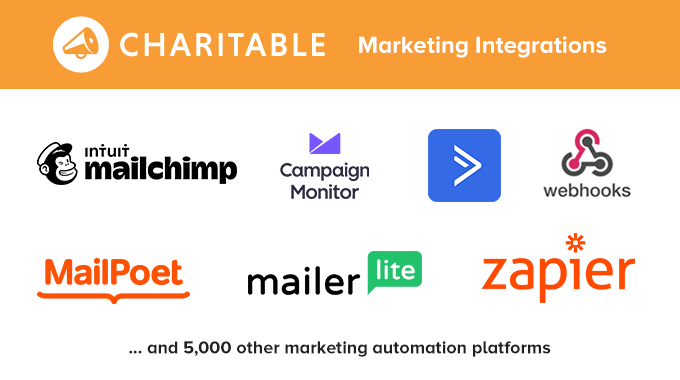
You can also stay connected with your donors through the email marketing feature which integrates seamlessly with Mailchimp, MailerLite, Active Campaign, Campaign Monitor, Mailster, Mailpoet, and 5000+ other marketing automation platforms using either Zapier or Webhooks.
And if you’re a developer, WP Charitable comes with custom hooks, filters, donation fields API, and extensive developer documentation, so you can customize the plugin based on your project needs.
To celebrate this big occasion, we’re offering up to $100 off on WP Charitable.
As you know, every year I do a WPBeginner reader survey where I ask for your suggestions on what new tutorials we should write, plugins we should build, new features we should add to our existing plugins, and so on.
For the last three years, the number of requests from our non-profit users to build a beginner-friendly WordPress donation plugin has been increasing.
Our first response to the survey request was to create a discounted WPForms plan for non-profits that makes it easy for non-profit organizations to create online donation forms while also getting access to all the powerful features of WPForms form builder which is used by 5 million websites.
This was much appreciated by a lot of users, but some organizations still didn’t have a budget for a discounted plan.
So last year, we acquired WP Simple Pay, which as the name suggests is a simple online payment plugin that lets you accept payments using Stripe credit card, ACH, Apple Pay, Google Pay, etc.
It even has a free version which solved the problem for a lot of smaller non-profit organizations that were on a tight budget.
The downside for a group of organizations was that it’s restricted to Stripe payment gateway only, and it lacked all the other powerful features that one would expect from a full donation & fundraising platform.
So after reviewing the 2022 WPBeginner reader survey results along with the WPForms user feedback, we decided that it was finally time for us to build a WordPress donations plugin that’s both easy and powerful.
We had two options, build from scratch or see if there was an existing solution in the market that we could simply acquire and add the features you all have been asking for.
Luckily, the timing aligned with the founders of Charitable, and we were able to make the deal happen where WP Charitable would join the Awesome Motive family of products.
The two co-founders will not be joining the team as they are focusing on other ventures instead.
I was able to convince one of the most highly respected and well-known WordPress developers, David Bisset, to join our team and lead the WP Charitable project.
David and I have known each other for nearly a decade. We both live in Florida, and we were co-organizers of the WordCamp Miami event.
I am excited to work alongside David as we work to build the best online fundraising platform for WordPress and the web.
As you know, at Awesome Motive, our mission is to help small businesses grow and compete with the big guys. Our software today powers over 20 million websites and helps shape the web for billions worldwide.
Along with our core mission, we believe that companies should be forces for good.
The WP Charitable plugin allows us to use our knowledge, experience, and resources to empower those who’re changing the world for good.
What’s Coming Next?
Our work is just starting.
We have an extensive list of ideas and feature roadmap from the feedback that you, the WPBeginner audience, have shared with us in the survey.
I’m looking forward to making those ideas come to life.
This is truly going to be a game changer!
If you have suggestions on features you’d like to see in the WP Charitable plugin, then please let us know by sending us a message via WPBeginner contact form.
Lastly, I just want to say how humbling it is to have this opportunity to serve so many great organizations and make a positive impact in our world.
The impact WP Charitable will have on the world is part of YOUR legacy too.
WPBeginner and Awesome Motive would not be here without YOU, and I just want to say how much I appreciate all of you.
Thank you so much for your continued support of WPBeginner and me over the last 13 years.
And I look forward to continue serving you and the larger WordPress / web ecosystem for years to come.
Yours Truly,
Syed Balkhi
Founder of WPBeginner
P.S. Want us to acquire or invest in your WordPress business? Learn more about the WPBeginner Growth Fund.
Do you want to create a Reddit-like website with WordPress?
Reddit is one of the largest online communities on the internet with more than 52 million active users. Making your own site like Reddit can help you build your own successful online community.
In this article, we’ll show you how to easily create a Reddit-like website with WordPress.
Here is an overview of the topics we’ll cover in this guide.
Reddit is the 9th most visited website in the world with a massive daily active userbase of more than 52 million users.
It is a popular news aggregation, content curation, and social networking platform. It is home to many user-managed communities called subreddits on almost every topic under the sun.
If you are building an online community, then Reddit can be used as an example of how to build user engagement and grow your WordPress website.
You can add user engagement features like upvoting and downvoting, discussions, content submission, social sharing and more to your WordPress website to create a Reddit like community.
Since Reddit is custom-coded by a team of professional developers, you may not be able to create an exact Reddit clone. However, you can copy all the features that make Reddit so engaging and apply them to your own website.
That being said, let’s take a look at how to easily build a Reddit like website with WordPress.
What You Need to Build a Reddit Like Website with WordPress
First, you need to make sure that you are using the right website builder platform to build your website.
There are two types of WordPress software. First there’s WordPress.org, which is also known as self-hosted WordPress. Then you have WordPress.com, which is a website hosting service.
You need WordPress.org because it gives you instant access to all the tools you’ll need to make a Reddit-like website. For more details, see our guide on the difference between WordPress.org vs WordPress.com.
To get started, you’ll need the following items:
A web hosting account (this is where your website files will be stored)
A domain name (this will be your website’s address e.g. wpbeginner.com)
Community building addons for WordPress (discussions, post submissions, upvoting, badges, and more)
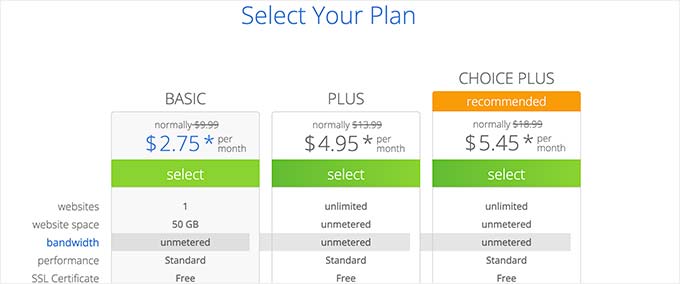
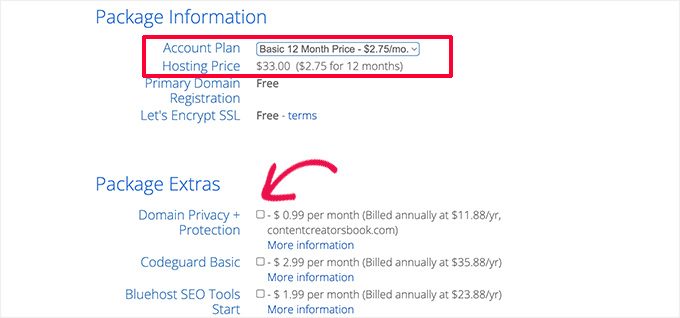
Normally, a web hosting account costs $7.99 per month (usually paid annually) and a domain name costs $14.99 per year.
Plus, you’ll need to buy premium plugins which may cost from $47 to $300 depending on which features you want to add to your website.
Now that’s a lot of money to start your Reddit-like website, particularly if you are just starting out on a limited budget.
Luckily, folks at Bluehost have agreed to offer WPBeginner users a generous discount on hosting with a free domain name. Basically, you can get started for $2.75 per month.
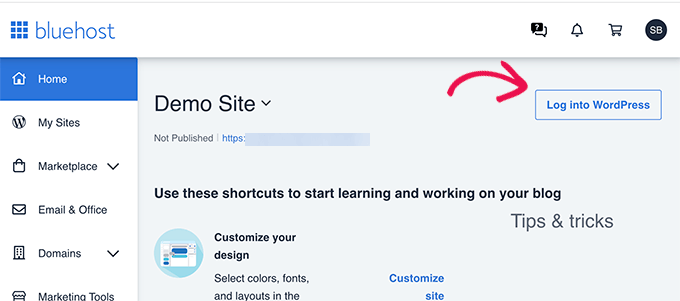
You can simply click on the ‘Log into WordPress’ button to enter your WordPress dashboard.
Choosing a Theme for Your Reddit-Style Website
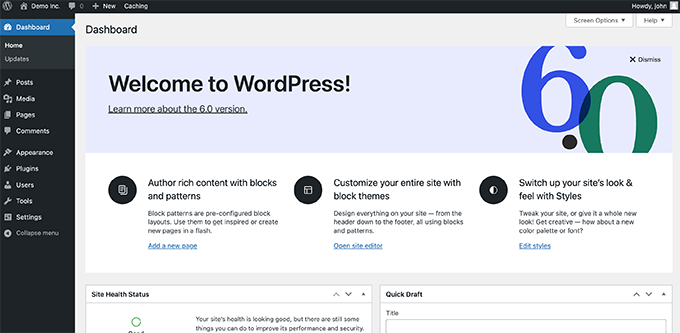
The default WordPress theme does not look anything like Reddit.
However, there are several WordPress themes that you can use to create a WordPress blog that looks similar to Reddit.
It’s important to know that WordPress themes are responsible for how your website looks, but it’s not responsible for all the functionality. It is ok to use a theme that doesn’t have any of Reddit’s community engagement features because we’ll use plugins to add those features.
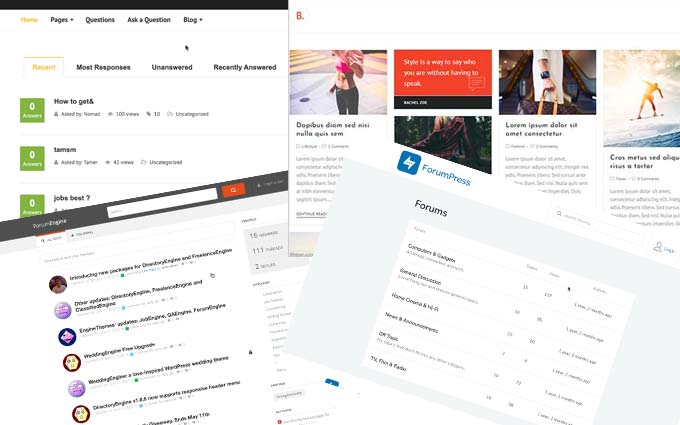
When you’re choosing a theme, it’s best to focus on the style and layout instead of any included features.
Now, there are a ton of premium and free WordPress themes to choose from. This abundance of choices can make it a bit overwhelming for a new user to pick one.
We recommend looking for a simple theme with lots of white space. This allows you to easily customize your theme.
Our top recommended theme is Astra because it’s fast-loading, customizable, and comes with dozens of starter templates you can use to customize your design.
It comes with 400+ pre-made layouts that you can use to get started, but it also has a custom theme builder that lets you build a fully custom website without any code.
Need more inspiration? Take a look at our staff picks for the best WordPress themes:
Adding Upvotes and Downvotes like Reddit in WordPress
WordPress comes with a built-in comment system. Similar to Reddit’s discussions, it allows users to easily leave comments on a post.
However, the default WordPress comment system is quite basic and doesn’t have any of Reddit’s user engagement features like upvotes or downvotes, social sharing, gamification with badges and rewards, and more.
Let’s change that by adding all the missing functionality with one plugin.
Upon signing up, you’ll be able to download Thrive Downloads Manager plugin. It is a tool that will help you easily download and install Thrive Comments from your WordPress dashboard.
After installation, the plugin will automatically connect and validate your license.
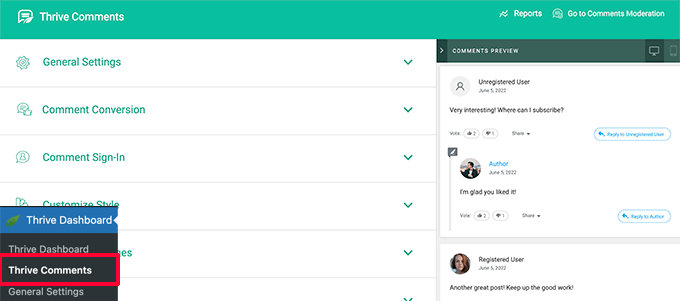
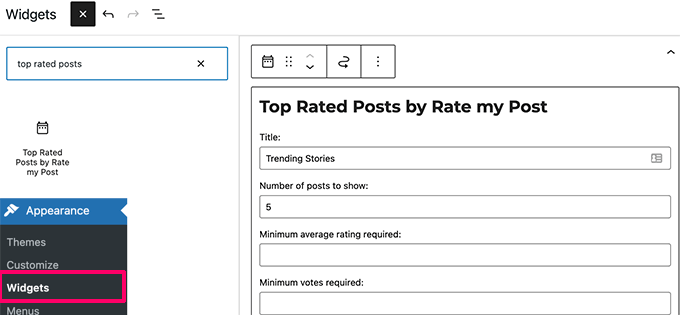
Next, you need to visit the Thrive Dashboard » Thrive Comments page to configure your comment settings.
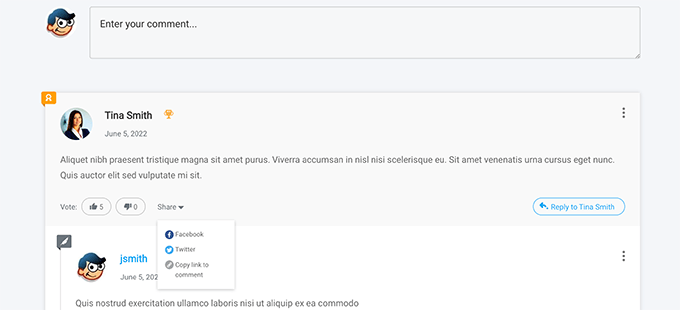
You’ll see comment options organized under different sections in the left column with a preview of comments in the right column.
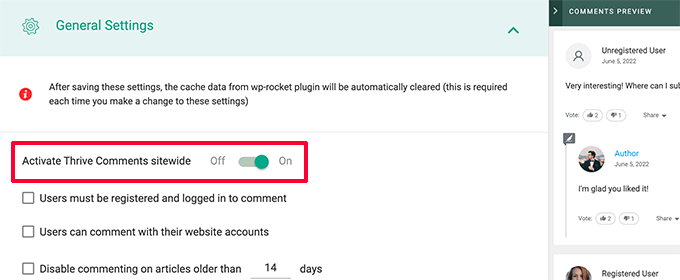
You can start by clicking on the General Settings tab and enabling Thrive Comments across your website.
Next, you would want to enable comment voting and badges functionality. Click on the Voting and Badges tab to expand those sections.
First, you need to choose what kind of voting you would like to display. The plugin allows you to choose from up and down vote, up vote only, or no voting options.
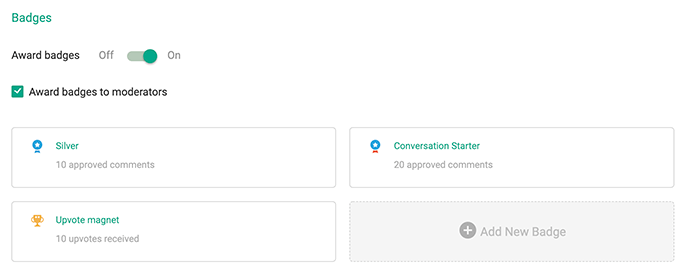
Below that you can set up badges for active commenters. Similar to Reddit’s badges, these are rewards for your most active community members to encourage them to contribute.
Click on the Add New Badge button to select a badge.
The plugin comes with a built-in icon set that you can use for comment badges.
You can reward badges based on number of comments, comment replies, featured comments, or upvotes received.
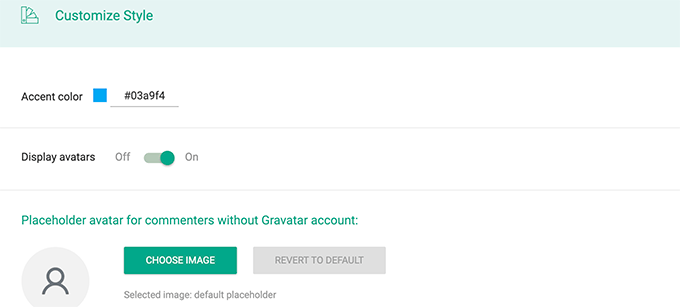
Want to customize the comment box style and appearance? Simply switch to the Customize Style tab where you can choose your own colors, default blank avatar, and date and time settings.
Thrive comments is a powerful plugin. You can review all the different options under the plugin settings and configure them however you like.
Once you are finished, you can go to any post or page on your website to see the new comments in action.
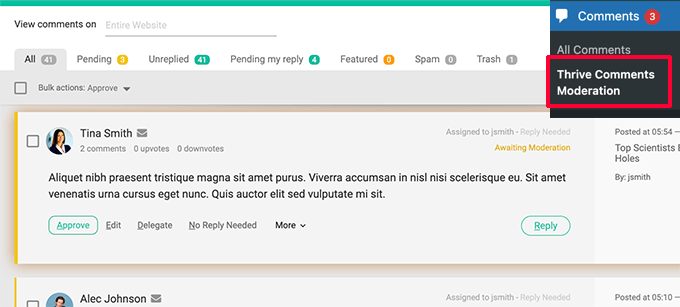
Now in order to run a successful online community, you would want to actively moderate comments.
Unlike default WordPress comment moderation tools, this interface helps you quickly answer comments, assign them to team members for follow-ups, feature a comment, and more.
Need help getting more comments on your Reddit like website? See our tutorial on how to get more comments to your blog posts in WordPress with tested and practical tips.
Allowing Users to Post Content on Your Website
Another important functionality of Reddit that you can easily add to your WordPress website is allowing users to submit content.
Luckily, WordPress has some excellent tools that make it super easy for you to manage user-submitted posts.
We’ll be using WPForms here, which is the best WordPress form builder plugin on the market used by over 5 million websites. It comes with user-submitted posts add-on that makes it super easy to accept user-generated content on your website.
Note: You’ll need at least their Pro plan to unlock the user-submitted posts feature.
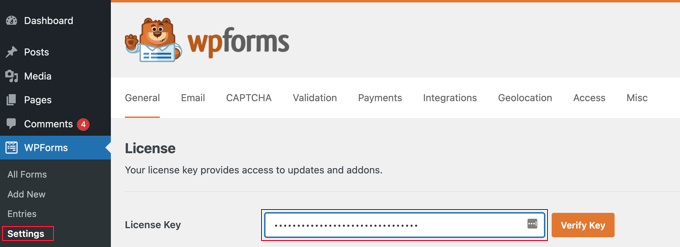
Upon activation, you need to visit the WPForms » Settings page to enter your plugin license key. You can find this information under your account on the WPForms website.
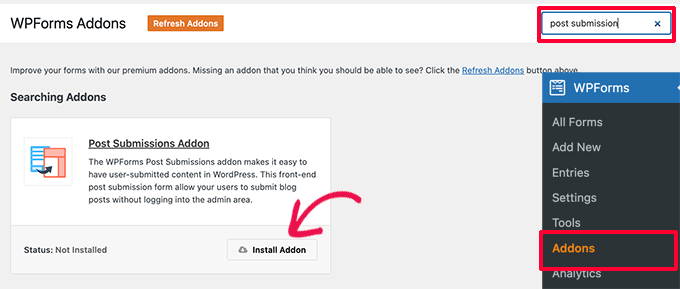
Next, head over to the WPForms » Addons page and look for the Post Submissions addon.
You can use the search or scroll down to the addon and then click on the Install Addon button next to it.
WPForms will now install and activate the Post Submission Addon for you.
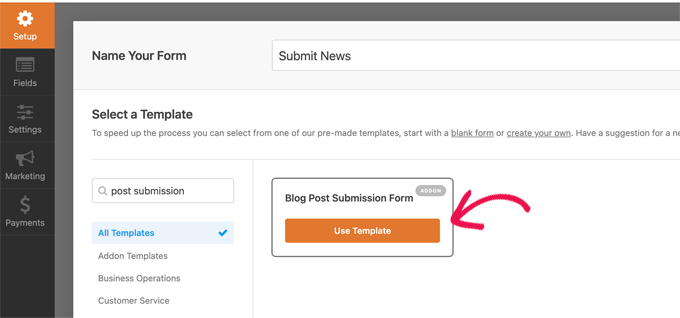
After that, go to WPForms
» Add New to create your content submission form. First, you need to provide a title for your form and then choose the Blog Post Submission Form template.
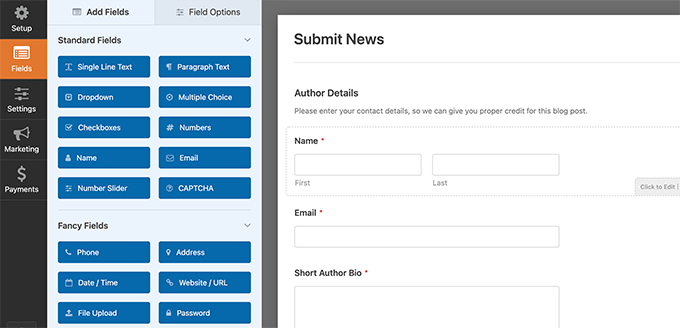
WPForms will now load the form builder interface with all the required fields to create a blog post submission form.
You will see your form preview in the right column. From here, you can simply click on any field to edit it or add new fields from the left column.
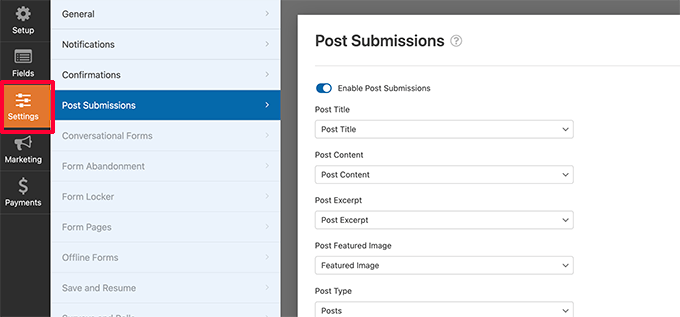
Once you are satisfied with the post submission form, you can switch to the Settings tab.
From here, you can map form fields to the blog post fields. You can also set up notifications for yourself and users informing them about the next steps.
Once you are satisfied with the settings, click on the Save button to save your form and exit the form builder.
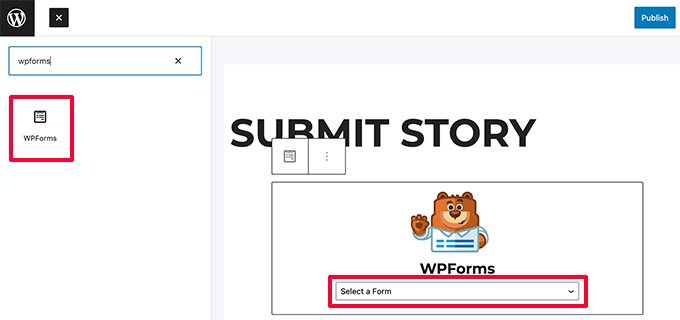
You can now create new post or page where you want to add the form. You can also edit an existing post or page.
On the edit screen, simply add the WPForms block to the content area and select the form you created earlier in the drop down menu.
After that, you can continue editing the page. For instance, you can add tips and guidelines for users about what kind of content they can submit.
Once you are finished, don’t forget to publish or update to save your changes. You can now preview this post or page to see your submission form in action.
Growing Your Reddit-Like Website to the Next Level
The best thing about WordPress is that there are a ton of free and paid plugins that you can use to add more Reddit-like features to your website.
Here we’ll mention additional tools and plugins that you can use to grow and take your Reddit like website to the next level.
1. Create Members-Only Content and Sell Subscriptions
Just like Reddit Premium, you can also create a premium subscription plan on your WordPress website by using MemberPress. It is the best WordPress membership plugin and allows you to easily sell online subscriptions.
With powerful access control, you can limit certain areas of your website to members only.
Want to see where your users are coming from and what they do on your website? MonsterInsights is the best Google Analytics plugin on the market.
It allows you to easily view your top content and track conversions and user engagement on your website.
4. Improve Your Website SEO from Day One
SEO (search engine optimization) plays a key role in the success of websites with tons of user generated content. You need to start optimizing your website for SEO from day one if you want to get the most traffic possible and grow your userbase.
We hope this article helped you learn how to easily create a Reddit like website with WordPress. You may also want to see our guide on bringing more traffic to your new site, or see our pick of the essential WordPress plugins to grow your business.
If you liked this article, then please subscribe to our YouTube Channel for WordPress video tutorials. You can also find us on Twitter and Facebook.
Are you seeing the ‘Post-Processing of Image Failed’ error in WordPress?
This error usually occurs when you are uploading an image file to WordPress using the built-in media uploader.
In this article, we will show you how to easily fix the ‘Post-Processing of Image Failed’ upload error in WordPress.
What Causes the ‘Post-Processing of Image Failed’ Error?
When you add an image to a post or the media library on your WordPress website, several things happen. The image file is uploaded to your WordPress hosting server, an attachment page is created for the image, and a PHP image editing module performs some post-processing.
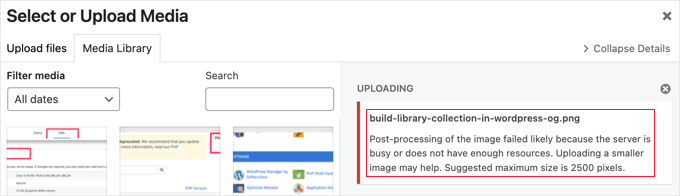
Unfortunately, sometimes during the image upload process you may see a WordPress error message like this:
‘Post-processing of the image likely failed because the server is busy or does not have enough resources. Uploading a smaller image may help. Suggested maximum size is 2500 pixels.’
Luckily, this WordPress error message provides quite a lot of detail. It tells you that the problem occurred when post-processing the image in WordPress and suggests there may be a problem with your web server.
The error message also suggests a possible solution. It recommends you upload a smaller image that is no larger than 2500 pixels in its longest dimension.
With that being said, let’s take a look at how to fix the ‘Post-Processing of Image Failed’ error in WordPress.
1. Make Sure The HTTP Error is Not Temporary
First, you should check to make sure that there are no special characters in the file name, such as an apostrophe. If it does, then you should rename the image file.
Next, you should wait a few minutes and then try uploading your image file again. If your server was simply busy as the message suggests, then it may have been caused by unusual traffic or low server resources.
Problems like these are automatically fixed on most WordPress hosting servers.
If you’re still having image upload issues after waiting a while, then you can try uploading a different file. You could also try clearing your browser cache or using a different web browser.
If you still see the ‘Post-Processing of Image Failed’ error after trying these steps, then the problem is not a temporary glitch, and you should read on to continue troubleshooting.
2. Increase WordPress Memory Limit
The error message suggests that your server may not have enough resources. Let’s increase the amount of memory that is available to WordPress.
You will need to increase the amount of memory PHP can use on your server. You can do this by adding the following code to your wp-config.php file.
define( 'WP_MEMORY_LIMIT', '256M' );
This code increases the WordPress memory limit to 256MB, which should be enough to fix any memory limit issues.
If your WordPress hosting company does not allow you to increase memory limit, then you may need to switch to a managed WordPress hosting provider like SiteGround or WP Engine.
3. Optimize the Image to Make It Smaller
The error message says that uploading a smaller image may help. It recommends that the longest edge of your image should have no more than 2500 pixels.
When starting a new blog, many beginners simply upload images without optimizing them for the web. Not only can that cause an error message like this one, but these large image files will also make your website slower.
Having a slow website will hurt your overall SEO rankings.
To optimize the image, you will need to use an image editing software to save in the optimal file format (such as JPEG, PNG, or GIF), resize the image dimensions to a smaller size, and compress the image to make the file size smaller again.
It’s important to note that sometimes this error message can be seen even when uploading smaller images. If you see the error even when uploading optimized images, then you’ll need to move to the next step of troubleshooting.
4. Change Image Editor Library Used by WordPress
WordPress post-processes images using two PHP modules, ImageMagick and GD Library. WordPress may use either one of them depending on which is available.
However, ImageMagick can run into memory issues that can cause errors during image uploads. To fix this, you can make the GD Library your default image editor.
Are you looking for call center software for your business?
Many customers like to reach out to businesses by phone to get information or help. Having a call center service for your business can streamline your customer support and provide a better user experience.
In this article, we’ll share the top call center software so that you can select the best option for your business.
How to Find the Best Call Center Software
Offering customer support through phone calls is a great way of helping your users. However, it can be hard for small businesses that are quickly growing to handle a large volume of phone calls.
With the help of a call center software, you can respond to multiple phone calls at once, answer customers questions more quickly, help your sales team reach a larger audience, improve the overall support process, and increase customer satisfaction.
There are a few features you should look for when selecting a call center software for your business, such as:
Interactive Voice Responses (IRV) – You should choose a software solution that offers automated responses through IRVs, greets a customer when they call, and helps to direct them to the right department.
Cloud Contact Center – A cloud-based call center allows your remote team to attend to customers from anywhere in the world without having to be on-premises.
Multichannel Support – Also called omnichannel routing, this lets your support staff respond to customers from social, live chat, email, phone calls, and other channels, all using the same software.
Call Routing & Voicemail Option – You should look for software that allows voicemail and call routing features, so customers can share their queries even when the call center agents aren’t available.
CRM Integrations – By integrating customer relationship management (CRM) software, you can make the best use of your customer information and get a complete picture of how often they call, their support tickets, and more. Some tools also offer CTI (computer telephony integration) to identify customers through phone numbers.
Reporting and Analytics Tools – Your call center software should provide additional reporting and analytics tools to see how well your customer support is performing.
Call Recording – You can perform quality management checks and training by listening to recent call recordings.
That said, let’s take a look at some of the best call center software you can choose for your business.
Nextiva is the best virtual business phone number service in the market. It’s the perfect solution for remote teams, since Nextiva is completely cloud-based.
Your support agents can simply log in to the Nextiva desktop or mobile app to handle all incoming calls. Plus, it includes complete help desk software as well. It lets you talk with customers across multiple communication channels, be it phone, voice, SMS, live chat, video, or social media.
With the Nextiva contact center solution, you also get screen popups that can be tailored according to your brand. There’s also a speech-enabled IVR feature that helps customers when they contact you.
You can take IVR a step further and automate routine tasks. This way, you can reduce the cost of hiring more agents and efficiently handle high call volumes. It also allows support agents to focus on attending important calls while IVR solves repetitive problems.
Besides that, Nextiva offers affordable cell phone plans and more features like a toll-free number, voicemail to email option, call recording, HD video conferencing, auto-attendant, and more.
You can also easily integrate it with different CRMs and communication tools like Salesforce, Oracle Sales Cloud, Microsoft, and more. It even offers APIs and SDKs for specific uses and allows you to set up workflow automation.
Note: At WPBeginner, we use Nextiva for all our business phone needs because the software offers robust features and affordable pricing plans. As a small business, it helps our team attend to incoming customer calls from anywhere in the world without having to share their personal cell phone numbers.
Besides that, Nextiva also allows us to send text messages and connect with customers through its video conferencing features.
Expert Review: In our experience, Nextiva helps provide exceptional customer experience and offers a complete cloud-based business phone service, which makes it the best call center software.
RingCentral is a popular business VoIP service provider and lets you set up a cloud call center solution for your business. You can quickly provide customer support from anywhere in the world and at any time.
It offers an omnichannel solution where you can define rules to route calls based on capacity, availability, and more. This way, you can speed up your customer support and easily have customer interactions on multiple channels at once.
With RingCentral, you can also boost your support agent’s productivity. The software offers gamification options that can be used to provide incentives to agents. Besides that, it’s a complete workforce management software that makes it super easy to handle your team’s schedule and plan inbound calls based on traffic volumes.
Another advantage of using RingCentral is that it provides detailed analytics about your customer support performance. You can monitor key performance indicators (KPIs) in real-time, track agent performance, set up call monitoring, self-service resources, and more.
Plus, there are data visualization and root cause analysis tools that help you build custom stats dashboards for reporting. Other than that, you get an automated IVR system, seamless integrations, a predictive dialer, and more with RingCentral.
Expert Review: RingCentral offers tailored solutions based on your audience or industry. Whether you’re in the financial, healthcare, education, government, or have an eCommerce store, RingCentral is a great call center software to have.
Ooma is an all-in-one virtual phone solution for businesses of all sizes. Whether you have a startup, small business, or running an enterprise, Ooma offers lots of features to keep your remote teams and customers connected.
Ooma makes it very easy for you to set up a cloud call center and provide exceptional customer support. It provides intelligent call routing functionality and lowers long call queues by helping customers find the right agent without going through repetitive or redundant steps.
You can also create customized call flows for your support team. The service offers a drag and drop call flow designer that helps you build a call sequence in a few minutes.
Other than that, Ooma also offers features like multi-level IVR and automatic call distribution based on caller data, business hours, and agent skills. You can even match callers to the right agent with intelligent reconnect, where the customer is automatically connected with the person they were speaking to before the call dropped.
Ooma also lets you monitor your customer support performance. However, it doesn’t match the 45 different reporting features and reports that Nextiva has to offer for measuring your VoIP call center efficiency.
Expert Review: Ooma is a great solution for small to medium-sized businesses looking to add a call center solution.
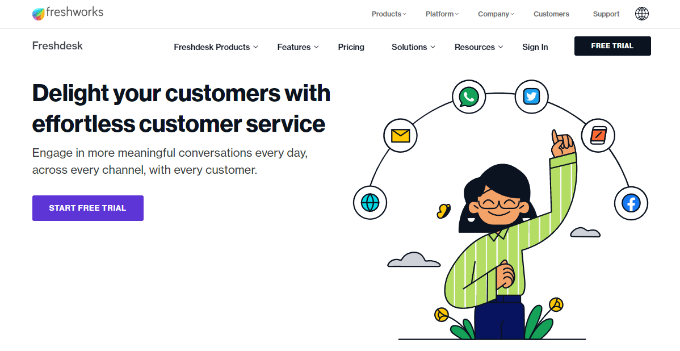
FreshDesk is a famous software that offers a complete contact center solution for businesses. Over 50,000 companies use FreshDesk to provide customer support.
FreshDesk Contact Center software, previously known as Freshcaller, is easy to use and helps you set up the software in just a few clicks. It also offers many features like setting up automated voice responses using artificial intelligence.
With FreshDesk, there’s an option to create a global contact center. You can use bring your own phone (BYOC) or purchase phone numbers from over 90 countries. Plus, it offers affordable pricing plans that you can scale as your business grows.
Other than that, it’s a complete omnichannel solution for your customer support. You can convert a call to a ticket and offer support to users from multiple channels in a single place while lowering wait time.
More features offered by FreshDesk include call recordings, call transcripts, call lifecycle information, voice bots, speech-enabled IVR, reporting tools to monitor agent performance and improve customer support, and more.
Expert Review: FreshDesk is a beginner-friendly call center solution. However, if you’re looking for more powerful features, then we recommend checking out Nextiva.
LiveAgent is the next call center software on our list, and it offers a lot of features like other services we’ve covered. However, what makes this service different is that you get a 14-day free trial to try the software before committing to a premium plan.
With LiveAgent, you get a cloud-based call center solution. The VoIP phone system helps your support agents to connect with customers from anywhere.
Plus, you get features like IVR, call back requests, call transfers, unlimited call recording, smart call routing, video conference calling functionality, in-app push notifications, chatbot, and automatic call distribution (ACD).
The software also integrates with popular CRMs like Salesforce and HubSpot. It also works seamlessly with email marketing tools like AWeber and Mailchimp. You can even integrate it with your WordPress website and add a live chat button.
Expert Review: If you’re looking for affordable pricing plans along with a free trial to test the software, then LiveAgent is the perfect tool for you.
8×8 is a cloud communication platform that offers a secure call center solution. The service is loaded with features and offers 99.99% uptime across UCaaS and CCaaS.
What this means is that the service is reliable and guarantees faster performance without any delays or downtime. Besides, it has 35 data centers located globally to provide great quality of service.
It has a simple user interface and offers a detailed knowledge base, expert connect, and a complete communication hub to help you get started.
8×8 call center also provides features to handle inbound and outbound calls. For instance, you get easy call routing, call recording, speed and text analytics, omnichannel support, IVR, agent workspace management, click to call option, and more. However, you’ll find more features in other software we’ve covered, like Nextiva and RingCentral.
The service also easily integrates with CRMs such as Salesforce, Microsoft Dynamics 365, Azure, and Zendesk. You can also improve your customer support through contact center analytics and even conduct surveys to get customer feedback.
8×8 call center pricing plans are on the expensive side, as they start from $85 per user per month. If you want a more affordable solution, then you’ll get more value for money using Nextiva.
Expert Review: 8×8 is a powerful virtual phone platform that offers a robust call center solution. It is great for SaaS enterprises and large organizations.
CloudTalk is the last call center solution on our list. It’s a popular virtual call center platform and powers over 2,500 call centers, including companies like DHL, Mercedes Benz, Fujitsu, and GoStudent.
The service offers 140 national phone numbers that you can use for your business or select a toll-free number. CloudTalk has also partnered with multiple telcos across the globe to provide a strong network and ensure crystal clear calls and reliable performance.
Other features offered by CloudTalk include call queuing, call recording, voicemail, adding extensions, fax to email, business hours, conference calls, call masking, 3-way calling, smart outbound auto dialer, and more.
You also get intelligent routing features like a complete call flow designer to create automated workflows, IVR, ACD, skill-based call routing, set a preferred agent for clients, call forwarding, VIP queues, auto-answer functionality, and more.
Expert Review: CloudTalk is a dedicated call center software. You can use it to provide inbound support, outbound sales, and easily collaborate with remote teams.
Which is the Best Call Center Software?
If you’re looking for a complete cloud-based call center, then we highly recommend Nextiva. The software ticks all the boxes for what you should look for in a call center solution.
It offers powerful features that go beyond simply creating a call center. Nextiva is a complete virtual phone solution for businesses that want to take their customer support to the next level.
You get IVR, call recording, video conferencing, mobile and desktop apps, detailed reports and metrics to track performance, and so much more with Nextiva. Plus, it easily integrates different CRMs and marketing tools.