Do you want to easily accept credit card payments on your WordPress site?
By default, WordPress does not come with credit card payment options, but there are plenty of plugins and tools that can help solve that.
In this article, we will share 2 easy ways to accept credit card payments on your WordPress site.

Why Accept Credit Card Payments in WordPress?
Credit and debit cards are the most common form of online payment in the world.
If you’re selling products or services on your WordPress website, it’s important to accept credit card payments.
Accepting credit card payments will improve your conversion rate and reduce cart abandonment.
Note: You will need to enable HTTPS/SSL on your website so that you can securely accept credit card payments. For more details, you can follow our guide on how to get a free SSL certificate for your WordPress site.
Often users don’t want to set up a full-fledged online store with a shopping cart to accept credit card payments. This makes a lot of sense, especially if you’re only selling a single product or accepting payments for consulting or services.
In this case, all you need is a simple online order form with a credit card payment option.
That being said, let’s look at how you can accept card payments on your website. Simply use the links below to jump to the method you prefer.
- Method 1. Accept Credit Card Payments with WP Simple Pay (Simplest)
- Method 2: Accept Credit Card Payments with WPForms (More Customizable)
- Method 3. Three Bonus Ways to Accept Credit Card Payments in WordPress
1. Accept Credit Card Payments in WordPress with WP Simple Pay
For this method, we’ll use WP Simple Pay, the best Stripe payment plugin on the market. With WP Simple Pay you can accept payments without having to set up and use a complicated eCommerce plugin.
WP Simple Pay integrates with the Stripe credit card processing platform. Like all payment processers, Stripe does charge a small fee per transaction. However, signing up for Stripe is free.
For this method, we’ll create a payment button that you can add to any page or post.
We’ll be using WP Simple Pay Lite because it’s 100% free. If you need more advanced features, there is also WP Simple Pay Pro. This version offers more customization options, a drag and drop form builder, and custom payment receipt emails.
First you’ll need to install and activate the WP Simple Pay plugin. If you need help, then see our guide on how to install a WordPress plugin.
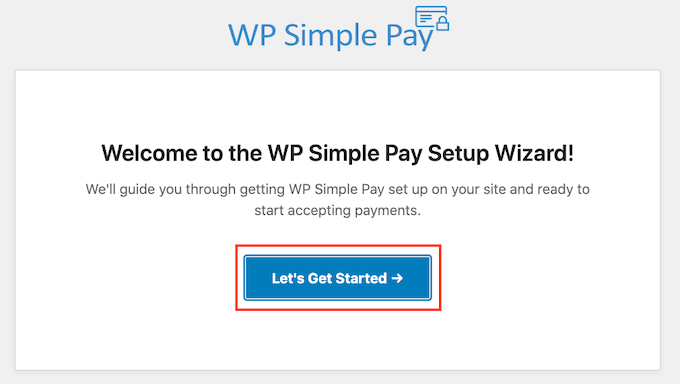
Upon activation, the plugin will automatically launch the WP Simple Pay setup wizard. To start accepting credit card payments, click on the ‘Let’s Get Started’ button.
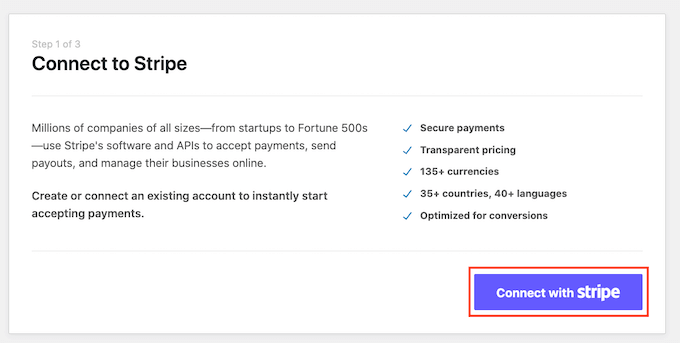
The first step is connecting WP Simple Pay to your Stripe account.
If you don’t already have a Stripe account, don’t worry. The setup wizard will walk you through the process of creating a new account, step by step.
First, click on the ‘Connect with Stripe’ button.
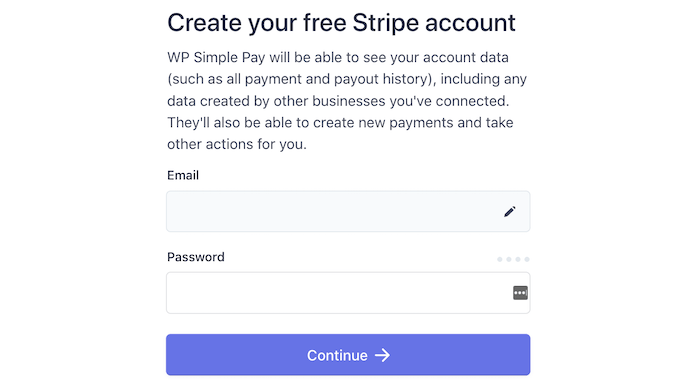
On the next screen, WP Simple Pay will ask for an email address.
If you’re already registered with Stripe, make sure you type the address that’s linked to your Stripe account.
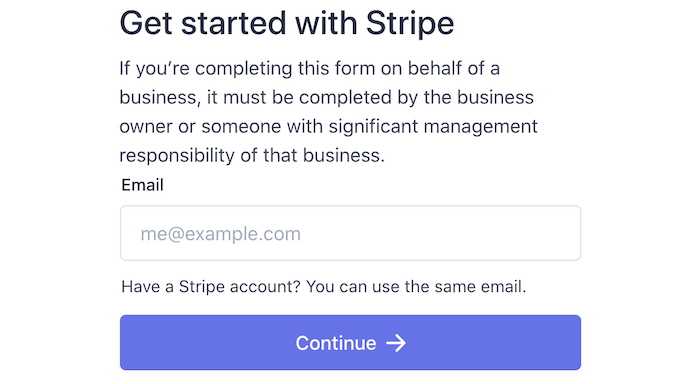
Don’t have a Stripe account? Then type the email address that you want to use for your new Stripe account.
Then simply click on the Continue button.
WP Simple Pay will now check whether there’s a Stripe account linked to your email address. If it finds an account, then WP Simple Pay will ask for your Stripe password.
If it doesn’t find an account, then WP Simple Pay will guide you through the process of registering with Stripe. Simply follow the onscreen instructions to create an account, and connect it to WP Simple Pay.
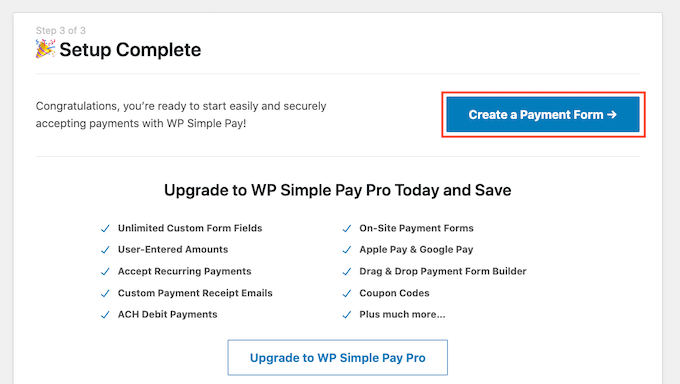
After connecting WP Simple Pay and Stripe, you’re ready to create your payment button.
Just click on ‘Create a Payment Form.’
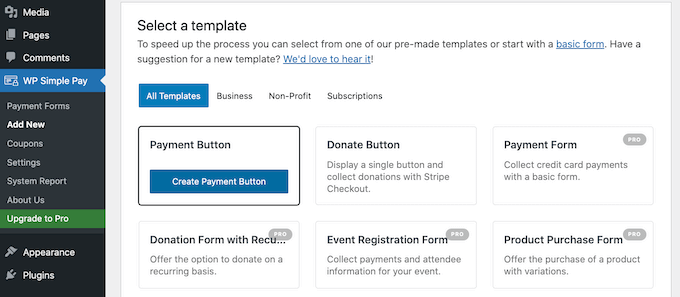
You can also create a payment button by heading over to WP Simple Pay » Add New.
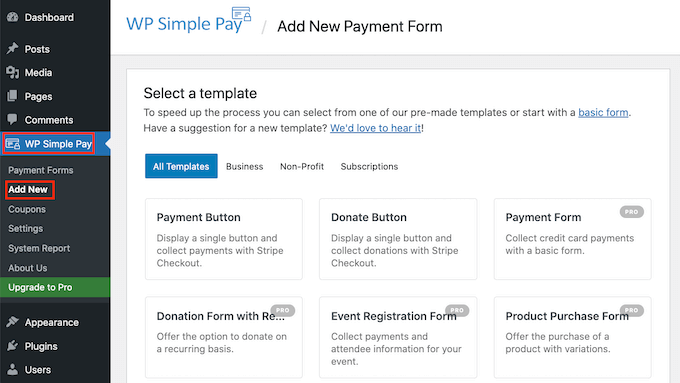
Now just hover your mouse over the ‘Payment Button’ template.
Then, click on ‘Create Payment Button’.
Now type a name for your payment button into the ‘Title’ field.
Your site visitors won’t see this name since it’s for your own reference only.
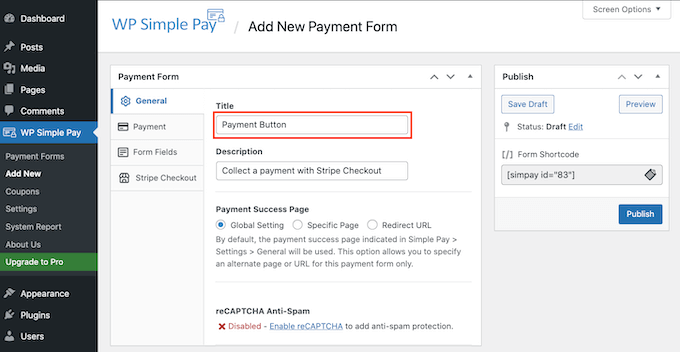
You can also add more details into the Description field. Again, WordPress won’t show this to your site’s visitors but it can be useful for your own reference.
Now just click on the Payment tab.
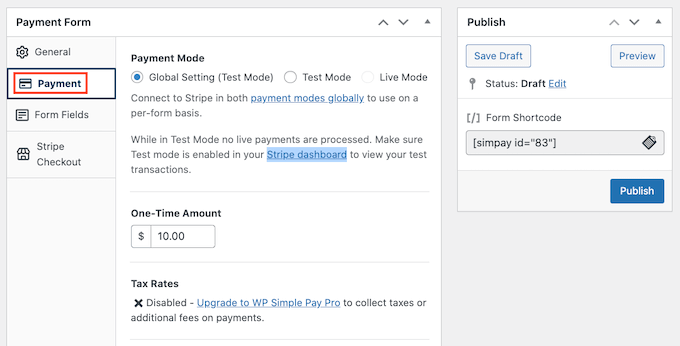
From here you can decide how much money to charge with your payment button.
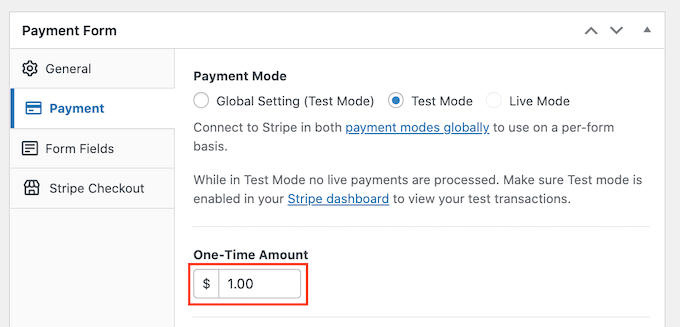
Go ahead and type this number into the ‘One-Time Amount’ field.
WP Simple Pay uses the dollar currency by default.
If you want to accept payments in any other currency, head over to WP Simple Pay » Settings. You can then select the General » Currency tab. Here you’ll find everything you need to change the default currency.
Next, scroll to the Button Text section.
This is the text that WordPress will show on your button. By default WP Simple Pay uses ‘Pay Now’ as its button label.
To change this, simply type some new text into the Button Text field.
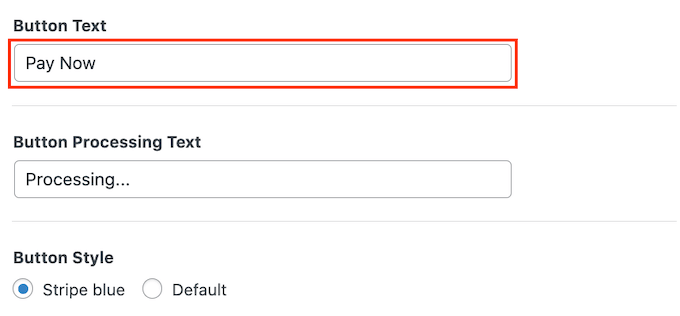
In this section you can also change the Button Processing Text.
This is the text that WP Simple Pay will show to visitors while it’s processing their payment information.
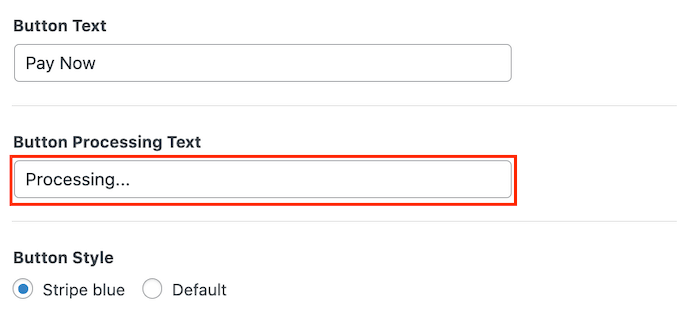
WP Simple Pay uses your WordPress theme’s button styling for the ‘Default’ button style.
Another option is to use the ‘Stripe blue’ style, which uses a gradient and rounded corners.

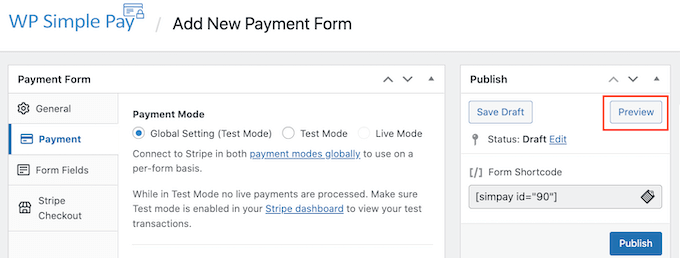
As you’re making these changes, you may want to check how your payment button will look to your visitors.
To preview the finished product, click on the Preview button.
Once you’re happy with what you’re seeing in the preview, it’s time to add the button to your WordPress website.
To do that, click on the Publish button.

You can now add your button to any page or post to accept credit card payments on your WordPress site, including your product pages and landing pages. You can also add the button to any widget-ready area of your site.
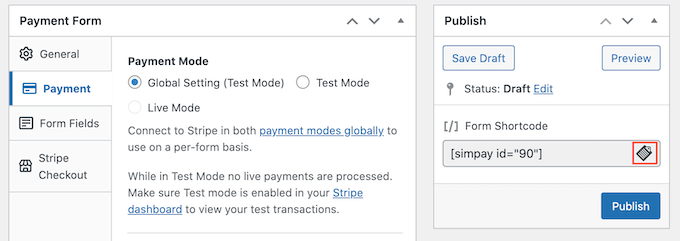
All you need is a piece of shortcode that WP Simple Pay creates automatically.
To grab this code simply find the ‘Form Shortcode’ field. Then click on its ‘Copy’ button.
You can now paste this shortcode into any page, post, or widget area. For more details on how to place the shortcode, you can see our guide on how to add a shortcode in WordPress.
After pasting this shortcode, your payment button will appear on your WordPress website.
Before you start accepting payments, it’s a good idea to test your button.
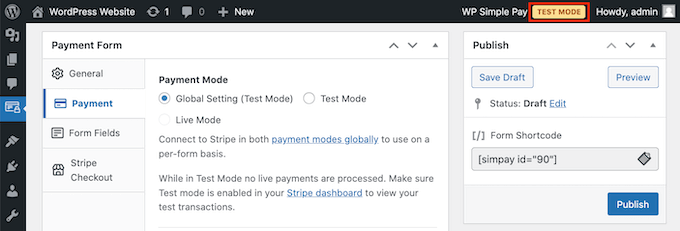
WP Simple Pay creates your new payment button in test mode by default. Your website won’t process any credit card payments while it’s in test mode.
To confirm that WP Simple Pay is currently in this mode, take a look at the toolbar at the very top of your WordPress dashboard. You should it say ‘Test Mode’.
If you head over to the page or post where you added this button, you should also see ‘Test Mode’ directly beneath your button.

When it comes to testing your button, there is one problem.
Stripe doesn’t show test payments by default! Fortunately there is an easy fix.
To see your test data simply log in to your Stripe dashboard in a new tab. Then click on the Payments tab.
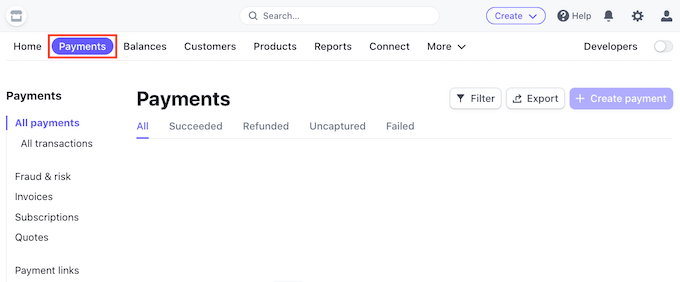
Next just click on the ‘Developers’ slider in the upper right corner.
The Stripe dashboard will now update to show a ‘Test Data’ banner. Any test payments will now show up in your Stripe dashboard.

You’re now ready to put your button to the test.
The easiest way to do this is by switching back to your WordPress website. Then head to the page where you added your button to accept credit card payments.
You can now give this button a click. Then just follow the onscreen instructions to submit a test payment. After sending the test payment, switch to your Stripe dashboard. You will now see your test payment in the dashboard.
Now you’ve checked that everything is running smoothly, it’s time to bring your button out of test mode.
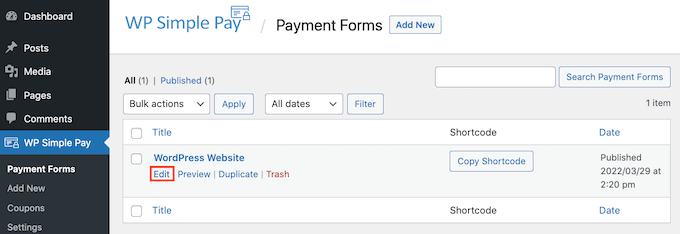
Simply go to WP Simple Pay » Payment Forms. You can then hover your mouse over your payment button, and click on the Edit link.
Find the Payment tab in the left-hand menu, and give it a click.
Finally, check the ‘Live Mode’ box in the ‘Payment Mode’ area.

Don’t forget to click on the ‘Update’ button at the top of your screen to save your changes.
Now, you can visit your website to see your payment button live.
2. Accept Credit Card Payments in WordPress with WPForms
If you want to create a straightforward payment button, then the WP Simple Pay method shown above is a great choice.
However, sometimes you may need to collect more information from your visitors by creating a payment form.
This means you’ll need a flexible and powerful form builder plugin.
WPForms is the best WordPress contact form plugin. You can use it to quickly add any kind of form, including payment forms, to your WordPress website.
WPForms even has a ton of payment and credit card templates that can help you get started quickly.
For this tutorial we’ll be using the WPForms Pro version because it gives you access to the Stripe Payments addon. This powerful addon lets you accept credit card payments in WordPress using the popular Stripe payment gateway.
However it’s important to remember that you can also use WPForms to accept credit card payments using Square, Authorize.net, and PayPal. We recommend Stripe because that’s who we use as our payment processor.
First, you’ll need to install and activate WPForms Pro. If you need help, then please see our guide on how to install a WordPress plugin.
After activating WPForms, head over to WPForms » Settings in your WordPress dashboard.
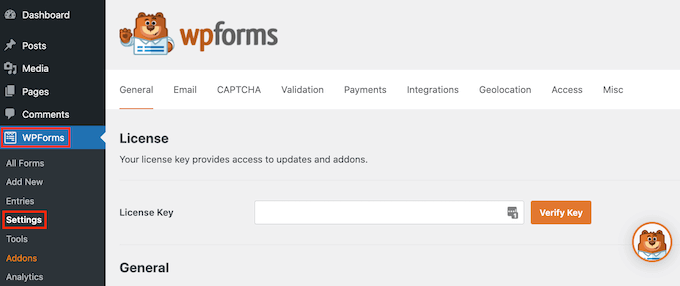
You can now enter your license key into the ‘License Key’ field. You’ll find this key in your WPForms Account.
After activating the core plugin, it’s time to install the Stripe addon.
In your WordPress dashboard, go to WPForms » Addons.
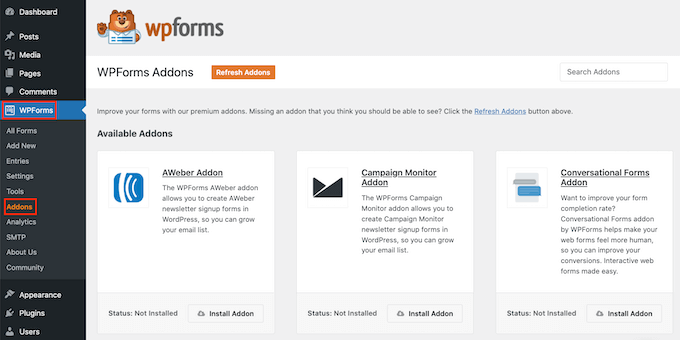
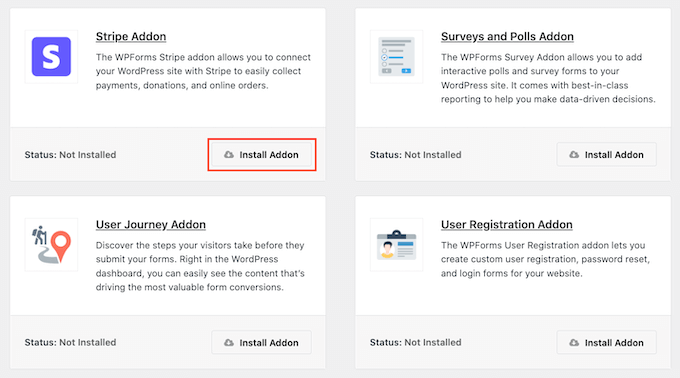
Simply scroll until you find the Stripe Addon.
Then click on its ‘Install Addon’ button.
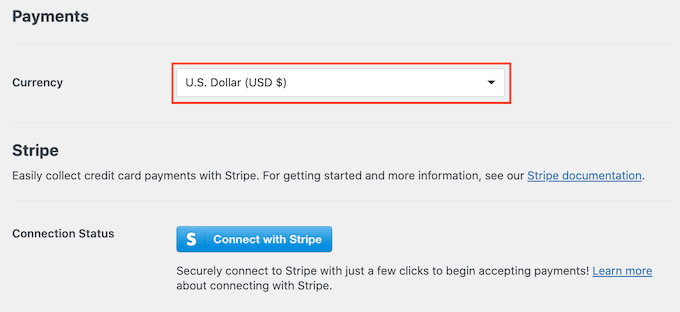
Next head over to WPForms » Settings.
Then, click on the Payments tab.

By default, WPForms will collect payments in American dollars.
If you prefer to accept payments in a different currency, just open the Currency dropdown and choose from the list.
The next step is connecting WP Simple Pay to your Stripe account.
To make this connection, scroll to the Connection Status section. Then just click on the ‘Connect with Stripe’ button.
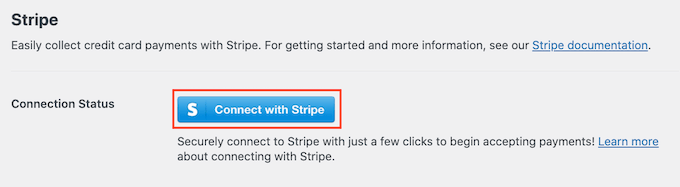
This opens a new tab. You can now follow the onscreen instructions to either create a new Stripe account, or connect WPForms to your existing Stripe account.
Once you’re successfully connected to Stripe, it’s time to create your payment form. To do this, head over to WPForms » Add New.
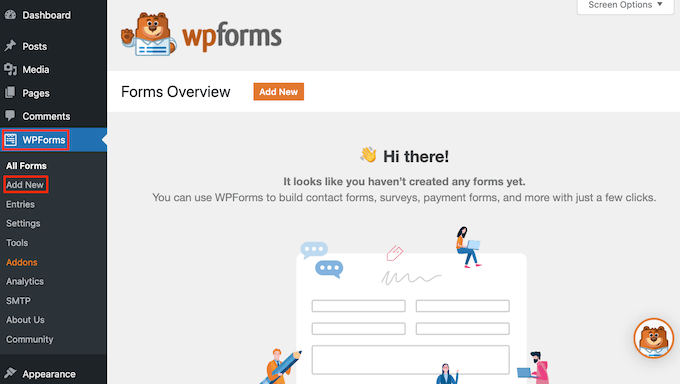
You can now type a name for your form into the ‘Name Your Form’ field.
Your site visitors won’t see the name, so it’s just for your reference.
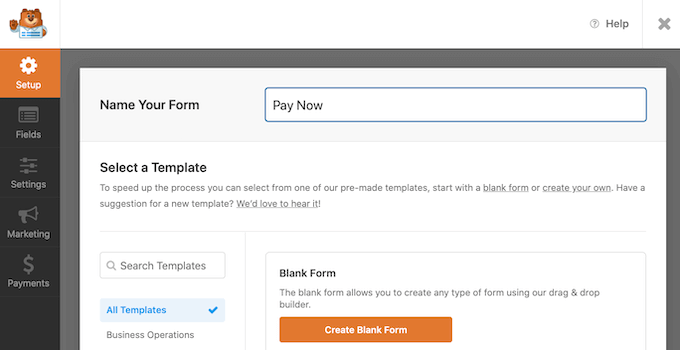
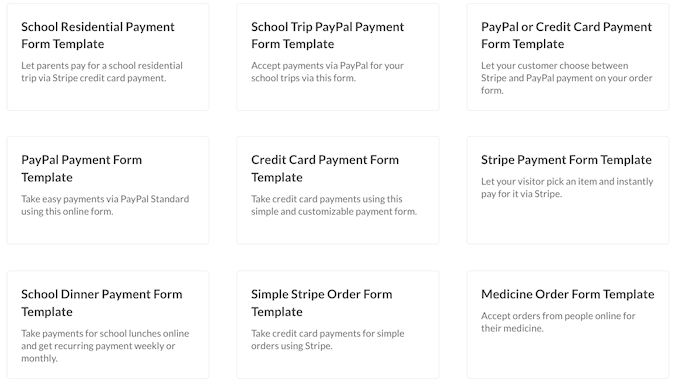
WPForms has different templates so you can quickly get started and build all kinds of forms. Since we’re creating a payment form, you may want to type either ‘payment’ or ‘credit card’ into the ‘Search Templates’ field.
This will display all the templates that have the word ‘payment’ or ‘credit card’ in the title.

To take a closer look at a template, simply hover your mouse over that template.
Then click on the View Demo button.
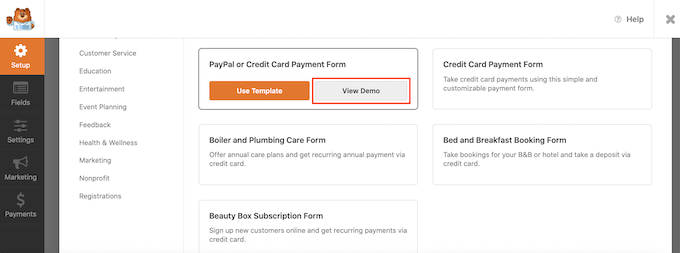
WPForms will now show this template in a new tab.
When you find a design you want to use, click on the Use Template button. For this tutorial, we’ll be using the Credit Card Payment Form template.
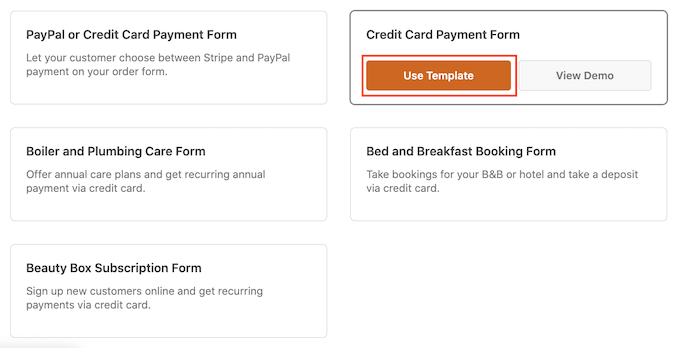
Your chosen WPForms template will now open in a new tab, ready for you to customize.
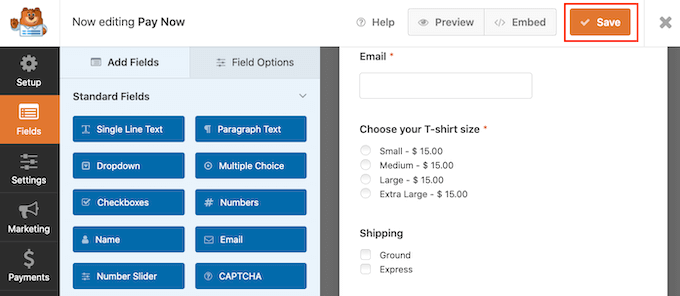
The Credit Card Payment Form has fields where customers can type their name and email address. It also has a ‘Choose your item’ section where visitors can select the item they want to buy.
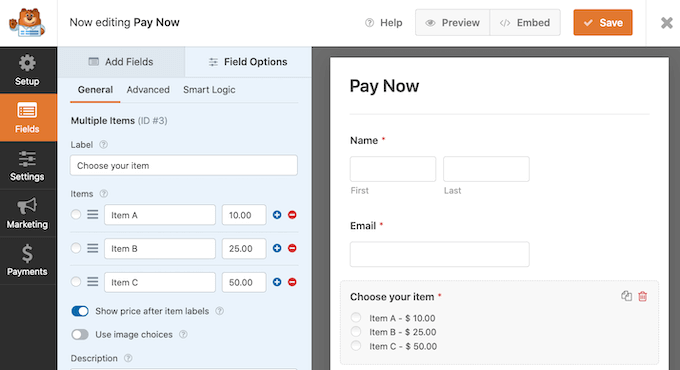
You can use this section to offer visitors a choice of products or services.
Another option is letting visitors customize a single product. For example, you might offer the same T-shirt in different sizes or colors.
To customize this section, simply give it a click. The WPForms sidebar will now update to show all the settings for this section.
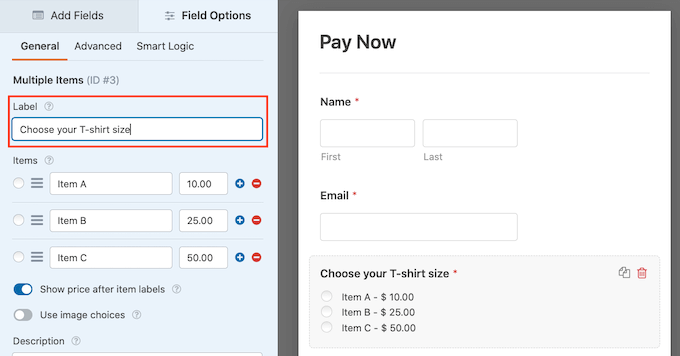
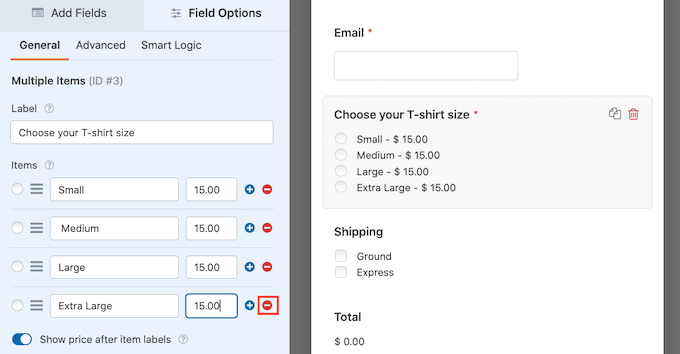
To change any piece of text, simply delete the default text and then type the word or phrase that you want to use instead. For example, you might delete ‘Choose your item’ and replace it with ‘Choose your T-shirt size.’
You can also change the price of each item.
To do this, simply delete the placeholder number for this item. You can now type the new amount into this field.
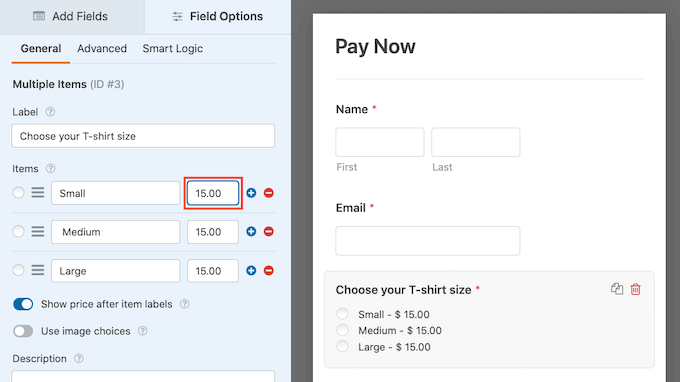
You can also change the text that WordPress uses for its placeholder items following the same process above.
By default, this template lets visitors choose between three items. If you want to add some more options, simply click on the + icon.
This adds a new ‘Item,’ ready for you to customize.
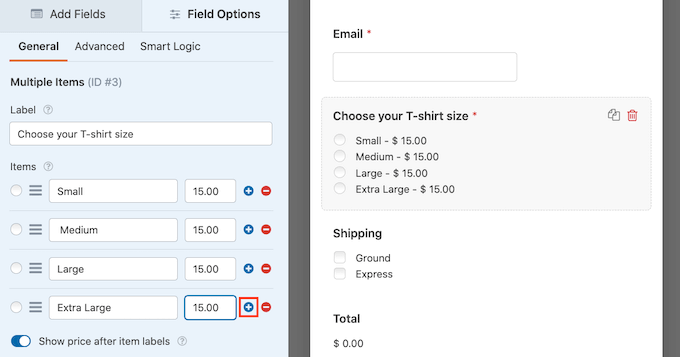
To remove an item from this section, click on its ‘-’ icon.
This option will now disappear from your credit card payment form.
Next this template offers visitors a choice of ‘Ground’ or ‘Express’ shipping methods.
To edit this section, simply give it a click. The WPForms sidebar will update to show all the settings for this section.
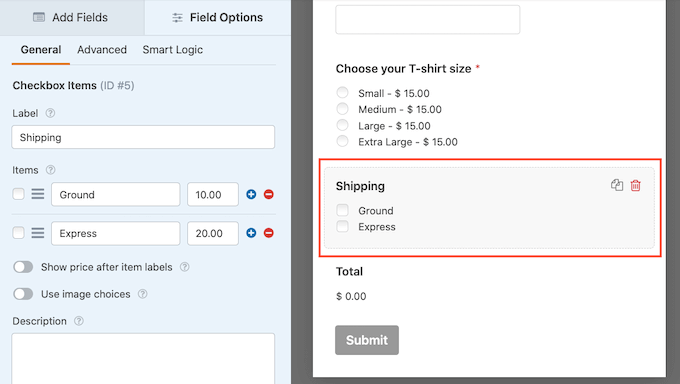
You can change the placeholder text, and add and remove shipping options by following the process described above.
You can also change the price for each shipping method. If you want to offer free shipping, then you can simply set this price to $0.
Another option is to delete this section completely.
To remove any section from your template, just hover your mouse over that section. Then click on the trash icon.

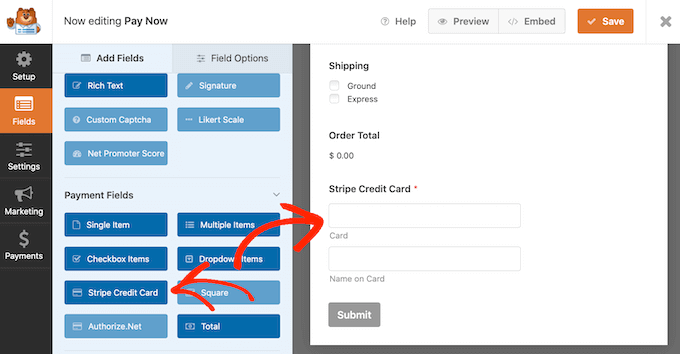
Next you need to add the Stripe Credit Card field to your form. This field will collect the customer’s payment information.
To add this field simply click on the ‘Add Fields’ tab.
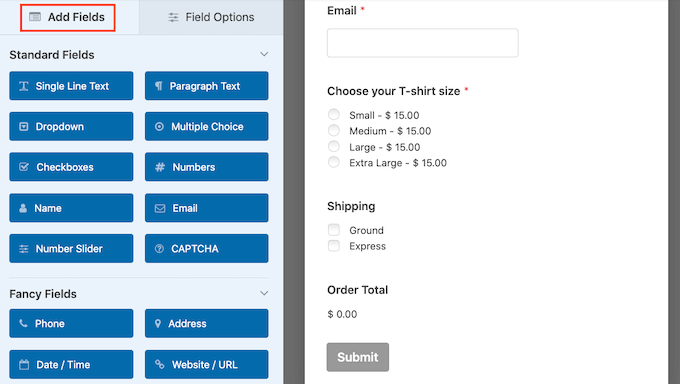
Then scroll to the Payment Field section.
You can now go ahead and drag the Stripe Credit Card field into place on your payment form.
You might want to add some more fields to the template to collect more information from your visitors, such as their shipping address or phone number. Simply repeat the process above to add new fields to your form.
You can also change the order these fields appear in using drag and drop.
Now that your form is set up, let’s enable payments for this form. To do that, you simply need to click on the ‘Payments’ tab in the left-hand menu and then select ‘Stripe.’
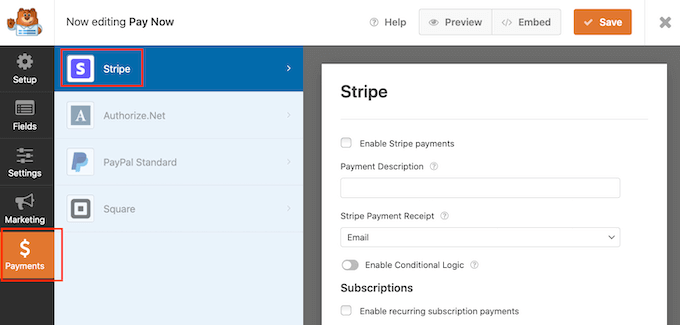
After that, just check the box next to the ‘Enable Stripe payments’ option.
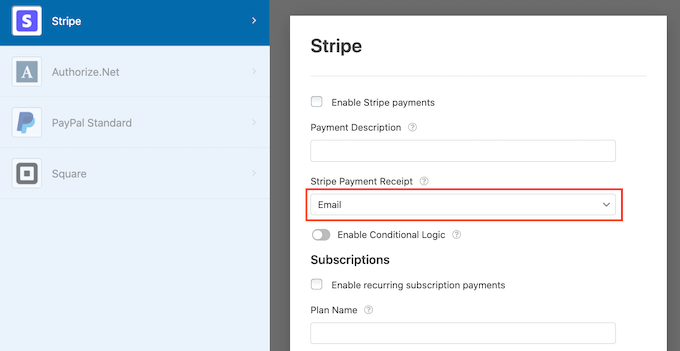
You can now type a description into the Payment Description field. This text will appear on the customer’s credit card statement.
You also have the option to send an email receipt to your customers. To create an email receipt, open the Stripe Payment Receipt dropdown. You can then choose ‘Email.’
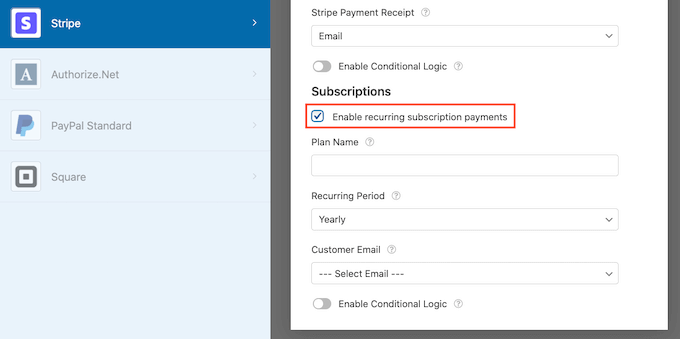
WPForms also allows you to set up smart conditional logic for your forms. This is where you choose to show or hide the payment form field based on the options your customer selects.
On this screen you can also enable recurring subscription payments and select the recurring time period. This can be useful for creating subscriptions and selling memberships.
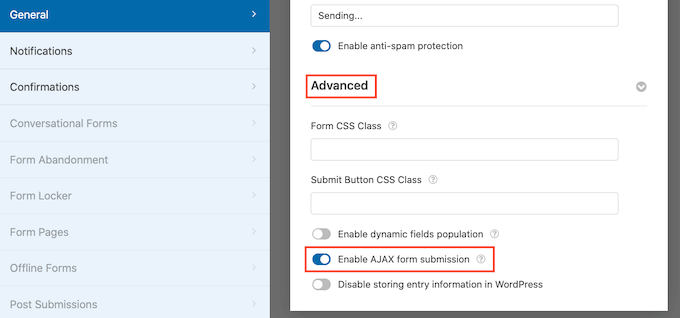
Next, you will need to enable AJAX form submissions to use the Stripe Credit Card field. AJAX form submissions allow customers to submit forms without reloading the entire page. This can improve the customer experience.
To enable AJAX submissions, simply go to Settings » General.
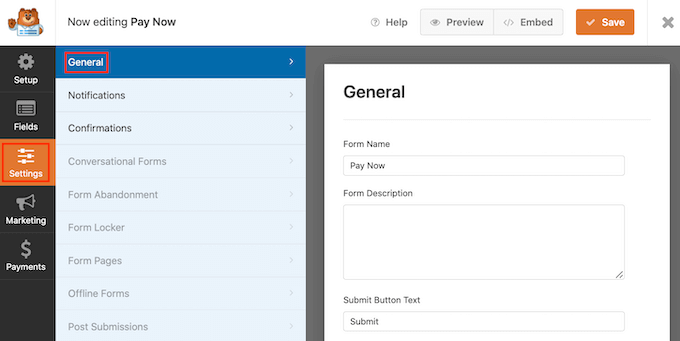
Then click to expand the Advanced section.
Finally, check the ‘Enable AJAX form submission’ box.
When you’re happy with how your credit card payment form looks, it’s time to save your changes.
To do this, just click on the Save button at the top of the screen.
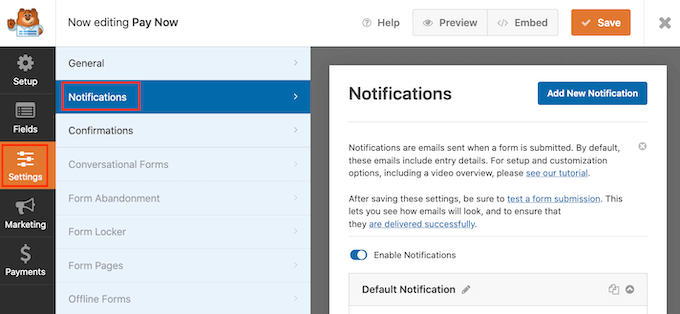
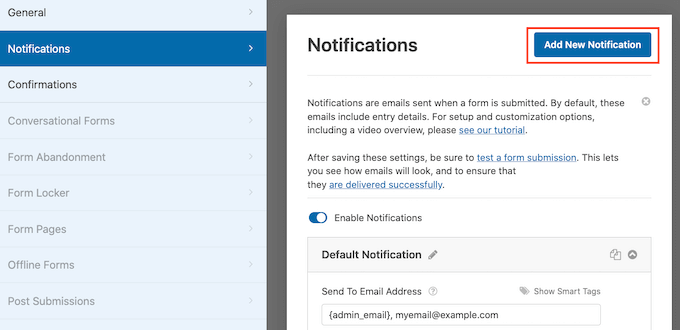
The next step is configuring your form’s notifications.
Every time a customer completes the payment form, WPForms will send an email to your WordPress admin by default.
Sometimes you may need to send these emails to a different address. You might even want to notify multiple people.
This is easy to do using WPForms. To customize your email notifications, click on the Settings tab. Then select Notifications.
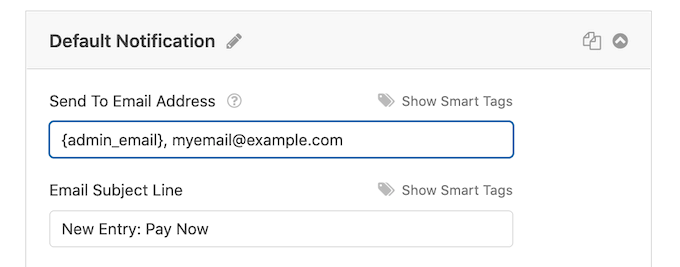
On this screen, find the ‘Send To Email Address’ field. By default this is set to {admin_email}. This is a dynamic value that tells WordPress to use the WordPress admin email.
You can delete this dynamic text and replace it with any other email address. Simply type the new address into the ‘Send To Email Address’ field.
If you want to email multiple people, just separate each address with a comma.
You can also edit the email message. For example, you’ll probably want to change its copy and email subject.
After creating these emails, you’ll want to make sure they’re sent to the recipient’s email inbox and not to the spam folder.
The best way to do this is by using an SMTP service provider to improve email deliverability. For more details, see our guide on how to fix WordPress not sending email issue.
You may also want to send a separate notification to your customers. For example, you might confirm their purchase or send them a ‘Thank You’ message. WPForms will send this email automatically whenever a customer submits the payment form.
To email your customers, click on the ‘Add New Notification’ button.
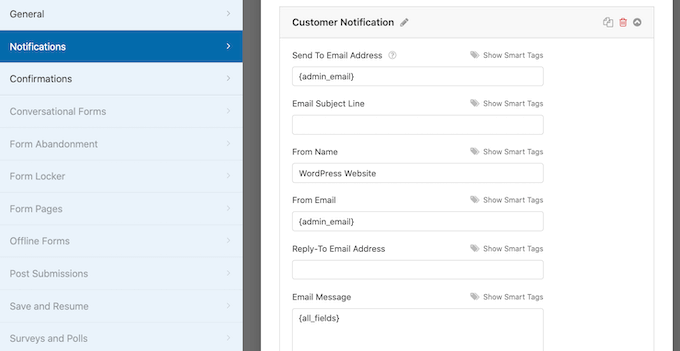
WPForms will ask you to provide a name for this notification. Let’s call it ‘Customer Notification.’
After that, WPForms will show all of the notification fields that you can customize.
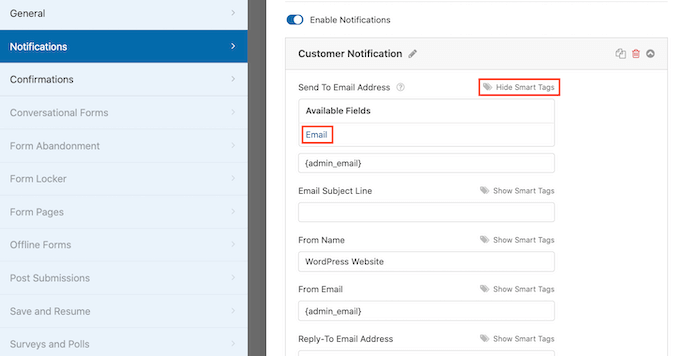
To make sure WPForms sends this notification to the right address, click on the ‘Show Smart Tags’ link next to the ‘Send To Email Address’ option.
Then simply select the ‘Email’ field. This allows WPForms to use the email address the customer provided when submitting their payment.
You can now customize the rest of the notification email. For example, you might want to change the subject line or add more text to the email message.
You can also personalize the email using smart tags. For example, you might add the customer’s name or some information about the product they just bought.
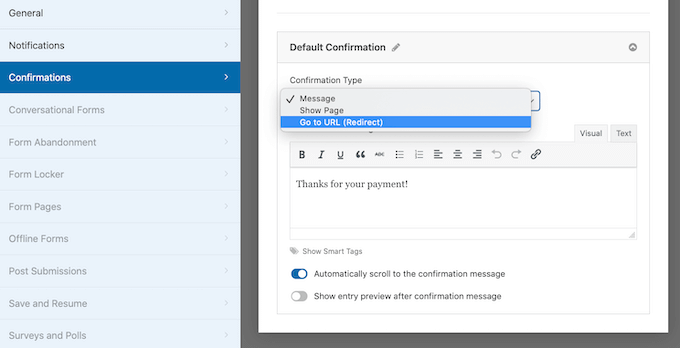
After that you can head over to the ‘Confirmations’ tab.
WPForms uses ‘Message’ as the default option. This means your site will show a thank you message every time a customer submits the payment form.
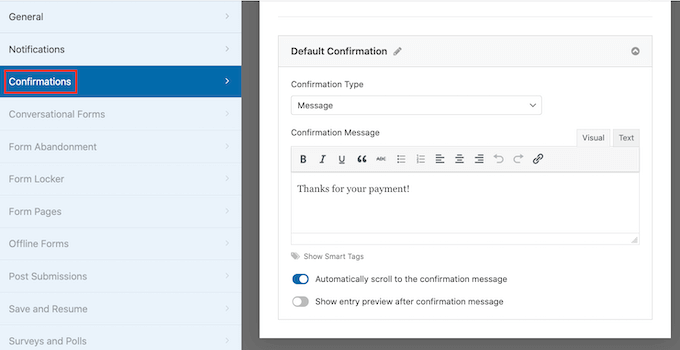
Instead of showing a message, you might prefer to show a specific page or redirect customers to another URL.
To make this change, simply open the ‘Confirmation Type’ dropdown. You can now choose from the available options.
The final step is adding this form to your WordPress website.
To add it to a post, simply open up the blog post you want to edit.
Then click on the plus (+) icon.

In the popup that appears, type ‘WPForms’ to find the right block.
Once you click on the WPForms block, it will add the block to your page.
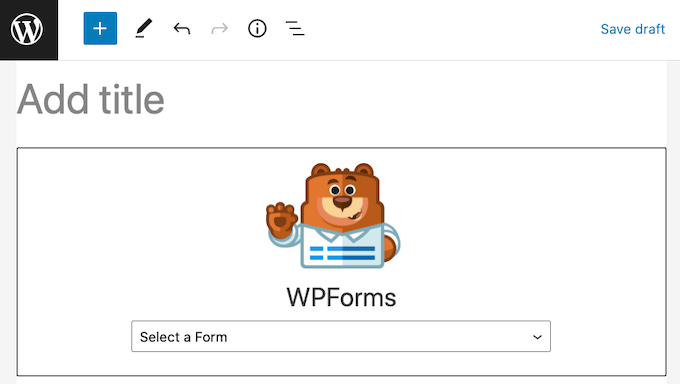
In your new block, click to open the dropdown menu.
You will now see a list of all the forms you’ve created using WPForms. Simply click to select your payment form.
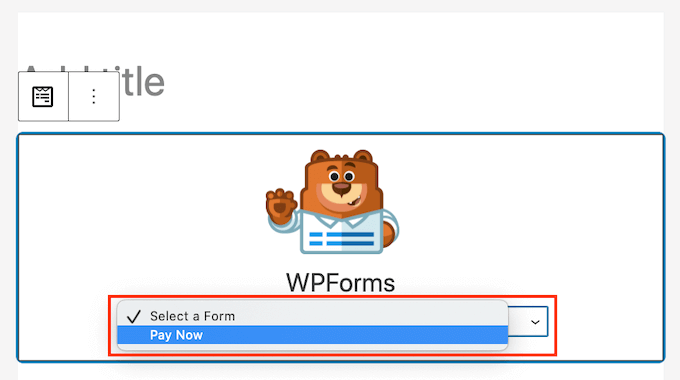
If you’re happy with how the form looks, then you can publish or update the page.
Now you can visit your website to see your form live. You’re ready to start accepting credit card payments on your WordPress website.

Method 3. Bonus Ways to Accept Credit Card Payments in WordPress
While both WP Simple Pay and WPForms are the most straightforward ways to accept credit card payments in WordPress, some users may have different needs.
For example, you may want to start an online store to sell physical products, sell ebooks, sell online courses, or even accept donations.
In those cases, you may need a full-featured solution for your specific use-case:
- MemberPress – this is a great solution for when you want to sell online courses or memberships. It has ways to accept credit card payments using Stripe and Authorize.net
- Easy Digital Downloads – this is perfect for selling digital downloads like eBooks, music, software, and more. EDD lets you accept credit card as well as have multiple payment options on cart.
- WooCommerce – this is a popular WordPress eCommerce plugin that lets you sell physical products online. WooCommerce lets you accept credit card payments as well.
We hope this article helped you learn how to easily accept credit card payments on your WordPress website. You may also want to see our list of the must have WordPress plugins for business websites, or check out our guide on how to create an email newsletter the right way.
If you liked this article, then please subscribe to our YouTube Channel for WordPress video tutorials. You can also find us on Twitter and Facebook.
The post How to Easily Accept Credit Card Payments on Your WordPress Site first appeared on WPBeginner.
June 29, 2022 at 02:00AM