Monday, July 18, 2022

How to Create an Author Website in WordPress (Step by Step)

Do you want to create an author website?

Making an author website allows you to connect with your readers directly and grow your personal brand to sell more books, create online communities, sell premium courses, find more speaking gigs, and more.

In this article, we’ll show you how you can easily create an author’s website in WordPress without hiring a developer.

Creating an author website in WordPress

Following is the list of topics that we’ll cover in this guide.

Ready? Let’s get started.

Why Build An Author’s Website?

Many authors rely heavily on promoting their works on social media platforms or through their publisher’s website/marketing channels.

However, at the end of the day, you don’t own any social media platform. The social media followers you gather would instantly disappear if your profile gets blocked by those websites.

The best way to promote your books or build a personal brand is by making a website.

Author website - Stephen King

First of all, you own your website, so no one can block you from it.

You can still build a social media following, but we highly recommend also building your email list. This way, you can have direct communication with your followers without relying on a third-party platform.

Lastly, having your own website gives you much more flexibility in how you earn an income. You can promote your books and other writings, build an online subscription-based community, and more.

That being said, let’s take a look at how to easily make an author’s website without any coding knowledge or special technical skills.

What Do You Need to Build an Author Website?

First, you need to choose the right website building platform for creating your author’s website.

We recommend using WordPress.org. It is the best website builder on the market and powers over 43% of all websites on the internet. Countless authors around the world including many #1 New York Times bestseller authors use WordPress for their websites.

Now keep in mind that when we say WordPress, we are talking about WordPress.org and not WordPress.com which is a website hosting company.

For more details, see our guide on the difference between WordPress.org and WordPress.com.

To make an author website in WordPress, you’ll need the following items:

  1. A domain name (e.g. wpbeginner.com). This will be your website’s address and what your users will type in their browser to reach your website.
  2. A website hosting account. This is where all your website files will be stored.

Usually, a domain costs around $14.99 per year, and website hosting plans start at $7.99 per month (often paid annually).

Luckily, the team at Bluehost has agreed to offer WPBeginner users a free domain name with a generous 60% discount on hosting. Basically, you can get started for $2.75 per month.

Bluehost is one of the biggest hosting companies in the world and an officially recommended WordPress hosting provider.

If your budget allows you to spend a little more on premium hosting, then you can check out SiteGround or WP Engine.

Need more hosting recommendations? See our comparison of the top WordPress hosting companies.

Getting Started with Your Author Site

Once you have signed up for a WordPress hosting account, the next step is to install WordPress.

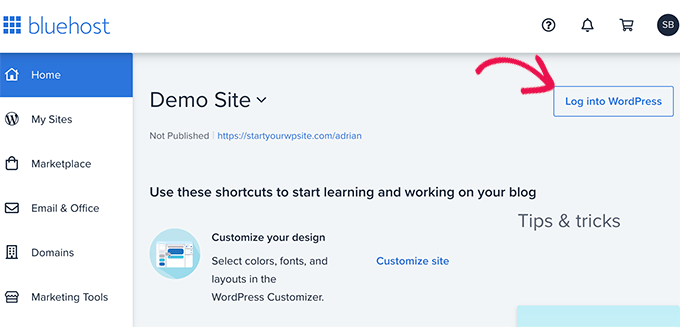
Now if you signed up with Bluehost, then they would automatically install WordPress for you.

Simply log in to your hosting account dashboard, and you’ll see a button to log in to WordPress.

Login to WordPress

For other hosting companies, you can follow our step-by-step guide on how to install WordPress.

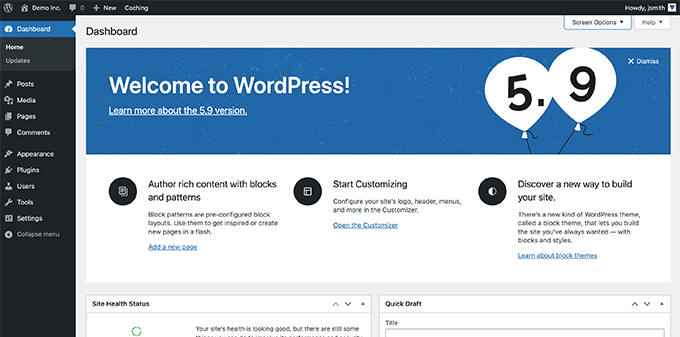
After that, you’ll reach your WordPress dashboard. It would look something like this:

WordPress dashboard

Examples of Author Websites (For Inspiration & Ideas)

Before you start working on your own author website, it’s a good idea to set some goals for what you want it to look like and what features you want to add.

The beauty of WordPress is that you can add just about every type of feature on your site since there are over 59,000 free plugins available (more on this later).

Following are a few examples of author websites that we really like. You can take a look at them to get ideas for your own website.

1. James Clear

James Clear - Author website example

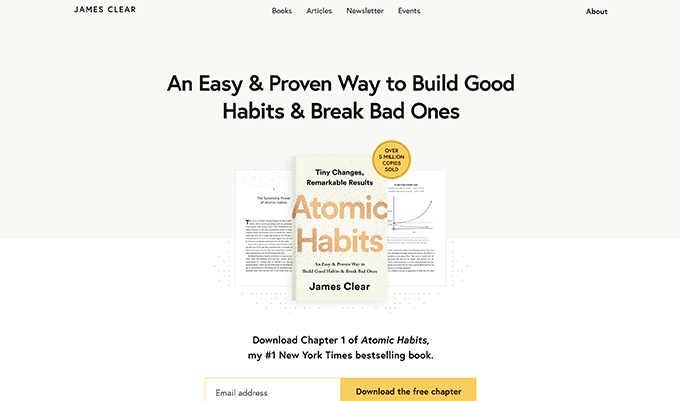
James Clear is the author of the #1 New York Times best-selling book Atomic Habits.

His website features a clean minimalist design with an email capture form as the main call to action.

2. Lisa Gardner

Lisa Gardner

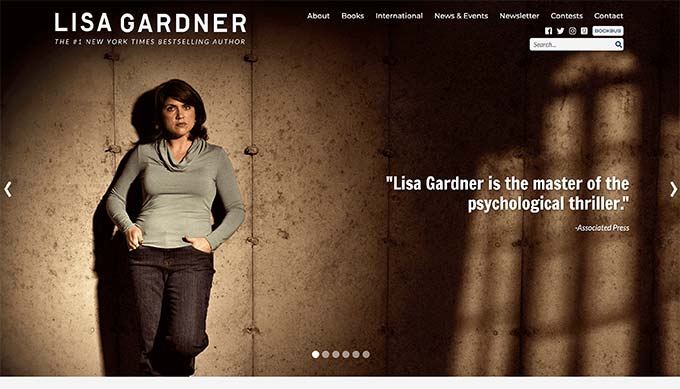
Popular fiction author Lisa Gardner’s website showcases primarily her work and drives traffic to online retailers where users can purchase more of her books.

It has a slider at the top and also has a prominent email newsletter signup form right below that.

3. Elizabeth Gilbert

Elizabeth Gilbert - Author website example

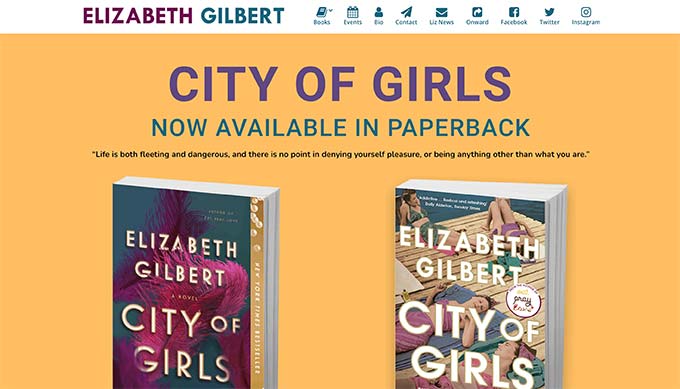
This author website example prominently displays Elizabeth Gilbert’s books with links to online retailers where users can buy those books.

On top, it links to different sections neatly highlighted with icons.

4. Simon Sinek

Simon Sinek - Author website example

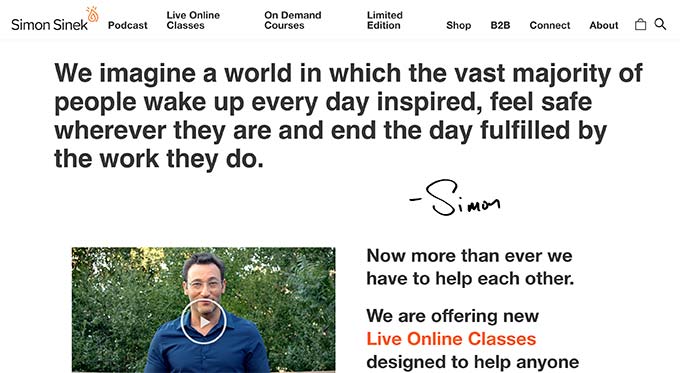
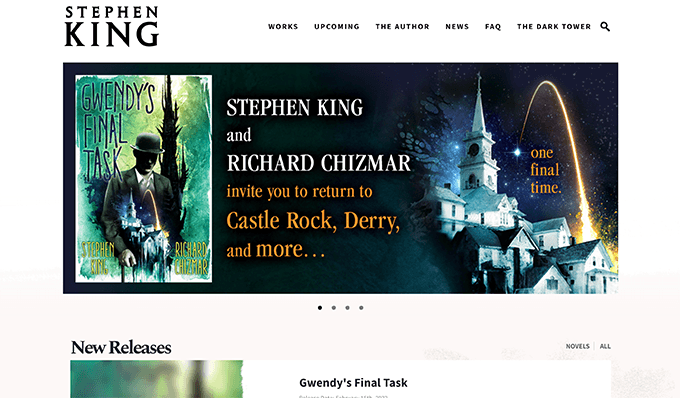
Simon is the author of the popular ‘Start with Why‘ book, and his website has multiple monetization options tied together.

It features books, a podcast, online courses, an online store, and more.

5. Malcolm Gladwell

Malcolm Gladwell - Author website example

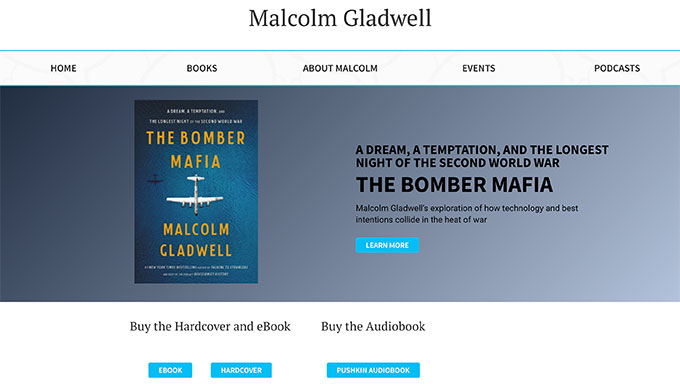
Malcolm Gladwell’s author website features a minimalist design with the latest book showcased prominently on the front page.

His menu also features a podcast.

Choosing a Theme for Your Author Site

Now that you have some ideas on how you want to structure your author’s website, it is time to choose a design.

Option 1. Choose a WordPress Theme for Authors

WordPress uses themes to control the display of your website. A typical WordPress theme contains several templates for different parts of a website.

There are thousands of free and paid WordPress themes available that you can use to build an author’s website. However, this abundance also makes it harder for beginners to figure out which design would work best for them.

To make it easier, we have compiled a list of the best WordPress themes for authors.

Choose a theme for your author website

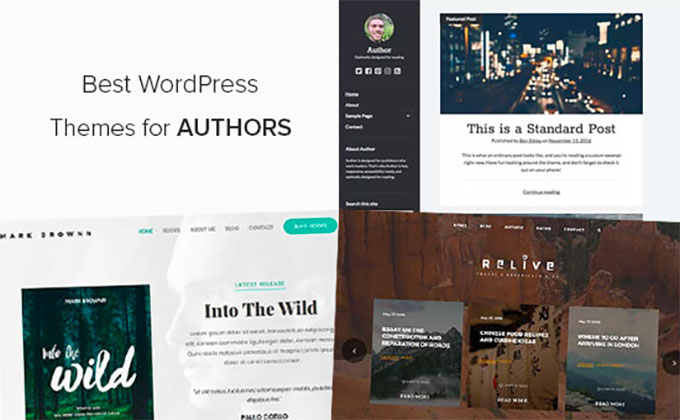
We recommend starting with a minimalist theme with a clean layout and lots of empty space. This makes your website looks clean and more professional.

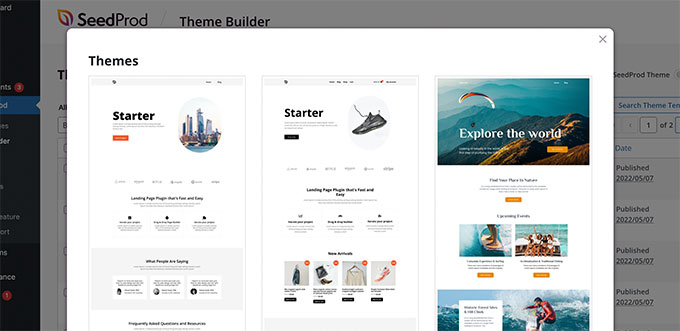
Option 2. Using SeedProd’s Drag and Drop Page Builder

WordPress themes are incredibly easy to use. However, sometimes you may want the ability to just create your custom website design.

This is where SeedProd comes in. It is the best WordPress page builder plugin on the market and allows you to create any kind of layout you need with drag & drop (no coding needed).

Building an author website using SeedProd page builder

SeedProd comes with an intuitive page builder where you can simply point and click to edit any item or drag and drop items to create your own layouts.

It is theme agnostic, which means it works regardless of which WordPress theme you are using.

Editing pages in SeedProd

You can even create a custom WordPress theme without any coding and then edit it using the same easy-to-use interface.

Setting Up Your Website Layout and Pages

WordPress comes with two commonly used content types called posts and pages.

Posts are part of a blog and displayed in reverse chronological order, with most recent posts at the top. On the other hand, pages are used for more static content. You can see other author websites to get an idea about which pages you need to create.

Typically, websites made for authors have the following essential pages:

  • Home page – This is the front page that users will see if they enter your domain name.
  • Blog page – This is where you can post regular updates, news, articles, and more.
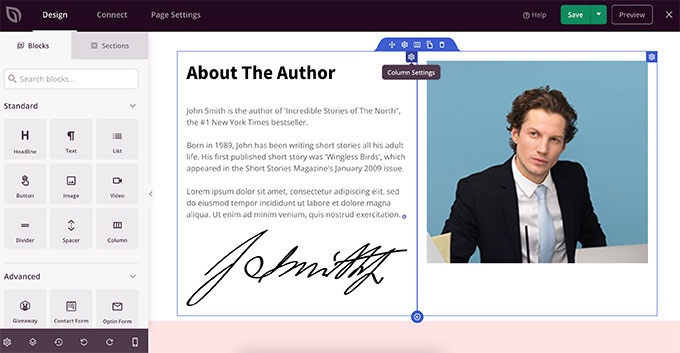
  • About / Bio – An about page provides a detailed introduction of the author with biographical information, awards, achievements, and more.
  • Contact Page – A simple page with a contact form and other ways to reach out to the author.

There could be other pages as well, depending on how you want to run your author website. For instance, if you have an online store where you sell merchandise, then you may want to add a shop page.

For more details, see our article on important pages for any type of WordPress website.

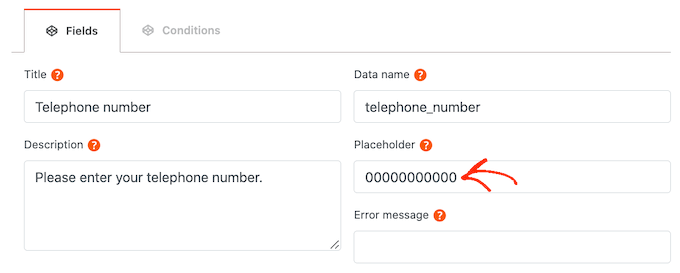
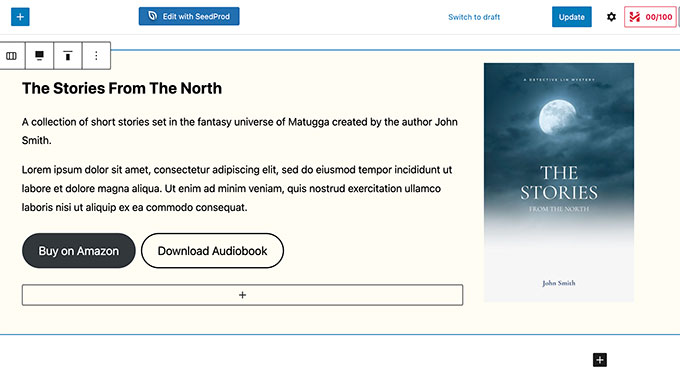
To create a new page in WordPress, simply head over to Pages » Add New. From here you can provide a title for your page and then add the content.

Add new page

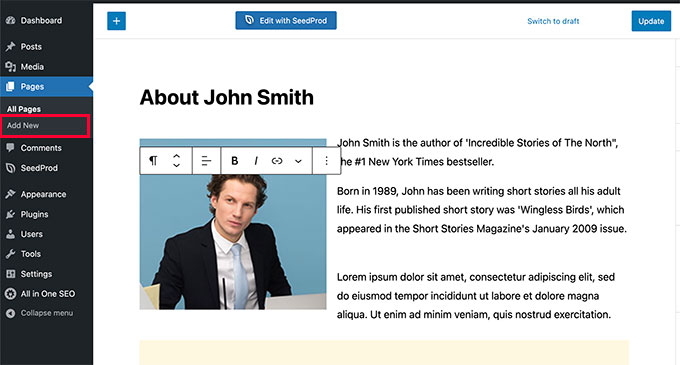
WordPress comes with a powerful block editor where each content item is added as a block. See our tutorial on how to use the WordPress editor to create beautiful content layouts for your pages.

Alternately, you can also use SeedProd to create custom page layouts for your website.

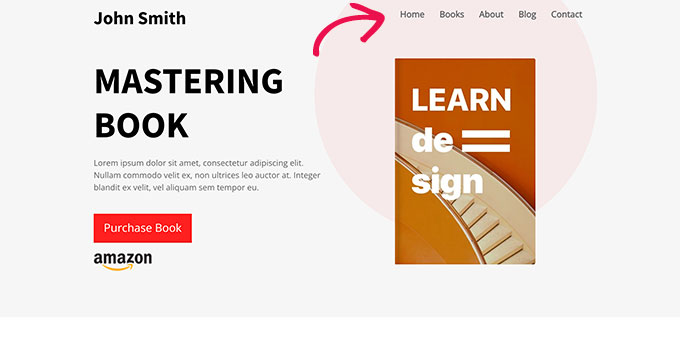
Once you have added a few pages, you would want to add them to the top navigation bar of your website.

You can simply go to Appearance » Menus page to create a new menu. After that, add the pages you just created from the left column to your menu.

Add navigation menu

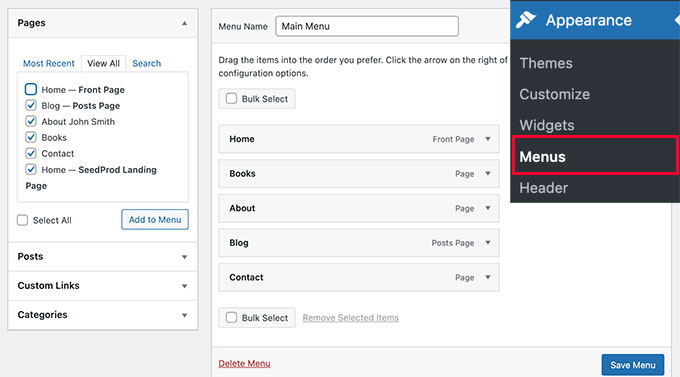
Don’t forget to click on the Save Menu button to store your changes. For more details, see our tutorial on how to add navigation menus in WordPress.

Navigation menu displayed

Selling Books on Your Author’s Website

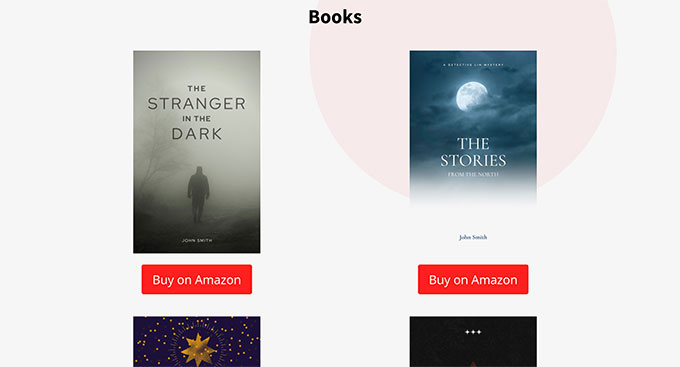
As an author, you would want to prominently showcase your books across your website.

WordPress makes it super easy.

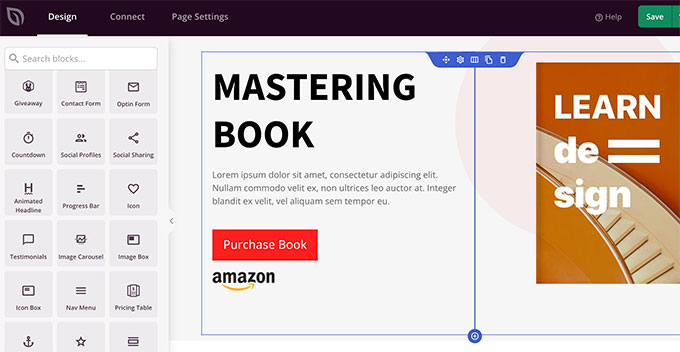
You can simply create a page called Books and add your book cover images with buttons to buy them on Amazon, or any other online store where your books are available.

Creating a books page

You can also display your newest book on the front page of your website with a call to action button that take users to an online retailer.

For step-by-step instructions, you can see our guides on how to add and align images and how to add buttons in WordPress.

Promoting a single book

If you are currently only selling ebooks as digital downloads, then you can check out our tutorial on how to sell ebooks in WordPress.

Promoting Your Author Website

Now that your author website is all set up, the next big step is to promote it.

This not only helps you sell more books but also establishes your author name as a brand.

Following are some essential tips used by almost all authors to promote their websites.

1. Start Your Email Newsletter

Start your online newsletter

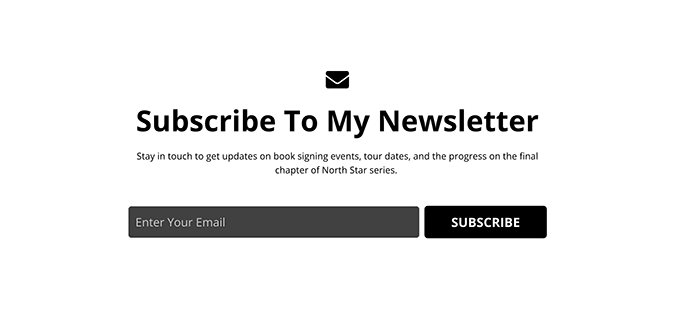
Not everyone visiting your website is going to buy your books right away. Plus, most people want to hear the latest news from their favorite authors.

An email newsletter is the easiest way to reach out to your readers and potential readers on a regular basis.

WordPress works with all top email marketing services. We recommend using Constant Contact as the most beginner-friendly email service on the market.

For more details, see our tutorial on how to start your newsletter.

Having a large subscriber base helps you negotiate better book contracts in the future.

2. Grow Your Email List Quickly

Email popup example

Now simply creating a newsletter and adding a plain sign-up form to your website is not enough to grow your email list quickly.

You need to actively promote your newsletter across your website and nudge users to sign up.

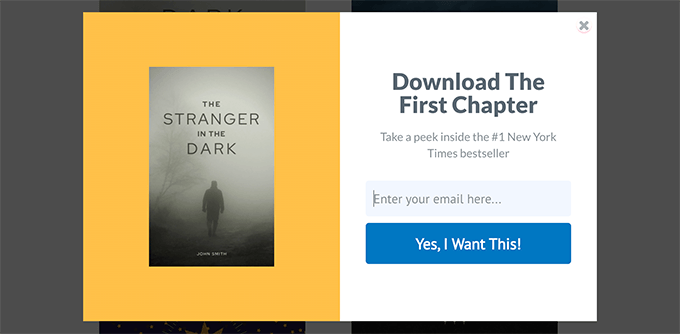
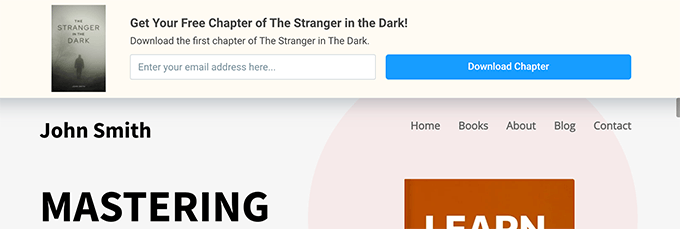
The best tool for this is OptinMonster. It is the industry-leading conversion optimization software that allows you to convert website visitors into subscribers and customers.

OptinMonster comes with tools like lightbox popups, slide-in popups, header & footer banners, countdown timers, and more. All of them allow you to capture more emails and grow your newsletter.

Header email banner

Need more tricks? See our tips on quickly growing your email list.

3. Optimize WordPress SEO for Author Website

SEO or search engine optimization helps you bring more free traffic to your website from search engines.

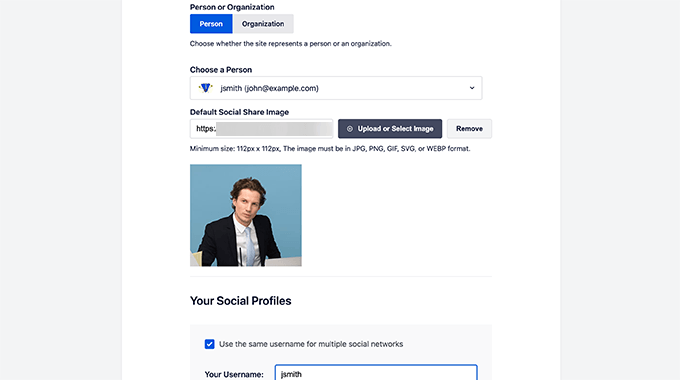
For that, you need All in One SEO for WordPress. It is the best WordPress SEO plugin and allows you to easily optimize your website without any technical knowledge.

The best part is that it comes with schema markup, which tells search engines that your website represents a person with your photo.

Person schema

Apart from that, All in One SEO will also monitor your site’s SEO score and will make recommendations to improve it.

For more details, see our step-by-step guide on how to properly set up All in One SEO for WordPress.

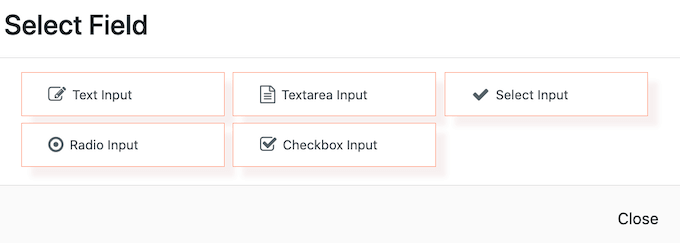
5. Add Contact Forms

Your author website is not only the place to promote your books, it is also the place to generate business opportunities, get reader feedback, and establish your brand.

Adding a contact form to your website is the best way for all these users to quickly send you a message.

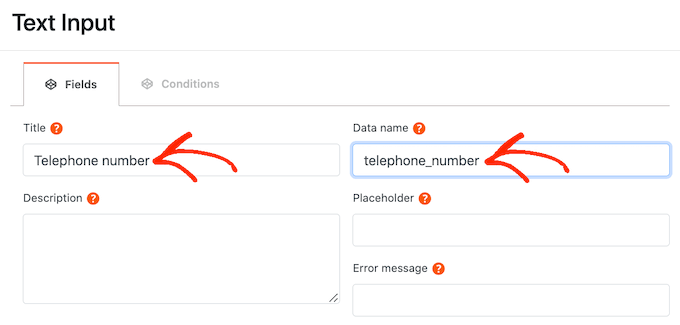
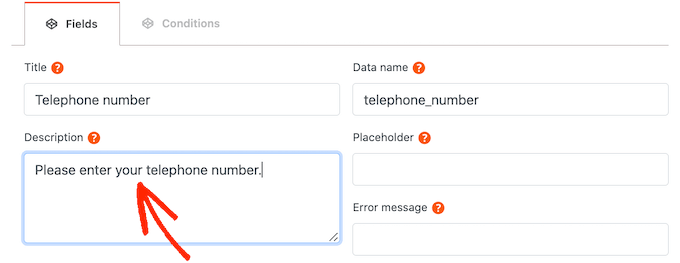
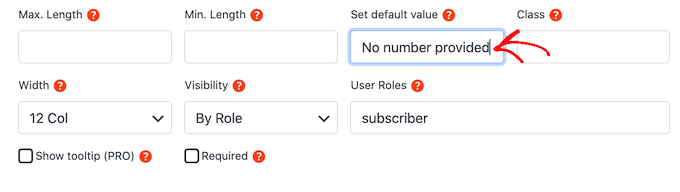
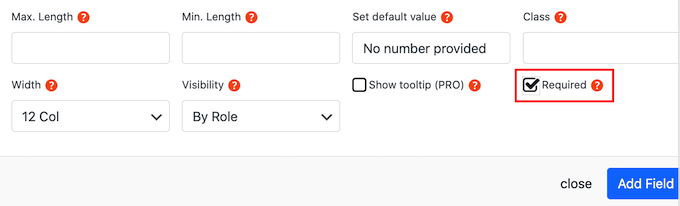
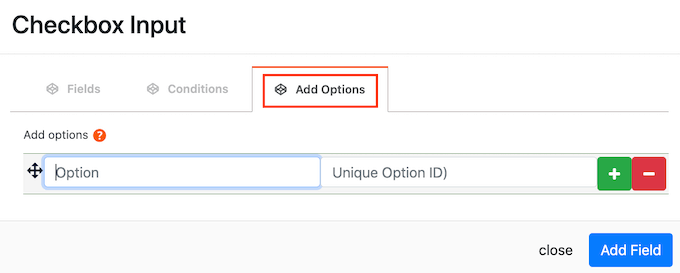
For this, you’ll need WPForms. It is the best WordPress contact form plugin on the market and comes with a simple drag and drop form builder.

Contact form builder

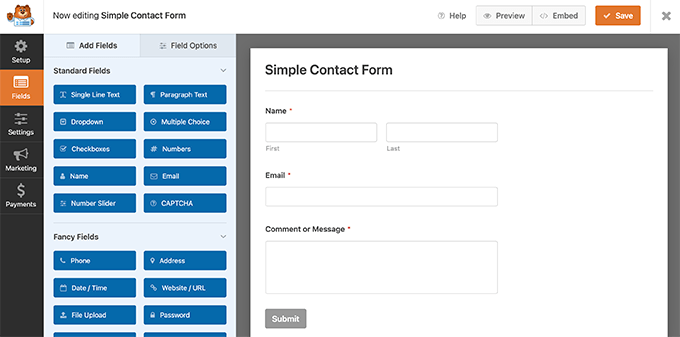
WPForms comes with features like entry management, user surveys, real-time polls, instant notifications, form templates, and spam protection.

6. Sell Online Courses and Subscriptions

Many authors particularly in self-help, health & nutrition, and business categories are now offering online courses and exclusive members-only content on their websites.

This helps them add another revenue stream apart from selling books.

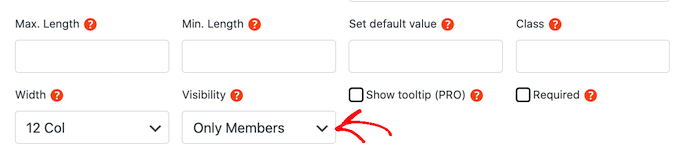
If you want to add that to your website, then you’ll need to install and activate MemberPress.

MemberPress to sell online courses and subscriptions

MemberPress is the best WordPress membership plugin that allows you to easily sell subscriptions, restrict content to paid users, and sell online courses.

You can easily accept online payments, set up recurring payments, add course content, set up drip content rules, and more.

For complete details, see our guide on how to build a membership website or see our tutorial on selling online courses for beginners.

7. Track User Activity on Your Author Site

Now that you have set up your website and started promoting it, you would want to keep an eye on how your site is performing.

You can easily track your website statistics with MonsterInsights. It is the best Google Analytics plugin for WordPress and helps you easily install Google Analytics.

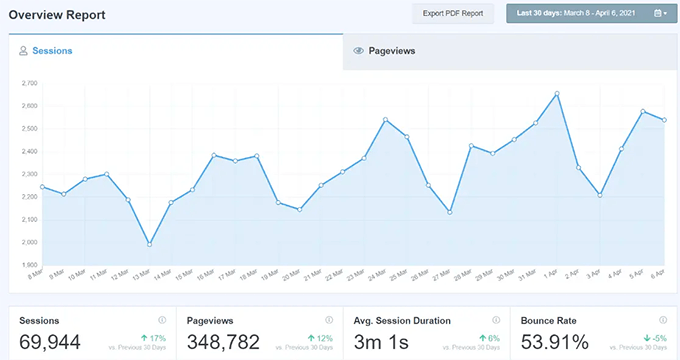
MonsterInsights shows easy-to-understand reports inside your WordPress dashboard. This gives you a clear picture of where your users are coming from and what they are doing on your website.

MonsterInsights reports

It also helps you track conversions for your forms, buttons, eCommerce, and more.

This way you can tweak your website to boost conversions and get more people to sign up for your newsletter, buy books, or join your membership program.

Need more suggestions, see our complete pick of the essential WordPress plugins for all sort of websites.

We hope this article helped you learn how to create an author website in WordPress. You may also want to see our guide on how much does it cost to build a WordPress website, or see our expert comparison of the best virtual business phone number apps.

If you liked this article, then please subscribe to our YouTube Channel for WordPress video tutorials. You can also find us on Twitter and Facebook.

The post How to Create an Author Website in WordPress (Step by Step) first appeared on WPBeginner.


July 18, 2022 at 03:00PM

Sunday, July 17, 2022

How to Add Custom Fields to Comments Form in WordPress

Do you want to add custom fields to the WordPress comment form?

The default WordPress comment form has four fields (name, email, website, and message). But sometimes you may want to add other fields like rating, checkbox option, etc.

In this article, we will show you how to customize the comment form in WordPress by adding custom fields.

How to add custom fields to comments Form in WordPress

Why Add Custom Fields to Comments Form in WordPress?

By default, the WordPress comment form asks for the visitor’s name, email address, and website. It also has an area where people can type in their comment, and a checkbox that visitors can use to save their personal information for the next time they post a comment.

The standard WordPress comment form

For most WordPress websites, this is perfect. However, sometimes you might want to customize the WordPress comment form to collect more information from your visitors.

This can help you learn more about the people who visit your WordPress blog, so you can provide them with a better experience.

Custom fields can also make your comment sections more engaging and lively. For example, you might ask visitors for information that will spark discussion and debate in your site’s comment section.

Or if you’re using comments for reviews, then you might want users to add the rating score in comments.

That being said, let’s see how you can add custom fields to the standard comments form on your WordPress website.

How to Customize the WordPress Comment Form

The easiest way to add custom fields to the WordPress comment form is by using the WordPress Comments Fields plugin.

This plugin lets you add a range of different fields to your comment forms, including checkboxes, radio buttons, and dropdown menus.

An example of a comment form with custom fields

All of the information that visitors enter into the custom fields will appear as part of their published comment.

This is why it’s a good idea to avoid using custom comment fields to collect sensitive information from your visitors.

A published comment featuring custom fields

First, you’ll need to install and activate the

WordPress Comments Fields plugin. For more details, please see our guide on how to install a WordPress plugin.

Upon activation, go to Comments » Comment Fields. To add a custom field to your comment form, simply click on the ‘Add field’ button.

Adding a custom field to the WordPress comment form

You can now choose the type of field that you want to add to your custom WordPress comment form.

Your choices include text fields, checkboxes, and radio buttons.

Adding different custom fields to the WordPress comment form

Once you’ve done that, you’ll see additional settings where you can configure the custom field.

To start, you’ll need to create a label. This will appear above your custom comment field and let visitors know what information you expect them to enter.

You can type your label into the ‘Title’ field. As you type, the plugin will fill in the ‘Data name’ field automatically.

The data name will help you identify this information when it’s used in other locations, for example in any email notifications you’ve set up.

If you want to use a different value instead, then you can simply change the text in the ‘Data name’ field.

Adding a title to your custom comment form

After you’ve done that, you can type an optional description into the ‘Description’ field.

This will be shown next to the field’s title. With that in mind, you can use the description to provide some extra information about the custom field, such as why you need this information from the visitor.

Adding a description to your custom comment form field

You can also set a minimum and maximum limit for how many characters the visitor can type into the custom field.

In this way, you can encourage visitors to enter the right information, while helping to combat comment spam in WordPress. For example, if you’re creating a custom field where visitors can type in their phone number, then it makes sense to set a maximum and minimum limit.

To set these optional limits, type your values into the ‘Max Length’ and ‘Min Length’ boxes.

Adding limits to your WordPress custom comment form

By default, everyone who visits your site will see this extra field in your WordPress custom comment form.

However, sometimes you may only want to show the custom field to people who have a certain user role. For example, if you’ve created a WordPress membership site, then you might want to show your custom field to registered members only.

To limit this field to members or guests, simply open the ‘Visibility’ dropdown and then click on either ‘Only members’ or ‘Only Guests.’

Creating a members-only custom comment field

Another option is to only show the custom field to people who have a specific user role.

To do this, open the ‘Visibility’ dropdown and then click on ‘By role.’ This adds a new field where you can type in the user role. To add multiple user roles, simply separate each role with a comma.

Changing who can see your custom comment field

Before the visitor starts typing into the custom field, you may want to show a placeholder value. This can help people understand what information they need to type into the custom comment field.

You can type your placeholder value into the ‘Placeholder’ field.

Adding a placeholder value to your WordPress comment field

If the visitor doesn’t enter anything into the custom field, then you may want to use a default value instead. For example, you might create a checkbox that’s set to ‘opt-out’ by default.

You can type a default value into the ‘Set default value’ field.

Changing who can see your custom comment field

Your custom comment field is marked as optional by default. However, you can make the field mandatory so that visitors can’t submit a comment without completing this field.

To make this change to your custom WordPress comment form, simply go ahead and check the ‘Required’ box.

Marking the field as required

Some custom fields have extra settings that you can configure.

If you’re creating a ‘Select Input,’ ‘Radio Input,’ or ‘Checkbox Input’ field, then make sure you click on the ‘Add Options’ tab.

Here, you can create all the options that visitors can choose between. For example, you might create ‘Yes’ and ‘No’ options for a custom checkbox field.

Creating a multi-choice option

To create an option, simply type in the text that will be shown to the visitor.

To add another option, go ahead and click on the + button and then type in the text that you want to use.

You can add as many options as you want to your WordPress custom comment form following the same process described above.

Creating a multiple choice comment field

When you’re happy with the options you’ve created, just click on the ‘Add Field’ button.

The popup will now close and you’ll see your new custom field in the Comments » Comment Fields section of the WordPress dashboard.

You can now add more fields to your custom WordPress comment form by following the same process described above.

When you’re ready to add a custom field to the comment form, make sure its ‘Status’ slider is set to ‘On.’

You can then go ahead and click on the ‘Save Fields’ button.

Adding the custom field to your WordPress website

Now if you visit your site, you’ll see the extra fields in the custom WordPress comment form.

If you want to remove a custom field from the comment form at any point, then simply head back to Comments » Comment Fields.

You can then find the custom field that you want to remove, and click on its sider so it shows a red ‘Off’ label.

Once you’ve done that, just click on the Save Fields button.

Removing a field from your custom comment form

Now if you check your website, you’ll see that this custom field has disappeared from the WordPress comment form.

We hope this article helped you learn how to add custom fields to the comments form in WordPress. You can also go through our guide on the best membership plugins and how to create a contact form in WordPress.

If you liked this article, then please subscribe to our YouTube Channel for WordPress video tutorials. You can also find us on Twitter and Facebook.

The post How to Add Custom Fields to Comments Form in WordPress first appeared on WPBeginner.


July 17, 2022 at 05:00PM

Saturday, July 16, 2022

How Much Does a Custom WordPress Theme Cost?

Do you want to know how much it costs to build a custom WordPress theme?

Creating a custom theme gives a lot of freedom and flexibility over the layout and design of your WordPress site. However, many people don’t opt for a custom theme because they think it will be expensive.

In this article, we will share how much does a custom WordPress theme cost, as well as a few tips on how you can save money and avoid overpaying.

How much does a WordPress theme cost

What is a Custom WordPress Theme?

A custom WordPress theme has a unique design, layout, and set of features that are made specifically for your business needs.

There are many free and premium WordPress themes available, but a custom WordPress theme helps your company or brand to stand out with a unique look.

The benefit of getting a custom WordPress theme is that you’re not limited by the constraints of a pre-existing template or layout. You have full freedom to customize your website and get any specific functionality built into your theme.

Create Custom Themes Using a Plugin vs Hiring a Designer

You now have lots of options to choose from when creating a WordPress theme. There are DIY theme builders that you can use on your own, or you can hire a freelance designer and agency to create a WordPress theme.

Let’s take a closer look at which is better, using a plugin or hiring a professional.

Using a WordPress Theme Builder Plugin

To create a custom WordPress theme, you no longer need to depend on someone who can design and code your theme for you.

SeedProd is a WordPress page builder that has made it super easy to create a custom theme from scratch without coding. It offers pre-built templates that you can use to get started quickly or use a blank template to create a custom theme.

SeedProd starter themes

Using the DIY drag and drop page builders, you can then easily customize every element of your theme.

Simply add and remove blocks from your theme, rearrange their order, edit the color, size, font, background image, add your logo, and change anything in the template.

SeedProd drag and drop theme builder

Using SeedProd is the best choice if you want to create your own custom theme on a budget.

Hiring a Designer and Developer to Create a Custom Theme

On the other hand, you may be able to find an individual who can do both designs and develop the site depending on your needs. However, it’s hard to find a person who’s excellent at both design and code.

When you go with a full-service agency, it’s a one-stop-shop because they have designers and developers on their team. This is also the reason why agencies are usually more expensive. Alternatively, you can hire an individual freelance designer and developer separately and manage the project yourself.

However, design and development is a creative process, so the project cost varies based on expertise, experience in the field, and creativity.

Well reputed WordPress development agencies may cost more than an individual developer or freelancer. A well-known WordPress developer can sometimes charge even more than an agency. Plus, placing change orders to make revisions to a theme can make it more expensive to develop.

Keep Costs Low by Having a Clear Scope of the Project

Whether you choose to hire a professional or choose a theme builder plugin, a pro tip for keeping costs low is by having a clear scope of the project.

For instance, when you’re building a house, you typically have a list of features that you want, such as 4 bedrooms, 3 bathrooms, a living room, etc.

You need to make a similar list for your WordPress website and list down all the things that you would like to have such as:

  • Editable home page with a testimonial slider and services list
  • Contact page with a contact form and a Google map with the ability to find directions
  • Gallery area to showcase the work
  • Blog section with social media share buttons

Having a detailed list makes it easier for someone to give you an accurate quote. It also helps limit revisions or change-order fees and helps you keep within your budget.

Factors that Affect the Cost of a Custom WordPress Theme

Since each custom WordPress theme is built specifically for the individual client, the cost of the project varies based on the requirements.

Below are some of the factors that will impact the cost of your custom WordPress theme:

Features, Functionality, and Expectations

Adding more features and functionality to your custom theme will increase the development time and cost. Usually, clients have higher expectations than their budget allows.

High-quality work with custom features will take more time, and hence it will cost more.

Similarly, you may require premium WordPress plugins to get the functionality you need for your website. This will add to the cost of developing a custom theme.

Change Orders and Revisions

If you change the scope of your custom WordPress theme project in the middle of the process, then this can significantly increase your cost.

While minor changes are ok, freelancers and agencies often charge change-order fees for major change requests.

Hosting, Maintenance, and Support

A custom WordPress theme does not include WordPress hosting, website maintenance, or offering support after the delivery of the project.

Some agencies and freelancers might offer these services at an additional cost.

How Much Does a Custom WordPress Theme Actually Cost?

Cost of building a custom WordPress theme

Previously, it was extremely difficult to explain how much a custom WordPress theme costs in fixed numbers because there were several factors to consider.

However, if you select a drag and drop WordPress page builder, then the cost of building a custom WordPress theme drops considerably.

For example, SeedProd offers its theme builder in the Pro plan, which starts at $199.50 per year. You can simply use the plugin to create a custom WordPress them yourself. Plus, if you add that with the cost of web hosting, domain, and SSL certificate, you can easily make a custom theme for under $500.

These days, even the large numbers of freelancers use drag & drop page builders now to create custom WordPress themes because it helps them build custom websites faster.

You can see our detailed guide on how much does it really cost to build a WordPress website for more details.

On the other hand, when you hire a freelancer or an agency, then a the cost of a custom WordPress theme for a business / personal website could cost between $1,500 – $5,000. A custom WordPress theme with additional built-in features or companion plugins can cost anywhere between $6,000 – $10,000.

If you have a complex enterprise-level project, then it is not uncommon for custom theme project prices to go above $30,000.

Therefore, we would highly recommend using a page builder to create a custom theme because the total cost will be lower, and you won’t have to spend a lot of money on freelancers and agencies.

How to Avoid Overpaying for a Custom WordPress Theme?

Avoid overspending on custom theme

With over a decade of experience in the WordPress industry, we have a few tips that you can use to avoid overpaying for a custom WordPress theme.

Find Live Website Examples for Inspiration when Possible

Going along with a detailed scope and having a list of inspirations really help with the design process.

You can have a list of websites and list out what you like about each of them.

This gives the designer a clear idea of what you’re looking for this reduces the revisions and overall cost.

Use Premium Plugins vs Custom Built Functionality

Most reputable WordPress professionals will always choose a premium WordPress plugin vs building it out from scratch because it’s more efficient and saves cost.

However, as a customer, we always recommend that you do your own research as well. Often the developer that you choose may have other suggestions, and it’s important that you understand why they decide to choose one plugin over another.

Customize Premium Themes vs Build from Scratch

One of the ways to significantly reduce cost while still getting a ‘custom’ look and feel is to find an existing theme that has 90% of what you want. While this cheats the custom theme concept, it can significantly reduce the overall cost.

Powerful drag and drop WordPress page builders like SeedProd, Beaver Builder and Divi have given birth to an entirely new industry of Website Assemblers. They come with various templates, so you can easily choose one and customize it according to your needs.

Professional website assemblers use existing WordPress plugins combined with a drag & drop page builder to build you a custom-looking WordPress site at a much more affordable price.

Find the Right Developer or Agency for a Custom WordPress Theme

Hire an agency or a designer

Due to its ease of use and low barrier of entry, there is a wide range of people and companies offering custom WordPress theme services.

Finding a developer or agency with the right experience and skillset can be a bit difficult. Especially because a lot of ‘website assemblers’ also call themselves developers.

Here are some places where you can find experienced developers for your custom WordPress theme project.

Codeable – This is our #1 pick for finding high-quality WordPress developers that are vetted by an expert team. You can post your project there and get a free estimate.

WPHired – This is a job board where you can post your WordPress jobs. Developers can then apply for the job, and you can discuss your project with them. You’ll have to look for developers with relevant experience and skills.

WordPress Jobs – Another WordPress-specific job board where you can post jobs and interview developers.

Upwork – An online freelancing website where you can post your job and interview developers from all over the world. This would allow you to find developers with lower rates. It is an enormous community with designers and developers of varying skills and expertise.

A custom WordPress theme can make your website stand out with its unique design and custom features. However, not all beginners and small businesses can afford that right away.

If you are just starting out, then you can use a page builder like SeedProd or a premium multipurpose theme to build your website theme at a fraction of the price.

With a custom theme, you get unique branding, custom design, and tailor-made functionality to help you grow your business faster and give you an edge over your competitors.

We hope this article helped you understand how much does a custom WordPress theme cost and how you can avoid overpaying. You may also want to see our guide on the best free business name generator and how to register a domain name.

If you liked this article, then please subscribe to our YouTube Channel for WordPress video tutorials. You can also find us on Twitter and Facebook.

The post How Much Does a Custom WordPress Theme Cost? first appeared on WPBeginner.


July 16, 2022 at 03:00PM

Friday, July 15, 2022

How to Get Word Count Stats in WordPress (3 Ways)

Do you want to get word count stats in WordPress?

When writing a post, you may have a specific word count that you’re aiming to reach. Plus, monitoring your word count stats can give you insights like what post length gets the most traffic and engagement.

In this article, we will show you how you can show detailed word count stats in WordPress.

How to get word count stats in WordPress

Why Get Word Count Stats for Your WordPress Website?

There are many reasons why you may want to get the word count for your WordPress website.

If you’re a freelance writer, then you may charge per word or your clients might have strict word count goals that you need to meet.

If you’ve added multiple authors to your WordPress blog, then monitoring their word count stats can help you identify the authors who are contributing the most to your website.

This insight can help you manage your multi-author WordPress blog more efficiently. For example, you might reward the author who has the highest word count, or schedule meetings with any writers who are underperforming.

Even if you’re the only person working on a website, word count stats can still be interesting. By looking at how your word count changes over time, you may be able to spot patterns and ways to be more productive.

With all that in mind, let’s look at a few different ways to get word count stats in WordPress. If you prefer to jump straight to a particular method, then you can use the links below.

Method 1. How to Check the Word Count on an Article in WordPress

The WordPress block editor makes it easy to see the word count for any page or post.

Simply click on the ‘i’ icon at the top of the screen, and WordPress will show some basic stats for the page or post, including the word count.

Getting the word count in the WordPress block editor

Even better, this word count will update automatically as you write.

If you have a word limit, then this is a quick and easy way to make sure you don’t go over that limit.

Method 2. Get Detailed Word Count Stats in WordPress With a Plugin

Sometimes you may want to see word count stats for a particular author, type of post, or even your entire website.

The easiest way to get these detailed stats is by using the WP Word Count plugin. This plugin shows how many words you’ve written based on month, author, and post type.

If you’re using custom post types, then WP Word Count can also show statistics for your custom posts.

First, you’ll need to install and activate the plugin. If you need help, then please see our guide on how to install a WordPress plugin.

Once you’ve done that, go to Word Count » Statistics. Before you can get your stats, you’ll need to click on the ‘calculate’ link.

Calculating the word count for your WordPress website

WP Word Count will ask whether you want to count the words for all your content, or to only count content that was created within a certain date range.

To calculate the total word count for your entire site, click on the ‘Count all content on this site at one time’ option. Then, go ahead and click on Calculate Word Counts.

Getting word count stats in WordPress

After a few moments, you should see a ‘Word counts calculated successfully’ message.

WP Word Count will now continue to calculate your stats automatically as you add more posts and pages to your site. This means you won’t need to click on the ‘calculate’ link every time you want to see the latest word count stats.

Now, anytime you want to see your stats, you can go to Word Count » Statistics. To see the total word count for all your content, click on the All Content tab.

On this screen, you’ll see the total word count for the different post types, divided into published and unpublished content.

Word count statistics in the WordPress dashboard

‘Total Words’ is your total word count across all content types.

This number combines both your published and unpublished content, so it isn’t necessarily the amount of words that visitors will see live on your website.

The WP Word Count plugin

This screen also shows separate word counts for published and unpublished content.

If you want to see the word count for specific months, then simply click on the ‘Monthly Statistics’ tab. This can help you spot trends including your most productive months, and times when you wrote fewer words compared to other months.

Monthly word count stats in WordPress

If multiple people write for your WordPress blog, then you may want to take a look at the ‘Author Statistics’ tab.

This lets you explore your site’s word count stats by author.

Author word count statistics in WordPress

You might also want to track the traffic that each of your authors brings to your website. To do that, you can see our guide on how to set up author tracking in WordPress.

By monitoring these important metrics on your WordPress site, you can identify what’s working on your website and what isn’t.

You can then use this insight to fine-tune your content calendar to get even more visitors to your website, and make money online blogging with WordPress.

Method 3. How to Add Word Count Stats in WordPress Using Code

Another option for tracking word counts is a code solution. This code snippet will show the word count next to each post on the Posts » All Posts screen.

Adding a word count to the WordPress dashboard

This is an easy way to spot your site’s longest posts, or check for any posts that don’t meet a required word count.

To show a word count on the All Posts screen, you’ll need to add some code to your site. We recommend doing this by creating a site-specific plugin or using a code snippets plugin.

No matter what option you choose, you’ll need to add the following code:

add_filter('manage_posts_columns', 'wpbeginner_add_column');
function wpbeginner_add_column($wpbeginner_wordcount_column) {
    $wpbeginner_wordcount_column['wpbeginner_wordcount'] = 'Word Count';
    return $wpbeginner_wordcount_column;
}
 
//Link the word count to our new column//
add_action('manage_posts_custom_column',  'wpbeginner_display_wordcount'); 
function wpbeginner_display_wordcount($name) 
{
   global $post;
   switch ($name)
{
     case 'wpbeginner_wordcount':
                //Get the post ID and pass it into the get_wordcount function//
            $wpbeginner_wordcount = wpbeginner_get_wordcount($post->ID);
            echo $wpbeginner_wordcount;
     }
}

function wpbeginner_get_wordcount($post_id) {
     //Get the post, remove any unnecessary tags and then perform the word count// 
     $wpbeginner_wordcount = str_word_count( strip_tags( strip_shortcodes(get_post_field( 'post_content', $post_id )) ) );
      return $wpbeginner_wordcount;

You can then save your changes.

Now, if you visit the Posts » All Posts screen, you’ll see the word count in a new column.

We hope this guide helped you learn how to get word count stats in WordPress. You may also want to learn how to set up Google Analytics goals for your WordPress site, or check out our list of the best email marketing services for small businesses.

If you liked this article, then please subscribe to our YouTube Channel for WordPress video tutorials. You can also find us on Twitter and Facebook.

The post How to Get Word Count Stats in WordPress (3 Ways) first appeared on WPBeginner.


July 15, 2022 at 02:00PM