Thursday, August 25, 2022

How to Customize WordPress Admin Dashboard (6 Tips)

Do you want to customize the WordPress admin dashboard?

The WordPress admin area can sometimes get too cluttered with widgets, menu items, and options added by WordPress itself or other plugins and themes.

In this beginner’s guide, we’ll show how to easily customize the WordPress admin dashboard by hiding unwanted items and rearranging admin screens. We will also cover how to change admin menus, and a whole lot more.

Customizing your WordPress admin area dashboard

Here is a brief overview of the topics we’ll cover in this article.

Ready? Let’s get started.

Why Customize WordPress Admin Area?

If you have been managing a WordPress website for a while now, you may have noticed different widgets, notices, and menu items in your WordPress admin area.

Cluttered WordPress admin area

Some items like plugin notices and alerts go away when you close or dismiss them. However, many other items stay in place on different WordPress admin screens.

What most WordPress beginners don’t know is that they can easily hide these items, move them around, and customize their WordPress admin dashboard on their website.

A lot of developers customize the WordPress admin dashboard for their clients to make it easier.

That being said, let’s look at how to easily customize your WordPress admin area and improve your WordPress experience.

1. Hiding WordPress Admin Elements with Screen Options

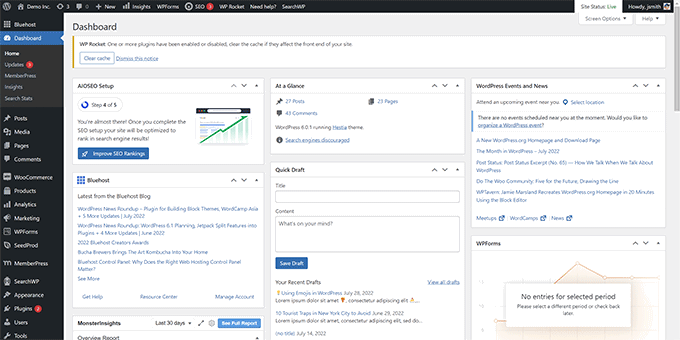
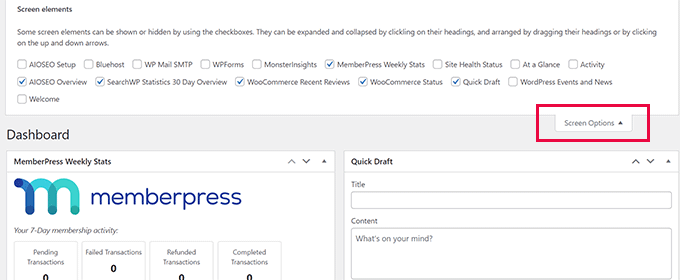
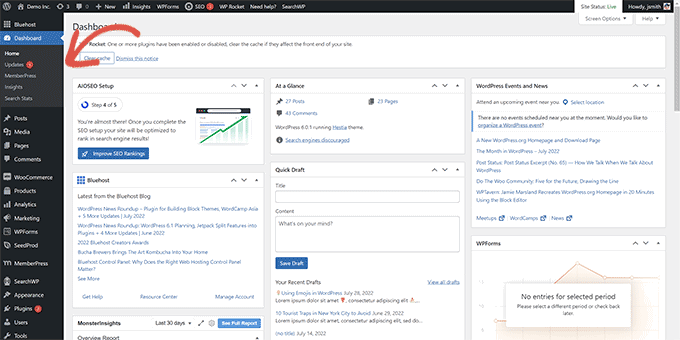
Many WordPress admin pages, including the main Dashboard, have a Screen Options button at the top right corner of the screen.

Clicking on it will bring a fly-down menu with different options. Simply uncheck the options you don’t want to see, and they will disappear from that page.

Screen Options on the Dashboard page in WordPress admin area

For instance, on the ‘Dashboard’ page, you can hide widgets you have never used and keep the widgets that provide valuable information.

While on the ‘Dashboard’ page, you can also drag and drop widgets to rearrange them on the screen. For instance, you can move your ‘At a Glance’ widget and ‘Site Health‘ widget to the top.

Moving widgets on the Dashboard screen

The ‘Screen Options’ button will show you different options depending on which page inside the WordPress admin area you are looking at.

For instance, on the Posts » All Posts page, the screen options button will allow you to show or hide columns, change the number of posts displayed, or switch to an extended view.

Screen Options on the posts page

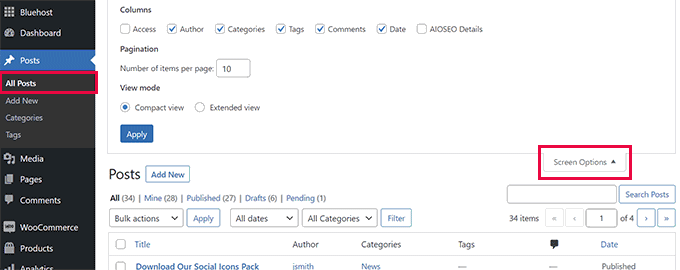
Try using the ‘Screen Options’ feature on different pages inside your WordPress admin area to see the options available to adjust those pages to your own needs.

Note: Screen Options settings are stored for each user. Your changes will not apply to other users or authors on your WordPress site.

2. Customize Block Editor Screen in WordPress Admin Area

An average WordPress user spends most of their time using the Block Editor. This is the default WordPress content editor that you use to write blog posts and create pages for your website.

The block editor already comes with a clutter-free user interface that provides you with lots of room to edit your content.

Block editor screen

However, it also allows you to adjust certain settings to make your writing experience even better.

Simply click on the three-dot menu button at the top right corner of the screen and click on the Preferences option.

Block editor Preferences

This will bring up a popup where you can adjust different settings for the block editor.

First, under the ‘General’ tab, you can reduce the User Interface, which will make the interface more compact.

Block editor general preferences

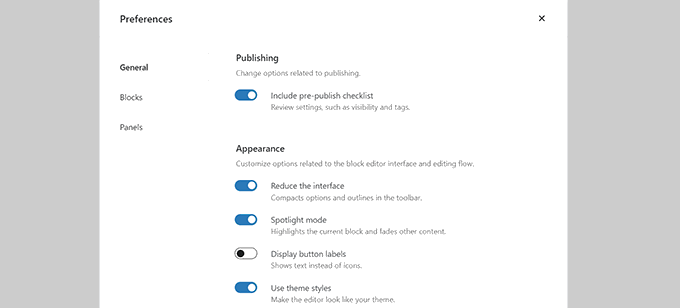
You can also turn on the ‘Spotlight mode,’ which will only highlight the block you are in and fade other parts of the screen.

Next, you can switch to the ‘Blocks’ tab. From here, you can show and hide blocks that are available for you inside the editor.

Show or hide blocks

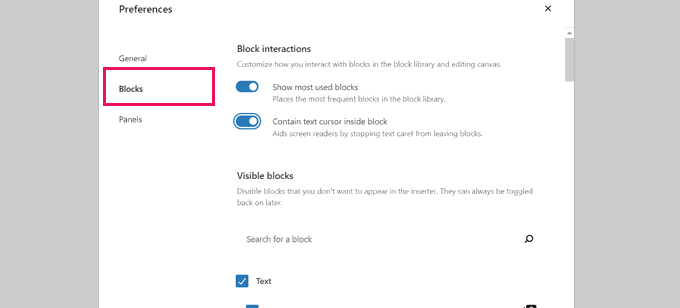
Lastly, the ‘Panels’ tab has even more options.

From here, you can decide which panels are shown or hidden inside the block editor’s right-hand sidebar.

Show hide panels in block editor

Once you have hidden the features you don’t use, you can click the ‘X’ in the upper-right corner to return to the post editor.

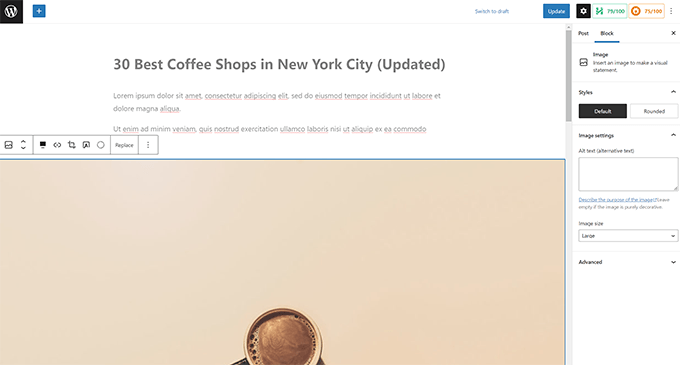
Next, clicking on the ‘Gear’ icon at the top will expand or hide the settings panel. This comes in handy when you are working with full-width content layouts.

show or hide settings panel

Inside the sidebar brought up by the Gear icon, you can choose to collapse any tab by clicking on the upward arrow.

This will clear additional clutter and help create a distraction-free block editor screen for you.

Collapse tabs in the post panel

You may also want to see these extra tips on mastering the WordPress content editor to make your content creation experience more pleasant.

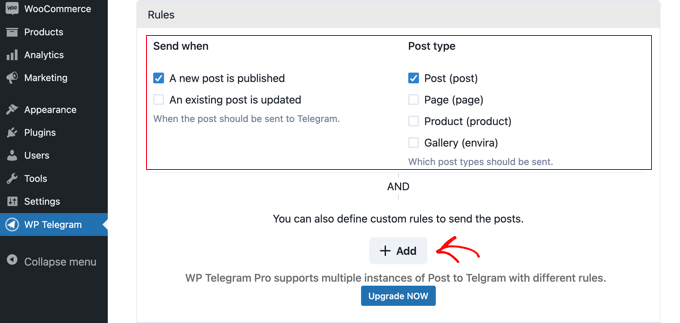
3. Show or Hide WordPress Admin Menu Items

As you install more WordPress plugins on your website, you will see that many of them add their own menu items to the left-hand sidebar menu in your WordPress admin dashboard.

Admin sidebar clutter

Now some of them you may need to access regularly. For instance, you may want to have easy access to contact form entries or fine-tune the SEO settings for your WordPress blog.

However, you may not need constant access to some of these menu items, or you may not want other users on your site to see them.

Luckily, there is a plugin to help you control which menu items appear in your WordPress admin sidebar. You can also control which user role can see a menu item in the admin area.

First, you need to install and activate the Admin Menu Editor plugin. For more details, see our step-by-step guide on how to install a WordPress plugin.

Upon activation, you need to visit the Settings » Menu Editor page to configure admin area menus.

You will see all the main menu items in the first column. Clicking on a menu item will show child items nested beneath it in the second column.

Delete menu item

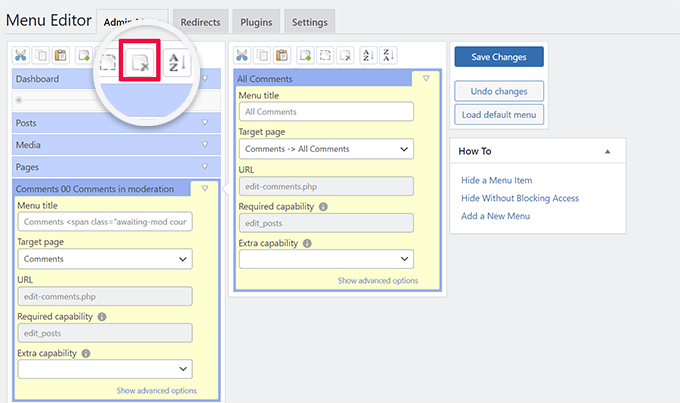
You can click to select a menu item and then click on the delete button at the top toolbar to remove it.

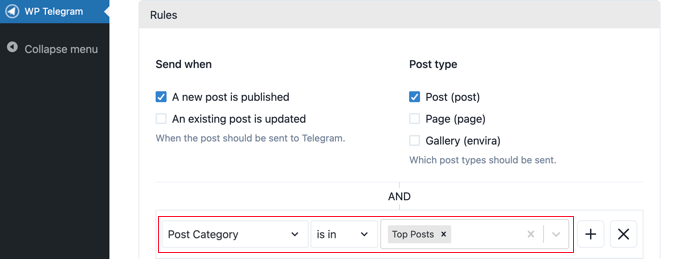
You can also restrict who can see a menu item in the WordPress admin sidebar. Simply click to select a menu item, and then under settings, set a restriction under ‘Extra capability.’

Restrict to user role

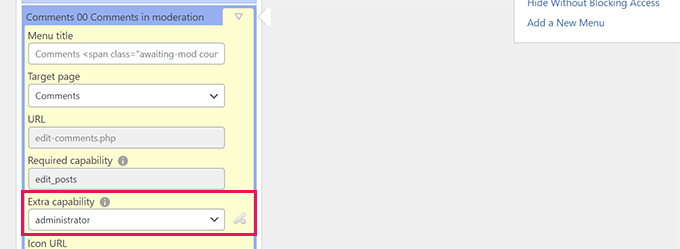
For instance, in the image above, we have hidden the Comments menu item from all users except those with the Administrator user role.

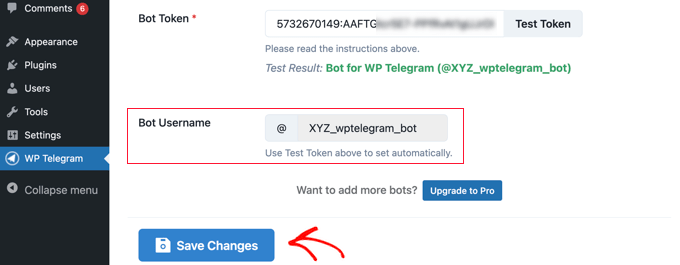
Once you have made changes to the admin area menus, don’t forget to click on the ‘Save Changes’ button to store your settings.

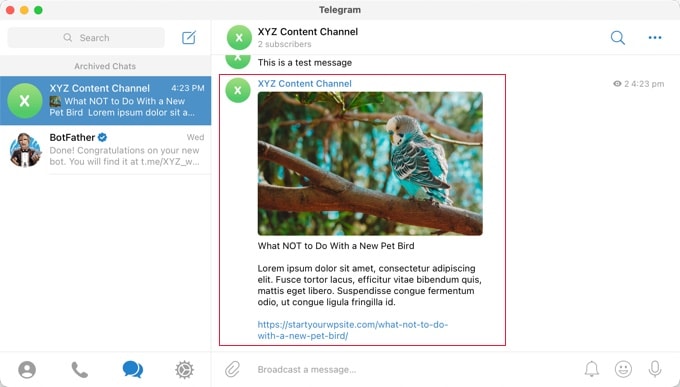
The plugin will show your customized WordPress admin area menus on the screen.

Hidden admin menus

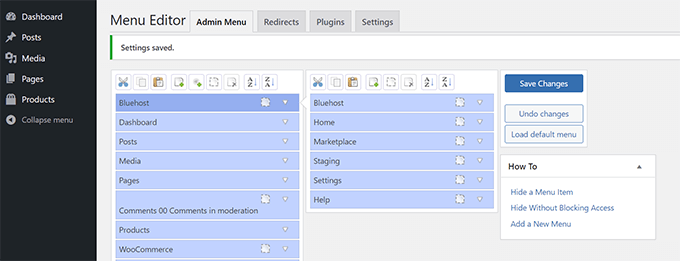
If you don’t see the changes appear immediately, you might have to refresh your page or log out and back in for the menu customizations to show up.

For more details, see our complete tutorial on how to hide unnecessary menu items in the WordPress admin area.

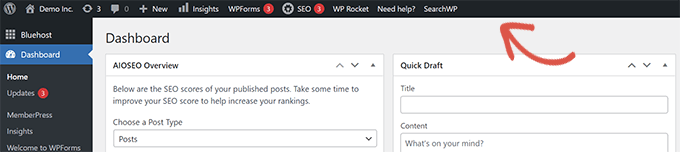
4. Customize What Appears in WordPress Admin Toolbar

The admin toolbar is the menu on top of WordPress admin area screens. The toolbar is also visible when you visit the public areas of your website while logged in.

WordPress admin toolbar

To customize the WordPress admin toolbar, install and activate the Adminimize plugin. For more details, see our step-by-step guide on how to install a WordPress plugin.

Upon activation, go to the Settings » Adminimize page and look for the ‘Admin Bar Backend Options’ and ‘Admin Bar Front End Options’ tabs.

Admin toolbar options

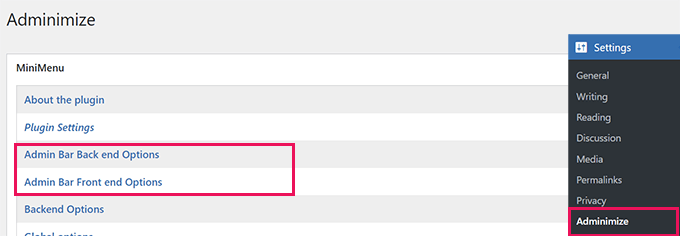
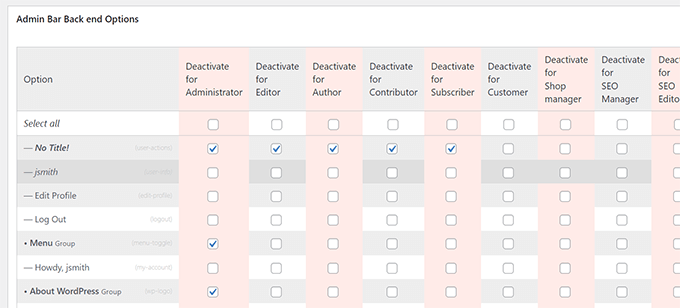
Clicking on either of them will take you to an options screen where you can select which items to display in the WordPress admin bar.

You can also choose items that will be visible to each user role.

Hide items from admin toolbar

Don’t forget to click the ‘Update options’ button to save your changes.

For more details, see our beginner’s guide to the WordPress admin toolbar.

5. Change The WordPress Admin Color Scheme

WordPress comes with a few basic color options that you can use for the admin area.

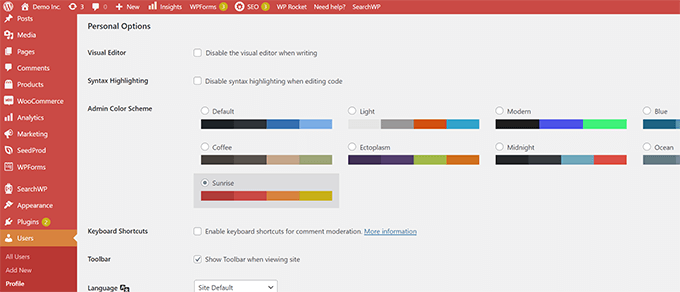
Simply head over to the Users » Profile page and find the ‘Admin Color Scheme’ options.

You then just have to click a color scheme to preview it in the WordPress admin area.

Choose a color scheme for WordPress admin area

Don’t forget to click on the ‘Update Profile’ button at the bottom to save your changes.

Don’t like the available color schemes?

You can make your own color scheme by installing and activating the Admin Color Schemer plugin. For more details, see our step by step guide on how to install a WordPress plugin.

Note: Admin Color Schemer plugin may show a warning that it hasn’t been updated for a while. That’s because the plugin didn’t need an update. It is created by the WordPress Core Team and is safe to install.

Upon activation, you need to visit the Tools » Admin Colors page to create your color scheme.

Make your own WordPress admin color scheme

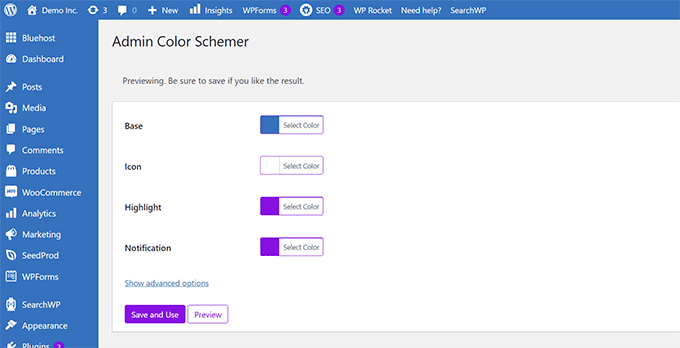
When you’re happy with your customizations, you can click ‘Save and Use’ to apply them to the dashboard.

Note: You can undo the color changes by simply deactivating the plugin or loading the default color scheme under the Users » Profile page.

For more details, see our tutorial on how to change the WordPress admin color scheme for beginners.

6. Create a Custom Login Page for WordPress Admin Area

Want to replace the default WordPress login page with your own custom login page without writing code?

For that, you’ll need SeedProd. It is the best WordPress page builder that allows you to design your WordPress website with a beautiful drag-and-drop tool (no coding required).

SeedProd WordPress Website Builder

First, you need to install and activate the SeedProd plugin. For more details, see our step-by-step guide on how to install a WordPress plugin.

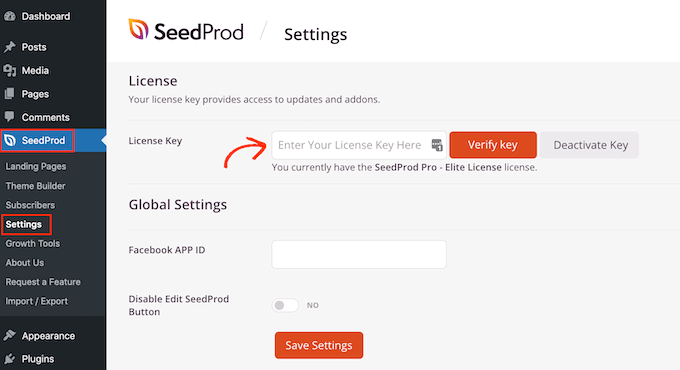
Upon activation, go to SeedProd » Settings page to enter your license key. You can find this information under your account on the SeedProd website.

Verifying your SeedProd license

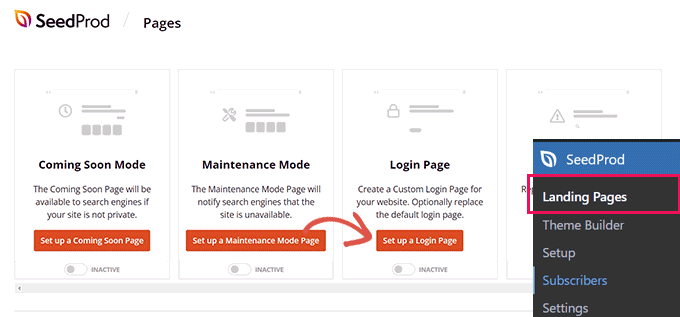
After that, head over to the SeedProd » Landing Pages.

You will now see a choice of different kinds of landing pages you can create, so find the one labeled ‘Login Page’ and click on the ‘Set up a Login Page’ button.

Set up a login page

Next, you’ll be asked to choose a template for your login page design.

SeedProd comes with a bunch of beautiful designs that you can use as a starting point.

Choose template

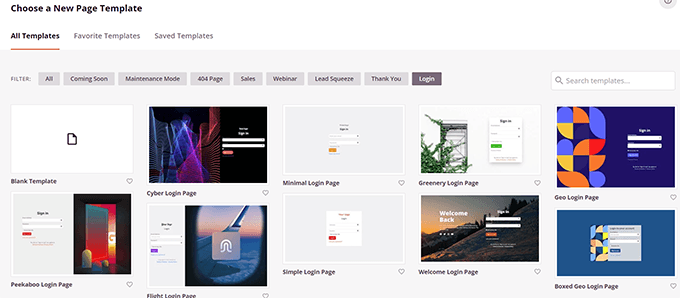
Simply click to select a template and then provide a name for your login page.

This name will be used internally to identify this page when you need to edit it again.

Login page name

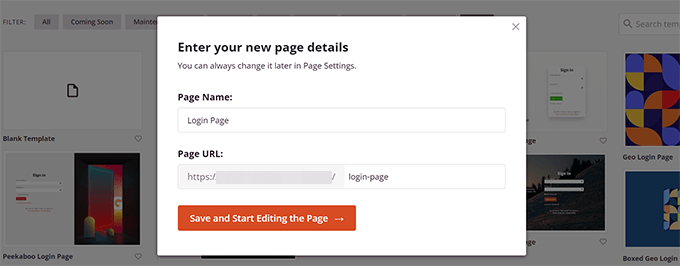
Click on the ‘Save and Start Editing the Page’ button to continue.

This will launch the SeedProd page builder interface. It is a drag-and-drop design tool where you can point and click on any item on the screen to edit it.

Login page builder

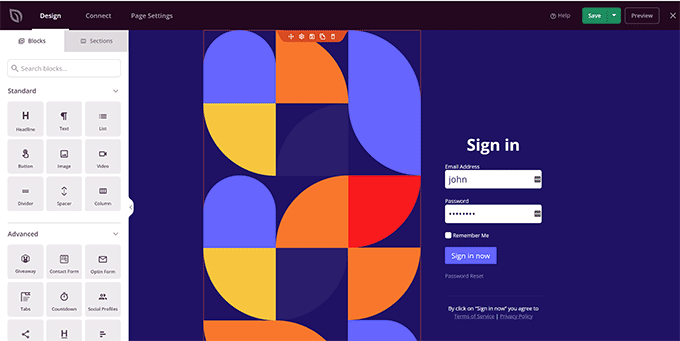
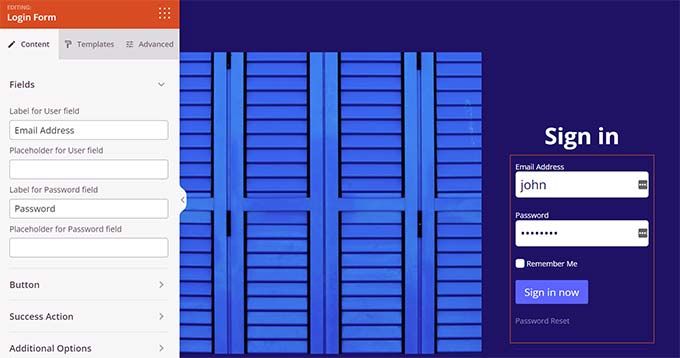
You can add new items from the sidebar or edit the login form to choose what happens after users log in.

You can also adjust any form labels or text, in addition to the page design itself.

Editing login form

Once you are finished, switch to the ‘Page Settings’ tab in the builder.

Scroll down to ‘Redirect the Default Login Page’ option to turn it on.

Turn on login page redirect

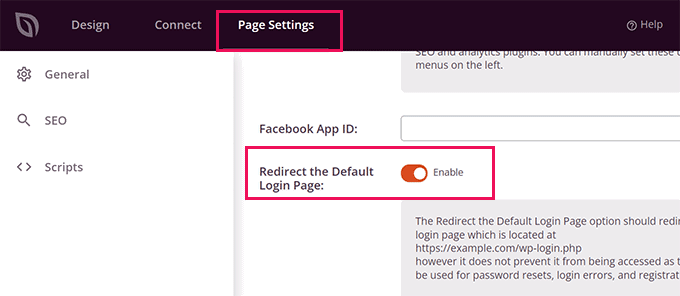
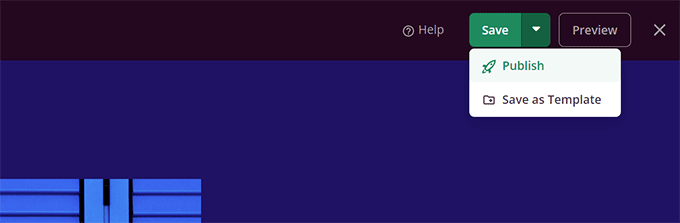
Finally, don’t forget to click on the ‘Save’ button in the top-right.

Then click ‘Publish’ to create your new login page.

Publish login page

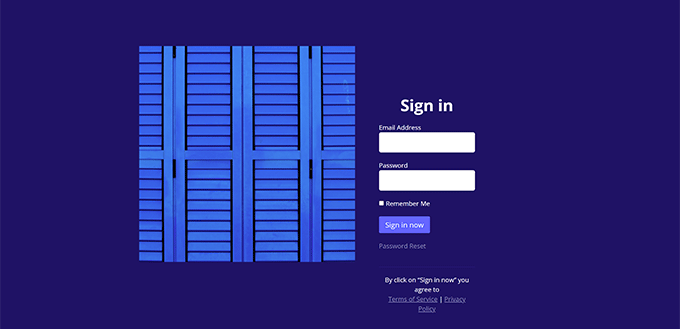
You can now visit the normal login page of your WordPress website.

You’ll see your custom design instead, and so will your users.

Custom login page

For more details, see our guide on how to create a custom login page for WordPress.

We hope this article helped you learn how to easily customize WordPress admin area. You may also want to see our guide on how to protect the WordPress admin area or check out our complete WordPress security guide to safeguard your entire website.

If you liked this article, then please subscribe to our YouTube Channel for WordPress video tutorials. You can also find us on Twitter and Facebook.

The post How to Customize WordPress Admin Dashboard (6 Tips) first appeared on WPBeginner.


August 25, 2022 at 02:17PM

Wednesday, August 24, 2022

How to Integrate Your WordPress Site with Telegram

Are you looking to integrate Telegram with your WordPress website?

Telegram is a powerful messenger app with robust security and privacy features. You can easily integrate it with WordPress to share posts and receive notifications.

In this article, we will show you how to properly integrate your WordPress site with Telegram.

How to Integrate Your WordPress Site with Telegram

Why Integrate Your WordPress Site with Telegram?

Telegram is a popular cloud-based messaging app like WhatsApp, only more secure. It also comes with features that are similar to Slack, a popular collaboration platform for teams.

It’s easy to integrate Telegram into your WordPress website using a plugin. This is an ideal way to keep your users and team up to date with what’s happening on your site.

For example, you can use automatically share your blog posts on a Telegram channel.

Also, you can send WordPress notifications to Telegram to keep up to date with everything that needs your attention on your site.

With that being said, let’s take a look at how to integrate your WordPress site with Telegram. Here’s what we’ll cover in this article:

Connecting WordPress and Telegram: Initial Set Up

The first thing you need to do is install and activate the WP Telegram (Auto Post and Notifications) plugin. For more details, see our step-by-step guide on how to install a WordPress plugin.

Upon activation, the plugin will add a new menu item labeled WP Telegram to your WordPress admin dashboard. Clicking on it will take you to the plugin’s settings page.

On the page’s ‘Basics’ tab, you’ll find a simple summary on how to set up Telegram for WordPress integration. We’ll walk you through these steps.

WP Telegram's Basic Settings

If you are not already running Telegram, then your first job is to install it on your mobile device, and then sign up for an account. This must be done on mobile because each account is linked to a phone number.

Simply go to the Telegram apps page to download and install the app for Android or iOS.

After you sign up, you can also run Telegram on your computer. Versions are available for macOS, Windows, Linux, and the web.

You’ll be integrating WordPress and Telegram using a bot. To create a bot, simply search Telegram for @BotFather and then click on that user to start a chat.

Search for the @BotFather Bot

You’ll see a list of Telegram commands you can use when chatting with this bot.

You need to type the command /newbot inside the chat.

Use the /newbot Command to Create a New Bot

A new bot is created, and you’ll be asked to give it a name. This can be anything you like.

For this tutorial, you should type ‘Bot for WP Telegram.’

Choose a Name for the Bot

Next, you need to choose a username for the bot. It needs to be unique and end in ‘bot’.

For this tutorial, we’ll type XYZ_wptelegram_bot.

Choose a Username for the Bot

You’ve now successfully created a Telegram bot.

A token will then be displayed in the chat window. Make sure you don’t share this with anyone because it is used to control your bot.

Copy the Bot's Token

You need to copy the token to the clipboard.

After that, you should return to your website and then paste the token into the Bot Token field under WP Telegram.

Paste the Token Into the Plugin's Settings

Once you’ve done that, you should click the ‘Test Token’ button.

The token is connected to this specific bot, so the Bot Username field fills in automatically.

Click Test Token and the Bot's Username Will Be Filled In Automatically

Don’t forget to click the ‘Save Changes’ button to store your settings.

Congratulations, you have finished the initial setup of Telegram and the WP Telegram plugin.

Next, you can configure the plugin to send WordPress posts to Telegram or send yourself WordPress notifications.

Sending WordPress Posts to Telegram

Make sure you’re on the ‘Post to Telegram’ tab in the plugin dashboard.

This page will let you configure the plugin to automatically send your posts to Telegram when they are published.

First, you need to toggle the ‘Active’ switch to the ‘On’ position.

Toggle the Active Switch on the Post to Telegram Tab

You will now see instructions on how to send your WordPress posts to Telegram.

Creating a Channel on Telegram

First, if you don’t already have a public Telegram channel, then you’ll have to create one.

To do this, you need to switch back to the Telegram app.

Then you should click the ‘New’ icon at the top of the screen, then click ‘New Channel’ from the dropdown menu.

Choose New Channel or New Group From the Drop Down Menu

On the next screen, you’ll see a description of what a Telegram channel is.

You’ll need to click the ‘Create Channel’ link at the bottom of the page.

Click on Create Channel

Now you need to give your channel a name and description. Remember that this will be a public channel, so name it appropriately.

After that, you should click ‘Next’ at the top right of the page.

Give Your Group or Channel a Name

Finally, make sure that your channel is public so that your users can subscribe.

You should also create a public link to make it easy to find and join. Simply type a unique ID after https://t.me/. Make a note of the ID because you will need it later when setting up the plugin in WordPress.

Add a Public Link to Your Group or Channel

When you click ‘Done,’ your Telegram channel will be created, and you will now need to add your bot as an administrator.

With your channel selected in Telegram, you need to click the ‘…’ menu at the top right of the screen and select ‘Info’ from the dropdown menu.

Go to the Info Page for Your Channel or Group

This screen displays information about your channel and provides buttons and menus so you can configure it.

You need to click on the ‘Administrators’ menu.

Click on the Administrators Menu

Here you can add a new administrator by clicking the ‘Add Admin’ link.

On the popup, enter the username of the bot you created earlier, and then click on the bot’s name in the list below.

Add Your Bot as an Administrator

The next screen will show you the bot’s permissions.

You can leave them as they are, but make sure that ‘Post Messages’ is enabled.

Make Sure Your Bot Has Permission to Post

When you click ‘Done’ at the bottom of the popup, your bot will be added as an administrator of your channel.

Your Bot Is Now an Administrator of Your Channel or Group

Adding Your Telegram Channel or Group to WordPress

Now you’ll need to return to your WordPress website to finish setting up the plugin. You should still be on the ‘Post to Telegram’ tab.

In the ‘Destination’ section, you need to click the ‘+Add’ button.

Click the +Add Button in the Destinations Section

You can now enter the channel or group ID you created earlier. That’s the last part of the public link you created, and we asked you to make a note of it.

You can then click the ‘Send Test’ button to send a test message to your group or channel to make sure the connection is working.

Click the Send Test Button to Make Sure Your Bot Can Post

You’ll see a popup with the default message, ‘This is a test message.’ If you like, you can customize it to say whatever you want, and then click the OK button.

If you set up the plugin successfully, then you should see the test message in your channel or group in Telegram.

Make Sure the Test Message Was Successfully Posted in Telegram

Other Settings for Sending WordPress Posts to Telegram

Now you can return to your site and finish setting up the plugin.

In the ‘Rules’ section, make sure the box is checked for sending new posts when they are published. If you like, you can check the second box as well, which will post to Telegram when you update an existing post.

After that, check the boxes for the post types you wish to broadcast on Telegram. The ‘Post’ box is checked by default, and if you like you can also check the ‘Page’ box.

If you have custom post types, then you may have additional checkboxes, such as for WooCommerce products or Envira Gallery.

Choose Which Post Types to Send and When to When to Send Them

You can add custom rules to further customize which posts are sent to Telegram.

For example, the screenshot below shows a rule that will only send posts to Telegram if they are in the Top Posts category.

Example of a Custom Rule

The WP Telegram plugin comes with many other options that let you customize the way your posts are sent. You can check and adjust them as needed. However, the default settings will work fine on most websites.

Once you’re happy with the settings, scroll to the bottom of the page and click the ‘Save Changes’ button to store your settings.

Now when you are creating or editing a post, you will see a new ‘Send to Telegram’ setting in the WordPress editor.

The WordPress Editor Now Has a Post to Telegram Setting

This is switched on by default. Simply switch it off if you don’t wish to send the post to Telegram.

The next time you publish a post that matches the rules you set, it will be automatically sent to your Telegram channel or group.

Preview of a WordPress Post Sent to Telegram

Sending WordPress Notifications to Telegram

Make sure you’re on the ‘Private Notifications’ tab on the WP Telegram page.

This page will let you configure the plugin to automatically send WordPress notifications to an individual privately or group on Telegram.

First, you need to toggle the ‘Active’ switch to the ‘On’ position.

Toggle the Active Switch on the Private Notifications Tab

You will now see instructions for two different methods on how to send your WordPress posts to Telegram.

Sending Notifications From WordPress to an Individual on Telegram

This method is best if you’d like WordPress to send notifications to just one person.

You will have to give the WP Telegram plugin your User Chat ID on Telegram.

To learn your ID, you need to search for @MyChatInfoBot on Telegram and then click on the first search result under ‘Contacts and Chats.’

Search for @MyChatInfoBot on Telegram

After that, click ‘Start’ at the bottom of the screen to start a chat with the bot.

In its first message, the bot will display your Chat ID in red.

The Bot Will Post Your Chat ID

You need to copy the Chat ID to the clipboard, and then return to your website.

In the ‘Notification Settings’ section in the screenshot below, you will find your admin email address. This is where WordPress admin notifications are sent by email.

Each time a notification is sent to this address, WordPress will also send it to the Telegram user you will enter in the plugin settings.

If you need to, you can use a different email address. To receive notifications sent to all email addresses, simply type ‘any’ in the ‘if email goes to’ field.

Click the +Add Button so You Can Add the Chat ID

Next, you’ll need to enter the User Chat ID you copied. Simply click the ‘+Add’ button.

This will show a new field under ‘Send it to.’ This is where you should paste your ID.

Paste the Chat ID Into the Field

Don’t click the ‘Send Test’ button yet.

First, you need to start a conversation with the bot you created earlier. You need to do that because bots can’t initiate a chat on Telegram.

You’ll have to switch back to Telegram and search for the name of the bot you created during the setup stage. Once you click on the bot, you can start a conversation by clicking ‘Start’ at the bottom of the screen.

Start a Chat With Your Bot in Telegram

Now, you can return to WordPress and click the ‘Send Test’ button. You should then click OK on the popup message that appears.

A confirmation will be displayed next to the ‘User Chat ID’ in WordPress, letting you know if the message was successful. You should also check Telegram to make sure the message is actually posted there.

Test Message Successfully Sent to Telegram

Now, back on your WordPress site, scroll down to the bottom of the page, and click the ‘Save Changes’ button to store your settings.

Congratulations, you will now receive a Telegram message each time there is an admin notification on your site.

Sending Notifications From WordPress to a Group on Telegram

This method is best if you work with a team on your WordPress website and want some or all of them to see the admin notifications on Telegram.

The steps for this method are similar to the ones above for sending notifications to a single user on Telegram. However, instead of pasting a ‘User Chat ID’ into WordPress, you will need to paste the ‘Group Chat ID.’

If you don’t already have a Telegram group for your team, then you need to create one.

While a Telegram channel is simply for posting information, members of a group are able to communicate with one another. You can also control who belongs to the group.

You should click the ‘New’ icon at the top of the Telegram screen and select ‘New Group’ from the drop down menu. The group will be private by default.

Create a New Group in Telegram

After that, you need to add any other members you wish to be part of the group.

You will be automatically added to the group, and you will need to add at least one additional member.

Select the Users You Wish to Add to the Group

After adding your team members, you should click ‘Next’ at the top of the screen.

Finally, clicking ‘Create’ at the top of the screen will create the group.

Name Your Group and Then Click Create

Now that you’ve created a group and added your team members, you will need to add two bots.

First, you should add @MyChatInfoBot so that you can find out the Group ID to paste into the plugin settings in WordPress.

Second, you need to add your own bot so that the plugin can send WordPress notifications.

You can open the group’s ‘Info’ page by clicking on the group name at the top of the screen. Once there, you need to click the ‘Add’ button to add new members.

Click the Add Button to Add the Bots to the Group

Next, you need to type @MyChatInfoBot into the ‘Add Members’ field and then click on it in the search results.

You will need to do the same with the bot you created during the initial Telegram setup.

Add 2 Bots to Your Group

Make sure you click ‘OK’ to add the two bots as group members.

Notice that the @MyChatInfoBot bot has automatically added your Group ID to the chat.

Copy the Chat ID of Your Group

Next, paste this ID into the ‘Send it to’ section back on your WordPress site.

Now, you can click the ‘Send Test’ button to make sure that everything is set up correctly.

Paste Your Group Chat ID Into the Plugin's Field

The plugin will pop up a default message that you can change if you like. After that, you should click the ‘OK’ button.

Now go ahead and switch to the Telegram app and make sure the test message was posted.

Test Message Successfully Posted to Telegram

Congratulations, now your WordPress notifications will be sent to your Telegram group.

We hope this tutorial helped you learn how to integrate your WordPress site with Telegram. You may also want to learn how to create a contact form in WordPress, or check out our list of email marketing services for small business.

If you liked this article, then please subscribe to our YouTube Channel for WordPress video tutorials. You can also find us on Twitter and Facebook.

The post How to Integrate Your WordPress Site with Telegram first appeared on WPBeginner.


August 24, 2022 at 09:46PM