Tuesday, August 30, 2022

How to Display Recently Registered Users in WordPress

Are you looking to display recently registered users in WordPress?

Sometimes you may want to display your recently registered users on your site to create a sense of community and encourage others to become a member, join your forum, or simply create an account. 

In this article, we’ll show you how to display recently registered users on your WordPress site.

How to display recently registered users in WordPress (3 ways)

Why Display Recently Registered Users in WordPress?

If you run a membership site, online course, forum, or any other type of WordPress website that allows for user registration, then you may want to display your recently registered users.

This adds social proof an also give other members a chance to welcome new members to the community. If you run a small business website, then you can even create a filterable directory of your team members or contributors.

There are all kinds of reasons to display your recently registered users in WordPress:

  • Create a resource of shared contact information
  • Showcase a list of donors for your nonprofit
  • Highlight a list of recently registered business owners
  • Encourage new forum sign ups by showing a large and active community

With that said, let’s show you how you can display recently registered users in WordPress. Simply use the quick links below to jump straight to the method you want to use.

Method 1. Display Recently Registered Users with Formidable Forms

The best way to display recently registered users is by using the Formidable Forms plugin. It’s one of the top contact form and best user registration plugins for WordPress in the market. 

Formidable Forms

It comes with advanced features that let you format, filter, and display user-submitted data on the front end of your website, including user profile data.

You can use it to create all kinds of useful online tools like web directories, online calculators, user directories, and more. Plus, you have complete control over how your user directories look and function.

It even integrates with MemberPress, so you can easily display a list of your recently registered members on your membership website

Note: Formidable Forms won’t automatically display all new users. Instead, it gives you complete control over which users and what information is displayed. To display a user in your directory, a separate form will need to be created and filled out. We’ll show you how.

First thing you need to do is install and activate the Formidable Forms plugin. For more details, see our guide on how to install a WordPress plugin.

Upon activation, you need to go to Formidable » Global Settings and then click the ‘Connect an Account’ button or manually enter your license key and click the ‘Save License’ button.

Enter Formidable Forms license key

You can find this information under your account on the Formidable Forms website.

Next, you need to install the Formidable Directory addon. Depending on your plan, this addon may already be active. 

If not, then you need to go to the Formidable Directory page and click the ‘Get Formidable Directory’ button. After you complete the purchase, it will automatically be added to your account. 

Formidable Directory

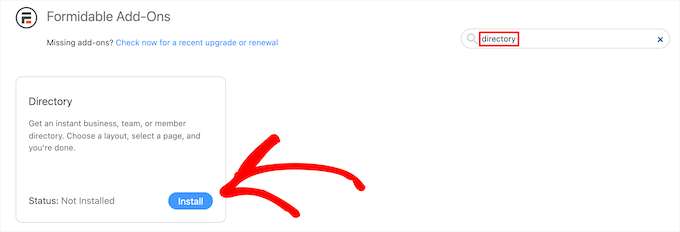
Next, go to Formidable Forms » Add-Ons and search for the ‘Directory’ addon.

Then, click the ‘Install’ button.

Install directory addon

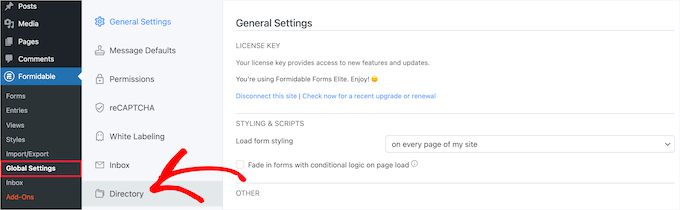
After that, navigate to Formidable » Global Settings.

Then, click the ‘Directory’ menu option.

Navigate to Formidable directory

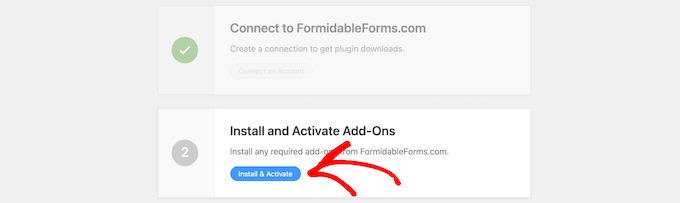
This will automatically start the setup wizard to help you create your user directory. If you haven’t connected your site to Formidable Forms, then you’ll be asked to do that now.

Then, click the ‘Install & Activate’ button to install and activate any required addons.

Install and activate addons

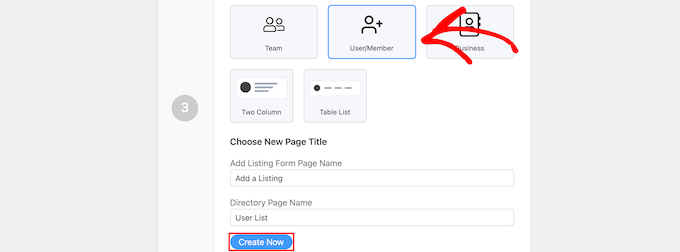
Next, click the ‘User/Member’ box to display your recently registered users and choose a ‘Two Column’ or ‘Table List’ display.

Then, enter a page name for your listing form and your directory page and click the ‘Create Now’ button.

Select user/member and name pages

This will automatically create the necessary forms, views, and pages to display your users, but it doesn’t publish them yet, so you can still make changes.

After that, click the ‘View Page’ button in the ‘Customize Your New Pages’ section.

Click view new page

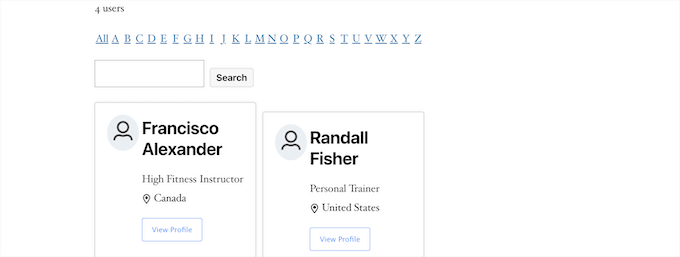
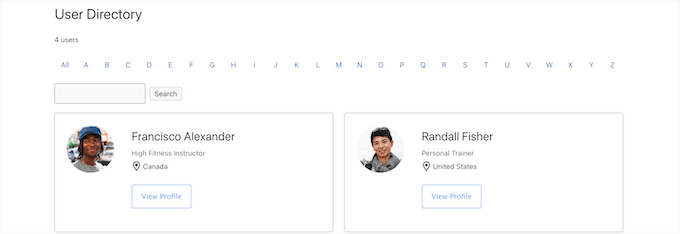
This will automatically take you to a page with your registered user list. 

It includes a search bar, A-Z filter, and boxes containing each of your registered users.

View registered users page

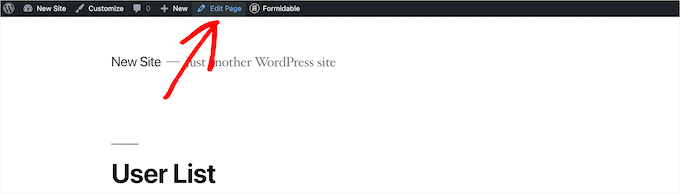
After that, you need to make your page live.

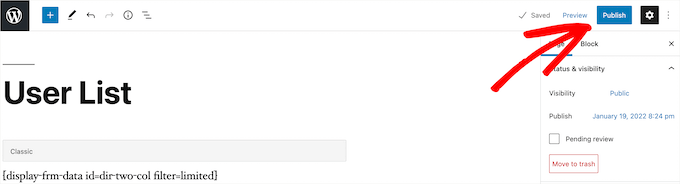
To do this, simply click the ‘Edit Page’ button at the top of the screen.

Click the edit page button

This brings you the page editor screen. You can edit this page just as you would any other WordPress page.

When you’ve finished editing the page, you need to click the ‘Publish’ button to make it live.

Publish page live

If you want to customize how your registered user directory looks, then go to Formidable » Views.

Then hover over the view that was just created and click ‘Edit’.

Go to formidable views

This brings you to the view editor screen.

Here, you can fully customize how your user directory looks. For example, you could limit the number of users per page, filter and sort the user entries, or add more content to their individual profiles.

Customize user directory in view editor

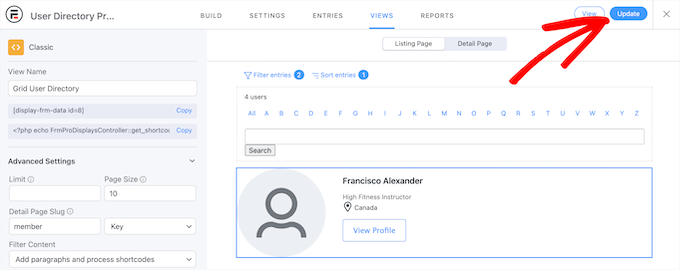
Once you’re finished making changes, click the ‘Update’ button.

It will automatically update the user directory you published earlier.

Updated user directory example

Publish Your Form to Collect Information From New Users

After you customize and publish your user directory, you’ll need to publish the form connected to the directory too. 

Users who have already registered on your WordPress site will need to fill out this separate form to be listed in the user directory.

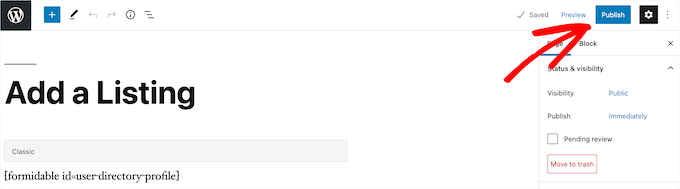
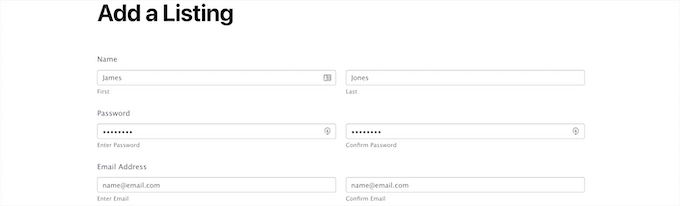
First, you need to go to Pages » All Pages and then click on the page that was created earlier, in this case, it’s ‘Add a Listing’.

Go to registration page

This brings you to the page editor screen, where you’ll see the page title and a shortcode.

Next, click the ‘Publish’ button to make your page live.

Publish registration page live

After that, you can view your page with the user registration form. 

New users can use this form to fill out their user directory profile information on your website.

User registration page example

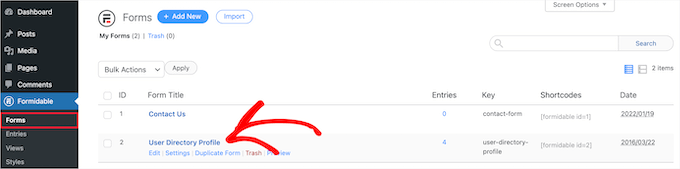
If you want to customize the form fields, then navigate to Formidable » Forms.

Next, click on the form you named earlier, in this case, it’s ‘User Directory Profile’.

Go to formidable form editor

This will bring up the form builder. 

If you want to add new form fields, then simply drag them from the options panel on the left onto your form.

Edit registration form

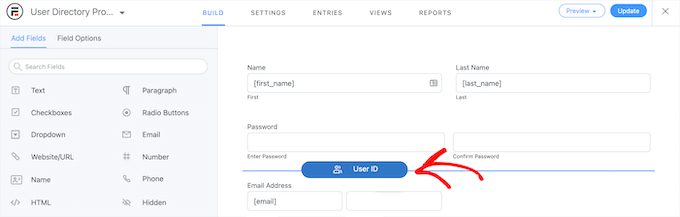
To delete existing form fields, click on the field and click the ‘Three Dots’ menu option.

Then, click ’Delete’.

Delete form fields

Once you’re finished customizing your form, make sure to click the ‘Update’ button to save your changes, and your form will automatically update.

Method 2. Display Recently Registered Users with Dynamic User Directory

Another way to display recently registered users is with the free Dynamic User Directory plugin.

It’s not as advanced or customizable as Formidable Forms, but it lets you display a simple list of your recently registered users.

First thing you need to do is install and activate the plugin. For more details, see our step by step guide on how to install a WordPress plugin.

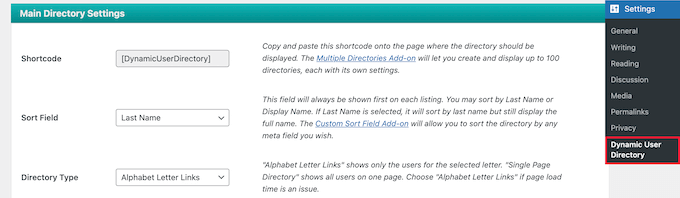
After that, you need to go Settings » Dynamic User Directory to configure your directory settings.

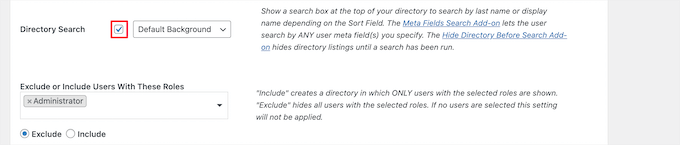
First, you can control how your registered user list is sorted in the ‘Sort Field’ drop down and choose which kind of directory type you want to display in the ‘Directory Type’ drop down.

Set main directory settings

After that, you can enable a directory search feature by checking the ‘Directory Search’ box.

If you want to exclude certain user roles, or specific users, then you can select them from the drop down list.

Enable directory search and user roles

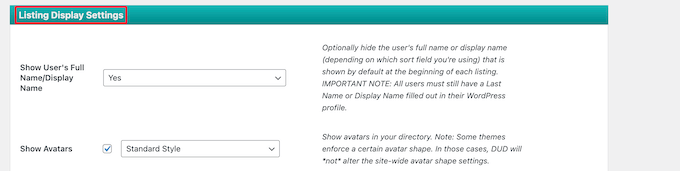
Next, you can control how your directory looks and the user information that will display in the ‘Listing Display Settings’ section.

You have control over the user’s name, avatars, borders, and more.

Set directory listing display settings

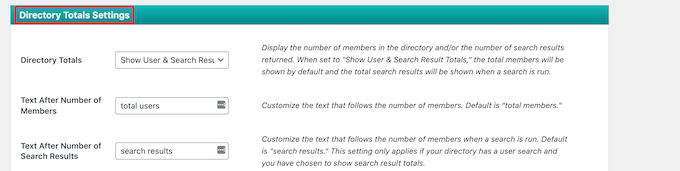
Below that, in the ‘Directory Totals Settings’ meta box, you can choose the total number of users, customize the text, and more.

Displaying the total number of users can be helpful if you want to use social proof to encourage new users to create an account on your site.

Choose to display directory totals

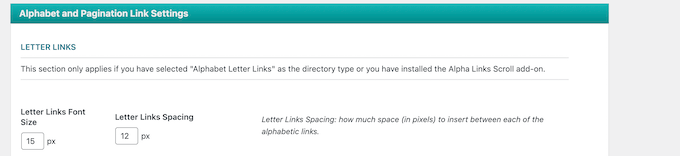
Next, you can customize how the letter links and pagination displays on your user list.

You can set the number of users to show per page, change the spacing, and more.

Change how letter links and pagination displays

Once you’re finished, click the ‘Save options’ button at the bottom of the screen to save your directory.

This will create and display a shortcode for your user directory at the top of the page. You need to copy this to add your directory to your site.

Copy user list shortcode

Then, open the page, post, or widget area to display your list of users.

Next, click the ‘Plus’ add block icon, search for ‘Shortcode’, and select it.

Add shortcode block

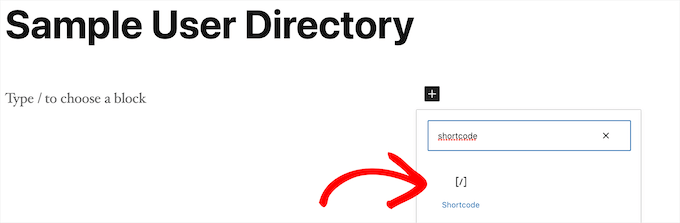
After that, simply paste the shortcode into the box.

Then, click the ‘Publish’ or ‘Update’ button.

Add user list shortcode to block

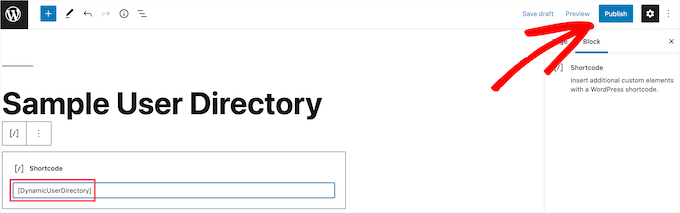
Now, you can view your list of recently registered users on your site.

If you want to add the list of recently registered users to a post or widget area, then simply follow the above steps.

Dynamic User Directory plugin example

Method 3. Display Recently Registered Users by Adding Code to WordPress

Another way you can display your recently registered users is by adding code to WordPress. If you haven’t done this before, then see our guide on how to copy and paste code in WordPress.

Then, you can add the following code snippet to your theme’s functions.php file, or by using a code snippets plugin like WPCode (recommended): 

function wpb_recently_registered_users() { 

global $wpdb;

$recentusers = '<ul class="recently-user">';

$usernames = $wpdb->get_results("SELECT user_nicename, user_url, user_email FROM $wpdb->users ORDER BY ID DESC LIMIT 5");

foreach ($usernames as $username) {

if (!$username->user_url) :

$recentusers .= '<li>' .get_avatar($username->user_email, 45) .$username->user_nicename."</a></li>";

else :

$recentusers .= '<li>' .get_avatar($username->user_email, 45).'<a href="'.$username->user_url.'">'.$username->user_nicename."</a></li>";

endif;
}
$recentusers .= '</ul>';

return $recentusers;
}

This code snippet creates a simple list of your recently registered users and displays the avatar image and username.

After that, there are two different ways you can display your recently registered users. The first is by adding a template tag to your theme’s template files, like sidebar.php, footer.php, and more.

To learn more, see our WordPress template hierarchy cheat sheet to help you find the right theme template file.

Then, add the following template tag code snippet:

<?php wpb_recently_registered_users(); ?>

The second method is easier for beginners and lets you display newly registered users by using a shortcode.

First, add the following code snippet to your theme’s functions.php file or by using a code snippets plugin, just below the code you added earlier.

add_shortcode('wpb_newusers', 'wpb_recently_registered_users');

This code will create the following shortcode you can use in your posts, pages, and widget areas. 
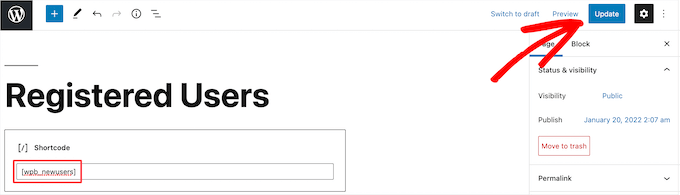
[wpb_newusers]

To add the shortcode to your website, simply open the page where you want the list of users to display.

Then, click the ‘Plus’ add block icon, search for ‘Shortcode’, and select it.

Add shortcode block

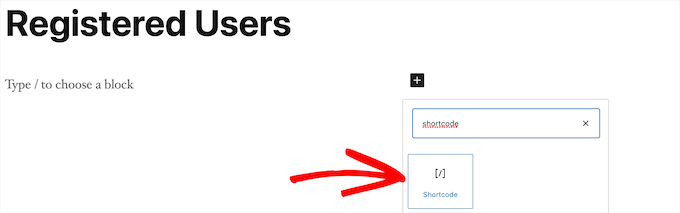
After that, paste the shortcode you copied above into the shortcode box.

When you’re done making changes, click the ‘Update’ or ‘Publish’ button to make your changes live.

Paste shortcode into block

You can follow the same steps by adding the shortcode to a post or a widget area.

Now you can view your list of recently registered users. To adjust how they appear, you would need to add custom CSS to your website.

Registered user list example

We hope this article helped you learn how to display recently registered users in WordPress. You may also want to see our guide on how to get a free SSL certificate, and our expert picks of the best business phone services for small businesses.  

If you liked this article, then please subscribe to our YouTube Channel for WordPress video tutorials. You can also find us on Twitter and Facebook.

The post How to Display Recently Registered Users in WordPress first appeared on WPBeginner.


August 30, 2022 at 02:15PM

Monday, August 29, 2022

How to Create a Subscription Box Service in WordPress

Recently, one of our readers asked if it was possible to create a subscription box service in WordPress?

Subscription boxes are a popular way of selling physical goods that can be delivered on a regular basis. They work especially well in niche markets.

In this article, we’ll show you how to create a subscription box service in WordPress.

How to Create a Subscription Box Service in WordPress

What Is a Subscription Box Service?

A subscription box service is a smart way to bring in regular revenue from your online store with recurring deliveries of physical products.

Subscription boxes are more than just a delivery service. They offer a personalized experience of curated products that bring real value to your customers, such as variety, convenience, and saving money. They work well in niche markets and for boutique products.

For example, HelloFresh is a subscription box service where you can sign up to have meal ingredients delivered to your door every week. Other examples are the Dollar Shave Club and Bean Box, which offer grooming and coffee products in subscription boxes.

Bean Box Subscription Box Service

Subscription boxes are an effective way to make recurring revenue. They usually have a higher profit margin, and over 2/3s of consumers in the United States have tried them. The market seems to double each year.

With that said, let’s take a look at how to create a subscription box service using WordPress.

What Do You Need to Start a Subscription Box Business?

Starting a subscription box company is easier than you might think. You’ll need the following things:

  • A theme and target audience for your subscription box
  • A domain name (like wpbeginner.com)
  • A WordPress hosting plan to store your files and website data
  • Ecommerce and subscription box plugins to create and manage your products and subscriptions
  • An hour or two to set it all up.

That’s it!

We’ll walk you through every step of the process in this guide. If you get stuck or have any questions, just leave a comment below or see our guide on how to get WordPress support.

Let’s get started.

Step 1: Set Up Your WordPress Website

The best website builder platform to set up and manage your subscription box business is WordPress, because it’s free and gives you maximum control over your site. This is why over 43% of all websites on the internet use WordPress.

Often beginners make the mistake of choosing the wrong type of WordPress. There are actually two different types, which can be confusing.

You don’t want WordPress.com, which is a hosting service that can get expensive and limits the features you have access to.

The one we recommend is WordPress.org, also called self-hosted WordPress. It’s a completely free software that you install on your own hosting and domain. Don’t worry, that’s easier than it sounds.

To get started, you’ll need to get web hosting.

Normally, web hosting costs $7.99 per month, a domain name starts at $14.99 per year, and an SSL certificate costs around $69.99 per year.

This can be a big investment when you’re just starting out.

Luckily, Bluehost has agreed to offer our readers a big 60% discount on web hosting, plus a free domain name and SSL certificate. 

Bluehost

Basically, you can get started for as low as $2.75 per month. 

Simply click on the Bluehost button below, and the discount will automatically be applied.

After you get your hosting account, see our guide on how to create a WordPress website for step by step instructions.

Step 2: Create a Subscription Box Service in WordPress

After your WordPress site is set up, there are a few plugins you’ll need to install to create the subscription box service:

  • WooCommerce, the world’s most popular eCommerce plugin
  • WooCommerce Subscriptions, a WooCommerce extension for all kinds of paid subscriptions
  • Subscription Box for WooCommerce, an addon for the Subscriptions extension that lets your customers create their own boxes.

We will walk you through everything, step by step.

If you don’t have an online store yet, then we have a step by step guide on how to start your online store. This will walk you through the first part, installing WooCommerce.

Next, you need to install and activate the WooCommerce Subscriptions extension. For more details, see our step by step guide on how to install a WordPress plugin.

WooCommerce Subscription Plugin

After installing the WooCommerce Subscriptions plugin, you need to install and activate the Subscription Box for WooCommerce extension.

This extension adds features that make it easy to create a subscription box service, such as allowing your customers to create their own boxes and change their box plan.

WooCommerce Subscription Box Plugin

After you setup these plugins, you will also need to ensure that you have chosen a website template (also known as a theme). There are dozens of pre-made WooCommerce themes that you can pick from.

Alternatively, if you’re looking to make a custom website design for your store, then you need to use a drag & drop builder like SeedProd. It lets you create completely custom WordPress themes without any code.

Step 3: Add Subscription Box Products

Once your website is setup, the first thing you need to do is add a subscription box product to sell in your online store.

You’ll need to select Products » Add New from your admin menu and type a name for the subscription box.

Add a New WooCommerce Product

You should also fill in the normal WooCommerce product settings, such as a description, image, price, and shipping information.

Next, you need to configure the settings for your subscription box. You should scroll down to the ‘Product data’ section and select ‘Box Product’ from the drop down menu.

Select 'Box Product' from the Product Data Drop Down

This will add a new tab to the side menu where you can build a box.

You need to click on the new ‘Build a Box’ tab so you can configure the settings for your subscription box and what it will contain.

Navigate to the 'Build a Box' Tab

First, you need to type a number in the ‘Box Quantity’ field. This is the number of items your customers can place in the box. After that, you need to select how often the items will be delivered, such as daily, weekly, monthly, or yearly.

Next, you need to choose a list of products that your customers can select when creating a custom box on your WordPress site. You can select those products individually in the ‘Products’ field, or simply add an entire product category, such as ‘Coffee’ or ‘Fruit’ in the ‘Product categories’ field.

Select the Products or Product Category That Can Be Added to the Box

You might like to choose products that have a similar price and weight. This will keep the total cost and weight of the box consistent, which will help when deciding how much to charge for the subscription box and for shipping.

Not everyone will want to take the time to choose products one by one. You can also create a standard box by selecting products in the ‘Default Products’ field.

Select the Products Contained in a Standard Box

To add items to the standard box, you need to search for the product you wish to add, type a quantity, then click the ‘Add To Default Product’ button. Simply repeat these steps until your subscription box is complete.

When you’re finished, don’t forget to click the ‘Publish’ button on the right of the screen to add the subscription box to your WooCommerce store.

If you’d like to add more than one subscription box, then simply repeat these steps.

Step 4: Display Subscription Boxes on Your Online Store

Next, you need to display your subscription boxes in your WooCommerce store.

Head over to Pages » Add New on your dashboard to create a new page. Give the page an engaging title, such as ‘Create a Subscription Box’ or ‘Build Your Own Bundle’.

Next, use the Columns block to add enough columns to display your subscription boxes.

Add Columns to Your Page

For each column, you’ll need to click the ‘+’ button and add a ‘Build a Box’ block.

Using the Block pane on the left, you can choose the subscription box you wish to display from the ‘Selected Box’ drop down menu.

Add a 'Build a Box' Block to Your Page

You can also type the other text that will be displayed, including the box heading and name, subscription label, and button label.

Once you’ve added all your subscription boxes, you’ll need to click the ‘Publish’ button at the top of the page to display them on your website.

When a customer clicks on a subscription box, they will be taken to the shop page for that box. Here they will see the list of products that you made available for this subscription box.

They can add individual products to the box by clicking the ‘Add to Box’ button under the product. They can also select how many of those products will be added.

Subscription Box Shop Page

Alternatively, they can click the ‘Add All’ button to create a standard box. Once they do that, all the default products will be added to the box.

Once the customer is happy with the box contents, they can check out.

We hope this tutorial helped you learn how to create a subscription box service in WordPress.

You may also want to learn how to create a WooCommerce popup to increase sales, or check out our expert pick of the best WooCommerce plugins.

If you liked this article, then please subscribe to our YouTube Channel for WordPress video tutorials. You can also find us on Twitter and Facebook.

The post How to Create a Subscription Box Service in WordPress first appeared on WPBeginner.


August 29, 2022 at 04:41PM

Sunday, August 28, 2022

How to Block WordPress Referrer Spam in Google Analytics

Do you want to block WordPress referrer spam in Google Analytics?

Referrer spam sends misleading data to your website to pollute your website’s analytics reports with spam links.

In this article, we’ll show you how to block WordPress referrer spam in Google Analytics effectively.

Blocking WordPress referrer spam in Google Analytics

What is Referrer Spam in WordPress and How Does It Affect Google Analytics?

Referrer spam in WordPress is a common spamming technique where fake traffic data is sent to a WordPress website.

This spam technique aims to pollute a website’s analytics data with spam URLs, keywords, and domain names.

It affects your Google Analytics reports as this data appears under Referral data and may affect your website’s overall page views, bounce rates, and session reports.

Referral spam in Google Analytics

If you are seeing many suspicious-looking domains in your Referral reports, then they are most likely spam referrers.

Blocking these spam referrals will improve your Google Analytics reports and ensure that your data is not polluted by spam requests.

That being said, let’s take a look at how to easily block referrer spam in Google Analytics on a WordPress website.

Note: If you’re new and haven’t setup Google analytics properly, then we recommend using our guide on how to install Google Analytics in WordPress.

Block Referrer Spam in Google Analytics with Sucuri

This is the easiest way to block the most common referrer spam in Google Analytics.

For this you’ll need Sucuri. It is the best WordPress security plugin and comes with the best website firewall on the market.

It blocks most common website threats including referrer spam before they even reach your website.

Sucuri

Sucuri also comes with website monitoring, malware scanner, integrity check, and dozens of security features. This protects your website against hacking, malware, and brute force attacks.

Manually Blocking Referrer Spam in Google Analytics With a Plugin

If you are not using Sucuri, then you can use this method to check referral traffic and block them.

First, you need to install and activate the Stop Referrer Spam plugin. For more details, see our step by step guide on how to install a WordPress plugin.

Upon activation, you need to visit the Settings » Referral Spam page to review plugin settings.

Block referrer spam plugin settings

The plugin uses a referral spam blacklist published by Matomo (Formerly Piwik, an open source analytics software).

You can also enter any suspicious domains that are already spamming your Google Analytics reports.

Don’t forget to click on the Save button to store your settings.

Be careful when adding domains in the plugin settings, as it will block all traffic from that domain name, including sub-domains.

3. Filter Out Ghost Referrers in Google Analytics

The first two techniques mentioned above will block referrer traffic that arrives at your website.

However, spammers may sometimes not send referral requests to your website. Instead, they would target your Google Analytics tracking code to trick it into recording a spam request.

These attempts will bypass filters on your website and may still appear in your Google Analytics reports.

You can filter these ghost referral spam in your Google Analytics account.

1. Block Unwanted Referrals in GA4

If your website is using Google Analytics 4 (GA4), then you can use the following method to remove unwanted referrals.

Simply log in to your Google Analytics dashboard and switch to the Admin view.

Select data stream

From here, under the Property column, select the Data Streams option. This will bring the Data Streams connected to your Google Analytics property.

After selecting your data stream you’ll see different settings. Simply scroll down to the Advanced Settings section and then click on the ‘More Tagging Settings’ tab.

Advanced Tagging Settings

Next, click on the ‘List Unwanted Referrals tab.

List unwanted referrals

This will bring you to the configuration screen.

Under Match Type, choose ‘Referral domain contains’, and then add the domain you want to block next to it.

Block domains

Click on the Add condition button to add another domain if needed.

Once finished, click on the Save button at the top right corner of the screen to save your settings.

Google Analytics will now exclude these referrals from your reports.

2. Block Unwanted Referrers in Older Google Analytics

If you are still using older Google Analytics account that uses the Universal Analytics (UA Tracking) code, then you can use this method.

Simply switch to the Admin view under your Google Analytics account.

Creating a filter in Google Analytics

From here, you need to click on the Filters option under the ‘View’ column.

This will bring up the Filters screen. Go ahead and click on the Add Filter button.

Add filter button

On the next screen, you can configure your filter settings.

First, you need to switch the Filter Type to ‘Custom’ and choose the ‘Exclude’ method.

Filter spam referrers from Google Analytics reports

After that, click on the ‘Filter Field’ drop-down and select the ‘Campaign Source’ option (this is where your filter will look for the match).

Lastly, add the domains that you want to block under the Filter pattern box in the following Regex Expression format.

spamwebsite\.com|more-spam\.com|.*spammysubdomain\.com

Notice how the domain name and extension are separated by a backslash and a dot (\.), and each domain name is separated by a pipe sign (|).

The last domain in the list has a dot and asterisk (.*) before the domain name. This asterisk blocks not only the domain name but also all its subdomains.

Go ahead and click on the Save button to store your filter settings.

Google Analytics will now remove these spam referrers from your reports.

Filters don’t affect on how Google Analytics collects data on your website. They just customize reports you view in your Google Analytics dashboard.

If you need to, you can always return to the filters screen to edit or delete a filter.

Edit or delete a filter in Google Analytics

We hope this article helped you learn how to block referrer spam in Google Analytics effectively. You may also want to see our ultimate conversion tracking guide for beginners or how to properly setup eCommerce tracking on your website.

If you liked this article, then please subscribe to our YouTube Channel for WordPress video tutorials. You can also find us on Twitter and Facebook.

The post How to Block WordPress Referrer Spam in Google Analytics first appeared on WPBeginner.


August 28, 2022 at 04:26PM