Tuesday, November 22, 2022

How to Raise Money with Crowdfunding in WordPress

Are you looking for a way to raise funds through crowdfunding using a WordPress website?

Raising funds for a project can be a challenging task. Most people use crowdfunding platforms like Kickstarter or Indiegogo to raise money. However, why work on the terms of third-party platforms when you can do it all on your own with a few simple clicks?

In this article, we will show you how to raise money with crowdfunding in WordPress.

How to Raise money with crowdfunding in WordPress

What is Crowdfunding?

Crowdfunding is an organized effort by a person to raise funds for a project, an organization, or their own needs.

Often entrepreneurs use crowdfunding to raise startup money by presenting their ideas to potential customers and allowing them to fund the project rather than giving up equity to investors. Instead of receiving equity, each donor gets a reward of some kind.

Usually, these rewards include getting a shirt, stickers, other goodies, or an actual product. The reward each donor receives is based on the amount they donate.

Besides startups, crowdfunding is a great way for an individual or even nonprofit organizations to raise money for any cause.

Many people use sites like Kickstarter or Indiegogo to crowdfund, but there are a few downsides to those sites. For example, Kickstarter takes 5% of any money you raise, plus processing fees. And if you don’t meet your fundraising goal, all the donations are returned and you won’t receive anything.

That’s why making a WordPress site can be a better alternative. It gives you much more control and flexibility over your crowdfunding campaign.

That said, let’s see how you can raise money through crowdfunding using WordPress.

How to Start Crowdfunding with WordPress

The easiest way to start crowdfunding is by using a WordPress plugin. There are many donations and fundraising plugins that help you collect online payments from investors and crowdfund your project.

We’ll show you 2 plugins that you can use to kickstart your crowdfunding in WordPress. Simply click the link below to jump ahead to any section:

Create a Crowdfunding Form Using WPForms

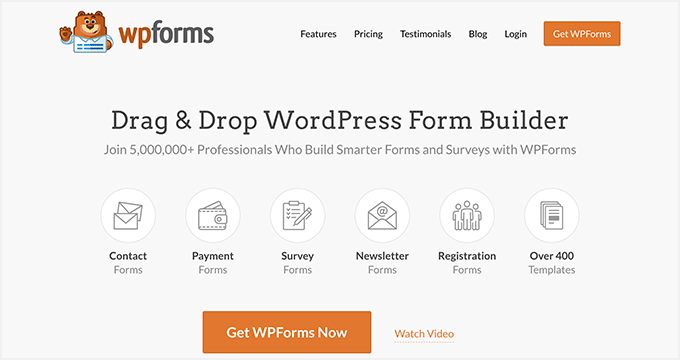
The easiest way of starting crowdfunding in WordPress is by using WPForms. It’s the best contact form plugin for WordPress and super easy to use.

You can use the drag and drop form builder to create any type of form in minutes without editing code. Plus, it easily integrates with payment services like PayPal and Stripe, allowing you to collect online payments from investors.

We’ll use the WPForms Pro version for this tutorial because it includes a nonprofit crowdfunding form template and payment gateway integrations. There is also a WPForms Lite version you can try for free.

First, you’ll need to install and activate the WPForms plugin on your website. If you need help, then please see our guide on how to install a WordPress plugin.

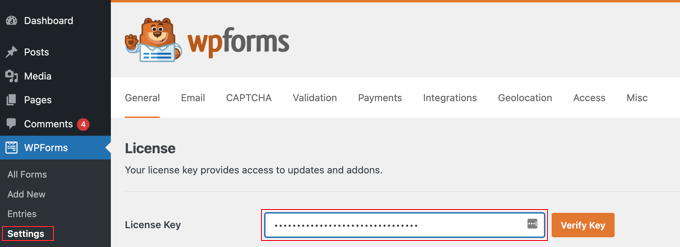
Upon installation, you can head to WPForms » Settings from your WordPress dashboard and enter your license key. You can easily find the license key in your account.

Visit the WPForms » Settings Page to Enter Your License Key

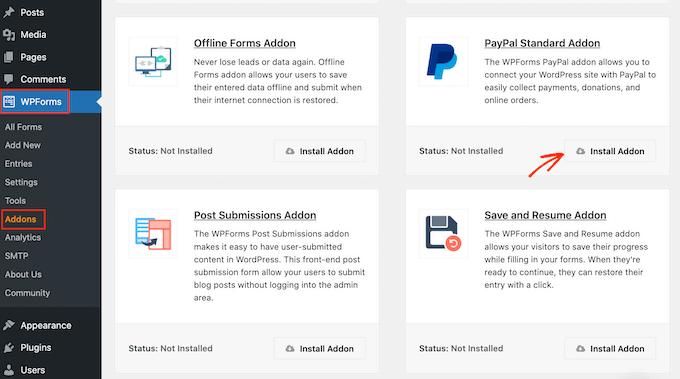
After that, you’ll need to integrate different payment services to raise money through crowdfunding. WPForms supports payment providers like PayPal, Stripe, Square, and Authorize.net.

Simply go to WPForms » Addons from the WordPress admin panel and click the ‘Install Addon’ button for your preferred payment addon.

WPForms' PayPal addon

Once the addon is active, you can now create a crowdfunding form for your WordPress website.

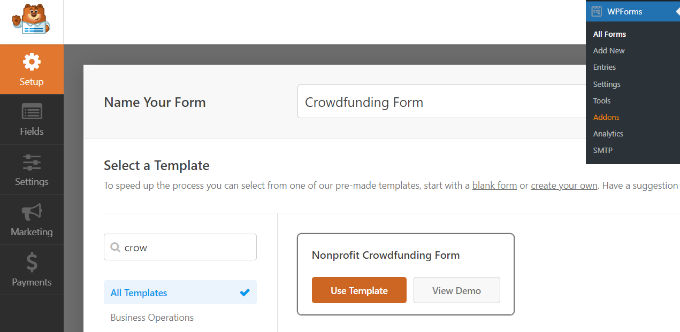
To start, you can go to WPForms » Add New from the WordPress dashboard. This will launch the WPForms drag and drop form builder.

Next, enter a name for your form at the top and then search for the ‘Nonprofit Crowdfunding Form’ template from the menu on your left. Simply hover over the form template and click the ‘Use Template’ button.

Select crowdfunding form template

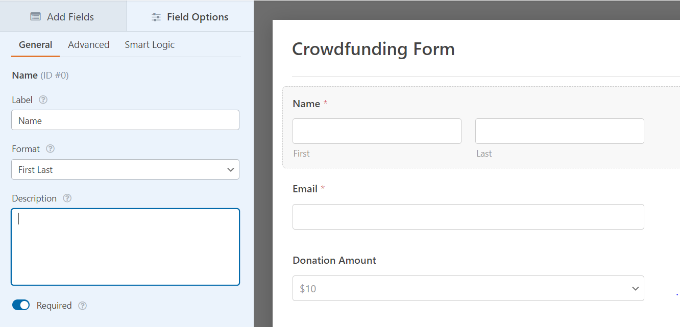
From here, you can use the drag and drop form builder to customize the template.

WPForms will already have form fields added to the template. However, you can add more fields by dragging them from the menu on your left or rearranging the existing fields.

Edit form template

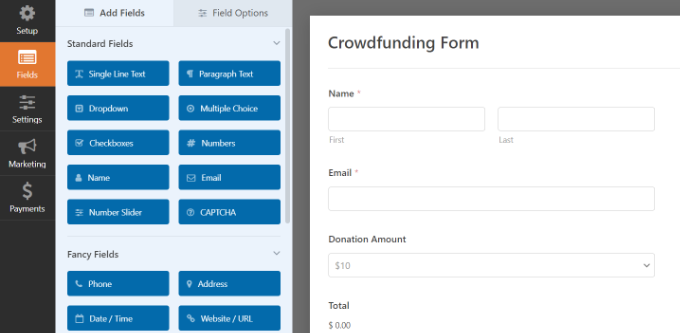
You can further customize each individual form field.

Simply select a form field, and you’ll see more options in the menu on your left. For instance, you can change the label and format of the field, make it a required field, and more.

More field options

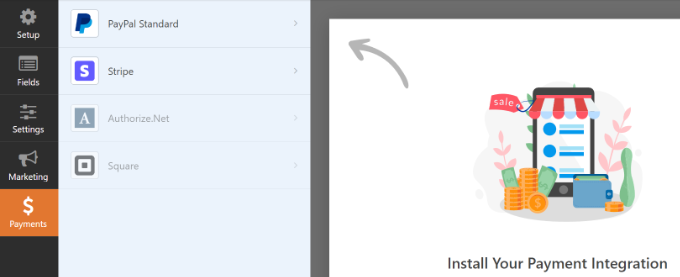
Next, you can go to the ‘Payment’ tab in the WPForms form builder.

Go ahead and select a payment gateway you want to connect to your crowdfunding form.

For the sake of this tutorial, we’ll select PayPal.

Select your payment gateway

After that, click the checkbox for ‘Enable PayPal Standard payments’ in the settings.

You can then provide a PayPal email address and select ‘Donation’ from the Payment Type dropdown menu.

Enable PayPal in WPForms

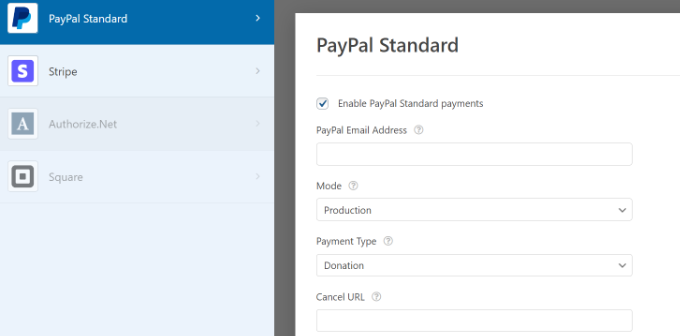
Below that, there are more options where you can enter the Cancel URL. This is a great opportunity to stay connected with your users if they decide the cancel the checkout process.

You can also customize the shipping address options and ask buyers to include a note with payment.

More payment settings in WPForms

Don’t forget to click the ‘Save’ button at the top.

Next, you can head to the ‘Settings’ tab in the form builder and go to Notifications.

Edit notifications settings

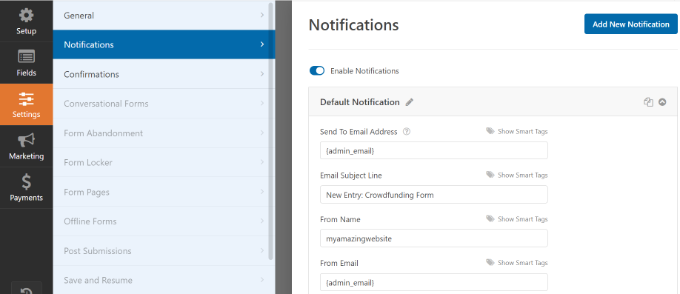
Here you can customize the notification settings sent to the site administrator. For example, you can change the email the notifications are sent to, edit the email subject line and message, and more.

Next, you can go to ‘Confirmations’ in the Settings tab and ensure your donors receive a confirmation email for funding your project.

Edit confirmations settings

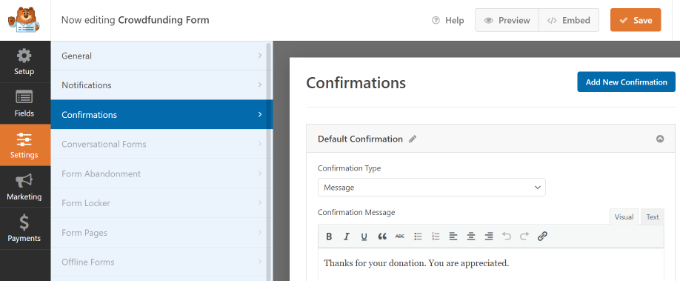
You can show a message when someone submits the crowdfunding form or take the user to another page or URL on your site.

When you’re done, don’t forget to click the ‘Save’ button at the top.

The next step is to add your crowdfunding form to your WordPress blog. You can simply click the ‘Embed’ button in the form builder at the top and choose whether you’d like to select an existing page or create a new page for your form.

Click the 'Create New Page' Button

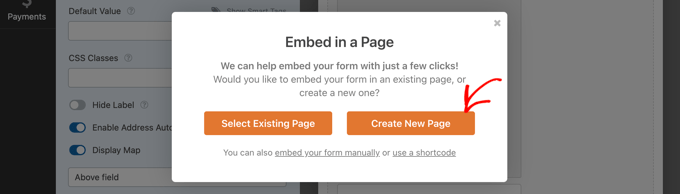
Let’s select the ‘Create New Page’ option for this tutorial.

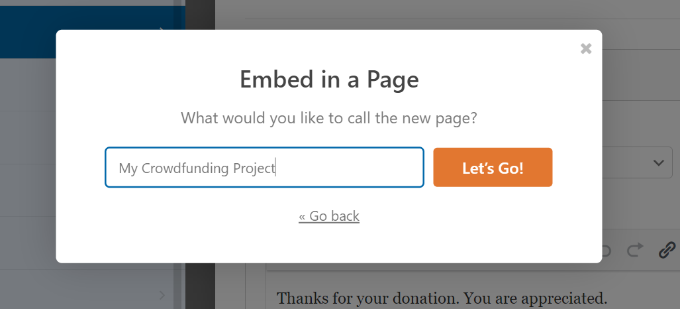
After that, enter a name for your new page and click the ‘Let’s Go!’ button.

Enter page name

WPForms will automatically embed your crowdfunding form to the new page you just created.

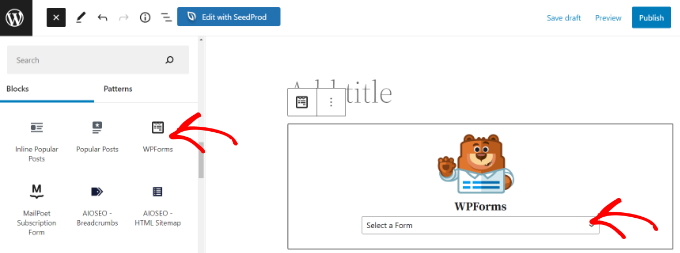
Alternatively, you can add a WPForms block in the WordPress content editor and select your form from the dropdown menu.

Embed your form in a page

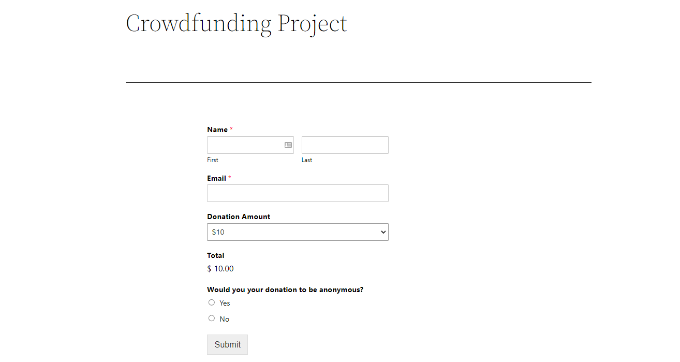
Go ahead and preview your crowdfunding form.

You can then click the ‘Publish’ button and visit your website to see the form in action.

Crowdfunding form preview

You can also see our guide on how to create a donate form for a nonprofit organization in WordPress.

Raise Money with Crowdfunding using WP Charitable

Another way you can start fundraising for your project is by using WP Charitable. It is one of the top-rated WordPress donation and fundraising plugins. Over 10,000 nonprofit organizations use WP Charitable to raise money through crowdfunding and donations.

The plugin offers numerous extensions and features that help you kickstart your crowdfunding campaign. For instance, you can set up peer-to-peer fundraising in WordPress and use word-of-mouth marketing to raise funds.

For this tutorial, we’ll use the WP Charitable Pro license because it includes the Ambassador extension for peer-to-peer fundraising and additional payment gateways.

First, you’ll need to install and activate the core WP Charitable plugin. If you need help, then please see our guide on how to install a WordPress plugin.

Upon activation, you’ll see the WP Charitable welcome screen in your WordPress dashboard. You can head to Charitable » Settings from the admin panel and go to the ‘Licenses’ tab.

Enter license key

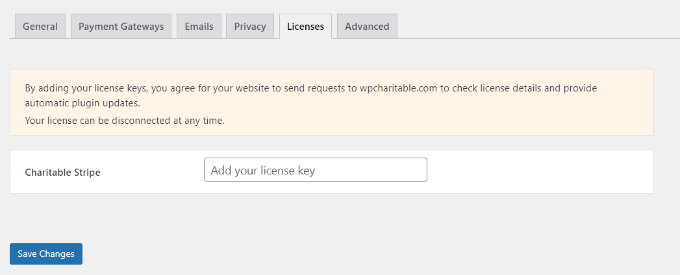
Simply enter your license key and click the ‘Save Changes’ button.

After that, you can head to the ‘Payment Gateways’ tab.

Go to payment gateways tab

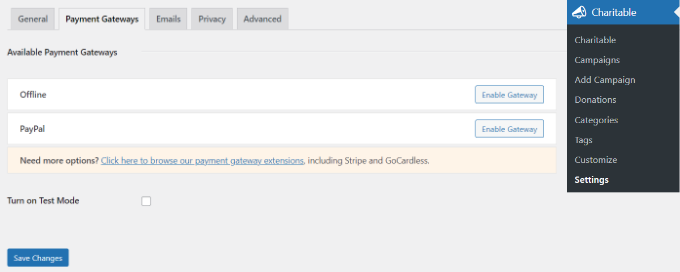
Go ahead and click the ‘Enable Gateway’ button for your preferred payment method.

The default payment gateways offered by WP Charitable will be an offline method or PayPal.

However, you can add more payment methods like Stripe, GoCardless, Payrexx, Mollie, Paystack, Braintree, Authorize.net, and more.

After enabling the payment option, simply click the ‘Gateway Settings’ button.

Open gateway settings

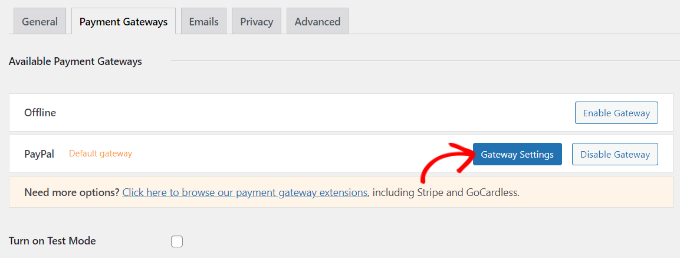
For the sake of this tutorial, we’ll set up PayPal as the payment gateway.

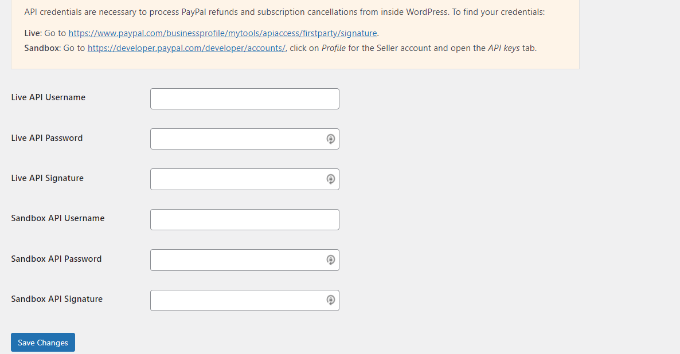
In the PayPal gateway settings, you’ll need to enter your PayPal email address and the API credentials.

Enter PayPal details

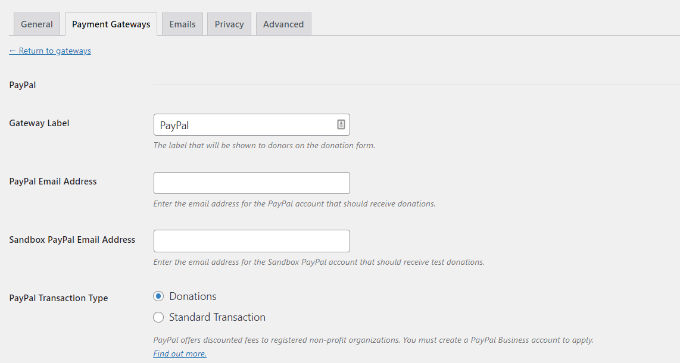
You can find the API credentials by going to your PayPal business profile.

When you’re done, click the ‘Save Changes’ button.

Enter API credentials

The next step is to create a fundraising campaign in WP Charitable.

Simply go to Charitable » Add Campaign from your WordPress dashboard and enter a name for your campaign at the top.

Add a new campaign

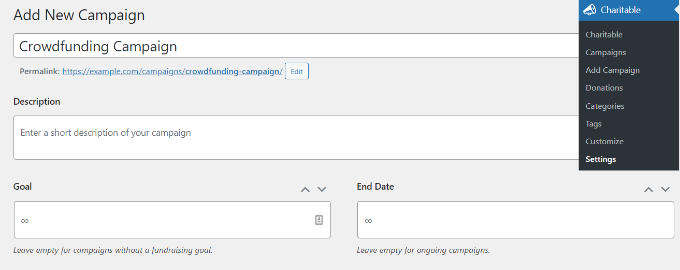
There are also options to enter a campaign description, set a goal, and add an end date to the campaign.

You can leave the goal field blank if you don’t have a set target amount you’d like to collect, and also leave the end date fields blank if it’s an ongoing campaign.

Besides that, you’ll see ‘Campaign Settings’ if you scroll down. Here you can add suggested donation amounts for your campaign. Simply click the ‘+ Add a Suggested Amount’ button and enter the amount.

Add suggested donation amounts

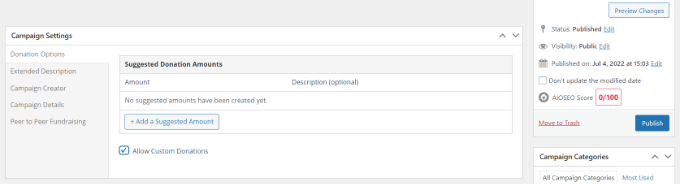
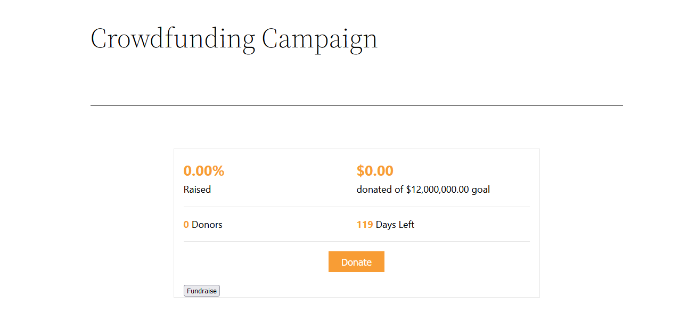
When you’re done, click the ‘Publish’ button to set your campaign live.

Then you can visit your website to see your crowdfunding campaign in action.

Crowdfunding preview in WP Charitable

Setting Up Peer-to-Peer Fundraising in WP Charitable

WP Charitable also lets you set up peer to peer fundraising in WordPress. This allows your team members and individuals to create their own campaign and help achieve your overall crowdfunding goal.

First, you can install and activate the Ambassadors extension on your website. It’s just like adding a new plugin. You can follow our guide on how to install a WordPress plugin for more details.

Upon activation, you can go to Charitable » Settings from your WordPress admin area and then click on the ‘Ambassadors’ tab. Next, click the checkbox to enable the ‘Fundraisers for existing campaigns’ option.

Enable fundraiser for existing campaigns

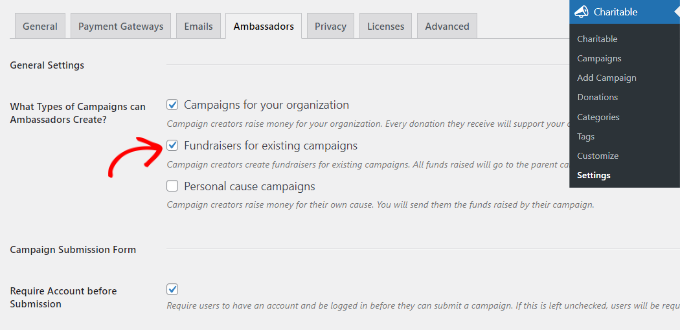
There is also an option to disable the requirement for users to register an account before submission.

Don’t forget to save your changes when done.

After that, you can edit an existing campaign in WP Charitable or add a new one. Next, you can go to the ‘Peer to Peer Fundraising’ tab in the Campaign Settings section.

Go ahead and click the checkbox for the ‘Allow peer to peer fundraising for this campaign’ option.

Peer to peer fundraising settings

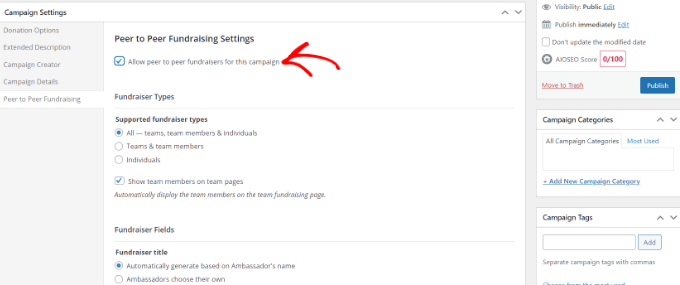
You should now see different settings under Peer to Peer Fundraising. You can select who can participate in the fundraiser, customize fundraiser fields, set a goal, add a photo, and more.

Simply publish your new campaign or update an existing one when you’re done.

A fundraiser option should now appear in your campaign. You can also add a fundraiser button anywhere on your website using the [charitable_fundraise_button] shortcode.

When users click the fundraiser button, they can choose what type of fundraiser they want to create.

Users can create their own fundraisers

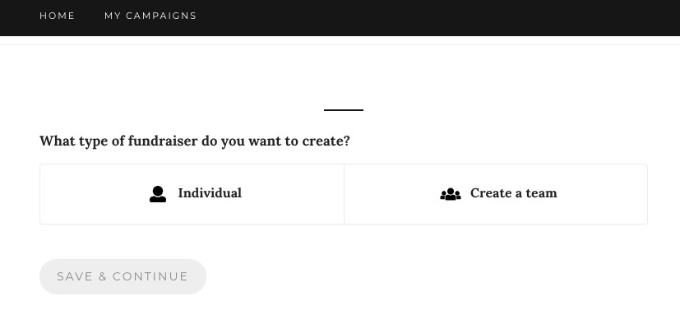
After that, users can simply enter details about the fundraiser and confirm their email addresses. Once that’s done, they can help raise money for your crowdfunding project.

We hope this article helped you learn how to raise money with crowdfunding in WordPress. You may also want to see our guide on how to start an online store and the ultimate guide on WordPress SEO.

If you liked this article, then please subscribe to our YouTube Channel for WordPress video tutorials. You can also find us on Twitter and Facebook.

The post How to Raise Money with Crowdfunding in WordPress first appeared on WPBeginner.


November 23, 2022 at 12:40AM

How to Create a Contact Info Widget in WordPress

Do you want to create a WordPress widget with your contact information?

Adding a contact info widget on your website will allow you to show your email address, phone number, address, and social media profiles. This will make it super easy for visitors to reach out to you.

In this article, we will show you how to create a WordPress widget for contact info.

How to Create a Contact Info Widget in WordPress

Why Should You Add a Contact Info Widget

When building a WordPress website, providing contact information is crucial if you want to build an email list, generate leads, and grow your site.

A contact info widget allows you to display your email address, phone number, and social media profiles in your preferred widget section.

This way, visitors can easily approach you if they want to place an order, need support, or have any questions.

With that being said, let’s see how you can easily create a contact info WordPress in WordPress.

How to Create a Contact Info Widget in WordPress

One of the best ways to add a contact info widget to WordPress is by using Contact Information Widget. It’s a free WordPress plugin that’s very easy to use and works with very little configuration.

First, you need to install and activate the Contact Information Widget plugin. For more details, please see our guide on how to install a WordPress plugin.

With this plugin, you can add the contact info block in any of the widget-enabled areas. Upon activation, simply head over to the Appearance » Widgets in the WordPress admin dashboard.

Once you’re on the ‘Widgets’ page, simply select where you want to add the widget.

Go to Widgets option from Appearance

Keep in mind that the areas you can place widgets in are defined by your WordPress theme, so it could look different depending on the theme you’re using.

If you’re not sure about your theme, then you can check out our article on the best block themes for WordPress. We will be using Hestia in this article.

Now we will be adding a contact info widget in the sidebar.

First, simply click the arrow icon in the upper-right corner of the ‘Sidebar’ box to expand it. Then you can click on the ‘+’ plus button to add a contact info widget.

Go to the sidebar and click the plus button

This will open up a ‘Widget Block Menu’ where you can search for the contact info widget by name. Or, click the ‘Browse all’ button to bring up a menu of all the available blocks.

After locating the widget, simply click on the ‘Contact Information’ option.

Choose Contact Information widget from the Widget Block Menu

Now, simply fill in all the contact information that you want to share with your readers such as your business phone number, address, etc.

Then just click on the ‘Update’ button to save your changes.

Simply fill in your contact information

You can also show icons beside your contact details. Simply go back to the ‘Widgets’ page and open up the ‘Contact Information’ widget.

Then, simply scroll down and check the ‘Show Icon’ box. The icon that shows will be automatically selected based on the type of information you’ve entered.

After that, simply click on the ‘Update’ button to save changes.

Check the Show Icon box

Now, when you visit your site, you will see the icon displayed beside your contact info.

For example, you will see a telephone handset next to a phone number or an envelope next to your business email address.

Contact info displayed on your site

Final Thoughts and Next Steps

The challenge with a contact information widget is that this will be visible on all pages of your website. Typically this information is best when added in the footer areas of your website.

Often when creating a business website, you may only want to display this information on your contact page. Some website owners don’t want to reveal their business email address at all to reduce spam.

In those cases, you will need to create a contact page and then add a contact form on your site using a plugin like WPForms. You can also embed your location map and other details on that page. This is what most business websites end up doing.

We hope this article helped you learn how to add a contact info widget in WordPress. You may also want to see our guide on how to create an email newsletter and our expert pick of the best live chat software.

If you liked this article, then please subscribe to our YouTube Channel for WordPress video tutorials. You can also find us on Twitter and Facebook.

The post How to Create a Contact Info Widget in WordPress first appeared on WPBeginner.


November 22, 2022 at 05:00PM

Monday, November 21, 2022

How to Add a Notification Center in WordPress Admin

Do you receive constant WordPress admin notifications from your plugins and themes?

Wouldn’t it be nice if you could take these notices and place them in a convenient, out-of-the-way dropdown menu at the top of the screen?

In this article, we will show you how to add a notification center in WordPress.

How to Add a Notification Center in WordPress

Why Add a Notification Center in WordPress?

On your WordPress website, you will see notifications from plugin and theme authors in the admin area of your site. If you have a lot of plugins, these admin notices can get out of control and sometimes cover half the screen.

Notification overload isn’t just a problem with WordPress. That’s why smartphone developers work hard to make it easy to manage notifications with a lock screen or swipe gestures.

Facebook does something similar by providing a dropdown notification area where you can see and manage notifications for specific people or pages.

The Facebook Notification Area

You can do this on your WordPress blog, too, by adding a notification center to your admin toolbar.

Note: This guide is about notifications that display in the WordPress admin dashboard. For help with managing your email notifications, you can see our guide on how to add better custom email notifications in WordPress.

With that being said, let’s take a look at how to add a notification center in WordPress.

How to Add a Notification Center in WordPress

The first thing you need to do is install and activate the Admin Notices Manager plugin. For more details, see our step-by-step guide on how to install a WordPress plugin.

Upon activation, the plugin will start to capture all new notifications. You don’t need to adjust any settings for it to begin working.

Admin notices will be moved out of the WordPress dashboard and displayed in one central location on the WordPress toolbar next to your username in the top bar, right beside the ‘Howdy Admin’ greeting.

To begin with, there will be no new notifications to display. Instead, the plugin will show a message that lets you know where the new notifications will be displayed.

After Activation, the Plugin Will Show Where Notifications Will Be Displayed

Once there are some notifications, the number of new notices will be highlighted on your admin toolbar.

When you click on the ‘Admin notices’ link at the top of the screen, a panel that lists each admin notice will appear below it.

Preview of the WordPress Notification Center

You can interact with a notification directly, clicking buttons or links right from the notification center.

When you’ve finished with a notification, you can dismiss it by clicking the ‘X’ icon in the top right corner. Or if you never wish to see that specific notification again, simply click the ‘Hide notice forever’ link at the bottom.

Adjusting Admin Notices Settings

Simply head over to the Settings » Admin Notices page to configure the plugin.

From here, you get to choose which types of admin notices appear in your new notification center. You can also select some to show up in the WordPress dashboard as usual, or you can hide them completely.

Admin Notices Settings

Here you will find settings for each type of standard admin notice:

  • Green success notices about changes made to your site, such as a changed setting
  • Red error notices that appear when something has gone wrong with your site
  • Yellow warning notices that let you know that something requires your attention
  • Blue information notices that display simple information

Near the bottom of the page, you can customize the way notifications are hidden and whether the notification center slides in from the side or is displayed as a popup.

More Admin Notices Settings

When you are happy with your settings, make sure you scroll to the bottom of the page and click the ‘Save Changes’ button to store your settings.

Your WordPress notification center is now set up, and all of your messages will start appearing in the top admin bar immediately.

We hope this tutorial helped you learn how to add a notification center in WordPress. You may also want to learn how to create a free business email address, or check out our list of important reasons why you should use WordPress for your website.

If you liked this article, then please subscribe to our YouTube Channel for WordPress video tutorials. You can also find us on Twitter and Facebook.

The post How to Add a Notification Center in WordPress Admin first appeared on WPBeginner.


November 22, 2022 at 01:02AM

How to Easily Hide (Noindex) PDF Files in WordPress

Do you want to hide your PDF files from search engines?

You might be running an online business selling ebooks and want to prevent people from finding the file using search engines. Or you might have sensitive information stored in those PDF documents that shouldn’t be publicly available.

In this article, we will show you how to hide (noindex) PDF files in WordPress.

How to Hide (Noindex) PDF Files in WordPress

Why Should You Hide (Noindex) Your PDF Files

PDFs are one of the most popular file formats, and there are many benefits of uploading them on your WordPress website.

PDFs are often used to build an email list. A lot of people convert long tutorials on their blog into PDFs, and then offer them as exclusive content on their website.

PDF files are also used to offer exclusive members-only premium content for paying subscribers as part of an online course or membership site.

If you’re using PDFs on your website in a similar way, then it is best that you hide your PDF files from search engines.

You do not want people to find your PDF files through search results where users would be able to access your PDFs without providing you with their email addresses or payments.

You might also have files containing sensitive data that shouldn’t be searchable by the public. Hiding those PDFs using noindex is essential for protection and data security.

With that being said, let’s show you how you can easily hide your PDF files from search engines.

Method 1. How to Hide (Noindex) Your PDF Files Using AIOSEO (Recommended)

The best way to hide your PDF files from search engines is by using the AIOSEO plugin.

All in One SEO (AIOSEO) is the best WordPress SEO plugin that allows you to easily optimize your WordPress website for search engines and social media platforms.

This plugin also allows you to easily edit your Robots.txt file, which gives bots instructions about your site. You will be adding a bit of code that will tell them to ignore your PDFs.

The first thing you need to do is install and activate AIOSEO. For further instructions, you can see our guide on how to install a WordPress plugin.

Next, you will need to set up AIOSEO for your site. If you need help, then you can follow our step-by-step guide on how to set up All in One SEO in WordPress correctly.

Once the plugin is activated, head over to All in One SEO » Tools in the WordPress dashboard.

Now that you’re on the ‘Tools’ page, head over to the ‘Robots.txt Editor’ section and click the toggle present beside ‘Enable Custom Robots.txt.’

Toggle the Enable Custom Robots.txt button

After that, scroll down to where it says ‘User Agent’ and simply add an asterisk (*) to apply the rule to all bots that crawl your site.

Then, select the ‘Disallow’ option in the ‘Rule’ section. Doing this will block all of the user agents from accessing the PDF files. Now, all you have to do is enter a directory path. Simply add /pdf/ in the ‘Directory Path’ field.

Note: If you have saved your PDF directory folder under any other name, then you will have to write that exact PDF directory name in the ‘Directory Path’ field.

Fill in the Rule Builder fields

Next, just scroll down and click on the ‘Save Changes’ button.

Once that’s done, you’ll be able to view your rules in the ‘Robots.txt Preview’ section of the page.

Robots.txt Preview box

Your robots.txt file will now tell search engines to ignore all the PDF files that are present in your PDF directory folder.

If you only want to hide individual PDF files, then you will need to simply type the name of that PDF in the ‘Directory Path’ field.

An example for a specific PDF you want to hide

For example, as you can see in the image above, entering example-pdf.pdf will prevent that single PDF file from being indexed without affecting others.

You can also add a rule like Disallow: /*.pdf$ to hide all PDF from search engines, but this will only work when User-agent is set to Googlebot. Not all search engines respect a broad rule like that.

Method 2. How to Hide (Noindex) Your PDF Files Using X-Robots-tag

If for some reason the previous method doesn’t work, then you can use the X-Robots-tag to hide your PDF files.

In this method, you will need to manually edit your WordPress site’s .htaccess file and add X-Robots-tag to it.

First, simply connect to your website using any FTP client or by using the file manager app on your WordPress hosting control panel.

Next, locate your .htaccess file which will be in the same folder as your /wp-content/ and /wp-admin/ folders.

If you cannot find the .htaccess file, then you can follow our tutorial on why you can’t find the .htaccess file to make it visible.

For this tutorial, we will be using FileZilla as an FTP client. Once connected to your site, you will find your .htaccess file in the ‘Remote Site’ section in the right-hand column.

Once you locate the .htaccess file, right-click and open the ‘View/Edit’ option.

view-htaccess-file

This will open the file in a text editor. If you are using Notepad, here is how it may look after you’ve added the X-Robots-tag.

X-robots-tag in Notepad

If you’re using Apache server, then simply add the following X-Robots-tag in the .htaccess file.

<Files ~ "\.pdf$">
Header set X-Robots-Tag "noindex, nofollow"
</Files>

If you’re using Ngnix server, then add the following:

location ~* \.pdf$ 
{
add_header X-Robots-Tag "noindex, nofollow";
}

Once you’ve added the X-robots-tag, simply save your file. This will now mark all .PDF files as noindex/nofollow, which means you’ve succeeded in hiding your PDF files from search engines!

Bonus: How to Protect PDF File Download in WordPress (3 Ways)

The above two methods cover how to hide PDF files from search engines, but if you want to further restrict PDF downloads to members only, require password or email address to download PDF, or even collect payments, then you will need one of following tools:

1. MemberPress

MemberPress is the best WordPress membership plugin in the market. It allows you to restrict PDF file access to registered-members only. You can even sell access to PDF files based on different subscription levels the user have.

MemberPress also lets you create and sell online courses and often website owners offer premium PDF companion guides with their courses.

Basically, this method will ensure that your PDF files are fully protected, and no one will be able to access your PDF file, unless they enter a password and login.

2. Easy Digital Downloads

Easy Digital Downloads is a popular WordPress eCommerce plugin that helps you sell digital products like PDF files, eBooks, and more.

It comes with maximum file protection features for PDF files, so you can store it in a private cloud, generate unique access links for each member, track download activity, limit the number of times a specific file can be downloaded, and more.

You can accept payments via credit card, PayPal, and others, so you can restrict PDF access by user’s subscription level.

3. OptinMonster

OptinMonster is the best lead generation plugin for WordPress. It helps you get more email subscribers and sales from your website visitors.

A lot of website owners use OptinMonster to require user to enter an email address before giving them access to their PDF files.

This process is called delivering a lead magnet or content upgrade. Once the user enters their email address in OptinMonster, they’re added as a subscriber in your email marketing service or CRM.

After that, they’ll get access to the PDF file in a personalized welcome email.

We hope this article helped you learn how to hide (noindex) your PDF files from search engines. You may also want to see our guide on how to build an email list in WordPress and check out our article on how to stop search engines from crawling a WordPress site.

If you liked this article, then please subscribe to our YouTube Channel for WordPress video tutorials. You can also find us on Twitter and Facebook.

The post How to Easily Hide (Noindex) PDF Files in WordPress first appeared on WPBeginner.


November 21, 2022 at 05:12PM

Friday, November 18, 2022

100+ Black Friday / Cyber Monday 2022 WordPress Deals – Big Savings

Looking for the best Black Friday and Cyber Monday deals on your favorite WordPress products?

The next few days are the perfect time to buy premium WordPress plugins, themes, web hosting, and tools to grow your business. As always, to help you find the best deals, we have created the ultimate listed of best WordPress Black Friday and Cyber Monday deals for 2022. Some of these are exclusive just for WPBeginner readers.

View our Complete Black Friday and Cyber Monday List for 2022

We will be updating this page on a daily basis to add more deals.

View our Complete Black Friday and Cyber Monday List for 2022

The post 100+ Black Friday / Cyber Monday 2022 WordPress Deals – Big Savings first appeared on WPBeginner.


November 19, 2022

9 Best Knowledge Base Plugins for WordPress (Compared)

Are you looking for a knowledge base plugin for WordPress?

A knowledge base plugin lets you easily publish documentation, tutorials, and how-to articles. You can efficiently organize these resources while keeping them apart from your blog and landing pages.

In this article, we’ll share some of the best knowledge base plugins for WordPress that you can use.

Best Knowledge Base Plugins for WordPress

What to Look for in a Knowledge Base WordPress Plugin?

Whether you run an online store or sell services on your WordPress website, having a knowledge base section allows you to help your customers without opening a support ticket or live chat window.

This boosts customer satisfaction while reducing customer support requests. Customer happiness helps you bring more business and sell more products.

Normally, you can publish your support guides as individual pages in WordPress. You can also publish them as posts and organize them with categories and tags.

However, it is difficult to keep support pages separate from sales pages or blog posts.

A knowledge base plugin allows you to keep your how-to resources separate and organize them more efficiently.

Without further delay, let’s look at the best knowledge base plugins for WordPress.

1. Heroic KB Plugin

Heroic Knowledge Base

Heroic KB plugin is an easy-to-use WordPress knowledge base plugin that’s extremely powerful and fully featured.

It allows you to add a searchable knowledge base to your existing site, so your visitors can easily find answers to their questions. It comes with a lightning-fast AJAX search feature, which adds real-time answers.

You get all the features you’d expect from a powerful knowledge base plugin, such as content categorization, drag & drop content ordering, article attachments, display widgets, and more.

The best part about the plugin is its built-in analytics and user feedback feature that lets you collect insights to improve your existing documentation, so you can reduce support, save time, and grow sales.

We used this plugin to build our developer docs on the WPForms website. Although our team has since customized it much further, this is still the best solution in the market.

2. BetterDocs

BetterDocs

BetterDocs is a powerful WordPress knowledge base plugin that is both easy to use and comprehensive.

It comes with ready-to-use knowledge base templates for WordPress. It also includes support for page builders with widgets. You can also use shortcodes to create custom layouts and insert knowledge base articles anywhere.

It includes a powerful search, floating table of contents, and a knowledge base bot that automatically tries to find answers to reduce support requests. The plugin also includes user role-based control and insights to view what users want.

3. Echo Knowledge Base

Echo Knowledge Base

Echo Knowledge Base is one of the best knowledge base plugins for WordPress. It comes with an easy setup wizard that walks you through plugin settings. You also get multiple layouts to choose from with options to customize every aspect.

You can choose from Basic, Tabs, or Category focused layouts. Each layout has a fast search bar on the top, which helps users quickly find answers. You can further organize articles in categories and tags.

The plugin also comes with hundreds of icons that you can use. It also includes shortcodes and templates to create FAQ sections and display knowledge base articles across your website.

4. weDocs

weDocs

weDocs is another excellent WordPress knowledge base and documentation plugin. It is easy to use and allows you to sort your documentation pages into sections, hierarchical docs, and tags.

It has a simpler interface to manage all your docs from one screen. The plugin does not include additional templates but works well with all popular WordPress themes.

The knowledge base layout is simple but efficient with sidebar navigation and bread crumbs menu.

5. Encyclopedia / Glossary / Wiki

Encyclopedia Glossary Wiki

Encyclopedia / Glossary / Wiki plugin is a flexible WordPress knowledge base plugin that allows you to organize your documents in a glossary format. You can organize your docs and articles alphabetically or by category and tags.

It includes a simple template to list all glossary items. You can add a search widget, enable comments for individual articles, and add a filtered index to sort items by alphabet.

The plugin provides an excellent option to organize your support pages in a glossary or encyclopedia style. It supports WPML and can be used on multilingual websites.

6. HelpCrunch

HelpCrunch

HelpCrunch is a fantastic option to create a knowledge base section in WordPress. The plugin offers several other features, including live chat, chatbot, email automation, and more.

You can organize your knowledge base articles by categories and tags. The plugin lets you fully customize the look of your knowledge base by choosing colors, adding background, etc.

It automatically drafts knowledgebase pages, which you can edit and publish on your site. And you can also add a chat widget to offer real-time support to your customers.

7. BasePress

BasePress

BasePress is a useful WordPress knowledge base and documentation management plugin. It allows you to easily build support pages and documents section for your products or services.

It comes with three templates to choose from with an advanced instant search bar that helps users quickly find the answers. You can organize articles in sections, categories, and tags with an easy drag and drop interface to reorder articles.

You can add an image and description for each section which creates a very neat index page for users to browse. The plugin also provides easy customization options to control the appearance of your article pages.

8. KB Support

KB Support

KB Support is a WordPress support and knowledge base plugin that is easy to use and extend. The plugin comes with a ticket management system and knowledge base platform to offer a complete support system that runs on your WordPress website.

You can easily add articles to your knowledge base section and sort them into categories and tags. After that, there is a simple shortcode that you can add to a WordPress page to display your knowledge base articles.

Customers can then submit a ticket when they cannot find an answer. This ticket appears on your WordPress dashboard, and you can reply to the user directly. There are paid add-ons to extend the plugin’s functionality, like the ability to send emails, WooCommerce integration, canned replies, and more.

9. Very Simple Knowledge Base

Very Simple Knowledge Base

Very Simple Knowledge Base is a simple and minimalist knowledge base plugin for WordPress.

It allows you to use your existing posts for knowledge base articles and display them with a shortcode. It then displays the items sorted by categories, and you can choose multi-column layouts to show more categories and articles.

The plugin works with any custom post type, including products or events. It offers flexibility but does not include any of the features you may find in other knowledge base plugins on this list. The plugin also does not offer an option to easily keep your regular blog posts separate from knowledge base articles.

Bonus Solutions

Customers may not always find the answer to their questions in your knowledge base articles. For instance, they may have some pre-sale questions or a bug report, or they may simply need a more personal response.

The following tools allow you to take support beyond knowledge base articles and boost customer satisfaction.

10. WPForms

WPForms

WPForms is the best WordPress form builder plugin on the market. It allows you to easily create any kind of form in WordPress, including a support request form.

As a small business, you may be unable to justify the cost of a full-fledged customer support platform. WPForms allows you to add a customer support form to your website and answer customer queries via email.

It has a built-in entry management system that allows you to keep a record of all customer requests. You can even export this data and use it in CRM software to manage all possible leads.

11. LiveChat

Live Chat Inc Website

LiveChat is the best live chat support software for small businesses. It allows you to add a live chat to your WordPress website and help customers instantly reach out for help.

Adding LiveChat helps you convert more visitors into customers. You can display a live chat popup across your website with targeted messaging. Users browsing the knowledge base will always have the option to get more help without leaving your website.

12. ChatBot

ChatBot

ChatBot.com uses a smart algorithm to help you better serve your customers while growing sales. It’s the best chatbot software for small businesses, and we’re in the process of using it on our sites as well.

A lot of companies these days are choosing to use ChatBot as an alternative to LiveChat and sometimes as a pre-live chat solution because it’s more cost-effective.

We hope this article helped you find the best WordPress knowledge base plugin for your website. You may also want to see our comparison of the best business phone services for small businesses and our step-by-step guide on adding web push notifications in WordPress to increase your traffic.

If you liked this article, then please subscribe to our YouTube Channel for WordPress video tutorials. You can also find us on Twitter and Facebook.

The post 9 Best Knowledge Base Plugins for WordPress (Compared) first appeared on WPBeginner.


November 18, 2022 at 05:00PM