Tuesday, February 21, 2023

How to Open a WordPress Popup Form On Click of Link or Image

Do you want to create a popup that appears when visitors click on a link or an image on your site?

This is a proven way to grow your email list. It is more effective since it starts with an action taken by a user. Popular sites often use it to offer an optin incentive to get even more subscribers.

In this article, we’ll show how to open a WordPress popup on click of a link or an image, step by step.

How to Open a WordPress Popup Form on Click of Link or Image

What Is an ‘On Click’ Popup Form?

On-click popup forms are lightbox popups that open when a user clicks on a link, button, or image on your WordPress website.

Normally, popups appear on websites when a user arrives or when they are about to leave. On-click popup forms are triggered by user interaction.

We also use on-click popups on WPBeginner to grow our email list. For instance, a popup will appear when a user clicks the email icon in the sidebar next to all social icons.

On click popup preview

Why Are On-Click Popup Forms So Effective?

On-click popup form is effective because it uses the powerful Zeigarnik effect. This is a psychological principle that states users who start an action themselves are more likely to finish it.

When someone clicks a link or button to trigger your popup, they’ve already shown interest. When the form popup appears, they’ll be more likely to use it.

For example, you can use an on-click popup to offer a lead magnet. This could be a free downloadable resource like an ebook or PDF file that users can get in exchange for their email address.

However, there are other ways to use on-click popups on your website. For instance, you can ask users to claim a coupon code, learn more about a product, fill-out surveys, and more.

That being said, let’s take a look at how to easily make an on-click lightbox popup for your website.

Creating an On-Click Popup in WordPress

The easiest way to create an on-click popup is by using OptinMonster. It is the popup plugin for WordPress and lead generation software.

First, you’ll need to sign up for an OptinMonster account. You’ll need the Pro account (or higher) because it includes the MonsterLinks™ feature that lets you create on-click popups.

Simply visit the OptinMonster website and click the ‘Get OptinMonster Now’ button to get started.

OptinMonster

Next, you need to install and activate the OptinMonster plugin on your WordPress website. For help, see our step-by-step guide on how to install a WordPress plugin.

This lets you connect your OptinMonster account to your WordPress site.

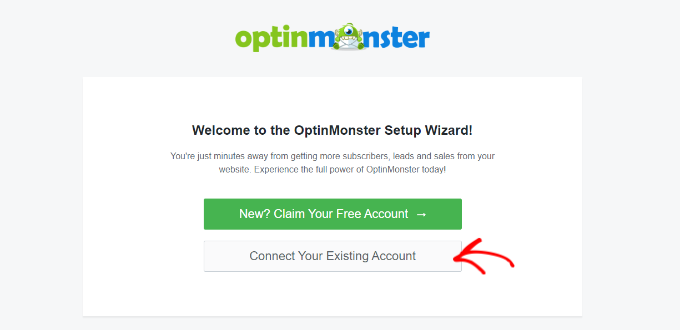
Once you’ve activated the plugin, you’ll need to connect your account. You should be taken to the Welcome page automatically in your WordPress dashboard.

Go ahead and click the ‘Connect Your Existing Account’ button.

Connect your existing account

After that, a new window will open.

You can click the ‘Connect to WordPress’ button to add your site to OptinMonster.

Connect OptinMonster to WordPress

Once you’ve connected your OptinMonster account to your WordPress site, you can create your on-click popup.

Simply go to OptinMonster » Campaigns from your WordPress dashboard and click the ‘Create Your First Campaign’ button.

Create your first campaign

You’ll be taken straight to the OptinMonster website.

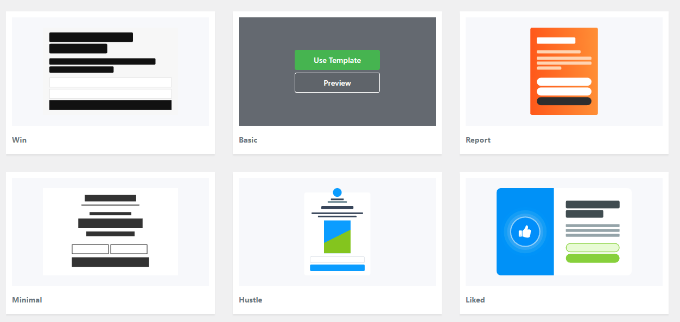
The Campaign Type should already be set to Popup. If not, just click on Popup to select it. Next, you’ll need to choose a campaign template.

Choose a campaign type and template

You’ll be able to modify the template exactly how this looks later. We’re going to use the ‘Basic’ template for this tutorial.

Simply run your cursor over the template and click the ‘Use Template’ button.

Select the basic template

Now, you’ll be prompted to enter a name for your campaign. This is just for you. The users will not see it.

Simply enter a name and click the ‘Start Building’ to create your popup.

Enter a name for your campaign

OptinMonster will automatically load up the template in the drag-and-drop campaign builder.

You can edit the default text and add or remove elements from your template. Simply drag blocks from the menu on your left and drop them on the template.

Add blocks to onclick campaign

You can also remove any element in the form by clicking on it and using the menu options to the left. For instance, we will remove the ‘Name’ field from the form.

First, you’ll need to click on the ‘Optin’ tab at the bottom of the screen. After that, click on the field to select it, and you’ll see the available options in the left column, including the option to remove it.

Delete name field

Once you have designed the popup, the next step is to design the Success view, which people see after filling out the form.

Simply switch to the ‘Success’ view at the top of the screen.

Edit the success view for onclick popup

You can edit the success view just like you edited the optin view. For instance, you may want to change the text or include a link to download a lead magnet.

Connecting Your Popup to Your Email List

Once you’re happy with your popup, click on the Integrations tab at the top of the screen. You’ll need to link OptinMonster to your email marketing service so that you can add people to your email list.

From here, click the ‘+ Add New Integration’ button on the left-hand side of the screen.

Add an email marketing tool

Next, you can select your email provider from the dropdown list.

From here, simply follow the instructions to connect it to OptinMonster.

Select your email provider

Setting Your Popup to Appear On Click

Now, you need to configure your popup to appear when the user clicks a link.

Go ahead and click on the Display Rules tab at the top of the screen.

Select display rules

The default display rule set by OptinMonster is ‘time on page.’ This means that the default pop-up will appear after the user has been looking at that page for a certain amount of time.

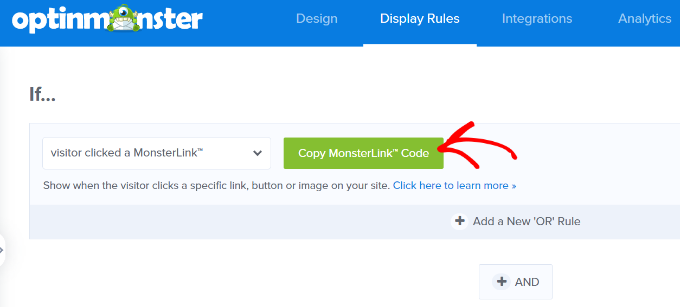
However, you can click the dropdown and select the ‘MonsterLink™’ (On Click)’ option instead.

Select MonsterLink display rule

After that, you should see your MonsterLink™ in the display rules.

You can click the button to copy your MonsterLink™ Code. You’ll need this in a moment.

Copy the MonsterLink

Making Your On-Click Popup Live

Next, you can go to the ‘Published’ tab at the top of the page and change your campaign’s status from ‘Draft’ to ‘Publish.’

Publish your on click campaign

Once you’ve done that, click the ‘Save’ button at the top of the screen and close the campaign builder.

Next, you’ll see the ‘WordPress Output Settings’ for your campaign. You can click the ‘Status’ dropdown menu and change it from ‘Pending’ to ‘Published.’ When that’s done, click the ‘Save Changes’ button.

Change status from pending to published

Adding Your MonsterLink to Your WordPress Website

Now, you need to add the special MonsterLink™ to your site. If you didn’t copy this earlier, you can get it by going back to the ‘Display Rules’ setting for your campaign.

First, you’ll need to create a new post or page, or edit the one where you want to add your link.

The MonsterLink™ is HTML code, so you need to paste it into a custom HTML block.

When you’re in the WordPress content editor, click the (+) button to add a Custom HTML block.

Add a Custom HTML Block to Your Page

Now, copy your MonsterLink™ into that block. It should look something like this:

<a href="https://app.monstercampaigns.com/c/mcqdabfqzia6zdiosiz0/" target="_blank" rel="noopener noreferrer">Subscribe Now!</a>

You can change the words ‘Subscribe Now!’ to whatever text you want to use for your link.

Enter the MonsterLink Code

Once you’ve placed the link, you can preview your page or post to ensure it’s working.

Here’s our link in action. Note we’ve applied some styling to the text to create a box with larger text to help promote the lead magnet:

On click popup preview

Tip: You’re not limited to just text links using MonsterLinks™. You can also use MonsterLink with call-to-action buttons, images, banners, or navigation menus on your website.

We hope this tutorial helped you learn how to trigger a WordPress popup form on click. You may also want to see our tutorial on how to speed up your WordPress site and our ultimate WordPress SEO guide.

If you liked this article, then please subscribe to our YouTube Channel for WordPress video tutorials. You can also find us on Twitter and Facebook.

The post How to Open a WordPress Popup Form On Click of Link or Image first appeared on WPBeginner.


February 22, 2023 at 01:12AM

Research: The Truth Behind Make Money Online Videos on YouTube and TikTok (We Analyzed 344 Videos)

Have you ever wondered whether those YouTube and TikTok influencers teaching how to make money online are telling the truth?

We analyzed 354 videos from YouTube and TikTok to see whether the business model or earning potential they share is realistic for an average person.

Here’s what we found out.

While a lot of these make money online influencer videos paint a rosier picture than the truth of online entrepreneurship, there are still a lot of options to earn consistent income through the internet.

Below are our findings on online business statistics along with the original research data that we collected from YouTube and TikTok.

How online entrepreneurs make money according to YouTube and TikTok

The Trend of Online Work: An Overview

The COVID-19 pandemic showed millions of people that they could work from anywhere and at any time. As offices closed and all but the most essential services shut down, many jobs moved onto the internet.

This trend towards flexibility has persisted: even as most of the world has returned to normal, people still like working remotely. In fact, 45% of employees said they were likely to look for a new job if their employer required them to report to work in person.

Online work can also open up new opportunities for people who lost their jobs during the financial crises spurred on by the pandemic, said Haiyi Zhu, a professor at Carnegie Mellon University’s Human-Computer Interaction Institute who studies gig work. These workers might “turn to online, virtual work as either a transitional job or to find additional income sources” as they look for new full-time employment, she explained.

At the same time, social media platforms like YouTube and TikTok have made it easier than ever for people to learn about online work opportunities. Searches for online gig work or investment opportunities can lead a user to hours upon hours of content, explaining potential business ideas and suggesting how much an aspiring worker could earn.

At WPBeginner, we’ve summarized the money-making advice from hundreds of top videos, exploring the trends in business options and earning potential.

Of course, some videos might paint a rosier picture than the truth of online entrepreneurship. But, there are still a lot of options for earning consistent income through the internet.

For this report, our team used 177 videos from YouTube and 177 videos from TikTok, available in this repository.

On YouTube, we selected videos that came up at the top of a search for “how to make money online.” While on TikTok, we used hashtags like #makemoneyonline and #entrepreneurship to select videos with this theme. We analyzed the videos based on the business options, potential earnings, and required skillsets they advertised.

The potential earnings we discuss in this article were taken directly from the YouTube and TikTok creators whose videos we analyzed.

These numbers do not necessarily reflect accurate trends. Rather, we are presenting them as a reflection of how online creators advertise work opportunities.

Wide Range of Earning Potential

After analyzing all of the videos from YouTube and TikTok, we found that the median pay these influencers advertised was about $50 per hour.

Distribution of Hourly Earnings by Platform - YouTube and TikTok Case Study

At the lowest end of the range, creators advertised microwork tasks, or series of small tasks (such as answering survey questions) that can be completed asynchronously over the internet. Microwork can lead to earnings as low as $1 per hour, according to the videos.

At the highest end of the range, video creators suggested that entrepreneurs can earn over $1,000 per hour for more skilled work like running a popular blog. In our expert opinion, this number is exaggerated and very rarely do individual bloggers get to such income level.

Overall, though, the earning potential mentioned in the videos skewed lower: 90% of the videos on both platforms advertised that workers would get under $300 per hour.

This statistic again should be taken with a grain of salt because it doesn’t factor in true-working hours because it’s unlikely to have a 40 hour work-week at that hourly rate.

Income instability is one of the most common challenges that online gig workers face, Zhu said. Her team has a paper currently undergoing peer review that names key issues across online gig workers and those that use online platforms to coordinate physical work, like driving for Uber or DoorDash. Other major challenges include a lack of employment benefits, health and safety (both physical and online), and a lack of power in the workplace, she said.

Some YouTube and TikTok creators advertise more lucrative career paths by talking about their own experiences getting rich, though their videos may be misleading.

For example, Adam Enfroy, a popular creator on both platforms, claims to make $300,000 a month through blogs and affiliate marketing, but this income is unrealistic for new marketers just starting out. According to statistics, the average earnings for professional, freelance marketers is $50 per hour or $100,000 per year only if you’re absolutely at the top of your game.

Making Money with Online Publishing

Business Types Mentioned by Platform on YouTube and TikTok
Online publishing Statistics, according to YouTube

Online publishing was the most popular type of online business advertised on YouTube, clocking in at 45% of the videos we analyzed.

Business Types Mentioned on YouTube Videos

This is a broad category of online work which might include setting up a blog that earns revenue through affiliate links, writing a newsletter, making videos on YouTube, or creating content as an influencer.

YouTube creators pushing online publishing advertised that workers could earn a median of:

  • $925 per hour writing a blog
  • $312 per hour writing a newsletter or similar periodic articles
  • $230 per hour for YouTube sponsorships
  • $106 per hour with affiliate marketing

Note: these rates shared in videos may not reflect actual earnings.

Affiliate marketing is one of the simpler options for a new writer with less experience. In this model, companies pay you to send customers to their products. Google a simple question like “best laptop for college,” and you’ll find hundreds of lists on sites ranging from independent blogs to the New York Times, taking advantage of the search engine to drive affiliate revenue.

Online publishing Statistics, according to TikTok

Creators on TikTok similarly advertised blogs and marketing as a high-earning strategy. The videos we analyzed claimed that writing a blog could net a median of $1,500 per year. Digging into this further, we analyzed the skills that TikTok creators claimed would be most lucrative for different online businesses.

Business Types Mentioned on TikTok Videos

According to the TikTok creators, marketing could lead to the highest (advertised) earnings at a median of $62.50 per hour, followed by investing at $56 per hour and video editing at $50 per hour.

As on YouTube, TikTok creators tend to provide fairly limited evidence for their earning estimates. Video creators also tend to advertise

business ideas that are easier to sell to a broad audience as “easy money-making strategies”. In reality, getting extremely rich off of a blog is harder than video creators make it sound.

Instead, experts suggested that selling writing or another type of service as a freelancer might be more successful for online workers with prior talents under their belts.

Making Money with a Service Business

Service businesses can include a range of skillsets.

On TikTok, we found that services businesses were the most popular type of online work advertised by creators.

Hourly Earnings by Online Business Type

These businesses include a range of skills and activities such as: starting your own agency to provide a service like tech support to other companies, selling goods through an online store, making content for clients on platforms like Upwork and Fiverr, and performing microwork tasks like filling out surveys or tagging content.

Microwork can be particularly appealing for people who are not currently employed full-time and looking to make extra cash, said Melissa Keith, a psychology professor at Bowling Green State University whose research focuses on the platform Mechanical Turk. Mechanical Turk, run by Amazon, allows remote workers to make money by doing small tasks that can’t be completed by computers.

Microwork rates are low, but improving.

“It’s pretty unrealistic to think you’re going to make a full-time salary on most of these platforms,” Keith said. But the all-remote, fully flexible nature of the platform allows workers to earn money on their own terms — potentially even while working at another job. While TikTok videos advertise that workers might be able to earn over $50 per hour while on platforms like Mechanical Turk, Keith found this number is unrealistic compared to her research. “A good rate is closer to $10 an hour,” she said.

In recent years, workers on microwork platforms have pushed the companies posting jobs to improve their hourly rates, Keith noted. Tasks that might once have paid under $1 an hour will now earn a worker the U.S. minimum wage, if not more. These rates can be particularly attractive to workers in other countries where the cost of living is lower.

Related: 11 Best WordPress Developer Jobs Sites (+ Example Job Templates)

Balancing Expectations and Reality

Online videos paint a rosy picture of entrepreneurship opportunities. This is especially true for financial and investment advice, as creators advertise buying into cryptocurrency and other risky assets. As CNET contributor Ana Staples points out, anyone can claim to be an expert on TikTok. Short, punchy videos can make getting rich online look much easier than it really is.

It’s also important to consider the gap between who makes videos about earning money online and who actually comprises the online gig workforce.

Our analysis found that the creators of YouTube and TikTok videos skew towards men in their 20s; the user bases of platforms like Mechanical Turk tend to be pretty evenly split on gender, Keith said.

YouTube TikTok Case Study Presenter Demographic

Younger men might be “more willing to share their success stories,” said Zhu, the Carnegie Mellon researcher. Meanwhile, low-income immigrants who are doing more low-paid gig work might “not necessarily want to brag about their work, and also don’t have the time to create videos,” she added.

As online work remains popular in the wake of the pandemic, Zhu and Keith both anticipate that workers will continue to push for higher wages, flexibility on the job, and benefits that better align with those of typical full-time employment. “If people move towards these more flexible work arrangements, we’re going to have to have systems in place to protect workers,” Keith said.

List of Sources

Federal Reserve Board, Haiyi Zhu, Upwork, CNET, Melissa Keith, YouTube and TikTok

That’s a wrap! We hope this original research gave you an idea of what to expect if you’re looking to start an online business or become a freelancer.

If you’re looking to start earning online, you may found the following resources helpful:

If you liked this article, then please subscribe to our YouTube Channel for WordPress video tutorials. You can also find us on Twitter and Facebook.

The post Research: The Truth Behind Make Money Online Videos on YouTube and TikTok (We Analyzed 344 Videos) first appeared on WPBeginner.


February 21, 2023 at 03:50PM

Monday, February 20, 2023

How to Enable Customer Tracking in WooCommerce with Google Analytics

Do you want to enable customer tracking in WooCommerce?

Customer tracking allows you to offer a personalized shopping experience based on customer behavior in your eCommerce store.

In this article, we will show you how to easily enable customer tracking in WooCommerce with Google Analytics.

How to Enable Customer tracking in WooCommerce with Google Analytics

Why Enable Customer Tracking in WooCommerce with Google Analytics?

Google Analytics allows you to see where your visitors are coming from and what they do on your website. In other words, it helps you track your traffic sources as well as user engagement on your website.

For eCommerce platforms, Google Analytics offers an enhanced eCommerce tracking feature. This allows you to better understand users’ shopping and checkout behavior. Plus, you can see which products perform the best and track your WooCommerce store’s sales performance.

By default, a WooCommerce store allows your customers to create an account or checkout as guest users. Creating an account helps the user save their shipping and billing information for faster checkout next time. It also helps you offer customers a personalized shopping experience based on their browsing and shopping history.

Wouldn’t it be great if you could track logged-in users with their user IDs in Google Analytics and also see the path customers took before making a purchase?

This will give you access to a treasure trove of information and insights on customer behavior. You can use it to offer a better on-site experience and boost your sales.

Let’s take a look at how to easily enable customer tracking in WooCommerce. Here are quick links that you can use to jump ahead to any section:

Set up Ecommerce Tracking in WordPress with Google Analytics

The best way to set up WooCommerce customer tracking in Google Analytics is using Monsterinsights. It is the best Analytics solution for WordPress and helps you set up tracking without editing code.

The plugin offers an eCommerce addon, which automatically detects WooCommerces and starts tracking customer behavior in Google Analytics. It also comes with a Customer Journey addon that allows you to see users’ behavior before they make a purchase.

First, you will need to install and activate the MonsterInsights plugin. For more details, see our step-by-step guide on how to install a WordPress plugin.

You will need to be on the ‘Pro’ plan to access the eCommerce and User Journey addon, which we will use for this tutorial. However, there is also a MonsterInsights Lite version you can use for free.

Upon activation, you will see the welcome screen and the setup wizard. Simply click the ‘Launch the Wizard’ button and follow the on-screen instructions.

Launch setup wizard

For detailed instructions, see our article on how to install Google Analytics in WordPress.

MonsterInsights also helps you set up Google Analytics 4 (GA4) property through its Dual Tracking feature. GA4 is the latest Analytics version, and it will soon replace Universal Analytics.

MonsterInsights Dual Tracking GA v4

If you haven’t created a Google Analytics 4 property, then now is the best time. That’s because, after July 1, 2023, Universal Analytics will sunset and won’t track your website data. Setting up GA4 after the sunset date will mean you’ll have to start from scratch and won’t have any historical data for comparison.

For more details, please see our guide on how to switch to Google Analytics 4 in WordPress.

Install the MonsterInsights eCommerce Addon

Once you’ve configured Google Analytics on your website, the next step is to install the eCommerce addon.

You need to visit the Insights » Addons page from your WordPress dashboard and navigate to the ‘eCommerce’ addon. Simply click the ‘Install’ button, and the addon will automatically activate.

Install the eCommerce addon

Enable Enhanced Ecommerce Tracking in Google Analytics

The next step is to enable eCommerce tracking in Google Analytics. E-commerce tracking is not enabled by default in your Google Analytics account, and you will have to manually enable it.

First, you’ll need to head over to your Google Analytics account dashboard and click the Admin option.

Click the admin settings button

Next, you need to click on the ‘Ecommerce Settings’ option.

It is located under the View column.

Ecommerce settings

On the settings page, click the slider under Enable Ecommerce and Enable Enhanced Ecommerce Reporting to turn it on.

Don’t forget to click the ‘Save’ button when you’re done.

Enable ecommerce and enhanced ecommerce reporting

Now, your Google Analytics account will start showing enhanced eCommerce reports for your WooCommerce store.

For more details, please see our guide on how to set up WooCommerce conversion tracking.

Enabling User Journey Addon in MonsterInsights

Now that you’ve set up WooCommerce tracking in Google Analytics, the next step is to enable the MonsterInsights Customer Journey addon.

The addon will allow you to see the steps a customer takes before making a purchase in WooCommerce. Plus, it also shows the time it took at each step, the pages a user visited, and more.

First, you’ll need to go to Insights » Addons from your WordPress admin panel. Next, navigate to the User Journey addon and click the ‘Install’ button.

Install the user journey addon

The addon will automatically activate and start tracking your WooCommerce customer’s journey.

Next, you can go to WooCommerce » Orders from your WordPress dashboard to view the path your customers took when purchasing a product.

WooCommerce order select

After that, click on the order for which you’d like to see the user journey.

On the next screen, you’ll see the path a customer took before buying the product. You get to view the pages they visited, where they clicked, and how much time they spent on a page.

User journey in MonsterInsights

This is really useful information to better understand your customers. You can see which product categories are performing the best and where customers are exiting your store during the purchase process. Using the data, you can then fix these issues and optimize your site for more conversions.

Enabling User ID Tracking in Google Analytics

While MonsterInsights makes it very easy to track customers on your WooCommerce store, it also tracks WordPress ID tracking in Google Analytics.

WordPress ID is a unique ID to identify every user on your website. The user ID is called the ‘Client ID’ in Universal Analytics and the ‘App Instance ID’ in Google Analytics.

Do remember that enhanced eCommerce tracking will enable eCommerce reporting features for your WooCommerce store. However, it does not enable user tracking by default.

Let’s take a look at how you can enable user ID tracking in Universal Analytics and Google Analytics 4.

Enabling Customer Tracking in Universal Analytics

To enable individual customer tracking, you need to visit your Google Analytics account dashboard and open the Admin page.

Click the admin settings button

Now, click on the ‘Tracking info’ link under the Property column to expand the submenu.

After that, you can click the User-ID link that appears below.

Go to user ID settings

On the next page, you’ll have to review and agree to the User-ID policy.

Simply click the ‘I agree to the User-ID Policy’ toggle to turn it on.

Enable the user ID feature

From here, click on the ‘Next step’ button to continue.

Google Analytics will now ask how you would like to configure the user-ID tracking.

Copy the user id code

Since you’ll be using MonsterInsights, there’s no need to set up the user-ID tracking code. The plugin will take care of this for you.

Simply scroll down and click the ‘Next step’ button to continue.

Head to the next step

Next, you will see information about creating a user ID view in Google Analytics.

Go ahead and click the ‘Create’ button.

Create user-id view

After that, you will be asked to enter a ‘Reporting View Name’, which will be used to display User ID reports.

We recommend including UserID in the name, so it is easy to remember which view has UserID tracking enabled.

Enter a reporting view name

There is also an option to select the Reporting Time Zone.

Next, you just need to scroll down to the bottom and click on the ‘Create view’ button to save it.

Select timezone and create view

Enabling Customer Tracking in Google Analytics 4

To start, you’ll need to go to the Admin settings from your GA4 dashboard and click the ‘Reporting Identity’ option.

Open reporting identity settings

On the next screen, you will need to select a way to identify users on your online store.

GA4 uses multiple ways to identify customers. These include user ID, Google signals, device ID, and modeled data. For the sake of this tutorial, we’ll select the ‘Observed’ option and click the ‘Save’ button.

Select observed option in reporting identity

Viewing Customer Tracking Reports in Google Analytics

Now that everything is set up, Google Analytics will now track all your website customers. It will also be able to track logged-in users with their unique WordPress user ID.

View User ID Data in Universal Analytics

To view all your individual customer activity, you can go to your Universal Analytics account and click on the Audience » User Explorer menu.

View user explorer client ID in UA

You will see individual customer reports with a unique ID assigned to all non-logged-in users.

To view customer tracking reports for logged-in users in WooCommerce, you need to click on the Google Analytics logo on the top left corner of the screen.

This will show all your Google Analytics profiles. You will see your website profile and under ‘All website data’ you will see the UserID reporting view you created earlier.

Select UA User ID view

Go ahead and click on the UserID reporting view to load it.

Once it’s loaded, you need to click on the Audience » User Explorer menu. This way, you will see a logged-in customer tracking report where each user is represented by their WordPress user ID on your website.

UA user explorer user ID report

You can click on the user ID to view a customer’s individual tracking data.

For instance, the device category they use, acquisition date, the channel they used to arrive on the online store, and more.

UA user explorer user id details

View User ID Data in Google Analytics 4

In Google Analytics 4, you’ll need to head to the ‘Explore’ tab from the menu on your left.

Under Explorations, you’ll see different report templates. Simply click the existing ‘User explorer’ report.

Select user explorer report

Next, you’ll see the User explorer report in Google Analytics 4.

One thing you can notice is the Client ID will be replaced with the App instance ID.

See user explorer report in ga4

You can click on any of the app instance IDs to view more details.

For example, the report shows the total events that were triggered, the location of the user, the time stamp for each event, and more.

View details of app instance ID

Matching Customer Tracking with Their WordPress Accounts

Now that you’ve identified users in Google Analytics, you can match them with WordPress accounts. This will help you know who this customer is, and how you can create personalized offers, emails, or shopping experiences for them.

First, you need to note down the customer ID you see in your Google Analytics User-ID reporting view.

After that, go to your WordPress website’s admin area and click on the ‘Users’ menu. It will show you a list of all users on your WordPress site.

Next, you can click the ‘Edit’ link below any username in the list.

Edit any user profile

WordPress will now open the user profile for you.

If you look in your browser’s address bar you will ‘user_id’ parameter in the URL.

User ID in URL

Next, you need to replace the value next to user_id with the one you copied from your Google Analytics report and press enter key on your keyboard.

WordPress will now load the user profile associated with that particular User ID. You now have the customer’s name, username, email address, and social media information. You can also track their orders, product views, cart activity, and more.

We hope this article helped you learn how to enable customer tracking in WooCommerce with Google Analytics. You may also want to see our expert pick of the best free WooCommerce plugins for your online store and how to get a free email domain.

If you liked this article, then please subscribe to our YouTube Channel for WordPress video tutorials. You can also find us on Twitter and Facebook.

The post How to Enable Customer Tracking in WooCommerce with Google Analytics first appeared on WPBeginner.


February 21, 2023 at 01:02AM