Friday, February 24, 2023

9 Best Age Verification Plugins for WordPress (Compared)

Are you looking for a plugin to set up age verification on your WordPress site?

Setting up age restrictions allows you to limit users from seeing content due to legal requirements or the nature of the content. You can set up age verification with the right WordPress plugin without editing any code.

In this article, our expert team have researched and picked the best age verification plugins for WordPress.

Best age verification plugins for WordPress

Why Do You Need an Age Verification Plugin?

If you’re selling products or promoting goods that are age sensitive, then it is important to verify the user’s age before allowing them access.

For example, many countries have laws and regulations that require websites to verify users’ age. This is common if you’re in the business of selling alcohol, tobacco, cannabis, vape, tattoos, and other similar goods.

Similarly, different videos and games are not appropriate for minors and require an age gate. You can also add age verification on your membership website if it contains sensitive content.

A simple way of adding age verification to a WordPress site is by using a plugin. You don’t have to edit any code or hire a developer.

Plus by using a plugin, you can show a confirmation form or a popup where users can enter their age before accessing the content or buying a product.

That being said, let’s look at the best age-verification WordPress plugins for different business needs.

1. WPForms

The WPForms form builder plugin for WordPress

WPForms is the best WordPress contact form plugin that is beginner friendly and lets you create all types of forms. It offers a drag-and-drop form builder and comes with over 500+ pre-built form templates.

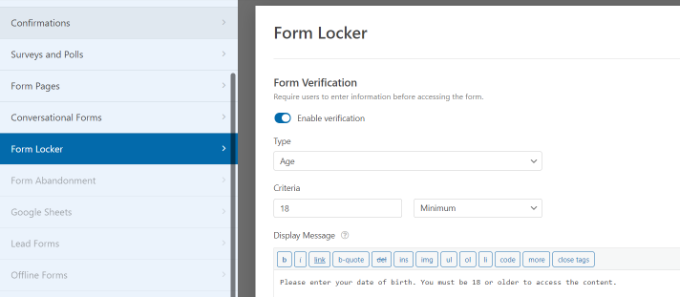
WPForms offers a Form Locker addon that allows you to set up age restrictions on your online forms. You can pick age as the verification type for your form and define the age limit. Users will then have to enter their date of birth before they can submit a form on your site.

Enable age verification in WPForms

Using WPForms, you can create forms for all kinds of situations. For instance, the plugin lets you create a login form or a registration form and only allows logged-in users to view the content.

If you’re looking for feedback about your company from a specific age group, then you can create a survey form and add an age restriction. Similarly, you can add an order form on your website with age verification to sell concert tickets or alcohol.

Besides that, WPForms also offers other features and addons. You can integrate payment services like Stripe and PayPal to accept online payments, allow file uploads, connect email marketing services, and more.

Pricing: You will need the WPForms Pro version to access the Form Locker addon and set up age verification in WordPress. This will cost you $199.50 per year. There is also a WPForms Lite version you can use for free.

2. OptinMonster

OptinMonster

OptinMonster is the best lead generation and popup plugin for WordPress. It helps you get more leads, grow your email list, and boost conversions.

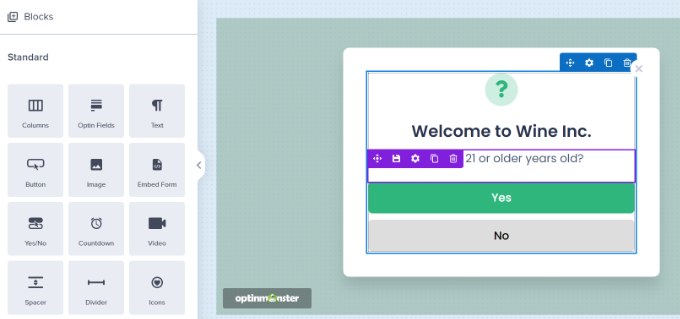
You can create stunning campaigns for your site, including age verification popups. The plugin offers a drag-and-drop campaign builder, pre-built templates, and lots of customization options. You can add different elements like images, buttons, videos, and more to your popup.

For instance, you can create a simple age verification lightbox popup with Yes/No options or show a popup where visitors need to enter their date of birth.

Create age verification popup

OptinMonsters also offers fullscreen campaigns, which are great for restricting access to your website or a page until users confirm their age.

The plugin provides powerful display rules that let you choose when and where to show your campaigns. For instance, you can show your age verification campaigns on selected pages or hide the popup for users that have already verified their age on your website.

Besides that, OptinMonster easily integrates with different email marketing services and works with eCommerce platforms like WooCommerce and Shopify.

Pricing: OptinMonster prices start from $9 per month (billed annually). There is also a free version of OptinMonster that you can use to get started.

3. Age Gate

Age gate

Age Gate is a free age verification WordPress plugin that is very easy to use. Using the plugin, you can easily restrict content based on the user’s age.

It offers 3 input options to add age verification in WordPress. You can show a dropdown menu and let visitors select an age, allow users to enter their date of birth, or simply offer a Yes/No option to verify age.

Other than that, you can choose whether to restrict the entire website or select pages based on age. Plus, there is also an option to set different age restrictions for individual content using the plugin.

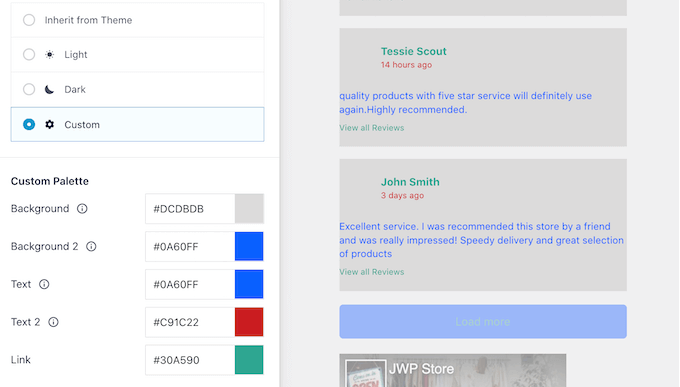
With Age Gate, you get multiple customization options to edit the appearance of your age restriction message. For instance, you can add a logo, change the background color, add blur, add a background image, and more.

Pricing: Age Gate is a free WordPress plugin.

4. MemberPress

MemberPress

MemberPress is the best membership plugin for WordPress. It lets you create a membership site and sell subscription-based products and services.

With MemberPress, you can add age restrictions to your WordPress site. Let’s say you don’t want members under 18 signing up for a particular membership or course. By setting up an age limit, you can prevent access to content.

Besides that, MemberPress offers other powerful features. It gives you full control over who can access content, release paid content over time, add payment gateways, and more. You can also create and sell online courses using MemberPress’s course builder.

If you want to learn more about setting up a subscription-based website, then please see our ultimate guide to creating a WordPress membership site.

Pricing: MemberPress is a premium plugin with prices starting from $179.50 per year.

5. WooCommerce Age Verification Popup

WooCommerce age verification popup

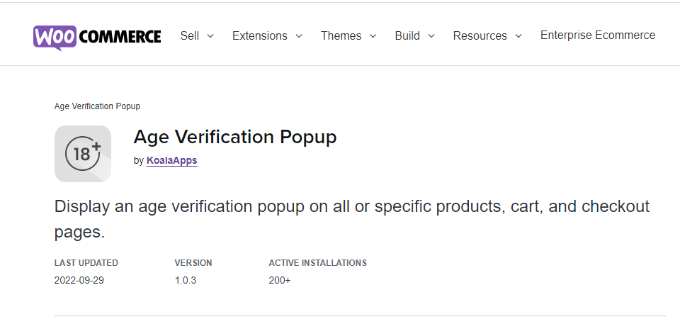
WooCommerce Age Verification Popup is the next plugin on our list. It is a paid extension for WooCommerce stores. If you have a WooCommerce store and you’re selling products like tobacco, vaping, medicines, fireworks, or items that require age verification, then this plugin is for you.

The plugin offers 4 verification methods where users can simply enter their age, select their date of birth, click a checkbox, or simply select from a Yes/No option.

Besides that, you can choose which pages the popup should appear on. For instance, you can enable it on your entire website or specific pages like cart, checkout, my account, and shopping page.

There are also different customization options you can use to edit your popup. These include adding a background image, selecting a color, adjusting the border height, and text size, and more.

However, if you want more options like prebuilt templates and the ability to add different elements to the popup, then you can use OptinMonster. It also works seamlessly with WooCommerce and offers more powerful display rules.

Pricing: WooCommerce Age Verification Popup is available for $29 per year.

6. Age Verification for WordPress

Age Verification

Age Verification for WordPress is a free WordPress plugin that you can use to add an age limit to your WordPress site. The plugin is beginner friendly and offers basic features.

It adds an age verification popup to your site and restricts access to content for visitors that don’t meet the age requirements. Once a user verifies their age, a cookie is saved for 30 days, so they don’t have to verify their age again.

The plugin offers limited options to edit your age verification box. For instance, you can only add a background image, logo, title text, message text, and edit the yes/no button text using the Age Verification plugin.

However, there are other plugins on our list, like WPForms and OptinMonster, that offer more customization options. Plus, you get to choose from pre-built templates and drag-and-drop builders.

Pricing: The Age Verification plugin is free to use.

7. AgeChecker.Net 

AgeChecker.net

AgeChecker.Net is a third-party age verification platform for eCommerce websites. It uses identity networks and a proprietary database to verify customer’s age at checkout.

The plugin is compatible with different eCommerce platforms, including WooCommerce, Shopify, Magento, BigCommerce, and more.

It adds age verification on checkout pages and instantly verifies 90% of the user’s age in the United States.

If the data isn’t available in the data sources, then it will ask for the customer’s ID verification. Once a customer submits the required documents, AgeChecker.Net’s 24/7 live team manually verifies it for you. If the customer is underage, they will disable their access to the product or service.

Other than that, you can customize the minimum age, digital signature requirements, and order blocking based on the customer’s location. Plus, the plugin is compliant with Food and Drug Administration (FDA) and other federal and state regulations in the US.

Pricing: AgeChecker.Net has a free WordPress plugin that connects with WooCommerce. However, you will need to signup for their premium plan, which will cost you $25 per month + 50¢ per accepted verification.

8. AgeVerify

AgeVerify

AgeVerify is another WordPress age verification plugin that is free to use. The plugin is super simple to use and lets you create an age-verification message for your website.

It comes with prebuilt templates that you can use for different types of businesses. Plus, you can edit the age verification text, change the text and color of the button, and more.

What makes this plugin different from others on our list is that it lets you edit the cookie duration (in hours) for the age verification message. This way, your visitors won’t have to verify their age each time they visit your website.

Pricing: AgeVerify is a free WordPress plugin.

9. Easy Age Verify

Easy Age verify

Easy Age Verify is an age verification plugin for WordPress that comes with pre-built verification settings and messages for alcohol, vape, and adult businesses.

The plugin is super easy to use and doesn’t require complex configuration. All you need to do is enable age verification, select your industry, and the plugin will take care of the rest. It also gives you the option to exclude age verification for logged-in users.

On the downside, you cannot customize the appearance of your age verification message in the free version. However, you can use WPForms as an alternative. It helps display a custom age verification form anywhere on your website.

Pricing: Easy Age Verify is free to use. There is also a premium version that unlocks customization features, and it costs $8.25 per month (billed annually).

Which is the Best Age Verification WordPress Plugin?

Our top picks for the best age verification plugin for WordPress are WPForms and OptinMonster.

WPForms offers a Form Locker addon that allows you to add an age gate on any type of form and display it anywhere on your site. It offers a drag-and-drop form builder, prebuilt templates, and lots of customization options.

On the other hand, if you’re looking to add an age verification popup on your WordPress site, then OptinMonster is the best option. It lets you create age verification popups, offers powerful targeting rules to show and track that campaign, and easily integrates with eCommerce platforms.

We hope this article helped you find the best age verification plugin for WordPress. You may also want to see our post on the best live chat software for small businesses and proven ways to make money online blogging with WordPress.

If you liked this article, then please subscribe to our YouTube Channel for WordPress video tutorials. You can also find us on Twitter and Facebook.

The post 9 Best Age Verification Plugins for WordPress (Compared) first appeared on WPBeginner.


February 24, 2023 at 02:48PM

Thursday, February 23, 2023

How to Display Your Facebook Page Reviews in WordPress

Do you want to display Facebook page reviews in WordPress?

Reviews and ratings can help you gain the trust of potential customers and encourage them to buy from your website. If you have a Facebook page, then you may already have lots of reviews that you can easily embed in your WordPress website.

In this article, we’ll show how to display your Facebook page reviews and ratings on your WordPress website.

How to display your Facebook page reviews in WordPress

Why Should You Display Facebook Page Reviews in WordPress?

Reviews can help you build social proof and gain the trust of your visitors, which means more sales for your business.

There are lots of ways to collect reviews, including using the best customer review plugins for WordPress or the best customer testimonial plugins.

However, Facebook has its own built-in review system. If you already have a Facebook page, then followers can review your products and services on that platform. This is great for helping you build an engaging and trusted Facebook page.

But it’s also a good idea to show these reviews on your WordPress website. That way, people can see all your positive reviews, even if they don’t visit your Facebook page.

The reviews can also highlight benefits and features that you missed in your website’s text and are great for improving your WordPress SEO.

After embedding the review feed on your site, new reviews will appear on your site automatically. This means visitors will always see the latest reviews without you having to add them to your site manually.

With that in mind, let’s see how to display your Facebook page reviews in WordPress.

How to Install a Facebook Page Reviews Plugin

The best way to display your Facebook reviews in WordPress is by using the Smash Balloon Custom Facebook Feed plugin with the Reviews extension.

This plugin and extension allow you to show all your Facebook page reviews in an attractive and fully-customizable layout. As you get more reviews, they’ll be added to your WordPress website automatically.

Facebook reviews, embedded using Smash Balloon

You can buy the Smash Balloon Custom Facebook Feed plugin and then purchase the Reviews extension separately. Or, you can get all of the Smash Balloon plugins and the Reviews extension by purchasing the Smash Balloon bundle.

Note: In this guide, we’ll be using the Pro version of Smash Balloon, as it allows you to embed Facebook reviews on your WordPress website. However, there’s also a free version that allows you to easily embed Facebook status posts in WordPress.

The first thing you need to do is install and activate the Smash Balloon Custom Facebook Feed plugin. For more details, see our guide on how to install a WordPress plugin.

Upon activation, you’ll need to go to Facebook Feed » Settings and enter your license key into the ‘License Key’ field.

Adding the license key to Smash Balloon

You’ll find this information under your account on the Smash Balloon website. After entering the key, click on the ‘Activate’ button.

Next, go to Facebook Feed » Extensions. Here, find the ‘Reviews’ extension.

The Smash Balloon reviews extension

If you haven’t purchased the bundle or extension, then click on its ‘Install’ button. You can then follow the onscreen instructions to purchase the Reviews extension.

You can then install the extension in exactly the same way you set up a WordPress plugin. For more details, see our guide on how to install a WordPress plugin.

Once you have the extension installed, go ahead and click on the ‘Activate’ button.

Activating the Smash Balloon Reviews extension

Connect the Facebook Reviews Plugin to Your Page

Now, it’s time to connect your Facebook page to WordPress so that you can show reviews from that page.

To get started, go to Facebook Feed » All Feeds and click on ‘Add New.’

Connecting Facebook page to WordPress

Smash Balloon lets you embed Facebook albums in WordPress as well as photos, events, videos, and more.

Since we want to embed our Facebook page reviews, click on ‘Reviews’ and then select the ‘Next’ button.

Creating a Reviews feed in WordPress

After that, you’ll need to select the Facebook page where you’ll get the reviews from.

To do that, click on ‘Add New.’

Choosing a Facebook page

On the next screen, select the radio button next to ‘Page.’

Once you’ve done that, go ahead and click on ‘Connect to Facebook.’

How to connect WordPress to your Facebook page

This opens a popup where you can log into your Facebook account and choose the pages where you’ll get the reviews from.

Once you’ve done that, click on ‘Next.’

Giving Smash Balloon access to your Facebook page

Facebook will then show all the information that Smash Balloon will have access to and the actions it can perform.

To restrict Smash Balloon’s access to your Facebook page, simply click any of the switches to turn it from ‘Yes’ to ‘No.’ Just be aware that this may affect the content that you can show on your WordPress blog or website.

With that in mind, it’s a good idea to leave all the switches enabled.

Changing the Facebook permissions in Smash Balloon

When you’re happy with how the Facebook permissions are configured, click on ‘Done.’

After a few moments, you should see a message confirming that you’ve connected your WordPress website and your Facebook page.

With that done, click on the ‘OK’ button.

Successfully connecting WordPress and Facebook

Smash Balloon will automatically take you back to the WordPress dashboard.

How to Display Your Facebook Page Reviews in WordPress

You’ll now see a popup with the Facebook page you connected to your WordPress website. Simply select the radio button next to your page and then click on the ‘Add’ button.

Displaying reviews from a Facebook page

If you closed the popup by accident, don’t worry. You can simply refresh the tab to reopen the Smash Balloon popup.

After that, Smash Balloon will take you back to the Facebook Feed » All Feeds page automatically. Just like before, click on the ‘Add New’ button, select ‘Radio,’ and then click on the ‘Next’ button.

Now, select your Facebook page, and click on ‘Next.’

Showing the reviews from a Facebook page

On this screen, you can choose the template you’ll use as the starting point for your review feed. You can customize all of these templates using the Smash Balloon editor.

We’re using the ‘Default’ template, but you can choose any template you want.

Choosing a template for your Facebook review feed

With that done, click on the ‘Next’ button.

Smash Balloon will now go ahead and create a feed of all your Facebook reviews.

How to Customize Your Embedded Facebook Reviews

This is a good start, but Smash Balloon has lots of settings that you can use to customize how the reviews appear on your WordPress website.

To fine-tune your review feed, go to Facebook Feed » All Feeds. Here, find the feed you just created and click on the ‘Edit’ button next to it.

How to customize your Facebook page review

This opens the Smash Balloon feed editor, which shows a preview of your review feed.

On the left-hand side, you’ll see all the different settings you can use to customize how the review feed looks on your site. Most of these settings are fairly straightforward, but we’ll quickly cover all the main settings.

How to create a custom Facebook review for your WordPress website

If you want to change the template you’re using, simply click on ‘Template.’

Then, select the ‘Change’ button and choose a new template.

Choosing a new template for your Facebook review feed

When you’re happy with the layout, click on the ‘Customize’ link.

This will take you back to the main Smash Balloon editor, where you can move to the next settings screen, which is ‘Feed Layout.’

On this screen, you can switch between masonry and list layouts and change the feed height.

Facebook reviews, arranged in a masonry layout

As you make changes, the preview on the right will update automatically, so you can try different settings to see what works best for your Facebook review feed.

By default, Smash Balloon will show a different number of reviews on desktop computers and mobile devices.

You can preview how the feed will look on desktop computers, tablets, and smartphones using the row of buttons in the upper-right corner.

Testing your Facebook review feed on smartphones and tablets

Just because your feed looks great on desktop devices, doesn’t mean it will look as good on smartphones and tablets.

So, after testing the mobile version of your WordPress website, you may want to change the number of posts that appear on smartphones and tablets, so the feed fits more comfortably on the screen.

To make this change, simply find the ‘Number of Posts’ section and type a different number into the ‘Mobile’ field.

Creating a responsive and mobile-friendly layout using Smash Balloon

If you do want to show less content on smartphones and tablets, then you can also change the number of columns.

To show fewer columns on mobile devices, simply type some new numbers into the ‘Columns’ settings. In the following image, we’re splitting the content into 3 columns on desktop, 2 columns on tablet, and 1 column on mobile devices.

Changing the number of columns in a mobile-friendly layout

By default, Smash Balloon uses the same color scheme as your WordPress theme, but it also lets you switch to a ‘Light’ or ‘Dark’ color scheme.

To take a look at these options, click on ‘Color Scheme’ on the main Smash Balloon menu. Here, you can test out the ‘Light’ and ‘Dark’ color schemes, change the text color in WordPress, select ‘Custom’ and use the controls to change the background color, and more.

Changing the color scheme of a Facebook review feed

Next, you can add a header above your review feed, which can include content like your page’s profile picture and name. This makes it clear that all the positive reviews are for your page or business.

To add a header section, select ‘Header’ from the left-hand menu.

Adding a header to your Facebook review feed

To start, you can add or hide the header by clicking on the ‘Enable’ slider.

If you do show a header, then you can use the controls to change the size of the header and its color, hide or show your page’s profile picture, show your page’s bio and likes, and more.

Customizing the review header using Smash Balloon

After that, you can change how the individual reviews look inside the feed by selecting ‘Post Style’ from the left-hand menu.

After that, click on ‘Post Style’ again.

Adding Facebook reviews to your WordPress website

Here, you can choose between a regular and a boxed layout.

If you click on ‘Boxed,’ then you can create a colored background for each post. You can also make the border radius larger to create curved corners or add a border shadow to help your reviews stand out.

Adding a boxed style to your WordPress reviews

If you choose a ‘Regular’ layout, then you can change the color and thickness of the line that separates the different reviews.

In the following image, we’ve increased the line thickness and used a different color.

Customize your Facebook page reviews in WordPress

You can also style the individual parts within each review by going back to the main Smash Balloon settings screen.

Once again, select ‘Post Style’ and then click on ‘Edit Individual Elements’ instead.

Editing individual elements in your business page reviews

You’ll now see all the different content that Smash Balloon shows from each review, such as the customer’s name, the date, and the number of likes, shares, and comments.

To remove a piece of content from your embedded reviews, click to uncheck its box.

Changing the content in your business reviews

To style a piece of content, simply click on its title. This will take you to a screen where you can change its text size and text color.

This allows you to make certain content stand out more than others. For example, you may want to make the review text bigger than the name of the person who left the review.

Changing the way your embedded Facebook reviews look in WordPress

By default, Smash Balloon will show a ‘View all Reviews’ link below each review.

You can change how this link looks or even replace it with your own message by clicking on ‘Post Action Links.’

Changing how the links look in your embedded social media reviews

Here, you can change the text size and color.

To replace the default text, simply type into the ‘View All Reviews text’ field.

Changing the text in your business review links

By default, Smash Balloon doesn’t add a Facebook ‘Like’ button to your review feed. This button makes it easier for visitors to follow you on Facebook, so they can learn more about your business.

For this reason, you may want to add this button by selecting the ‘Like Box’ settings.

Adding a Facebook Like button to your WordPress website

Here, simply click on ‘Enable’ so that the toggle turns blue.

You can now use the ‘Position’ dropdown to show the Like Box below or above the review feed.

Changing the position of your Facebook like button

You can also use these settings to make the button large or small, show your page’s cover photo, or add a custom call-to-action.

Reviews are already a powerful form of social proof, but you may also want to show the total number of people who follow you on Facebook. To do this, simply click on the ‘Show fans’ switch so that it turns blue.

Showing your social media followers on your WordPress website

The ‘Load More’ button gives visitors an easy way to scroll through more of your reviews. If you have a lot of reviews, then it’s a good idea to add this button to your feed if it isn’t already enabled.

To do this, select the ‘Load More Button’ option from the left-hand menu.

Adding a Load More button to your WordPress blog

Then, click on the ‘Enable’ toggle so that it turns blue.

You can also make the button stand out by changing its background color, hover state, and text color.

You can even add your own messaging to the button by typing into the ‘Text’ field. For example, you may want to use something like ‘Read More Reviews.’

Customizing the social media 'Load More' button

When you’re happy with how the Facebook review feed looks, don’t forget to click on ‘Save’ to store your changes.

How to Embed Your Facebook Review Feed in WordPress

You’re now ready to add the review feed to your site using a block, widget, or shortcode.

If you’ve created more than one feed using Smash Balloon, then you’ll need to know the review feed’s code if you’re planning to use a block or widget.

To get this information, go to Facebook Feed » All Feeds and then look at the feed="" part of the shortcode. This is the code you’ll need to add to a block or widget, so make a note of it.

In the following image, we’ll need to use feed="5".

The Smash Balloon shortcode settings

If you want to embed your reviews in a page or post, then you can use the ‘Custom Facebook Feed’ block.

Simply open the page or post where you want to show your reviews. Then, click on the ‘+’ icon to add a new block and start typing ‘Custom Facebook Feed.’

When the Facebook block appears, click to add it to your page or post.

The Custom Facebook Feed WordPress plugin

The block will show one of your Smash Balloon feeds by default. If this isn’t your Facebook review feed, then find the ‘Shortcode Settings’ section in the right-hand menu.

Here, go ahead and add the feed="" code, then click on ‘Apply Changes.’

Adding a review feed to your WordPress website

After that, publish or update the page to make the reviews live on your website.

Another option is to add the feed to any widget-ready area, such as the sidebar or similar section. This allows visitors to see your latest reviews no matter where they are on your WordPress website.

To do this, head over to Appearance » Widgets in the WordPress dashboard and then click on the blue ‘+’ button.

Adding a social media widget to your WordPress website

After that, type ‘Custom Facebook Feed’ into the search bar.

When the right widget appears, drag it to where you want to show the reviews on your WordPress website, such as the sidebar.

Adding the Custom Facebook Feed widget to your WordPress website

By default, the widget will show one of the feeds you created using Smash Balloon.

If this isn’t your Facebook review feed, then type the feed’s code into the ‘Shortcode Settings’ box. After that, click on ‘Apply Changes.’

The Smash Balloon social media widget

You can now click on the ‘Update’ button to make the social media widget live. For more information, please see our complete guide on how to add and use widgets in WordPress.

Another option is embedding the review feed on any page, post, or widget-ready area using a shortcode. Simply head over to Facebook Feed » All Feeds and copy all the code under the ‘Shortcode’ column.

You can now add this code to any shortcode block. For more information, see our complete guide on how to add a shortcode in WordPress.

Finally, if you have a block-enabled theme, then you can use the full-site editor to add the ‘Custom Facebook Feed’ block anywhere on your site.

In the WordPress dashboard, simply go to Appearance » Editor.

Adding a Facebook review feed using the WordPress Full Site Editor

By default, the full-site editor will show the theme’s home template. If you want to add the review feed to a different template, then click on the arrow next to ‘Home.’

You can then choose a template from the dropdown menu, such as the footer template.

Adding Facebook reviews to your site using the FSE Full Site Editor

Another option is to click on ‘Browse all templates.’

The full-site editor will now show a list of all the templates you can edit. Simply click on the template where you want to show your reviews.

Browsing the block templates in the Full Site Editor (FSE)

Once you’ve chosen your template, simply hover your mouse over the area where you want to add the review feed.

Then, click on the blue ‘+’ when it appears.

Adding the Custom Facebook Feed block to your WordPress theme

After that, start typing in ‘Custom Facebook Feed.’

When the right block appears, click to add it to the template.

Adding a Facebook review feed to the WordPress FSE

As always, Smash Balloon will show a feed by default. You can change this feed by adding a shortcode following the same process described above.

We hope this article helped you learn how to display your Facebook page reviews in WordPress. You may also want to see our expert pick of the best Facebook plugins for your blog, or how to create a custom Instagram photo feed.

If you liked this article, then please subscribe to our YouTube Channel for WordPress video tutorials. You can also find us on Twitter and Facebook.

The post How to Display Your Facebook Page Reviews in WordPress first appeared on WPBeginner.


February 24, 2023 at 01:08AM