Do you want to redact text on your WordPress website?
Redaction can be a way to share information with your visitors without hurting anyone’s privacy. You can even use it as an unusual paywall or a game where you challenge visitors to fill in the missing words.
In this article, we will show you how you can redact text in WordPress.
Why Redact Text in WordPress?
Redaction is where you edit text by blacking out sensitive parts of it. It is a way to share information and documents with the general public while keeping confidential and sensitive information private.
Redaction can help you share real world examples without breaking your privacy policy. For example, if you’re showing visitors how to write a great CV then you might want to include a few examples of real CVs you’ve received. You can use redaction to block out each applicant’s name, address, and other personal information.
When you redact text, that content still exists in your WordPress dashboard. This means you can easily remove the redaction at any point.
Redaction can also be an eye-catching way to preview the kind of content visitors can expect when they sign up to your WordPress membership site. Visitors can then buy a membership to remove the redaction and enjoy the full, uncensored version.
That being said, let’s see how you can easily redact text on your WordPress website.
How to Redact Text in WordPress
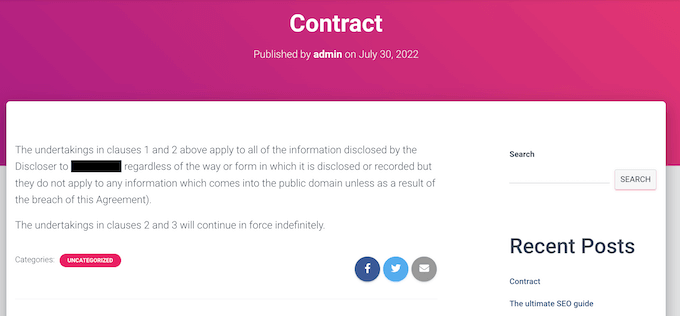
The easiest way to redact text in WordPress is by using Eyes Only. This plugin will replace any redacted text with a black block.
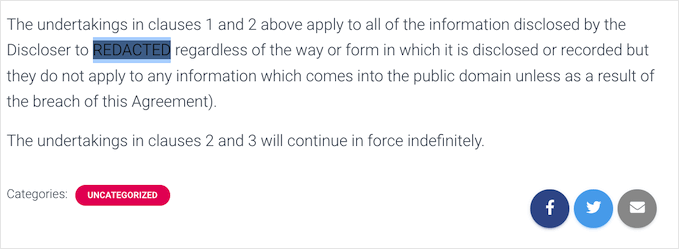
If the visitor highlights the block, then they’ll simply see the word REDACTED in white letters.
You can see an example of how this might look in the following image.
Another option is to automatically replace any word or phrase with an alternative chosen by you. For example, if you can’t use a client’s name on your small business website then you might replace the information with a more vague word such as ‘client.’
First, you’ll need to install and activate the plugin. If you need help, then please see our guide on how to install a WordPress plugin.
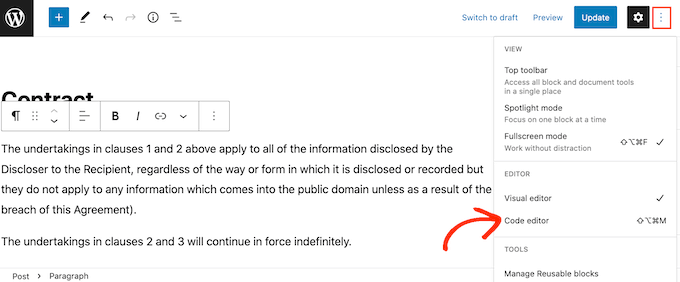
Then, click on the dotted icon in the top right corner and click on ‘Code editor.’
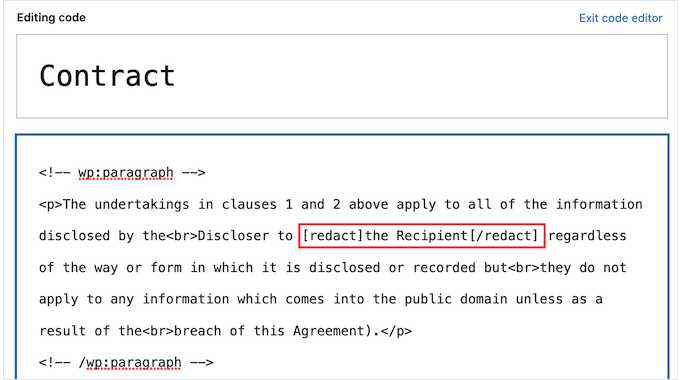
Next, find the piece of text that you want to redact. At the start of the text, type in the following tag:
[redact]
At the end of the redacted text, type in:
[/redact]
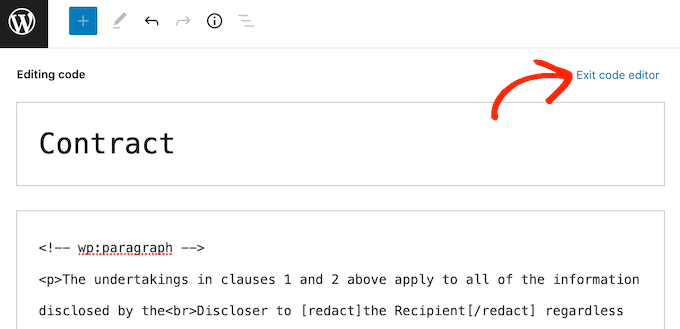
In the following image, we’re redacting ‘the Recipient.’
To redact more text just follow the same process described above.
If you want to switch back to the default plain text block editor at any point, then simply click on ‘Exit code editor.’
After adding tags to all the text that you want to redact, you can go ahead and publish or update the page.
Just be aware that the text won’t appear redacted while you’re logged into your WordPress account. To check that the text is redacted, you’ll either need to log out of your account or visit the page in an incognito tab in your web browser.
Another option is to automatically replace specific words with alternative words. This is useful if there’s a word that you never want to show on your site, such as the name of a confidential supplier or customer.
By configuring the plugin to automatically redact a word, you can make sure that information never shows up on your website. This automated workflow can also save you a lot of time and hard work.
Since it replaces each redacted word with an alternative word, this method can also make your pages easier to read and nicer to look at, particularly when compared to a page that has lots of blacked-out content.
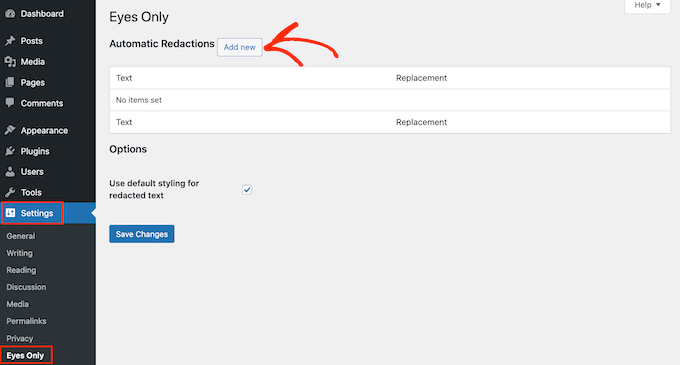
To redact a word or phrase automatically, head over to Settings » Eyes Only. Then, go ahead and click on the ‘Add new’ button.
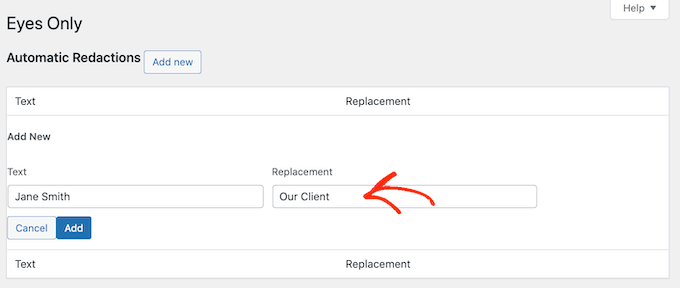
In the new ‘Text’ field, simply type in the text that you want to redact automatically. Just be aware that the text replacement is case sensitive.
In the ‘Replacement’ field, type in the text that you want to show instead of the redacted text.
In the following image, we’re replacing ‘Jane Smith’ with ‘Our Client.’
You can then go ahead and click on the ‘Add’ button.
If you want to automatically replace more words or phrases, then simply repeat the process described above.
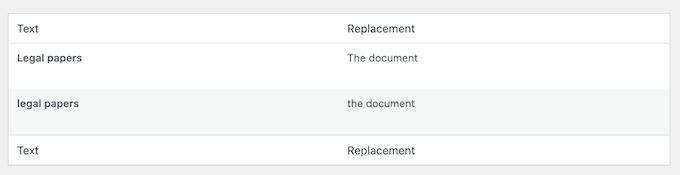
As we already mentioned, the text replacement is case sensitive. If you want to redact a word no matter whether it’s capitalizated, you’ll need to create two separate text replacement rules.
One of these rules should replace the capitalized version, and another should replace the uncapitalized version, as you can see in the following image.
When you’re happy with the redaction rules you’ve created, click on the Save Changes button at the bottom of the screen.
The plugin will now scan your site and automatically replace any matches that it finds.
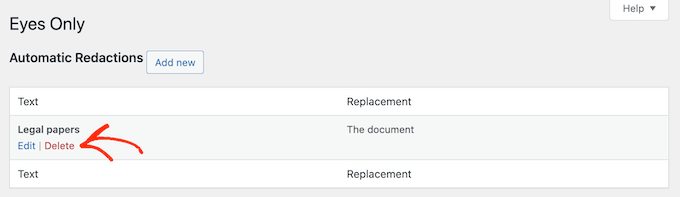
At some point you may no longer want to hide a particular word or phrase. In this case, you can simply delete the redaction rule. This will automatically remove the masking and show the original words across your WordPress blog.
To delete a redaction rule, simply go to Settings » Eyes Only.
Then, just hover the mouse over the rule that you want to delete and click on the ‘Delete’ link when it appears.
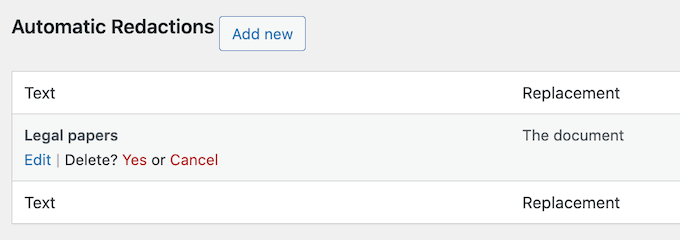
You will need to confirm that you want to delete the rule.
If you still want to go ahead, then click on ‘Yes.’
Finally, it’s time to click the ‘Save Changes’ button at the bottom. Now if you visit any page or post that has the original word, you’ll see that the plugin is no longer redacting the text.
Do you want to build an online question and answer community like Stack Overflow or Quora?
You can create a whole site dedicated to Q&A, or add a question and answer section to an existing WordPress site. No matter what approach you take, helpful questions and answers can improve the visitor experience and keep people on your website for longer.
In this article, we will show you how to easily create a question and answers site in WordPress.
Getting Started with a Question and Answer Website
To start your own question and answers website, you will need the following:
A domain name. This is the name of your website such as stackoverflow.com.
A web hosting account. This is where your website’s files are stored. All websites need web hosting.
A Content Management System. This is software that helps you create, publish, and manage all your questions and answers. For this guide, we’ll be using WordPress as it powers nearly 43% of all websites and gives you complete control over your content. To learn more about why we recommend WordPress to all our readers, please see our complete WordPress review with pros and cons.
Extra software, plugins, or tools. These add special question-and-answer features to your WordPress website.
How Much Does It Cost to Build a Question and Answer Website?
The answer to this question depends on the features you need, how many visitors you get, how much content you create, and lots of other factors.
To help you budget, we’ve created a complete guide on how much it really costs to build a website. However, typically the cost of building a website can range from anywhere between $100 per year to as high as $30,000 per year.
We recommend you start small and then add more features to your question-and-answer site as it grows and gets more popular. This helps you avoid spending too much on your site, before it starts making a profit.
That said, let’s see how you can build a successful Q&A website for under $100.
Although the WordPress software is free, hosting and domain names are where the costs can really start to add up.
A domain name typically costs $14.99/year and hosting costs start from $7.99/month. This is A LOT for new websites or anyone who is working with a limited budget.
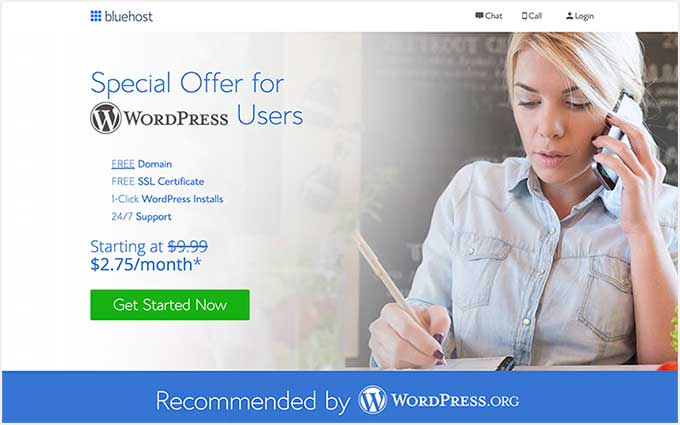
Luckily, Bluehost has agreed to offer our users a free domain name and over 60% off on web hosting. Basically, you can get started for $2.75 per month.
Bluehost is one of the largest hosting companies in the world and an officially recommended WordPress hosting provider.
They’re also offering our readers a free SSL certificate so you have the option to accept payments online. This is perfect if you want to make money from your question and answer website in the future.
To buy a domain name and hosting, simply go to the Bluehost website in a new browser window and click on the green ‘Get Started Now’ button.
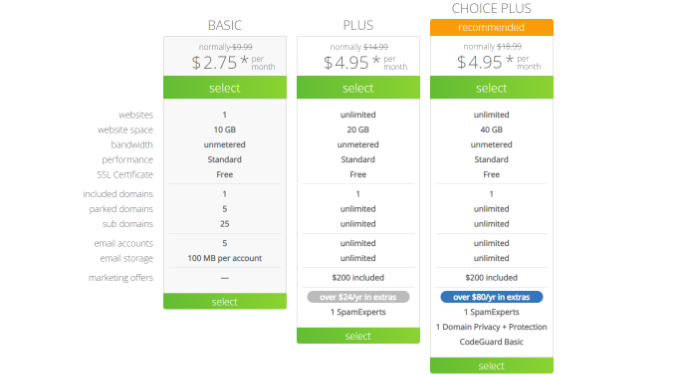
This will bring you to a pricing page where you can choose a hosting plan for your question-and-answer website.
We recommend choosing a Basic or Plus plan, as they’re the most popular web hosting plans among our readers.
After selecting a plan, click on ‘Continue.’
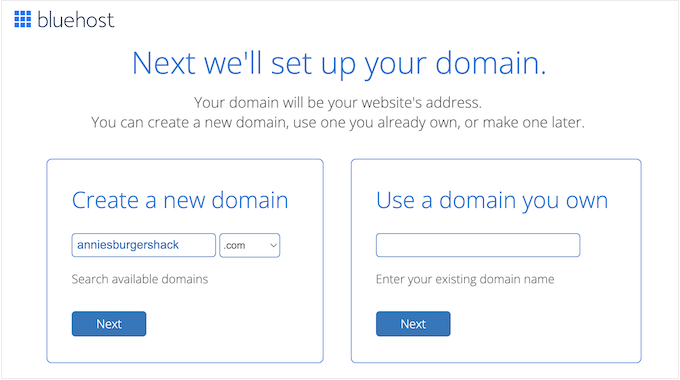
On the next screen, you’ll need to choose a domain name.
Ideally, the domain name will be easy to pronounce and spell, and easy to remember.
After choosing a name, click on the ‘Next’ button to continue.
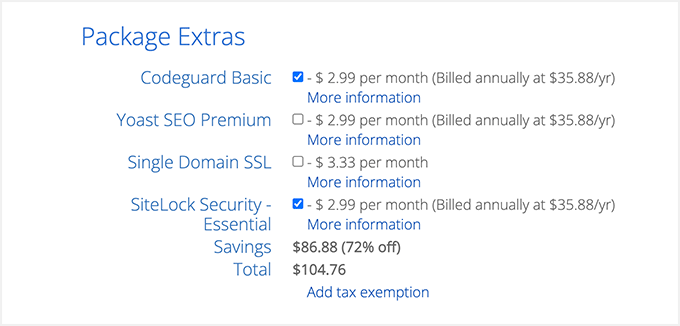
Now you’ll need to provide your account information such as your name and business email address. After that, you’ll also see optional extras that you can purchase.
We generally don’t recommend purchasing these extras straight away, as you can always add them later on if you need them.
After that, simply type in your payment information to complete the purchase.
Once you’ve done that, you’ll get an email with instructions on how to log in to your web hosting control panel. This is your hosting account dashboard where you can manage your Q&A website, including setting up email notifications and asking for WordPress support, if you need it.
It’s also where you’ll install the WordPress software.
Step 2. Install WordPress on Your Question and Answer Website
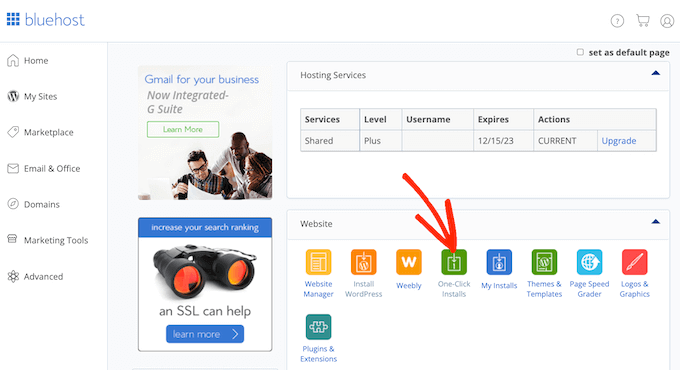
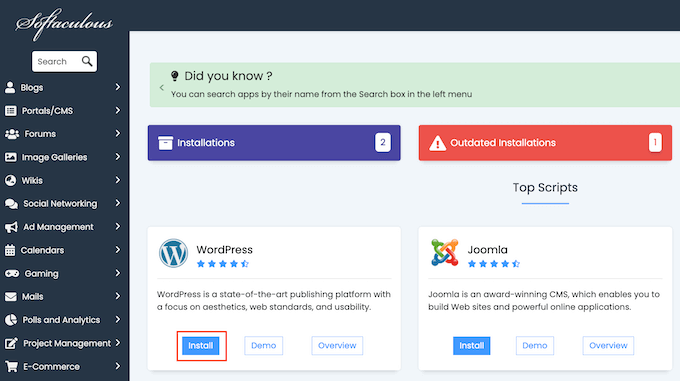
When you signup with Bluehost using our link, you’ll get access to a one-click WordPress installer.
Simply log into your Bluehost account and click on ‘One Click Install.’
Here, you’ll see all the different software you can add to your account.
Simply find ‘WordPress’ and give it a click.
Here, just click on the ‘Install’ button.
You can now follow the onscreen instructions to install the WordPress software.
Once that process is finished, you can log in to the WordPress dashboard by simply going to yoursite.com/wp-admin/ directly from your browser.
After installing WordPress, you’ll typically want to change the default theme. WordPress themes are professionally designed templates that change how your site looks and acts.
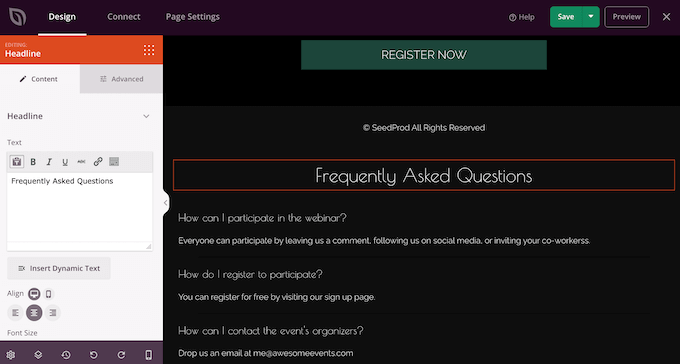
Another option is to use a landing page builder plugin such as SeedProd.
SeedProd is the best drag-and-drop WordPress page builder and comes with built-in templates that you can use to build a professionally-designed question-and-answer website.
It even has a ready-made FAQ section that you can add to any page using drag and drop.
The easiest way to add question and answer features to your WordPress website is by using the AnsPress plugin. This plugin allows you to create a Stack Overflow-style question and answer site.
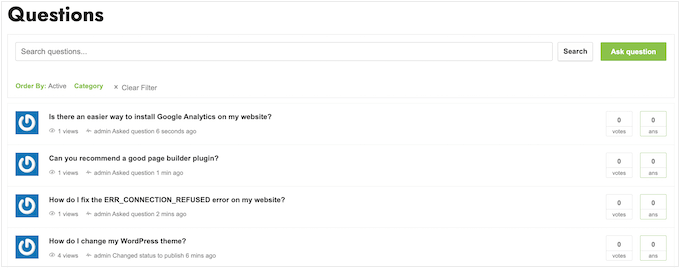
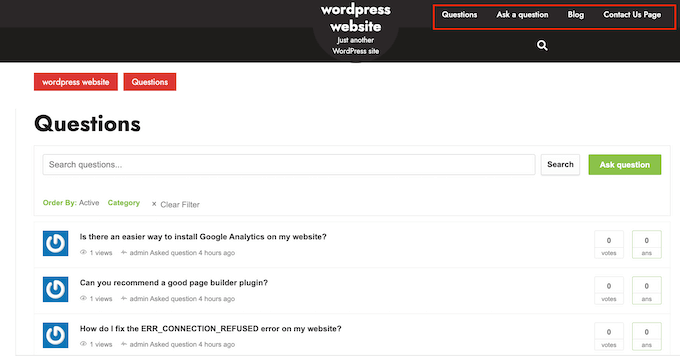
Even better, AnsPress automatically creates all the pages you need to launch a successful Q and A site.
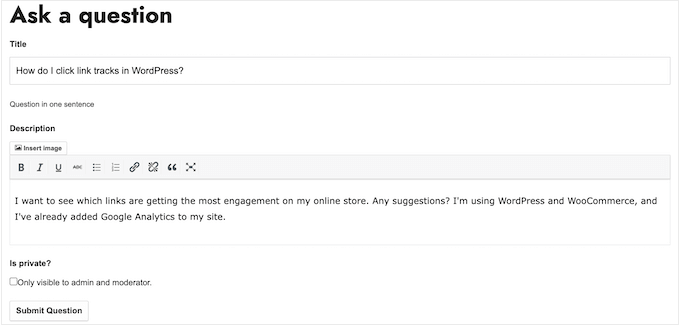
This includes a page where visitors can type in their questions, in exactly the same way people use websites like Quora.
The first thing you need to do is install and activate AnsPress. For more details, see our step-by-step guide on how to install a WordPress plugin.
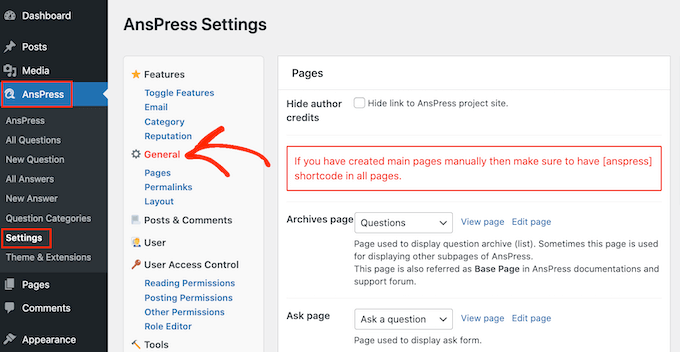
Upon activation, AnsPress automatically adds question-and-answer pages to your WordPress website. To see these pages, head over to AnsPress »Settings in the WordPress dashboard.
Once there, you can select ‘General’ in the menu on the left-hand side.
This page lists all the different pages that AnsPress has created.
To take a closer look at any page, simply click on its ‘View page’ link.
The default AnsPress pages should be a good fit for most WordPress blogs and websites. However, you can always add your own content to these pages.
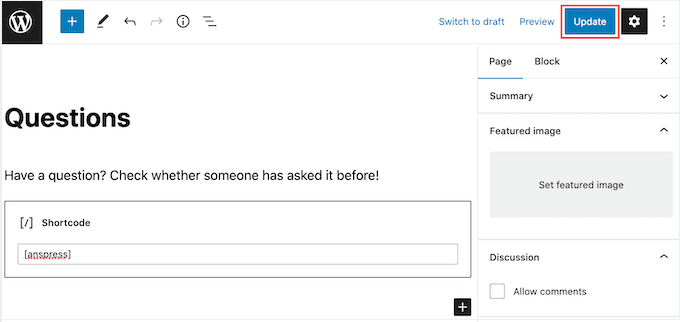
For example, you might add some text that encourages visitors to post their questions, and tells them when to expect an answer.
To add your own content to any AnsPress page, simply click on the ‘Edit page’ link next to it.
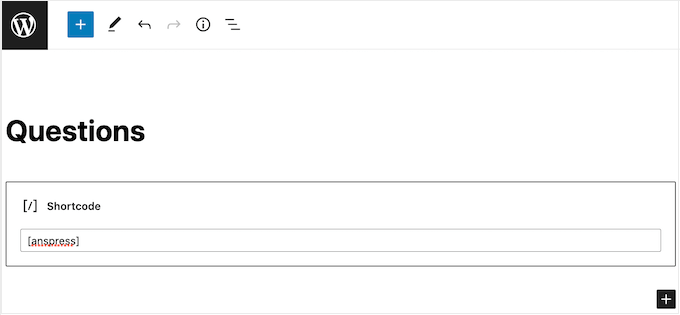
This opens the standard WordPress post editor where you can add text, images, and more.
As you can see, AnsPress adds all its content using shortcode, so don’t change this code in any way.
When you’re happy with the changes you’ve made, just click on ‘Update.’
You can edit any default AnsPress page by following the same process described above.
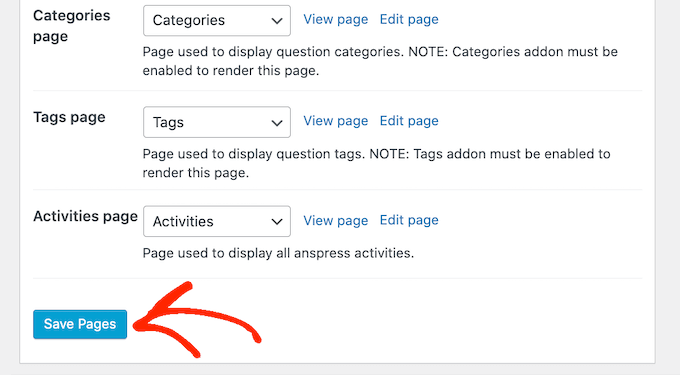
When you’ve finished, don’t forget to click on ‘Save Pages’ to store your settings.
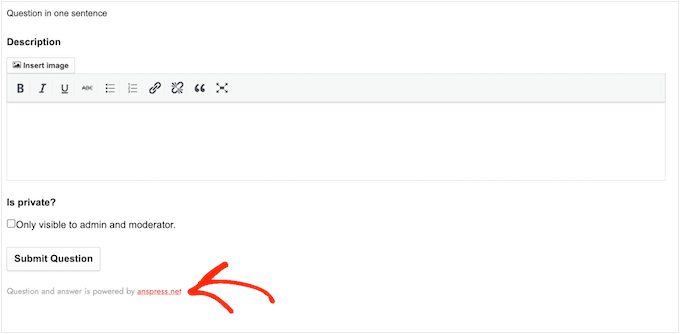
By default, AnsPress adds the following message to all its pages: ‘Question and answer is powered by anspress.net.’ This can make your site look less professional.
It also links to the AnsPress site, which can hurt your pageviews and bounce rate by encouraging people to leave your site.
Because of that, it’s a good idea to remove this text by checking the box next to ‘Hide author credits’ and then clicking on ‘Save Changes.’
Now if you look at any AnsPress page, you’ll see the text has vanished.
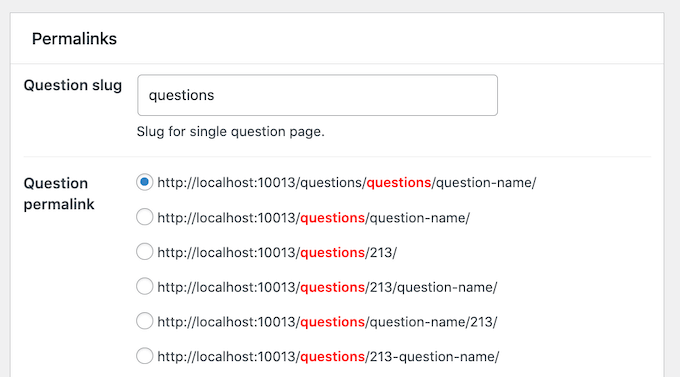
With that done, scroll to the ‘Permalinks’ section in the AnsPress settings.
Here, you’ll see the permalink structure and settings that the plugin uses by default. These settings should work well for most websites, but you may be able to improve your WordPress SEO by making some small changes.
In the image below, each question will now use the slug /questions/wordpress-questions/question-name/ which will help us rank for the term ‘WordPress.’
If you do make any changes in this section, then don’t forget to click on ‘Save Changes.’
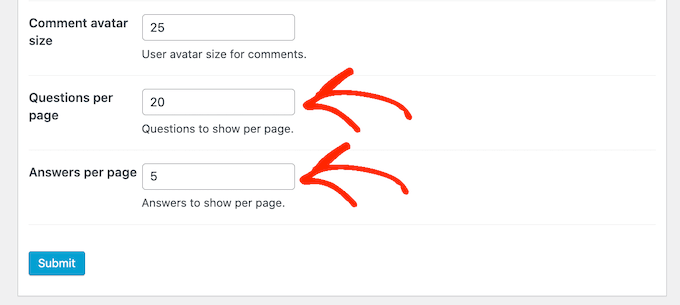
Next, it’s time to fine-tune the layout by scrolling to the ‘Layout’ section. Here, you’ll see that AnsPress shows the user’s Gravatar in a few different places including next to questions, answers, and comments.
You can change the size of these avatars by typing into the different boxes.
By default, AnsPress will show 20 questions per page and 5 answers per page. You can show more or less content by typing new numbers into the ‘Questions per page’ or ‘Answers per page’ box.
If you show fewer questions and answers per page, then users will need to scroll less. This is particularly helpful for visitors who are using smaller devices like smartphones and tablets. It can also speed up your WordPress performance since you’re loading less content.
Just be aware that most visitors expect to get the right answer on the first page, so you’ll want to show a reasonable number of answers per page.
When you’re happy with how your Q&A site is set up, click on the ‘Submit’ button.
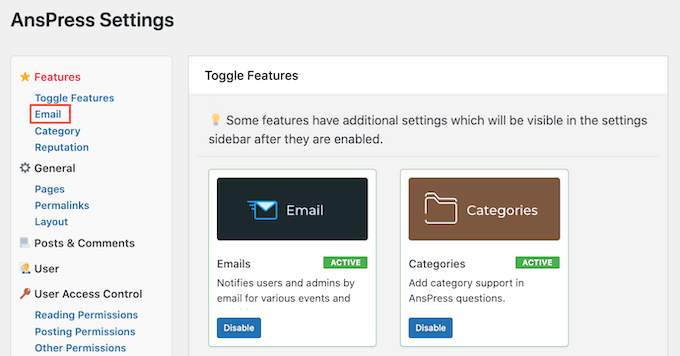
Email notifications are an important part of running a successful question-and-answer website. They let admins know when customers or potential leads post a new question, and they also let users know when their question gets an answer.
In this way, emails can keep users engaged and help your Q&A site run more smoothly.
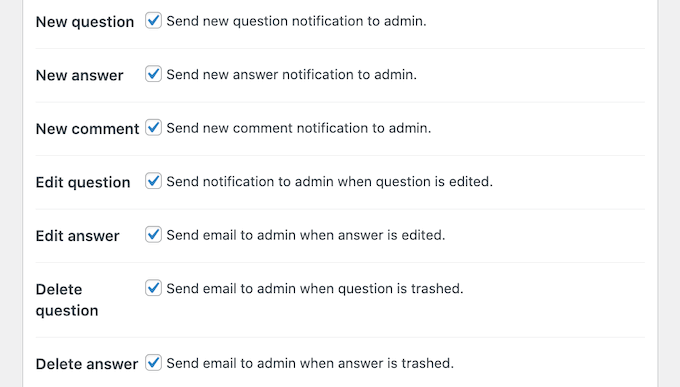
AnsPress comes with built-in email notifications that work out-of-the-box. However, it’s still smart to see whether there are any changes you want to make by clicking on the ‘Email’ link.
Here, you can see all the different emails that AnsPress will send automatically.
To enable or disable an email, simply click on the box next to it.
Pro Tip: You need to make sure all your Q&A emails go to the user’s email inbox and not to the spam folder. The best way to do this is by using an SMTP service provider to improve email deliverability. For more details, see our guide on how to fix WordPress not sending email issue.
As always, don’t forget to click on ‘Submit’ to save your changes.
Some question-and-answer sites are completely open to the public. This means that non-logged-in users can see the content, and may even be able to post questions and answers without creating an account.
Other Q&A sites are completely private or require user registration.
There are drawbacks and positives to the different approaches. A public question-and-answer site will typically get more traffic and engagement, but it may also get more spam and attract low-quality answers.
If you’re using questions and answers to make money online blogging with WordPress, then you may want to make some parts of your site members-only. This allows you to charge a subscription fee using a plugin like MemberPress.
Another option is allowing people to register with your website for free, so you can collect their email addresses. In this way, your question-and-answer site can help you do lead generation like a pro.
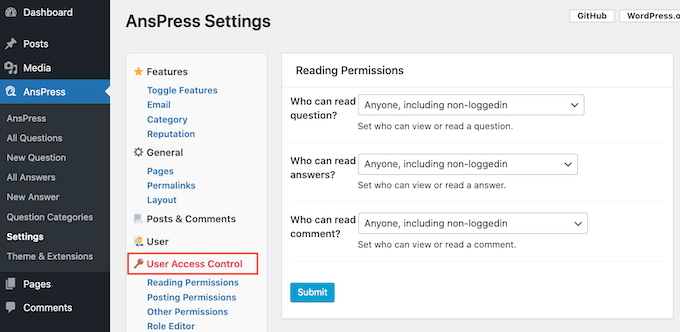
However you plan to use your question-and-answer site, it’s a good idea to review the posting permissions by selecting ‘User Access Control.’
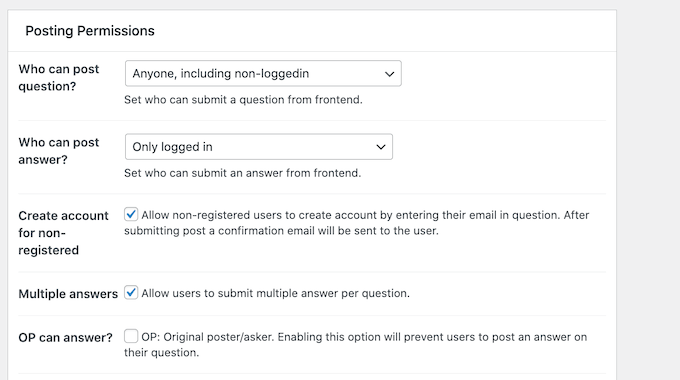
Here, you can see all the different content that logged-in and non-logged-in users can access, and the actions they take. You can change these settings using the different dropdown menus.
You can also change whether questions and answers get posted automatically, or if they’re held for admin approval. By default, non-logged-in users can post questions and answers, but you’ll need to approve them manually in the admin area.
These settings are self-explanatory but they have a big impact on how your question-and-answer site runs. With that being said, it’s worth going through the different settings carefully and then making any changes.
If you do edit these settings, then don’t forget to click on the ‘Submit’ button.
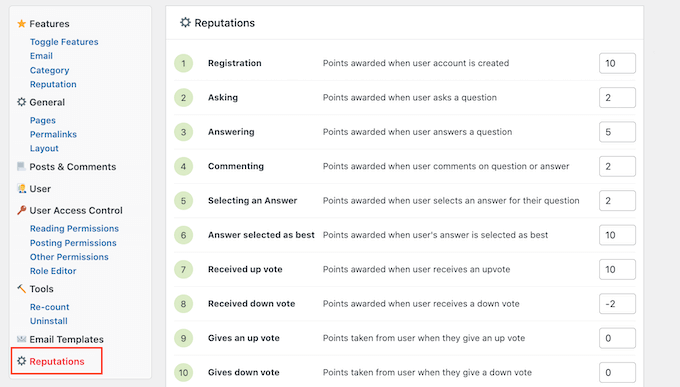
AnsPress encourages users to engage with your site through gamification, by awarding reputation points for different actions. This reputation system works by default, but you can change how many points AnsPress awards for each action by selecting ‘Reputations.’
Here, you’ll see all the different actions and their reputation points.
To award more or less points for an action, simply type a new number into its box. When you’re happy with how the reputation system is set up, click on Save Events Points.
There are some more settings you may want to look through, but this should be enough to help you set up a successful question-and-answer website.
When you’re happy with how the plugin and pages are set up, it’s a good idea to add them to your website’s navigation menu so visitors can find them.
If you need reminding about all the different pages that AnsPress added to your site, then simply go to AnsPress »Settings and then click on the ‘Pages’ link.
Managing Your Question Answer Site
At this point, your site is ready to start accepting questions and answers from users. However, depending on how your Q&A site is set up, you may need to manually approve some, or all, of these posts.
By default, AnsPress will email the WordPress admin about any questions or answers that need manual approval. You’ll also see notifications in the admin dashboard.
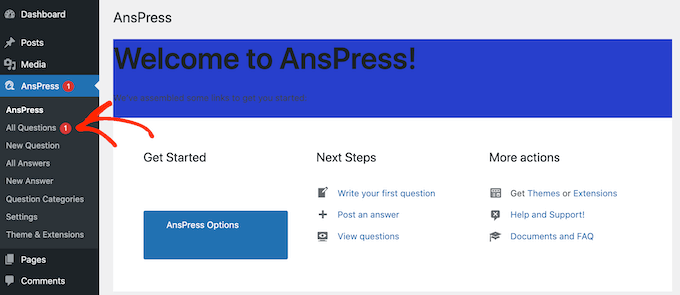
To manually approve an answer or question, simply click on either ‘All Questions’ or ‘All Answers’ in the left-hand menu.
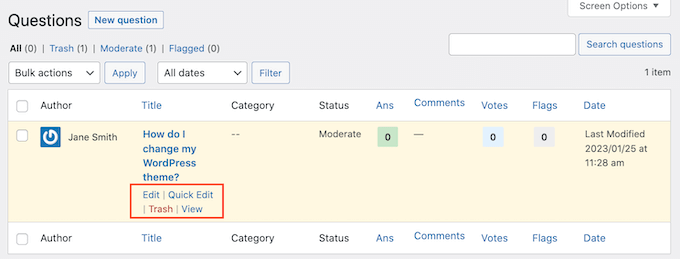
You can then hover your mouse over the post that you want to review and click on ‘View.’
This will show a preview of how the question or answer will look on your website.
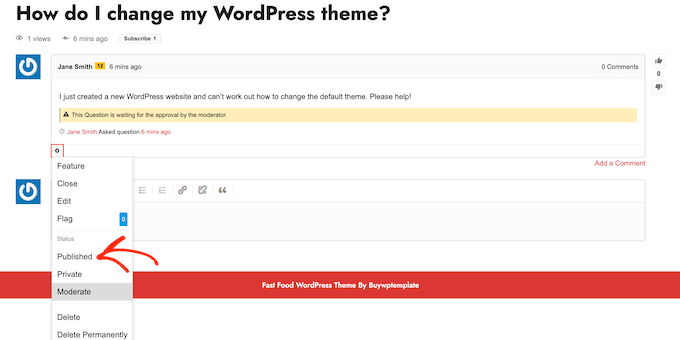
If you’re happy to make it live, then click on the small cog icon and then select ‘Published.’
If you don’t want to publish the post, then select ‘Delete’ or ‘Delete Permanently’ instead.
Do you want users to easily change the currency on your WordPress website?
A multi-currency WordPress plugin lets you show different currencies on your website and automatically apply the exchange rate. This way, customers can switch their local currency when purchasing a product.
In this article, we’ll share the best multi-currency WordPress plugins that you can use on your site.
Why Use a Multi Currency WordPress Plugin?
A multi currency plugin allows you to offer multiple currencies on your WordPress website. Your customers can switch currencies from the US dollar to their native currency with a click of a button.
If you’re running an online store, then having a currency switcher plugin can come in handy.
You can reach a wider audience and target users from around the world. Customers from other countries can easily convert the product prices into their local currency without leaving your website.
It also improves the overall shopping experience for customers. The plugin removes any pricing confusion that people may have. As a result, you get to keep customers on your website and boost sales.
That said, let’s look at the best multi-currency plugins for WordPress.
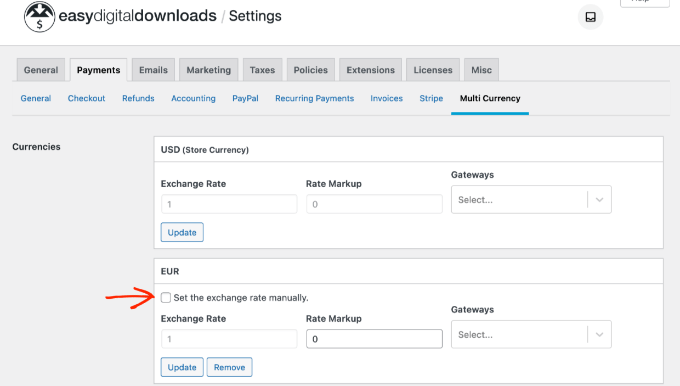
It offers multi-currency support and lets you show prices in different currencies. You can select from over 200 currencies and have complete control over the exchange rate.
There is an automatic option where the plugin will auto-update the exchange rate and convert the price from USD to the customer’s local currency. On the other hand, you can also manually set the exchange rate.
Besides that, Easy Digital Downloads lets you sell digital downloads with ease. It offers unlimited file downloads, full data reporting, a shopping cart, and more. It also easily integrates with payment gateways like Stripe, PayPal and third-party tools like AWeber, ConvertKit and Slack.
Pricing: Easy Digital Downloads is a premium plugin with prices starting from $99.50 per year.
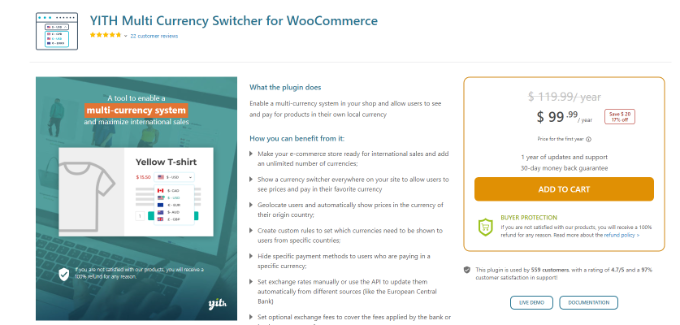
It is super easy to use and lets you add unlimited currencies to your WooCommerce store. You can show a currency switcher anywhere on your website and let customers choose their local currency.
Besides that, the plugin also automatically detects users’ geolocation and displays prices in their native currency. It integrates with APIs of the European Central Bank, Google Finance, and other providers to automatically update exchange rates.
You can also control the frequency of exchange rate updates. For example, the plugin can check it daily, twice daily, weekly, monthly, or every 15 days.
Other than that, you get options to customize the currency switcher, display different payment methods for specific countries, and more.
Pricing: YITH Multi Currency Switcher for WooCommerce is a premium plugin that will cost you $99.99 annually.
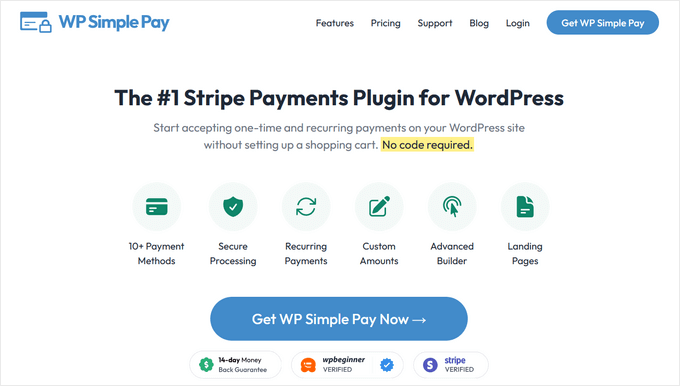
WP Simple Pay is the best Stripe plugin for WordPress that lets you accept one-time or recurring payments on your website. The best part, you don’t have to set up a shopping cart to collect payments.
WP Simple Pay lets you select from 135+ different currencies supported by Stripe. It also lets you choose your site’s region’s default currency, format, and tax rate. This way, you can charge customers in their native currency and receive funds in your preferred currency.
With WP Simple Pay, you get a drag-and-drop payment form builder and over 10 different payment methods. For example, you can collect payments through credit and debit cards, Apple Pay, Google Pay, ACH direct debit, and more.
Pricing: WP Simple Pay prices start from $49.50 per year. There is also a free version you can use to get started.
CURCY is a free WooCommerce multi currency plugin. It lets you accept payments in different currencies and helps customers to switch to their preferred currency.
The plugin is easy to use and set up. It automatically detects users’ location on your WooCommerce store and displays products in the native currency.
You can also allow the plugin to set the exchange rate automatically. However, there are different options for controlling the exchange rate. For example, you can manually set the rate, keep the product prices fixed in other currencies, and manage the exchange rate fee.
WooCommerce Multi-Currency is a premium WooCommerce extension that allows you to show product prices in the customer’s country’s currency.
Like many other plugins on our list, you can choose between automatic or manual exchange rate settings. The plugin supports different exchange rate providers’ APIs, such as Open Exchange Rate, Abstract, Exchange Rate API, and more.
Using a shortcode, you can display the currency switcher anywhere on your WooCommerce store. It also has a sidebar widget and helps customers quickly convert prices into their local currency.
Pricing: WooCommerce Multi-Currency prices start from $99 per year.
Currency Switcher for WordPress is another free and beginner-friendly plugin you can use to show different currencies on your website.
It works with Open Exchange Rate API and allows you to automatically convert the prices into different currencies depending on the exchange rate. There is also an option to manually control the exchange rate.
Currency Switcher for WordPress supports currency conversion for visitors from the United States, Australia, Europe, and India.
Currency Converter Widget is a premium WooCommerce plugin that you can use on your store. The multi-currency plugin offers a dynamic widget that converts product prices in real-time.
It automatically grabs the latest exchange rate and applies it to the products. You can add and convert as many currencies as you want.
The best part is that the plugin saves the converted total at checkout. This way, you can see the prices customers saw on your WooCommerce store.
Pricing: Currency Converter Widget will cost you $49 per year.
Which is the Best Multi Currency WordPress Plugin?
Based on our research, the best WordPress multi-currency plugin are Easy Digital Downloads, YITH multi currency switcher for WooCommerce, and WP Simple Pay.
The choice of picking the best multi-currency plugin depends on the type of website you’re running.
For instance, if you’re selling digital products, then Easy Digital Downloads is the best choice. It is super easy to use and lets you select from over 200 different currencies. You get full control over the exchange rate and can add as many currencies as you want.
On the other hand, YITH Multi Currency Switcher for WooCommerce is the best multi-currency plugin to use if you have a WooCommerce store. It automatically detects the user’s location and converts product prices. Plus, you can choose from different providers to set the exchange rate.
Lastly, you can also use WP Simple Pay to collect online payments without setting up a shopping cart. It is the best Stripe plugin and supports over 135 currencies.