Monday, February 24, 2020

How to Create a Contract Agreement Form With Digital Signatures in WordPress

Do you want to add a contract agreement form to your WordPress website that people can e-sign?

Typically to get contracts signed, you either have to manually print / scan the signature, or pay for an expensive third-party e-sign service.

Wouldn’t it be nice if you could get users to sign forms with a digital signature in WordPress without the high costs?

In this article, we’ll show you how to easily create a contract agreement form with digital signatures in WordPress.
Why Create an Online Contract Agreement Form?

An online contract agreement form is easy to fill and submit. Normally, you’ll send the agreement as PDF, which the other party will have to print, fill-in, scan, and send back.

That’s a lot of work.

By creating an online contract agreement form on your website, users can fill it right away and sign it digitally with an e-signature.

It does not require any overly priced SaaS software and works very well for many different kinds of legal documents.

For instance, you can use it to create a code of conduct form, employment forms, non-profit or volunteer application forms, and more.

Are Digital Signatures Legal?

Yes, digital signatures and digitally signed documents are legally enforceable. If both parties agree to digital signatures, and the software used keeps a record of digital signatures, then they are legally binding.

However, they cannot be used for all kinds of legal documents. For example, legal documents or forms that require to be notarized, need court stamps, or witnesses.

With that said, this article is not legal advice, please consider a lawyer for practical legal advice and guidance.

Preparing Your Contract Agreement Form

If you don’t already have a contract drawn up, it’s a very good idea to consult a lawyer. You want to be sure that your contract is legal and that it won’t cause you any possible problems in the future.

Apart from the contract terms themselves, your contract form will probably need space for:

  • The name of the person signing.
  • The address of the person signing.
  • The date the contract is signed.
  • Space for your client (or new employee) to actually sign the contract.

That being said, let’s create a contract agreement form with a digital signature field.

How to Create a Digitally Signed Contract Form in WordPress

The first thing you need to do is install and activate the WPForms plugin. For more details, see our step by step guide on how to install a WordPress plugin.

WPForms is a premium plugin, and you’ll need at least their Pro plan to access the Signatures addon.

Upon activation, you need to visit the WPForms » Settings page to enter your license key. You can find this information under your account on the WPForms website.
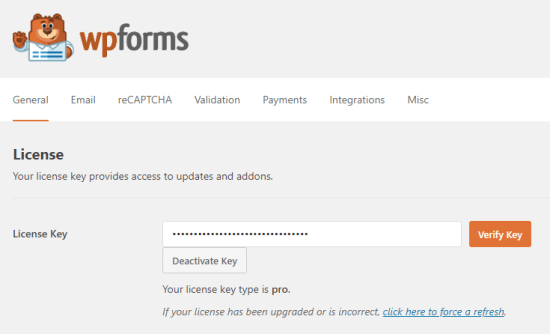
Entering your license key for WPForms

Next, you need to visit the WPForms » Addons page and install the Signature addon.
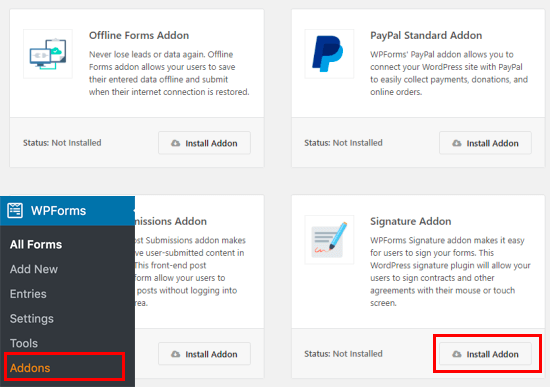
Installing the Signature addon

You are now ready to create your contract agreement form with the digital signature feature.

Simply go to the WPForms » Add New page to create your form. This will launch the WPForms form builder interface where you need to provide a title for your form and then choose a template.

We’re going to use the ‘Blank Form’ template for this example, but you can choose a different one if you prefer. Just click on the template to load it.
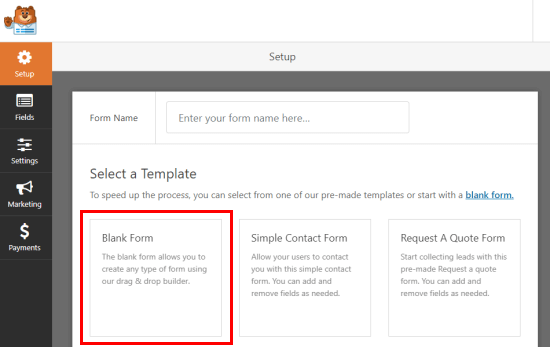
Selecting the Blank Form template

You’ll probably want to include the text of your contract itself on the page above the form. This could include your own signature as an image.

In the form itself, you just need to add the fields (form elements) that need to be filled in.

To add a new field, simply click on a field from the left column. You can rearrange fields by moving them up and down in the preview column.
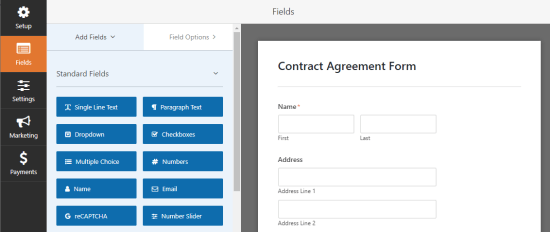
Adding new fields to the contract agreement form

If you want to send a copy of the signed form to the user as well, then don’t forget to add an email field where users can provide their email address.

Once you’re happy with the fields you’ve added, it’s time to add the most important form field: the signature field.

Scroll down to the ‘Fancy Fields’ section and click to add the Signature field to your form.
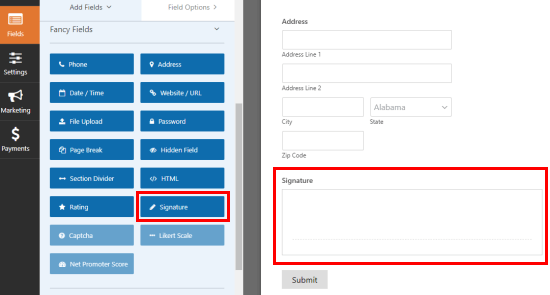
Adding the Signature field to the contract agreement form

That’s it. You’ve created your form. Next, we need to make sure the settings are correct.

Configuring Your Contract Agreement Form’s Settings

Click on the ‘Settings’ tab to view your form’s settings. The default settings will work in most cases, but you may want to make some changes.

In particular, you’ll want to check that the ‘Notifications’ are correct.

By default, the signed contract agreement form will be sent to the administrator’s email address. This is normally the email address of whoever set up your WordPress site. If that’s not you, then enter your email address here instead.

You may also want to send a copy of the form to the user as well. To do that, go to Settings » Notifications tab and click on the Add New Notification button.
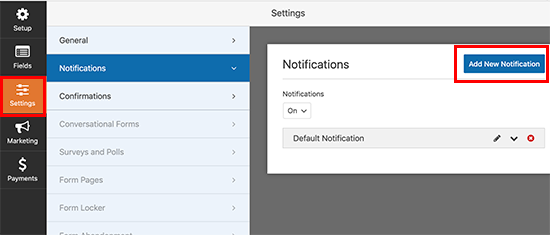
Add new notification

In the ‘Send to Email Address’ section, click on the Smart Tags link and select the Email field.
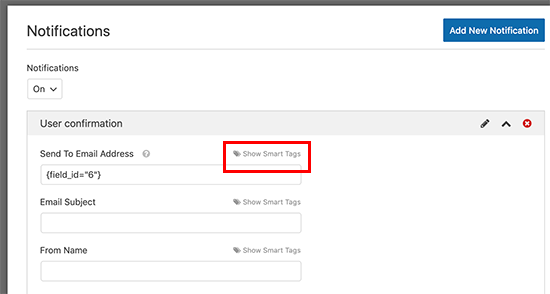
Add email field

Review all other settings and adjust them to your requirements. WPForms will now send the form confirmation email to the user as well.

Next, switch to the ‘Confirmation’ tab, you can edit the confirmation message that the client (or employee or volunteer) signing the form will see.

Once you’re happy with the settings, click the ‘Save’ button at the top of the screen. You can now close and exit the form builder.

Add Your Contract Agreement Form to Your Site

Finally, you need to put your contract agreement form onto your website.

Create a new page or edit an existing one. First, you’ll need to add the text of your contract terms here before including the form itself.

After that, simply add the WPForms block to your content area.

Adding a WPForms block to your page

Select your contract agreement form from the drop-down box, and WPForms will automatically load a preview of the form in the editor.
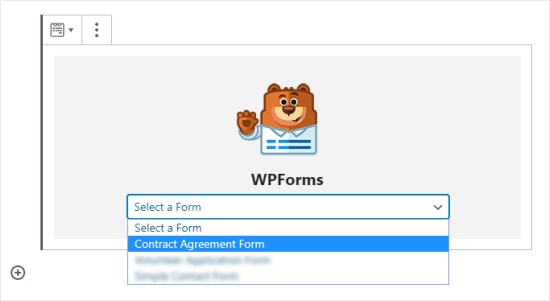
Select your contract agreement form from the drop down menu

You can now save or publish your page to make your form publicly available.

After that, visit the page to see your contract agreement form in action. Don’t forget to test out the contract agreement form. You should be able to enter your signature by using your mouse, trackpad, or a touchscreen.
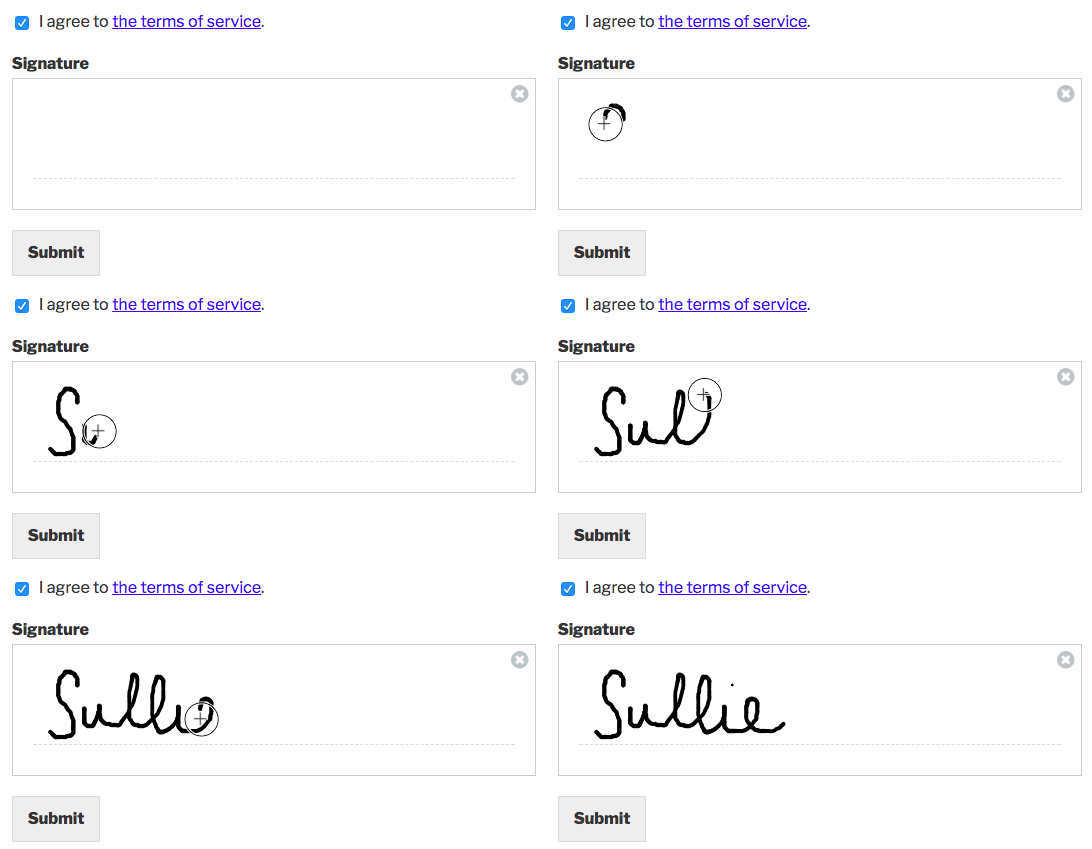
WPForms Signature Field Example

Make sure you see the confirmation message and receive an email after submitting the form.

If you don’t get an email, don’t worry. It’s quite a common problem and we’ve got instructions on how to fix WordPress not sending emails.

We hope this article helped you learn how to create a contract agreement form with digital signatures in WordPress. You may also be interested in our articles on the best WordPress plugins and the best business phone services for small businesses.

If you liked this article, then please subscribe to our YouTube Channel for WordPress video tutorials. You can also find us on Twitter and Facebook.

The post How to Create a Contract Agreement Form With Digital Signatures in WordPress appeared first on WPBeginner.


February 24, 2020 at 06:55PM
Friday, February 21, 2020

7 Best Countdown Plugins for WordPress (Easy to Use)

Readers often ask us how to add a countdown timer to their website. Countdown timers are a great way to build anticipation, excitement, and create FOMO effect on your website.

There are lots of different countdown plugins out there that let you create a countdown timer, so which one should you use?

In this article, we’ll share the best countdown plugins for WordPress and explain the key features of each.

Best countdown plugins for WordPress

What is a Countdown Timer Plugin and When You Need it?

A countdown timer plugin allows you to display a timer that counts down to a specific time or date.

Smart marketers use countdown timers to build excitement and create a sense of urgency among their customers. It helps them take advantage of the FOMO effect to boost conversions.

There are many WordPress plugins that allow you to add countdown timers to your website. These countdown timers can be divided into two groups:

1. Normal Countdown Timers

A normal countdown timer, sometimes called a static or fixed countdown timer, is what most people think of when they imagine a timer.

This timer counts down to a certain fixed point. That might be the launch of a website, the end of a sale, or another event.

The countdown clock’s endpoint is the same for everyone and doesn’t change depending on who’s viewing it.

Evergreen Timer

An evergreen countdown timer, sometimes called a dynamic countdown timer, is specific to each user.

It begins counting down when the person arrives on your site. For instance, they might have 4 hours to take advantage of a special offer.

This can be a powerful marketing technique as it lets you create a sense of urgency.

Note that most WordPress plugins are designed to run normal countdown timers, and only some let you run evergreen timers.

Having said that, let’s take a look at some of the best countdown timer plugins for WordPress.

1. OptinMonster

The OptinMonster website

OptinMonster is a powerful popup and lead generation plugin for WordPress. It allows you to convert abandoning website visitors into subscribers and paying customers.

With OptinMonster, you can create both static and evergreen timers. You can make as many timers as you want, and you can use different timers on different pages.

There are lots of ways you can position your countdown timer using OptinMonster. One of the best is to use a floating bar that sticks to the top or bottom of your page. That way, it stays visible at all times.

OptinMonster has full instructions on how to create and customize your countdown timer.

Here’s a countdown timer we created using the OptinMonster plugin:

An example of a countdown created using OptinMonster

Note: You’ll need the OptinMonster’s Pro plan or higher in order to use countdown timers.

They allow you to add countdown timers on popups, floating bars, full screen welcome mats, scroll boxes, and inline widgets.

On top of that, you can personaize the timers based on user’s location, which page they’re on, where they’re visiting from, and more.

2. SeedProd

The SeedProd website

The SeedProd plugin is a great option if you want a “coming soon” page for your website. It lets you easily set up a special landing page and put your site into coming soon or maintenance mode.

With this plugin, you’ll be creating a normal timer that counts down to the same point for everyone. That will usually be the day that your site launches. You can’t use it to create an evergreen timer.

One really clever SeedProd feature is that you can set your site to instantly launch when the timer finishes. You don’t have to remember to do it yourself manually. Just turn on the ‘autolaunch’ feature when adding the countdown timer to your page or editing it.

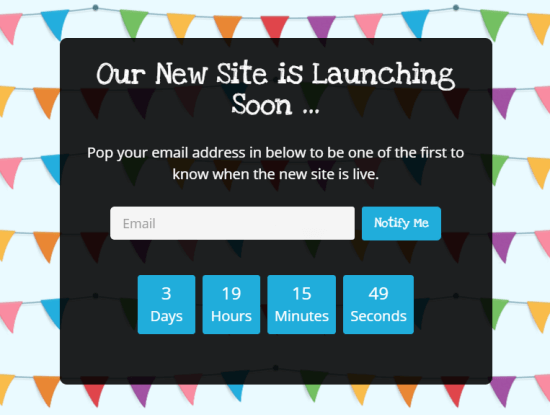
Here’s a countdown timer we created using SeedProd’s Coming Soon Page Pro plugin:

An example of a countdown timer created with SeedProd

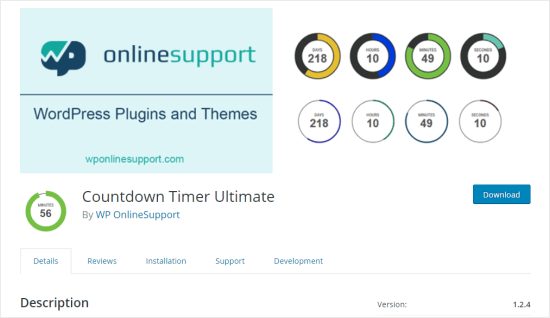
3. Countdown Timer Ultimate

The Countdown Timer Ultimate WordPress plugin page

Countdown Timer Ultimate is another good option to consider if you want to create a normal countdown timer. It’s a simple plugin and doesn’t have the ability to show evergreen timers that are specific to individual site visitors.

You can use Countdown Timer Ultimate to make as many countdown timers as you want, and you can customize how they look to some degree.

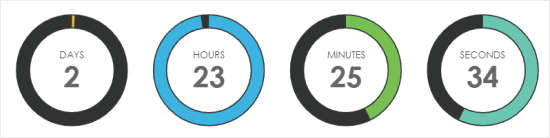
Here’s a countdown timer we created using the free version of the Countdown Timer Ultimate plugin:

An example timer created with Countdown Timer Ultimate

The pro plugin gives you more advanced options. These include being able to show specific text when the countdown expires and extra design features.

For instructions, see our guide on how to add a countdown timer widget in WordPress.

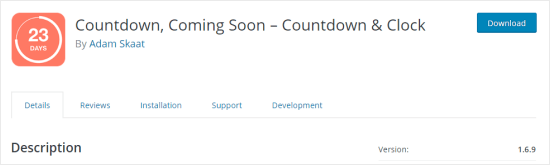
4. Countdown Builder

The Countdown Builder plugin page

Countdown Builder is a simple countdown timer with multiple different styles built in. These include circle countdowns, flip clock countdowns, and even a coming soon page.

You can place your timer within a post or page in the WordPress block editor by selecting the ‘Countdown’ block (under ‘Widgets’). You can also choose to automatically display it on specific posts or pages.

Here’s a timer we created using it:

An example timer created using Countdown Builder

If you want, you can edit how your clock looks in detail, changing things like the font size, the labels, and the animation style. You don’t need to do this with CSS. There’s a built-in editor.

With the pro version, you can add an email sign up, schedule timers in advance, show/hide timers on mobile devices, and more. The pro version is priced from $19.99 upwards, depending on what features you want.

5. Evergreen Countdown Timer

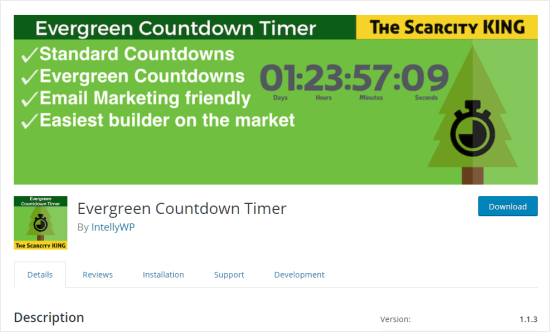
The Evergreen Countdown Timer plugin

The Evergreen Countdown Timer lets you create evergreen countdowns, as you might expect from its name. You can also use it to create normal countdowns as well.

You can choose how the plugin detects visitors, either by a cookie or by their IP address.

To add the timers to your page, you’ll need to enter a shortcode. You can simply copy and paste this from the Manager section of your countdown timer settings.

Once your timer hits zero, you can automatically redirect the visitor to a URL of your choice. For instance, you could send them to a registration page if you’re counting down to the launch of your new course.

Here’s a timer we created using the Evergreen Countdown Timer plugin:

An example timer created using the Evergreen Countdown Timer

There’s a pro version of the plugin, which gives you lots of extra options. It also lets you choose more colors than just black or white for your timer.

With the pro version, you can provide a countdown for available “spots” such as seats or tickets. This could work well if you’re selling places for a paid webinar or another live event.

6. WordPress Countdown Widget

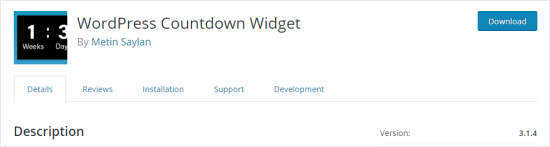
The WordPress Countdown Widget plugin

WordPress Countdown Widget is a free plugin that has a drag and drop interface. You can use it to create multiple timers on your site.

The plugin allows you to add countdown timers in side widgets, posts or pages by using a shortcode. The plugin’s website has full instructions for using the shortcode.

Unlike other plugins, this plugin also offers “countup” timers, where your timer counts up from a point in the past rather than counting down to a point in the future.

For instance, you could create a plugin to show how long it’s been since a historical event, like the birth of someone famous.

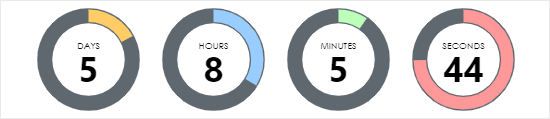
You could even use this to show how long it’s been since your company was founded or since you started your blog. Here’s an example that we created:

An example timer created using the WordPress Countdown Widget

7. HurryTimer

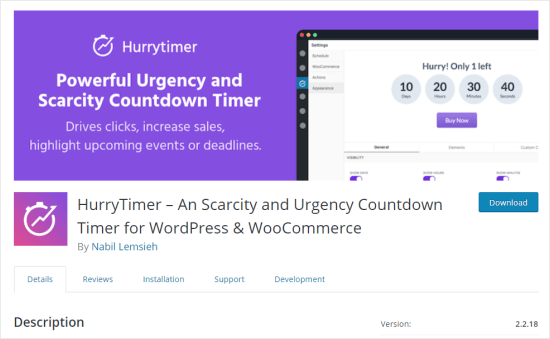
The HurryTimer plugin

The free version of HurryTimer lets you create both evergreen and regular timers. The evergreen timer uses both cookie and IP detection to display the right timer to each individual user.

You can also set up timers to run a countdown between two fixed dates. This is useful if you want to get ready for an upcoming sale in advance.

The timer works with WooCommerce, though you don’t have to run WooCommerce to use it. You can display your timer several times on the same page, if you want to.

Here’s a timer we created using HurryTimer:

An example timer created using HurryTimer

If you have the pro version, you can set up a recurring timer. This is a timer that runs according to rules that you specify. For instance, you could have a timer that shows shipping cut-off times.

With the pro version, you can also create an announcement bar that sticks to the top or bottom of the screen to keep your timer visible.

We hope this article helped you learn about the best countdown plugins for WordPress. You may also be interested in our tips to recover WooCommerce abandoned cart sales, and our list of the best email marketing services to grow your sales.

If you liked this article, then please subscribe to our YouTube Channel for WordPress video tutorials. You can also find us on Twitter and Facebook.

The post 7 Best Countdown Plugins for WordPress (Easy to Use) appeared first on WPBeginner.


February 21, 2020 at 06:11PM

Thursday, February 20, 2020

How to Install a WordPress Plugin – Step by Step for Beginners

After installing WordPress, the first thing every beginner needs to learn is how to install a WordPress plugin.

In simple words, WordPress plugins are like apps for your WordPress website. They allow you to add new features to WordPress like a contact form, slideshow, shopping cart, and more.

There are thousands of free and paid plugins available for WordPress. In this step by step guide, we will show you how to install a WordPress plugin.

Installing a WordPress plugin - A beginner's guide

Before You Start

If you are using WordPress.com, then you cannot install plugins.

We often get complaints from users saying that they can’t see the plugins menu in their WordPress dashboard. It is because you are using WordPress.com, which has its limitations.

You cannot install plugins on WordPress.com unless you upgrade to their business plan. On the other hand, you can install any plugin you want on your self hosted WordPress.org website right out of the box (See the differences between self hosted WordPress.org vs WordPress.com).

If you want to switch from WordPress.com to WordPress.org, then read our tutorial on how to properly move from WordPress.com to WordPress.org.

That being said, now let’s take a look at how to install a WordPress plugin on your website.

How to Install a WordPress Plugin

To make it easy, we have created a video tutorial on how to install a WordPress plugin that you can watch below.

However, if you just want to follow text-instructions, then you can follow our step by step tutorial on how to install a WordPress plugin.

We have covered all three methods: installing a WordPress plugin using search, uploading a WordPress plugin, and manually installing a WordPress plugin using FTP.

Ready? Let’s get started.

Install a Plugin using WordPress Plugin Search

The easiest way of installing a WordPress plugin is to use the plugin search. The only downside of this option is that a plugin must be in the WordPress plugin directory which is limited to only free plugins.

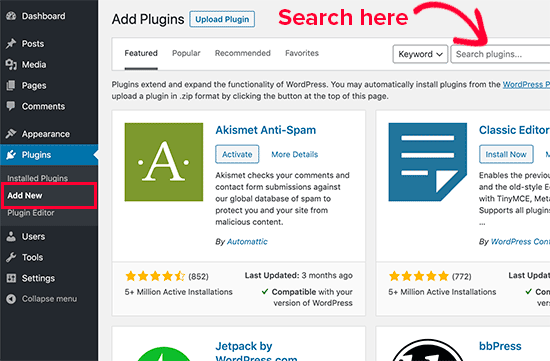
First thing you need to visit the Plugins » Add New page inside your WordPress admin area.

Searching for plugins to install in WordPress admin area

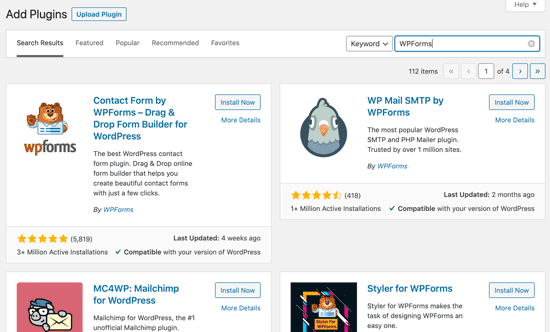
You will see a screen like the one in the screenshot above. Find the plugin by typing the plugin name or the functionality you are looking for. After that, you will see a bunch of listings like the example below:

Plugin search results

You can pick the plugin that is best for you. Since in our search, we were looking for WPForms which is the best WordPress contact form plugin, we’ll click the ‘Install Now’ button next to it.

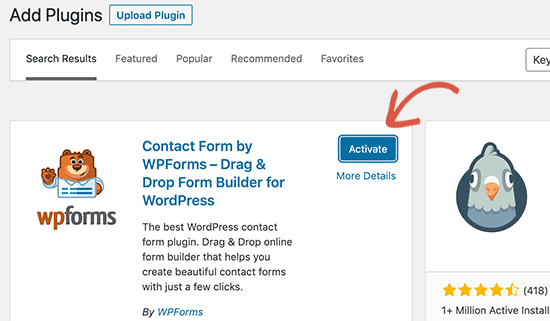
WordPress will now download and install the plugin for you. After this, you’ll notice the ‘Install Now’ button will change into the ‘Activate’ button.

Activating a WordPress plugin

A WordPress plugin can be installed on your site, but it will not work unless you activate it. So go ahead and click on the activate button to start using that plugin on your WordPress site.

That’s all, you have successfully installed your first WordPress plugin.

The next step is to configure the plugin settings. These settings will vary for each plugin therefore we will not be covering that in this post.

Install a Plugin using the WordPress Admin Plugin Upload

Paid WordPress plugins are not listed in the WordPress plugin directory. These plugins cannot be installed using the first method.

That’s why WordPress comes with the upload method to install such plugins. We will show you how to install WordPress plugins using the upload option in the admin area.

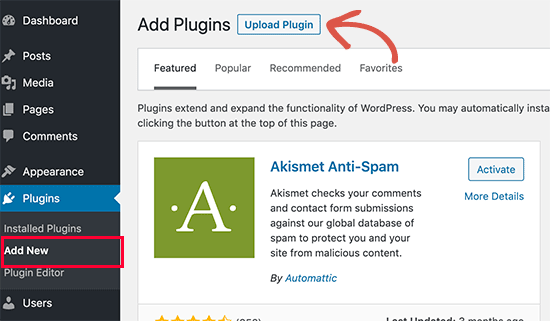
First, you need to download the plugin from the source (which will be a zip file). Next, you need to go to WordPress admin area and visit Plugins » Add New page.

After that, click on the ‘Upload Plugin’ button on top of the page.

Upload plugin button

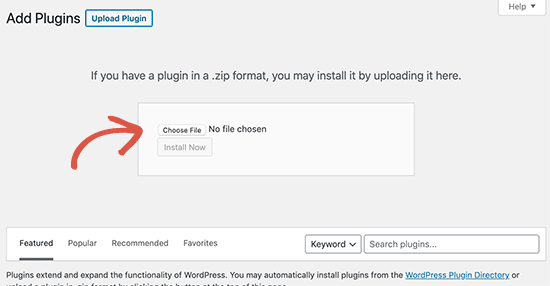
This will reveal the plugin upload form. Here you need to click on the ‘Choose File’ button and select the plugin file you downloaded earlier to your computer.

Select plugin zip file to upload and install in WordPress

After you have selected the file, you need to click on the ‘Install Now’ button.

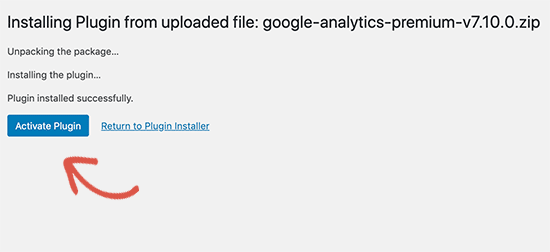
WordPress will now upload the plugin file from your computer and install it for you. You will see a success message like this after the installation is finished.

Activate plugin

Once installed, you need to click on the Activate Plugin link to start using the plugin.

You would have to configure the settings to fit your needs. These settings will vary for each plugin therefore we will not be covering that in this post.

Manually Install a WordPress Plugin using FTP

In some rare cases, your WordPress hosting provider may have file restrictions that could limit your ability to install a plugin from the admin area.

In this situation, your best bet is to install the plugin manually using FTP.

The FTP manager method is the least friendly for beginners.

First you will need to download the plugin’s source file (it will be a zip file). Next, you need to extract the zip file on your computer.

Extracting the plugin zip file will create a new folder with the same name. This is the folder that you need to manually upload to your website using a FTP client.

You would need to access your host through the FTP manager. If you do not have your FTP username and password, then contact your WordPress hosting provider and ask them.

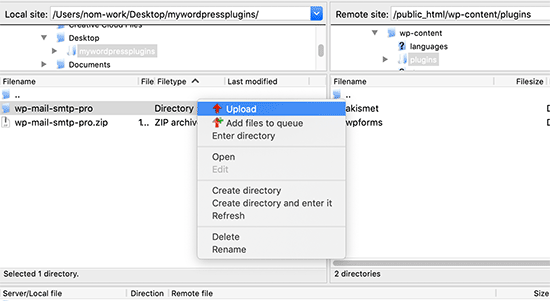
Open the FTP client on your computer and connect to your website using the login credentials provided by your web host. Once connected, you need to go to the /wp-content/plugins/ folder on your website.

Next, upload the folder you extracted from the zip file to the /wp-content/plugins/ folder on your web server.

Uploading a plugin via FTP

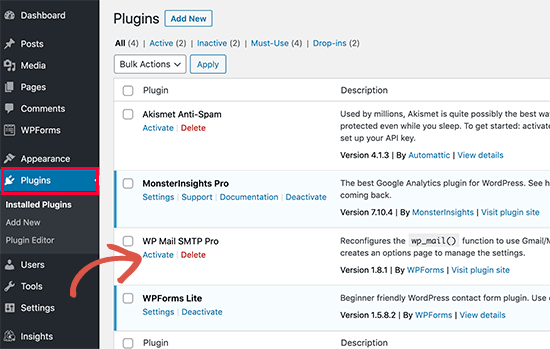
After uploading the files, you need to visit the WordPress admin area and click on the Plugins link in the admin menu. You’ll see your plugin successfully installed on the plugins page.

Activate installed plugin

You need to click on the Activate link below the plugin to start using it.

Upon activating, you may need to configure the plugin settings. WordPress plugins come with their own settings which differ from one plugin to another so we will not describe them here.

FAQs About Installing WordPress Plugins

As a beginners you may have few questions about installing WordPress plugins. As the largest WordPress resource site, we have heard all of them.

Here are some of the most frequently asked questions about installing WordPress plugins.

1. How do I find the best WordPress plugins to install on my website?

There are more than 55,000 WordPress plugins on the free WordPress plugin directory alone. Many more are available as premium plugins. This makes it a bit difficult for beginners to find the best plugin for the feature they need.

We have compiled a list of all the essential WordPress plugins that most WordPress websites need.

We also have a detailed tutorial on choosing the best WordPress plugin where we show you what to look for when looking for a plugin.

2. What is the difference between installed and active plugins?

WordPress allows you to install a plugin and not use it at all. In order to use a plugin on your site, you need to ‘Activate’ it.

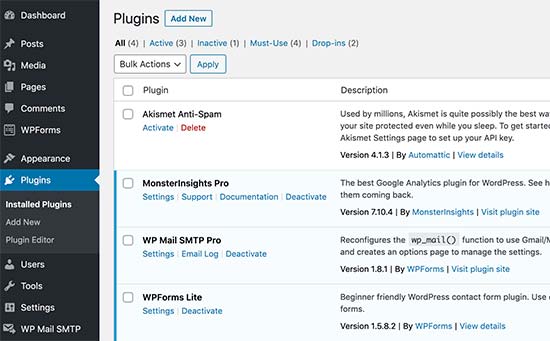
You can see active plugins by visiting the ‘Plugins’ page in the WordPress admin area. They will be highlighted with a blue background.

Installed and active plugins

Plugins with the white background are installed on your website but not active.

3. Should I delete inactive plugins?

If you are not using a plugin, then it is recommended to delete it from your website. For more on this topic, see our article on why should you delete inactive plugins in WordPress.

4. How many plugins I can install in WordPress?

You can install as many WordPress plugins as you need. It is not the number of plugins that affect your website speed, but the quality of those plugins. For more information, see our article on how many WordPress plugins you should install.

5. How do I uninstall a WordPress plugin

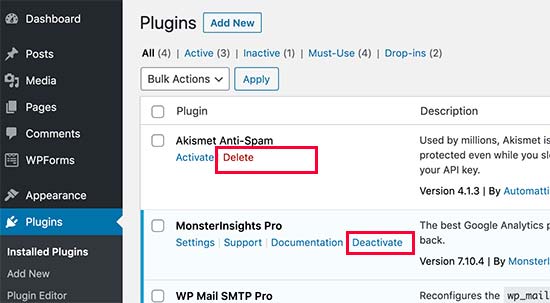
You can uninstall a WordPress plugin by visiting the Plugins page in the WordPress admin area. If the plugin you want to remove is currently active, then first you’ll need to deactivate it. After that, you can simply click on the delete link to remove it from your website.

Uninstall a WordPress plugin

For more detailed instructions, see our guide on how to properly uninstall a WordPress plugin.

We hope this helped you learn how to install WordPress plugins.

You may also want to see our plugins category where we write about the best WordPress plugins that you can use to accomplish whatever you’re looking to do. Each of those articles comes with step-by-step instructions on how to set up individual plugins.

If you liked this article, then please subscribe to our YouTube Channel for WordPress video tutorials. You can also find us on Twitter and Facebook.

The post How to Install a WordPress Plugin – Step by Step for Beginners appeared first on WPBeginner.


February 20, 2020 at 04:00PM