Tuesday, September 1, 2020

How to Delete All Pending Comments in WordPress

Do you have a lot of pending comments in WordPress that you want to delete? This can easily happen if you get a lot of spam comments.

Normally, deleting comments in WordPress is easy, but it gets trickier when there is a large number of pending comments. You may even come across weird errors while bulk deleting comments if there are too many of them.

In this article, we’ll show you how to easily bulk delete all pending comments in WordPress, step by step.
Deleting all pending comments in WordPress

What Are Pending Comments in WordPress?

Pending comments in WordPress are the comments that are awaiting moderation.

You’ll find them in the WordPress admin area by visiting the ‘Comments’ page and switching to the ‘Pending’ tab.
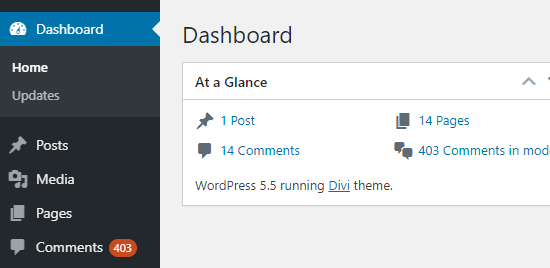
The number of pending comments showing in the WordPress admin sidebar and on the dashboard

We recommend users turn on comment moderation on all their websites to combat comment spam. This means all comments on your website will go to the Pending queue before they are approved.

Why would anyone want to delete pending comments?

There are many scenarios when you may need to do that. For instance:

  • Akismet anti-spam plugin got disabled on your site and suddenly all spam comments are appearing in pending.
  • You simply forgot about a website, and it gathered hundreds of comments that are no longer relevant.
  • Articles on your website generating a lot of unwanted comments
  • You forgot to turn off comments on older posts

It can take a long time to go through and moderate each comment individually. If you are confident that there are no comments marked ‘pending’ that you want to keep, then you can simply bulk delete them all.

1. Deleting All Pending Comments in WordPress Manually

If you only have a few hundred pending comments, it’s quite quick to delete them manually.

Simply go to the ‘Comments’ page in WordPress admin area and then click on the ‘Pending’ tab to see a list of all your pending comments.

By default, this list will show 20 pending comments at a time. To change this, click on the ‘Screen Options’ tab at the top-right corner of the page.
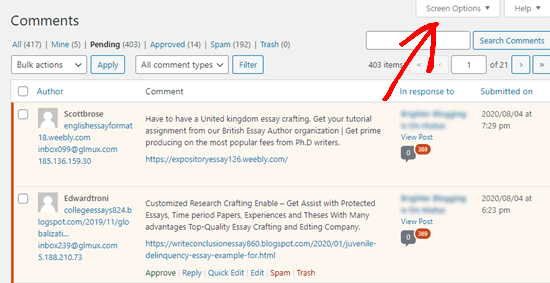
Opening up the screen options tab on the pending comments page

Next, type ‘100’ into the ‘Number of items per page’ and click the Apply button:
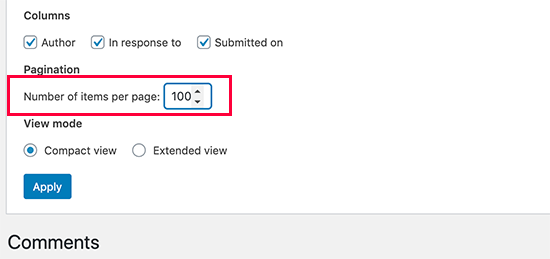
Changing the pagination for the comments to fit more on each page

Now that you have 100 comments displaying, simply check the box to the left of ‘Author’ at the top of the list of comments. This selects all the comments on the page:

Check the box to the left of Author to select all comments on the page

Then, click on the ‘Bulk actions’ dropdown and select the ‘Move to Trash’ option. Go ahead and click the Apply button to move all those comments into the trash:
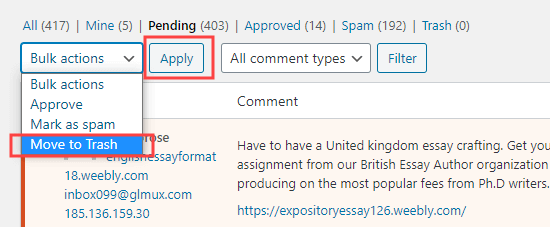
Bulk selecting the pending comments and moving them to the trash

WordPress will automatically show the next 100 comments on the page. Simply repeat the process to remove these too.

When you delete any comment on WordPress, it is not deleted right away. Instead, it is sent to the ‘Trash’ and will remain there for 30-days. After that, it will be automatically deleted permanently.

If you would rather delete them permanently right away, then you need to switch to the ‘Trash’ tab on the ‘Comments’ page and then click on the ‘Empty Trash’ button.
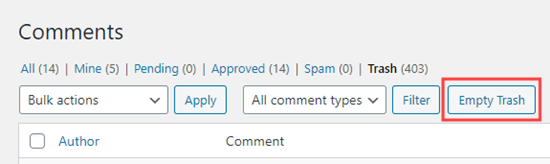
Emptying the trash to delete all the pending comments from WordPress

You will then see a message confirming that those comments have been deleted:
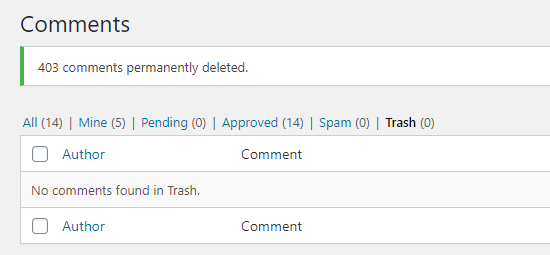
WordPress showing a message to confirm that the comments have been permanently deleted

Note: You can use the Screen Options to show up to 999 comments per page. However, this will increase the load on your WordPress hosting servers and slow down your site. You might also see an error message like this one when you try to move comments to the trash:

Error message shown when trying to move too many comments to the trash at one time

If you have more than a few hundred pending comments, then we recommend using a plugin method to delete them.

2. Deleting Large Number of Pending Comments in WordPress Using a Plugin

The quickest way to delete a very large number of pending comments is to use a plugin.

This will delete your pending (and spam) comments permanently. We recommend making a backup of your WordPress site before proceeding, just in case you change your mind later.

First, you need to install and activate the Delete Pending Comments plugin. For more details, see our step by step guide on how to install a WordPress plugin.

Upon activation, go to the Comments » Delete Pending Comments page in your WordPress admin. You will see a message letting you know how many pending comments there are.

Note: This figure includes spam comments, which are deleted at the same time as the pending comments.
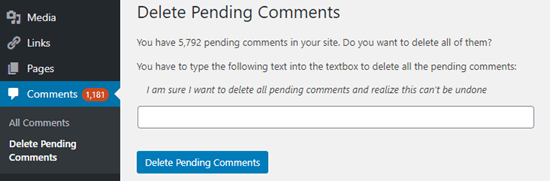
The Delete Pending Comments page in the WordPress admin

To delete all the pending comments, you need to type the required line of text into the box. You can copy and paste this text if you prefer.

After that, go ahead and click the ‘Delete Pending Comments’ button.
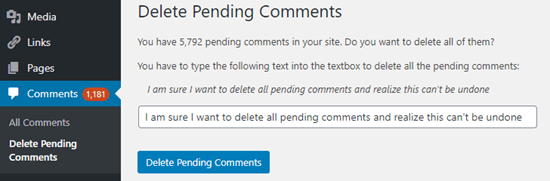
Enter the line of text in order to delete the pending comments

You will then see a message confirming that all pending and spam comments have been deleted.

Message confirming that all pending and spam comments have been deleted

Deleting Spam Comments Only in WordPress

What if you don’t want to delete pending comments but just want to delete the ones that are marked as spam? That’s very easy to do in WordPress.

First, go to Comments in your WordPress admin and click on the Spam tab:
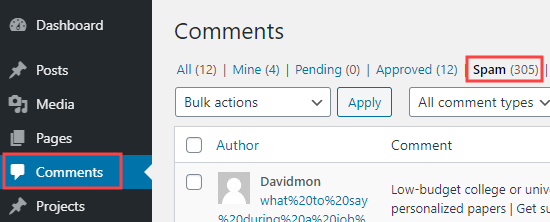
Click on the Spam tab to see a list of comments that have been marked as spam

Next, click the Empty Spam button. This will delete all spam comments permanently, not just the ones on the current page:
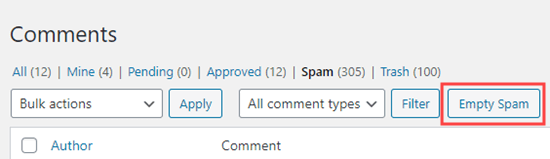
Empty the spam to permanently delete all spam comments

We hope this article helped you learn how to delete all pending comments in WordPress. You may also want to see our WordPress security guide to protect your website, or see our guide on how to allow users to report inappropriate comments in WordPress.

If you liked this article, then please subscribe to our YouTube Channel for WordPress video tutorials. You can also find us on Twitter and Facebook.

The post How to Delete All Pending Comments in WordPress appeared first on WPBeginner.


September 01, 2020 at 05:00PM
Monday, August 31, 2020

Coming Soon vs Maintenance Mode: What’s the Difference (Explained)

Recently, a reader asked us if there is a difference between coming soon mode and maintenance mode?

The answer is: Yes. They are both used for different purposes and search engines treat coming soon mode differently from maintenance mode.

In this article, we’ll explain the difference between coming soon vs maintenance mode, so you can choose the best option for your needs.

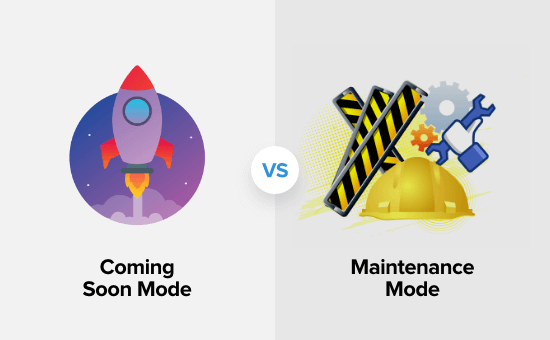
Understanding the difference between coming soon mode and maintenance mode

What is Coming Soon Mode vs. Maintenance Mode, and Why Does It Matter?

Coming soon mode is used when your website has not yet been launched. Maintenance mode is used when your website is temporarily offline for maintenance.

It’s easy to get these 2 modes confused. Several WordPress plugins such as SeedProd’s Coming Soon and Maintenance Mode Plugin let you put your site into either coming soon mode or maintenance mode. You may not be sure about the difference.

It’s extremely important to use each mode correctly. Because if you choose the wrong option, then it can harm your WordPress site’s SEO rankings.

When to Use a Coming Soon Page

You should use a coming soon page after you have registered a domain name, but before you have finished creating your website.

A coming soon page lets you gather interest on your site before you launch it. Plus, it lets Google start sending you visitors.

It’s best practice to have an email newsletter form on your coming soon page. This allows people to sign up and get an email when your site goes live.

SeedProd lets you create great-looking coming soon pages with just a few clicks. Let’s take a look at how to create a coming soon page like this:

The Coming Soon page live on our demo website

How to Create a Coming Soon Page

To create a coming soon page, you first need to install and activate the SeedProd plugin. For more details, see our step by step guide on how to install a WordPress plugin.

We’re using the Pro version for our tutorial, but you can also use the free version of SeedProd.

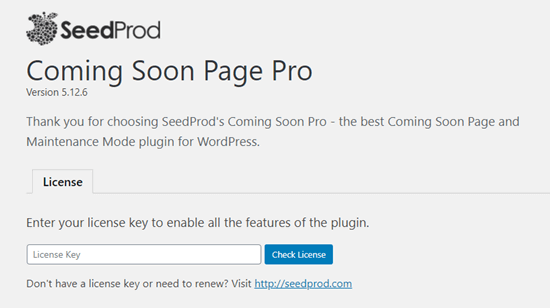
Upon activation, you should be prompted for your license key. You will find this in your account area on the SeedProd website. Simply enter it on your WordPress site and click the ‘Check License’ button:

Enter your SeedProd license. You can find this in your Account area on the SeedProd site.

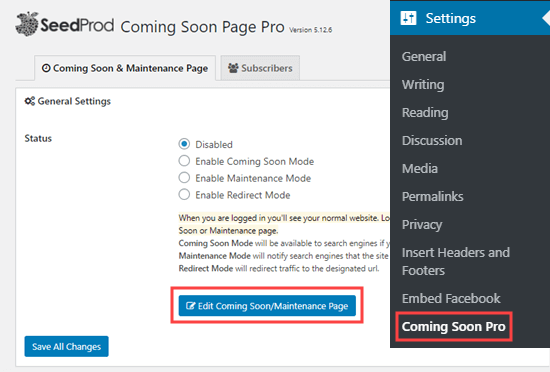
After that, go to the Settings » Coming Soon page and click the ‘Edit Coming Soon/Maintenance Page’ button:

Editing the coming soon/maintenance page in SeedProd

Then, simply pick a template for your coming soon page. There are over 50 different coming soon templates ones to choose from:

Choosing a template for your coming soon page in SeedProd

You will now be taken into SeedProd’s coming soon page editor. Go ahead and change anything you want using the tabs in the left-hand sidebar.

The SeedProd 'Kitchen Pattern' template

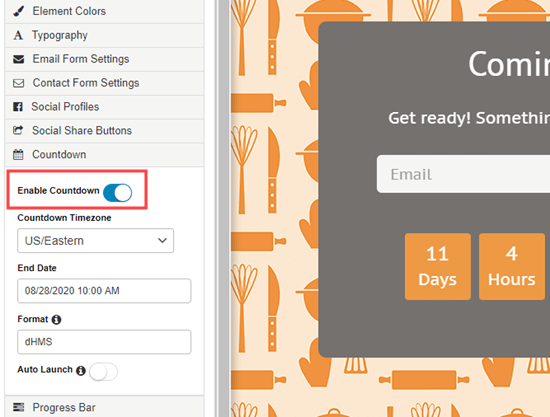
For instance, you can click on the Countdown tab to enable a timer. You will need to specify an end date for the timer:

Enabling the coming soon countdown in SeedProd

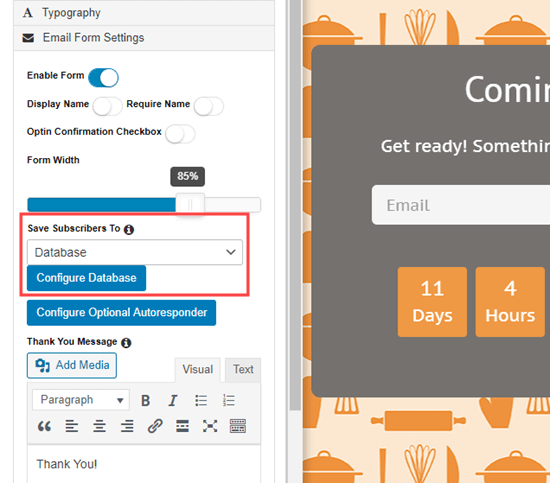
If you would like to integrate your coming soon form with your email marketing service, then simply click on the ‘Email Form Settings’ tab. Next, select your email marketing service from the ‘Save Subscribers To’ dropdown:

Choose your email service from the dropdown in the SeedProd coming soon page builder

You then need to follow the on-screen instructions to connect your coming soon page with your email list.

Go ahead and make any other changes you want. Once you’re happy with your coming soon page, click the ‘Save’ button at the top of the screen. Next, click the ‘Back to Settings’ link:

Save your coming soon page then click the 'Back to Settings' link

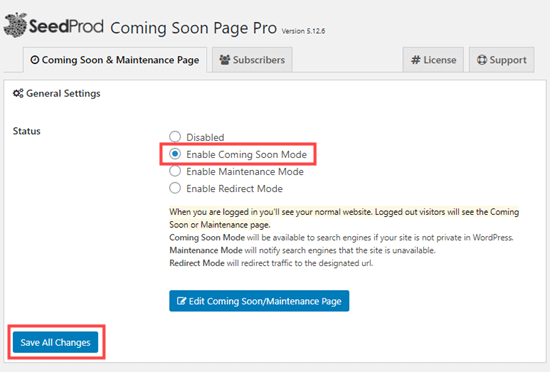
Now, simply click the ‘Enable Coming Soon Mode’ button then the ‘Save All Changes’ button.

Enable coming soon mode in SeedProd

Your coming soon page is now live. To view it, log out of your website and visit any page:

The Coming Soon page live on our demo website

When to Use Maintenance Mode

You should use maintenance mode if you need to briefly take your site offline for changes or updates.

For instance, you might want to use maintenance mode while changing WordPress themes. This ensures that your site still functions correctly and looks good with the new theme.

Another good time to use maintenance mode is if you’re adding an online store to your site. You can leave your website online but put your store into maintenance mode.

Maintenance mode lets search engines know that your site is currently down. It does this by returning the header code 503. That way, your site’s SEO won’t be affected by the downtime.

It’s good practice to let users know that your site will be back soon, too. You can do this by putting a message on your maintenance page. You might want to add an email form so they can get an email alert once your site is back up.

Tip: When you update plugins, themes, or core WordPress, your site will automatically go into maintenance mode for a few seconds. If your site gets stuck in this mode, we have instructions on fixing the WordPress maintenance mode error.

How to Put Your Site in Maintenance Mode

To put your site in maintenance mode, first install and activate the SeedProd plugin.

Next, follow the instructions above for creating a coming soon page above to create your maintenance mode page.

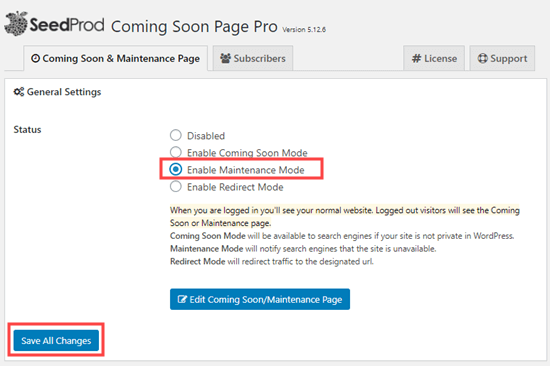
When you are ready to put your site into maintenance mode, simply go to the Settings » Coming Soon Pro page in your WordPress admin. Then, select the ‘Enable Maintenance Mode’ option and click the ‘Save All Changes’ button.

Enabling maintenance mode in SeedProd

Remember, maintenance mode should only be used when your site is down for maintenance. If you have not yet launched your site, use coming soon mode instead.

We hope this article helped you understand how to choose coming soon vs maintenance mode. You may also want to check out our guide on the must have WordPress plugins for your website and our guide on how to install Google Analytics in WordPress.

If you liked this article, then please subscribe to our YouTube Channel for WordPress video tutorials. You can also find us on Twitter and Facebook.

The post Coming Soon vs Maintenance Mode: What’s the Difference (Explained) appeared first on WPBeginner.


August 31, 2020 at 05:11PM

Friday, August 28, 2020

5 Best WordPress Request a Quote Plugins (Instant Quotes)

Are you looking for the best request a quote plugin for your WordPress website or WooCommerce store?

Some businesses may not be able to list prices on their website. A request a quote form allows your customers to ask for the quote by providing the information you need to determine the price.

In this article, we will take you through the best WordPress ‘request a quote’ plugins that you can use to make more sales through your website.

The best 'request a quote' plugins for WordPress

Why Use a Request a Quote Plugin for WordPress?

Some products and services can’t be easily priced without some details from the customer.

For instance, if you provide a lawn care service, your price will vary depending on the size of the lawn, existing condition, and other factors. You might also offer optional extras, such as creating decorative borders.

Similarly if you sell custom made furniture on your online store, then the prices will vary based on customers’ requirements.

Some companies share their complex custom pricing in a table, but this can be confusing for customers.

Others ask customers to email for a quote. But customers might not send all the information that’s needed.

The best solution is to use a request a quote WordPress plugin. Depending on the plugin you choose, this might be able to provide an instant quote.

Alternatively, you can simply respond to the customer by email once you’ve received their request.

Note: This article is about price quotations provided for a product or service. To display or rotate interesting quotes on your site, see our guide on showing random quotes in your sidebar.

With that said, let’s take a look at the best request a quote plugins for WordPress and WooCommerce.

1. WPForms

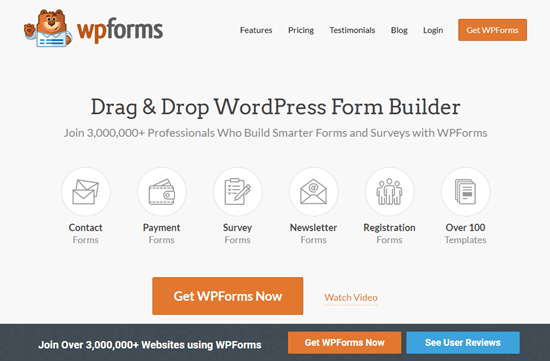
The WPForms website

WPForms is the best contact form plugin for WordPress. It allows you to easily add any kind of forms to your WordPress website using a simple drag and drop form builder.

It includes ready-to-use templates including one for a Request a Quote form. You can use it as a starting point to quickly build your form and then customize it to match your specific requirements.

WPForms’ Conditional Logic feature lets you show specific fields based on the information that the customer gives you. For instance, you could create a form that shows different options based on the service that your customer requests.

It also lets you create special Conversational Forms that take a ‘one question at a time’ approach. This can help reduce form abandonment rates, by making your form feel easy and attractive to your customers.

You can create lots of other types of forms with WPForms, too. For instance, you can use it to run a survey on your website.

Price:

WPForms costs from $39.50/year. This includes Conditional Logic. However, to get Conversational Forms, you need the Pro package for $199.50/year.

2. Wholesale Suite (Order Form and Prices Premium)

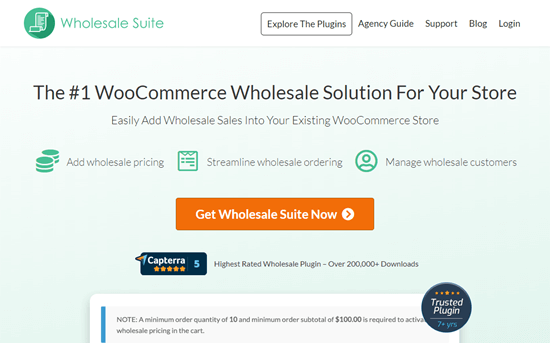
The Wholesale Suite website

Wholesale Suite Order Form and Wholesale Prices Premium are a great option if you use WooCommerce on your website.

These plugins let you offer wholesale pricing, providing an instant quote so customers can buy straight away.

Wholesale Suite’s plugins also integrate with several popular WordPress and WooCommerce plugins.

If you sell bulk products to wholesale customers, then these plugins make it much easier for them to order from your store.

With Wholesale Suite Order Form, your products are all displayed in a searchable and sortable WooCommerce table. This means your whole product catalog can be seen on a single page.

By also using the Wholesale Prices Premium plugin, you can offer discounted wholesale prices in your quote. The plugin also lets you set minimum purchase rules. You can discount by a percentage based on the product’s category, too.

Price:

Each plugin costs from $59/year for a single site license.

3. Formidable Forms

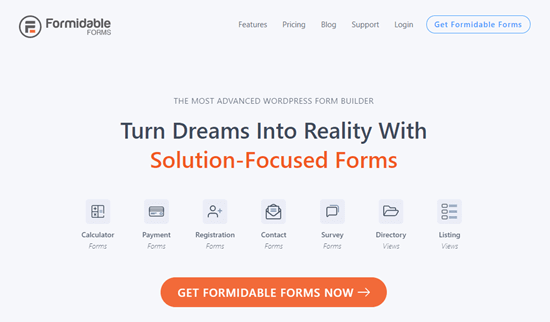
The Formidable Forms website

Formidable Forms is an advanced forms plugin for WordPress. It has powerful features that mean it can be used to create online calculators.

You can use Formidable Forms’ Request a Quote form to make a form that automatically calculates a quote for the customer instantly. Because of Formidable Forms’ flexibility, it’s easy to add as many variables as you want.

The quote that Formidable Forms produces can then be emailed to your customer. It can even be included in a booking form so your customer can book and pay for your service or product.

There are plenty of other forms you can create using Formidable Forms, too. For instance, you could use it to create a quiz for your WordPress site.

Formidable Forms also comes with visual design tools that let you make your request a quote form look great.

Price:

Formidable Forms costs from $99.38/year.

4. YITH WooCommerce Request a Quote

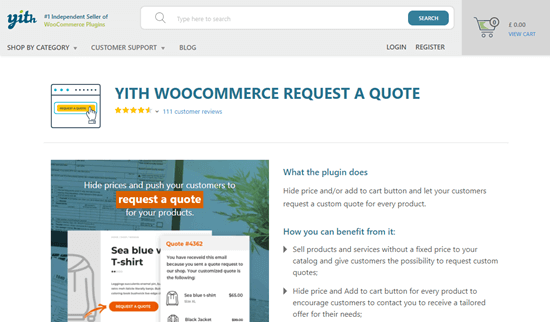
YITH WooCommerce Request a Quote

YITH WooCommerce Request a Quote hides the price and/or the Add to Cart button for the products you select in WooCommerce. In the place of these, it gives your customers the option to request a quote for the product.

Customers can choose from the options you set. You can even allow them to upload files. For instance, if you provide printing services, then you could ask the customer to upload their print-ready files when they request the quote.

The plugin also supports product variations, letting you add specific variations to the quote list.

When you are ready, it’s quick and easy to respond to the customer with a quote. The customer will receive this in a nicely-formatted email.

The whole process can be managed through your WordPress dashboard. Here, you are able to see quote requests, pending quotes, pending payments, and more.

Price:

YITH WooCommerce Request a Quote costs from $59.99/month.

There’s also a free version of the plugin, with limited features.

5. Request a Quote for WooCommerce

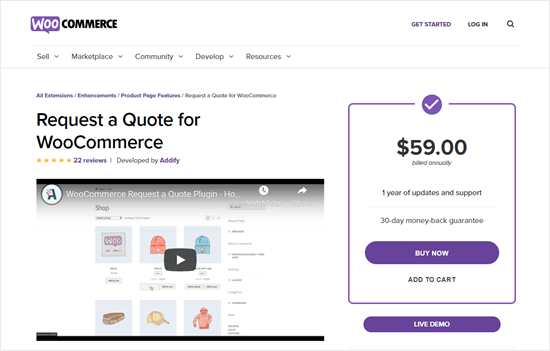
Request a Quote for WooCommerce

Request a Quote for WooCommerce is an official WooCommerce plugin. It lets your customer add products to a quote basket, just like they would normally add products to their cart.

You can customize the quote button text, the quote submission messages, and more. You can also automatically redirect the customer to a specified page on your site after they submit their request for a quote.

Request a Quote for WooCommerce is a great option if you have personalized products that could have a range of prices depending on what the customer wants.

You can also use this plugin to sell to wholesale, B2B, or retail customers.

Price:

Request a Quote for WooCommerce costs $59/year.

We hope this article helped you learn about the best request a quote plugins for WordPress. You may also want to see our comparison of the best live chat software and best business phone services to help you get even more sales from your website.

If you liked this article, then please subscribe to our YouTube Channel for WordPress video tutorials. You can also find us on Twitter and Facebook.

The post 5 Best WordPress Request a Quote Plugins (Instant Quotes) appeared first on WPBeginner.


August 28, 2020 at 05:00PM