Monday, September 14, 2020

How to Make a Print on Demand Shop in WordPress

Do you want to create a print on demand shop in WordPress?

You can use print on demand shop as a new online business idea, or use it to sell t-shirts and other swags to support your existing brand.

In this article, we will show you how to make a print on demand shop in WordPress, so you can run an online store without dealing with any inventory or shipping.
Creating a print on demand shop in WordPress

What is Print on Demand and Why Use It?

Print on demand is a manufacturing method where a design is only printed on a product once a customer orders it. This is very similar to dropshipping except the products are custom made for you.

It can be used for clothing, bags, homeware, and more.

Print on demand isn’t as cost effective as mass production manufacturing methods, but it has some big advantages for small businesses, and it can still be very profitable.

With print on demand, you don’t pay anything until a customer pays you which makes it much easier for small businesses to get started.

There’s no need to buy inventory upfront, and you don’t need any storage space either. Plus, you can easily experiment with different designs to see which is most popular.

There are a few different print on demand companies out there. In this tutorial, we’ll be using Printful. It’s well established and integrates easily with your WordPress site through WooCommerce.

As well as printed designs, Printful also offers embroidery for some products, such as baseball caps and backpacks.

You can use it to easily sell your custom branded merchandise such as t-shirts, hoodies, shorts, hats, backpacks, bracelets, phone cases, keychains, coffee mugs, blankets, and over 249 products.

Creating an Account with Printful to Sell Your Products

First, you need to sign up for a free account with Printful. Simply go to the Printful website and click the ‘Start selling’ button:
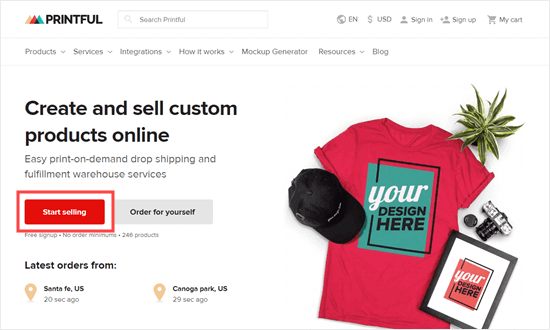
Click the 'Start Selling' button to begin selling with Printful

Next, enter your name, email address, and password. You also need to check the box to agree to Printful’s terms and conditions:
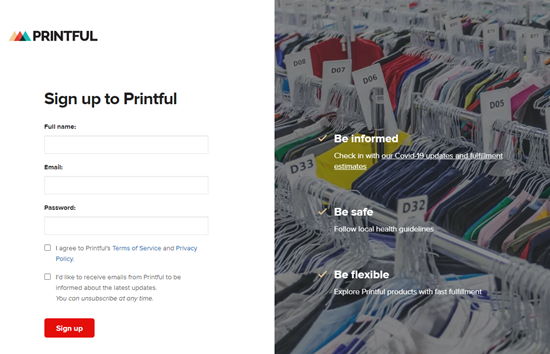
Enter your details to sign up for Printful

Printful will ask a few questions about how you plan to use their service. Once you’ve answered these, you will see the Printful dashboard.
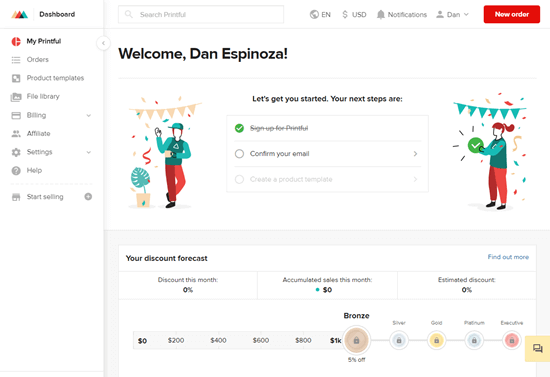
The welcome page for the Printful dashboard

You will also get an email with a link that you need to click to confirm your email address.

You can go ahead and set up your products straight away. Simply go to ‘Product templates’, and then click the ‘New template’ button.
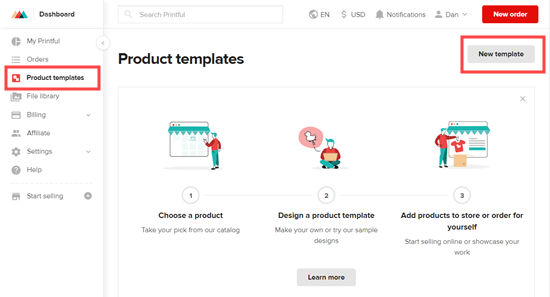
Creating a new product template in Printful

Here, you will see a wide range of different templates. Just click on the product you want to use. We’re going to create a basic T-Shirt:
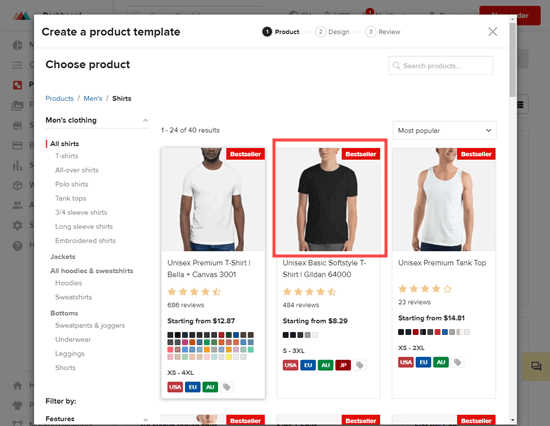
Creating a basic print on demand t-shirt with Printful

If you already have a design for your product, go ahead and drag it here to upload it. For example, you might use your business logo or company slogan. Here’s an example of a T-Shirt using the OptinMonster logo:
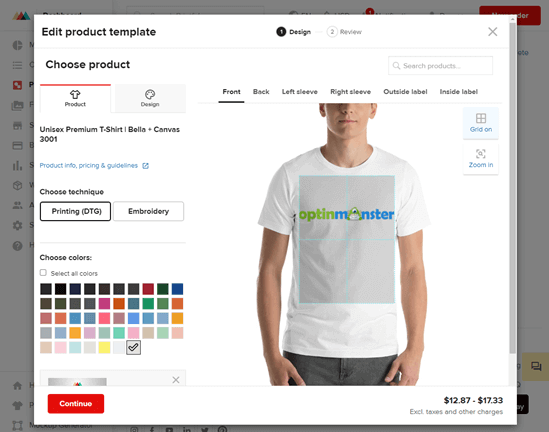
Creating an OptinMonster t-shirt with Printful

We’re going to add text and clipart from Printful to create our product. In the mockup generator, you can change the size and color of the text, and you can easily drag it to resize or reposition it.
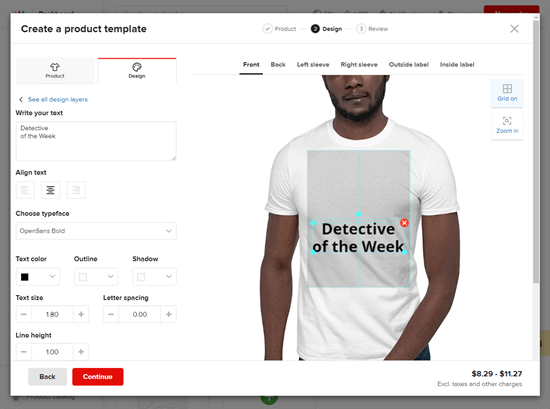
Adding text and clipart to a print on demand t-shirt in Printful

The tabs at the top of the screen let you add designs to other areas of the product, where applicable. Once you’re happy with your design, click the ‘Continue’ button:
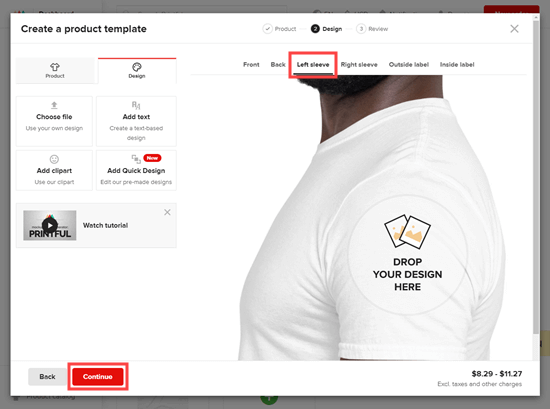
Editing the left sleeve of the print on demand t-shirt in Printful

Now, it’s time to give your template a title and save it. It’s easy to go back and change it if you want to make changes in the future. You can find it by going to the ‘Product templates’ tab again:
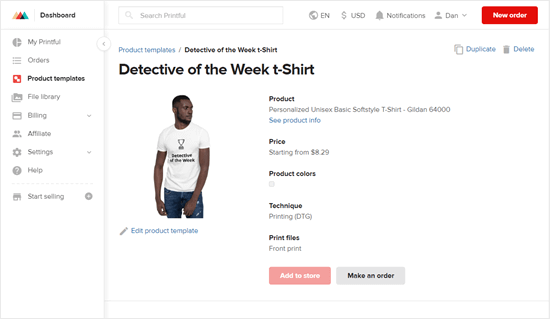
Viewing your product in the list of product templates that you've created in Printful

Go ahead and create as many products as you want.

You also need to set up a billing method for Printful. Your customers will pay you through your online store for the product, and Printful will charge you the cost of shipping it. We will show you how to setup your online store in the next step.

For now, let’s setup Printful billing. Simply go to Billing » Billing methods in Printful, then click the ‘Add new billing method’ button:
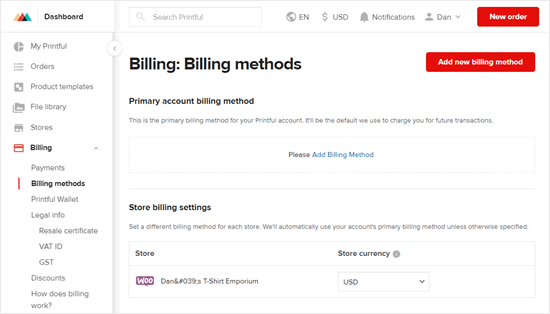
Setting up a billing method in Printful

Then, you need to enter the details for either your credit card or your PayPal account. Don’t worry, you will not be charged unless you order a shirt from your account.

Connecting Printful to Your WordPress Site

The next step is to connect your Printful account to your WordPress site. You need to have the WooCommerce plugin installed and activated on your site.

If you don’t have an online store yet, then don’t worry. We have a step by step guide on how to start your online store.

You’ll need a domain name and web hosting for your store. Domain is your website’s name, and web hosting is where your website files are stored.

We recommend using Bluehost. They’re one of the largest hosting providers in the world, and they’re officially recommended by WordPress.

They’re offering WPBeginner readers a 60% discount + free domain + free SSL + automatic WooCommerce setup. This means you can get started for $3.95 per month instead of $13.99 regular price.

→ Click here to Claim this Exclusive Bluehost offer ←

Once your online store is setup, you’re ready to connect it to your Printful account.

In order to connect Printful to your online store, you need to enable the Legacy REST API feature in WooCommerce. In your WordPress admin area, go to the WooCommerce » Settings page:
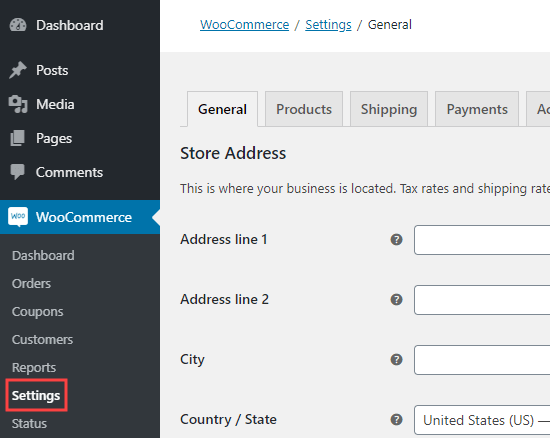
The WooCommerce settings page in your WordPress dashboard

Next, click on Advanced » Legacy API. Here, you simply need to click the box for ‘Enable the legacy REST API’ then click the ‘Save changes’ button:
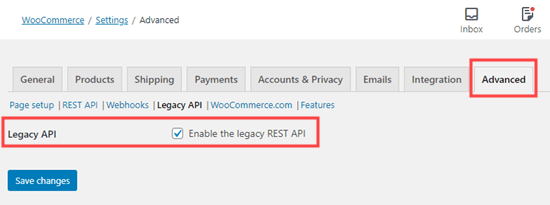
Enabling the Advanced Legacy REST API in WooCommerce so you can connect to Printful

The next step is to install and activate the Printful Integration for WooCommerce plugin. For more details, see our step by step guide on how to install a WordPress plugin.

Upon activation, go to the Printful tab in your WordPress admin. Then, simply click the ‘Connect’ button:
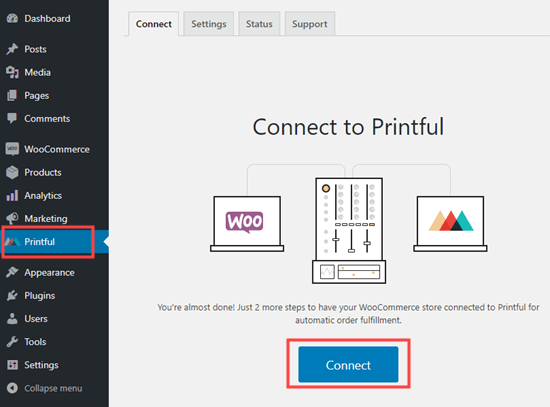
Click the button to connect Printful to WooCommerce

You will be prompted by WooCommerce to approve the connection. Simply click the ‘Approve’ button to continue, then follow the on-screen prompts to connect and confirm your account.

Once you’ve done that, you will see a message letting you know that your product data is being synchronized. After a minute or so, your WooCommerce store will be linked.
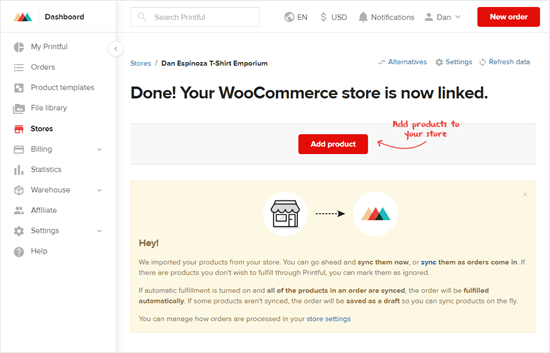
Your WooCommerce store is now linked to your Printful account

To put your products live in your store, you need to go back to your Printful account. Then, go to the Product Templates tab in your Printful dashboard.

Then, click the checkbox above the product you want to add to your store, and click the ‘Add to store’ button.
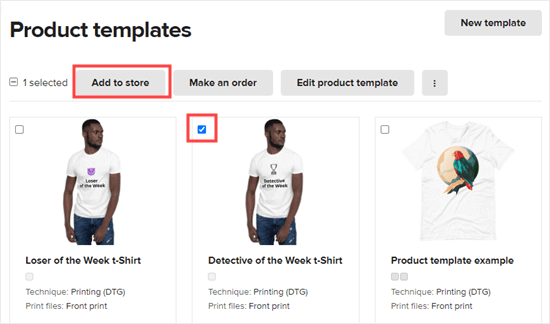
Select one of your print on demand products and click to add it to your WooCommerce store

Note: You cannot add two or more products to your store at the same time. You need to go through an approval process for each product.

Now, simply follow Printful’s prompts. You will get to select colors and sizes, view the mockup images, and give your product a name and description.

The final step is to set the pricing. Printful will automatically suggest prices for you. These are marked up from the price that Printful charges so that you can make a profit on each item:
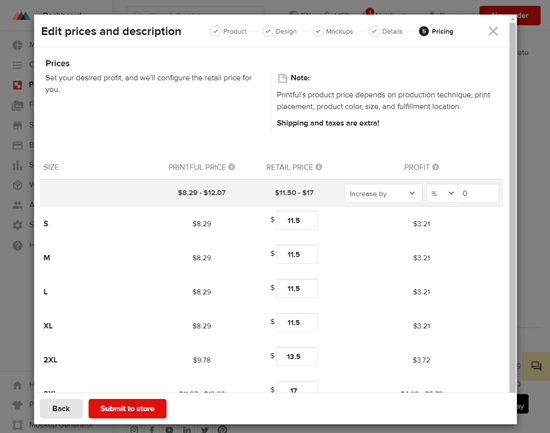
Setting your product prices in Printful

Once you’ve set your prices, simply click the ‘Submit to store’ button to send the product to your WooCommerce store. It will now be live on your site:
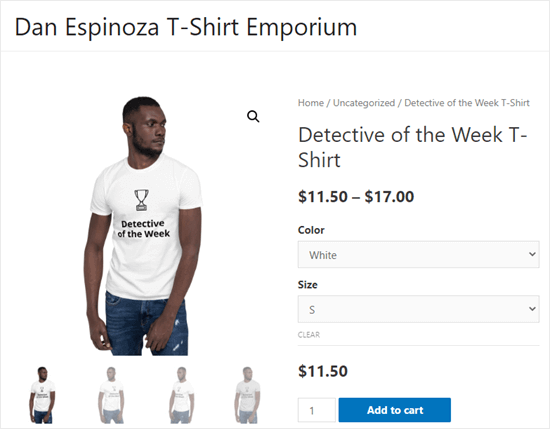
Viewing your finished print on demand product live on your website

Go ahead and repeat this process for each product that you want to add to your store.

You will then be able to see and edit your Printful products in your WordPress admin by going to Products » All Products:

The list of print on demand products in WooCommerce, viewed in your WordPress dashboard

You can create as many products as you like in Printful. You don’t need to pay anything until you get orders. Printful will handle all the production and shipping for you.

Here’s our finished online store, with a range of Printful’s products:

The finished print on demand store, with a range of products ready to buy

We hope this article helped you learn how to make a print on demand shop in WordPress. You may also be interested in our articles on the best WooCommerce plugins and best email marketing services to help you get more subscribers and sales.

If you liked this article, then please subscribe to our YouTube Channel for WordPress video tutorials. You can also find us on Twitter and Facebook.

The post How to Make a Print on Demand Shop in WordPress appeared first on WPBeginner.


September 14, 2020 at 04:35PM

Friday, September 11, 2020

14 Best AI Chatbots Software for Your Website (Compared)

Are you looking for the best chatbot software for your site?

Chatbots allow you to free up time by automatically answering common customer questions. They can also be used to generate leads, improve user experience, and make more sales.

In this article, we have handpicked the best AI chatbots software for your WordPress site to improve customer experience and boost conversions.

The best AI chatbots software for WordPress

1. ChatBot.com

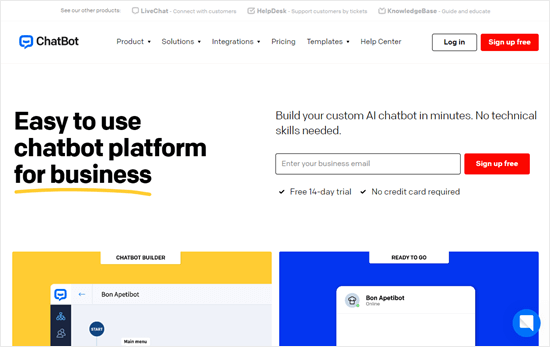
The ChatBot website

ChatBot allows you to easily make chatbots using their drag and drop chatbot builder. You don’t need to do any coding or have any special technical skills.

It even comes with pre-built templates that you can use as a starting point to quickly get your AI ChatBot up and running. These templates include different scenarios like selling products, customer service, recruitment, bookings, and more.

ChatBot integrates with your WordPress website and can be used along with top live chat software well as other popular apps that you may be using to grow your business.

ChatBot is also a great chatbot for Facebook messenger powered by the same AI-driven software. This gives you a powerful tool to retarget customers on Facebook, collect data, and spend money wisely on Facebook ads.

They offer a free 14-day trial (no credit card required) which helps you try it out before choosing a paid plan.

Integrating ChatBot within our own businesses is a big priority for us currently. ChatBot is a great tool for us because it lets us seamlessly forward users to our live support teams where needed.

Pricing: ChatBot costs from $50 per month, which includes 1 active chatbot and 1000 chats per month.

2. ManyChat

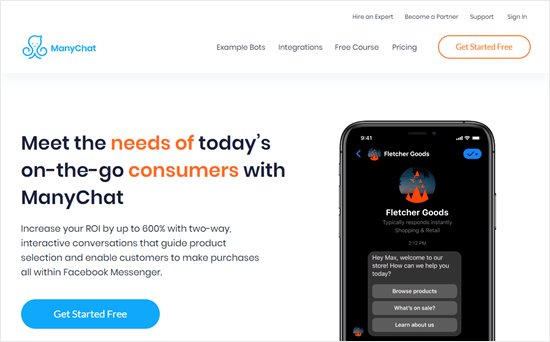
The ManyChat website

ManyChat is a Facebook messenger chatbot builder. With more than 1.3 Billion people using Facebook Messenger, it allows you to have a wider reach and more powerful retargeting options on the Facebook platform.

In simpler words, it helps you make sales, decrease cart abandonment, capture leads, and more by using Facebook Messenger.

It comes with a simple drag and drop interface which makes it super easy to set up a chatbot for your Facebook page. You can automatically welcome new users, point them to products, schedule messages, respond to specific keywords, and much more.

Pricing: ManyChat has a free plan that you can use to get started. This includes basic quick-start templates, 2 drip sequences, and up to 10 tags for audience segmentation. The premium plan has unlimited drip sequences and tags, plus split testing, buy buttons, and more.

3. Freshchat

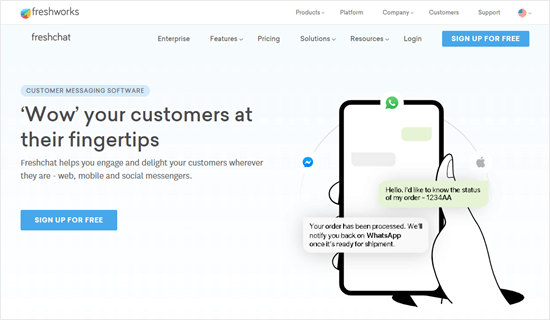
The Freshchat website

Freshchat allows you to build chatbots for WhatsApp, Messenger, Apple Business Chat, mobile, and web.

It is powered by Freddy, their artificial intelligence algorithm. It is designed to detect intent and engage with the customer, rather than simply being intended to free up the time of your live chat agents.

Using their machine learning technology, Freshchat can even provide you with a list of customer and prospect questions that need precise or better answers.

Pricing: You will need Freshchat’s ‘Forest’ plan for enterprises to use their chatbot. This isn’t cheap, at $69 per user per month when billed monthly.

4. Drift

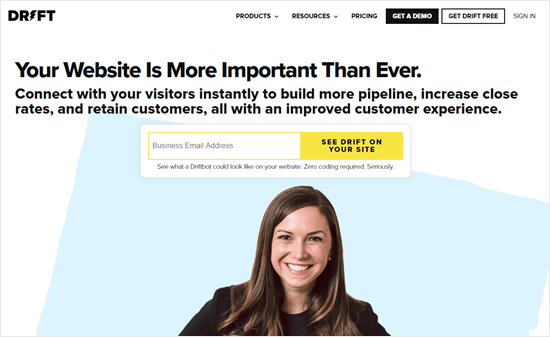
The Drift website

Drift lets you combine live chat and an automated chatbot, like many of the tools on this list. It also integrates with the most popular CRMs and email marketing services.

Drift allows you to proactively start conversations with customers that are already engaged with the products or services on your website. It is designed to use conversations for conversions and allows you to create scenarios that help you get more sales.

It offers integrations with many third-party tools such as Zendesk, Help Scout, and more.

Drift is more suitable for fairly large businesses, and the pricing reflects that. If you’re just starting to make money online, we recommend that you try one of the other tools on our list.

Pricing: Drift costs from $400/month billed annually. This includes 5 users. (There is a free plan available too, but that doesn’t have the chatbot features.)

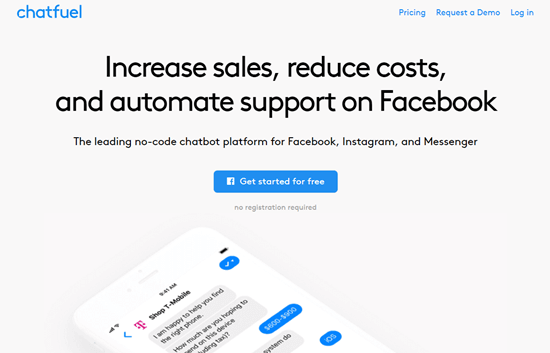
5. Chatfuel

The Chatfuel website

Chatfuel is a powerful chatbot platform for Messenger, Facebook, and Instagram. You don’t need any coding knowledge or previous experience to use it.

Lots of different companies use Chatfuel, including large brands like Adidas, T-Mobile, LEGO, TechCrunch, and more.

You can use your bot to increase sales, to qualify leads, or to provide answers to frequently asked questions. This lets you save a lot of time for your customer service team.

There is plenty of documentation on the Chatfuel website to help you build a bot easily. This includes advice on how to make sure you follow Facebook’s rules for using a Messenger bot.

Pricing: Chatfuel costs from $15/month, with no user limit. There’s also a free plan that offers a fully-featured bot and up to 50 users.

6. MobileMonkey

The MobileMonkey website

MobileMonkey lets you create bots using their OmniChat™ technology. These bots work in web chat, in Messenger, and even through SMS text messages.

This saves you time and money creating different bots using different tools. You can create a single bot and use it across multiple platforms.

Your customer service team can easily respond to messages. MobileMonkey has desktop and mobile apps that give you a single inbox to easily monitor and respond to messages from different channels.

It also offers integrations with third-party software that you may already be using such as CRM software, email marketing service, webinar provider, and more.

Pricing: MobileMonkey costs from $14.25/month, billed annually, for an unlimited number of leads. There’s also a free version with unlimited leads but fewer features.

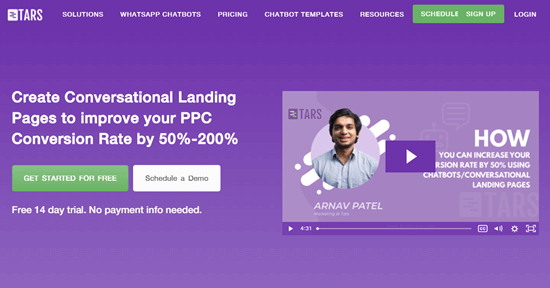
7. Tars

The Tars website

Tars is a tool that lets you create conversational landing pages. Essentially, this means replacing a traditional landing page with a chatbot.

It lets you easily qualify leads. Tars is particularly well optimized for mobile users, providing a natural and easy chatbot conversation.

Making a chatbot is quite straight forward using Tars. You can either create a conversation workflow from scratch, or you can use a pre-built template.

Pricing: Tars costs from $83.25/month, billed annually. There’s no free plan, but you can take a free 14-day trial (no credit card required).

8. Tidio

Tidio

Tidio is a live chat platform powered by chatbots. It allows you to communicate your clients by using web and mobile friendly chatbot, Facebook Messenger chatbot, and more.

It comes with an easy dashboard and a mobile app to answer all user inquires at any time from anywhere. You can also use automation as much as you like to answer customer questions and design funnels that lead to conversions.

You can use a chatbot template or create your own chatbot scenarios based on keywords and customer behavior on your site. It is easy to use and integrate with your eCommerce platform, email marketing, and help desk software.

Pricing: Starting from $18 per month. They have a free plan too but it does not include chatbots.

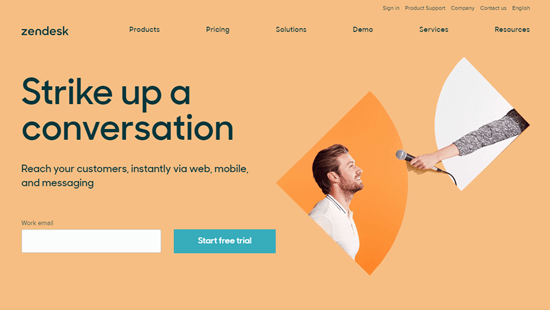
9. Zendesk Chat

The Zendesk Chat website

Zendesk Chat is part of Zendesk, a popular customer support platform for businesses. It has features that let you handle support tickets, chat live with your customers, and more.

You can use automated messages within Zendesk Chat, such as triggering messages based on what your customers are doing. You can also optimize your messages by testing which ones have a high engagement rate.

You can even integrate it with other chatbot tools if you want more advanced chatbot features.

Pricing: Zendesk Chat costs from $14 per agent per month, when billed annually. You can take a 14 day free trial (no credit card details needed). There’s also a free Lite version, which only lets you have 1 agent and 1 chat at a time.

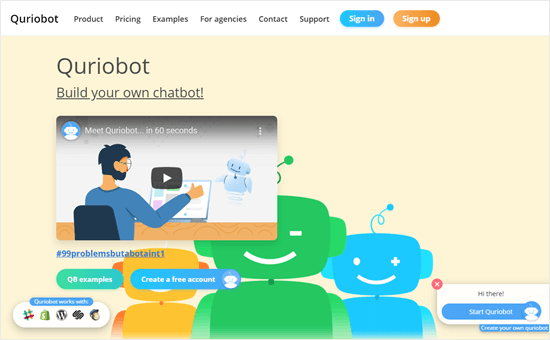
10. Quriobot

The Quriobot website

Quriobot is a simple chatbot that has a free plan, making it a good option for small companies on a tight budget.

Like other chatbot software, it has a simple drag and drop interface. You can either build conversations from scratch or use one of the available templates. You can also create several bots at once.

You can adjust Quriobot’s styling to fit your website’s color scheme and you can even add custom CSS if you want to.

Quriobot integrates with help desk software such as LiveAgent, if you want a complete solution that gives you a support desk, live chat, and more.

Pricing: Quriobot has a generous free plan that allows you up to 500 chats per month, with unlimited bots and organization members. If you want more chats per month, or if you want to remove the Quriobot branding, you need to pay from €9/month. (Quriobot’s pricing is in Euros.)

11. Intercom

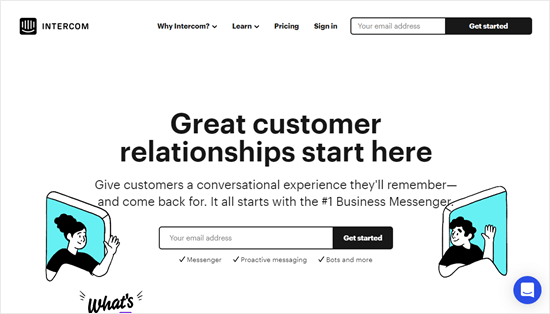
The Intercom website

Intercom is a flexible tool that can be used as a chatbot or for live chat with an agent. You can use it to automate your marketing and to engage users.

Intercom’s whole approach is designed to be conversational, to help you build relationships. It’s easy to scale as your business grows, too.

With Intercom, you can personalize your chatbot’s interactions with customers. You can filter and target customers based on what they do (or don’t do) and you can group them into segments based on their attributes and behavior.

Intercom integrates with email marketing services, Slack, Google Analytics, CRM software, and more.

Pricing: Intercom’s Start package costs from $39/month. However, to use the chatbot features, you need at least the Growth plan from $99/month. You can take a free 14 day trial of either of these plans (credit card details are required).

12. SnapEngage

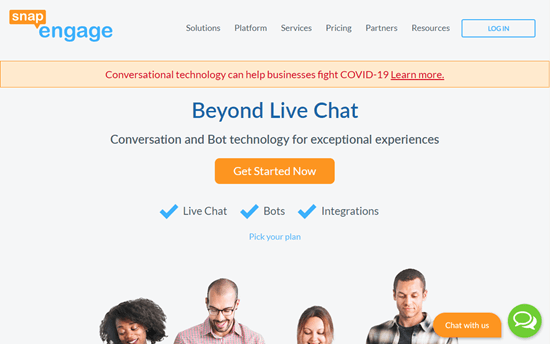
The SnapEngage website

SnapEngage is designed to help you with both sales and support. You can use it on your WordPress site. It also integrates with Facebook Messenger, and other popular software.

It comes with ready-to-use bots, such as the Info-Capture and the Answer Bot. You can also create custom bots using the custom bot API.

If you run a healthcare site, then SnapEngage offers ‘Health Engage’ to provide secure, HIPAA-compliant chatbots, live chat, and SMS messaging.

Pricing: SnapEngage costs from $16 per user per month (with a minimum of 3 users), billed annually. Their HealthEngage option costs from $26 per user per month, again with a minimum of 3 users.

13. LivePerson

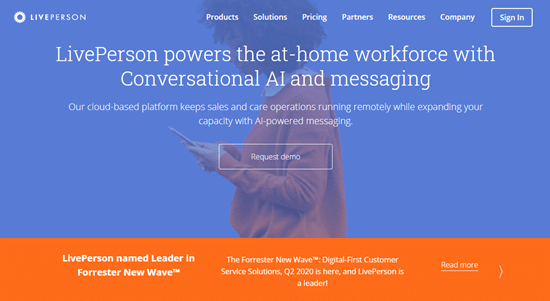
The LivePerson website

LivePerson offers live chat software, as you might expect from their name. You can also use it to create automated conversation flows using a chatbot.

Your chatbots can connect potential buyers to a live agent, send offers based on the customer’s interests, and even schedule appointments or meetings. Customers can also check on their order status, find out their account balance, and get answers to billing or payment questions.

As well as integrating with your WordPress site, LivePerson can be used on Facebook, Twitter, and more.

Pricing: LivePerson doesn’t provide a standard scale of prices. Instead, you need to contact them for a quote.

14. Ada

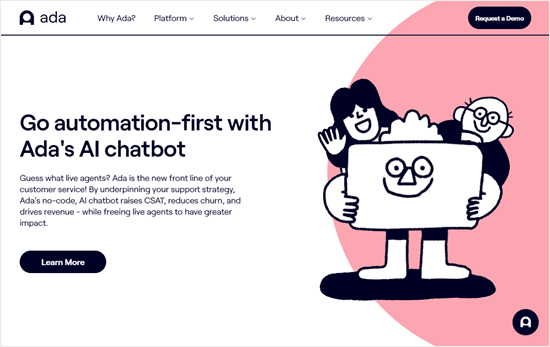
The Ada website

Ada is a chatbot that can tailor its responses and recommendations based on the customer’s information, intent, and interests. It’s designed to be simple to use, so that your support team can set everything up. There’s no coding involved.

You can also integrate Ada with your live chat so that customers can move seamlessly from the chatbot to a live agent. It also integrates with your team calendar to schedule appointments and bookings.

Pricing: Ada doesn’t provide prices upfront. Instead, you need to chat with the sales team or request a demo to find out how much it will cost you.

Our Pick: Best Chatbot Software

For most businesses, we recommend ChatBot.com as the best AI chatbot software because it’s easy to use and comes with pre-made workflows.

They also offer many built-in integrations with third-party marketing services, and the pricing is fairly affordable compared to other solutions.

If you’re looking for alternatives, then please take a look at FreshChat or Drift.

We hope this article helped you learn about the best AI chatbots software for your WordPress site. You might also want to take a look at our guides to the best live chat software and best business phone services for small businesses.

If you liked this article, then please subscribe to our YouTube Channel for WordPress video tutorials. You can also find us on Twitter and Facebook.

The post 14 Best AI Chatbots Software for Your Website (Compared) appeared first on WPBeginner.


September 11, 2020 at 05:30PM

Thursday, September 10, 2020

How to Easily Add Custom CSS to Your WordPress Site

Sometimes you may find yourself needing to add Custom CSS in your WordPress site.

Perhaps it’s because you’re following a tutorial on WPBeginner or our YouTube channel. For most beginners, using FTP is too confusing, but there are other ways to add custom CSS.

In this article, we will show you how to easily add custom CSS to your WordPress site without editing any theme files.

Adding custom CSS to your WordPress site

Video Tutorial

If you prefer written tutorials or want to move at your own pace, then continue reading the instructions below.

Method 1: Adding Custom CSS Using Theme Customizer

Since WordPress 4.7, users can now add custom CSS directly from the WordPress admin area. This is super-easy, and you would be able to see your changes with a live preview instantly.

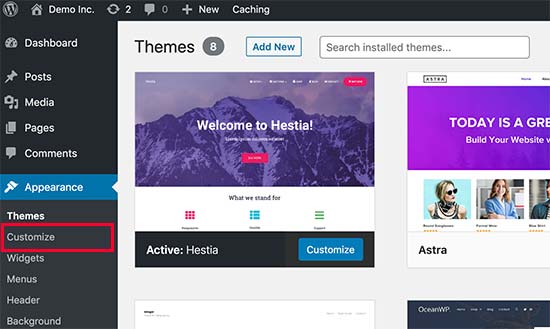
First, you need to head over to the Themes » Customize page.

Launching the theme customizer

This will launch the WordPress theme customizer interface.

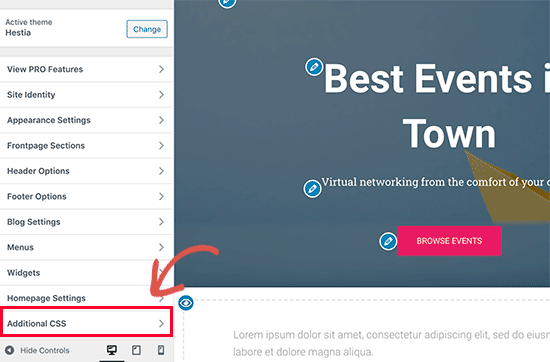
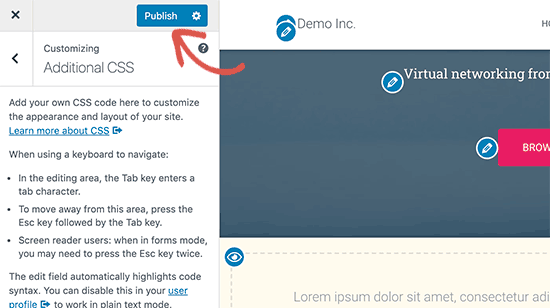
You will see your site’s live preview with a bunch of options on the left pane. Click on the Additional CSS tab from the left pane.

Additional CSS option in WordPress theme customizer

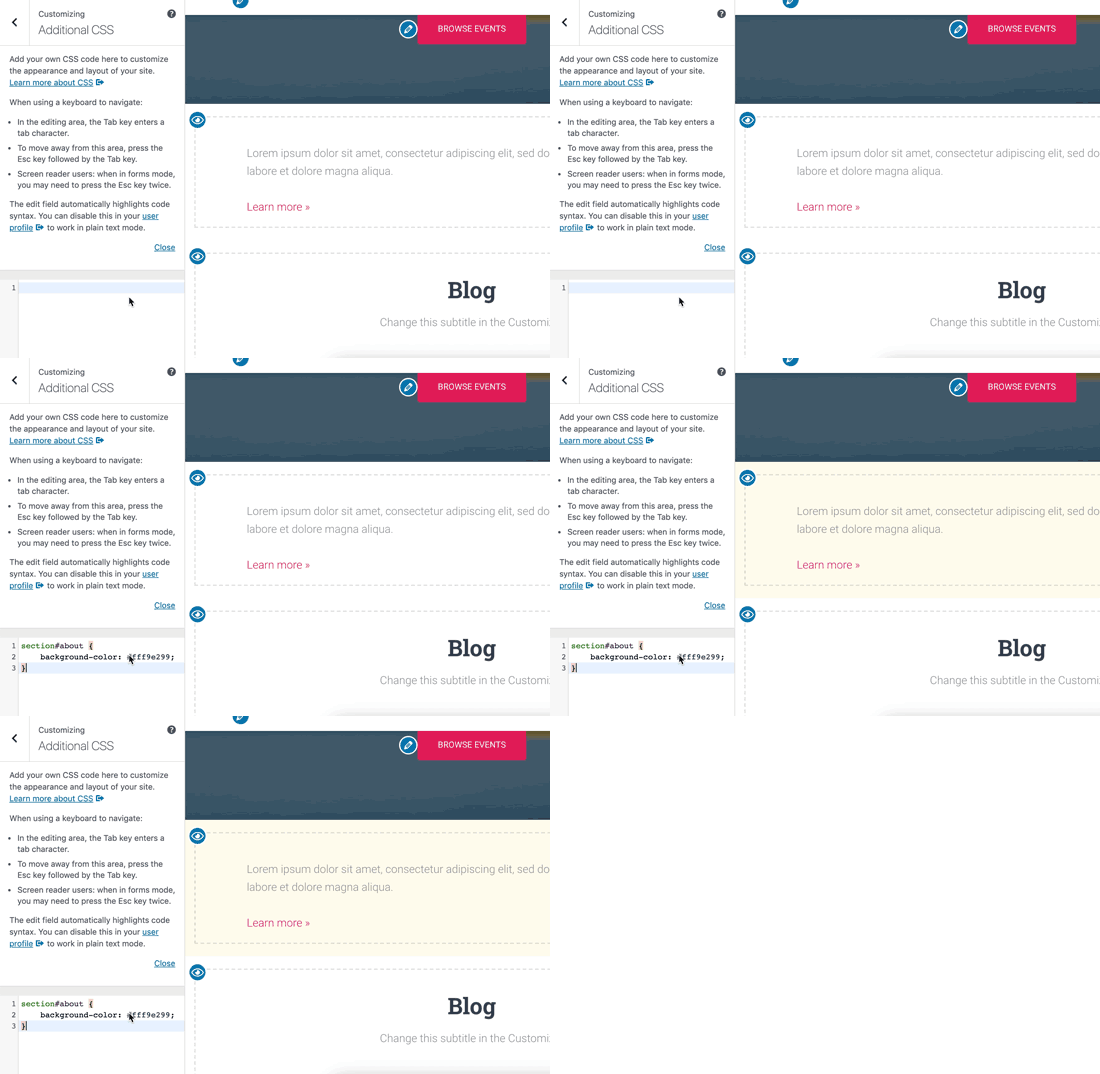
The tab will slide to show you a simple box where you can add your custom CSS. As soon as you add a valid CSS rule, you will be able to see it applied on your website’s live preview pane.

Adding custom CSS with live preview

You can continue adding custom CSS code, until you are satisfied with how it looks on your site.

Don’t forget to click on the ‘Save & Publish’ button on the top when you are finished.

Save your custom CSS changes

Note: Any custom CSS that you add using theme customizer is only available with that particular theme. If you would like to use it with other themes, then you will need to copy and paste it to your new theme using the same method.

Method 2: Adding Custom CSS Using a Plugin

The first method only allows you to save custom CSS for the currently active theme. If you change the theme, then you may need to copy and paste your custom CSS to the new theme.

If you want your custom CSS to be applied regardless of which WordPress theme you are using, then this method is for you.

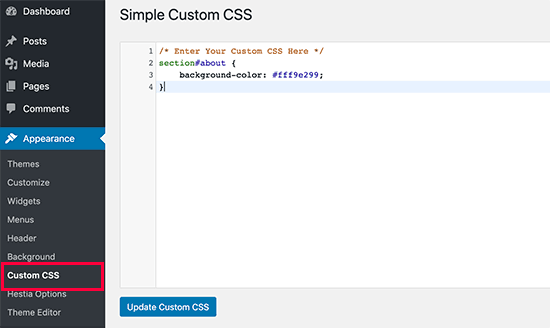
First thing you need to do is install and activate the Simple Custom CSS plugin. Upon activation simply go to Appearance » Custom CSS and write down or paste your custom CSS.

Simple Custom CSS

Don’t forget to press the ‘Update Custom CSS’ button to save your changes.

You can now view your WordPress website to see the custom CSS in action.

Using a Custom CSS plugin vs Adding CSS in Theme

Both methods described above are recommended for beginners. Advanced users can also add custom CSS directly to their themes.

However, adding custom CSS snippets into your parent theme is not recommended. Your CSS changes will be lost if you accidentally update the theme without saving your custom changes.

The best approach is to use a child theme instead. However, many beginners don’t want to create a child theme. Apart from adding custom CSS, often beginners really don’t know how they will be using that child theme.

Using a custom CSS plugin allows you to store your custom CSS independently from your theme. This way you can easily switch themes and your custom CSS will still be there.

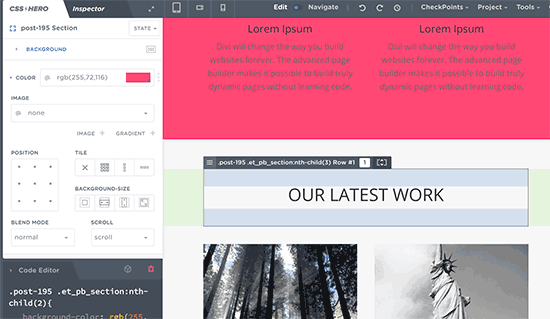
Another great way to add custom CSS to your WordPress site is by using the CSS Hero plugin. This wonderful plugin allows you to edit almost every CSS style on your WordPress site without writing a single line of code.

Editing custom CSS with CSS Hero plugin for WordPress

We hope this article helped add custom CSS to your WordPress site. You may also want to see how our guide on how to create a custom WordPress theme without writing any code, and the best WordPress drag & drop page builder plugins.

If you liked this article, then please subscribe to our YouTube Channel for WordPress video tutorials. You can also find us on Twitter and Facebook.

The post How to Easily Add Custom CSS to Your WordPress Site appeared first on WPBeginner.


September 10, 2020 at 05:00PM