Monday, November 9, 2020

How to Enable GZIP Compression in WordPress (3 Ways)

Do you want to enable GZIP compression in WordPress? GZIP compression makes your website faster by compressing the data and delivering it to the user’s browsers much quickly.

A faster website improves user experience and brings in more sales and conversions for your business.

In this article, we’ll show you exactly how to easily enable GZIP compression in WordPress.
Enabling GZIP compression in WordPress

What is GZIP Compression?

GZIP compression is a technology that compresses data files before it is sent to users’ browsers. This reduces the file download time which makes your website faster.

Once the compressed data arrives, all modern browsers automatically unzip the compressed files and display them. GZIP compression doesn’t change how your website looks or functions.

It just makes your website load faster.

GZIP is supported by all popular web browsers, server software, and all best WordPress hosting companies.

How does GZIP compression work?

Gzip compression uses compression algorithms that work on website files like HTML, CSS, JavaScript, and more. When a user requests a page from your website, the algorithm sends the output back in a compressed format.

Depending on data size, the compression can reduce file sizes by up to 70%.

This is why most website speed test tools like Google Pagespeed Insights highly recommend enabling gzip compression. These tools will also show a warning if gzip compression is not enabled onn your website.
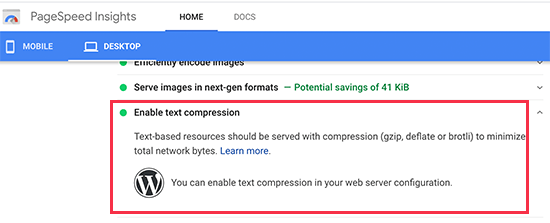
Pagespeed Insights

Note: By default, Gzip compression does not compress images or videos. For that you’ll need to optimize images for web on your WordPress site.

Why You Need to Enable GZIP Compression in WordPress?

Plain raw data takes longer to download which affects your page load speed. If several users arrive at the same time, then it will further slow down your WordPress website.

Using GZIP compression allows you to efficiently transfer data, boost page load times, and reduce the load on your website hosting. It is an essential step in improving your website speed and performance.

Now, you might think that GZIP sounds very technical and complicated. However, there are many WordPress plugins that make it super easy to add GZIP compression on your WordPress website.

In some cases, you may even have GZIP already enabled by your WordPress hosting company.

Bluehost an officially recommended WordPress hosting provider automatically enables GZIP compression on all new WordPress sites.

To test if GZIP is enabled on your site, simply go to this GZIP tester and enter the URL of your site. If GZIP is working on your site, you will see a ‘GZIP Is Enabled’ message.
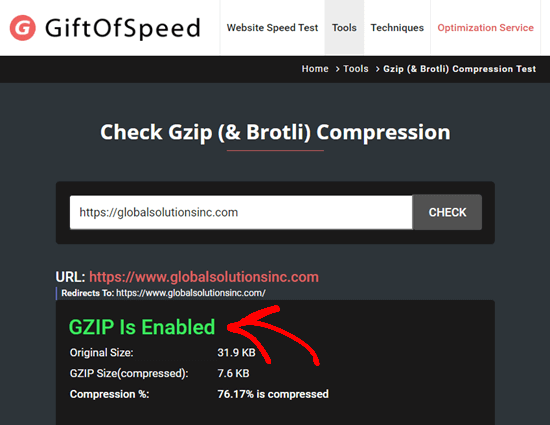
Using a GZIP test tool to see that GZIP is enabled on the specifed website

If you need to add GZIP compression by yourself, then you can use any of the following methods to do so:

Enabling GZIP Compression with WPRocket

WP Rocket is the best caching plugin for WordPress. It is incredibly easy to use and turns on all the essential speed optimization features out of the box, including GZIP compression.

First, you need to install and activate the WP Rocket plugin. For more details, see our step by step guide on how to install a WordPress plugin.

Upon activation, your license key should be automatically activated for you. You can check this by going to the Settings » WP Rocket page in your WordPress admin.

You should see a message letting you know that WP Rocket is active and working.
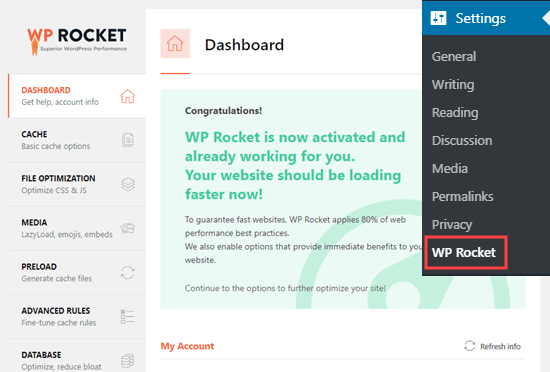
The message showing that WP Rocket is active and working on your site

WP Rocket automatically enables GZIP compression for you if you’re using an Apache server. Most WordPress web hosting providers use Apache for their servers. You don’t need to take any additional steps.

For a breakdown of all WP Rocket features, check out our guide on installing and setting up WPRocket.

Enabling GZIP Compression with WP Super Cache

WP Super Cache is a free WordPress caching plugin. It is also a great way to enable GZIP compression on your WordPress site.

First, you need to install and activate the WP Super Cache plugin. For more details, see our step by step guide on how to install a WordPress plugin.

Upon activation, go to the Settings » WP Super Cache page » Advanced in your WordPress dashboard. Then, simply check the box ‘Compress pages so they’re served more quickly to visitors’ box.
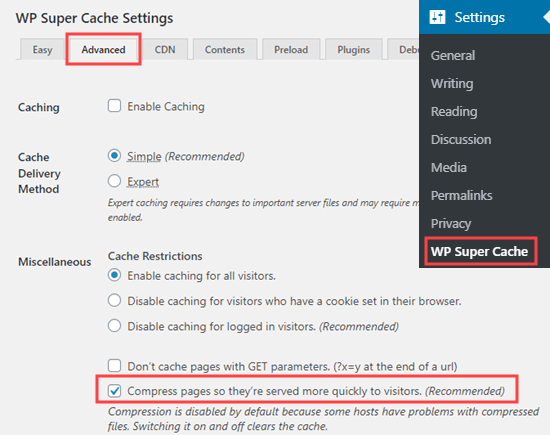
Check the box to compress pages

You then need to scroll down the page and click the ‘Update Status’ button to save your changes. WP Super Cache will now enable gZip compression on your WordPress website.

Enabling GZIP Compression with W3 Total Cache

W3 Total Cache is another great WordPress caching plugin. It’s not quite so beginner-friendly as WP Rocket, but there’s a free version. This makes it a good option if the costs of creating a WordPress site are adding up.

First, you need to install and activate the W3 Total Cache plugin. For more details, see our step by step guide on how to install a WordPress plugin.

Upon activation, GZIP compression will be automatically enabled on your website. You can check or change this by going to the Performance » General Settings page in your WordPress dashboard.

Scroll down this page to Browser Cache and make sure there is a check in the Enable box:
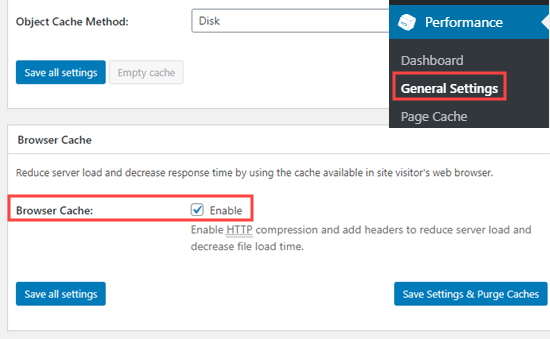
Make sure the browser cache box is checked

Don’t forget to click the ‘Save all changes’ button if you make any changes.

Checking that GZIP is Enabled on Your Website

After enabling GZIP, you may notice that your website pages load a bit faster. However, if you want to check that GZIP is running, you can simply use a GZIP checker tool.

Using a GZIP test tool to see that GZIP is enabled on the specifed website

We hope this article helped you learn how to enable GZIP compression in WordPress. You may also want to see our ultimate guide to speeding up WordPress, and check out our 27 proven tips on how to increase your website traffic.

If you liked this article, then please subscribe to our YouTube Channel for WordPress video tutorials. You can also find us on Twitter and Facebook.

The post How to Enable GZIP Compression in WordPress (3 Ways) appeared first on WPBeginner.


November 09, 2020 at 06:00PM
Friday, November 6, 2020

7 Best Web Push Notification Software in 2020 (Compared)

Are you looking for the best push notification software for your website?

Web push notifications are a powerful tool that allows you to connect with visitors after they leave your website. You can send targeted messages to your users which leads to more traffic, conversions, and sales.

In this article, we’ll share our pick of the best web push notification software for your website.

The best push notification software compared

Why Push Notifications Are a Powerful Marketing Tool

Push notifications allow you to engage and retain visitors after they leave your website.

You can send targeted personalized messages to users and bring them back to your website. This could be blog post notifications, product announcements, abandoned cart reminders, and more.

An example push notifiation from PushEngage

Push notifications go directly to the user’s web browser or mobile device which means it has a much higher engagement rate.

Many big sites like Facebook use push notifications. However, most small businesses haven’t yet realized how powerful they are. On WPBeginner website, push notifications are consistently a top 5 traffic source.

If you’re not using push notifications, then now is a great time to start, so you can get ahead of your competition.

With that said, here’s our comparison of the best push notification tools that you can try. All of them are fully compatible with WordPress which is the most popular website builder in the world.

1. PushEngage

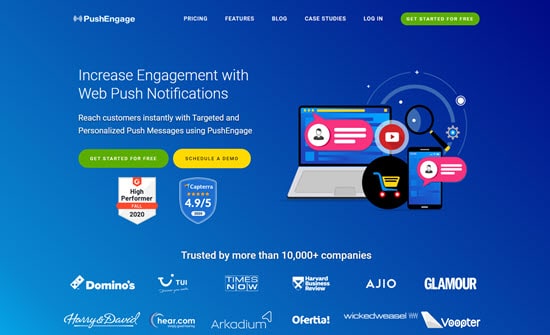
PushEngage

PushEngage is the best push notification tool on the market. It allows you to connect with visitors after they leave your site with targeted push messages.

You can set it up to automatically send your new blog post notifications, or use it to manually send custom messages.

It is super easy to set up and is a perfect solution for both beginners as well as advanced users. It works on both HTTP and HTTPs websites, and they support all devices / browsers.

PushEngage comes with powerful features such as A/B testing, automatic drip campaigns, smart opt-in reminders, custom triggered campaigns, and more.

Their triggered campaign feature lets you automatically create abandoned cart notification, schedule messages, send price drop alerts, and more.

Plus, you can track the performance of each campaign and even calculate the revenue generated from them using goal tracking.

PushEngage’s dynamic segmentation helps you send more targeted messages based on users’ actions. For example, you can segment visitors who added products to the cart, bought something, viewed a specific page, and more.

This level of personalization helps you get maximum results, so you get more traffic and sales.

Over 10,000+ companies use PushEngage, including big name brands like Dominos, TUI, Harvard Business Review, and of course WPBeginner.

Price:

PushEngage costs from $25/month, which gives you 5,000 subscribers and unlimited notifications.

There’s also a limited free plan, which gives you up to 2,500 subscribers and 120 notifications/month.

Editor’s note:

Our founder, Syed Balkhi, fell in love with this platform because of the impact it had on our business. In October 2020, we acquired PushEngage, and it’s now part of WPBeginner’s family of products.

2. OneSignal

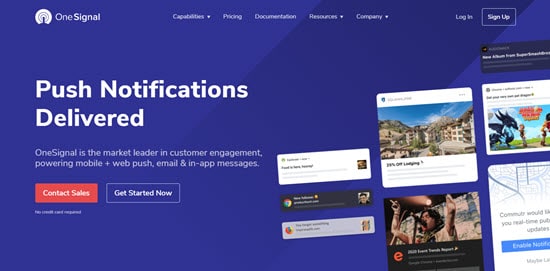
OneSignal

OneSignal is a popular push notification tool. It has similar features to PushEngage. You can use it to create automatic push notifications, announcements, abandoned cart notifications, and more.

You can easily set your push prompt to display after a certain number of page views and/or seconds. This means you don’t need to display the push prompt the moment someone arrives on your site.

Along with offering push notifications, OneSignal lets you create in-app messages and emails. Like PushEngage, OneSignal offers A/B testing and useful analytics. You can also segment your audience for better targeting.

One key drawback to OneSignal is that it gets expensive as you need more features. It also has fewer automation, personalization, and customization options than PushEngage.

Price:

At the time of writing this article, OneSignal’s paid plans started at $99/month. They have introduced a Growth plan which will be available in November at $9 per month.

However, this plan is still limited, and you will need their Professional plan at $99/month to get the most features. There’s also a free plan available with up to 10,000 subscribers.

3. VWO Engage (PushCrew)

VWO Engage

VWO Engage, which used to be called PushCrew, has a web push notifications tool that works on both desktop and mobile.

It’s designed to let you create push notification campaigns, which have entry and exit triggers. That means the campaign can automatically start based on the user’s actions, such as clicking a particular link.

Users can also be automatically opted out of the campaign when they take a set action, such as clicking a button or filling out a form.

VWO Engage offers segmentation, analytics, personalized notifications, and A/B testing. However, their segmentation tools and engagement campaigns are quite limited.

Price:

VWO Engage costs from $99/month. This gives you up to 10,000 subscribers and unlimited notifications.

There’s no free plan available. However, you can take a free trial for 30 days, with no credit card required.

4. iZooto

iZooto

iZooto offers real-time push notifications, recurring notifications, and scheduled notifications.

Like the other tools we’ve featured, iZooto allows you to personalize push notifications. You can also set up segmentation for more targeted messaging.

It includes A/B testing, Timezone based notifications, capture key user attributes and interests, and more.

Your initial push prompt can appear when the user scrolls down, after a certain length of time, or after a button click. This can help you increase the percentage of site visitors signing up for push notifications.

The iZooto customer success team will help you transfer over your subscribers if you’re already using a different push notification tool.

iZooto only works with https websites, which means your site needs to be using an SSL certificate.

Price:

iZooto costs from $85/month, which gives you up to 30,000 subscribers and unlimited notifications.

There’s no free plan available. However, you can take a 14-day free trial (no credit card required).

5. Webpushr

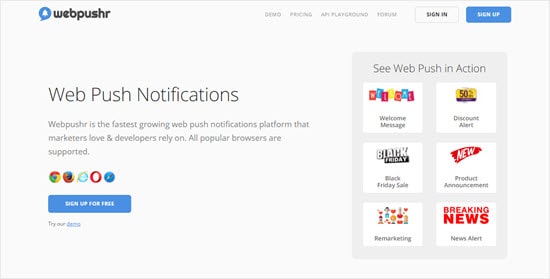
Webpushr

Webpushr is a straightforward web notifications platform that supports all popular browsers. It offers a range of different prompt templates that you can customize.

Webpushr makes it easy to transfer subscribers from another platform. It includes features like user segmentation, automatic web push, and HTTP support. Plus, it’s designed to integrate seamlessly with both WordPress and WooCommerce.

Webpushr gives you unlimited team members and unlimited segments for your subscribers. It also supports large images, action buttons, emoji, and custom branding.

Unlike most push notification plugins, Webpushr gives you all features on all plans. This includes their free plan. The only difference is how many subscribers you can have.

Price:

Webpushr costs from $19/month for up to 100,000 subscribers and unlimited notifications.

There’s also a free plan available. This gives you up to 60,000 subscribers and unlimited notifications.

6. PushAssist

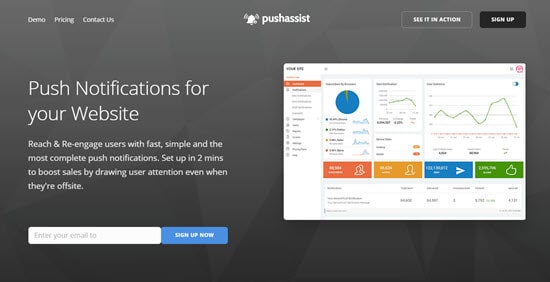
PushAssist

PushAssist is a push notification tool that supports Chrome, Firefox, and Safari browsers. It’s easy to set up, and works on both desktop and mobile.

With PushAssist, you get audience segmentation, personalization, scheduling tools, and insights into your customer data.

You also have the option to monetize your push traffic by letting advertisers send out push notifications to your audience. This could help you make money online.

You can use PushAssist with an HTTP or HTTPs website. However, you cannot remove the PushAssist branding unless you’re using the Business plan or higher.

Price:

PushAssist costs from $9/month for up to 3,500 subscribers.

There’s also a free plan available. This gives you up to 3,000 subscribers and unlimited notifications.

7. WonderPush

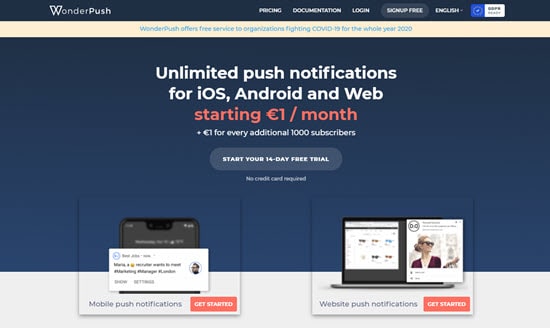
WonderPush

WonderPush works in a similar way to most other push notification plugins. It lets you segment your subscribers, automate notifications based on behavior or time, access real-time analytics, and more.

WonderPush lets you create various types of notification. These include eCommerce push notifications, such as automated abandoned cart notifications.

You get all the features however much you’re paying. This includes unlimited staff members, unlimited notifications, A/B testing, personalization, and more.

Price:

WonderPush has a different pricing model from the other tools we’ve featured. It costs from €1 per month for up to 1,000 subscribers, then it’s an extra €1 for every 1,000 subscribers after that.

There’s no free plan, but you can take a 14-day free trial. This doesn’t require a credit card.

Which is the Best Push Notification Software?

PushEngage is the best push notification software on the market. It’s beginner-friendly and easy to get started with, yet it also offers lots of powerful features.

Their free plan is suitable for small businesses and blogs. Their pricing is the most competitive as it scales which is a big reason why many large businesses use PushEngage. Their platform is robust and the support team is top-notch.

OneSignal can be a good fit too. However, their free plan is quite limited and even the paid plans have fewer features and customization options.

We hope this article helped you learn about the best push notification software for websites. You might also like our article on the best email marketing services, and the best business phone services for your small business.

If you liked this article, then please subscribe to our YouTube Channel for WordPress video tutorials. You can also find us on Twitter and Facebook.

The post 7 Best Web Push Notification Software in 2020 (Compared) appeared first on WPBeginner.


November 06, 2020 at 06:00PM

Thursday, November 5, 2020

Welcome Uncanny Owl and Automator Plugin to the WPBeginner Growth Fund

Today, I’m extremely excited to announce that WPBeginner Growth Fund has taken an investment stake in Uncanny Owl, the parent company of a fast growing WordPress automation plugin, Uncanny Automator, and a suite of e-learning plugins for WordPress.

Over 25,000+ websites use Uncanny Owl plugins to automate and grow their businesses.

WPBeginner Growth Fund invests in Uncanny Owl and Uncanny Automator Plugin

About Uncanny Owl and Uncanny Automator Plugin

Uncanny Owl is a Toronto based WordPress company founded by Ryan Moore and Ken Young.

They specialize in helping automate WordPress-powered learning platforms and membership sites to deliver compelling e-learning solutions.

Their team is behind the fast growing WordPress automation plugin, Uncanny Automator, which helps you automate various WordPress admin tasks, so you can save time & money.

Uncanny Automator Explained

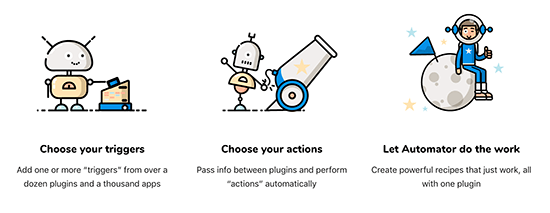
It seamlessly integrates with many popular WordPress plugins and third-party platforms, so you can easily build automation recipes without writing any code (over 300 triggers & actions).

In plain English, it helps your WordPress plugins talk to each other, so you can do cool things like:

  • Have 2 WordPress sites talk to each other – sell products on one while create users & setup access on another.
  • Create buttons that can automatically create user accounts and perform other actions in WordPress.
  • Add custom user attributes to user profiles based on user’s actions.
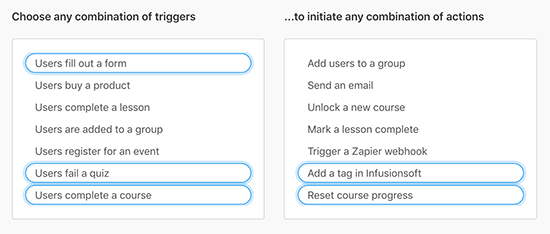
  • Trigger automation recipes in one plugin from the action taken by another plugin (for example, a submission of WPForms can be used to register a user in MemberPress, add them to a BuddyBoss group, and get a calendar event added).
  • Connect your WordPress site with 2000+ external services using a single Zapier integration.
  • … and so much more

Uncanny Automator Triggers and Actions

Uncanny Owl is also known for their popular Uncanny Toolkit and other e-learning extensions.

Background Story — Why Uncanny Owl?

I got introduced to Uncanny Owl brand through their Uncanny Automator plugin because I have always wished something like this existed in WordPress.

Having the ability for two plugins to talk to each other and seamlessly automate tasks is a dream come true.

What’s even better is that they let you do it across two sites without writing any code. The moment I saw it, I was like … this is Zapier for WordPress.

The fact that they had already built the product that would save website owners a lot of time, I wanted to work with them.

Coincidently, two of our mutual friends, Artur and Chris from Extendify, reached out and asked if I would be interested in chatting with the Uncanny Owl founders to discuss a deeper partnership.

My answer was, absolutely!

After few conversations, we decided to join forces.

I invested in the Uncanny Owl business through the WPBeginner Growth Fund and will be advising the team on how to expand their WordPress product business.

At Awesome Motive, we have years of experience building popular WordPress plugins that are used by over 15 million websites including OptinMonster, WPForms, MonsterInsights, and many more.

Not to mention, our other WPBeginner growth fund portfolio companies like MemberPress, Formidable Forms, Pretty Links, Wholesale Suite, and others have seen tremendous growth over the years.

Sharing our combined knowledge with Uncanny Owl will help all of us better serve the larger WordPress community.

I’m really excited to be working with Ryan, Ken, and the entire team to help accelerate their growth in 2021 and beyond.

Thank you so much for your continued support of WPBeginner.

Sincerely,

Syed Balkhi
Founder of WPBeginner

P.S. Want us to acquire or invest in your WordPress business? Learn more about the WPBeginner Growth Fund.

The post Welcome Uncanny Owl and Automator Plugin to the WPBeginner Growth Fund appeared first on WPBeginner.


November 05, 2020 at 07:00PM