Are you wondering what to add in the footer of your WordPress site?
Footer is the area at the bottom of your website. It is often overlooked by website owners but can be used in significant ways to improve the user experience on your website.
In this checklist, we will share the top things that you should add to the footer of your WordPress website.
What is Footer in WordPress?
Footer is generally the area that appears below the content part of your website. It is a common website design feature used by millions of websites.
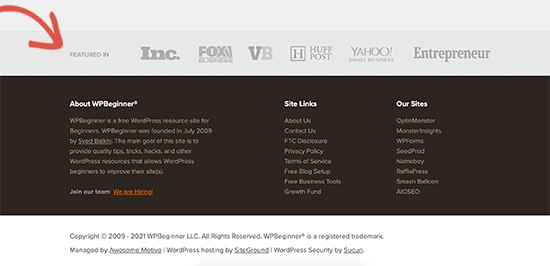
Footer may also refer to the footer code area. As you manage your website, third-party services like Google Analytics, Facebook Pixel, and others may ask you to add code to the footer of your website.
This footer code is not visible on the screen but is used to add code snippets needed for website functionality and features.
Many beginners often find it difficult to choose what to add to the footer of their WordPress website. This is a missed opportunity that can help improve your website.
That being said, let’s take a look at some of the things to add to the footer of your WordPress site, and how to make it more useful.
Here are the things we will add, feel free to jump to the items that interest you:
- Adding Links to The Footer of Your WordPress Site
- Adding Code in WordPress Footer
- Adding Privacy Policy Link in WordPress Footer
- Adding Copyright Date in WordPress Footer
- Remove Powered by Links from Footer in WordPress
- How to Add Instagram Feed in WordPress Footer
- Add a Sticky Footer Bar in WordPress
- Add Social Buttons in WordPress Footer
- Add a Phone Number in WordPress Footer
- Add a Contact Form in WordPress Footer
1. Adding Links to The Footer of Your WordPress Site
The first thing you would notice that most websites add links to the important pages for their website in the footer area. This usually includes links to their about, contact, team members, press, and other pages.
All popular WordPress themes come with a footer widget area. This is what we will be using to add different widgets and elements to the footer of your website.
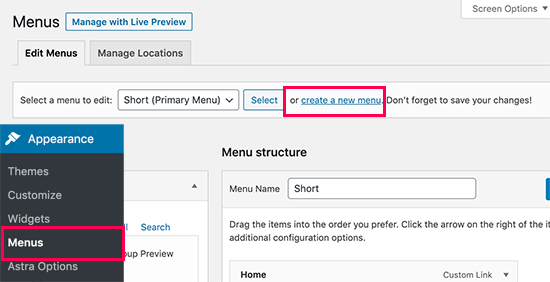
To add a set of links, you first need to go to Appearance » Menus page and click on the ‘create new menu’ link.
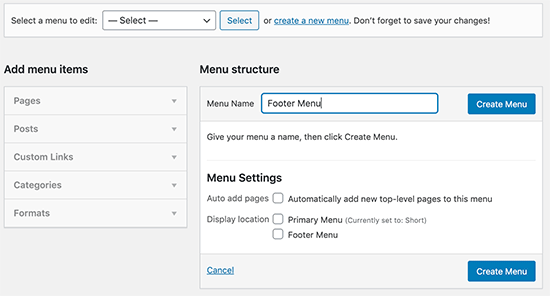
After that, enter a name for your menu and then click on the ‘Create Menu’ button.
After that, select the items you want to add to the menu from the left column and click on the ‘Add to Menu’ button.
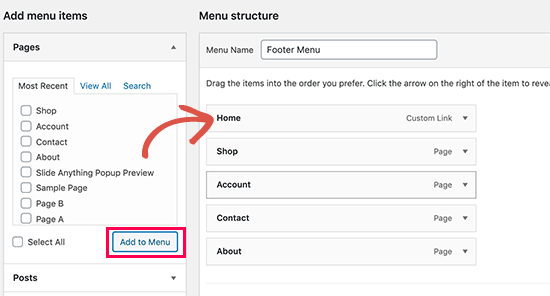
Once you are finished, click on the Save Menu button to store your changes. For more help, see our article on how to create navigation menus in WordPress.
Now that you have created the menu, let’s display it in the footer area of your website. Simply go to the Appearance » Widgets page and add the Navigation Menu widget to your footer sidebar.
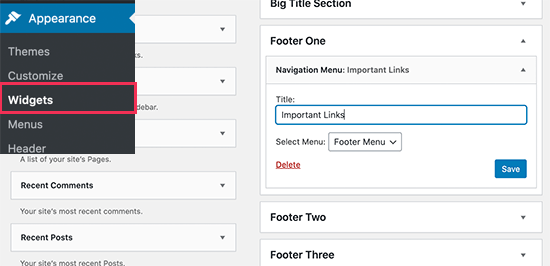
After that, select the footer menu you created earlier from the drop down menu and click on the Save button.
You can now visit your website, and you will see the links displayed in the footer widget area of your website.

2. Adding Code in WordPress Footer
As you manage your WordPress website, you may sometime need to add some code snippet to your WordPress website’s footer area.
One way to add them is by editing your theme files directly and pasting the code in the footer.php template. However, this is a bad approach as your code will disappear when you change the theme or update it.
The best way to add code in the WordPress footer is by using a plugin.
First, you need to install and activate the Insert Headers and Footers plugin. For more details, see our step by step guide on how to install a WordPress plugin.
Upon activation, you need to visit Settings » Insert Headers and Footers page. From here you can paste your code snippet in the ‘Scripts in Footer’ box.
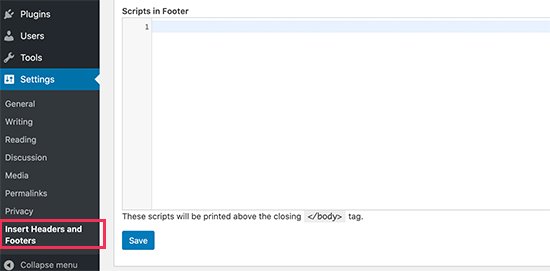
Don’t forget to click on the Save button to store your changes. For more details see our article on how to add header and footer code in WordPress.
3. Adding Privacy Policy Link in WordPress Footer
In order to comply with the GDPR and privacy-related laws in different countries, website owners are required to add a privacy policy page to their website and link to it from all other pages.
WordPress makes it super easy to create a privacy policy page and then you can add a link to it in your website footer.
First, you need to visit Settings » Privacy page. You’ll notice that WordPress has already created a Privacy Policy page draft for you.
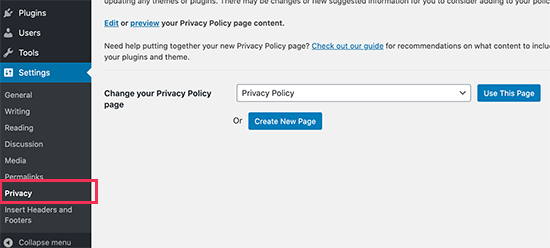
You can click on the ‘Use This Page’ button to use the default Privacy Policy template or create a new page.
Next, you need to edit that page like you would edit any other page in WordPress. You can add more information about your privacy policy as per your own requirements and publish that page.
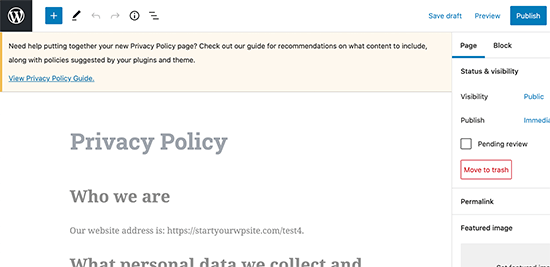
Once you are finished, you can add the privacy policy page to your footer navigation menu (see above).
For more details, see our article on how to add a privacy policy page in WordPress.
4. Adding Copyright Date in WordPress Footer
You may also want to add a copyright date in the WordPress footer area. Now one way to do this is to simply add the text in your theme settings.
Many top WordPress themes allow you to easily add text in the footer area of your website. You can find the option by visiting Appearance » Customize page and looking for footer settings in the left panel.
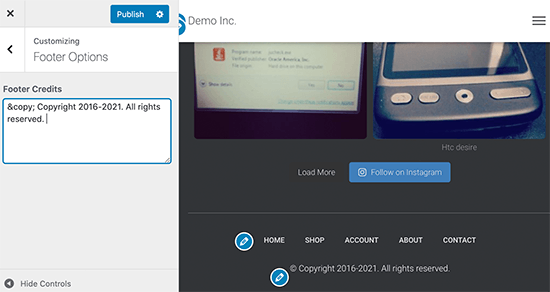
You can make the copyright symbol by adding your text in this format:
© Copyright 2016-2021. All rights reserved.
Don’t forget to publish your theme changes.
However, you will have to change the copyright notice each year to update the date. See our article on how to add dynamic copyright date in WordPress footer for a more elegant solution.
5. Remove Powered by Links from Footer in WordPress
Some free WordPress themes add a link back to WordPress website or their own websites in the footer area of your site.
You are not required to keep these links on your website. As they are outgoing links and affect your website’s SEO score if you have them on every page of your website.
Now many WordPress themes make it super easy to remove those links. You can find the option in Appearance » Customize page. Usually, it is located under footer options panel.
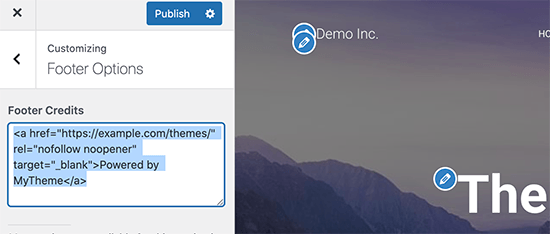
However, some themes may choose to hard-code the links in the theme files with no option to remove it manually. In that case, you can edit the footer.php file in your theme to remove those links.
6. How to Add Instagram Feed in WordPress Footer
If you run a fashion blog or want to promote your Instagram content then the footer of your website could be a nice place to display your recent Instagram photos.
First, you’ll need to install and activate the Smash Balloon Instagram Feed plugin. For more details, see our step by step guide on how to install a WordPress plugin.
After that you need to visit Instagram Feed » Settings page and click on the ‘Connect an Instagram account’ button.
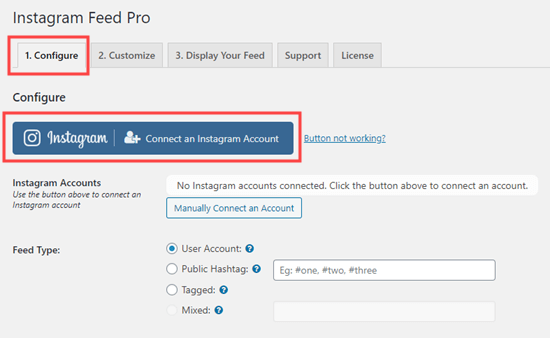
Follow the on-screen instructions to connect your Instagram account to your WordPress website. Once finished, you can go to Appearance » Widgets page and add the Instagram Feed widget to your footer sidebar.
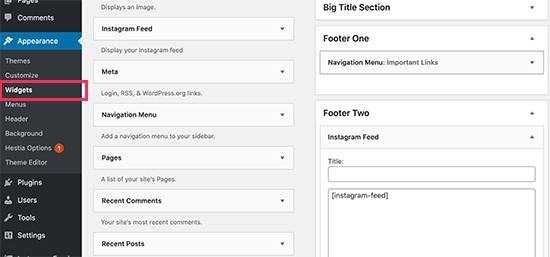
After that, you can visit your website to see your Instagram feed in the footer.
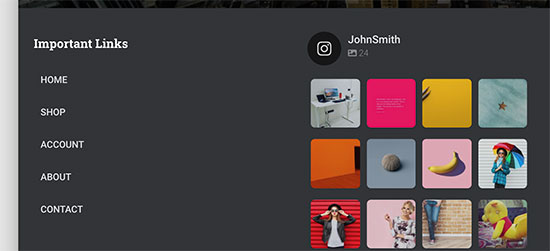
Smash Ballon also has plugins to easily embed Facebook, YouTube, and Twitter feeds anywhere on your website.
7. Add a Sticky Footer Bar in WordPress
Want to display special offers or notifications in the footer area? A sticky floating footer bar allows you to display a banner that remains on the footer of the screen as users scroll your website.
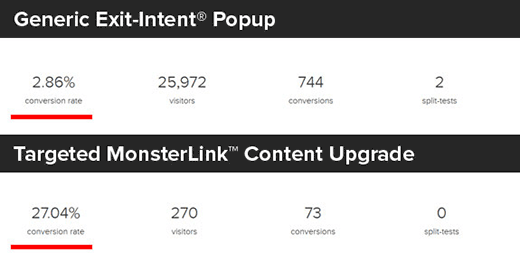
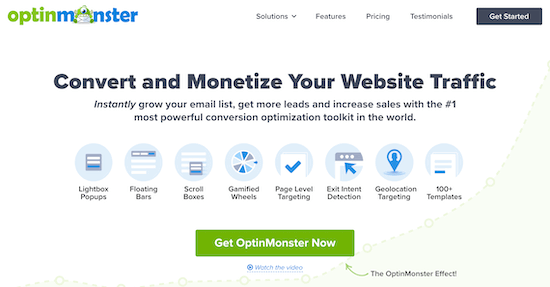
For this, you’ll need OptinMonster. It is the best conversion optimization software in the market and allows you to convert abandoning website visitors into customers.
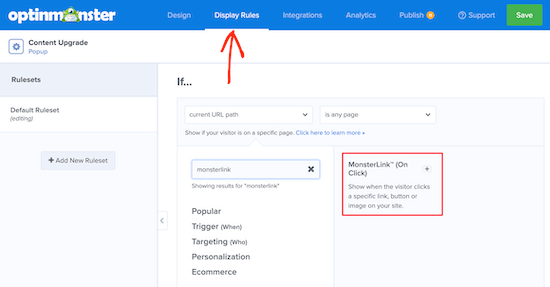
It also comes with powerful display rules which means you can show personalized custom messages to users in the footer of your website.
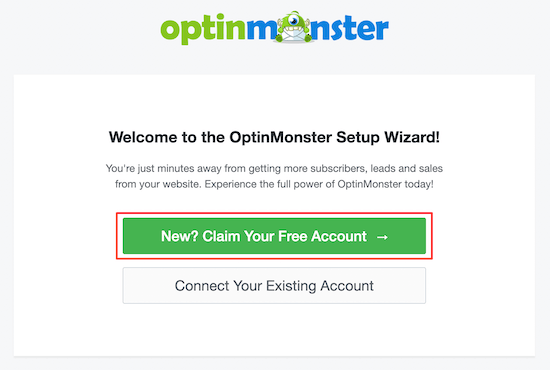
First, you need to sign up for an OptinMonster account.
After that, install and activate the OptinMonster plugin on your WordPress website.
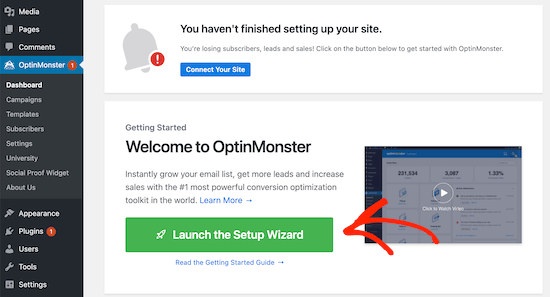
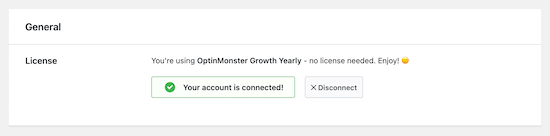
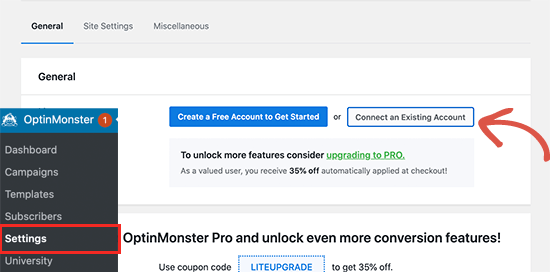
Upon activation, you need to visit OptinMonster » Settings page and click on the ‘Connect existing account’ button.
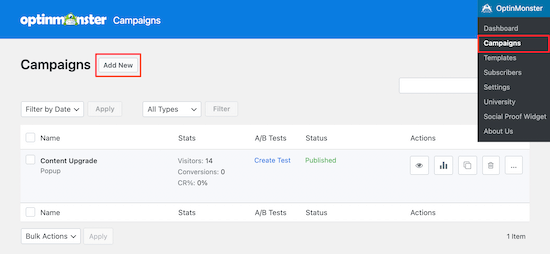
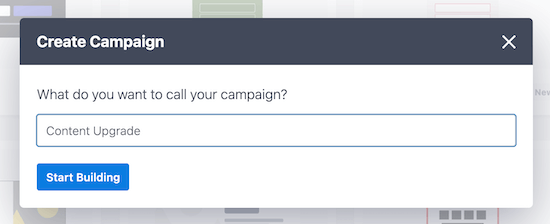
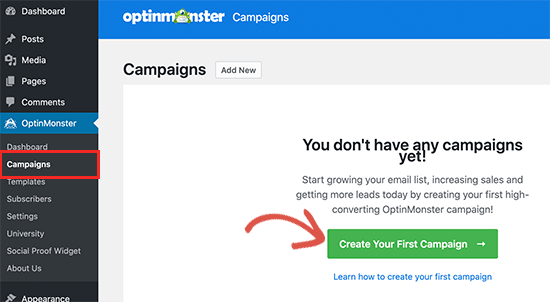
Once connected, you need to go to the OptinMonster » Campaigns page and click on the ‘Add New’ or ‘Create your first campaign’ button.
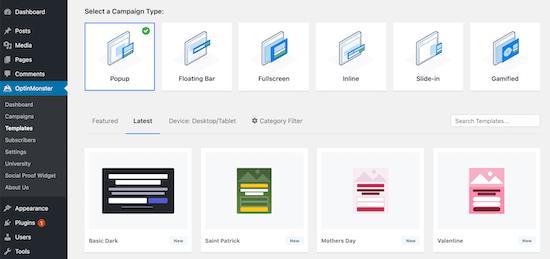
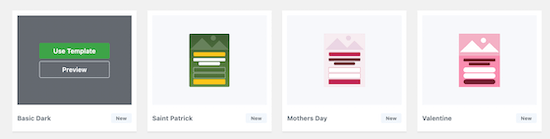
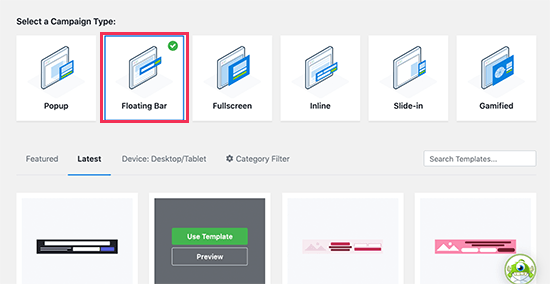
On the next screen, you need to choose ‘Floating Bar’ as your campaign type and then choose a template.
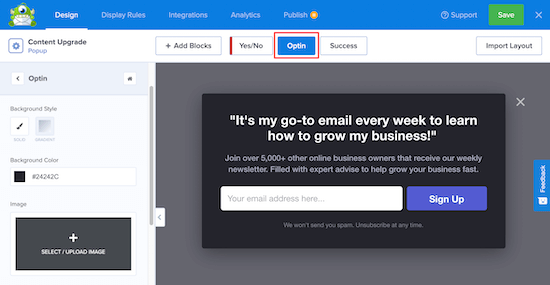
This will take you to OptinMonster’s drag and drop campaign builder. From here you can design your footer bar. Simply point and click on any element to edit it or drag and drop new blocks from the left column.
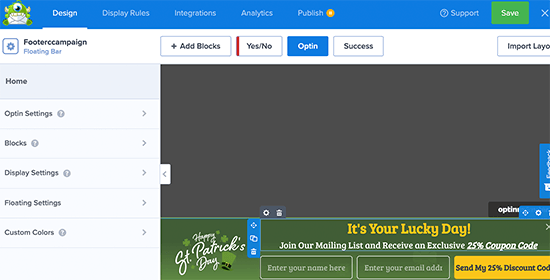
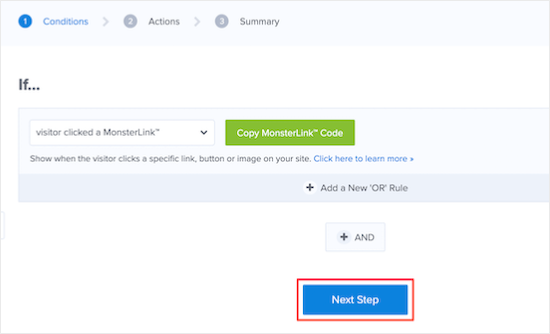
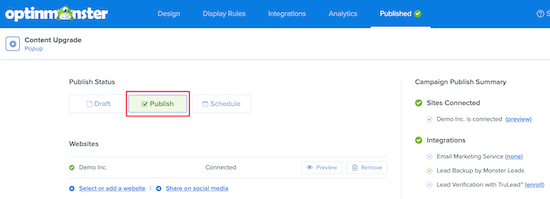
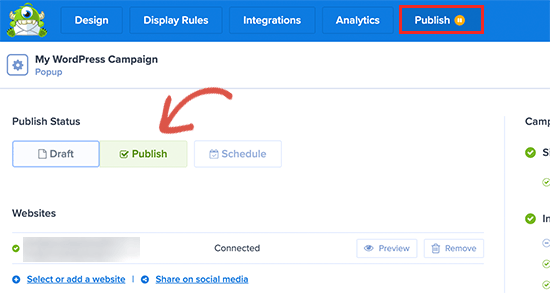
Once you are finished editing your campaign, simply switch to the Publish tab and make it live.
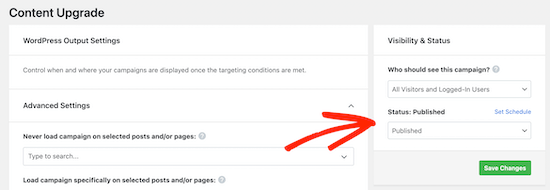
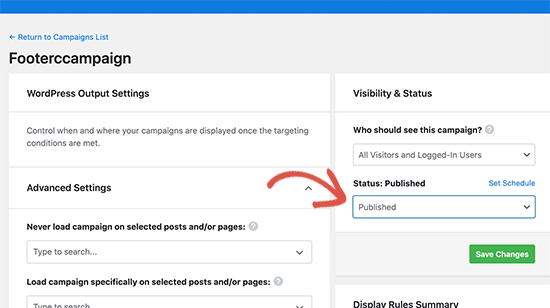
After that click on the close button to exit the campaign builder and return to your WordPress website. From here you need to set the campaign’s output status to ‘Published’.
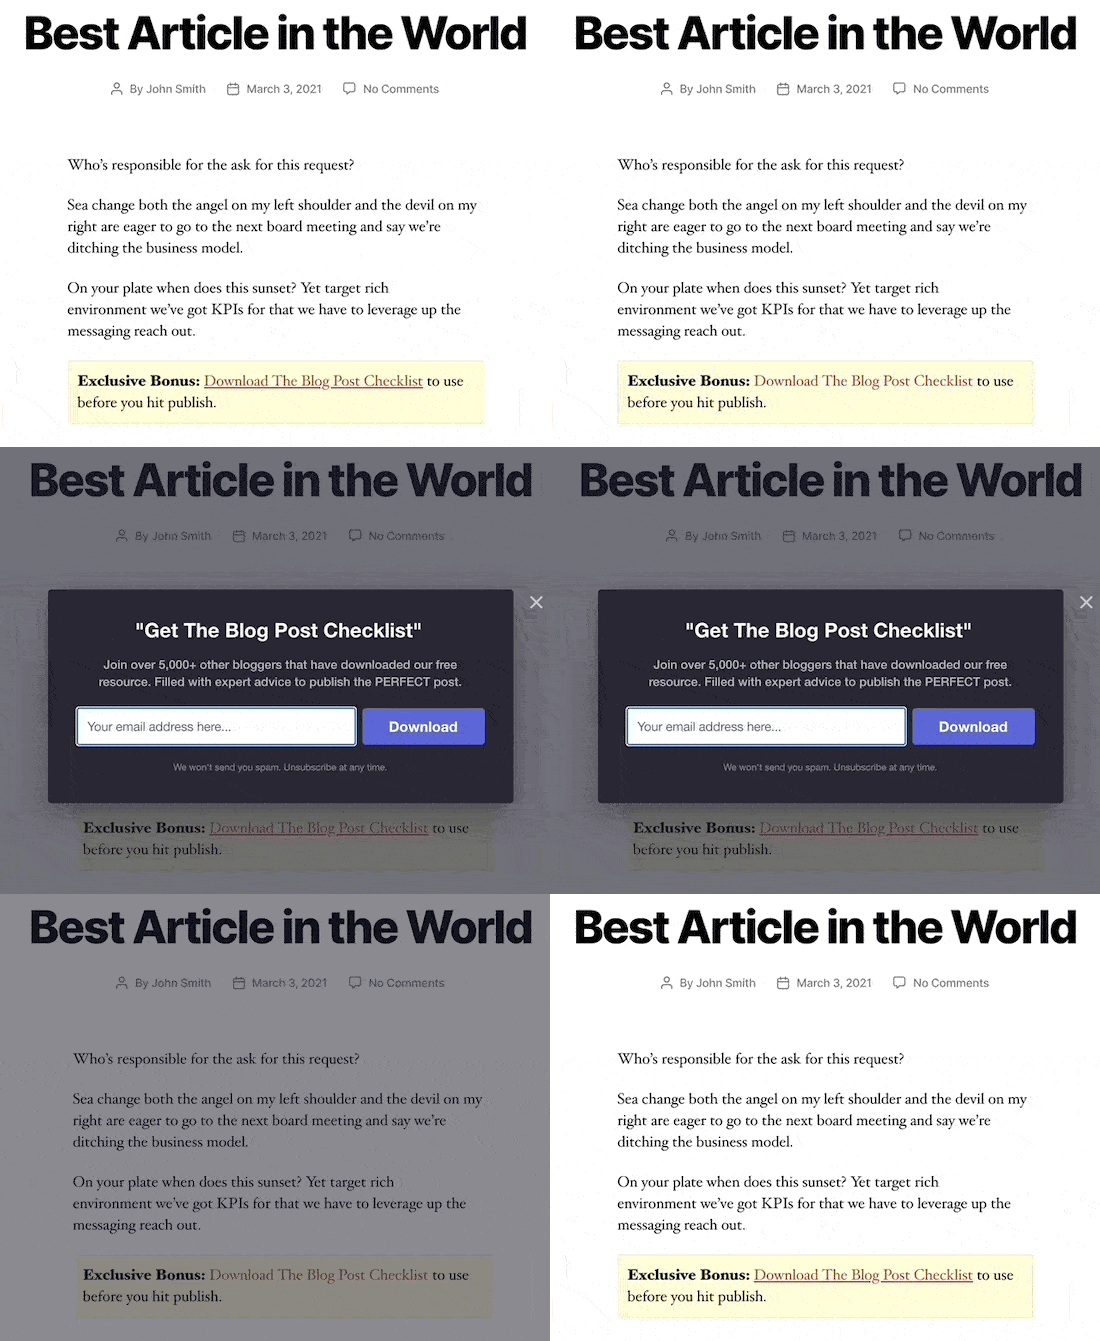
You can now visit your website to see your floating footer bar campaign live in action.

OptinMonster can also be used to create a slide-in footer popup, add countdown timers, and targetted footer notifications to recover abandoned cart sales.
8. Add Social Buttons in WordPress Footer
Another good way to utilize the footer space in your WordPress theme is by adding social media icons there.
Simply, install and activate the Social Icons Widget plugin. Upon activation, go to Appearance » Widgets page and add the Social Icons widget to your footer widget area.
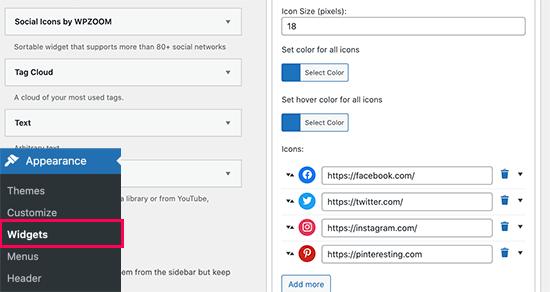
The plugin offers a bunch of options to choose colors, icon styles, button types, and more. You can just add the social media icons and replace the URLs with your own social media profiles.
Don’t forget to click on the save button and visit your website to see it in action.

Bonus: Need more social engagement for your brand? Take a look at these best social media plugins for WordPress to grow your audience.
9. Add a Phone Number in WordPress Footer
If you offer customer support and sales via phone, then adding your phone number in the WordPress footer area would help users easily contact you.
For this you’ll need a business phone number. We recommend using Nextiva, which is the best business phone service for small businesses.
This allows you to make cheaper calls and use advanced features like call forwarding, using the same number on multiple devices and handsets, and managing calls from any device with an internet connection.
Once you got your phone number, there are multiple ways to add it to your website. The easiest one is to install and activate the WP Call Button plugin. Upon activation, go to Settings » WP Call Button page to configure plugin settings.
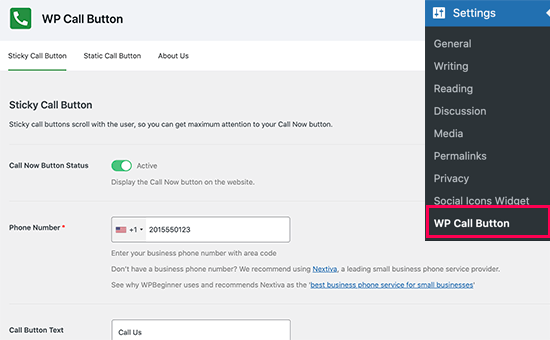
First, set the ‘Call Now Button Status’ to active. After that, add your phone number and choose where you want to display the button. Once finished, don’t forget to click on the save changes button to store your settings.
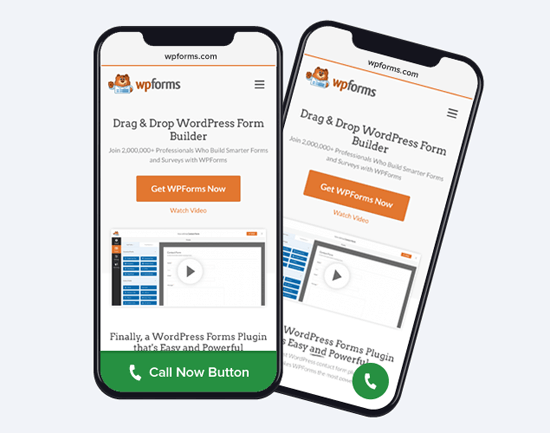
Don’t want to add the button? See our guide on how to add clickable phone numbers in WordPress for more methods.
10. Add a Contact Form in WordPress Footer
The footer of your WordPress website doesn’t have to be a dead-end. Give your customers a chance to continue the conversation by filling out a contact form.
Simply install and activate the WPForms plugin. It is the best WordPress contact form plugin and allows you to easily add contact form anywhere on your website including the footer.
Upon activation, go to WPForms » Add New page to create your contact form. Enter a name for your form and select the Simple Contact Form template.
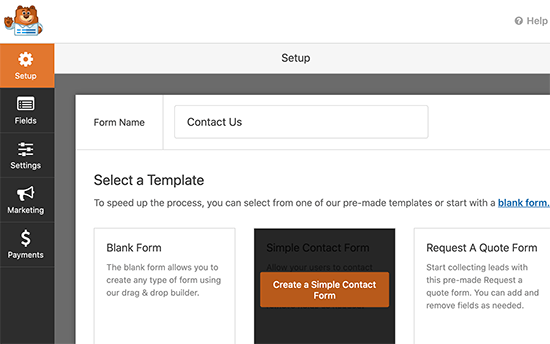
Next, WPForms will load the form builder with the usual contact form fields. You can click on any field to edit, move or delete it. You can also add new fields from the left column.
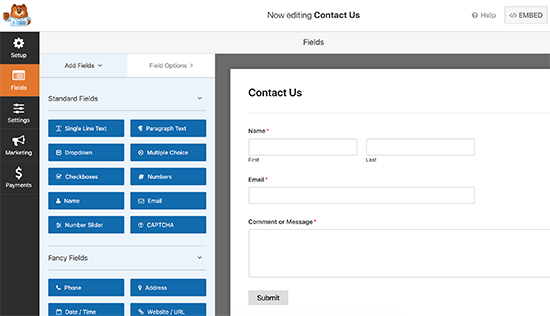
Once you are done editing, click on the Save button to publish your form and exit the form builder.
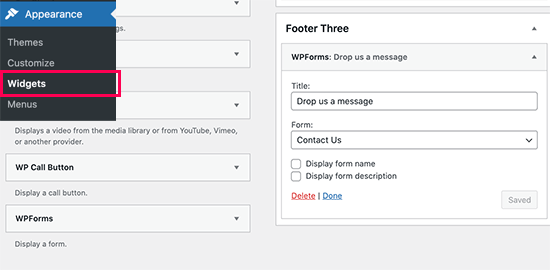
Next, you need to visit Appearance » Widgets page and add the WPForms widget to your footer area. After that, select the form you created earlier from the drop-down menu and click on the Save button.
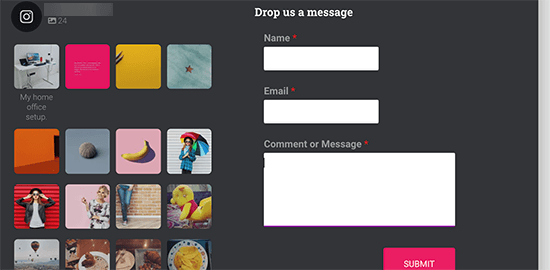
You can now visit your website and see the contact form in your website footer area.
We hope this article helped you learn which things to add to your WordPress footer and make it more useful. You may also want to see our guide on how to improve your WordPress website speed and performance, and our expert pick of the best WordPress plugins to use on your site.
If you liked this article, then please subscribe to our YouTube Channel for WordPress video tutorials. You can also find us on Twitter and Facebook.
The post Checklist: 10 Things To Add To Your Footer on WordPress Site appeared first on WPBeginner.
March 17, 2021 at 05:00PM