Do you want to offer shipping discounts on your WooCommerce store?
Shipping discounts are a great way to boost sales on your online store. It keeps your customers happy and lets them purchase more products and services.
In this article, we’ll show you how to offer a shipping discount in WooCommerce.
Why Offer Shipping Discounts in WooCommerce?
One the best ways to drive more sales from your WooCommerce store is by offering shipping discounts to customers. These discounts provide an extra incentive for people to purchase your products and services.
Shipping discounts can also help recover abandon cart sales in WooCommerce. You can show an exit-intent popup and offer free shipping to convert the abandoning visitor into a customer.
Aside from free shipping, there are different types of shipping discounts you can offer in WooCommerce.
For example, you can provide a fixed or percentage-based discount on total order amount, create shipping deals for registered users, and much more.
That said, let’s look at how you can offer shipping discounts in WooCommerce.
Offering Shipping Discounts in WooCommerce
The easiest way to create shipping discounts in WooComemrce is by using the Advanced Coupons for WooCommerce plugin.
It’s one of the best WooCommerce plugins to have on your website. The plugin offers a lot of flexibility and helps you create different types of shipping discounts.
You can also create buy one get one (BOGO) deals, a loyalty program, set up cart conditioning, automatically apply discount coupons, and more.
We’ll be using the Advanced Coupon for WooCommerce Premium version for this tutorial because it comes with extra features like shipping override. However, there is also a free version of Advanced Coupons you can use to create shipping discounts.
First, you’ll need to install and activate the Advanced Coupon for WooCommerce plugin. If you need help, then see our guide on how to install a WordPress plugin.
Note: You’ll need to install and activate both the free plugin and the premium plugin. That’s because Advanced Coupons for WoooCommerce Premium uses dependencies from the free plugin and unlocks additional features.
Upon activation, you’ll need to navigate to Coupons » License from your WordPress dashboard. Go ahead and enter the License Key and Activation Email and click the ‘Activate Key’ button.
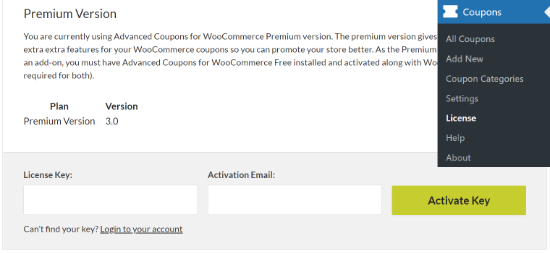
You can easily find the license key in your Advanced Coupon account area and the email you received when signing up for the service.
Setup Shipping Zones in WooCommerce
The next step is to create shipping zones in WooCommerce and configure regions where you’ll offer shipping discounts.
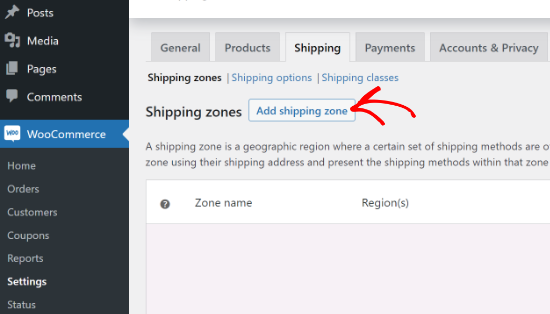
You can start by heading over to WooCommerce » Settings and then select the ‘Shipping’ tab. Next, you’ll need to click the ‘Add shipping zone’ button.
On the next screen, simply enter a name for your zone, select regions from the dropdown menu, and then click the ‘Add shipping method’ button.
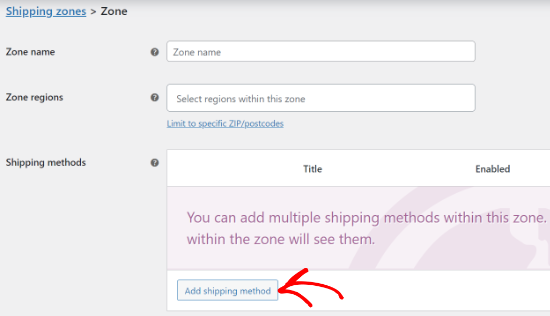
Now, you’ll see different shipping methods in the dropdown menu. You can set a flat rate, free shipping, or local pickup for your WooCommerce store.
Simply select your preferred shipping method and click the ‘Add shipping method’ button.
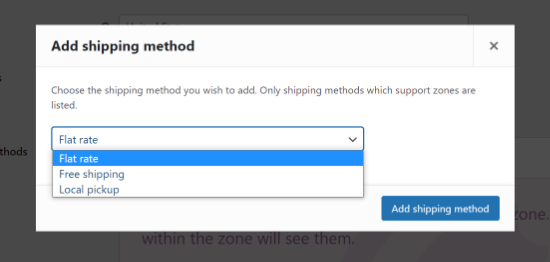
Your shipping method will now be added to the shipping zone. To further configure it, simply hover over the shipping method and click the ‘Edit’ button.
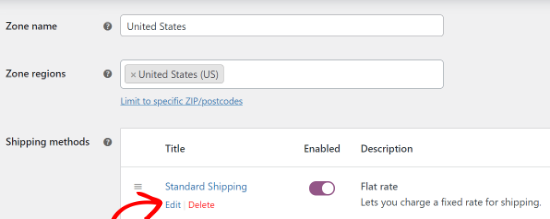
You’ll see a popup window with more settings for the shipping method you selected. For example, we used the ‘Flat rate’ method to create standard and express shipping options for our demo WooCommerce store.
The options will differ based on the shipping method you choose. In the case of flat rate settings, you can change the method title, add a tax status, and enter the shipping cost.
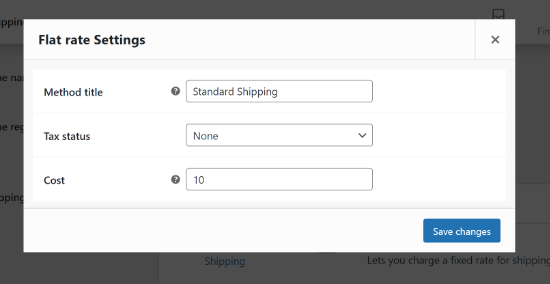
After entering these details, simply click the ‘Save changes’ button. You’ve successfully created a shipping zone for your WooCommerce store.
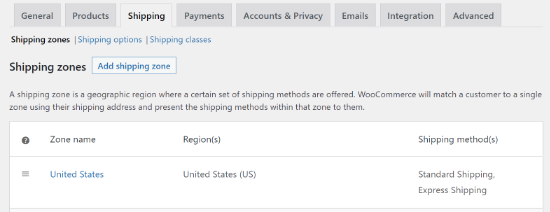
To view your newly added shipping zone, simply head back to the ‘Shipping zone’ tab. You can create as many shipping zones as you want by repeating these steps.
Creating a Shipping Discount Coupon
After creating a shipping zone, you’re now ready to create a shipping discount coupon for WooCommerce.
To start, you can navigate to Coupons » Add New from the WordPress admin panel.
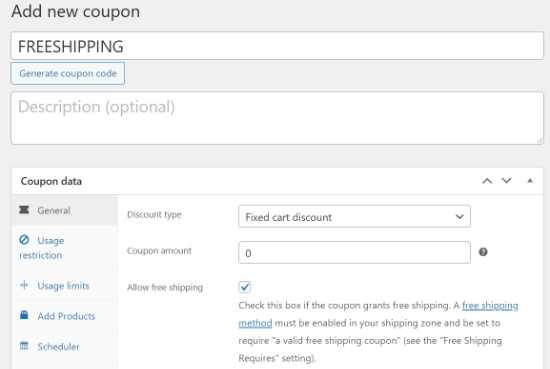
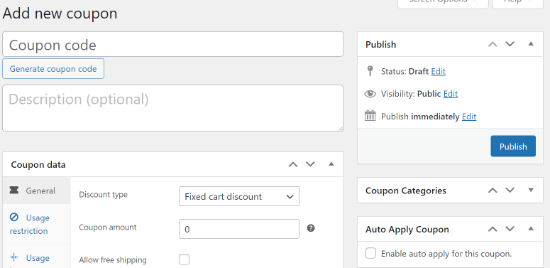
After that, you’ll need to enter a coupon code or click the ‘Generate coupon code’ button at the top to automatically create a coupon code. This will be the code that your customers will use to avail the shipping discount.
Next, scroll down to the Coupon data meta box. Here, you can choose different Discount types from the dropdown menu.
The plugin lets you offer a fixed discount on a cart or product, a percentage discount, or a buy one get one deal. You can also enter the discount amount.
For this tutorial, we’ll use the default settings and keep the Discount type to ‘Fixed cart discount’ and the Coupon amount to 0.
Once that’s done, you’ll need to go to the ‘Shipping Overrides’ tab in the Coupon data section and click the ‘+ Add Shipping Override’ option.
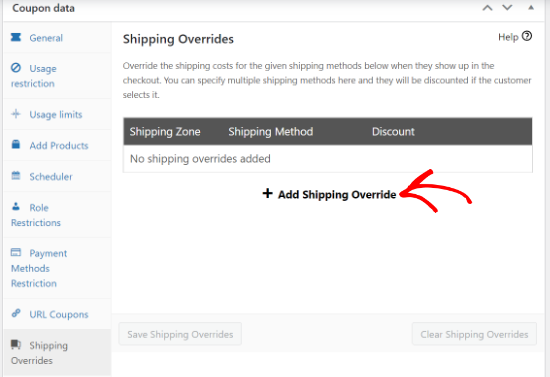
Next, you can select your Shipping Zone, choose the Shipping Method, and then enter a Discount.
Advanced Coupons for WooCommerce offers 3 types of discounts. There is a Percentage discount that provides a percentage off the regular cost of shipping or a Fixed discount that will take a certain amount off the shipping cost.
The last option is the Override price, which will apply completely different pricing when the coupon is used. If you want to offer free shipping, then select this option and set the amount to 0.
In this article, we’ll set up 50% off on the Express Shipping option. Go ahead and select your shipping zone, shipping method, and add the discount amount.
Once you’ve entered the details, simply click the ‘Add’ button.
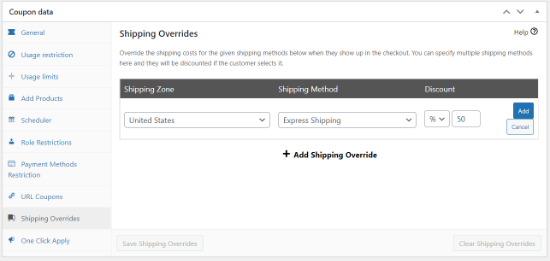
After adding the Shipping Overrides, don’t forget to click the ‘Save Shipping Overrides’ button.
The plugin also offers more optional settings to customize your shipping discount coupon.
For instance, in the ‘Usage restriction’ tab, you can enter a minimum and maximum spend to use the coupon, don’t allow customers to use the coupon when other product coupons are applied, and more.
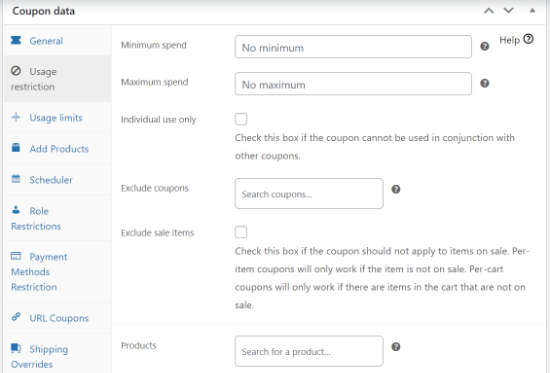
Similarly, you can also configure the usage limit for the coupon, automatically add products to the cart, schedule a coupon, enable role restrictions to access the coupon, and more.
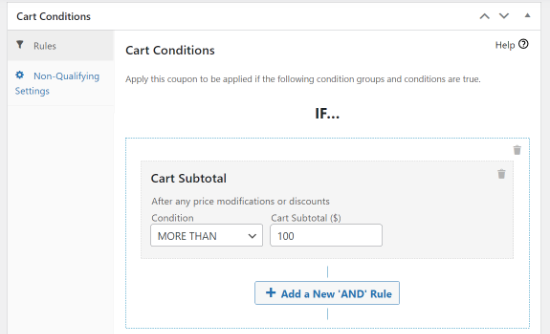
Besides that, you can also create different conditions to apply the coupon by scrolling down to the ‘Cart Conditions’ section. For example, you can set a condition where the coupon will only be used if the cart subtotal is above a certain amount.
Once you’ve customized your shipping discount coupon, go ahead and click the ‘Publish’ button.
You can also click the ‘Enable auto apply for this coupon’ option in the Auto Apply Coupon box and automate your shipping discounts.
When you enable this option, the discount coupon is automatically applied to the cart, and customers don’t have to type the code.
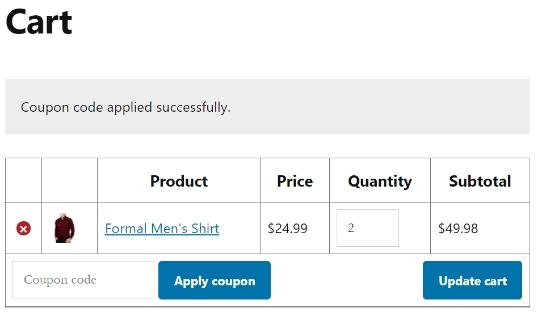
Next, you can test if your shipping discounts are working by visiting your WooCommerce store.
Simply add a product to the cart and then view the cart page. Now, enter your shipping discount code in the ‘Coupon code’ field and click the ‘Apply coupon’ button.
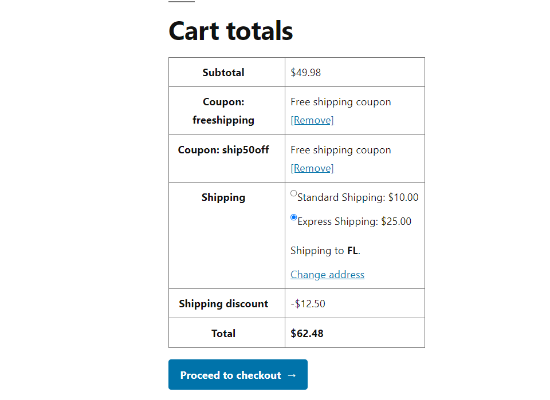
You should see a shipping discount in the cart total when you select the shipping method on which the coupon is applied.
In this case, you’ll notice a 50% discount on Express Shipping and view the amount in the ‘Shipping discount’ field.
We hope this article helped you learn how to offer a shipping discount in WooCommerce. You may also want to go through our guide on how to start a WordPress blog and the best email marketing services for small businesses.
If you liked this article, then please subscribe to our YouTube Channel for WordPress video tutorials. You can also find us on Twitter and Facebook.
The post How to Offer a Shipping Discount in WooCommerce first appeared on WPBeginner.
November 18, 2021 at 05:00PM