Tuesday, December 14, 2021

WPBeginner v6 – Behind the Scenes of Our New Site Design

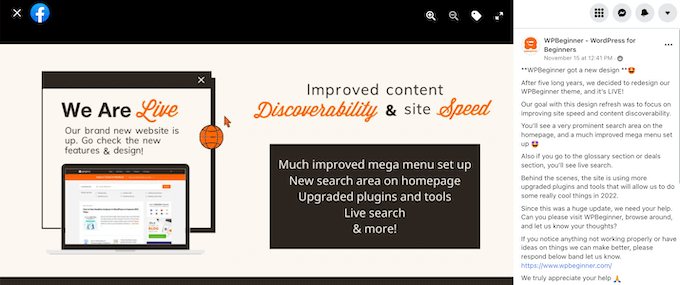
If you visited WPBeginner in the last few weeks, then you probably noticed that we got a new website design. While it has a lot of similarities to the last one, there’s a lot that changed behind the scenes.

As I promised in the newsletter, I want to share the thought process behind our redesign, what we learned, what’s new on the site, and most importantly how you can use some of our learnings to improve your website.

WPBeginner v6 - Behind the Scenes

A Little Background

I started WPBeginner in 2009, and like most new creators, I changed our website theme design four times in the first 3 years.

As my business grew, I realized that website redesigns take up a lot of time and resources which could be better spent on fulfilling our core mission:

Help small businesses grow and compete with the big guys through our tools, team, and training.

So I made it a point to dedicate all my focus on our core mission and our business grew tremendously.

The last redesign of WPBeginner was launched in 2016, and we’ve come a long way since then.

Here’s what happened in the last 5 years:

Collectively our plugins are now used by over 19 million websites, and 4 of our plugins are in the top 20 WordPress plugins of all time.

While all of those are great accomplishments, we have a new set of challenges that needed to be addressed, so we can continue to improve and serve our mission.

This brings me to WPBeginner v6.

Design Focused on Content Discoverability

WPBeginner started out as a simple tutorial blog, but it has really become the Wikipedia for WordPress.

Our users repeatedly told us that when they wanted to find an answer to their WordPress problems, they simply Google the keyword and add WPBeginner at the end to find the best solution.

Google WordPress problems with WPBeginner answers

To help our readers quickly find the answer to their WordPress questions, we made the Search feature a big focus on our new homepage.

Whether you’re a returning visitor coming to search our content library, or a new reader just getting started with WordPress, the homepage of WPBeginner now makes it easy for you to find what you’re looking for.

WPBeginner homepage search

You will also notice a similar search widget in our sidebar on all single post pages as well as on our website header when you click the search icon.

WPBeginner Full Screen Mobile Search and Sidebar Search Widget

One of the reasons why WPBeginner has become the largest WordPress resource site for non-techy users is because we explain complex WordPress topics in plain English, step-by-step.

In the new design, we have added live search feature to our WordPress glossary section, so you can easily familiarize yourself with common WordPress lingo. This is basically like a dictionary for WordPress terms.

WPBeginner WordPress Glossary Live Search

As a WPBeginner user, you get exclusive access to the best WordPress discounts on popular plugins, premium themes, hosting, and other marketing tools.

Our team truly has done a great job negotiating the best deals for you, and this section has grown quite a bit to have over 100+ coupons and deals.

Due to popular user request, we have also added Live Search on our Deals section, so you can quickly find the best deal on your favorite WordPress products.

Search WordPress and Blogging Deals

As we go into 2022, a big priority for us is content discoverability.

This helps us deliver the best user experience, increases time on site, boost pageviews, and reduce our overall bounce rate.

I believe that in 2022, user experience optimization (UXO) is going to play a critical role in SEO.

If you want to beat your competitors and get a competitive advantage, I strongly recommend paying attention to UXO.

I’ll be sharing tips through out this article on how you can implement similar features on your site like we did in our new theme.

How to Improve WordPress Search

The default WordPress search feature isn’t very powerful, so if you want to customize the ranking algorithm and control what shows up for each search, I recommend using the SearchWP plugin.

Alternatively, you can also use Google custom site search which uses the Google algorithm, but the downside is that Google will display ads on your search pages which doesn’t look very good.

If you’re looking to add live search on your site like we have done on the Deals section or Glossary, then follow this tutorial on how to add AJAX live search in WordPress.

Other WordPress search tutorials that you might find helpful are how to create a custom WordPress search form, and how to add a search bar in WordPress menu.

New WordPress Mega Menu

Going along the theme of content discoverability, we upgraded our old WordPress dropdown menus into new multi-column Mega Menus.

WPBeginner WordPress Mega Menu

This allows our new users to quickly and easily find our very best content.

It also allows us to better highlight our new products, the free business tools that we’ve building, and more.

How to Add a Mega Menu in WordPress

Although we’ve built a custom solution for WPBeginner, you can follow this tutorial on how to add a mega menu in WordPress to better highlight your top pages.

The WordPress Block Editor (Finally)

In 2019, WordPress introduced the super powerful block editor (aka Gutenberg) for creating content.

I immediately started using it on my personal blog, but since WPBeginner was using a legacy theme with a lot of custom coded features, the switch wasn’t as easy.

So for the last two years, we were stuck using the Classic Editor on WPBeginner site while all of our newer websites got the latest and greatest features of the WordPress block editor.

Finally with our new theme, we can now use all the awesome features of the WordPress block editor.

For example, now I can add a really cool “Did You Know” block without writing any code:

WPBeginner – Fun Fact:

Our team has now grown to over 200+ people across 39 different countries. We’re hiring for full-time remote positions. If you’re interested, check out our Careers page.

We also completely redesigned several of our landing pages using the WordPress block editor.

For example, check out our new free WordPress blog setup landing page.

Free WordPress Blog Setup Landing Page

We also redesigned our free business tools using the block editor to highlight some of the recent free tools that we have built.

Free Business Tools for Small Businesses

We will still be using SeedProd for creating completely custom landing pages when needed because it’s a proper drag & drop WordPress page builder.

While it was fun learning how to use Gutenberg to create a custom landing pages, it still requires A LOT of coding to be done for the setup before marketing teams can create a custom landing page.

Whereas when you’re using a page builder plugin, marketing teams can quickly create custom landing pages, funnel layouts, etc without any help from the dev team.

WordPress core team is working hard on the full-site editing features, but it still needs a lot of work before it can compete with the powerful features that you get with page builders like

SeedProd, Divi, or Beaver Builder.

With that said, the block editor is pretty darn awesome, and there are plenty of WordPress block plugins that you can use to create cool design elements to enhance your content.

Here’s another cool block that our new theme has for highlighting featured plugins:

SeedProd Logo

SeedProd is the most beginner-friendly drag & drop page builder for WordPress. It comes with over 150+ pre-made templates, and their theme builder feature allows you to build completely custom WordPress themes (without any code). Try SeedProd Today »

In the coming blog posts, I’m sure you’ll see more content design blocks that we have to further enhance our content readability.

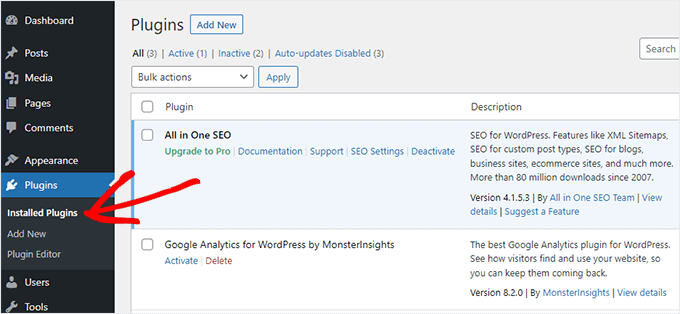
Switching from Yoast to AIOSEO

For the longest time, WPBeginner site was using a very old & customized version of the Yoast SEO plugin (v 2.3.5).

To put in perspective, they’re on version 17 right now.

I didn’t want to update Yoast because their team had removed some essential features that I thought were important for SEO.

I also felt that the overall WordPress SEO space had stopped innovating.

So beginning of 2020, we acquired AIOSEO, the original all-in-one SEO plugin, and I had my team completely revamp it.

AIOSEO - Best WordPress SEO Plugin

I’m super proud of the work our team has done, and it has all the SEO features you need to get a competitive advantage.

Like the block editor, our newer websites started switching to AIOSEO and started to see their rankings improve, so I was eager to start using it on WPBeginner.

Now, we’re using the latest and greatest of SEO features from All in One SEO.

We now have features like video sitemap to help boost our content rankings with videos, RSS sitemap to help our content indexed faster, advanced SEO modules to have more fine-tune control over our site SEO, and tons more.

I truly believe it’s the best SEO plugin in the market, and most importantly it’s priced fairly for small businesses and agencies.

I plan to do a full write up in the coming weeks about why we switched with a detailed feature breakdown, but in the meantime, you can try the free version of All in One SEO, or check out the Pro version that has all the powerful features that I’m using on WPBeginner.

WordPress Speed Improvements

Numerous studies have shown that faster websites improve user experience, increase time on site, and overall conversions.

This is also why Google made website speed a SEO ranking factor.

Now if you’ve been following the site for a while, then you know that I’m obsessed with performance optimization.

WPBeginner site was already pretty fast thanks to our amazing WordPress hosting partner SiteGround. They offer a highly optimized WordPress hosting solution built on top of the Google cloud platform.

And of course we were following the WordPress speed best practices, but with our new theme design, we made several notable speed improvements.

Here’s our Google Page Speed results:

WPBeginner Google Page Speed Test Results

Here’s the result of the homepage from GTMetrix and Pingdom:

WPBeginner Speed Test results from Pingdom and GTMetrix

And we got this result despite adding new sections, more content to the homepage, wider images, etc.

And before you ask, the WPBeginner site has 68 active plugins currently.

So you might be wondering how did I manage to add more content on the site while reducing the page size and making everything faster?

Well, I removed things that I felt we no longer needed, and these are somethings that I really want more website owners to consider doing as well.

Not only will this help speed up your site which helps SEO rankings, but it will reduce your overall bandwidth consumption, reduce costs, and improve your website’s carbon footprint.

Disabling Gravatar from WordPress Comments

WordPress comes with a built-in 3rd party service called Gravatar short for Globally Recognized Avatars.

This allows you to see a user’s profile photo or avatar when they leave a comment on your WordPress site.

The challenge is that it requires your website visitors to setup a Gravatar account which most users don’t. So instead your website just loads the gray mystery man avatar which doesn’t look good.

No Gravatar in Comments

Now let’s say that you have a popular blog post with 50 comments where only 10% of the users have a Gravatar image and 90% don’t. Well, that’s 50 additional images that your page is loading that really don’t add significant value to the content.

That’s why a lot of popular blogs have started to disable Gravatar, and we’re doing the same on WPBeginner.

This simple change has drastically improved our page load times and site speed score.

Removing 3rd Party Custom Fonts

I will be honest, I never thought twice about custom fonts in the past.

It was something that just felt normal and made the site look good from a typography point of view at least if you’re lucky enough to have a fast internet.

In the old WPBeginner theme, we used a custom Adobe font called Proxima Nova, a popular icon font called FontAwesome, and our OptinMonster popups were using the Source Sans Pro from Google fonts.

When I visited the site from a remote location with poor internet quality, I truly realized how big of a performance impact these fonts have on the user experience.

In our new design, I wanted to solve this problem, so we can make it easy for students and business owners in developing countries to access WPBeginner, learn WordPress, and grow their online presence.

The new WPBeginner v6 theme uses the default System Fonts which have come a long way. They look great across all devices, and of course it’s super fast.

No flash of unstyled text (FOUT), no cumulative layout shift (CLS), and significantly reduced blocking time.

If you login to the WordPress dashboard or use Github, then you’ll notice that our fonts are similar because both of these platforms made the switch to system fonts earlier.

While removing custom fonts may not be a viable solution for all business websites, it’s definitely something I believe both designers & developers should be mindful about when it comes to speed.

Some best practices that can help:

  • Instead of using two separate fonts for heading vs content, consider using the same font for both.
  • Instead of using multiple different font weights and styles such as thin, regular, semibold, bold, extra bold, black, and then italics version of all these, consider reducing the font weights to only two: regular and bold.
  • Instead of loading the entire FontAwesome or another icon font library, consider adding direct SVGs of the icons that you need.

Disabling Custom Fonts in OptinMonster

Once the theme was designed and coded, I still had to solve one more problem with fonts.

My website popups and email subscription forms use OptinMonster, and they were still loading Google fonts.

Now disabling OptinMonster wasn’t an option since it helps me get more email subscribers and boost our website conversions.

Luckily, it’s one of my companies, so I asked the development team for a solution to disable Google fonts.

Turned out, I wasn’t the first one who requested this feature, and OptinMonster already had an API solution that allows for not only disabling Google fonts, but also loading any custom web font that you want.

I’m fairly tech savvy and can implement the small snippet the team shared in the documentation, but I know many of our customers aren’t.

So now our team has actually built this feature inside the campaign builder (no coding needed).

Disable Custom Web Fonts in OptinMonster

But if you’re comfortable with code and don’t want to manually toggle this setting off for each campaign, you can just follow the hack that I’m using.

First add the following JS snippet to disable OptinMonster from loading any web fonts on your site:

<script type="text/javascript">
document.addEventListener('om.Scripts.init', function(event) {
event.detail.Scripts.enabled.fonts= false;
});
</script>

Next, add the following CSS in your style.css file:

html .Campaign * { font-family: "Proxima Nova", Helvetica, "Helvetica Neue", Arial, sans-serif !important; }

Of course don’t forget to change the fonts to match your website fonts. This will basically apply the font-family above to all OptinMonster campaigns that load on your site.

Switched from W3 Total Cache to WP Rocket

For the longest time, I was running a highly customized configuration of W3 Total Cache plugin on WPBeginner.

While it got the job done, it was no match for WP Rocket which we have been using on all our product sites.

So with this redesign, I finally switched to WP Rocket which comes with A LOT of great website speed features most notably a reliable cache pre-loading and file minification.

This plugin is crucial if you want to improve your website speed.

Just a quick note if you’re using ThirstyAffiliates or Pretty Links to manage your affiliate links, then make sure that you exclude them from being cached.

Simply go to the Advanced Rules tab and add your affiliate slug under the Never Cache URLs setting.

Never cache affiliate URLs in WP Rocket

If you don’t do this and you have cache pre-load enabled, then WP Rocket will attempt to cache your affiliate links since they look like internal links.

This can artificially inflate your click counts and impact your affiliate metrics.

I have asked the WP Rocket team to see if they can automatically detect popular affiliate plugins and pre-fill the excluded URL tag to make it more beginner friendly, and I hope they implement the suggestion.

What’s Coming Next?

I have big plans for 2022 that’s why I wanted to get the new site design live before the end of this year.

We’re planning to launch a whole new section on WPBeginner that a lot of you have been asking about for the last 2 years.

It’s coming soon, and I hope to launch it by beginning of Q2 2022.

I’m also planning to experiment more with in the new block editor to create a better overall reading experience for you.

Other than that, keep an eye out on our YouTube channel as we’re going to be doing some really cool things there in 2022.

As always, I want to thank you all for your continued support and feedback over the years.

Yours Truly,
Syed Balkhi
Founder of WPBeginner

The post WPBeginner v6 – Behind the Scenes of Our New Site Design first appeared on WPBeginner.


December 14, 2021 at 04:00PM

Monday, December 13, 2021

How to Add Product Tags, Attributes, and Categories to WooCommerce

Do you want to learn how to add tags, attributes, and categories to your WooCommerce products?

By optimizing your WooCommerce product listings, you can help your visitors find what they’re looking for and get more traffic from search engines and social media. 

In this article, we’ll show you how to add product tags, attributes, categories, and more in WooCommerce, step by step.

How to add product tags, attributes, and categories to WooCommerce

Why Add Product Tags, Attributes and Categories to WooCommerce Products?

Adding the right product tags, attributes, and categories in WooCommerce will help you to get more traffic to your online store, make more sales, and improve the overall user experience for your customers.

Firstly, using categories, tags, and attributes in WooCommerce will make your store more organized, helping visitors find the products they’re looking for much faster.

They can also help to improve your store’s search engine optimization. That’s because using descriptive tags, attributes, and categories will help your products to appear in more searches, growing your traffic and sales.

What’s the Difference Between Categories, Tags, and Attributes in WooCommerce?

Many beginners get confused about the differences between categories, tags, and attributes. 

Categories are meant for a broad grouping of your products, like men’s, women’s, or children’s clothing.

Tags are more like keywords for a specific product. A women’s shirt could have tags like summer, discount, casual, soft, and more.

Attributes are for specific characteristics of a product. For example, you can give important information about the product’s weight, material, color, and more.

This is common in clothing stores, where customers can filter products by a specific size, color, or fabric.

Here’s an example of a WooCommerce product with the category ‘Accessorites’ and an attribute for the color red listed on the product page.

WooCommerce product with categories, tags, attributes

Categories and tags are used for your WordPress blog posts as well. You can read more about the difference in our guide to categories vs tags.

That being said, let’s show you how to add product categories, tags, and attributes to your WooCommerce products.

Adding Product Categories, Tags, and Attributes to WooCommerce Products

WooCommerce has built in settings to add categories, tags, and attributes right out of the box. 

To add categories, navigate to Products » Categories in your WordPress admin panel.

Then, you can give your category a name, add a slug, and choose whether or not it has a parent category. 

Add new product category

Next, you can optionally give your category a description and choose the ‘Display type’ from the ‘Default’ drop down.

This controls what the category landing page will look like. Here you can choose to display your ‘Default’ theme options, ‘Products’, ‘Subcategories’, or ‘Both’.

The Default option will depend on the theme you’re using. ‘Products’ would display all the products in that category and any subcategories on the main category page (for example, wpbeginner.com/shop/jackets). ‘Subcategories’ would simply display the subcategories, and the visitor would have to click on one of the subcategories to view those products.

Select category display type

If you want to add a category thumbnail, then click the ‘Upload/Add image’ button.

Make sure you click the ‘Add new category’ button to save your changes.

Add product category thumbnail

To add more categories or subcategories, simply follow the same steps as above. 

Now you can assign a product to a category by going to your product page, then checking the category box in the ‘Product categories’ section.

Add category on individual product page

You can also click the ‘Add new category’ link.

This brings up a section where you can quickly create new categories on the fly. 

Add new category on product page

Once you’re finished assigning categories, make sure to click the ‘Publish’ or ‘Update’ button.

Adding and Editing Product Tags

Your product tags are similar to tags in your blog posts. You can use product tags to make it easier for your visitors to find the exact products they’re looking for. 

To add new tags, simply go to Products » Tags and enter the name of your tag, the slug, the description, and then click the ‘Add new tag’ button.

Add new product tag

To add more tags, simply follow the same steps as above. 

You can also add individual tags to your product pages. Simply open up the product page you want to edit, then enter your tags into the ‘Product tags’ box and click the ‘Add’ button.

Add tags to product page

Once you’re finished, make sure to click ‘Publish’ or ‘Update’ to save your changes. 

Adding and Editing Product Attributes

Finally, you have product attributes. These help group products together and offer users a way to filter your products.

To add product attributes, you need to go to Products » Attributes and then give your attribute a name and slug.

You can also enable archives by checking the ‘Enable Archives’ box. This gives you the ability to display all items that share that attribute on a page. 

Add new product attribute

After that, you need to choose the ‘Default sort order’. This is the order your products will appear on the shop page for that attribute.

We’ll choose the ‘Custom ordering’ option to give more control, but you can also order by name, and term ID.

Set default sort order

Then, click the ‘Add attribute’ button to add it to the attribute table.

Now, you need to click the ‘Configure terms’ link to add terms to the attribute. 

Click configure terms

For example, if you created an attribute called ‘Color’, then you can add the individual colors as terms.

This brings up a screen similar to the main attribute screen, where you need to enter the name, slug, and optional description.

Add new attribute term

Then, click the ‘Add New Color’ button to save your attribute terms. You can add as many attribute terms as you want by repeating the process.

Once you’ve done that, you can add your attributes to individual products.

Simply open up the product page you want to edit, then click the ‘Attributes’ option in the ‘Product data’ section under the text editor.

Go to product data attributes section

Next, select your attribute in the ‘Custom product attribute’ drop down.

Then, click ‘Add’.

Select product attribute drop down

This adds the attribute to your product. 

Now, you can select your attribute terms from the ‘Value(s)’ box.

Select attribute terms

Once you’re done adding your attributes, click the ‘Save attributes’ button.

After that, make sure to click ‘Publish’ or ‘Update’ to save your product. 

Optimizing Your Product Listings for WooCommerce SEO

Once you’re done creating tags, attributes, and categories, you can improve your product pages even more with the help of an SEO plugin.

We recommend using All in One SEO since it’s the best WordPress SEO plugin in the market used by over 3 million website owners. 

AIOSEO

It’s very easy to use and lets you optimize your website for SEO without any technical skills. This means more traffic from the search engines and social media, and more eyes on your products. 

Note: There is a free version of the plugin, but we’ll be using the Pro version since it includes the WooCommerce SEO features we need. 

First thing you need to do is install, activate, and setup the plugin. For more details, see our guide on how to setup All in One SEO for WordPress correctly.

After that, you can optimize your product titles by opening the page for a product and scrolling down to the ‘AIOSEO Settings’ box below the product editor.

Here you can change the product’s SEO title and description. You can use the smart tags to automatically generate descriptions based on your product details, or enter a custom title and description instead.

Optimize product title with AIOSEO

Make sure that you use your main product keyword in both the title and meta description fields.

After that, click on the ‘Social’ tab to optimize how your product will display across social media. 

AIOSEO product social sharing settings

You have complete control over the product image you want to use, which will help you get more engagement from your followers.

Next, click the ‘Schema’ tab. Schema markup lets the search engines better display your content in the search results. 

If you’ve seen product listings with prices, star ratings, and more, then you’ve seen product schema in action.

Schema search example

All in One SEO will automatically choose the right schema type for your products and fill in the pricing, availability, and more.

You can also add additional schema markup, including the brand, identifier type, and identifier fields. Identifiers can be any unique ID such as ISBNs, GTIN codes, or UUIDs.

AIOSEO product schema

Once you’re done customizing your product listing for SEO, make sure to click the ‘Update’ button to save your changes. 

For more details, see our ultimate WooCommerce SEO guide for ranking higher in Google. 

We hope this article helped you learn how to add product tags, attributes, and categories to WooCommerce. You may also want to see our expert picks of the best WooCommerce plugins for your store and our guide on how to create an email newsletter the right way.

If you liked this article, then please subscribe to our YouTube Channel for WordPress video tutorials. You can also find us on Twitter and Facebook.

The post How to Add Product Tags, Attributes, and Categories to WooCommerce first appeared on WPBeginner.


December 13, 2021 at 04:25PM

Friday, December 10, 2021

12+ Things You MUST DO Before Changing WordPress Themes

Are you wondering what you should do before you change WordPress themes?

When switching your WordPress theme, there are few very important steps that you must take to ensure the process is smooth, and you don’t lose any important data. 

In this WordPress checklist, we’ll share the top things you must do before you change WordPress themes.

12+ things you must do before changing WordPress themes

Editor’s Note: If you’re looking for step-by-step instructions on how to switch themes, then please see our beginner’s guide on how to properly change your WordPress theme.

Switching a theme is an important decision that every website owner makes at least once every few years.

Of course you have to decide your reasoning of why you’re switching, and pick a theme that suits all your needs.

We have a list of best WordPress multi-purpose themes and best WordPress blog themes that you can check out if you’re looking for recommendations.

Once you have chosen the theme that you want to switch to, it’s important that you follow the checklist below to ensure that you don’t lose any content or data during the process.

1. Make Note of Any WordPress Theme Customizations

Some WordPress website owners will customize their WordPress themes by adding code snippets directly to their theme files. Code snippets can be a great way to add new features to your website that aren’t part of the stock theme.

But, if you’re adding those snippets directly to your theme files, it can be easy to lose track of them.

If you or a web developer made these changes, then make sure you go through your current theme files and note all of the additional code that’s been added. 

For adding code snippets in the future, we always recommend to use a site-specific plugin or a code snippets plugin. This way, you can keep those snippets even if you change themes later. For more details, see our beginner’s guide on pasting snippets from the web into WordPress.

2. Get Current WordPress Theme Performance Metrics 

Before changing your theme, you should check your current website’s loading speed and performance. This lets you compare any differences in the page load time after you switch themes.

Since WordPress speed and performance plays an important role in user experience and WordPress SEO, you need to ensure the new theme is faster than what you’re using now. 

You can easily check your current website speed metrics using a WordPress speed testing tool such as IsItWP’s free website speed testing tool.

For more details, see our guide on how to run a website speed test.

3. Make Note of Current Theme Sidebars and Widget Areas

Sidebars are used for adding different widgets to your website, like email newsletter subscription forms, social media buttons, popular posts, and more.

Since every theme has different widget areas, your widgets may unexpectedly move or disappear from your site if you switch themes.

That’s why it’s important to make a note of what widgets you’re using in your WordPress sidebars and any other widget areas of your website before you change themes. Then you can easily replicate them after switching.

If you’ve added any custom code or shortcodes, then make sure to copy this code and save it somewhere safe so that you can use it with your new theme. 

4. Copy Existing WordPress Tracking Codes

Many users will add analytics tracking code directly to their theme files. Some WordPress themes also allow you to add tracking codes directly into your theme options panel.

It’s a common mistake to overlook these important tracking codes. 

You need to make sure you copy all of your website tracking codes you’re using for analytics, advertising, and more, so you can add them to your new website. 

If you want to make it easy on yourself, then we recommend using a plugin like MonsterInsights to install Google Analytics in WordPress.

By using MonsterInsights, you can rest assured there will be no interruptions to your analytics or lost data. You’ll also unlock bonus tracking like link clicks and button click tracking, WordPress category and tag analytics, author tracking, and much more.

MonsterInsights

For all other tracking codes, you can use the Insert Headers and Footers plugin. For more details, see our guide on how to add header and footer code in WordPress.

5. Back Up Your Current WordPress Website

It’s always a good idea to back up your website on a regular basis. Before changing your theme, you should completely back up your posts, pages, plugins, media, and databases.

The easiest way to do this is by using a WordPress backup plugin to create a backup of your entire site. For more details, see our guide on how to backup your WordPress site with UpdraftPlus.

This will help ensure you can easily recover your website if anything goes wrong when switching themes. 

6. Put Your WordPress Site Into Maintenance Mode

When making changes to your site, it’s always a good practice to put your website into maintenance mode. Maintenance mode lets you display a user friendly notice to your visitors.

Maintenance mode page example

This helps prevent your visitors from seeing your website when it’s half-finished or under construction.

To do this, we recommend using the SeedProd plugin. It’s the best drag and drop WordPress page builder used by over 1 million websites.

It lets you easily create custom maintenance mode pages, landing pages, coming soon pages, 404 pages, and more. 

SeedProd

For more details, see our guide on how to put your WordPress site in maintenance mode.

7. Test All Functionality and Installed WordPress Plugins

Once you have a new WordPress theme activated, you need to ensure you have the same functionality as before and that all of your old plugins work with your new theme.

You can start by adding back the code snippets that you copied from your old WordPress theme files. For more details, see our beginner’s guide to pasting code snippets into WordPress.

Then, spend some time using the features of your site that are powered by WordPress plugins. If you’re experiencing any errors at this time, see our beginner’s guide to troubleshooting WordPress errors.

8. Test New WordPress Theme Across Browsers and Devices

Cross-browser testing will help you make sure your new website looks good on different browsers, screen sizes, operating systems, and mobile devices.

Most of your visitors will probably use Google Chrome to visit your WordPress blog. However, other web browsers like Firefox, Microsoft Edge, Safari, and more are still used by hundreds of millions of users worldwide.

If your new website doesn’t work right on one of those browsers, then you’re missing out on visitors and traffic. 

Luckily, you can use all kinds of cross-browser testing tools to see how your website looks across different browsers and devices.

For more details, see our guide on how to test a WordPress site in different browsers.

9. Delete WordPress Plugins You No Longer Need

Some WordPress themes will pre-install plugins when you install the theme. Some of these may be useful, but other times you won’t need them.

Simply go to Plugins » Installed Plugins to see if your theme has added any new plugins.

List of installed plugins

Now is also a good time to go through your entire plugin list to see if any plugins are worth deleting. 

If you’re looking for high quality plugins to use with your new theme, then see our picks of the must have WordPress plugins

10. Let Your Users Know Your New Website is Live

Once you’re ready to make your new WordPress theme live, you can turn off maintenance mode.

You should also get in touch with your readers to tell them about your new website. This will prepare your audience so that they’re not confused by any big design changes, and it will also help to keep your subscribers engaged and returning to your site to see the new design.

Here’s an example post we shared on Facebook about our new website redesign.

Redesign announcement example

We recommend notifying your audience via your email newsletter, social media, and push notifications.

If you’re looking for more ways to promote your site, then see our guide on how to share your blog posts with readers.

11. Test Loading Speeds for Your New WordPress Theme

Once your new theme is live and you’ve gone through the steps above, it’s time to do another speed test. Ideally, your new website will be faster and get better scores in your speed test.

To do this, simply use the same website speed tool you used earlier and compare the results. 

If the new theme is slower than your old theme, then make sure you run multiple tests, test from different areas, and check to see if you have any caching or firewall settings that could be causing the dip. 

12. Monitor Your WordPress Website Bounce Rate

Bounce rate is the percentage of visitors who land on your website and leave without continuing to a second page. A high bounce rate means that you didn’t convince your visitor to stay on your site long enough to take action.

After you switch themes, it’s important to monitor your bounce rate. Some themes are simply friendlier at helping visitors navigate around your site.

If your bounce rate has gone up since switching theme, then you’ll want to work to lower it. You can do this by improving your navigation menus, adding more internal links, adding a popular posts widget, and more.

For more details, see our guide on how to increase pageviews and reduce bounce rate in WordPress

13. Listen to Reader Feedback to Improve Your WordPress Website

Finally, it’s important you listen to reader feedback after you switch to a new theme. Some readers may love or hate certain parts of your design. 

You don’t have to listen to every reader and make the changes they suggest. But, if there’s a group of readers who are experiencing the same issue, then it’s probably worth looking into.

You can collect visitor feedback by adding a contact form to your website, or running a survey asking for reader feedback on your new design.

The easiest way to do this is by using WPForms. It’s the best WordPress survey plugin in the market used by over 5 million websites. 

WPForms

It lets you easily create engaging survey forms with the drag and drop builder.

Plus, the reporting section automatically creates beautiful reports to help analyze your results. 

For more details, see our guide on how to create a survey in WordPress.

We hope this article helped you learn exactly what you should do before switching WordPress themes. You may also want to see our guide on how to choose the best WordPress hosting and our expert picks of the best AI chatbot software for your website.

If you liked this article, then please subscribe to our YouTube Channel for WordPress video tutorials. You can also find us on Twitter and Facebook.

The post 12+ Things You MUST DO Before Changing WordPress Themes first appeared on WPBeginner.


December 10, 2021 at 04:30PM