Our readers often ask, what are web push notifications and how do they work?
Web push notifications are messages that you can send to people’s web browsers after they subscribe and give permission. Push notifications are a powerful marketing tactic that can help you bring back users to your website to boost your traffic, sales, and conversions.
In this article, we will explain what web push notifications are and how they work. We’ll also talk about how to add web push notifications to your website.
- What Are Web Push Notifications?
- How Do Web Push Notifications Work?
- Pros and Cons of Using Web Push Notifications
- Who Needs Web Push Notifications for Their Website?
- How to Add Web Push Notifications to Your Website
- Sending Web Push Notifications to Your Subscribers
- Optimizing Web Push Notifications for Higher Conversions
What Are Web Push Notifications?
Web push notifications are custom messages with links that you can send as notifications to users’ web browsers.

Users can opt in to receive these push notifications from a website.
Subscribers can get the notifications on both mobile and desktop browsers. This is why web push notifications are also called browser notifications.
Perhaps the best part of using web push notifications is that users don’t need to be on your website to receive push notifications. And unlike email newsletters, you don’t have to wait for your subscribers to check their email.
These notifications can be customized, personalized, and timely which makes them highly effective in boosting user engagement.
How Are Web Push Notifications Different Than App Push Notifications?
Web push notifications use technology that’s built-in to modern browsers. Almost all top browsers on the market support web push notifications.
They are sent by network request when a user has their web browser open and they work on both mobile and desktop devices.
App push notifications, on the other hand, use the built-in notification technology of a smartphone’s operating system (such as Android OS or iOS). Using this technology, an app can send a notification without connecting to the internet.
Users need to install the app in order to receive app-based push notifications. On the other hand, they don’t need to install any additional app to receive web push notifications.
How Do Web Push Notifications Work?
Almost all modern browsers come with built-in support for push notifications.
This support allows website owners like you to request your visitors’ permission to send them web push notifications.
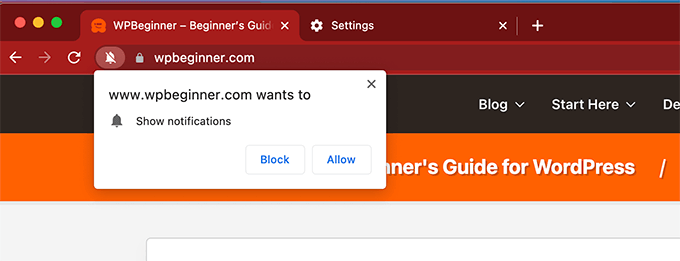
Once a person opts in, their web browser will be able to receive web push notifications from that particular website.
However, in order to send web push notifications, you’ll need to sign up for a web push notification service.
A push notification services will allow you to deliver push notifications to users’ browsers based on criteria defined by you. For instance, you can schedule a push notification at a specific time to users based on their time zones.
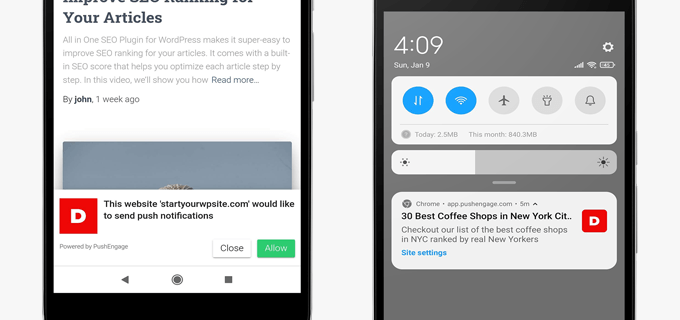
Once you send a message, your push notification service sends it to the users’ browser, which then displays the notification to the user’s screen.
Depending on which device type or browser a user has, these notifications may look a little different, but the message will be the same.
Pros and Cons of Using Web Push Notifications for Your Website
Before you add web push notifications to your site, it’s smart to consider the advantages and disadvantages of using them.
Pros:
- Web push notifications are an easy way to send timely and targeted messages to users on their devices.
- They work on both mobile and desktop.
- Unlike social media or email marketing, users don’t need to visit a specific website or open an additional app to view the notifications.
- They are highly effective with up to 50% open rates on average. This makes them very useful in building engagement on your site.
Cons:
- If used incorrectly, web push notifications may frustrate or annoy users on your site.
- Some of your users may already have web push notifications disabled in their browser settings, which may limit your reach.
Considering these factors, web push notifications have a lot more pros than cons, as long as they’re used correctly. A high engagement rate alone is a good enough reason to add them to any website.
Who Needs Web Push Notifications for Their Website?
Web push notifications are extremely useful in bringing back users to your website. This makes them a must-have for all kinds of websites.
For instance, if you start a blog, then web push notifications can help you quickly build a loyal following and get more repeat visitors.
For an online store, web push notifications can help you bring back existing customers while nudging new visitors into making a purchase.
For a typical business website, push notifications can help you keep customers engaged with new offers and can help you generate more leads and sales.
That being said, let’s take a look at how to easily add web push notifications to your website.
How to Add Web Push Notifications to Your Website
First, you need to sign up with PushEngage which is the best web push notifications service on the market.
PushEngage allows you to easily schedule messages, trigger event-based notifications, send cart abandonment notices, and more.
Note: PushEngage also has a free web push notification plan which is limited to 200 subscribers and up to 30 campaigns.
Upon sign up, you’ll reach your PushEngage account dashboard. From here, you need to go to Settings » Site Settings » Installation Settings page.
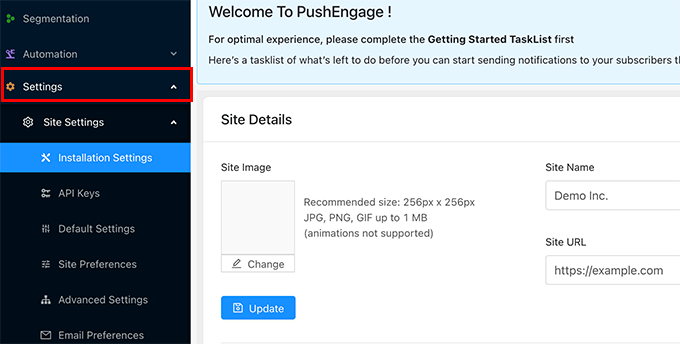
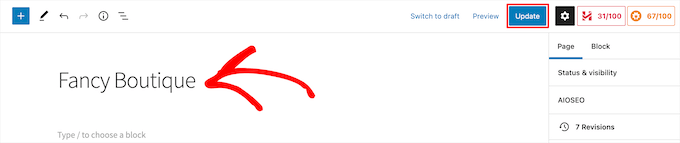
First, you need to provide your site title and URL and then upload a site logo. After that, don’t forget to click on the Update button to save your settings.
Next, you need to generate API keys. These keys will allow your website to communicate with your account on the PushEngage website.
Simply go to the Settings » Site Settings » API Keys page in your PushEngage dashboard and click on the ‘Generate a New API Key’ button:
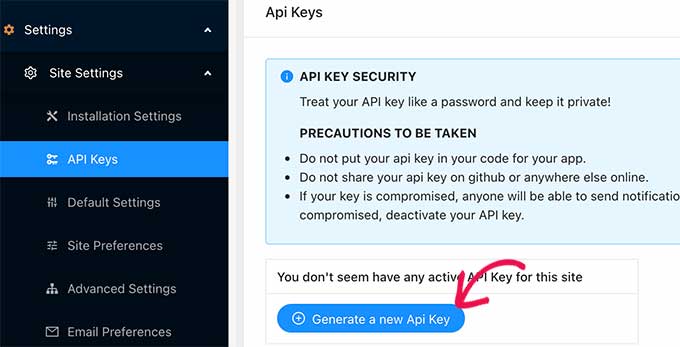
PushEngage will now show you the API key which is a string of letters, symbols, and numbers. You need to copy and paste this API key into a text editor.
You are now ready to connect PushEngage to your website.
First, you need to switch to the admin area of your WordPress website, and then install and activate the PushEngage WordPress plugin. For more details, see our step by step guide on how to install a WordPress plugin.
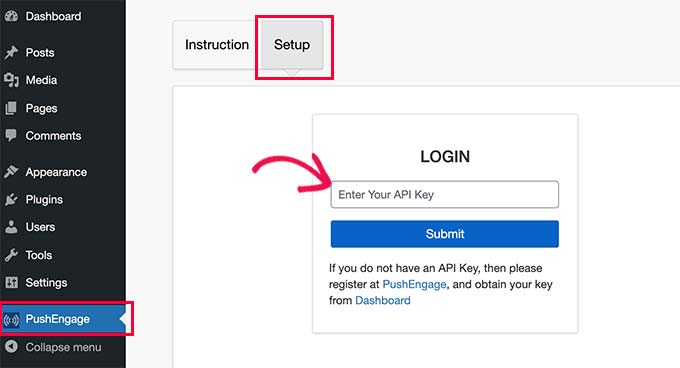
Upon activation, click on the PushEngage menu in your WordPress admin sidebar and then switch to the Setup tab.
Here, you need to copy and paste the API key you copied in the earlier step and then click on the Submit button.
PushEngage will now connect to your WordPress website. You can now switch to the Subscription Dialogbox tab to configure the plugin settings.
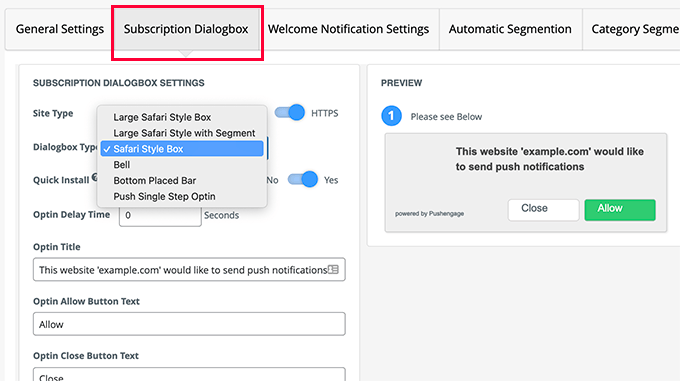
PushEngage comes with a lot of dialog box styles to choose from. This is what your users will see as a prompt to subscribe to your web push notifications.
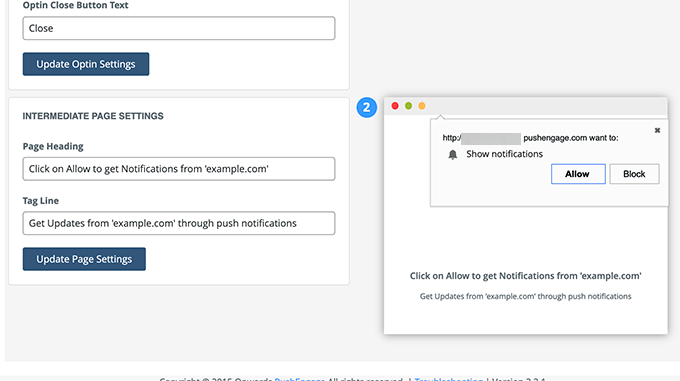
Below this, you can change the message that’s shown on the page that appears after the user first clicks Allow.
After that, you can switch to the Welcome Notification settings. This is the notification users see after subscribing to your push notifications.
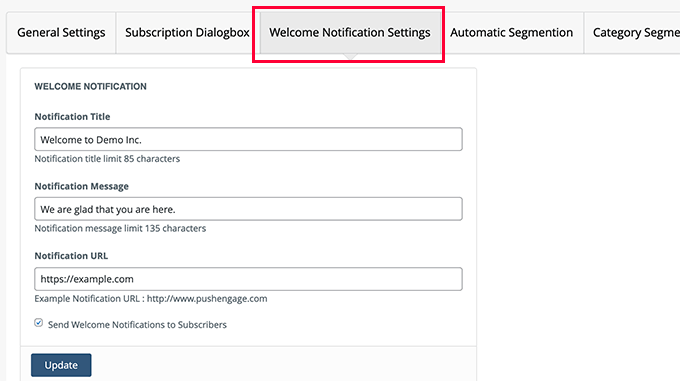
Don’t forget to click on the Update button to save your settings.
Sending Web Push Notifications to Subscribers
PushEngage makes it super easy to send web push notifications to your subscribers.
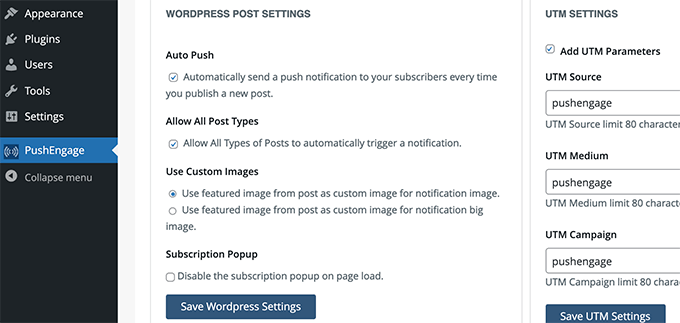
First, you can configure the WordPress plugin on your site to automatically send web push notifications to notify subscribers of new posts.
Simply click on the PushEngage menu in the WordPress admin area and then switch to the General Settings tab. From here, you need to scroll down to the ‘WordPress Post Settings’ section.
You can also manually write custom notifications and schedule them or send them right away.
To do that, you need to switch to the PushEngage dashboard and click on the Notifications » Create » New Notification menu.
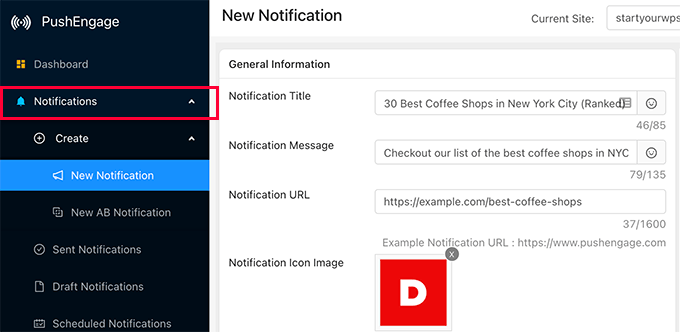
From here, you need to provide a title (headline), message, and URL. This URL is where you want users to go when they click or tap on the notification.
By default, your site logo will be used, but you can replace it with any custom image you want.
You’ll see a live preview of your notification in different browsers in the right column.
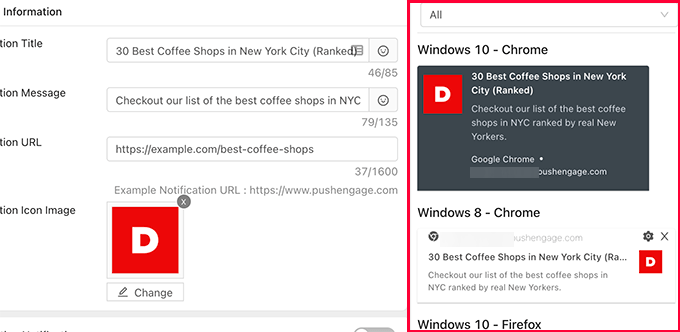
You can also send a preview notification to your own browser.
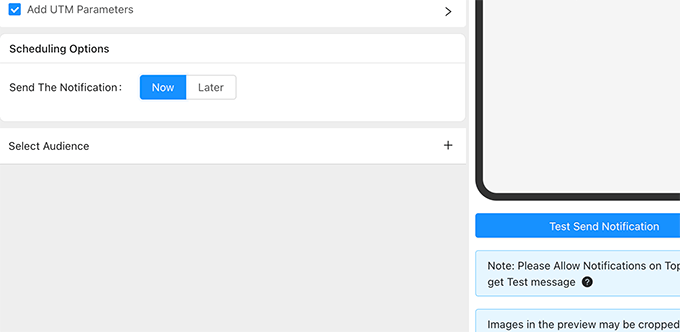
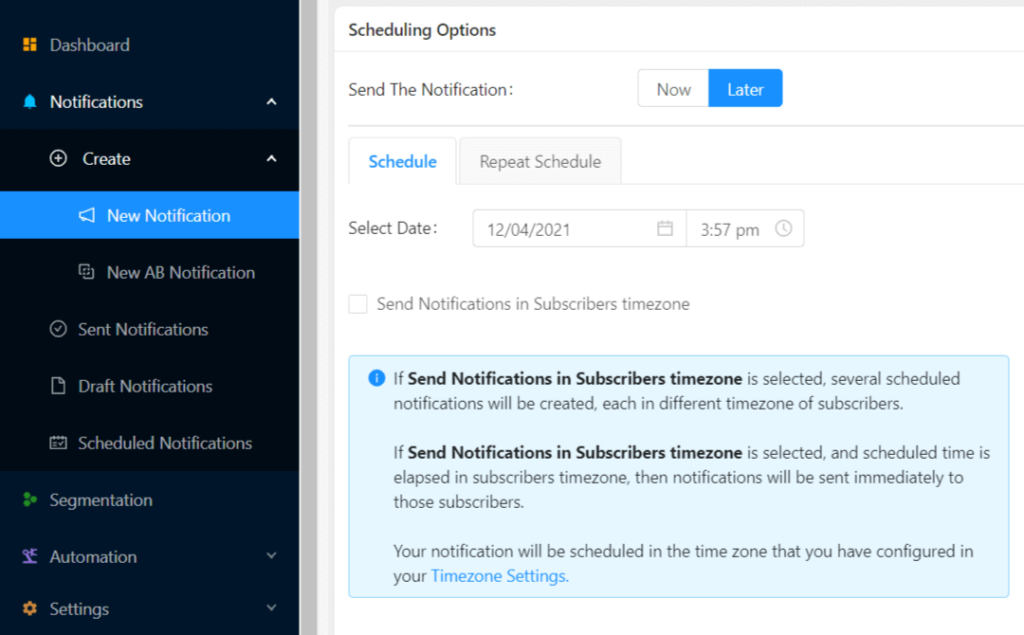
Once you are satisfied with the notification, you can go ahead and send it or schedule it to be sent later.
Here is how it looked on our computer using macOS and Google Chrome.
Optimizing Web Push Notifications for Higher Conversions
Web push notifications are highly engaging in bringing more returning visitors to your website.
However, with little tweaks to your campaigns, subscription box, and settings, you can further boost your push notification click-through rates.
Here are a few tested tips that will help you optimize your web push notifications.
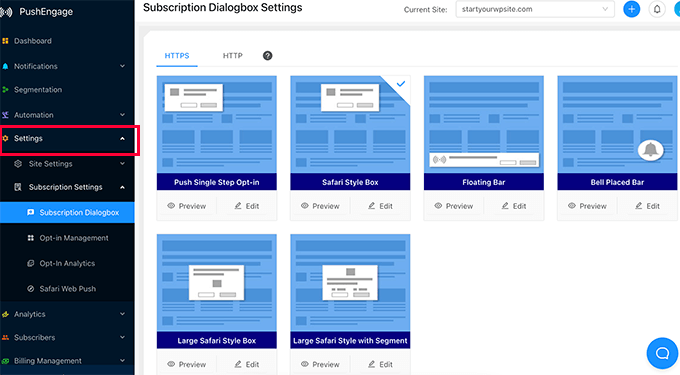
1. Try Different Dialog Box Types
PushEngage comes with a lot of subscription dialog box options. Some of them may work more effectively than others on your website.
Usually, the single opt-in option works well for many sites. However, the disadvantage is that once users click on the block button, it is stored in their browser settings and they may not reset those settings for a very long time.
It’s smart to try different styles to see how it affects your opt-in rates.
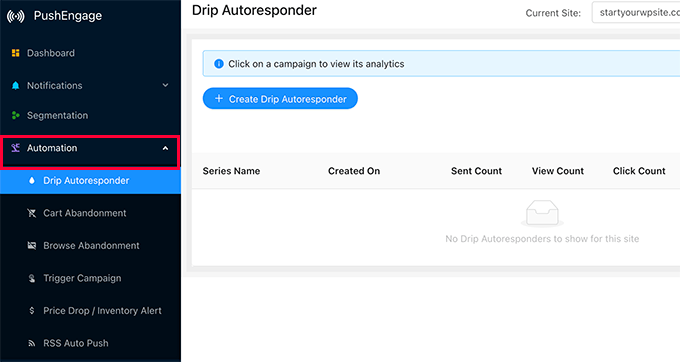
2. Take Advantage of Automation Features
PushEngage comes with excellent automation tools to automatically send push notifications to your subscribers. This includes cart abandonment notifications, drip autoresponders, browse abandonment, triggers, and more.
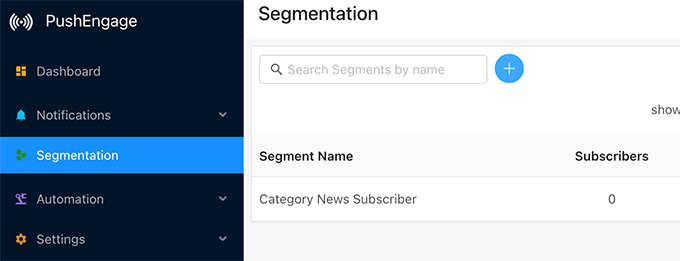
3. Segment Your Audience for More Personalized Push Notifications
With PushEngage, you can create audience segments to automatically create a custom personalized experience for your users. PushEngage allows you to automatically segment users based on the page they subscribed from, the pages they’ve viewed on your website, their device type, location, and more.
4. Set a Steady Frequency for Web Push Notifications Messages
Notifications can be highly useful, but if they’re overused they can easily become a nuisance to your subscribers. Make sure you set a steady frequency of web push notifications per week. Not too many to annoy users, and not so little that users forget your brand altogether.
5. Track Web Push Notification Analytics and Conversions
Once you start getting push notification subscribers, you’ll want to keep an eye on how they are converting.
The metrics you want to track are the click-through rates, to see how many subscribers click on the notifications, and conversions, to see if they make a purchase or convert after landing on your website.
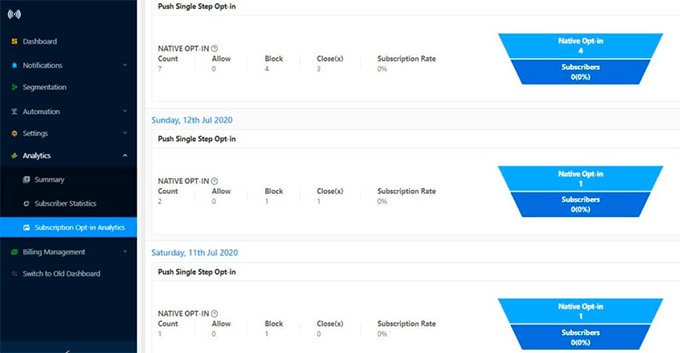
PushEngage comes with built-in analytics for opt-ins, user engagement, and goal tracking. It can also integrate with WooCommerce to track conversions.
However, the best way to get the full picture is by using MonsterInsights. It is the best Google Analytics plugin for WordPress and allows you to easily install Google Analytics in WordPress.
We hope this article helped you learn more about web push notifications and how does it work.
You may also want to check out our guide on how to get even more visitors to your website and how to improve your organic click-through rate for more free traffic from search engines.
If you liked this article, then please subscribe to our YouTube Channel for WordPress video tutorials. You can also find us on Twitter and Facebook.
The post What Are Web Push Notifications and How Do They Work? (Explained) first appeared on WPBeginner.
January 12, 2022 at 05:44PM