Friday, February 25, 2022

How to Make Your WordPress Blog Completely Private (4 Ways)

Do you want to make your WordPress blog completely private? 

You can make your blog completely private so that no one but you and your chosen visitors can see the content you publish.

In this article, we’ll show you how to make your WordPress blog completely private. 

How to make your WordPress blog completely private (3 ways)

Why Make Your WordPress Blog Completely Private?

Usually, when you add a new blog post in WordPress, you’ll want to publish it for the entire world to see. 

However, there are times when you may want to create a private blog or make certain posts private and only available to specific users.

There are all kinds of reasons to make your WordPress blog private:

  • A blog that’s being built, or undergoing maintenance, so it’s not fully ready for the public.
  • A family blog for sharing your family events, wedding photos, baby pictures, and more.
  • A private blog for your private diary or personal journal.
  • A space for teams to work on projects and collaborate outside of public view.
  • A classroom website with lessons and notes that’s only available to registered students.

That being said, let’s show you how you can make your WordPress blog completely private. Simply use the quick links below to jump straight to the method you want to use.

Method 1. Making Your WordPress Blog Private with SeedProd

The easiest way to make your blog completely private is by using the SeedProd plugin. It’s the best WordPress theme builder and drag and drop page builder for WordPress used by over 1 million websites.

It lets you easily create coming soon and maintenance mode pages to make your WordPress blog private, plus it makes it easy to build your email list even while you’re building your blog.

SeedProd

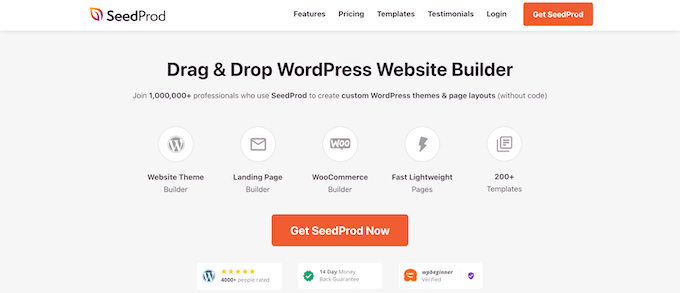
It’s also equipped with 150+ different templates you can use to create custom pages like, 404 pages, webinar registration pages, and even entire custom WordPress themes without writing any code.

If you want to create a coming soon page to launch your blog, then see our guide on how to create a beautiful coming soon page in WordPress with SeedProd.

Beyond keeping your blog private, your coming soon page can also help to gauge user interest, build hype, and capture leads.

With your coming soon page live, you can keep your blog private as long as you like. You can even customize your coming soon page to act as a home screen, while your blog remains private.

Coming soon page example

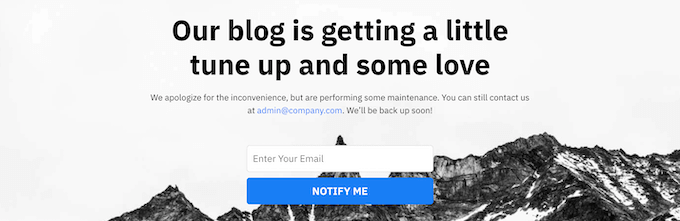
If you want to put your blog in maintenance mode temporarily, then see our guide on how to put your WordPress site in maintenance mode.

Once your blog is in maintenance mode, you can freely make changes to your blog, or even build a new blog from scratch. Maintenance mode also prevents the search engines from indexing and ranking your site.

Your visitors will only see the maintenance mode screen.

Maintenance mode page example

Method 2. Creating a Private Members-Only Website with MemberPress

Another way you can make your blog private is by creating a membership blog that’s entirely private to members. 

The best way to do this is with the MemberPress plugin. It’s one of the best WordPress membership plugins that’s helped creators earn more than $600 million in the last year alone.

MemberPress

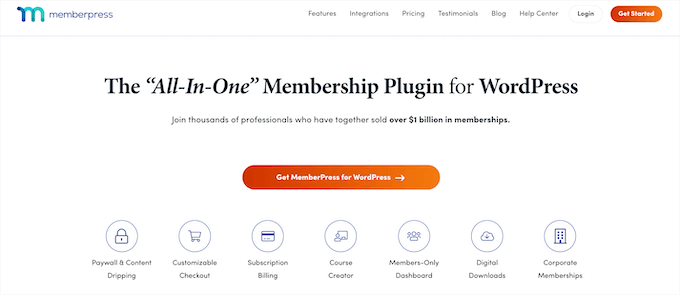
It lets you easily create online courses, manage access controls, and add lessons, all within the WordPress block editor.

Plus, it integrates with the top WordPress page builder plugins, lets you add drip content in WordPress for your premium posts, add content paywalls, and lock free content for specific users.

For more details on setting up your members-only website, see our ultimate guide on creating a WordPress membership site.

Method 3. Making Your WordPress Blog Completely Private with My Private Site

Another way you can make your WordPress blog private is by using the My Private Site plugin. This plugin makes it easy to hide your blog and is a great fit for family blogs and companies who never plan on making their content public. 

It can also be used when your website is under construction, but the SeedProd method above does a much better job at helping you create a coming soon or under construction page. 

First thing you need to do is install and activate the plugin. For more details, see our beginner’s guide on how to install a WordPress plugin.

Upon activation, you need to go to My Private Site » Site Privacy to configure the plugin settings.

Next, you need to check the ‘Enable login privacy’ box, so the plugin will make your site private.

Then, click the ‘Save Privacy Status’ button.

Check enable login privacy box

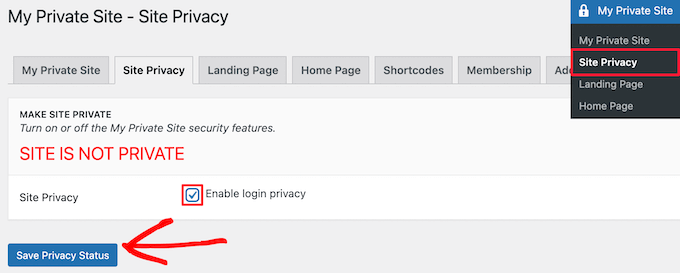
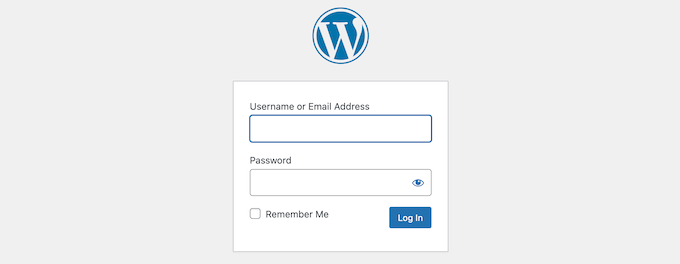
With this option enabled, visitors will see your site login screen when trying to visit your website.

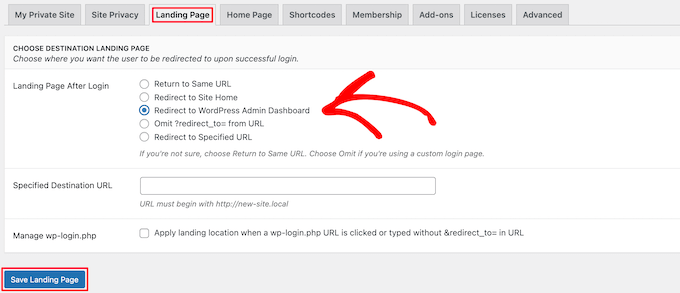
Next, click the ‘Landing Page’ menu option.

Here, you can choose where users will be redirected after a successful login. 

Simply select the radio button in the ‘Landing Page After Login’ section, or enter a specific URL into the ’Specified Destination URL’ box.

Then, click the ‘Save Landing Page’ button.

Landing page redirection options

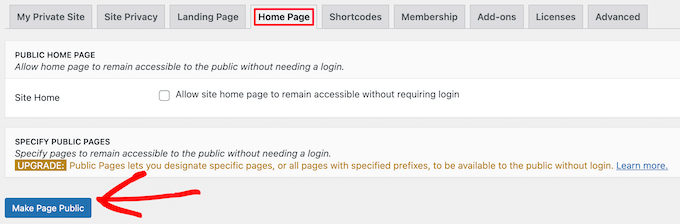
After that, click the ‘Home Page’ menu option. 

Here, you can check the box in the ‘Site Home’ section to make your homepage accessible to visitors. 

We’ll leave the box unchecked, but it can be helpful if you want to show a message to your visitors while keeping the rest of your website hidden. 

If you make changes, then click the ‘Make Page Public’ button.

Optional make home page public

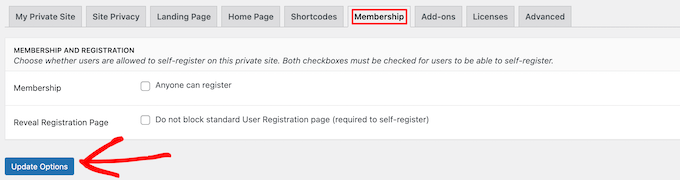
Next, click the ‘Membership’ menu option.

Here, you can choose whether or not you want users to be able to register to your blog.

To allow visitors to register and view your blog, both boxes must be checked. If you don’t want to allow user registration, then simply leave both boxes unchecked.

Then, click the ‘Update Options’ button.

User registration options on private blog

After that, your WordPress blog will be completely private.

Only users with login credentials will be able to log in and view your blog.

Login page example

Method 4. Making Individual Blog Posts Completely Private with WordPress Settings

If you only want to make individual blog posts completely private, then you can use the built-in WordPress settings to do this.

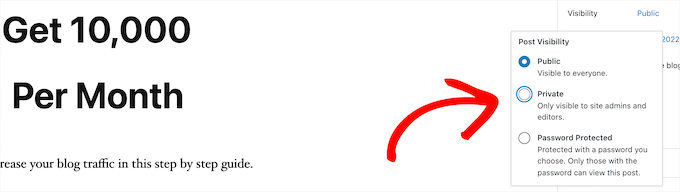
Simply open up the blog post you want to make private, or create a new post. Then, on the post editor screen, you’ll see a ‘Visibility’ option in the ‘Status & visibility’ meta box.

Then, you need to click the ‘Public’ link.

Edit blog post visibility

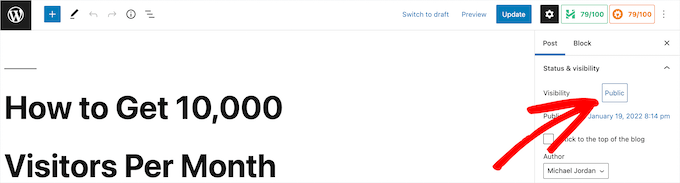
This brings up a drop down where you can select the ‘Private’ option or even make your post password protected.

Simply click the radio button to choose the option best for your needs.

Make post private or password protected

If you choose to make your post password protected, then you’ll need to enter a password. Your users will need to enter the password you entered to view the post.

Once you’re finished making changes, make sure to click the ‘Update’ or ‘Publish’ button to make your post private.

Now, only admins and editors will be able to view the post when they are logged into the WordPress dashboard.

If you’re the only user on your blog, then you don’t need to worry about this. But, if you have other users, then you need to make sure they have the right user role to view the post.

For more details, see our guide on how to add or remove capabilities to user roles in WordPress.

If you want to make users sign up, or become a member, before viewing your content, then see our guide on how to add content locking in WordPress.

We hope this article helped you learn how to make your WordPress blog completely private. You may also want to see our guide on how to get a free email domain, and our expert picks of the best analytics solutions for WordPress users

If you liked this article, then please subscribe to our YouTube Channel for WordPress video tutorials. You can also find us on Twitter and Facebook.

The post How to Make Your WordPress Blog Completely Private (4 Ways) first appeared on WPBeginner.


February 25, 2022 at 05:00PM

Thursday, February 24, 2022

How to Rollback WordPress Plugins (Version Control for Beginners)

Have you ever updated a WordPress plugin only to have the new version break your site?

This can be extremely frustrating and is one of the main reasons why many beginners don’t always update plugins.

In this article, we will show you how to rollback WordPress plugins like a version control system for beginners.

How to Rollback WordPress Plugins (Version Control for Beginners)

When Do You Need to Rollback WordPress Plugins?

It’s best practice to keep your WordPress website up to date. That means you should always use the latest version of WordPress, plugins, and themes.

Unfortunately, on rare occasions, updates can sometimes break your website. This can happen if there’s a bug in the code, or if the update introduces some kind of conflict with your theme or another plugin.

That’s why we always recommend that you create a complete WordPress backup before performing any updates.

However, restoring your entire site from a backup can be a hassle, and you might lose other recent changes that you want to keep. So instead of restoring a backup, if you know which plugin caused the problem, then you can easily revert the changes and report the problem to the developer so it can be fixed.

Alternatively, you can manually install the older version of the plugin. But if you can still log in to your WordPress admin area, then simply rolling back the plugin version is more efficient.

Let’s take a look at how you can easily rollback WordPress plugins using a version control designed for absolute beginners. But first, we’ll show you how to fix your website if it’s broken and you’re unable to log in.

What if You Are Locked Out of Your Website?

Before you can rollback a plugin or theme you have to log in to your website.

But what if the updated plugin or theme has completely broken your website so it displays the critical error or white screen of death? Or perhaps your site is still running, but you are locked out of WordPress admin?

In those cases, you will have to deactivate your plugin or theme manually.

Deactivating WordPress Plugins Manually

If updating a plugin has caused a serious problem on your WordPress website, then we recommend that you deactivate all plugins and then reactivate them one by one.

You’ll need to refer to our guide on how to deactivate all plugins when not able to access wp-admin and follow one of the two methods to manually deactivate all of your plugins.

Manually Deactivate Plugins

You should now be able to log in to your WordPress admin area. You can move on to the second section below and learn how to roll back the problem plugin to an earlier version. After that, you can reactivate your plugins one by one.

Deactivating WordPress Themes Manually

If an updated theme is the cause of your website problems, then we recommend that you download a copy of that theme to your computer and then delete the theme.

You can learn how to do that in our step by step guide on how to uninstall and delete a WordPress theme. You’ll have to carefully follow the sections on how to prepare before deleting a WordPress theme, and how to delete the theme via FTP or the cPanel File Manager.

Manually Deleting a Theme

After that, you should be able to log in to your WordPress admin area again. You’ll need to upload the theme folder from your computer to your website, and then scroll down to the third section below to learn how to roll back the plugin to a previous version.

Are You Still Seeing an Error Message?

If you are still seeing an error message that prevents you from logging in to WordPress, then you should make a note of the error and then see if our guide on what to do when you are locked out of WordPress admin offers a fix for that error.

If not, then check our list of the 50 most common WordPress errors and how to fix them. You can also see our guide on how to properly ask for WordPress support for more options to get help with the error.

Rolling Back a WordPress Plugin to a Previous Version

The first thing you need to do is install and activate the WP Rollback plugin. For more details, see our step by step guide on how to install a WordPress plugin.

Upon activation, go to the Plugins » Installed Plugins page and you will notice a new ‘Rollback’ link below each plugin that you installed from the WordPress.org plugin directory.

Note: You won’t be able to rollback third party plugins that aren’t in the official WordPress plugin directory.

The Plugins Page Now Has a New Rollback Link

When you need to revert to a previous version of the plugin, simply visit the plugins page and click the ‘Rollback’ link below that plugin.

The WP Rollback plugin will take you to a page where you can see which version you have installed and the versions you can rollback to.

Select a Version to Rollback To

Simply select an older version and then click the ‘Rollback’ button.

The plugin will now display a warning message. This message simply informs you that you should create a complete WordPress backup before proceeding.

WP Rollback Will Display a Warning Message

If you already have a recent backup of your WordPress site, then you can continue by clicking on the ‘Rollback’ button.

WP Rollback will download and replace your current version with the version you selected. Don’t forget to click the ‘Activate Plugin’ link when you’re ready.

WP Rollback Will Download and Install the Previous Version

Rolling Back WordPress Themes to Previous Version

If you are using a free theme downloaded from WordPress.org theme directory, then WP Rollback can also rollback your theme.

Simply go to Appearance » Themes page and click on the theme that you want to rollback.

Click the Theme You Wish to Rollback

The ‘Theme Details’ popup will appear that displays the name and description of the plugin, a link to enable auto-updates, and a button to customize the theme.

You will also notice a ‘Rollback’ button in the bottom right corner.

Click the Rollback Button in the Bottom Right Corner

If you don’t see a rollback option, then first make sure that the theme is from the WordPress.org theme directory. The plugin does not work on themes downloaded from any other sources.

If you are certain that the theme you are trying to rollback is from WordPress.org directory, then you just need to visit the Dashboard » Updates page. This will force WordPress to check for updates.

Now come back to the themes page and click on the theme you wanted to rollback. You should now be able to click the ‘Rollback’ button.

This will take you to a page where you can see the theme version which is currently installed, and a list of versions you can rollback to.

Select the Version You Wish to Rollback To

Simply select a previous version and then click the ‘Rollback’ button.

A warning message will be displayed reminding you to complete a backup before continuing.

WP Rollback Will Display a Warning Message

If you recently created a backup of your site, then you can safely click the ‘Rollback’ button.

The version of the theme you selected will be downloaded and replace the current version. If you want to use the theme on your website, then you should click the ‘Activate’ link.

WP Rollback Will Download and Install the Previous Version

We hope this tutorial helped you learn how to rollback WordPress plugins like a version control system for beginners. You may also want to learn how to create a free business email address, or check out our list of the most common WordPress errors and how to fix them.

If you liked this article, then please subscribe to our YouTube Channel for WordPress video tutorials. You can also find us on Twitter and Facebook.

The post How to Rollback WordPress Plugins (Version Control for Beginners) first appeared on WPBeginner.


February 24, 2022 at 07:00PM

Wednesday, February 23, 2022

How to Embed a YouTube Playlist in WordPress (Best Method)

Are you looking to embed YouTube playlists on your WordPress website?

Adding YouTube playlists to your blog posts and landing pages can increase user engagement and improve your search engine optimization (SEO). It also helps get more subscribers and grow your channel.

In this article, we’ll show you how to embed a YouTube playlist in WordPress.

How to embed a YouTube playlist in WordPress

Why Embed YouTube Playlists in WordPress?

If you want to make your content more engaging, then adding YouTube videos is a great way to grab your visitor’s attention.

There are a lot of benefits to embedding YouTube content:

  • You can keep people engaged and get them to spend more time on your website.
  • Video content helps boost your WordPress SEO, because the high engagement and low bounce rate send a positive signal to search engines.
  • It helps you to promote your YouTube channel and get more subscribers.

There are a few different ways to add YouTube content to your site. You could embed a single YouTube video, show the latest videos from your YouTube channel, or even create a video gallery.

So, why choose a playlist?

Embedding a playlist lets you keep the videos focused on a single topic.

A playlist also helps you to guide your visitors from one video to the next one in order, helping them to stay even more engaged on your website.

That said, let’s look at how you can embed YouTube playlists on your WordPress site.

Embedding YouTube Playlists in WordPress

WordPress by default does not allow you to embed a playlist. The easiest way to embed a YouTube playlist in WordPress is by using the YouTube Feed Pro by SmashBalloon plugin.

It’s the best WordPress plugin for YouTube and helps you create custom YouTube feeds for your website. It lets you add your YouTube playlists and offers lots of customization features.

YouTube feeds pro by SmashBalloon

The plugin automatically updates the playlist when you add more videos to it on YouTube. You can even embed live YouTube streams in WordPress.

For this tutorial, we’ll be using the premium version of YouTube Feed Pro because it offers more features. There is also a free version that you can use to try it out.

First, you’ll need to install and activate the YouTube Feed Pro by SmashBalloon plugin. Please see our guide on how to install a WordPress plugin for more details.

Upon activation, you can head over to Feeds for YouTube from your WordPress dashboard and then go to the ‘License’ tab.

Simply enter your license key and then click the ‘Activate License’ button. You can find the key in your account.

Enter license key

Next, you’ll need to go to the ‘Configure’ tab and connect your YouTube account.

To do that, go ahead and click the ‘Connect to YouTube to Create a Feed’ button.

Connect to YouTube to create a feed

A popup will now appear informing you that the plugin will require read-only access to your YouTube account to retrieve the API key.

Simply click the ‘Continue’ button to move on to the next step.

Click the continue button

Next, you’ll need to select your Google account.

Select Google account

On the next screen, the plugin will require access to your Google account.

Simply click the ‘Continue’ button.

Allow access to your account

You’ll now be redirected back to your WordPress website, and a popup will appear showing that you’ve successfully connected your account.

Go ahead and click the ‘Dismiss’ button to continue.

Successfully connected your account

Next to the ‘YouTube Accounts’ section, you can see that you’ve successfully connected your Google account.

See successfully connected notification

Now, you’ll need to create an API key so that the plugin automatically fetches your playlists and displays them in WordPress.

Let’s see how you can get an API Key.

Creating a YouTube API Key

You’ll first need to visit the Google Cloud Platform website and then login to your Google account.

After that, click on the ‘My First Project’ option at the top.

Click my first project

Now, you’ll see a popup window appear where you can select your projects.

Simply click the ‘New Project’ button to get started. You can also select an existing project if you want.

Create a new project

After that, you’ll need to enter a name for your project under the ‘Project Name’ field. We’ve called ours ‘YouTube Playlist’.

Then click the ‘Create’ button.

Enter name for a project

Once your project is created, you can click the menu option in the top left corner (3 horizontal lines) next to Google Cloud Platform and go to ‘API & Services’ from the menu.

Then click the ‘+ Enable APIs and Services’ option at the top.

Enable APIs and services

This will open the API library page. Go ahead and enter YouTube in the search box to find the YouTube API.

Next, you’ll need to select the ‘YouTube Data API v3’ option.

Select YouTube data API v3

After that, simply click the ‘Enable’ button to activate the YouTube API key.

Enable YouTube API

Now, you’ll need to go to the Credentials menu in the left menu, and then click the ‘+ Create Credentials’ at the top.

From the options that appear in the dropdown, go ahead and select ‘API key.’

Create API key

A popup window will now appear with the YouTube API key.

Simply copy the API key or store it on a notepad file.

Copy the API key

Next, you can head back to your WordPress website and then navigate back to Feeds for YouTube from your dashboard.

Now, go to the ‘Configure’ tab and enter your API key.

Enter API key

When you enter the API key, you’ll notice more options will be unlocked in Feeds for YouTube, including the ‘Select a Feed Type’ options.

You can now choose ‘Playlist’ as the feed type and enter the YouTube playlist ID. There is also an option to change the frequency that your site will check for new posts in your YouTube playlist.

Unlock feed type options

You can find the playlist ID by visiting your YouTube channel and then going to the playlist you’d like to display on your website.

The string of letters and numbers after the ‘=’ symbol in the URL is your playlist ID. Simply copy the ID and enter it in the Feeds for YouTube plugin.

Find YouTube playlist ID

Now that you’ve created an API key and added the YouTube playlist ID, let’s see how you can customize the feed and embed it on your website.

Customize and Embed Your YouTube Playlist

To customize your YouTube playlist feed, simply head over to the ‘Customize’ tab in the Feeds for YouTube plugin.

Here you can edit the width, height, and background color of your YouTube feed.

Edit width and height of feed

Next, you can scroll down and change the layout of the feed. The plugin offers multiple layout options, including a grid, gallery, list, or carousel type.

Besides that, there are also options for selecting the number of columns (for mobile and desktop), the number of videos, and spacing between the videos.

Change the layout

The plugin also offers more optional options to customize your YouTube feed. For instance, you can choose what info to display, like the play icon, title, views, date, and more.

There are also options for entering translations for info text, edit header options, changing the Load More and Subscribe button settings, adding moderation, and other advanced settings.

Video experience settings

Don’t forget to click the ‘Save Changes’ button when you’re done.

Next, you can now display your YouTube playlist on any WordPress page or post.

To start, simply create a new page or edit an existing one. Once you’re in the WordPress content editor, simply click the ‘+’ button and add the ‘Feeds for YouTube’ block.

Add Feed for YouTube block

Your YouTube playlist will now appear on your page.

Go ahead and publish your article to see the YouTube playlist feed in action.

YouTube Playlist preview

We hope this article helped you learn how to embed a YouTube playlist in WordPress. You may also want to check out our guide on how to start an online store and the best live chat software.

If you liked this article, then please subscribe to our YouTube Channel for WordPress video tutorials. You can also find us on Twitter and Facebook.

The post How to Embed a YouTube Playlist in WordPress (Best Method) first appeared on WPBeginner.


February 23, 2022 at 04:00PM