Wednesday, March 9, 2022

How to Set Up WordPress Form Tracking in Google Analytics

Are you wondering how your WordPress forms are performing?

Tracking forms in Google Analytics helps you uncover insights about how people interact with your forms, where your leads are coming from, which marketing campaigns are performing the best, and more.

In this article, we’ll show you how to set up WordPress form tracking in Google Analytics.

How to Set up WordPress from tracking in Google Analytics

Why Track WordPress Forms in Google Analytics?

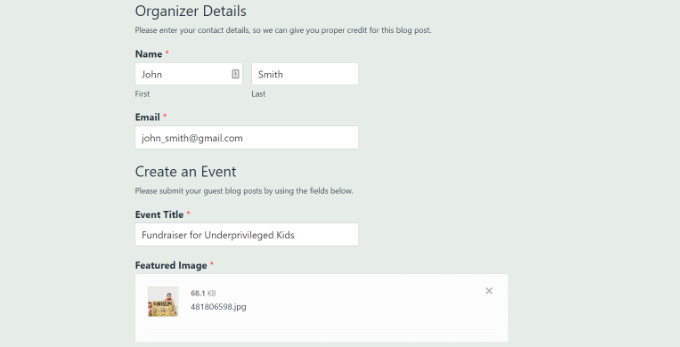
Forms are an essential part of a WordPress website. They help you stay connected with your audience, build an email list, boost eCommerce conversions, and grow your business.

By setting up form tracking in Google Analytics, you get to see how different forms are performing on your website. This way, you can promote high converting forms on your most important page while optimizing low converting forms.

Another benefit of form tracking is that it helps you better understand your audience. You can find out which channel they’re using to find your website and submit a form. Plus, you can also track and reduce form abandonment by tracking them in Google Analytics.

Similarly, it also helps identify how your lead generation campaigns are performing or which referral website is driving the most leads on your site.

That said, let’s look at how you can track WordPress forms in Google Analytics.

Setting Up WordPress Form Tracking in Google Analytics

The best way to set up WordPress form tracking in Google Analytics is by using MonsterInsights. It’s the best Google Analytics plugin for WordPress, and over 3 million professionals use it to uncover insights and use data to grow their business.

Google Analytics doesn’t track WordPress forms by default. You would have to edit code to track your forms. This can be tricky for beginners, as the slightest mistake can mess up your tracking and break your website.

MonsterInsights removes the need for writing code or hiring a developer. It allows you to set up Google Analytics and track WordPress forms without editing code.

MonsterInsights

You can also track website traffic, uncover top referral traffic sources, find out your top-performing posts and pages, and more.

The plugin easily integrates with all of the most popular WordPress form plugins like WPForms, Formidable Forms, Contact Form 7, and more.

For this tutorial, we’ll be using the MonsterInsights Pro plan because it includes the Forms addon, dashboard reports, and other advanced tracking features. There is also a MonsterInsights Lite version that you can use to get started.

First, you’ll need to install and activate the MonsterInsights plugin. Please see our guide on how to install a WordPress plugin for more details.

Upon activation, you’ll be taken to Insights in your WordPress dashboard and see MonsterInsights welcome screen. Go ahead and click the ‘Launch the Wizard’ button to configure the plugin and connect it with Google Analytics.

Launch setup wizard

If you need help, then please follow our guide on how to install Google Analytics in WordPress.

After that, you can head over to the Insights » Addons page from your WordPress admin panel. Next, scroll down to the ‘Forms’ addon and click the ‘Install’ button.

Install forms addon

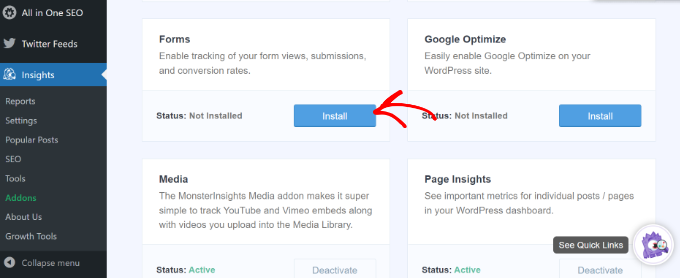
Once the plugin is installed, you should see the ‘Status’ change from Not Installed to Active.

MonsterInsights will now automatically detect your WordPress form plugin and track your forms in Google Analytics.

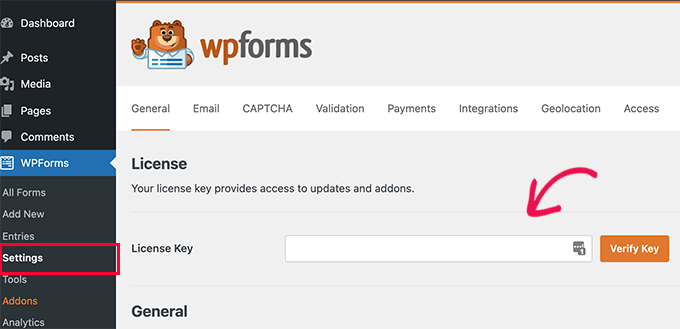
To check the settings, you can head over to Insights » Settings from your WordPress dashboard and go to the ‘Conversions’ tab.

MonsterInsights settings - conversions tab

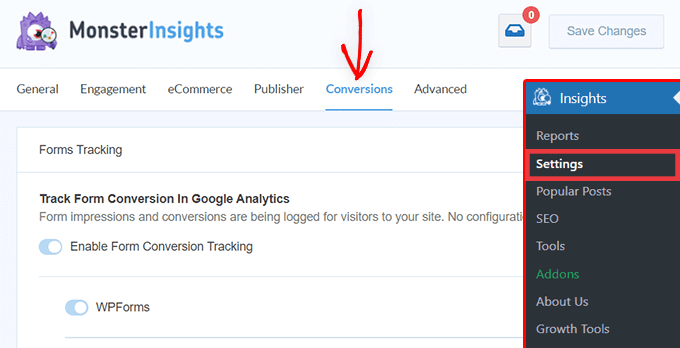
You’ll see that the toggle for Form Conversion Tracking option is already enabled.

Now, are you ready to see how your forms are performing?

See How Your WordPress Forms Are Performing

MonsterInsights makes it super simple to see the data by showing stats inside your WordPress dashboard. This helps save time, as you can quickly find the data you need to make decisions.

To view the report, head over to Insights » Reports from the WordPress dashboard and then click the ‘Forms’ tab.

Forms report

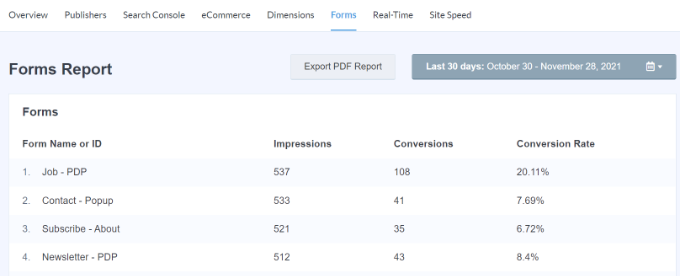
In the report, you’ll see impressions, which is the number of people who have viewed your form. You can also see the conversions, which is the number of people who completed the form, and conversion rates for each form on your website.

Now you can also see WordPress form tracking data in Google Analytics.

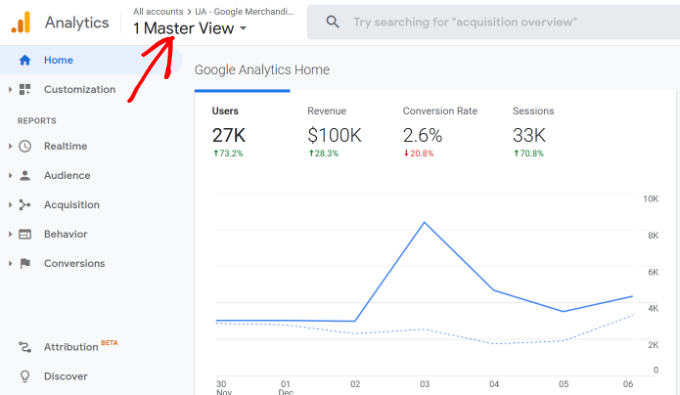
First, you’ll need to log in to your Google Analytics account and select your website property from the menu at the top.

Choose a website property

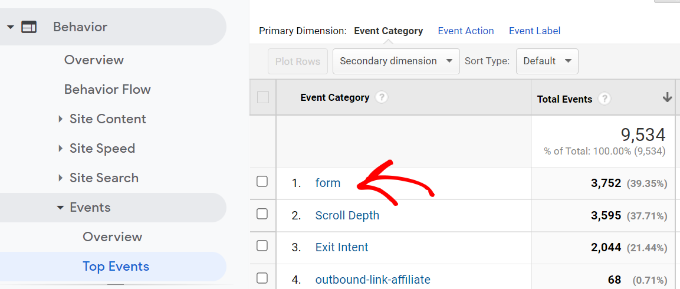
After that, you’ll need to go to Behavior » Events » Top Events from the menu on your left.

You can see different event categories in this section. Go ahead and click on the ‘form’ event category.

Click on form event category

On the next screen, you’ll see the total impressions and conversions for your WordPress form.

You can select the ‘impression’ event action if you’d like to see the number of people who viewed your form or select ‘conversion’ if you want how many visitors submitted your forms.

Select event action for forms

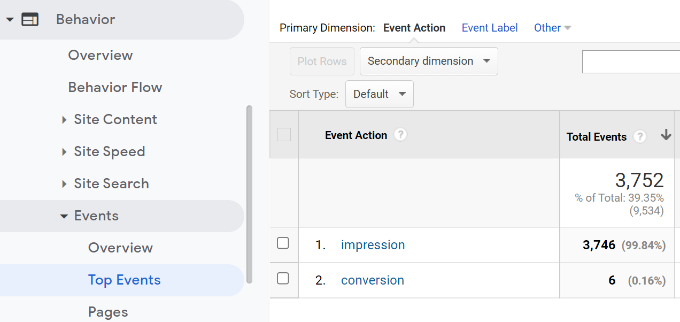
For example, let’s select the ‘impression’ event action.

Next, you’ll see which WordPress forms get the most views on your website.

See event label for form tracking

Besides Google Analytics, there’s another way to see how people interact with your forms. Let’s take a look.

Bonus: Track User Journey in WPForms

If you’re using the WPForms plugin for adding a contact form or any other type of form, then you can see what each user did on your site before submitting a form.

WPForms is the best contact form plugin for WordPress. It offers a User Journey addon that shows the steps your visitors took before submitting a form, such as the pages they viewed or optin campaigns they clicked.

You’ll need the WPForms Pro version because it includes the User Journey addon.

First, you’ll have to install and active the WPForms plugin. For more details, please see our tutorial on how to install a WordPress plugin.

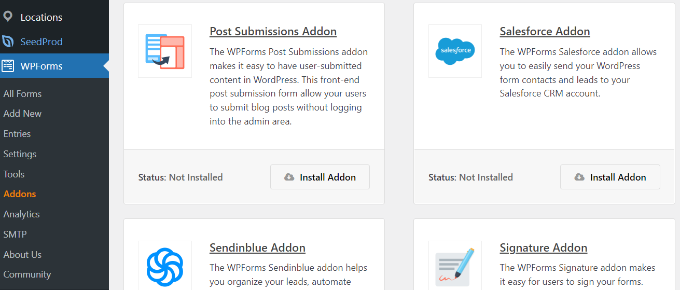
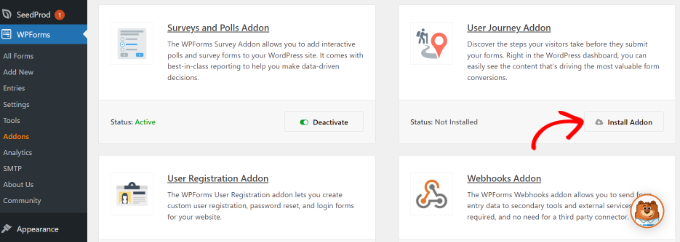
Next, you can head over to WPForms » Addons from your WordPress dashboard. Then navigate to the User Journey Addon and click the ‘Install Addon’ button.

Install user journey addon

Once the addon is installed, you can go to WPForms » Entries from your WordPress dashboard.

After that, select a WordPress form to see the user journey.

Select form entries

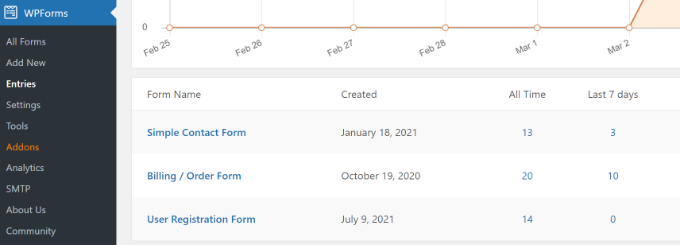
For the sake of this tutorial, we’ll view the Simple Contact Form entries.

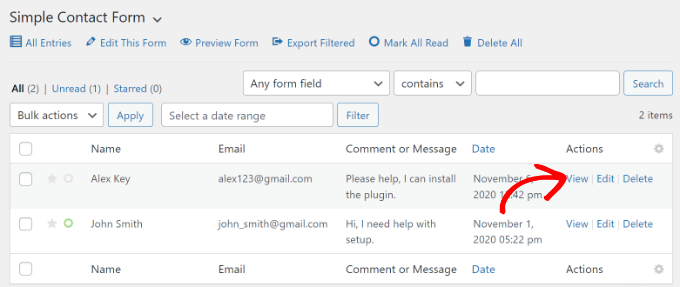
Next, you can click the ‘View’ button under Actions for any entry and see the user’s steps before submitting the form.

View the action of each user

On the next screen, you’ll see details of your user.

Simply scroll down to the ‘User Journey’ section and see their path before arriving on the contact form and submitting it.

View user journey in WPForms

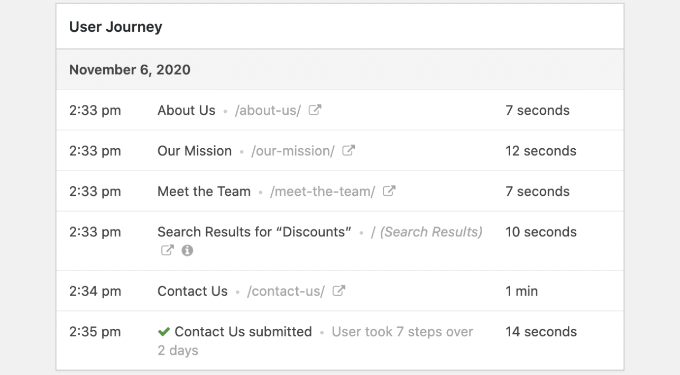
Using the data, you can better understand your users and see which pages or campaigns they visit before converting into leads.

This way, you can promote your forms on pages that people view the most and increase your marketing campaigns’ visibility to get more leads.

For more details, please see our tutorial on how to track user journey on WordPress lead forms.

We hope our article helped you learn how to set up WordPress form tracking in Google Analytics. You can also see our guide on how to create a free business email address, or check out our expert comparison of the best managed WordPress hosting compared.

If you liked this article, then please subscribe to our YouTube Channel for WordPress video tutorials. You can also find us on Twitter and Facebook.

The post How to Set Up WordPress Form Tracking in Google Analytics first appeared on WPBeginner.


March 09, 2022 at 05:00PM

Tuesday, March 8, 2022

How to Make an Online Quiz Website (Step by Step)

Do you want to create your own online quiz website?

A website with interactive quizzes can be a fun project and a great way to earn passive income. By creating your quiz website with WordPress, you have complete control over the features, design, and monetization of your quiz site.

In this article, we’ll show you how to easily build an online quiz website step by step, with no technical skills needed.

How to Make an Online Quiz Website (Step by Step)

What Do You Need to Build an Online Quiz Website Using WordPress?

To create a quiz website like Buzzfeed or others, there are a few requirements:

  • A domain name (such as example.com or wpbeginner.com)
  • A web hosting account (this is storage space for all your website files)
  • A WordPress theme (this controls the design of your quiz website)
  • The right WordPress plugins (plugins are like apps and add features like quizzes to your website)
  • 1 hour of your undivided attention

Depending on how many quizzes you want to start with, it’s possible to create your entire quiz site from scratch to launch in under an hour. We’ll walk you through each step.

In this tutorial, we’ll cover the following:

  • How to get a free domain name
  • How to choose the best hosting
  • How to pick a WordPress theme
  • Which online quiz tool to use
  • How to monetize your quiz site
  • Bonus tools and resources to grow your quiz website

Ready? Let’s get started!

Step 1: Choosing the Right Website Platform

To create a website, first you need to choose a website builder platform.

It is very important to choose the right one to start with, since moving platforms later on can be a huge hassle.

Since you’re here reading this, you’re on the right track. We strongly recommend WordPress because it’s 100% free and allows you complete freedom to create any type of site you want. Over 43% of all websites on the internet are powered by WordPress.

However, there are two types of WordPress software, so you’ll need to make sure you’re using the right one. First there is WordPress.com, which is a blog hosting platform. The second is WordPress.org, which is the free software we recommend.

We will be using the second option (WordPress.org) because it’s more powerful. For a detailed comparison, you can see our guide on the difference between WordPress.com and WordPress.org.

To create your online quiz website, you’ll also need a domain and web hosting. Choosing the right web hosting is important because it supports your whole website. You want to find fast, reliable hosting that can grow with you as your website grows.

Typically a domain name can cost $14.99 per year, and hosting usually starts around $7.99 a month. This can be a big cost if you’re just getting started.

That’s why we recommend Bluehost.

Getting started with personal website on Bluehost

Bluehost is officially recommended by WordPress, and they have agreed to offer our readers a free domain and a big discount on web hosting.

Best of all, Bluehost automatically installs WordPress for you, so you can get started building your quiz website right away.

Pro Tip: It’s smart to choose a niche, or specific topic, for your quiz website. Instead of creating a general quiz website which would have to compete against big sites like Buzzfeed, you can become known for specializing in a certain topic, like video games, geography, or pop music.

Once you’ve purchased your hosting and chosen a domain name, you’ll be able to access your new WordPress site by clicking the ‘Log in to WordPress’ button from the hosting dashboard.

Bluehost Dashboard - log in to WordPress

You can follow our guide on how to make a website for details on how to set up WordPress and start adding content to your site.

Step 2: Picking the Perfect WordPress Theme

When using WordPress, the theme you choose is what determines the layout and design of your website.

There are thousands of free and premium themes available, which can make it hard to choose.

Although there are quiz themes available, we recommend looking for a simple theme instead.

You don’t need to buy a fancy theme with quiz features included, because they’re often slow and bloated and will lock you into using their design forever. Instead, it’s better to use plugins to add quizzes to your website. We’ll show you how to do that below.

By using a simple theme, you’ll have the option to change your design in the future without breaking any quizzes or other features.

That said, we have an in-depth article that will help you select the perfect WordPress theme.

If you want a quick pick, our top recommended theme for an online quiz website is Astra.

You can get started with Astra for free, and it includes dozens of professionally-designed templates to choose from.

If you want to build a completely custom WordPress theme, then we recommend using SeedProd.

SeedProd is a drag & drop website builder for WordPress that lets you build completely custom websites without writing any code.

SeedProd Website Builder Coupon Code

For more theme options, you can see our list of the best simple themes to focus the design on your quizzes, or see our pick of the best magazine themes for more image-heavy designs.

Once you’ve chosen a theme, you can see our guide on how to install a WordPress theme to set it up.

Step 3: Installing the Right Online Quiz Plugins

After you set up your theme, the next step is to add quizzes to your new website.

The best way to do that is with a quiz plugin.

Plugins are like apps for your WordPress site. They allow you to add all kinds of different features to your site.

There are a few different quiz plugins we recommend:

1. Formidable Forms

Formidable Forms

Formidable Forms is an advanced form builder that lets you create custom forms with a powerful drag and drop builder, including contact forms, online calculators, and more.

It comes with dozens of form templates, or you can create your own from scratch.

You can use Formidable Forms to create quizzes that are automatically scored for the user. After they submit the quiz, you can email them the score, which makes this plugin a great tool to grow your email list.

Note: You’ll need to get at least the Business plan, which includes the Quiz Maker addon.

For more details, see our guide on how to easily create a quiz in WordPress.

2. Interact Quiz Maker

Interact Quiz Maker

Interact Quiz Maker is a powerful app for creating viral quizzes so you can generate leads.

It offers a drag and drop quiz builder with features to customize the design, style, and colors of your quizzes. Plus, they include over 800 pre-built quiz templates that you can use out of the box or customize.

One standout feature of Interact is that you can create branching quizzes which show questions based on the user’s answers to previous questions. They also have social sharing features so your quizzes can go viral when people share their results.

Interact also integrates with email marketing services so you can grow your list.

3. MemberPress

MemberPress homepage

MemberPress is the best LMS (learning management system) plugin for WordPress.

If you’re wanting to create an online quiz site with courses, scoring, and grades, then MemberPress is the best option. It’s a full course solution that lets you create lesson plans and subscriptions levels, manage user access and payments, and so much more.

For more details, you can see our complete guide on how to create and sell online courses in WordPress.

Once you’ve created the quizzes on your website, you may want to start monetizing your website. We’ll cover that next.

Step 4: Monetizing Your Online Quiz Website

If you want to make money from your quiz website, there are several ways to do it.

Build an Email List

Firstly, we always recommend starting an email list.

Quizzes are a smart way to get email subscribers because people are often happy to enter their email address to receive their quiz results.

Email marketing is important because most website visitors don’t return. Once they’re on your email list, you can send them fun newsletters to get them to return to your website.

You can even get paid sponsors for your email newsletters once you have built up a good number of subscribers.

To get started, see our guide on how to start an email list the right way and our comparison of best email marketing services.

Display Ads

An easy way to get started monetizing your quiz website is to sell ads.

You can see our guide on how to monetize a WordPress blog with Google AdSense to get started, and this tutorial on how to optimize your AdSense revenue for more tips.

While Google AdSense is popular and easy to set up, the money you can earn is limited and Google takes a big cut.

Another option is to sell ad space on your website directly, so you can negotiate the price yourself. To learn more, you can see our guide on how to sell ads on your WordPress blog.

For more ideas on monetizing your online quiz website, you can check out our guide on proven ways to make money online.

Bonus: Best Tools & Resources to Grow Your Quiz Website

WordPress is a super powerful platform and has all the tools you need to grow your traffic and take your website to the next level.

We recommend the following plugins to help grow your website more quickly:

AIOSEO – It’s the best WordPress SEO plugin and will help you rank higher in the search engines.

MonsterInsights – It allows you to easily install Google Analytics in WordPress, so you can understand where your visitors are coming from and what content on your site is the most valuable.

PushEngage – With PushEngage you can send push notifications to your site visitors, encouraging them to return to your website.

Looking for more? See our list of must-have WordPress plugins.

To help you learn WordPress, here are some useful resources:

  • WPBeginner Blog – This is where we publish our WordPress tutorials, how tos, and step by step guides.
  • WPBeginner Videos – These step by step videos will help you learn WordPress FAST.
  • WPBeginner on YouTube – Need more video instructions? Subscribe to our YouTube channel with more than 260,000 subscribers and 28 Million+ views.
  • WPBeginner Blueprint – Check out plugins, tools, and services we use on WPBeginner.
  • WPBeginner Deals – Exclusive discounts on WordPress products and services for WPBeginner users.

We also have some must-follow guides that you should bookmark for when you need them:

If you need more help with WordPress, we also have an active WordPress Facebook group with over 80,000 members where you can get answers to any WordPress question.

That’s it! We hope this article helped you to create an online quiz website, step by step. You may also want to see our guide on how much does it cost to build a WordPress website, or our expert pick of the best AI chatbot software.

If you liked this article, then please subscribe to our YouTube Channel for WordPress video tutorials. You can also find us on Twitter and Facebook.

The post How to Make an Online Quiz Website (Step by Step) first appeared on WPBeginner.


March 08, 2022 at 03:00PM

Monday, March 7, 2022

How to Create a User-Submitted Events Calendar in WordPress

Do you want to allow users to submit calendar events on your WordPress website?

Adding user-submitted events is a great way to build a community and boost engagement on your website.

In this article, we’ll show you how to create a user-submitted events calendar in WordPress without giving visitors access to your admin area.

Create a user submitted events calendar in WordPress

Why Create a User-Submitted Events Calendar?

Crowdsourcing events for your WordPress calendar is a great way to build a community, attract new visitors, and keep your calendar updated with the latest events. It also helps save time since you don’t have to search the internet for upcoming events.

When your community members can add events to your calendar, they’ll get free promotion for their events, and your website visitors and other community members can easily learn about events happening in their area.

For example, let’s say you’re running a charity or non-profit membership website. You can allow members to add different fundraisers, seminars, and other charity events to your site’s calendar.

The problem is that WordPress doesn’t allow users to submit calendar events or upload files on the front end by default. You will have to create an account for each user and allow access to the admin area. This method is time-consuming and could be risky.

Thankfully, there’s an easier way. Let’s see how you can let people add calendar events in WordPress.

Creating a User-Submitted Events Calendar in WordPress

The best way to allow users to add calendar events without giving them access to your WordPress admin panel is by using WPForms. It’s the best contact form plugin for WordPress and is trusted by over 5 million businesses.

The plugin lets you create a file upload form and offers a Post Submissions addon that allows you to accept event listings, PDFs, articles, quotations, and other content on the front end of your website.

WPForms

Note: You’ll need the WPForms Pro version because it includes the Post Submission addon, premium integrations, and other customization features.

First, you’ll need to install and activate the WPForms plugin. If you need help, then please see our guide on how to install a WordPress plugin.

Upon activation, simply head over to WPForms » Settings from your WordPress dashboard and enter your license key. You can find the license key in the WPForms account area.

WPForms license key

Next, click the ‘Verify Key’ button to continue.

After verifying the license key, you’ll need to go to WPForms » Addons and then scroll down to the Post Submissions Addon.

Go ahead and click the ‘Install Addon’ button.

Post submission addon by WPForms

Once the addon is installed, you’ll notice the Status change from ‘Not Installed’ to ‘Active.’

Setting Up The Events Calendar Plugin

Next, you’ll need a WordPress events calendar plugin to create an events calendar on your website.

We’ll use The Events Calendar plugin for our tutorial. It is a powerful event management system for WordPress and offers lots of features. You can easily use it to add events and manage organizers and venues.

Plus, The Event Calendar offers a free version and easily integrates with WPForms.

First, you’ll need to install and activate The Event Calendar plugin. For more details, check out our guide on how to install a WordPress plugin.

Upon activation, you’ll be redirected to Events » Settings in the WordPress admin panel. The plugin will ask you to join its community. You can simply click the ‘Skip’ button for now.

Set up the event calendar plugin

After that, you can go through different settings for your events calendar.

There are settings in the ‘General’ tab to change the number of events to show per page, activate the block editor for events, show comments, edit the event URL slug, and more.

General settings tab

You can also set the time zone settings for your events calendar if you scroll down. The plugin lets you use your site’s time zone everywhere or manually set the time zone for each event.

We suggest using the ‘Use the site-wide time zone everywhere’ option. This will help match the events times that users submit with your site’s time zone.

When you’ve made the changes, click the ‘Save Changes’ button.

Change time zone settings

After that, you can go to the ‘Display’ tab and edit the appearance of your events calendar.

For instance, there are options to turn off the default style, choose a template, enable event views, and more.

Edit display settings

Once you’ve made the changes, let’s see how you can create a form to accept calendar events.

Creating a User Submitted Events Form

In the next step, you’ll need to set up a form using WPForms to allow users to submit events.

To start, you can go to WPForms » Add New from your WordPress dashboard. This will launch the drag and drop form builder.

Simply enter a name for your form at the top and then select the ‘Blog Post Submission Form’ template.

We’re using this template because when you use The Events Calendar plugin, each event is a custom post type. Using WPForms, you can edit the blog post submission form template to submit an event custom post type instead of a regular blog post.

Choose blog post submission form template

Next, you can customize your post submission form.

Using the drag and drop form builder, WPForms lets you add different form fields. You can add a dropdown menu, checkboxes, phone number, address, website URL, and more.

Plus, it also lets you rearrange the order of each form field and remove fields you don’t need.

Drag and drop form fields

For example, we’ll add the ‘Date / Time’ fields to our form template to show the ‘Event Start Date / Time’ and ‘Event Finish Date / Time’.

Pro Tip: When you add the Date / Time field, make sure to click the checkbox for ‘Disable Past Dates.’ You can find this option under the Advanced Options tab.

This will ensure that all your new events have a future date. It also helps catch mistakes if someone accidentally enters the wrong year.

Disable past dates

When creating your form, you can rename different form fields. To do that, simply click on them and then change the ‘Label’ under Field Options in the menu on your left.

For our tutorial, we changed the label for Post Title to Event Title and Post Excerpt to Event Description.

Edit form field labels

After that, you’ll need to go to the Settings » Post Submissions tab in the form builder.

Now, make sure that the ‘Post Submissions’ option is On.

Ensure post submission is on and match metadata

Besides that, you’ll need to match your form fields with the fields that The Events Calendar plugin will look for.

For example, this is how we mapped our demo form fields:

  • Post Title to Event Title
  • Post Excerpt to Event Description
  • Post Featured Image to Featured Image
  • Post Type to Events
  • Post Status to Pending Review
  • Post Author to Current User

The Pending Review status allows you to moderate each event submission. Plus, if you’re accepting online payments, then you can check if the payments were successful before approving the event.

Next, you’ll also need to map the event start and end date/time. For that, scroll down to the ‘Custom Post Meta’ section and enter a code to map the respective fields in your form.

To start, add _EventStartDate code and select your event start time field (like Event Start Date / Time) from the dropdown menu.

Then click the ‘+’ button to add another Custom Post Meta and enter the _EventEndDate code to map the event finish form field (like Event Finish Date / Time).

Enter custom post meta

Next, you can also change other settings of your form.

If you go to the ‘Confirmations’ tab, you’ll see settings for showing the thank you page that will appear when users submit a calendar event.

You can show a message, a page or redirect people to another URL when they submit the form.

Confirmation settings

Other than that, you can also change the ‘Notifications’ settings.

Here, the plugin lets you choose different settings for receiving a notification when someone submits a form. For instance, you can change the send to email address, subject line, from name, and more.

Edit notification settings

Don’t forget to click the ‘Save’ button at the top when you’ve made the changes.

Publishing Your User-Submitted Events Form

Now that you’ve created a user-submitted events form, it’s time to publish it on your WordPress website.

WPForms offers multiple options to embed your form in WordPress. You can use the WPForms block in the block editor, use a shortcode, add a sidebar widget, and more.

For this tutorial, we’ll use the Embed wizard offered by WPForms.

To start, simply click the ‘Embed’ button at the top right corner.

Edit notification settings

When you click the button, a popup window will appear.

Go ahead and click the ‘Create New Page’ button, and WPForms will automatically create a new page for your form.

Create a new page

You can also click the ‘Select Existing Page’ to add the form to a published page.

Next, you’ll need to enter a name for your page. Once that’s done, simply click the ‘Let’s Go!’ button.

Enter name for page

On the next screen, you can see your user-submitted events form on the new WordPress page.

Go ahead and preview the page and then click the ‘Publish’ button.

Publish your page

You can now visit your website to see the form in action.

Here’s what it will look like on the front end of your website.

Form preview

Next, you can review the calendar events your users submit by going to Events from your WordPress dashboard.

All the user-submitted events will be listed here as pending. You can click the ‘Edit’ button under each event to review them.

View your event

When reviewing the event, ensure that the user has filled out all the details. If any information is missing, you can add it or reject the calendar event if it doesn’t meet your website requirements.

After that, simply Publish the user-submitted event. You can then view your events by visiting the URL created by The Events Calendar: https://www.example.com/events

Events page preview

We hope this article helped you learn how to create a user-submitted events calendar in WordPress. You may also want to check out our guides on how to move a website from HTTP to HTTPS and the best WordPress SEO plugins and tools to improve your website’s ranking.

If you liked this article, then please subscribe to our YouTube Channel for WordPress video tutorials. You can also find us on Twitter and Facebook.

The post How to Create a User-Submitted Events Calendar in WordPress first appeared on WPBeginner.


March 07, 2022 at 05:00PM