Tuesday, July 5, 2022

How to Change the Category Base Prefix in WordPress

Do you want to change the category base prefix in WordPress?

By default, WordPress automatically adds /category/ as a prefix to URLs for all category pages. However, you can easily change the category base prefix or completely remove it.

In this article, we will show you how to change the category base prefix in WordPress.

How to change the category base prefix in WordPress

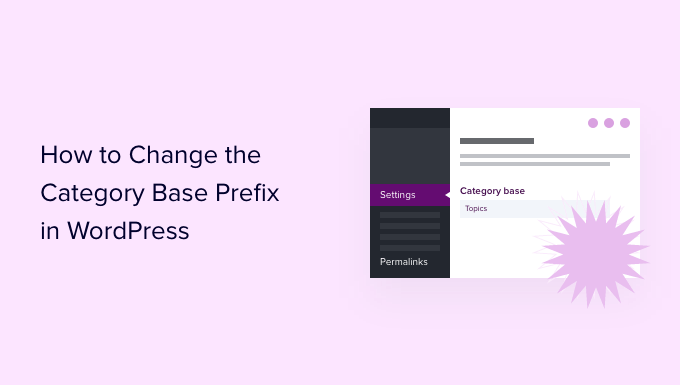
What is Category Base Prefix? Should You Change It?

Each category on your WordPress site gets its own page and RSS feed. You can view all posts filed under a category by visiting that category archive page.

By default, WordPress adds ‘category’ as a base prefix to URLs for category pages. This helps differentiate pages and posts from category and tag archives.

For example, if you have a category called ‘News’ then its URL will look like this:

https://ift.tt/2oTXCzh

Similarly, WordPress also adds tag prefixes to URLs for tag archives.

https://ift.tt/2A63sMQ

This SEO-friendly URL structure helps users and search engines understand what kind of page they are visiting.

Most websites don’t need to change the base prefix at all. However, if you are creating a niche site where you would like to use a different word or phrase for your categories, then you can change the category base prefix to reflect that.

Changing Category Base Prefix in WordPress

Changing the category base prefix is quite simple in WordPress.

You need to visit the Settings » Permalinks page from your WordPress dashboard and scroll down to the ‘Optional’ section.

Add a new category base prefix

In the ‘Category base’ field, you can enter the prefix you would like to use next to the category base option. You can also change the tag base prefix if you want.

For example, you can add ‘topics’ as the new prefix. In this case, your category URLs will look like this:

https://ift.tt/gcN7R1x

Don’t forget to click on the ‘Save Changes’ button to store your settings.

Removing Category Base Prefix from URLs

Many of our users have asked us about removing the category base prefix from WordPress URLs altogether. This will change your category URLs to look like this:

https://ift.tt/c27ERvC

This is not a good idea, and we recommend that you do not remove category base prefix.

The category base prefix helps both users and search engines distinguish between posts/pages and categories. Removing the prefix makes your URLs ambiguous, which is not good for user experience or WordPress SEO.

You may also run into technical issues with various WordPress plugins. For example, if you have a category and a page with the same name or when you are using %postname% as your URL structure for single posts, then your site will experience an infinite redirect loop causing the pages to never load.

However, if you still want to do this, then you can use the All in One SEO (AIOSEO) plugin.

All In One SEO - AIOSEO

It is the best SEO plugin for WordPress and makes it super easy to optimize your website for search engines. Plus, it gives you an option to strip the category base prefix with a click of a button.

For this tutorial, we’ll use the AIOSEO Pro license because it includes the feature to remove category base and other powerful options like the redirection manager and link assistant. There’s also a free version of AIOSEO that you can use.

First, you’ll need to install and activate the AIOSEO plugin. For more details, please see our guide on how to install a WordPress plugin.

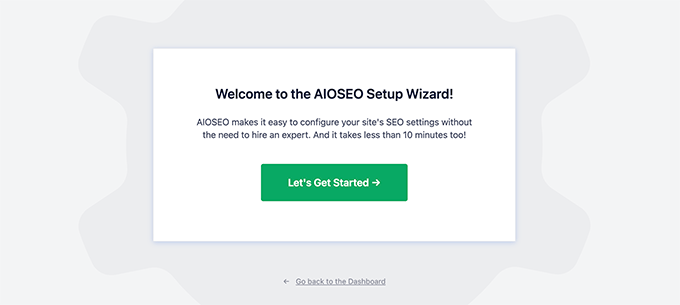
Upon activation, you’ll see the AIOSEO setup wizard. Simply click the ‘Let’s Get Started’ button. You can see our guide on how to setup All in One SEO for WordPress for more information.

All in One SEO setup

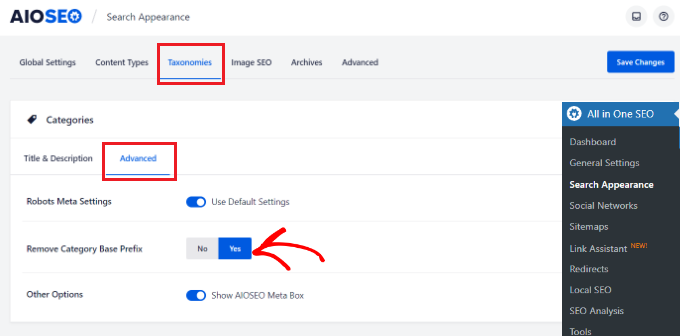
Next, you can head over to All in One SEO Search » Appearance from your WordPress admin panel and click on the ‘Taxonomies’ tab.

After that, go to the Categories section and switch to the ‘Advanced’ tab. From here, simply click the toggle to Yes for ‘Remove Category Base Prefix’ option.

Enable the remove category base prefix button

Don’t forget to click the ‘Save Changes’ button when you’re done.

Setting Up Redirects After Changing Category Base Prefix

If you are changing or removing the category base prefix on a new WordPress website, then you don’t need to do anything. However, if you are doing this on an existing website, then users visiting the old category page will see a 404 error.

To fix this, you will need to set up a redirect to make sure both search engines and regular visitors are properly redirected to the correct category page on your site.

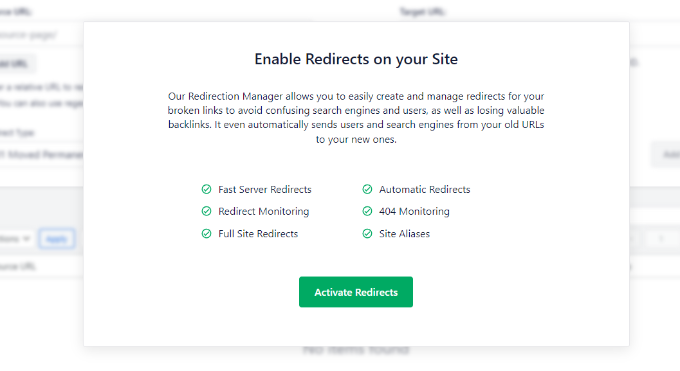
The easiest way of setting up redirection in WordPress is by using the All in One SEO (AIOSEO) plugin.

To start, you can go to All in One SEO » Redirects from the WordPress admin panel and then click the ‘Activate Redirects’ button.

Activate redirects

Once it’s active, you can go to the ‘Redirects’ tab to setup redirection.

Simply enter the URL you want to redirect under the ‘Source URL’ field and the new location for the link under the ‘Target URL’ field.

As for the Redirct Type, you can select ‘301 Moved Permanently’ from the dropdown menu. This will permanently move your old category pages to the new destination.

Set up redirection in AIOSEO

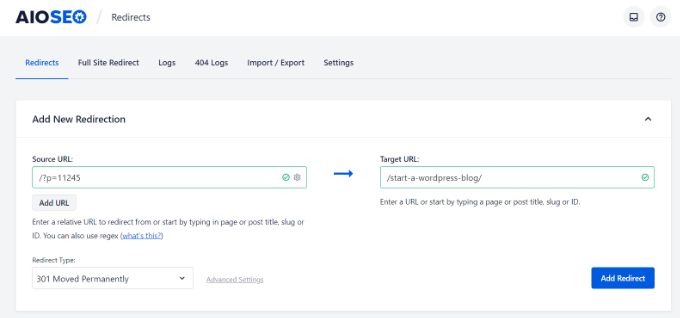
Don’t forget to click the ‘Add Redirect’ button when you’re done.

For more details, please see our beginners guide to creating 301 redirects in WordPress.

Now all your users and search engines will be redirected to the correct URLs using your new category prefix.

We hope this article helped you learn how to change the category base prefix in WordPress. You may also want to see our list of most wanted WordPress tips, tricks, and hacks and how to start an online store.

If you liked this article, then please subscribe to our YouTube Channel for WordPress video tutorials. You can also find us on Twitter and Facebook.

The post How to Change the Category Base Prefix in WordPress first appeared on WPBeginner.


July 05, 2022 at 05:00PM

Monday, July 4, 2022

WPBeginner Turns 13 Years Old – Reflections and Updates

Today, WPBeginner turns 13 years old, and it seems we have a teenager on our hand.

It feels pretty unreal to type this.

Like every year, I want to take a few minutes and do a quick recap of all the major things happening in business as well as my personal life.

WPBeginner 13th Birthday - Reflection and Updates

WPBeginner Story

I started using WordPress when I was 16 years old and started WPBeginner at age 19 with a single mission: make WordPress easy for beginners.

Since then WPBeginner has become the largest free WordPress resource site for beginners.

For those of you who’re new, you can read the full WPBeginner story on our about page and use the Start Here page to get the most out of WPBeginner.

Personal Updates

My son, Solomon, is now 5.5 years old, and he will be starting school in August. Time is flying by so fast.

We’re taking advantage of our flexible schedule right now and maximizing our international travel trips. Not to mention, I felt I had a bit of catching up to do considering all the COVID lockdowns.

This year we have taken several trips, but two of my absolute favorites were the Arctic Circle in Finland and the beautiful Serengeti National Park in Tanzania.

Syed Balkhi and Family 2022

If all goes according to plan between work travel and family trips, I will visit 8 countries this year. It’s pretty exciting to be traveling again without restrictions, but at times I have felt overwhelmed depending on what’s going on in the business.

If you didn’t get a chance to read my 2021 recap, I highly recommend checking it out on my personal blog where I share lessons learned from last year.

WPBeginner Updates

Thanks to our awesome community, WPBeginner has continued to grow year over year. Aside from tons of amazing WordPress tutorials on our blog, there have been several notable updates from last year, that I’d like to highlight.

But before I do that, I want to share a huge milestone that I’m super proud of. We got featured on the NASDAQ billboard in Time Square for passing 20 million active installs of our products.

Awesome Motive NASDAQ Billboard - WPBeginner

This was a pretty huge moment for our entire team — going from a blog to being on Time Square in New York City!!!

This was a dream come true moment, and it’s proof that hard work does pay off.

Talking about hard work, here are some big WPBeginner updates that happened in the last 12 months:

1. New WPBeginner Website Design

After 5 long years, we finally did a design refresh for WPBeginner site, and our big focus was content discoverability.

WPBeginner started out as a simple tutorial blog, but over the years it has truly become the Wikipedia for WordPress.

Now when you arrive at the website, you’ll see a big search bar on the homepage.

WPBeginner homepage search

If you visit our WordPress glossary section or best WordPress discounts section, then you will also see a live search feature to quickly find what you’re looking for.

WPBeginner WordPress Glossary Live Search

Aside from that, we also added mega menus, switched from Yoast to AIOSEO, started using the block editor for everything, and a whole lot more.

Not to mention, we made the site super fast and our Google Core Web Vitals score is nearly perfect.

WPBeginner Google Page Speed Test Results

I wrote a full behind the scenes case study with helpful links and tutorials, so you can learn and improve your website.

2. Larger Community + More Content

Our community has continued to grow on all social media networks. Our WPBeginner Engage Facebook group now has over 86,000 members.

And the WPBeginner YouTube channel has passed 274,000 subscribers.

To keep up with growth, we’re doubling down on our video content strategy. This is part of the bigger plan that I can’t wait to share with you in the coming months.

Aside from our video, we have also launched the WPBeginner Podcast. This is an experiment that we’re trying out, so please send us your feedback by leaving comments and sending us your ideas on what topics you want us to cover in future episodes.

You can listen to the WPBeginner podcast on your favorite networks including YouTube, Apple Podcast, Google Play, Spotify, Amazon Audible, etc.

3. Contributing to WordPress and Open Source

As I mentioned last year, we have continued to ramp up our contribution to various free open source projects including WordPress core.

As part of our Five for the Future commitment, we hired John James Jacoby, one of the most well-respected WordPress core contributors, so he can spend 100% of his time on making WordPress and BuddyPress better.

Aside from the contributions that are visible on WordPress.org, we’re offering over 1200 hours of free WordPress support each month through our various support channels including our contact form, Facebook group, etc.

We also invested in creating a free migration tool to help users switch from Shopify to WordPress. This is in addition maintaining several other platform migration tools like Weebly to WordPress and Medium to WordPress.

At WPBeginner, we maintain dozens of free small business tools, and we added few new ones to the mix including:

4. New Acquisitions & Investments

In 2018, I created the WPBeginner Growth Fund to invest in WordPress focused companies that are solving important problems that you, our readers, want me to help out with.

In the past 12 months, we have made several big acquisitions and investments in the ecosystem.

  • We acquired SearchWP to help website owners improve their WordPress search results by giving them more control over the search algorithm. Here’s the full background story.
  • We acquired Easy Digital Downloads which helps you sell digital downloads like eBooks, software, music, etc. This is the exact software that we use to sell all of our WordPress plugins and SaaS. Here’s the full background story.
  • As part of the above deal, we also acquired WP Simple Pay plugin which helps website owners accept credit card payments without a full shopping cart. It lets you add Apple Pay, Google Pay, Buy Now Pay Later, and more powerful payment features.
  • And the deal also included the #1 affiliate management plugin for WordPress called AffiliateWP. This lets you create your own affiliate program for your online store without the middle man fees.
  • Last month, we announced our acquisition of WP Charitable, a top-rated WordPress donation and fundraising plugin. See the full story here.

Aside from the full acquisitions, we also invested in WooFunnels, the leading funnel building software for WooCommerce. Simply put, it helps you make more money from your website visitors. See more details here.

We also took an investment stake in ConvertKit which is one of popular email marketing services for creators.

I’m really proud of how far we’ve come with the Growth Fund, and it’s really amazing to see the impact our companies are making in the WordPress ecosystem and the larger open web.

Want me to invest in your business? Learn more about the WPBeginner growth fund.

Product / Company Updates

One of the questions that I often get asked via our contact form is what is WPBeginner’s income, and how does WPBeginner make money by giving away all WordPress tutorials for free.

Well, we make money indirectly through our suite of premium WordPress plugins that are now running on over 20 million websites. Aside from that, we also have investments in a suite of other WordPress companies through our growth fund that I mentioned above.

Our team at Awesome Motive continued to set new records this year, and all of our products saw tremendous growth.

Here’s a list of our plugins that you should check out:

  • OptinMonster – #1 conversion optimization software that helps you convert abandoning website visitors into subscribers and customers. There’s also a free version here.
  • WPForms – the most beginner friendly WordPress form builder used by over 5 million websites. There’s also a free version – WPForms Lite.
  • MonsterInsights – the most popular WordPress Analytics plugin that helps you grow your business with confidence. I use this on all of my websites. Free version available: MonsterInsights Lite.
  • AIOSEO – the original WordPress SEO plugin to help you get more traffic. Used by over 3 million websites. There’s also a free version of AIOSEO.
  • WP Mail SMTP – the #1 plugin that helps improve your WordPress email deliverability. The free version: WP Mail SMTP Lite is sufficient for most website owners.
  • SeedProd – the best drag & drop website builder for WordPress. You can use it to create custom WordPress themes, landing pages, and website layouts without any code. Try the free version of SeedProd.
  • RafflePress – powerful WordPress giveaway and contest plugin to grow your website traffic.
  • Smash Balloon – most popular social media feeds plugin for WordPress. Free version available for InstagramFacebookTwitter, and YouTube feeds.
  • PushEngage – leading web push notification software for small businesses – helps send over 9 billion push notifications each month.
  • SearchWP – The most advanced WordPress search plugin. Completely customize your WordPress search form and search results algorithm to improve your content discoverability and increase sales. Trusted by over 30,000+ website owners.
  • Easy Digital Downloads – Top rated WordPress plugin for selling digital products and subscriptions. Easily sell eBooks, software, music, and more, protect digital downloads, accept payments, and more. Trusted by over 50,000+ website owners.
  • AffiliateWP – The most popular affiliate management plugin for WordPress. Easily launch an affiliate program for your store. One-click integration with WooCommerce, WPForms, and 20 other payment plugins. Unlock a new growth channel without the middleman fees.
  • WP Simple Pay – Easily accept payments online without a complex shopping cart setup. Great for simple one-time or recurring payments. Built-in support for credit card payments, ACH bank debit, Apple Pay, Google Pay, and more.
  • Sugar Calendar – An event calendar management plugin for WordPress. Create events, sell tickets, sync with Google Calendar, and more. Great for churches, conferences, paid webinars, and more.
  • TrustPulse – Leverage the power of social proof to instantly increase site conversions by up to 15%. Automatically show real-time purchase notification and other website activity notifications to increase trust, conversions, and sales.
  • WP Charitable – Top-rated donation and fundraising plugin for WordPress. Over 10,000+ non-profit organizations and website owners across the world use Charitable to create fundraising campaigns and raise more money online.

We’re a fully remote team of over 215+ people across 45 countries. Want to join our team and work alongside me in helping small businesses grow and compete with the big guys? We’re hiring.

Thank You Everyone

I want to say thank you to everyone who has supported us in this journey. I really do appreciate all of your retweets, personal emails, content suggestions, and the interactions at the events.

I also want to say special thank you to everyone who’s using our plugins because that enables us to keep bringing more free tutorials on WPBeginner.

You all are AMAZING and without you, there is no WPBeginner.

I look forward to another solid year ahead of us.

Syed Balkhi
Founder of WPBeginner

The post WPBeginner Turns 13 Years Old – Reflections and Updates first appeared on WPBeginner.


July 04, 2022 at 05:00PM

Sunday, July 3, 2022

How to Show Different Menus to Logged in Users in WordPress

Do you want to show different menus to logged-in users in WordPress?

By default, WordPress allows you to show the same navigation menu in a specific location in your theme. But what if you wanted to show a different menu to logged-in users on your website?

In this article, we’ll show you how to easily show different menus to logged-in users in WordPress.

Showing different navigtion menus to logged in and non-logged in users in WordPress

Why Show Different Menus to Logged in Users in WordPress?

Changing different areas of your WordPress website based on your visitors and their activity makes your site feel personalized for each user.

This personalized content helps you improve the user experience on your WordPress website.

Now, if you run a website where users don’t need to register or log in, then you can probably use the same navigation menus across your website.

However, other websites may greatly benefit from showing custom menus to logged-in users.

For instance, websites like an online store, a WordPress membership site community, or an online learning platform, can all benefit from personalized navigation menus.

A personalized navigation menu for logged-in users helps them more easily find things they signed up for.

For instance, a user on an online store can manage their account, or a member of a paid community can easily renew their subscription or view the online courses they purchased.

By default, WordPress does let you create as many navigation menus as you want. However, you can only choose to show one menu at a particular location in your WordPress theme.

That being said, let’s take a look at how to easily change this behavior and show different menus to logged-in users in WordPress.

Creating Menus for Logged in and Non Logged in Users in WordPress

No matter which method you use, you’ll first need to create both of the navigation menus that you want to show to your logged-in and logged-out users.

Simply head over to the Appearance » Menus page in the WordPress dashboard. If you already have a navigation menu that you use on your website for all users, then this can be your default menu.

Main menu

After that, click on the ‘create a new menu’ link to create a new custom menu for your logged-in users.

Here you can add menu items that you want to show to registered or logged-in users. For example, you might want to add a logout link to your menu.

On the left-hand side of the screen, you can see a list of your website pages. Simply check the box next to any page you want to add to your menu and click the ‘Add to Menu’ button.

Logged in menu

You can also drag and drop the menu items on the right side of the screen to rearrange them.

Further down the page, you can choose a location to display your menu. But, you don’t need to assign a location to this menu now. We’ll do that later in the article.

Don’t forget to click on the ‘Save Menu’ button to store your changes.

For more details on creating menus, take a look at our beginner’s guide to WordPress navigation menus.

Method 1. Show Different Menus to Logged in Users in WordPress Using a Plugin

This method is easier and recommended for all WordPress users.

First, you need to install and activate the Conditional Menus plugin. For more details, see our step-by-step guide on how to install a WordPress plugin.

Upon activation, you need to visit the Appearance » Menus page and switch to the ‘Manage Locations’ tab.

From here, you’ll see the list of available menu locations defined in your WordPress theme and the menus that are currently displaying.

Manage menu locations

For instance, it is showing that our Primary Menu location is showing a navigation menu titled ‘Main Menu’.

Now, we need to tell the plugin to show a different menu when a certain condition is matched.

To do that, click on the ‘+ Conditional Menu’ link, and then select the navigation menu you want to show to the logged-in users from the drop-down menu.

Select logged in menu

Next, you need to click on the ‘+ Conditions’ link.

This will bring up a popup where you’ll see a bunch of conditions to choose from.

Select logged in user aa the condition

Simply check the box next to the ‘User logged in’ option, and then click on the Save button.

You can now visit your website to see the logged-in user menu in action. You can also log out of your WordPress admin to view the navigation menu that’ll be shown to all other users.

Different menu for logged in users

Method 2. Manually Select Logged in Menu in WordPress Using Code

This method requires you to add code to your WordPress website. If you haven’t done this before, then take a look at our guide on how to copy and paste code snippets in WordPress.

First, you need to add the following code to your theme’s functions.php file or a site-specific plugin.

function my_wp_nav_menu_args( $args = '' ) {
if( is_user_logged_in() ) {
// Logged in menu to display
$args['menu'] = 43;

} else {
// Non-logged-in menu to display
$args['menu'] = 35;
}
return $args;
}
add_filter( 'wp_nav_menu_args', 'my_wp_nav_menu_args' );

Make sure that you replace 43 and 35 with the IDs for navigation menus you created earlier.

You can find the ID of a navigation menu by selecting it on the Menus page. You will see the menu ID number in your browser’s address bar.

Find navigation menu ID

We hope this article helped you learn how to easily show different navigation menus to logged-in users in WordPress.

You may also want to see our guide on how to get a free email domain, or see our expert roundup of the best business phone services for small business.

If you liked this article, then please subscribe to our YouTube Channel for WordPress video tutorials. You can also find us on Twitter and Facebook.

The post How to Show Different Menus to Logged in Users in WordPress first appeared on WPBeginner.


July 04, 2022 at 10:01AM