Certified WordPress Developer and SEO Specialist with 10+ years of experience on Fiverr. I provide expert solutions for WordPress error fixing, debugging, speed optimization, and security hardening. Services include hacked site recovery, malware removal, on-page SEO optimization, and full customization to ensure your website runs fast, secure, and ranks higher on Google.
Do you want to learn more about WordPress security keys and salts?
WordPress uses security keys to protect your website against hacking attempts. You can use them more efficiently to improve WordPress security.
In this article, we will discuss what are WordPress security keys and salts and why you should use them.
What are WordPress Security Keys and SALTs?
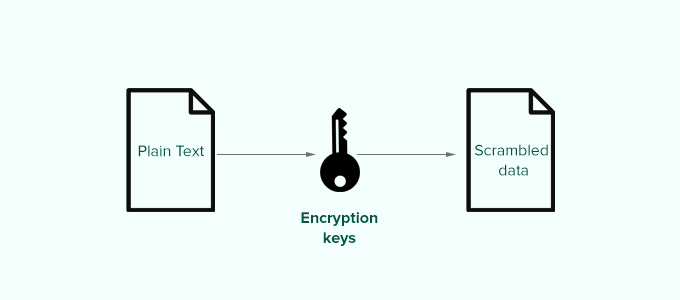
WordPress security keys are an encryption tool that protects login information by making it harder to decode.
These keys act just like real keys and are used to lock and unlock encrypted information such as passwords, keeping your WordPress site secure.
Here is how it works.
Basically, when you log in to a WordPress website, your information is stored on your computer in cookies. This allows you to continue working on your website without the need to log in on each page load.
All information is stored in encrypted form by converting it into a string of alpha-numeric and special characters.
This encrypted data can be translated using WordPress security keys. Without the keys, this data is nearly impossible to crack.
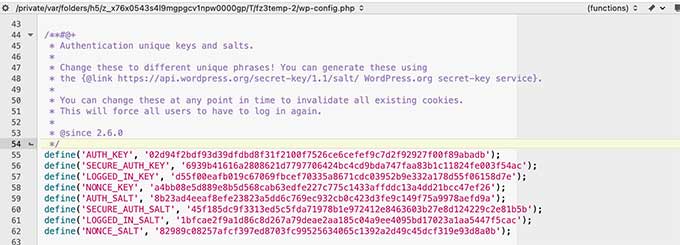
These security keys are automatically generated by your WordPress site and stored in your WordPress configuration file (wp-config.php).
There are a total of four security keys:
AUTH_KEY
SECURE_AUTH_KEY
LOGGED_IN_KEY
NONCE_KEY
Apart from WordPress security keys, you’ll also find the following SALTs.
AUTH_SALT
SECURE_AUTH_SALT
LOGGED_IN_SALT
NONCE_SALT
Salts add extra information to your encrypted info which provides another layer of security to your encrypted data.
Why Use WordPress Security Keys?
WordPress security keys protect your website against hacking attempts by making your passwords secure.
For instance, a regular password with medium-level difficulty can be easily cracked using brute force attacks.
On the other hand, a password string like ‘7C17bd5b44d6c9c37c01468b20d89c35e576914c289f98685941accddf67bf32b49’ takes years to decrypt without knowing the security keys.
That’s why you should never share WordPress security keys with anyone and protect them as you would normally protect sensitive information online.
That being said, let’s take a look at how to use WordPress security keys to keep your WordPress site protected.
How to Use WordPress Security Keys?
Normally, you don’t need to do anything extra since in most cases WordPress will automatically generate and use security keys + salts on each new WordPress install.
You can view your WordPress security keys and salts by using an FTP client or the File Manager app in your WordPress hosting account control panel.
Simply connect to your website, and open the wp-config.php file. Inside it, you’ll see your WordPress security keys defined.
However, depending on how you initially installed WordPress, your website may not have security keys defined at all.
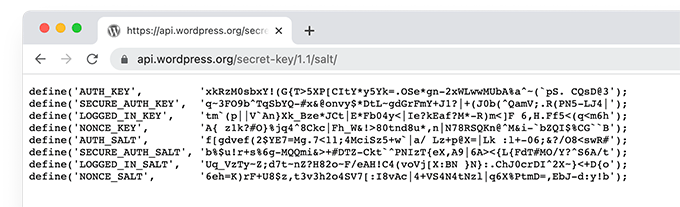
If your security keys are empty, then don’t worry. You can easily add them manually by going to the WordPress Security Key Generator page to generate a new set of keys.
Next, copy and paste these keys inside your wp-config.php file, and you are done.
You can use the same method to delete your current WordPress security keys and replace them with new keys.
Note: When you replace the security keys, all users will be forced to re-login which is great for security.
Regenerate WordPress Security Keys using a Plugin
If you suspect that your website is hacked, then you need to regenerate WordPress security keys and change your passwords.
You can manually copy and paste new security keys as mentioned above. However, a much easier approach would be using a plugin. This way you can also set a schedule to automatically regenerate security keys regularly.
1. Update WordPress Security Keys using Sucuri
The easiest way to automatically regenerate WordPress security keys by using Sucuri. It is one of the best WordPress security plugins on the market that protects your WordPress website against common threats.
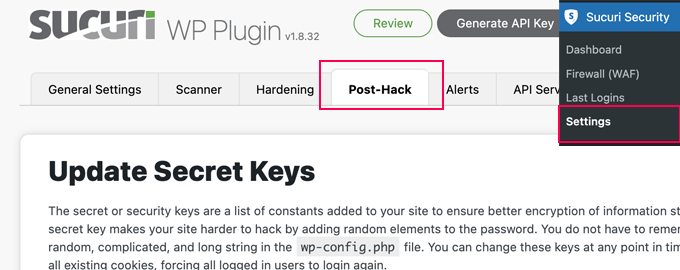
Upon activation, you need to visit the Sucuri Security » Settings page and switch to the Post-Hack tab.
From here, simply click on the Generate New Security Keys button under the ‘Update Secret Keys’ section.
Note: Regenerating new security keys will log you out of the WordPress admin area and you’ll need to login again.
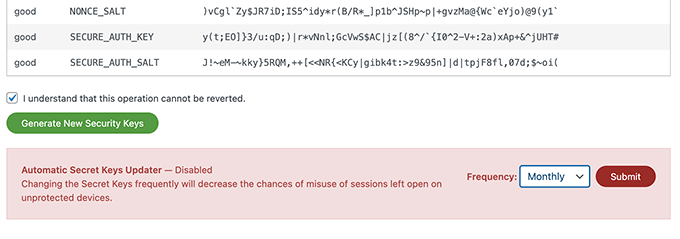
After that, revisit the
Sucuri Security » Settings page and switch to the Post-Hack tab again.
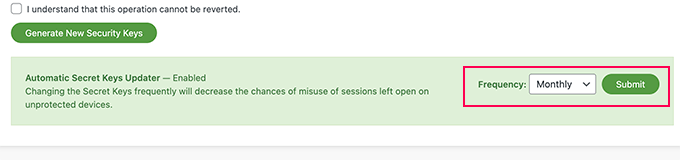
Under the security keys section, enable the Automatic Secret Keys Updater by choosing a frequency (daily, weekly, monthly, yearly). Then click on the Submit button.
Sucuri will now automatically reset your WordPress security keys based on the frequency you have chosen.
2. Update WordPress Security Keys using Salt Shaker
This method is for users who are not using Sucuri and need to automate security key regeneration.
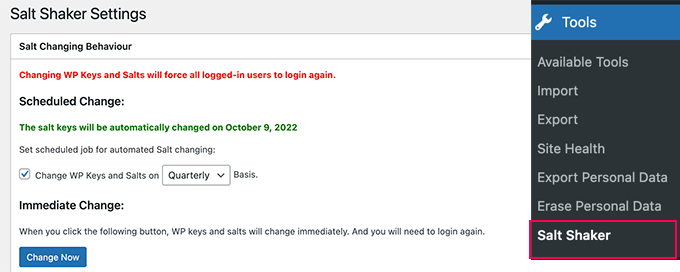
Upon activation, you need to visit Tools » Salt Shaker page to configure plugin settings.
From here, you can set a schedule to automatically generate security keys. You can also just click on the ‘Change now’ button to immediately regenerate security keys.
We hope this article helped you understand what are WordPress security keys and how to use them. You may also want to see our guide on how to fix common WordPress errors, or see our expert pick of the must have WordPress plugins for your website.
If you liked this article, then please subscribe to our YouTube Channel for WordPress video tutorials. You can also find us on Twitter and Facebook.
Are you looking for a default WordPress generated CSS cheat sheet?
WordPress automatically adds some CSS classes to different elements in most themes. These default CSS classes can be used to style those elements in your WordPress theme.
In this article, we’ll show you the default WordPress generated CSS cheat sheet. We’ll also talk about how to easily find CSS classes and how to add custom CSS classes whenever you need them.
Why Learn About the Default WordPress-Generated CSS?
WordPress automatically generates and adds default CSS classes to different elements on your WordPress website.
WordPress theme developers can then use these CSS classes to style common areas of all WordPress sites. That can include the content area, sidebars, widgets, navigation menus, and more.
It also helps you quickly style certain elements in your WordPress theme by adding custom CSS without creating your own theme.
Note: You don’t have to learn CSS in order to change your theme styles or create a custom theme. If you prefer not to learn to code, then you can use a drag and drop builder like SeedProd. We’ll talk more about it later in the article.
That being said, let’s take a look at the default WordPress generated CSS classes.
Default Body Class Styles
The body tag <body> in HTML contains the whole layout structure of any web page which makes it very significant in any WordPress theme design.
WordPress adds several CSS classes to the body area that theme designers can use to style the body container.
// Added when a website is using a right-to-left language e.g. Arabic, Hebrew
.rtl {}

// Added when home page is being displayed
.home {}

// Added when blog page is being displayed
.blog {}

// Added when an Archive page is being displayed
.archive {}

// Added when a date based archive is displayed
.date {}

// Added on search pages
.search {}

// Added when pagination is enabled
.paged {}

// Added when an attachment page is displayed
.attachment {}

// Added when a 404 error page is displayed
.error404 {}

// Added when a single post is dispayed includes post ID
.single postid-(id) {}

// Added when a single attachment is displayed. Includes attachment ID
.attachmentid-(id) {}

// Added when a single attachment is displayed. Includes attachment mime-type
.attachment-(mime-type) {}

// Added when an author page is displayed
.author {}

// Added when an author page is displayed. Includes author name.
.author-(user_nicename) {}

// Added when a category page is displayed
.category {}

//Added when a category page is displayed. Includes category slug.
.category-(slug) {}

// Added when a tag page is displayed.
.tag {}

// Added when a tag page is displayed. Includes tag slug.
.tag-(slug) {}

// Added when a parent page is displayed.
.page-parent {}

// Added when a child page is displayed. Includes parent page ID.
.page-child parent-pageid-(id) {}

// Added when a page is displayed using page template. Includes page template file name.
.page-template page-template-(template file name) {}

// Added when search results are displayed.
.search-results {}

// Added when search returns no results.
.search-no-results {}

// Added when a logged in user is detected.
.logged-in {}

// Added when a paginated page is displayed. Includes page number.
.paged-(page number) {}

// Added when a paginated single item is displayed. Includes page number.
.single-paged-(page number) {}

// Added when a paged page type is displayed. Includes page number.
.page-paged-(page number) {}

// Added when a paged category page is displayed. Includes page number.
.category-paged-(page number) {}

// Added when a paged tag page is displayed. Includes page number.
.tag-paged-(page number) {}

//Added when a paged date based archive page is displayed. Includes page number.
.date-paged-(page number) {}

// Added when a paged author page is displayed. Includes page number.
.author-paged-(page number) {}

// Added when a paaged search page is displayed. Includes page number.
.search-paged-(page number) {}
As you can see, these classes include a wide variety of conditions that you can target in your CSS styles.
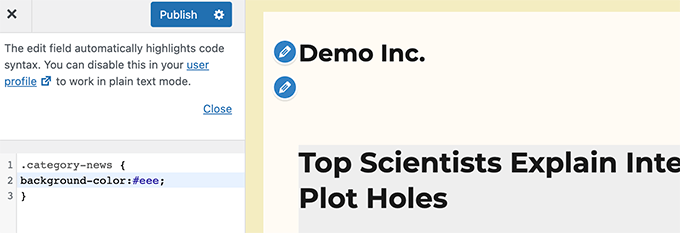
For instance, if you wanted the ‘News’ category page to have a different background color, then you can add the following custom CSS.
Just like with the body element, WordPress adds dynamic classes to the post elements as well.
This element is usually the <article> tag in your theme template. However, it could be any other tag depending on your theme. The post CSS classes are displayed in your theme by adding the post_class() template tag.
Here is a list of some of the most common CSS classes generated by the post_class() function:
// Adds a class with ID for single items
.post-(ID) {}

// Generic post claass added for single blog posts.
.post {}

// Generic page class added when a single page is displayed.
.page {}

// Generic attachment class added to attachment pages.
.attachment {}

// Adds a post type class e.g. type-post
.type(post-type){}

// Adds a class for post format if theme supports posts formats. E.g. format-standard
.format-(post-format){}

// Added when an item has a featured image
.has-post-thumbnail{}

// Added when a sticky post is displayed
.sticky {}

// Generic class to display an entry
.hentry {}

// Classes with categories assigned to a post. E.g. category-news category-movies
.category-(slug) {}

// Classes with tags assigned to a post. e.g. tag-photofriday tag-tgif
.tag-(slug) {}
Post classes allow you to style blog posts and pages matching different conditions. For instance, you can style blog posts filed in a specific category differently using the following custom CSS:
WordPress also adds CSS classes to your navigation menus. Following are the default classes added to navigation menus by default.
 // Class for Current Page
.current_page_item{}

// Class for Current Category
.current-cat{}

// Class for any other current Menu Item
.current-menu-item{}

 // Class for a taxonomies
.menu-item-type-(taxonomy){}

// class to distinguish post types.
.menu-item-type-(post_type){}

// Class for any custom item that you added
.menu-item-type-custom{}

// Class for the Home Link
.menu-item-home{}
Your WordPress theme will also add a CSS class to each navigation menu location.
Let’s say your theme assigns primary-menu class to a menu location inside header area, then you can target it in your CSS using the following CSS classes.
// container class
#header .primary-menu{}

// container class first unordered list
#header .primary-menu ul {}

//unordered list within an unordered list
#header .primary-menu ul ul {}

 // each navigation item
#header .primary-menu li {}

// each navigation item anchor
#header .primary-menu li a {}

// unordered list if there is drop down items
#header .primary-menu li ul {}

// each drop down navigation item
#header .primary-menu li li {}

// each drap down navigation item anchor
#header .primary-menu li li a {}
Widgets are an easy way to display non-content blocks in your WordPress theme. They are typically displayed in dedicated widget-ready areas or sidebars in your WordPress theme.
WordPress adds the following classes to the legacy widgets.
.widget {}

#searchform {}
.widget_search {}
.screen-reader-text {}

.widget_meta {}
.widget_meta ul {}
.widget_meta ul li {}
.widget_meta ul li a {}

.widget_links {}
.widget_links ul {}
.widget_links ul li {}
.widget_links ul li a {}

.widget_archive {}
.widget_archive ul {}
.widget_archive ul li {}
.widget_archive ul li a {}
.widget_archive select {}
.widget_archive option {}

.widget_pages {}
.widget_pages ul {}
.widget_pages ul li {}
.widget_pages ul li a {}

.widget_links {}
.widget_links li:after {}
.widget_links li:before {}
.widget_tag_cloud {}
.widget_tag_cloud a {}
.widget_tag_cloud a:after {}
.widget_tag_cloud a:before {}

.widget_calendar {}
#calendar_wrap {}
#calendar_wrap th {}
#calendar_wrap td {}
#wp-calendar tr td {}
#wp-calendar caption {}
#wp-calendar a {}
#wp-calendar #today {}
#wp-calendar #prev {}
#wp-calendar #next {}
#wp-calendar #next a {}
#wp-calendar #prev a {}

.widget_categories {}
.widget_categories ul {}
.widget_categories ul li {}
.widget_categories ul ul.children {}
.widget_categories a {}
.widget_categories select{}
.widget_categories select#cat {}
.widget_categories select.postform {}
.widget_categories option {}
.widget_categories .level-0 {}
.widget_categories .level-1 {}
.widget_categories .level-2 {}
.widget_categories .level-3 {}

.recentcomments {}
#recentcomments {}
#recentcomments li {}
#recentcomments li a {}
.widget_recent_comments {}

.widget_recent_entries {}
.widget_recent_entries ul {}
.widget_recent_entries ul li {}
.widget_recent_entries ul li a {}

.textwidget {}
.widget_text {}
.textwidget p {}
However, as WordPress moves to block-based widget areas, you can now add different blocks to your widget areas and each one of them generates CSS classes dynamically.
We’ll show you how to find these CSS classes later in this article.
Default Comment Form Classes
Comments are the engagement hub for many WordPress websites. Styling them helps you provide users a cleaner more engaging experience.
WordPress adds the following default CSS classes to help theme developers style comment area.
/*Comment Output*/

.commentlist .reply {}
.commentlist .reply a {}

.commentlist .alt {}
.commentlist .odd {}
.commentlist .even {}
.commentlist .thread-alt {}
.commentlist .thread-odd {}
.commentlist .thread-even {}
.commentlist li ul.children .alt {}
.commentlist li ul.children .odd {}
.commentlist li ul.children .even {}

.commentlist .vcard {}
.commentlist .vcard cite.fn {}
.commentlist .vcard span.says {}
.commentlist .vcard img.photo {}
.commentlist .vcard img.avatar {}
.commentlist .vcard cite.fn a.url {}

.commentlist .comment-meta {}
.commentlist .comment-meta a {}
.commentlist .commentmetadata {}
.commentlist .commentmetadata a {}

.commentlist .parent {}
.commentlist .comment {}
.commentlist .children {}
.commentlist .pingback {}
.commentlist .bypostauthor {}
.commentlist .comment-author {}
.commentlist .comment-author-admin {}

.commentlist {}
.commentlist li {}
.commentlist li p {}
.commentlist li ul {}
.commentlist li ul.children li {}
.commentlist li ul.children li.alt {}
.commentlist li ul.children li.byuser {}
.commentlist li ul.children li.comment {}
.commentlist li ul.children li.depth-{id} {}
.commentlist li ul.children li.bypostauthor {}
.commentlist li ul.children li.comment-author-admin {}

#cancel-comment-reply {}
#cancel-comment-reply a {}

/*Comment Form */

#respond { }
#reply-title { }
#cancel-comment-reply-link { }
#commentform { }
#author { }
#email { }
#url { }
#comment
#submit
.comment-notes { }
.required { }
.comment-form-author { }
.comment-form-email { }
.comment-form-url { }
.comment-form-comment { }
.form-allowed-tags { }
.form-submit
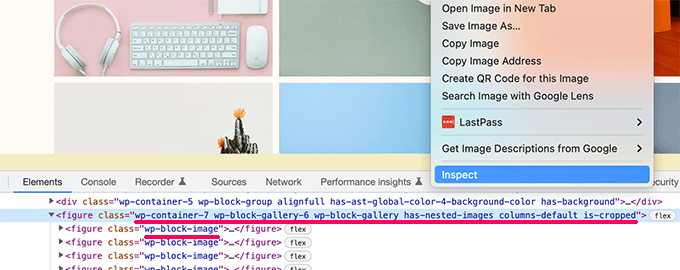
To find these CSS classes, you’ll need to add that particular block to a post or page. After that, you need to click on the Preview button to see the block in action.
In the preview tab, take your mouse to the block that you just added and select Inspect tool by right-clicking.
In the developer console, you’ll see the HTML generated by the block. From here, you can see the CSS classes added by the block.
In the screenshot above, we are looking at the Gallery block’s CSS classes. You can then use these CSS classes to style the gallery block in your WordPress theme.
Adding Your Own Custom CSS Classes in WordPress
Now, default WordPress CSS classes are quite comprehensive. However, their purpose is to mainly provide theme developers a standardized framework to build with.
For your individual website, you may need to add custom CSS for areas where you may not be able to find a default CSS class to target.
Similarly, sometimes you may just want to make a small change on a specific post or page without applying it to your entire theme.
Luckily WordPress provides you with several easy ways to add CSS classes in different areas.
Add Custom CSS Classes to a Block Inside the Block Editor
If you want to quickly add a custom CSS class to a specific post or page, then the easiest way to do that is by using the block editor.
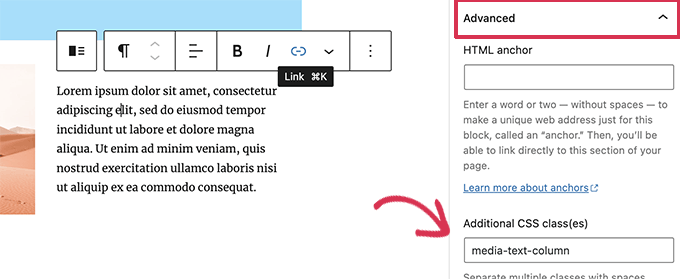
Simply edit the post or page and then select the block where you want to add custom CSS class. Under block settings, click on the advanced panel and add the name for your CSS class.
Don’t forget to save your changes by clicking on the Update button.
You can now use this class to add custom CSS code that will only affect this particular block in this particular post or page.
In WordPress Navigation Menus
You can also add custom CSS to your WordPress navigation menu items. Let’s say you want to convert a menu item into button, then this method comes in handy.
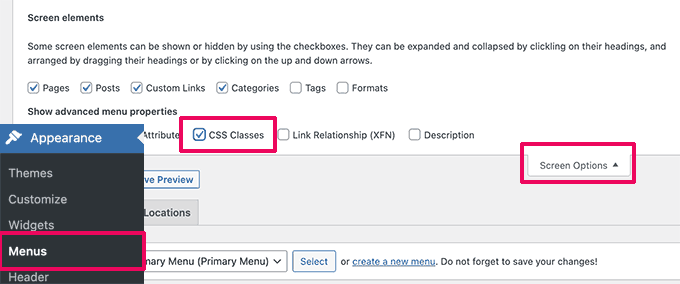
Simply go to the Appearance » Menus page and click on the Screen Options button at the top right corner of the screen.
From here, you need to check the box next to CSS classes option.
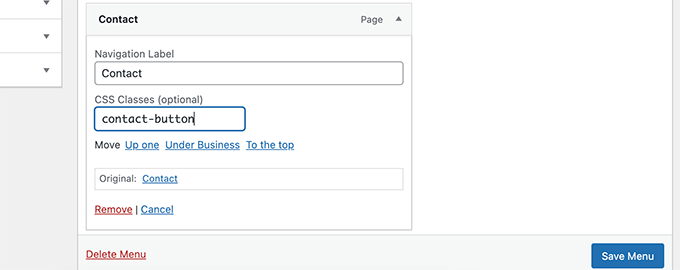
Next, you need to scroll down and click to expand the menu item where you want to add the custom CSS class.
You’ll notice a field labeled CSS classes. Go ahead and add your custom CSS class here.
Don’t forget to click on the Save Menu button to store your changes.
You can now use this custom CSS class to style that particular menu item differently.
Bonus: Easily Design a WordPress Theme Without Writing CSS Code
Learning to style your WordPress theme with custom CSS is a highly useful skill. However, some users may simply want a solution to design their WordPress theme without ever writing CSS code.
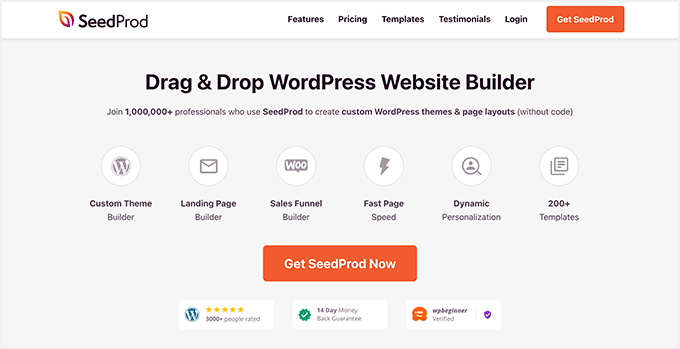
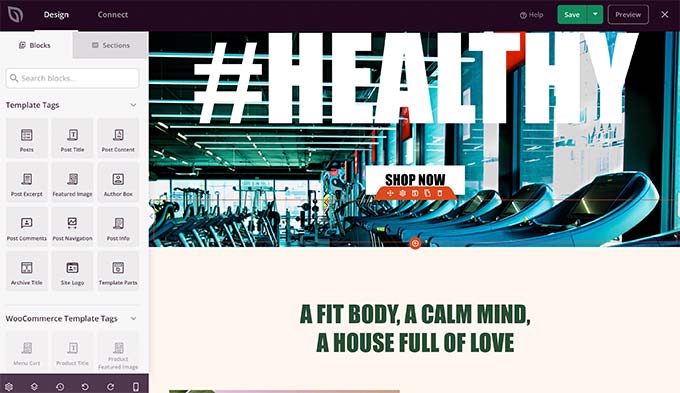
For this, you’ll need SeedProd. It is the best WordPress page builder tool on the market that allows you to easily create custom themes without writing any code.
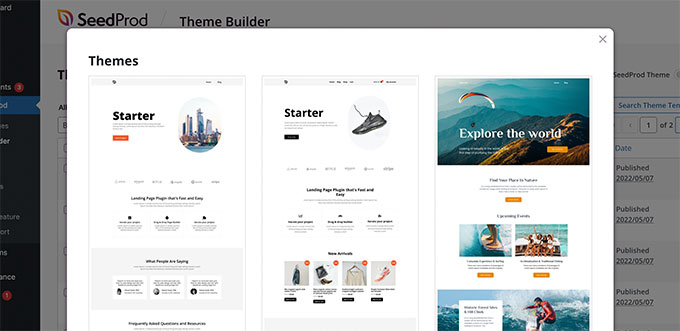
SeedProd comes with ready to use themes that you can use as an starting point.
You can also create a theme from scratch by manually creating templates.
You can then edit your custom theme using an intuitive drag and drop site building interface.
Simply drop blocks to your design to create your own layouts.
You can also easily change any item with simple point and click. You can use your own colors, background, fonts, and more.
Do you want to display WordPress posts in a grid layout?
A grid layout gives you more flexibility when displaying your posts in WordPress. This can be helpful when creating custom pages.
In this article, we’ll show you how to easily display your WordPress posts in a grid layout anywhere on your site.
When Do You Need a Grid Layout for WordPress?
Every WordPress theme supports the traditional vertical layout of blog posts, and this works well for most kinds of websites. However, this layout can take up a lot of space, especially if you have a lot of posts.
If you’re creating a custom homepage for your site, then you may want to use the grid layout to display your recent posts.
This will give you more space to add other elements to your home page.
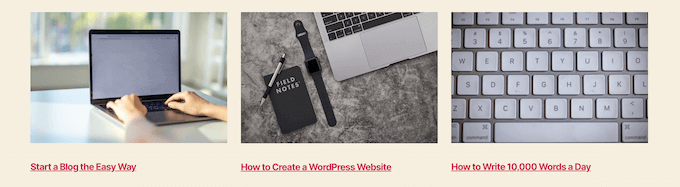
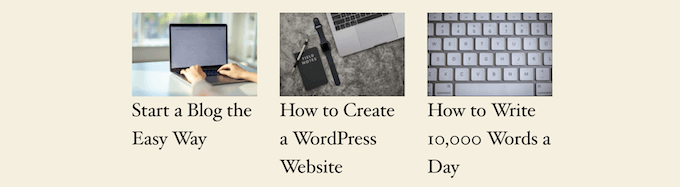
Plus, your post grid will highlight your featured images, so it’s visually appealing and clickable. You can also use the post grid to show off your creative portfolio and other types of custom content.
Many magazine themes and photography themes already use the grid-based layout to display posts. However, if your theme doesn’t support this functionality, then you’ll need to add it.
With that said, let’s show you how to display your WordPress posts in a grid layout. Simply use the quick links below to jump straight to the method you want to use.
Method 1. Create a WordPress Post Grid Layout with Block Editor
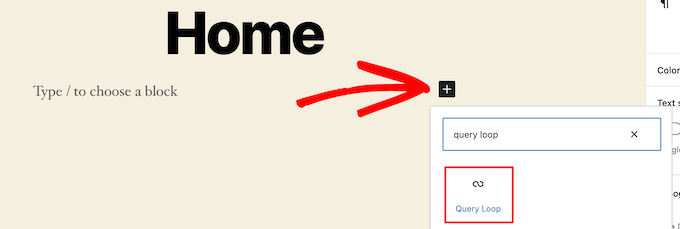
This method lets you simply display your posts and thumbnails in a post grid layout using the WordPress block editor. There’s a built-in post grid block that lets you create your own grid.
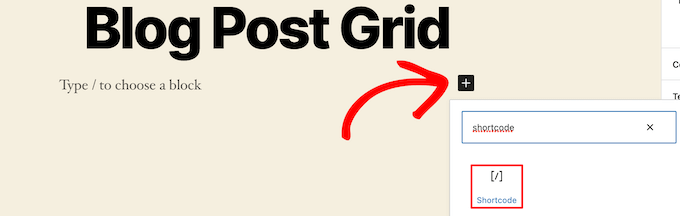
To do this, open up the page you want to edit, then click the ‘Plus’ add block button and search for ‘Query Loop’, then click the block to add it.
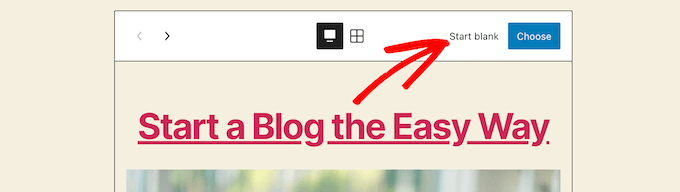
This block adds your post loop to your page.
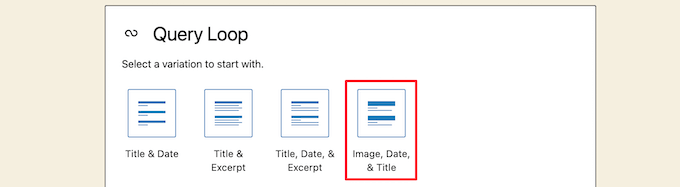
Then, click the ‘Start Blank’ option at the top of the block to create a post grid.
This gives a few different choices depending on the type of information you want to display with your post grid.
We’ll select the ‘Image, Date, & Title’ option, but you can choose whatever you like.
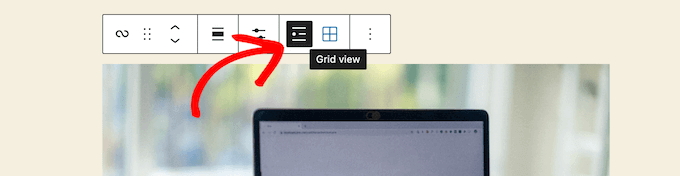
After that, hover over the image and select the ‘Grid View’ option.
This turns your list into a post grid.
Next, you can customize the information you want to display.
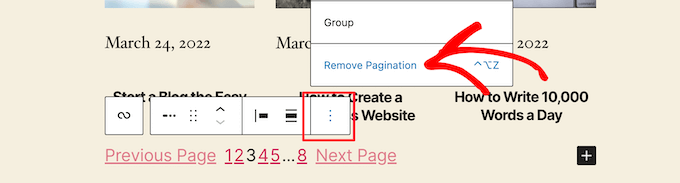
First, we’re going to delete the pagination at the bottom of the block. To do this, simply click on it, and click the ‘Three Dots’ options menu.
Then, click on ‘Remove Pagination’.
This will automatically remove the element from the block.
You can delete the dates from the posts the same way or leave more post information for your visitors.
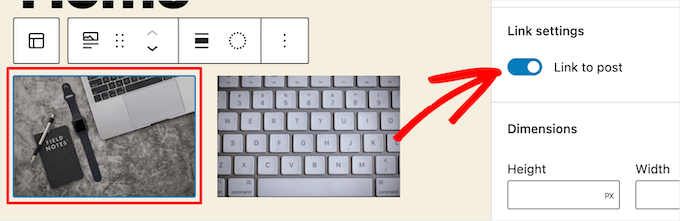
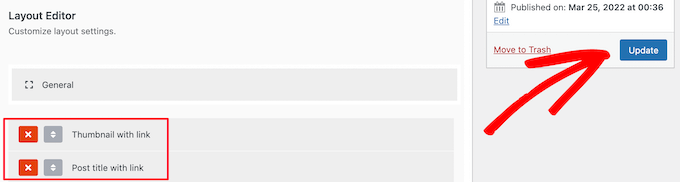
Next, we’ll add links to both the post thumbnail and post title.
Simply click on your post thumbnail and turn on the ‘Link to Post’ toggle in the right-hand options panel.
Then, do the same thing for your post title.
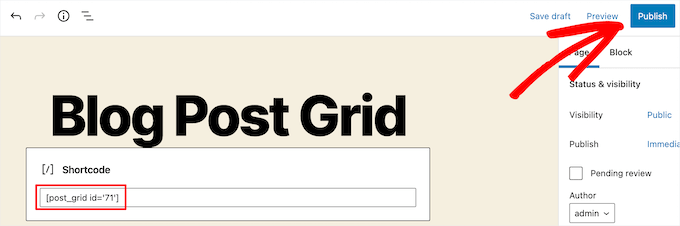
Once you’re finished, click the ‘Update’ or ‘Publish’ button to make your post grid live.
Now, you can visit your WordPress website to see your new WordPress post grid.
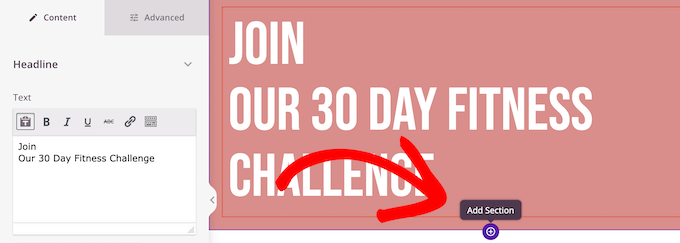
In the SeedProd builder, as you’re customizing your page, simply click the plus ‘Add Section’ button anywhere on the page.
This will bring up an option to add a new block.
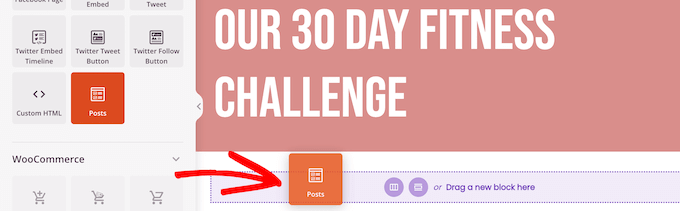
Next, drag the ‘Posts’ block over to your page, and it will automatically add a list of posts to your page.
Now, you can customize this block with the left-hand options panel.
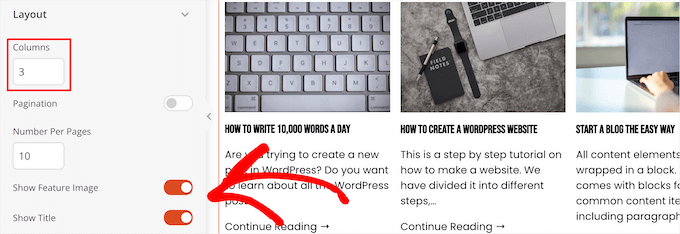
First, scroll down to the ‘Layout’ section. Here you can set the number of columns for your blog post grid and turn on the ‘Show Feature Image’ and ‘Show Title’ toggles.
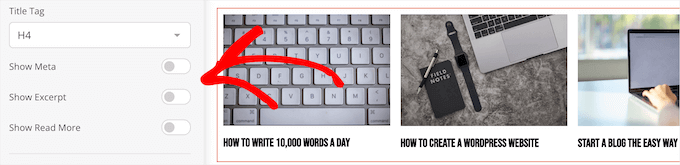
Next, scroll down to the ‘Show Excerpt’ toggle and the ‘Show Read More’ toggles and turn them off to create a simple blog post grid layout.
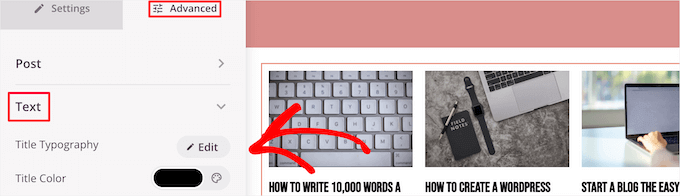
If you want to customize the color scheme, text, and more, then click the ‘Advanced’ tab at the top of the left-hand column.
Then, click the ‘Text’ drop down and make your changes.
You can continue customizing your page and blog post grid layout as much as you’d like.
Once you’re done, click the ‘Save’ button and select the ‘Publish’ drop down at the top of the page to make your changes live.
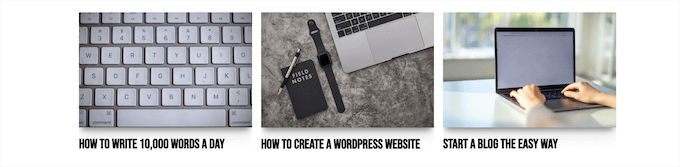
Now, you can view your new post grid on your website.
Method 4. Create a WordPress Post Grid Layout by Adding Code to WordPress
This method requires some basic understanding of how to add code to WordPress. If you haven’t done this before, then see our guide on how to copy and paste code in WordPress.
Next, you’ll need to find the right WordPress theme file where you’ll be adding the code snippet. For example, you can add it to your single.php, so it appears at the bottom of all of your posts.
You can also create a custom page template and use it to display your blog post grid layout with thumbnails.
Once you’ve done that, you can start adding code to WordPress. Since the code snippet is quite long, we’ll break it down section by section.
First, add the following code snippet to your theme template file.
<?php
$counter = 1; //start counter

$grids = 2; //Grids per row

global $query_string; //Need this to make pagination work

/*Setting up our custom query (In here we are setting it to show 12 posts per page and eliminate all sticky posts*/
query_posts($query_string . '&caller_get_posts=1&posts_per_page=12');

if(have_posts()) :  while(have_posts()) :  the_post();
?>
This code snippet sets up the post loop query. You can change the ‘posts_per_page’ variable to display more posts per page if you’d like.
Then, add the following code snippet to your theme template file.
<?php
//Show the left hand side column
if($counter == 1) :
?>
            <div class="griditemleft">
                <div class="postimage">
                    <a href="<?php the_permalink(); ?>" title="<?php the_title_attribute(); ?>"><?php the_post_thumbnail('category-thumbnail'); ?></a>
                </div>
                <h2><a href="<?php the_permalink(); ?>" title="<?php the_title_attribute(); ?>"><?php the_title(); ?></a></h2>
            </div>
<?php
//Show the right hand side column
elseif($counter == $grids) :
?>
<div class="griditemright">
                <div class="postimage">
                    <a href="<?php the_permalink(); ?>" title="<?php the_title_attribute(); ?>"><?php the_post_thumbnail('category-thumbnail'); ?></a>
                </div>
                <h2><a href="<?php the_permalink(); ?>" title="<?php the_title_attribute(); ?>"><?php the_title(); ?></a></h2>
            </div>
<div class="clear"></div>
<?php
$counter = 0;
endif;
?>
This code snippet creates two columns for our posts and will display the title and post image. It also creates a CSS class that we’ll show you how to style later.
It also references ‘postimage’, so you’ll need to change this to the name of the image size you created earlier.
After that, add the following code snippet at the end.
<?php
$counter++;
endwhile;
//Post Navigation code goes here
endif;
?>
This code snippet simply closes the loop. It also gives the option to add post navigation, but most website owners use a different plugin for this, so we didn’t include it to avoid code conflicts.
Here’s how the final code snippet looks altogether.
<div id="gridcontainer">
<?php
$counter = 1; //start counter

$grids = 2; //Grids per row

global $query_string; //Need this to make pagination work


/*Setting up our custom query (In here we are setting it to show 12 posts per page and eliminate all sticky posts) */
query_posts($query_string . '&caller_get_posts=1&posts_per_page=12');


if(have_posts()) :  while(have_posts()) :  the_post();
?>
<?php
//Show the left hand side column
if($counter == 1) :
?>
            <div class="griditemleft">
                <div class="postimage">
                    <a href="<?php the_permalink(); ?>" title="<?php the_title_attribute(); ?>"><?php the_post_thumbnail('category-thumbnail'); ?></a>
                </div>
                <h2><a href="<?php the_permalink(); ?>" title="<?php the_title_attribute(); ?>"><?php the_title(); ?></a></h2>
            </div>
<?php
//Show the right hand side column
elseif($counter == $grids) :
?>
<div class="griditemright">
                <div class="postimage">
                    <a href="<?php the_permalink(); ?>" title="<?php the_title_attribute(); ?>"><?php the_post_thumbnail('category-thumbnail'); ?></a>
                </div>
                <h2><a href="<?php the_permalink(); ?>" title="<?php the_title_attribute(); ?>"><?php the_title(); ?></a></h2>
            </div>
<div class="clear"></div>
<?php
$counter = 0;
endif;
?>
<?php
$counter++;
endwhile;
//Pagination can go here if you want it.
endif;
?>
</div>
Now, you’ll need to add the following CSS to your site to make sure your post grid displays nicely.