Certified WordPress Developer and SEO Specialist with 10+ years of experience on Fiverr. I provide expert solutions for WordPress error fixing, debugging, speed optimization, and security hardening. Services include hacked site recovery, malware removal, on-page SEO optimization, and full customization to ensure your website runs fast, secure, and ranks higher on Google.
WordPress pages can be standalone or hierarchical, which means the page has its own sub-pages known as child pages. For instance, you may want to create a Case Studies parent page and then create child pages for each of your separate case studies.
In this article, we will show how to organize your pages by creating a child page in WordPress.
What is a Child Page in WordPress?
WordPress comes with two default post types called posts and pages.
Posts are blog content, and are shown in reverse chronological order so the people who visit your WordPress blog will see the newest posts first.
Posts are normally organized with categories and tags, which is a great way to help visitors find related content.
Pages are one-off or standalone content that is not part of a blog. For example, many websites have an About Us and a Contact Us page. These pages can be hierarchical, which means you can organize them with parent and child pages.
Typically, business websites use pages to build a website without necessarily creating a blog. Businesses who want to add a blog to their content marketing strategy can still do so by simply creating a separate blog page, but this isn’t mandatory.
If you have too many pages, then it becomes difficult to organize them. This is where child pages come in.
You can create a parent page and then add child pages to better organize your navigation menus and your website as a whole. For example, the MonsterInsights website has a ‘Features’ parent page with a separate child page for each feature. This makes it easier for customers to find the feature they want to read about.
Many online stores also use child and parent pages to help visitors explore their eCommerce site and find products to buy.
Any child page can also have its own child pages. In this way, you can build relationships between your pages and create a logical structure that’s easier for visitors to navigate.
When pages are organized into parent and child categories, they also tend to be easier to manage in the WordPress admin area. This is particularly true as your WordPress website continues to grow.
That being said, let’s take a look at how to easily create a child page in WordPress.
How to Create a Child Page in WordPress?
To create a child page, you first need a parent page. You can use any page as a parent, or create a new page.
Once you have a parent page, you’re ready to add some child pages. Again, you can turn any existing page into a child, or create an entirely new page which will become your child page.
Then, simply open the child page for editing.
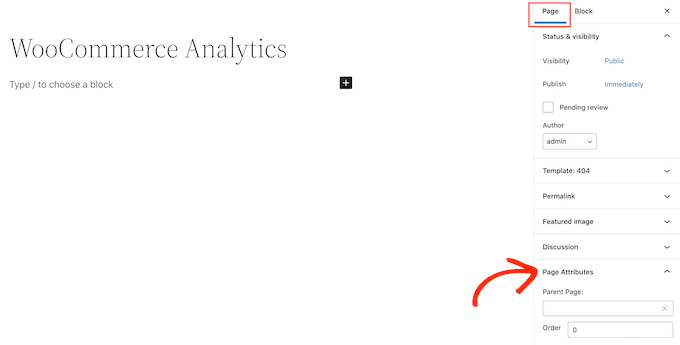
In the right-hand menu, click on the ‘Page’ tab. Then, find the ‘Page Attributes’ section and give it a click to expand.
If you look at the ‘Parent Page’ field then this is blank by default. This means the page is currently a parent page.
To turn this parent into a child page, simply open the ‘Parent’ dropdown. You can then select the page that you want to use as the parent page.
After that, go ahead and save your changes by clicking on the Update or Publish button.
To create more child pages, simply repeat the process described above.
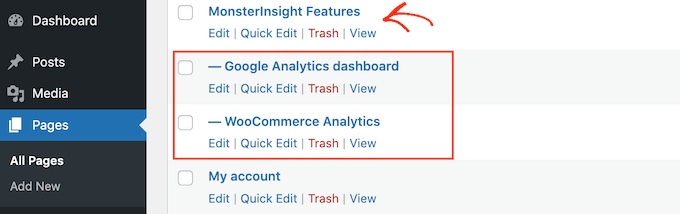
To see all of your child pages, head over to Pages » All Pages. WordPress will show all of your child pages listed under their parent page with a — prefix.
In the following image, you can see that ‘Google Analytics dashboard’ and ‘WooCommerce Analytics’ are child pages of ‘MonsterInsight Features.’
Are you looking for a way to redirect users after they’ve submitted a form on your WordPress site?
You can lead users to your top-performing blog posts, display the latest deals, or show a thank you page to build a relationship with your audience.
In this article, we’ll show you how to redirect users after form submission in WordPress.
Why Redirect Users After Form Submission?
When a user submits a form on your WordPress site, many business owners might think that’s the end of the process. However, you can use forms to increase user engagement on your website and get even more conversions.
For instance, you can direct users to a thank you page after form submission and list your high-converting articles. This way, you can get more pageviews to your best content and drive more sales.
On an online store, you can upsell products and offer incentives like discounts and free shipping when a visitor submits a form.
You could even redirect users to a page where they can download a free resource after submitting the form. For example, you can create a lead magnet where people can fill out a form in exchange for a free resource like an eBook, podcast, media file, or PDF.
That said, let’s see 4 different ways you can easily redirect users after form submission in WordPress. Simply click the links below to jump ahead to your preferred section:
The easiest way of redirecting users after they’ve filled out a form is by using WPForms. It’s the best contact form plugin for WordPress, and over 5 million professionals use it to create different types of forms for their websites.
WPForms comes with a built-in setting to let you choose if you’d like to show a thank you message, show a specific page, or redirect users to another URL altogether. Plus, you get a drag-and-drop form builder to easily customize your form.
For this tutorial, we’ll use the WPForms Lite version because it is free to use, and you can redirect users after form submission in just a few clicks. There is also a WPForms Pro version which offers more pre-built form templates, customization options, and powerful addons.
First, you’ll need to install and activate the WPForms plugin. For more details, please see our guide on how to install a WordPress plugin.
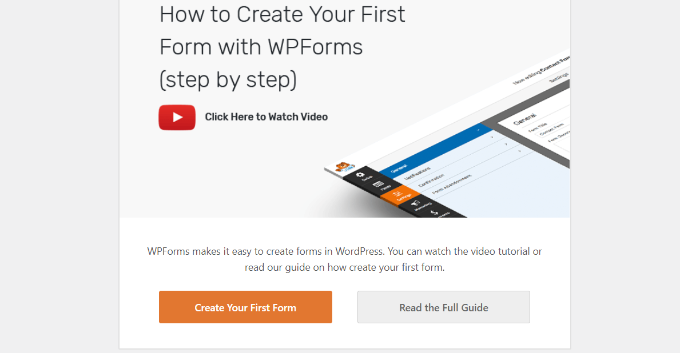
Upon activation, you will see the WPForms welcome page in your WordPress dashboard. Go ahead and click the ‘Create Your First Form’ button.
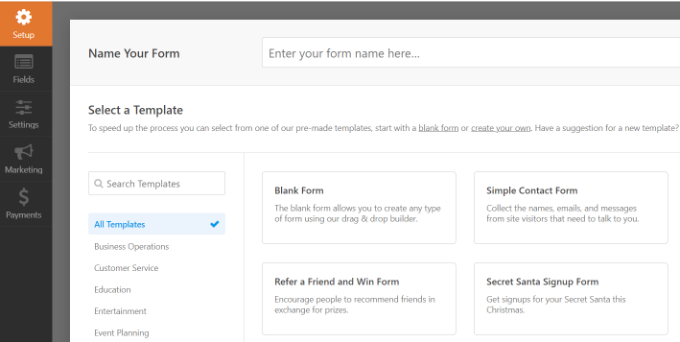
After that, WPForms will have you choose from multiple, free form templates. You can select any template and quickly customize it according to your needs.
Let’s start by entering a name for our form at the top and then selecting the ‘Simple Contact Form’ template.
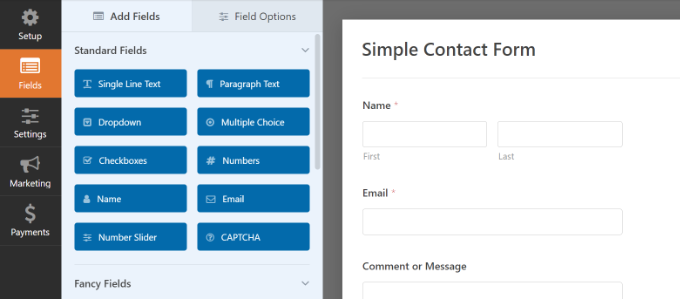
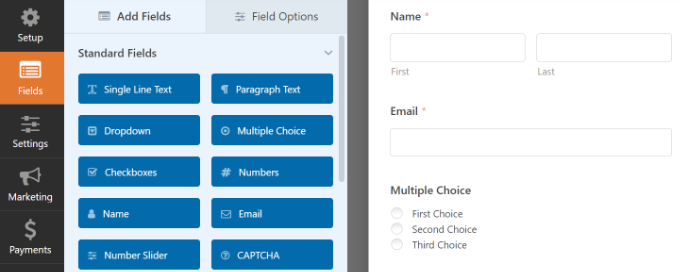
After selecting a template, the WPForms form builder will launch.
Here, you can customize your form and add new fields from the menu on your left. Simply drag and drop the fields you’d like to add. You can then rearrange their order to your liking.
If you want to add fancy fields like a website URL, phone number, address, file upload option, and more, then we recommend upgrading to the WPForms Pro license.
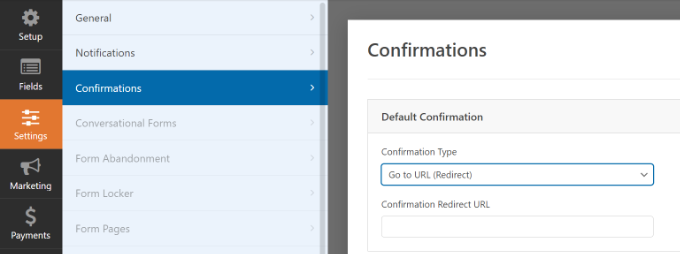
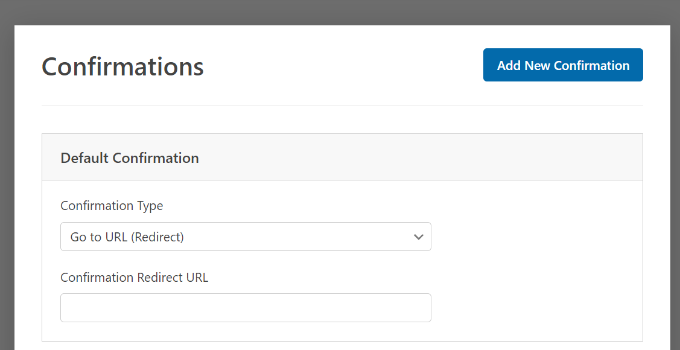
Once you’ve customized your contact form, simply go to Settings » Confirmations in the form builder.
Under the Confirmation Type setting, click the dropdown menu and select the ‘Go to URL (Redirect)’ option.
After that, simply enter a link in the ‘Confirmation Redirect URL’ field and specify where you’d like to redirect users after they’ve submitted a form.
How to Embed Your Form in WordPress
Once you’ve added a redirect URL, the next step is to embed the form on your website.
Go ahead and click the ‘Save’ button at the top to store your form settings and then click the ‘Embed’ button beside it.
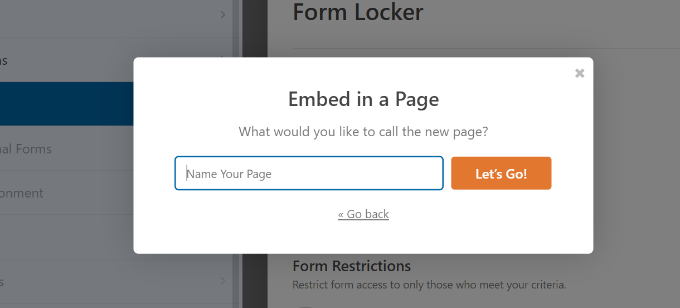
WPForms will now ask if you’d like to embed the form on an existing page or on a new page.
We’ll choose the ‘Create New Page’ option for this tutorial.
Next, you’ll need to enter a name for your new page.
After entering the name, simply click the ‘Let’s Go’ button.
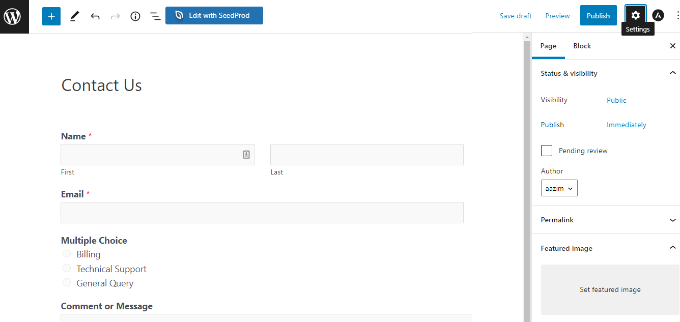
The plugin will now automatically add your form to the WordPress content editor inside the WPForms block.
When you’re ready, simply click the ‘Publish’ button at the top.
Redirect Users Based on Their Responses After Form Submission
WPForms also lets you set up conditional logic, which automatically redirects users to different pages based on their responses when submitting a form.
For example, let’s say you have different teams that handle questions sent by users, like billing, technical support, and general inquiries. Based on the choice a user selects in the form, you can redirect them to a specific URL that relates to their needs.
Note that you’ll need a WPForms Pro license to use the conditional logic feature. You also get more form fields to add to the template, and you can use addons like User Journey to see how people interact with your forms.
First, you can add a multiple choice, checkbox, or any other field that allows users to select different options. We’ll add a ‘Multiple Choice’ field in our tutorial.
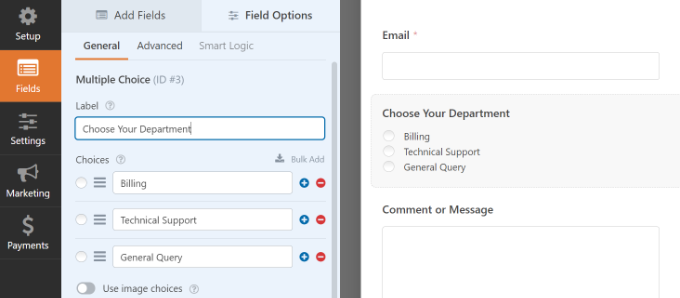
Next, you can edit the options in the ‘Multiple Choice’ form field by simply clicking on the fields in the template to the right.
For instance, you can see in the image below that we renamed the options to different departments that would handle specific questions.
After that, you can head to Settings » Confirmations in the form builder.
Now click the ‘Add New Confirmation’ button to set up conditional logic.
Next, you will have to enter a name for your new redirect. Be specific so you are able to track it easily.
Simply click the ‘OK’ button when you’re done.
For this tutorial, we want to direct users to specific pages based on the department they select in the form.
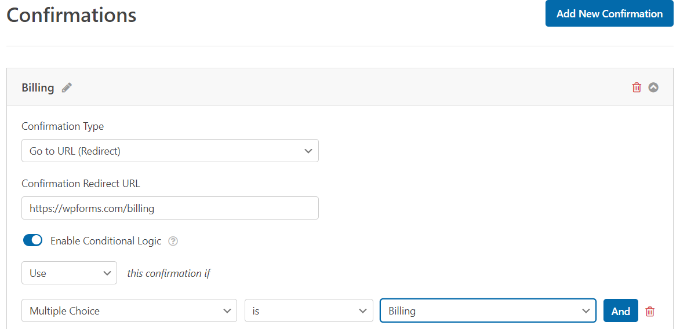
First, you can select ‘Go to URL (Redirect)’ from the Confirmation Type dropdown menu and then enter a link to the respective page in the ‘Confirmation Redirect URL’ field.
Next, you will need to click the ‘Enable Conditional Logic’ toggle. Once you do that, more options will appear.
Go ahead and select ‘Use’ this confirmation if ‘Multiple Choice’ is ‘Billing’ in the conditional logic settings. This will redirect users to a URL that holds more information about billing when they submit a form.
That’s all! Simply save the form and the WPForms block you added earlier will automatically redirect users to different the URL you set based on their responses.
Next, you can just repeat this step for other multiple choice options in the form and create new confirmation notifications with conditional logic.
Redirect Users After Comment Submission in WordPress
Did you know that you can redirect users to different pages if you have first-time commenters on your WordPress site?
For example, you can show a simple thank you page with an email signup form and get users to subscribe to your newsletter after commenting. Similarly, you can redirect people to a page with your social media links and increase followers.
Redirecting users after comment submission can also help boost pageviews and conversions. You can redirect commenters to your top blog posts, show a special offer or coupon page, or display a lead magnet page to get more conversions.
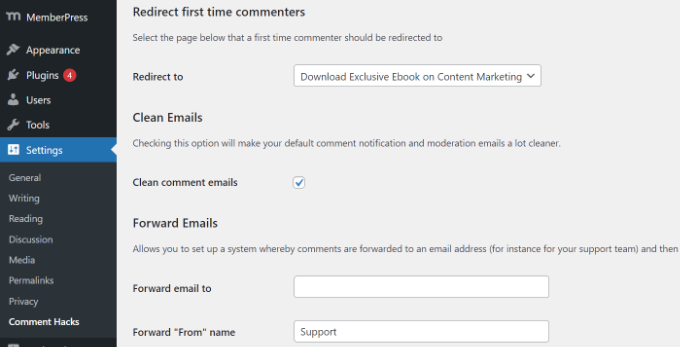
It lets you choose which page to display after a first-time user leaves a comment.
All you have to do is navigate to Settings »Comments Hacks in your WordPress admin dashboard. Then just select the specific page you want to send them with the ‘Redirect to’ dropdown.
Be sure to save the page to store your settings when you’re finished.
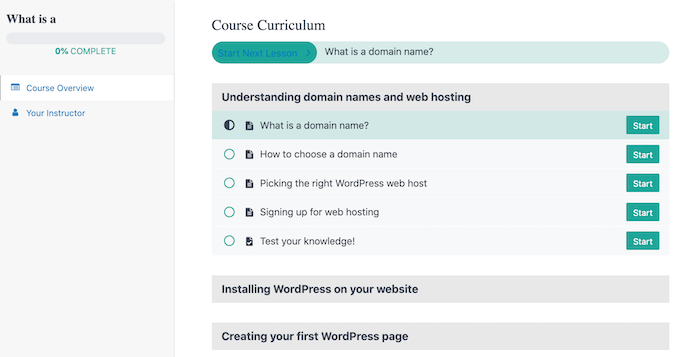
For instance, if you run membership website or sell online courses, you can redirect users to their account area or dashboard upon submitting a registration form. This way, users can access their download files, license keys, course materials, curriculums, and more.
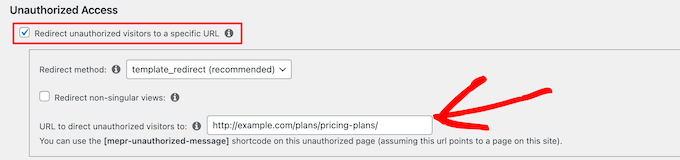
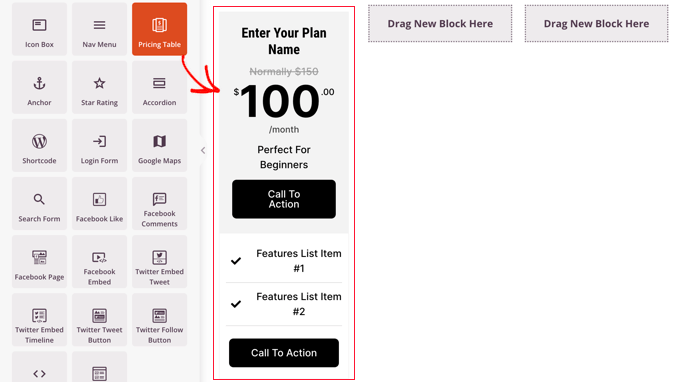
Using MemberPress, you can also create a pricing page using one of the plugin’s built-in templates. If an unregistered user tries to access restricted content, then you can redirect them to a pricing page.
Once you’ve created a custom pricing page, simply enter the URL in the ‘Unauthorized Access’ section of MemeberPress to redirect unregisted users to your pricing page or registration page.
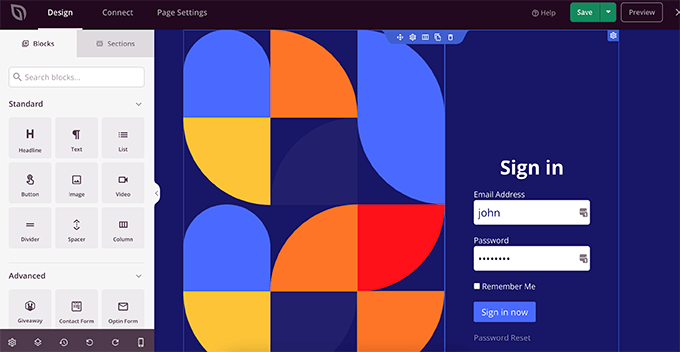
If you want even more options, we recommend using a page builder like SeedProd. SeedProd is a drag-and-drop page builder that makes it super easy to customize the layout and design of any page.
Do you want to improve your WordPress comment notification emails?
Comments drive discussion and user engagement on many blogs. However, WordPress doesn’t do such a great job when it comes to notifying users about comment activity.
In this article, we will show you how to better manage WordPress comment notification emails to boost user activity on your website.
Why Improve WordPress Comment Notification Emails
Comments are an important element of many WordPress websites, particularly on news sites and WordPress blogs. More comment activity means a more engaged audience which results in more page views and ultimately more revenue.
However, the comment system that comes with every WordPress website is fairly limited. It sends comment notifications only to site administrators and article authors. Apart from that, there isn’t a default option for other site users to be notified of new comments.
Wouldn’t it be nice if users were able to get comment notifications for the posts they like or when someone replies to a comment they left?
That said, let’s see how you can enhance the default WordPress comment system and notification emails for a more engaging user experience on your website.
The Default Comment Notification Options in WordPress
By default, WordPress does not have an option to send notifications to commenters.
However, it does have an option to send email notifications to site administrators when a new comment is published and when a comment is held for moderation.
You can view these options by going to Settings » Discussion from your WordPress dashboard and navigating to the ‘Email me whenever’ section.
Both these notifications are only sent to the site administrators. However, WordPress also sends an email notification to the post author about new comments.
If you get a lot of comments on your website, you might not want to receive email notifications for all comments held for moderation. You can simply uncheck the box here to disable those.
How to Let Users Know When Their Comment is Approved
If a user’s comment is held for moderation, they will see a message telling them so. However, they will have no idea whether you approve it or not without returning to your site.
Unfortunately, many of these users never return to your website to check, so they won’t ever know that you approved their comments.
Comment Approved Notifier Extended will notify users when their comment is approved. It works right out of the box, and there are no additional settings you need to configure.
How to Allow Users to Subscribe to Just their Own Comments in WordPress
Many users may not want to receive notifications for all comments on an article. However, they may want to know if someone replied only to their own comments.
How to Allow Authors to Subscribe to Other Author’s Posts
If you run a multi-author blog, then other authors may want to keep up with discussions across your website. If you already have comment subscriptions enabled, then each author can manually go and subscribe to comments.
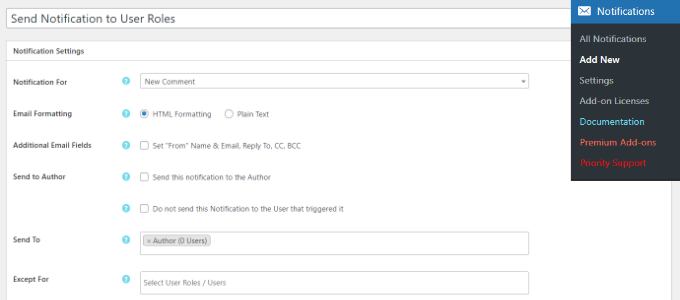
Once the plugin is active, you can head to Notifications » Add New from your WordPress dashboard and can enter a title for your notification at the top.
Next, you can select ‘New Comment’ from the ‘Notification for’ dropdown menu. After that, simply add the user roles that will receive these notifications in the ‘Send To’ field.
The plugin also offers an option to send notifications to the post’s author and even exclude user roles from receiving email notifications for new comments.
How to Create Custom Comment Notification in WordPress
Want to create your own custom comment notifications in WordPress? Custom notifications can allow you to replace the default WordPress notification with your own.
Upon activation, you need to visit the Notifications » Add New page from your WordPress admin panel to create your custom comment notifications.
You can edit the notifications for new comments, comments awaiting moderation, and comment replies. Additionally, you can send notifications to any user role or to individual users.
The plugin also lets you add email addresses manually that are not even connected to a user on the site.
You have the option to completely customize the comment notification sent by WordPress and use shortcodes inside the email text to add custom tags.
How to Improve Deliverability of WordPress Email Notifications
All the above tips will fail if your WordPress site fails to send email notifications or if those emails are marked spam by email providers.
To fix WordPress email issues and improve email deliverability, you need to install and activate the WP Mail SMTP plugin. For more details, see our step-by-step guide on how to install a WordPress plugin.
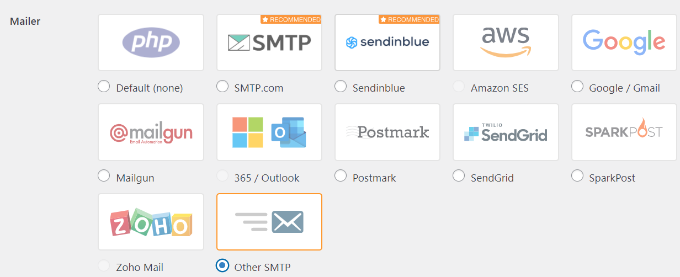
Upon activation, visit the Settings » WP Mail SMTP page to configure plugin settings.
This plugin allows you to use SMTP (Simple Mail Transfer Protocol) to send emails. SMTP is a much better and more reliable method than the default mail function used by WordPress.
It works with any email service that supports SMTP. This includes your free Gmail account as well as Google Workspace, Mailgun, and Sendgrid.