Friday, November 4, 2022

10 Best VoIP WordPress Themes in 2022 (Compared)

Are you looking for the best VoIP WordPress themes?

VoIP (Voice over Internet Protocol) is a modern technology to connect with your users on voice calls. You can offer VoIP software, call forwarding services, networking services, and calling products on your business website with a suitable WordPress theme.

In this article, we will share some of the best VoIP WordPress themes for your business website.

Best VOIP WordPress Themes

How to Make a VoIP Website With WordPress?

WordPress is the most popular website builder on the market used by over 43% of all websites on the internet. You can use it to create any type of website without any technical skills or coding knowledge.

There are two kinds of WordPress websites. WordPress.org, which is a self-hosted platform, and WordPress.com, which is a hosting solution.

We have a complete guide on the difference between WordPress.com vs. WordPress.org for your assistance.

You’ll need the self-hosted WordPress.org to make your VoIP business website. And you’ll also need a domain name and web hosting.

For this, we recommend Bluehost. It’s one of the most popular web hosting companies and an official WordPress hosting partner.

The best part is that Bluehost offers WPBeginner users an exclusive 73% off on web hosting, plus a free domain name and a free SSL certificate.

Bluehost WordPress Hosting offer for WPBeginner Users

Bluehost reduces your initial cost to $2.75 per month.

So you can start your VoIP calling services website without worrying about the budget.

After purchasing the web hosting, you next need to make a WordPress website and set up your VoIP WordPress theme.

If you need assistance, check out our complete guide on how to install a WordPress theme.

Now, look at some of the best VoIP WordPress themes.

1. Astra

Astra

Astra is the most popular WordPress theme on the market. It has a multipurpose approach and lets you create any type of website.

It comes with dozens of starter sites that are fully functional with ready-made pages and content. All you need to do is replace the text and images to launch your website.

Astra fully supports page builders, so you can add your VoIP calling services to get new customers. You can also integrate WooCommerce to make sales pages and collect online payments.

2. SeedProd

SeedProd WordPress Website Builder

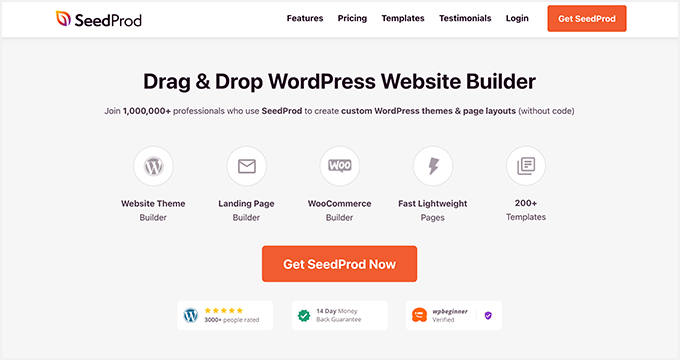
SeedProd is the best WordPress website and theme builder. It isn’t your regular theme but a one-stop solution for you to make your website layout from scratch.

It’s beginner friendly and easy to use. You get a drag-and-drop builder to add sections on the homepage of your VoIP software website.

SeedProd also lets you create dedicated VoIP landing pages where you can display features like business call forwarding, auto attendant, and more.

SeedProd site kits make it even faster to set up everything in just a few clicks. And the best part is that you don’t need to hire a professional developer or write any code.

3. Divi

Divi

Divi is a powerful WordPress theme for beginners to visually design a website of any kind, including a VoIP business phone service website. You’ll get the Divi Builder alongside their website templates, so the native drag and drop builder makes it even easier to customize your site.

The Divi website templates are ready-made and come with page layouts, design elements, and more. You need to replace the dummy content with your text and images to start.

It comes with eCommerce modules and elements to sell your VoIP calling services. The theme integrates with popular plugins like WPForms to create an order form for your business.

Also, the Divi Builder has modern tools to edit and customize your content. You can quickly make changes, and Divi Builder will keep a revision history to revert or compare your updates.

4. Ultra

Ultra

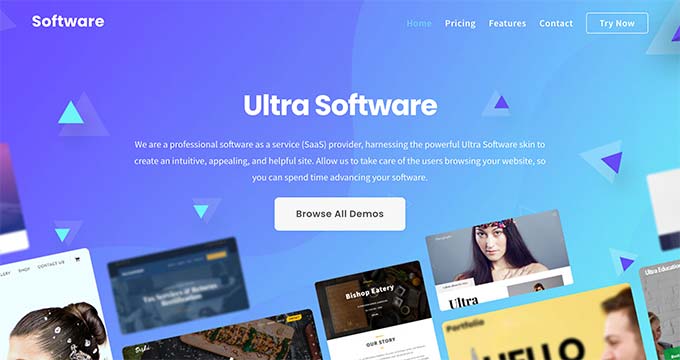
Ultra is a highly flexible WordPress multipurpose theme. It comes with a few ready-made templates designed specifically for VoIP software, VoIP app, and VoIP calling services.

It comes with the native Themify Builder to easily customize your VoIP networking website. Ultra theme also includes built-in addons to add more features and options using the drag and drop builder.

The theme offers multiple custom designs for the header, footer, pages, posts, and background. Moreover, you get fonts and color schemes to further optimize the look of your website.

Ultra has many other features, including parallax scrolling, beautiful navigation menus, image filters, and more. It also fully supports WooCommerce to sell your products and services online.

5. OceanWP

OceanWP

OceanWP is an excellent WordPress theme built for all kinds of websites. It comes with hundreds of free and premium website layouts for different business niches.

The theme supports page builders like Beaver Builder or Elementor out of the box. This allows you to set up your VoIP website with OceanWP easily and fast.

When it comes to features, OceanWP includes multiple header styles, a header social menu, a top bar, responsive navigation menus, and more. It also comes with color and typography settings to make your content stand out.

OceanWP has seamless WooCommerce integration that lets you create an online store. You can customize the shop page, product page, checkout page, and other pages using a drag and drop builder.

6. Neve

Neve

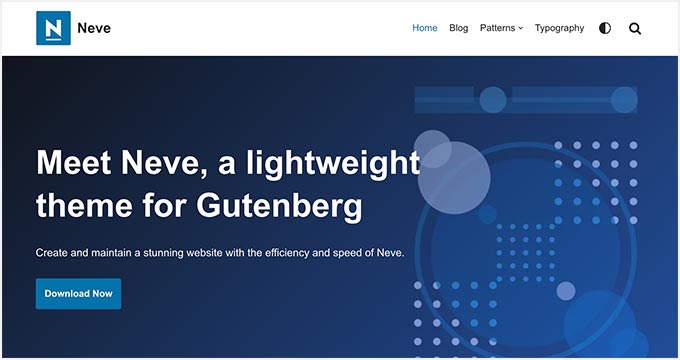
Neve is a super fast WordPress theme for your VoIP software website. It has a huge library of starter sites and templates that you can import into your WordPress site in 1-click.

The theme is compatible with popular WordPress page builders on the market. It also fully supports the WordPress block editor and customizer for all changes you need to make before you launch the site.

Here’s a quick difference between WordPress block editors vs page builders for your information.

Neve also includes blog layouts to make a blog page. It adds custom blog controls within the WordPress editor to manage the display of your content and articles.

Other features include custom backgrounds, additional fonts, demo content import, and more. Neve is translation-ready using third-party plugins like WPML and supports all RTL languages.

7. Altitude Pro

Altitude Pro

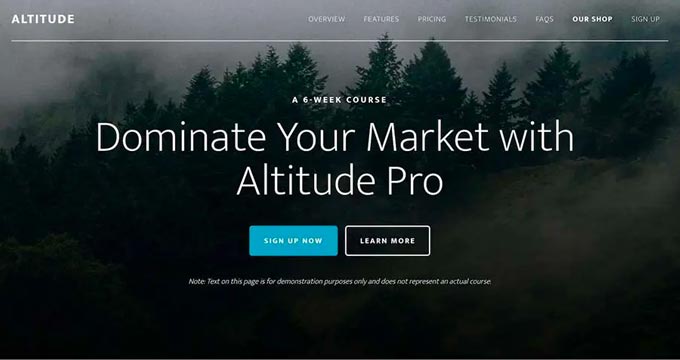
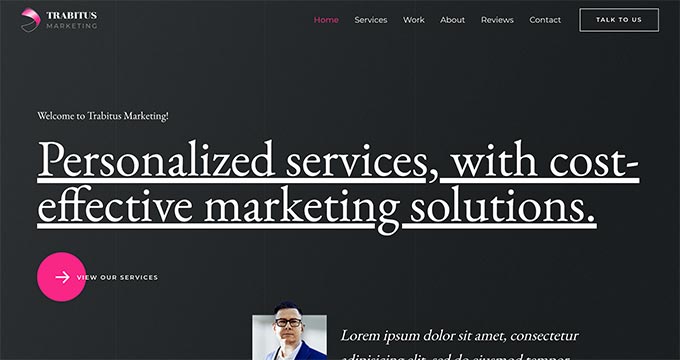
Altitude Pro is a WordPress multipurpose theme. It’s suitable for online businesses, software companies, digital services providers, and others, including VoIP calling businesses.

The theme has a bold header layout with a dark background, a simple navigation menu, a custom logo, a welcome message, and call-to-action buttons. It’s fully customizable using the built-in theme options panel.

Altitude Pro also includes theme customizer settings for colors, background images, fonts, and more. You can preview the changes in real-time before you publish your site on the internet.

It has WooCommerce support to sell your products and services online. You can set up your online store and use their ready-made widgets to easily add eCommerce features.

StudioPress is now part of WP Engine, the most popular managed WordPress hosting company. You can get this theme and all 35+ other StudioPress themes when you sign up for WP Engine hosting to build your website.

Bonus: WPBeginner users also get an additional 20% OFF. Get started with WP Engine today!

8. Sydney Pro

Sydney Pro

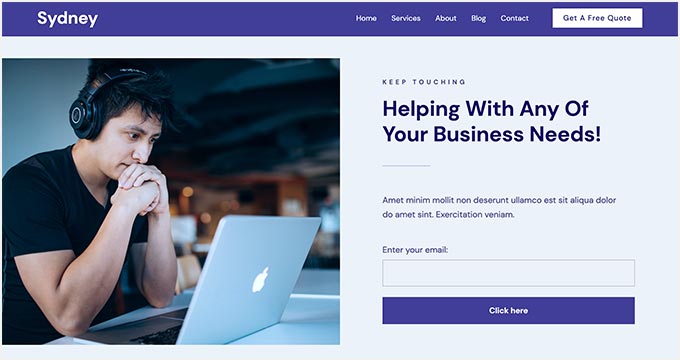
Sydney Pro is a beautiful WordPress multipurpose theme built for online business sites. It has a fullscreen background in the default layout that you can replace with an image slider, video header, or keep the static image.

Besides the default theme design, Sydney Pro comes with dozens of ready-made starter sites to help launch your VoIP networking site quickly. 

The theme has multiple header layouts for different screen sizes and devices. It lets you manage the first look of your site by adding single and dual navigation menus, a custom logo, social icons, a cart button, and more.

Sydney Pro is comfortably compatible with Elementor page builder to add your landing pages and product pages. The theme itself supports WooCommerce features out of the box.

9. Inspiro Pro

Inspiro Pro

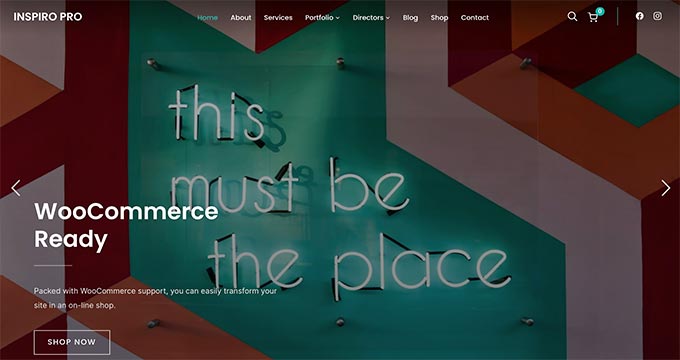
Inspiro Pro is an elegant WordPress multipurpose theme. It comes with drag and drop page builder integration to make it easy for you to set up the landing pages for your VoIP calling website.

The theme supports videos out of the box. It allows you to embed self-hosted videos and third-party videos on your site. With this feature, you can share educational videos related to your business.

Inspiro also comes with custom widgets to add multiple features on the homepage and other pages. When it comes to customization, you’ll get a theme options panel within your WordPress dashboard with all options.

10. Struct

Struct

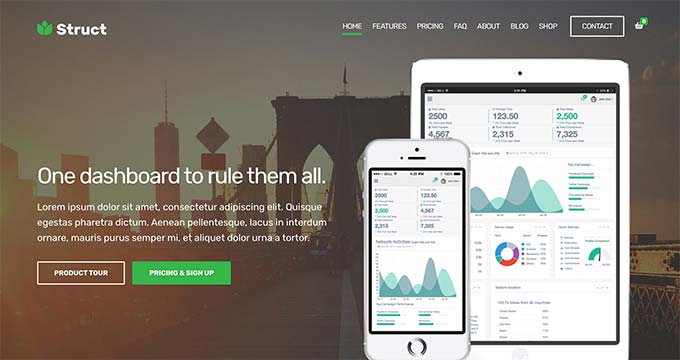
Struct is a fantastic WordPress theme built for online businesses. It’s a perfect choice for your VoIP business site with ready-made features like services management, portfolio management, and more.

It has a fullscreen background layout where you can add a custom image. The homepage lets you add a custom logo, navigation menu, welcome text, and call-to-action buttons.

Struct is fully responsive and designed beautifully for any screen size or device. It also supports WooCommerce features and extensions to sell your services online.

We hope this article has helped you find the best VoIP WordPress themes. You may also want to check out our guides on how to add web push notification in WordPress, and the best email marketing services for small businesses.

If you liked this article, then please subscribe to our YouTube Channel for WordPress video tutorials. You can also find us on Twitter and Facebook.

The post 10 Best VoIP WordPress Themes in 2022 (Compared) first appeared on WPBeginner.


November 04, 2022 at 04:32PM

Thursday, November 3, 2022

How to Easily Create a Quiz in WordPress

Do you want to create a quiz in WordPress?

No matter whether you’re testing knowledge or creating viral content like Buzzfeed, quizzes can get more engagement on your site. You can even use them to collect feedback and ideas from your customers, so you can improve their experience.

In this article, we will show you how to easily create a quiz in WordPress.

How to easily create a quiz in WordPress

Why Add Quizzes to Your WordPress Site?

Quizzes are fun and engaging. Since they’re so interactive, users find them more rewarding than other types of form.

Marketers have been using quizzes to generate leads since the very early days of the internet. For example, you might ask for the visitor’s email address so you can send them their quiz results, or ask them to sign up for your email newsletter.

They’re also a great way to get more social shares by encouraging visitors to post their results.

BuzzFeed is probably the most popular example of viral quizzes.

An example of a Buzzfeed quiz

If you sell online courses, then quizzes are an important way to test the student’s knowledge and reinforce learning. Since these quizzes are automated, they’re also an easy way to improve the student experience.

If you run an online store, then you might even create a short quiz that asks the shopper for some information and then suggests a product or service based on their answers.

An example of a product quiz

This is much more engaging than asking them to read through product descriptions and could get you some extra sales.

Having said that, let’s go ahead and see how to easily create a quiz in WordPress.

Creating a WordPress Quiz with Formidable Forms

For this guide, we’ll be using the Formidable Forms plugin. It is one of the best WordPress quiz plugins on the market and allows you to create advanced quizzes using a simple drag-and-drop builder.

Formidable Forms is also one of the best WordPress form builder plugins. This means that once it’s set up on your website, you can use it to build all kinds of forms including contact forms, registration forms, booking forms, and more.

With that being said, let’s see how you can create a WordPress quiz using Formidable Forms.

Step 1: Install the Formidable Forms and Quiz Maker Addon

To create a quiz, you’ll need to use the Formidable Forms Business plan, as it includes the Quiz Maker addon.

The first thing you need to do is install and activate the Formidable Forms plugin. For detailed instructions, see our guide on how to install a WordPress plugin.

Upon activation, you’ll also need to install Formidable Forms Lite. This free plugin provides the core foundation for the premium plugin’s more advanced features.

Once you’ve done that, go to the Formidable Forms » Global Settings page in your dashboard and select ‘Click to enter a license key manually.’

Adding the Formidable Forms license

You can find the license key under your account on the Formidable Forms website. After entering this information, go ahead and click the ‘Save License’ button.

Next, you will need to install the Quiz Maker addon by going to Formidable » Add-Ons. On this screen, find the Quiz Maker addon and click on its Install button.

After a few moments, Formidable Forms will mark the Quiz addon as ‘Active.’

Installing the Quiz Maker addon

Step 2: Create a WordPress Quiz with Formidable Quiz Maker

Now you’ve installed the Formidable Forms Quiz Maker, you’re ready to create your first WordPress quiz.

To get started, go to Formidable » Forms and then click the ‘Add New’ button.

Creating a new WordPress form

This opens a popup showing all of the plugin’s ready-made templates, including templates that you can use to create a mortgage calculator and a booking form.

In this guide, we’ll be starting from scratch so click on the ‘Blank Form.’

A blank Formidable Form template

Once you’ve done that, type a title into the ‘Form Name’ field and enter an optional description. This information is just for your reference so you can use anything you want.

Then, simply click on the ‘Create’ button.

Creating a new quiz using Formidable Forms

This will open the template in the Formidable Forms editor.

To the right is a live preview, and on the left-hand side is a menu with all the fields you can drag and drop into your quiz.

The Formidable Forms editor

You can create quizzes for lots of different purposes, including getting customer feedback, performing market research on your WordPress blog, testing knowledge, and more.

You may need different types of fields depending on the kind of quiz you’re creating. As an example, we’ll show you how to create a simple quiz that tests the visitor’s knowledge. We’ll be creating different kinds of questions, including multiple choice.

To add a field to your quiz, simply drag it from the left-hand menu and then drop it onto the live preview. Let’s start by adding a ‘Text’ field.

Adding fields to your form

After that, click to select your new ‘Text’ field in the live editor.

You can then go ahead and type your question into the ‘Field Label.’

Creating a simple text question

Next, we’re going to create a multiple choice question.

Simply drag a ‘Dropdown’ field onto the form.

How to create a multiple choice question

Once again, click the ‘Dropdown’ field in the preview to the right and then type your question into the ‘Field Label.’

You can now type the possible answers into the ‘Dropdown Options’ section.

Adding multiple answers to a quiz question

To add more answers to your multiple choice question, simply click on the ‘Add Option’ button. You can repeat these steps to add more questions to your quiz.

When you’re happy with how the quiz looks, it’s time to configure the correct answers and how to show the user’s score.

To do this, click on the ‘Settings’ tab and then select ‘Actions & Notifications.’ You can now click on ‘Scored quiz.’

Creating a quiz in WordPress

If you scroll to the new ‘Scored Quiz’ section, then you’ll see that this action already has some default settings.

Formidable Forms can randomize the questions and answers, which will make it more difficult for people to cheat.

By default, these settings are disabled but you may want to enable them by clicking on the ‘Randomize questions’ and ‘Randomize options’ toggles.

Randomizing questions in your online quiz

Formidable Forms awards one point for every right answer. However, if you enable advanced scoring then you can take points away for wrong answers.

We’ll be covering advanced scoring shortly, but if you plan to deduct points then you can click to activate the ‘Allow negative scoring’ toggle.

Enabling negative scoring for your quiz

Next, let’s set the correct answers so that Formidable Forms can score visitors automatically.

To do this, go ahead and click on the ‘Customize Quiz Scoring’ button.

Set up quiz scoring in WordPress

To add the correct answer, simply click on the toggle next to each question.

For text questions, simply type the correct answer into the field. You can also use the dropdown to specify whether the user’s answer should include this exact text, some of the text, or none of the text.

Setting the correct answers for an online test

For multiple choice questions, click on ‘Add Correct Answers’ to open a menu showing all the possible options.

You can now check the box next to each correct answer.

Setting the right answers for an online exam

By default, each correct answer is worth 1 point. To award more points, simply type a different number into the ‘Max score’ box.

Sometimes you may want to assign a unique score to the different answers in a multiple choice question.

To do this, select ‘Advanced scoring’ and then type in the score for each answer.

Setting up advanced scoring for your online questionnaire

Once you’ve set all of the correct answers, click on ‘Done’ to save your changes.

After that, you can set the action that Formidable Forms will perform every time someone submits a quiz. Simply open the following dropdown to see the different options: ‘What would you like to do after submit?’

Creating a quiz in WordPress

If you choose ‘Show the score,’ then Formidable Forms will display a standard message with the visitor’s score.

You can see an example of this in the following image.

Showing the score to your learners

If you select ‘Show user’s answers,’ then Formidable Forms will show the user’s score plus their answers.

This can help reinforce learning by encouraging visitors to review their answers and think about which ones they may have answered wrong.

Showing the answers to your students

There is also ‘Show correct answers’ that shows users which questions they got right.

If they got a question wrong, then Formidable Forms will show the right answer. This can help students learn from their mistakes.

However, it isn’t a good option if learners have the option to retake the quiz as this could lead to cheating.

Displaying the right answers to customers

The final option is ‘Use default success settings,’ which shows a message that reads, ‘Your responses were successfully submitted. Thank you!’

You’ll typically want to change this message to include the user’s score. To do this, click on ‘General’ and customize the message in the ‘On Submit’ box.

Showing a custom success message to learners

To show the user’s score, simply add the [219] key. A ‘key’ is a dynamic value you can use to customize messages to each user.

For example, you might type in: ‘Your responses were successfully submitted. You scored [219].’ The [219] will automatically be replaced with their score.

A custom score message, created using Formidable Forms

There are more keys that can help you create a more personalized message.

To take a look at the different keys, simply click on the ‘Keys’ tab in the little popup.

Using keys to create a personalized message

After that, click the ‘Update’ button to store your changes. You’ve now successfully created your first quiz.

Step 3: Adding Your Quiz to Your WordPress Site

You can now add your quiz to any post or page, or any widget-ready area of your WordPress theme. In our example, we’ll add the quiz to a page, but the steps will be similar when adding the quiz to other areas of your WordPress site.

To start, go to Pages » Add New in your WordPress admin area. Once inside the content editor, click on the ‘+’ button to add a new block.

In the popup that appears, type ‘Formidable Forms’ to find the right one, and then add the block to your post.

The Formidable Forms block

After that, simply open the ‘Select a form’ dropdown.

Then, choose whichever quiz you have already created, and now WordPress will load the quiz automatically.

Adding a quiz to your WordPress website

Now you can add any other content to the page, including any categories and tags or customized permalinks that you want to use.

When you’re ready, either publish or update the page. Your WordPress quiz is now live and users can start answering questions.

We hope this article helped you add a quiz to your WordPress site. You may also want to see our guide on how to run a giveaway in WordPress and our expert pick of the best LMS plugins.

If you liked this article, then please subscribe to our YouTube Channel for WordPress video tutorials. You can also find us on Twitter and Facebook.

The post How to Easily Create a Quiz in WordPress first appeared on WPBeginner.


November 03, 2022 at 11:56PM

GA4 vs Universal Analytics: What’s the Difference

Are you wondering what’s the difference between Google Analytics 4 and Universal Analytics?

GA4 is the latest version of Google Analytics and will soon replace Universal Analytics. In the new version, you get new reports, metrics, tracking systems, and more.

In this article, we’ll compare GA4 vs Universal Analytics and show you what the real difference is between the two platforms.

Difference between Google Analytics 4 and Universal Analytics

GA4 vs Universal Analytics: A Brief Overview

Google Analytics 4 is the new generation of Google’s famous analytics platform. It is designed to track your WordPress website and apps in the same property. Previously you’d have to track your apps and websites separately in Universal Analytics.

With Google Analytics 4, you get a better picture of your customer’s journey across multiple channels and devices. GA4 also offers better data privacy for users.

GA4 reports interface

On the other hand, Universal Analytics (UA) is the previous version of Google Analytics. It was introduced in 2012 and is probably the version many websites use today for tracking their website traffic.

However, Universal Analytics will sunset on July 1, 2023. This means that it will no longer track your visitors after the sunset date, and Google will not support or introduce new features for it.

That’s why it is important that you switch to Google Analytics 4 as soon as possible. This way, you’ll protect your data and have historical records to compare to when UA shuts down.

Let’s look at some significant differences between GA4 and Universal Analytics. You can click any of the links below to be taken to the section for that specific feature.

A Changed Reporting Interface

The first difference you’ll notice between Google Analytics 4 vs Universal Analytics is the new reporting interface.

In GA4, most of the reports have been replaced or renamed. One of the reasons for this is that the latest analytics version uses a different measurement model compared to Universal Analytics.

For example, you’ll see new reports such as Engagement, Monetization, and Retention in GA4.

New reports in GA4

On the other hand, Universal Analytics has a completely different reporting interface.

For example, all the reports are grouped together under 5 main categories.

  • Realtime
  • Audience
  • Acquisition
  • Behavior
  • Conversions.

You can find each of these in the left-hand menu on your main GA4 dashboard.

Universal analytics interface

That said, it can be overwhelming for beginners to understand these reports and uncover insights about their website traffic.

An easier way to get the information you need for decision-making is by using MonsterInsights. It is the best Google Analytics plugin for WordPress and offers a beginner-friendly reporting interface.

You get to see important data inside your WordPress dashboard without worrying about navigating the complex Google Analytics reports.

Overview report in MonsterInsights

If you haven’t set up analytics on your website, then please see our guide on how to install Google Analytics in WordPress.

New Data Measurement Model in GA4

Another major difference between GA4 vs Universal Analytics is how they work when collecting and processing your website data. Universal Analytics uses a measurement model based on sessions and pageviews. Whereas, GA4 uses an event-based model to track your data.

Sessions can link data to a single individual and track them specifically as they interact with your site. Event data is anonymous, and the importance is placed on specific actions taken instead of specific users taking those actions.

This allows you to track complex buyer journeys across multiple devices accurately.

It also makes it easier to enable enhanced measurement features in Google Analytics 4. For example, you can set up outbound link click and scroll depth tracking with a click of a switch in GA4.

With Universal Analytics, on the other hand, you’d have to perform a complex setup or tweak the tracking code to configure that kind of link click-tracking or scroll-tracking.

No Bounce Rate and New Reporting Metrics

With Google Analytics 4, you get new metrics along with new reports. Right off the bat, you’ll notice that there is no bounce rate metric in Google Analytics 4.

Bounce rate tells you the number of users that left your website without interacting, like clicking a link, signing up for a newsletter, or purchasing a product.

Instead, GA4 shows a new metric called ‘Engaged sessions per user.’ It shows how many people interacted with your content. This includes a session where a user stays on a page for 10 seconds or more, triggers 1 or more events, or a user views 2 or more pages.

See average engagement time report

Besides that, GA4 also offers more new metrics in the Engagement report. For instance, there is an average engagement time metric, which used to be the average session duration in Universal Analytics.

Another new metric you’ll find in Google Analytics 4 is the Pages and screens. It shows the pages and app screens that get the most traffic on your website.

You can find this data in UA under the top landing pages report. If you’re using MonsterInsights, then the plugin will show your most important pages inside the WordPress dashboard.

Top landing pages report in MI

Google Analytics 4 Doesn’t Track Form Conversions

The next difference you’ll notice when comparing GA4 vs Universal Analytics is that of form conversions.

Forms are really useful for any business. They allow users to get in touch with you, provide feedback, and resolve their queries. Tracking your WordPress form in Google Analytics helps you see which form performs better.

However, setting up form conversion tracking in Google Analytics 4 requires adding custom code. This can be very tricky if you’re not a developer. The slightest mistake can mess up your tracking and break your website.

That said, MonsterInsights helps you track forms out of the box. You don’t have to edit code or hire a developer. Plus, it shows a report inside your WordPress admin area with impressions, conversions, and conversion rates for each form.

Forms report

Universal Analytics Goals Are Replaced with Events

In Universal Analytics, you can record different user interactions using goals. You get 4 types of goals in UA, which include:

  • Destination – You can set a destination goal to track when a user arrives on a specific page, like a thank you page or a product landing page.
  • Duration – This goal helps you see how long people stay on your website before exiting.
  • Pages per Visit – Using the pages per visit goals allows you to uncover the number of pages a visitor views before leaving your site.
  • Event – With the help of events, you can track user interactions on your site that Universal Analytics doesn’t track by default.

However, Google Analytics 4 replaces these goals with events. For example, if you have an online store, then you can enable events to track interactions and how many people enter payment details and shipment information.

Events to enable in ga4

Perform Advanced Analysis in Google Analytics 4

Another difference between both analytics platforms is the level of advanced analysis you can perform in Google Analytics 4.

In Universal Analytics, you can create custom reports and use secondary dimensions to uncover insights. However, GA4 takes it a step further with its Exploration reports.

Explorations tab in ga4

You get prebuilt templates for different analyses you’d like to perform or if you’d like to set up a custom report.

For example, you can use the ‘Funnel’ exploration template to see your customers’ journey before purchasing.

Besides that, GA4 exploration reports also offer multiple options to add different segments, dimensions, and metrics to your custom reports.

Customize your exploration reports

On a side note, using Exploration reports can be tricky for beginners. These reports are mainly for power users or people with advanced Google Analytics knowledge.

An easier way of uncovering insights is by using MonsterInsights. It shows a stats dashboard inside your WordPress dashboard. You can quickly see how your site performs, which pages people view the most, and much more without creating a complex custom report in Google Analytics.

We hope that this article helped you learn about the difference between GA4 vs Universal Analytics. You can also see our guide on the best WordPress plugins and the ultimate guide to WordPress SEO.

If you liked this article, then please subscribe to our YouTube Channel for WordPress video tutorials. You can also find us on Twitter and Facebook.

The post GA4 vs Universal Analytics: What’s the Difference first appeared on WPBeginner.


November 03, 2022 at 05:02PM