Certified WordPress Developer and SEO Specialist with 10+ years of experience on Fiverr. I provide expert solutions for WordPress error fixing, debugging, speed optimization, and security hardening. Services include hacked site recovery, malware removal, on-page SEO optimization, and full customization to ensure your website runs fast, secure, and ranks higher on Google.
Are you looking to improve user engagement on your website?
Having reaction buttons on your WordPress site gives your readers a simple and easy way to leave feedback on your blog without having to type a comment.
In this article, we will show you how to add reaction buttons in WordPress.
Why Add Reaction Buttons in WordPress?
Reaction buttons help you boost user engagement on your WordPress blog. because not all users have the time or confidence to leave a comment.
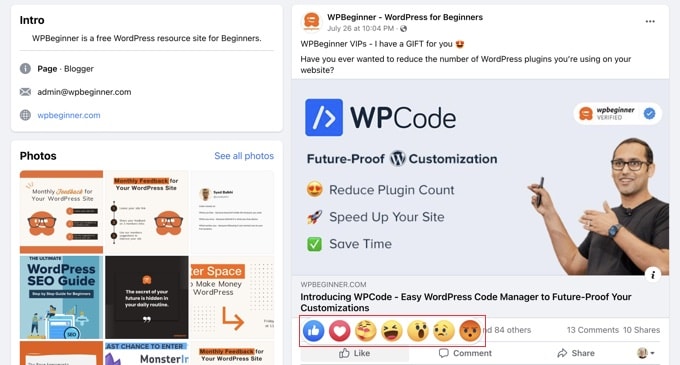
That’s why popular social media websites like Facebook use Like and other Reaction buttons to boost engagement. You can also add a Facebook Like button to your posts.
You can encourage more interaction on your site by adding WordPress reaction buttons. These allow your users to engage with your post with just a click.
With that being said, let’s take a look at how to add this kind of reaction button to your WordPress site.
For this tutorial, we’ll use the free version of the plugin. There is also a premium version, WP Reactions, which adds additional features such as buttons for more social platforms.
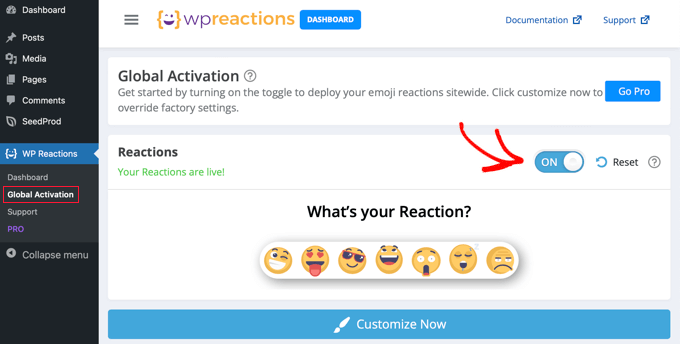
Upon activation, head over to WP Reactions » Global Activation to configure the plugin. Once there, you need to toggle the ‘Reactions’ switch to the ON position.
WordPress reaction buttons will now be displayed at the bottom of each post and page. You can customize various reaction options by clicking the ‘Customize Now’ button and using the WP Reactions setup wizard.
Customizing Your WordPress Reaction Buttons
The default settings of the WP Reactions plugin will work for most WordPress websites. However, there are still many ways to customize them to suit your needs.
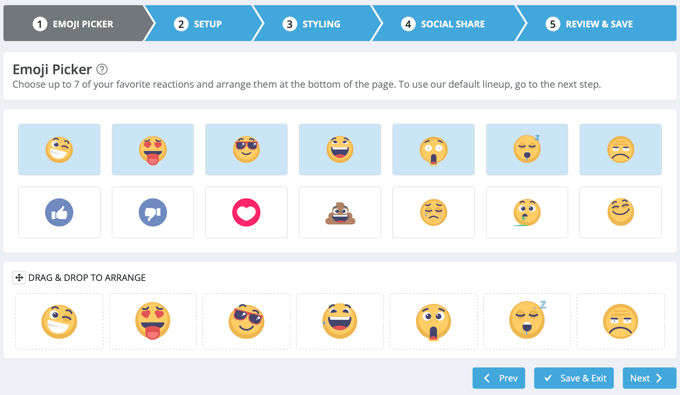
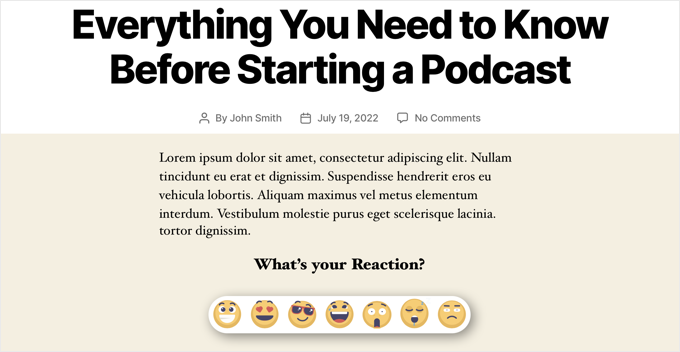
First, you will see the 7 default emojis at the bottom of the screen. You can rearrange or replace the emojis by dragging and dropping them. When an emoji is highlighted blue, that means it’s already included.
When you are happy with your reaction button selection, click the ‘Next’ button at the bottom.
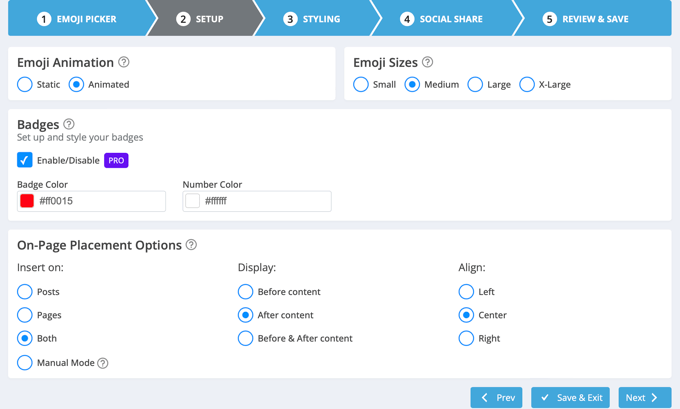
On the next page, you can choose the size of the emojis and whether to animate them. You can also choose the color of the badges that show how many times users have clicked on each reaction.
Now you can decide where to place the reaction buttons using the settings at the bottom of the screen. They can appear on posts, pages, or both, and you can display them before or after the content. You can also select if they will be left-, center-, or right-aligned.
When you are happy with your selections, just click the ‘Next’ button.
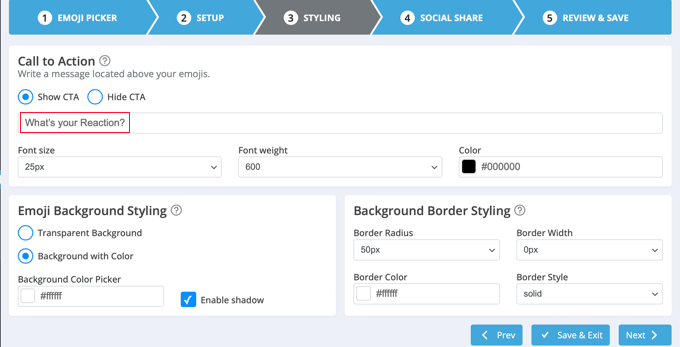
You can now choose the styling for the call to action (CTA), background, and border. By default, the words ‘What’s your Reaction?’ will appear above the buttons. You can change or hide this text, as well as adjust the font options.
You can click the ‘Next’ button when you’re finished.
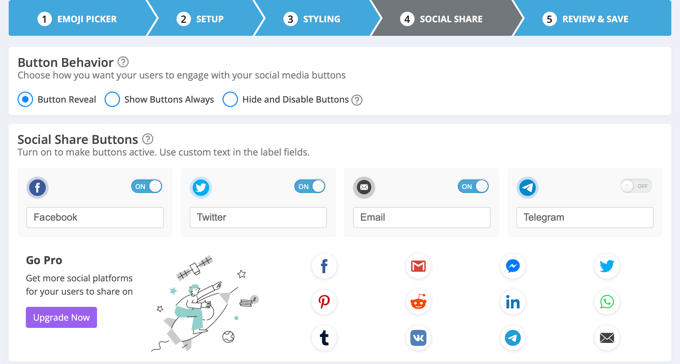
On the following page, you will configure the optional social share buttons. There are options to show buttons for Facebook, Twitter, Email, and Telegram. Pro users have even more options like LinkedIn and WhatsApp.
By default, the plugin will show these social share buttons after the user clicks a reaction button. You can change or disable this setting under the ‘Button Behavior’ section.
As you scroll down the page, you will find options to customize the size and color of the social share buttons. Make sure you press the ‘Next’ button when you are ready.
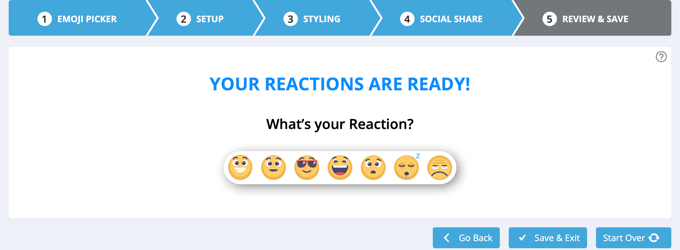
Congratulations, you have now successfully configured your WordPress reaction buttons. Make sure you click the ‘Save & Exit’ button to store your settings.
Previewing Your WordPress Reaction Buttons
You can now visit any post on your website to see the reaction buttons in action. This is how it looks on our demo website using the default settings.
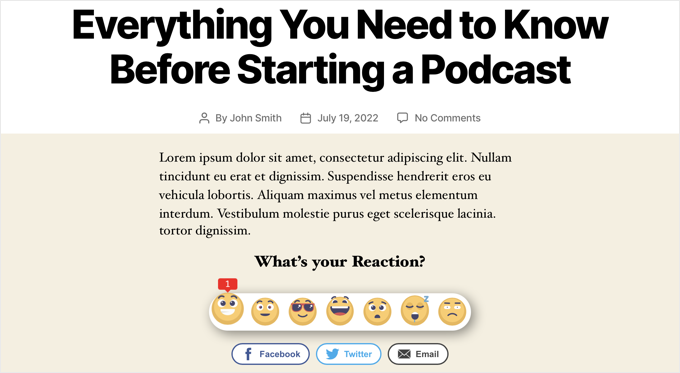
When you click one of the reaction buttons, its badge will be updated with a new total.
Notice that since we clicked an emoji, the social share buttons are now displayed under the WordPress reaction buttons.
Do you want to create a survey on your WordPress website?
Surveys help you gather valuable information, so you can use it to make data-driven decisions. For example, you can find out what new features to introduce or whether people liked a particular promotional campaign.
In this article, we will show you how to easily create a survey in WordPress and generate beautiful reports.
Choosing The Best Survey Tool for WordPress
There are many online services that allow you to create survey forms and embed them in WordPress websites. The downside of these forms is that the data is stored on third-party servers, and you have limited customization options.
Some of these forms are also limited to the number of responses you can collect. You have to pay extra to get more responses, and these services have high monthly costs.
Wouldn’t it be nice if you could run surveys on your own website without relying on third-party services?
This is where WPForms comes in. It is the best WordPress form builder plugin in the market used by over 5 million websites. With the WPForms survey feature, you get the following:
Powerful drag-and-drop form builder to create surveys
Smart survey fields like Rating, Likert Scale, and more
Conditional logic to personalize survey fields based on user input
Interactive survey reports with bars, graphs, charts, and tables
Ability to export survey graphs as JPEG, PDF, or Print Formats
That being said, let’s look at how to easily create and add surveys to your WordPress website.
Creating a Survey in WordPress
The first thing you need to do is install and activate the WPForms plugin. For more details, see our step-by-step guide on how to install a WordPress plugin.
WPForms surveys and polls addon is part of their Pro plan. WPBeginner users can use our WPForms coupon to get 50% OFF on all WPForms licenses.
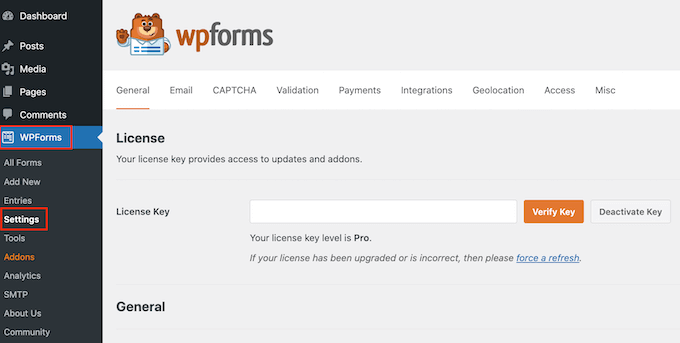
Once the plugin is activated, you need to head over to WPForms » Settings page to enter your license keys. You can find this information under your account on the WPForms website.
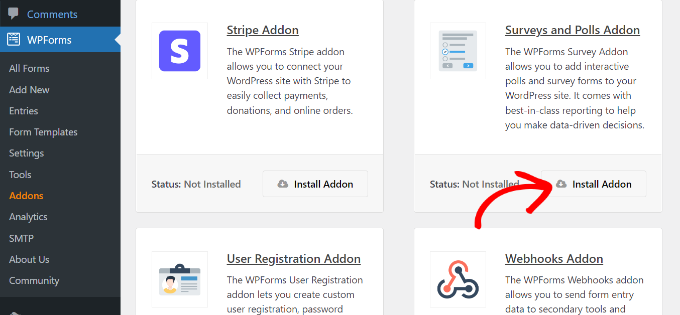
Next, you need to visit the WPForms » Addons page and scroll down to the Surveys and Polls addon.
Go ahead and click on the ‘Install’ addon button to install and activate the survey addon.
Now you are ready to create a survey form.
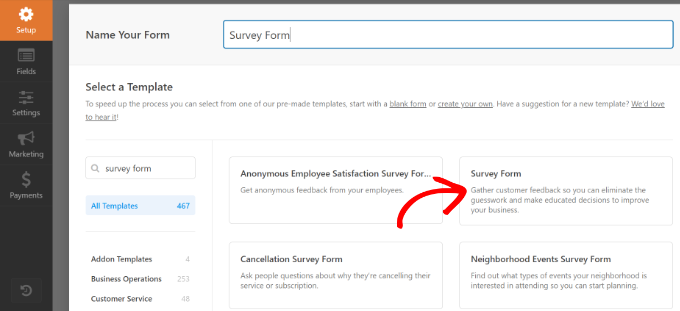
You need to visit WPForms » Add New page to create a new form. This will launch the WPForms form builder interface, and you can choose from multiple pre-built form templates.
First, you need to provide a title for your survey form and click on the Survey Form template.
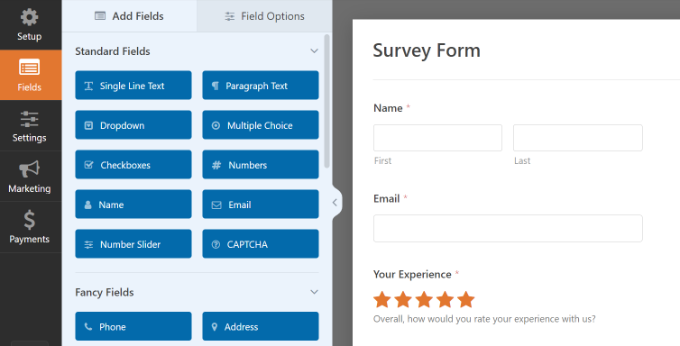
This will load a sample customer feedback form template with several fields already added to the form.
You can just point and click to edit any field, rearrange them with drag and drop, or remove them from the form. You can also add new form fields from the left column.
WPForms supports all commonly used form fields, including dropdown, radio buttons, checkboxes, Likert scale, text input, rating scale, and many more. This makes it super easy for you to build highly interactive survey forms.
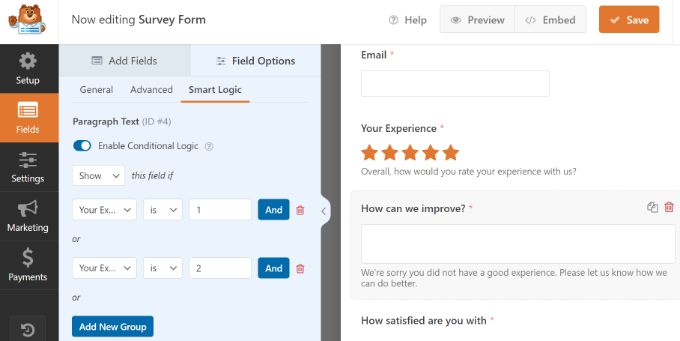
WPForms also includes conditional logic, which means you can personalize your survey questions based on user input in one of the previous fields.
Once you have created the form, you need to click the ‘Save’ button to store your form settings.
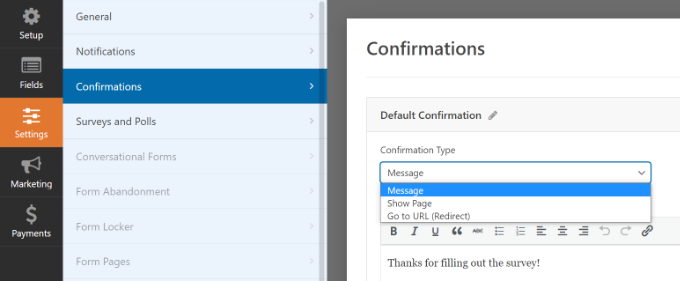
Next, you can go to the Settings tab and select Confirmations in the WPForms form builder.
Here, you can choose whether to show a message, page, or redirect users to a URL when they submit the survey form.
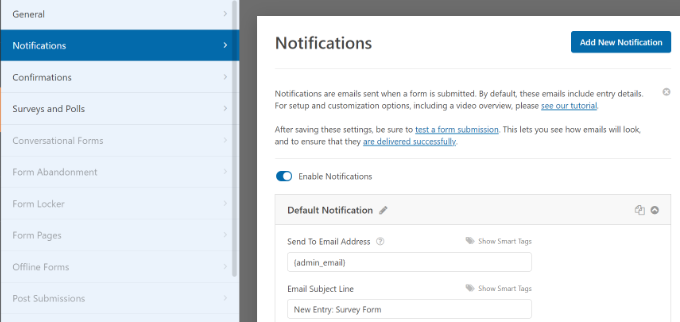
Besides that, WPForms also lets you edit the notification settings, so you get email alerts when a user fills out your survey.
You can now click on the close button to exit the form builder.
Adding The Survey Form to Your WordPress Website
WPForms makes it very simple to add your forms anywhere on your website. You can easily add your survey form to any WordPress post, page, custom post type, or sidebar.
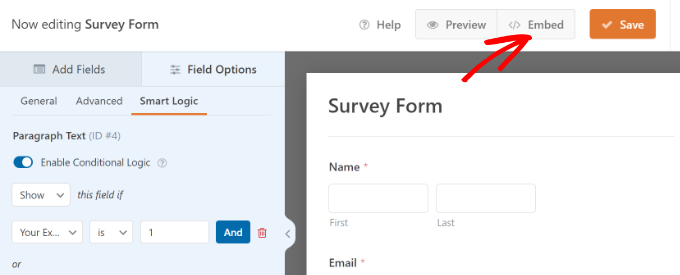
It gives an option in the form builder to embed the form in a new or existing page. Simply click the ‘Embed’ button at the top.
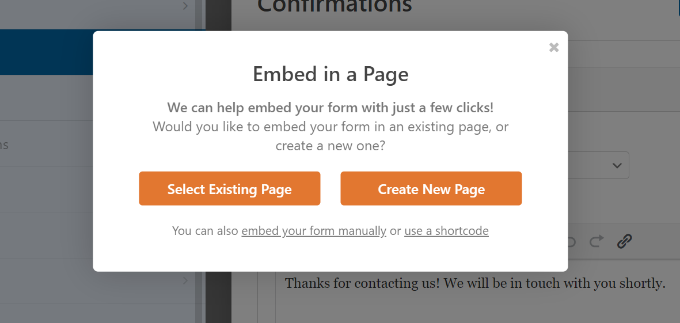
Next, a popup window will open, where you can select whether you’d like to create a new page or select an existing page.
We’ll choose the ‘Create New Page’ for this tutorial.
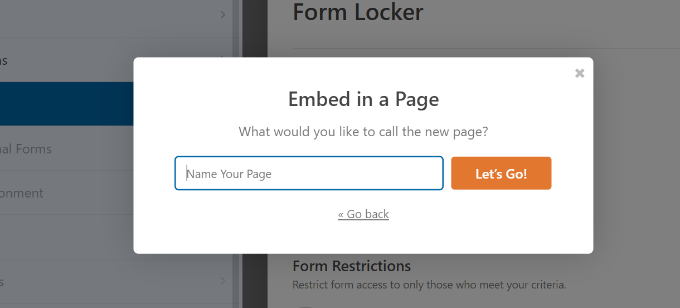
In the next step, you’ll need to enter a name for your new page.
After naming your survey form page, click the ‘Let’s Go’ button.
The plugin will now embed your survey form on the new page.
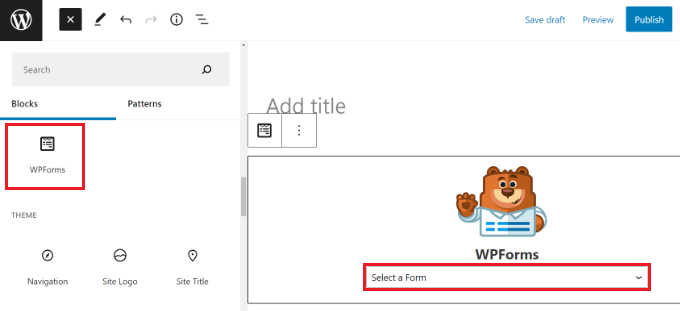
Alternatively, you can add a WPForms block in the content editor and select your survey form from the dropdown menu.
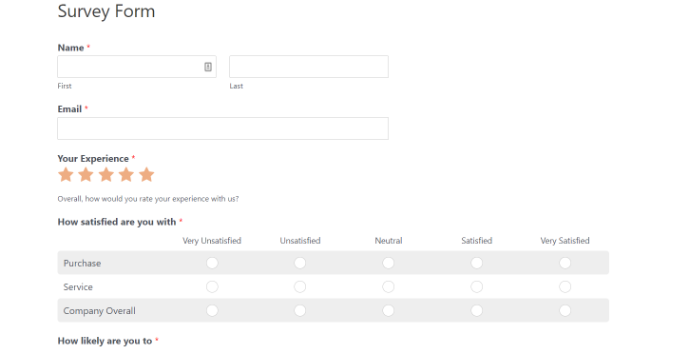
You will now see the form added to the content editor.
Once you are done editing, go ahead and publish it. You can visit your website to see your survey form live in action.
WPForms also allows you to easily add your survey form to any sidebar or widget-ready area.
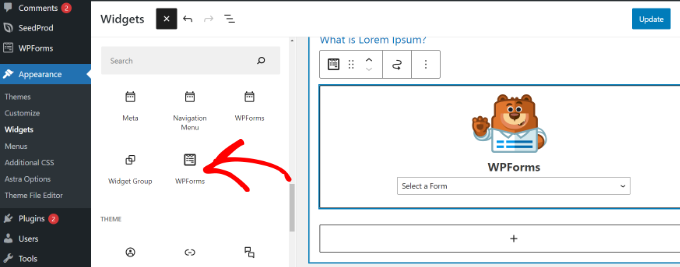
Simply head over to the Appearance » Widgets page in your WordPress admin area and add a WPForms widget block to any sidebar.
In the widget settings, select the survey form you created earlier from the dropdown menu, and don’t forget to click on the ‘Update’ button to store your changes.
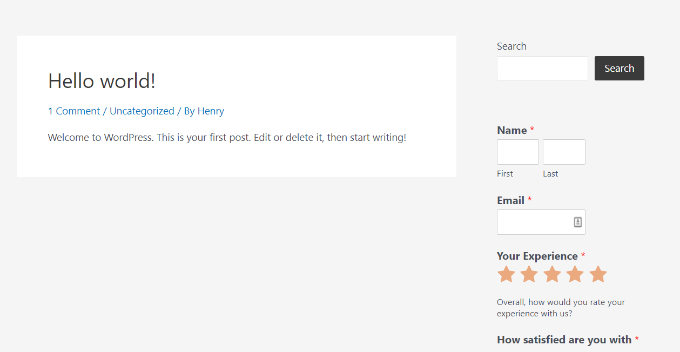
You can now visit your website to see your survey form displayed in the sidebar.
Viewing Your Survey Form Results
WPForms shows survey results in beautiful charts and graphs. You can also print survey results and export them to your favorite spreadsheet software.
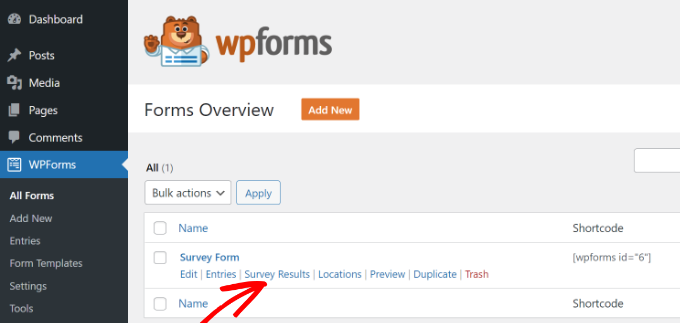
To view your survey results, you need to visit WPForms » All Forms page and click on the ‘Survey Results’ link below your survey form.
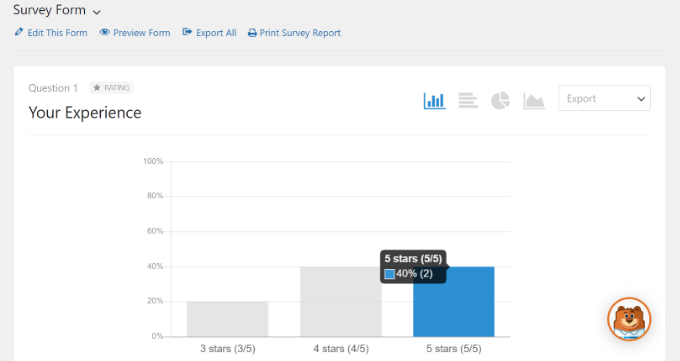
On the results page, you will see your survey responses displayed in an interactive chart and tables.
You can export responses to a single question and the entire survey.
On the top, you will see options to switch to different chart types and export options.
You can save individual survey results in JPEG, PDF, and Print formats to easily share them on presentation slides, blog posts, or social media.
Convert Any Form into a Survey
WPForms also allows you to make any form into a survey form and display past results as a survey. You can even select specific form fields you want to be treated as survey fields.
This is particularly useful if you want to gather data through other forms like a contact form, user registration, or newsletter sign-up form.
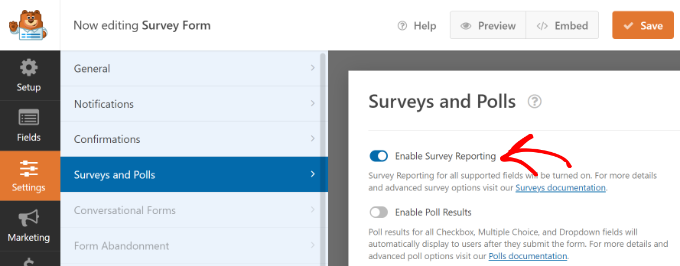
To convert an existing WPForms form into a survey, simply edit the form in WPForms and go to the Settings » Surveys and Polls section. You need to check the box next to the ‘Enable Survey Reporting’ option and save your changes.
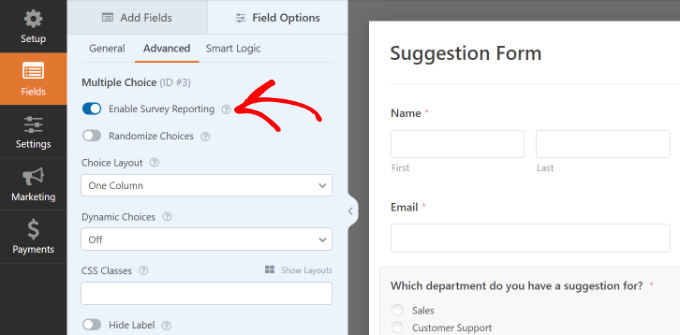
To enable survey reporting for an individual form field, simply edit the form and click on the field you want to enable.
Under the ‘Field Options’ section on your left side, you need to click on Advanced options and check the ‘Enable Survey Reporting’ option.
Are you looking for WordPress plugins to manage multi-author blogs?
Running a multi-author WordPress website comes with different challenges compared to a single-author WordPress blog. You’ll need to plan content, create an editorial workflow, monitor user activity, and make sure that your website runs at peak performance.
This sounds like a lot of work, but luckily some really helpful plugins can make it all go smoothly.
In this article, we will share some of the best plugins to efficiently manage multi-author WordPress blogs.
Without any further delay, let’s look into the best WordPress plugins to efficiently manage multi-author blogs.
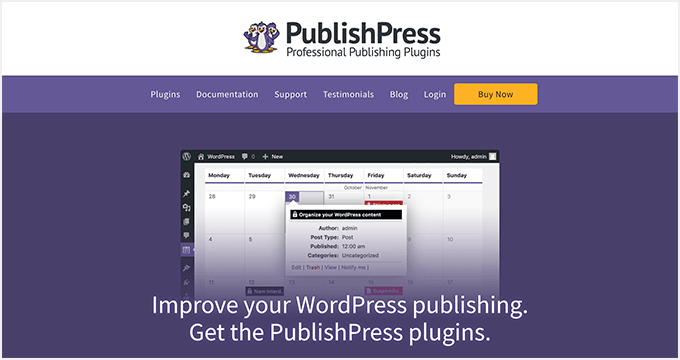
PublishPress is the best publishing tool kit for any type of content-rich website and a must-have plugin for multi-author WordPress blogs.
It allows you to create and manage an editorial calendar inside WordPress, follow up on drafts and article ideas progress, manage authors, set up custom notifications, and more.
The plugin comes with addons that give you a powerful set of tools. These addons include Capability Manager Enhanced (to customize user permissions), Revisions (to manage revisions in WordPress), and Press Permit, which lets you control viewing permissions on WordPress.
This incredibly powerful plugin helps you every step of the way, from content planning to publishing, while ensuring that nothing slips through the cracks. For more details, see our guide on how to improve your editorial workflow in WordPress.
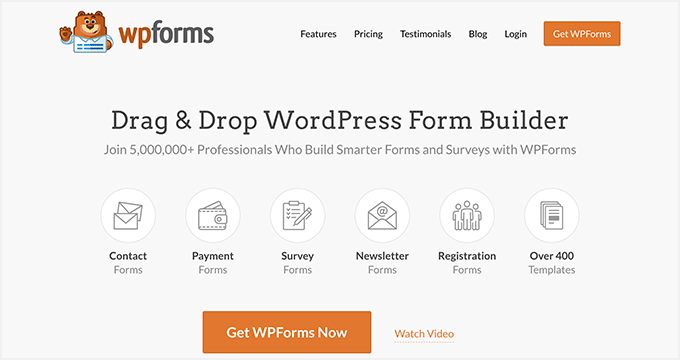
WPForms is the best WordPress contact form plugin on the market. It allows you to easily build forms using a simple drag and drop form builder.
Their Pro plan also comes with user registration, a custom login form, and post-submission addons. This allows you to accept posts on your website without allowing anyone accesses to your WordPress admin area,
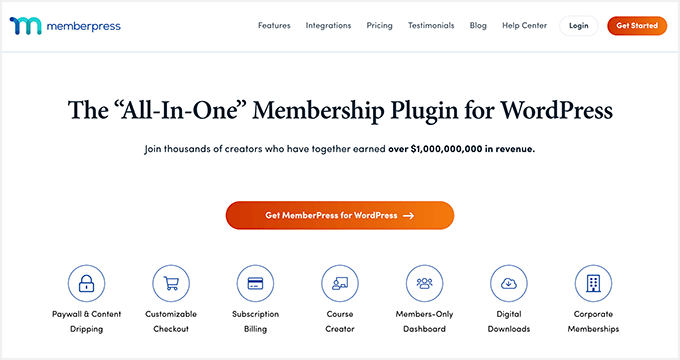
If you want to build a website where only paid members can submit posts, then you’ll love MemberPress. It is the best WordPress membership plugin and allows you to easily sell subscriptions and membership plans.
It allows you to easily restrict access to any content based on the user’s membership level. You can also use it with WPForms to create front-end post submission pages.
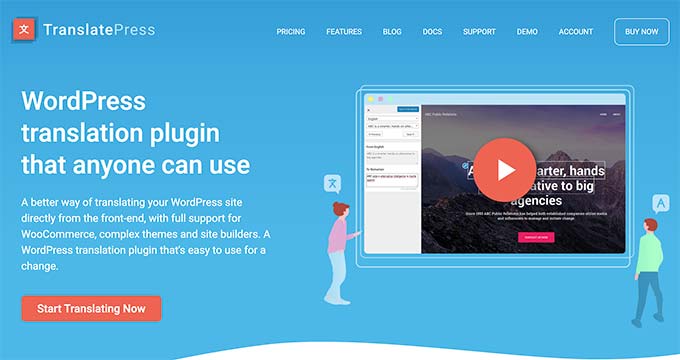
TranslatePress is a fantastic plugin that helps you easily manage translations if you run a multilingual WordPress website.
It allows you and other authors on your website to easily translate content with a live preview. You can also use it to translate WordPress themes and plugins as well.
As a multi-author WordPress site, more people have access to the admin area of your WordPress website. While making sure that your authors can write posts, you would also want to make sure that your admin area is safe and secure.
Sucuri performs regular security checkups and acts as a website firewall. This allows malicious attacks to be blocked even before they reach your website.
Pre-Publish Checklist helps you add a post editor checklist, allowing authors to check everything on the list before publishing or submitting it for review.
As the administrator of a multi-author WordPress website, you want to ensure that all authors follow the editorial process you have set up for your website.
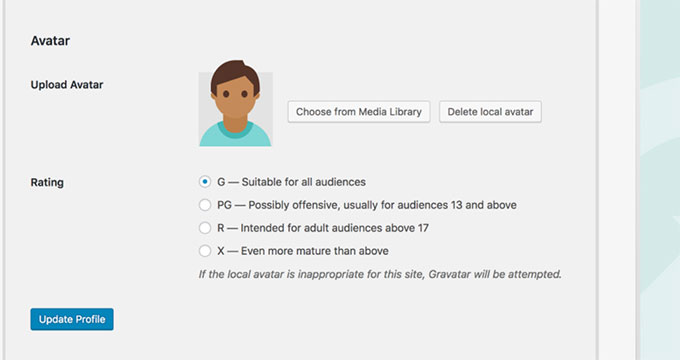
Simple Local Avatars plugin allows users on your WordPress site to upload their author photo by editing their profile.
By default, WordPress uses Gravatar to display user avatars in comments and user profiles. If some of your users may not have a gravatar setup for their email address or simply want to use another picture on their author profile, then Simple Local Avatars is the go-to-plugin.
It also shows where your users are coming from, what content is doing well, what users do when viewing your website, and more. This data provides insights to make an effective content strategy for your website.
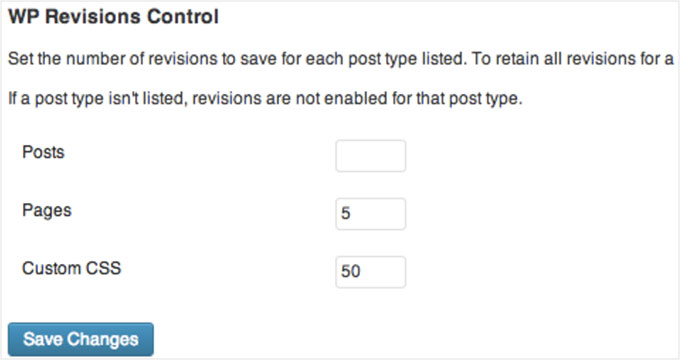
WP Revisions Control helps you set several revisions that WordPress should keep. After that number, WordPress will automatically delete the oldest revision. You can also delete all revisions for a specific post if you want.
WordPress automatically saves drafts as revisions. This helps you easily undo changes and revert to an earlier draft of your article. However, these revisions add to your WordPress database size if you run a large multi-author WordPress site.
To learn more, see our beginner’s guide to WordPress post revisions with step-by-step instructions on how to use revisions on your blog.
Author Avatars List plugin allows you to easily add a blog authors list anywhere on your site. It comes with a sidebar widget, and you can also use the shortcode to easily add it to a post or page.
An easy way to attract more authors to write for your website is by showcasing authors prominently on your website. One way to do this is by displaying a list of blog authors.
Adminimize gives admins full control over what users can or cannot see inside the WordPress admin area. Admins of a multi-author blog can use it to disable user access to unnecessary sections.
User Notes allow you to leave notes on user profiles. These notes can only be seen by admins, can be very helpful, and may serve as a reminder tool.
For example, if an author is not following the deadlines, you can add a note to remind yourself that this particular author is careless with the deadlines.
Simple Author Box helps you easily add an author bio box below articles. You can customize it to match your theme colors, configure what you want to show, and add social sharing buttons.
By default, modern WordPress themes can display an author’s profile pic along with their bio below the article. However, some are not very good at it, or you may want to get more control over the author bio box, and that’s where the Simple Author Box plugin comes in handy.
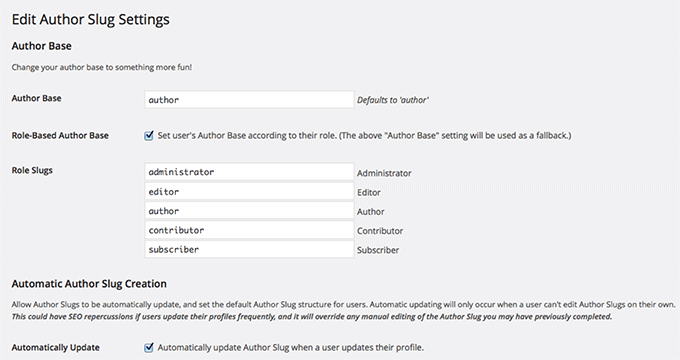
Edit Author Slug plugin allows you to do that. You can simply edit a user profile and change the author URL slug. It also allows you to change the author base.
WordPress has an SEO-friendly URL structure that allows you to choose URL slugs for your posts and pages. However, there is no option to do so for an author page, so you can use the Edit Author Slug plugin to make it happen.
Basically, users can log in without having access to the admin area of your website. Theme My Login can be used with other plugins to create a front-end editing experience for your authors.
Two Factor plugin allows you to easily add Two Factor authentication to your website. This adds an extra step to your WordPress login screen and makes it difficult for hackers to access your website.
To finish the login process, you can generate a one-time password using an app like LastPass Authenticator.
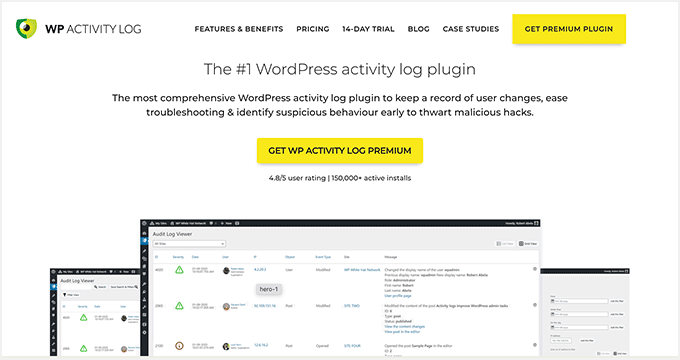
WP Activity Log helps you keep a log of everything on your website. This allows you to see when each user logged in, what they did, and all other website activities.
Constant Contact plugin allows you to quickly send an email to all authors and registered users on your website. This comes in handy if you want to communicate important announcements, notifications, and site-related updates.
Emergency Password Reset plugin allows you to reset all user passwords in WordPress with a single click. It also sends an email to all your users with a link to set new passwords.
If you are worried that your WordPress site’s security is compromised, you need to immediately change all WordPress passwords. Now, if you run a multi-author WordPress website, you must make sure all user passwords are changed.