Certified WordPress Developer and SEO Specialist with 10+ years of experience on Fiverr. I provide expert solutions for WordPress error fixing, debugging, speed optimization, and security hardening. Services include hacked site recovery, malware removal, on-page SEO optimization, and full customization to ensure your website runs fast, secure, and ranks higher on Google.
Do you want to add an HTML sitemap page in WordPress?
Unlike XML sitemaps that are submitted to search engines for better crawling, HTML sitemaps present an organized list of your pages and posts for your website visitors.
In this article, we’ll show you how to add an HTML sitemap page in WordPress.
What’s the Difference Between XML and HTML Sitemaps?
An XML sitemap is a file that lists your website content in an XML format for search engines like Google and others.
On the other hand, an HTML sitemap is for your actual website visitors. It is a simple page that lists all your posts and pages in an organized way.
Now that you know the difference, let’s take a look at how to add an HTML sitemap page to WordPress using two different WordPress plugins. You can use the quick links below to jump straight to the method you want to use.
Method 1. Add HTML Sitemap Page in WordPress With All in One SEO
We recommend using the All in One SEO plugin to add an HTML sitemap page in WordPress. It’s the best WordPress SEO plugin in the market used by over 3 million websites and lets you create an HTML sitemap with a couple of clicks.
Note: There is a free version of All in One SEO Lite available which includes the HTML sitemap feature below, but we will be using the premium version in our screenshots because it includes powerful features like smart sitemaps, redirection manager, SEO schema, and more.
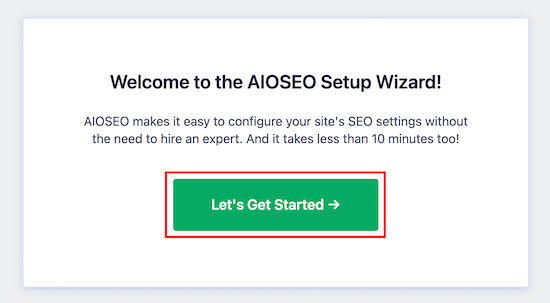
Upon activation, the AIOSEO setup wizard will open, which will guide you through setting up the plugin and getting your SEO settings right.
Simply click the ‘Let’s Get Started’ button and follow the steps.
After that, you’ll be taken to the WordPress admin dashboard, where you’ll have a new menu option called ‘All in One SEO’.
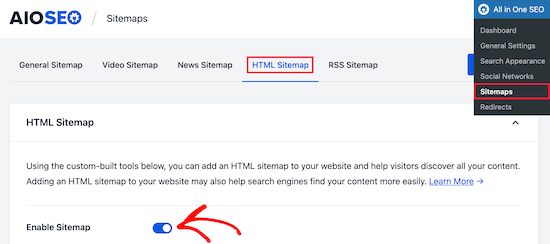
Then, you need to go to All in One SEO » Sitemaps, click on the ‘HTML Sitemap’ menu option, and make sure the ‘Enable Sitemap’ toggle is turned on.
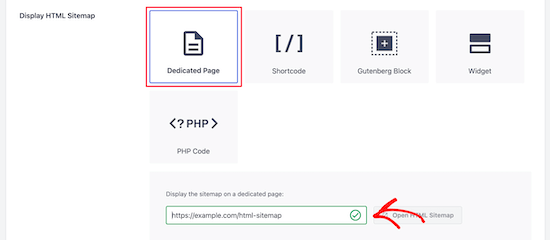
Next, you can choose how you want to display your HTML sitemap.
For this tutorial, we’ll select the ‘Dedicated Page’ option, but you can also add it as a shortcode, block, widget, and more.
Then, enter the page URL where you want the HTML sitemap to display. The plugin will automatically create a new page for you.
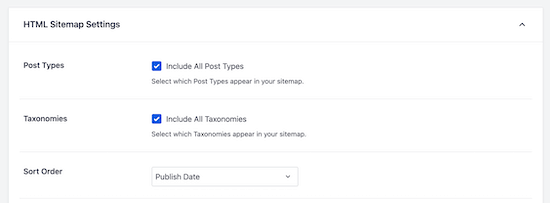
Once you’ve done that, scroll down to the ‘HTML Sitemap Settings’ section.
Here you can customize how your HTML sitemap will display. You have control over what posts and pages will display, taxonomies such as categories and tags, sort order, and more.
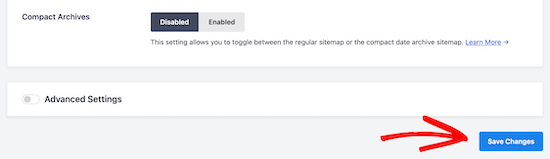
You can also turn on ‘Compact Archives’ to display your HTML sitemap in a compact date archive format.
This is similar to how we display our compact archives on our 404 pages here at WPBeginner.
After you’re done customizing your HTML sitemap settings, make sure to click the ‘Save Changes’ button.
Now your visitors can view your HTML sitemap and more easily navigate around your website.
If you chose the ‘Dedicated Page’ option above, then you can visit the page by clicking the ‘Open HTML Sitemap’ button.
Method 2. Add HTML Sitemap Page in WordPress With Simple Sitemap
Simple Sitemap is a free plugin that lets you easily add an HTML sitemap to your WordPress website.
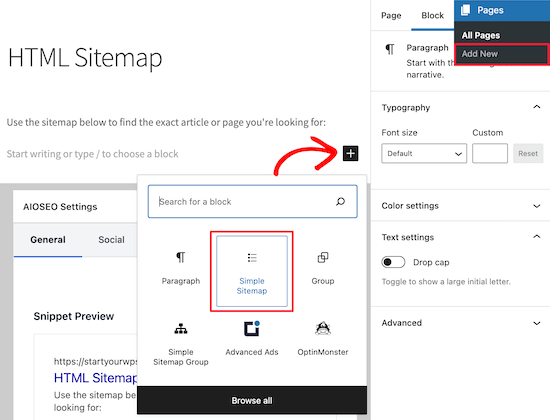
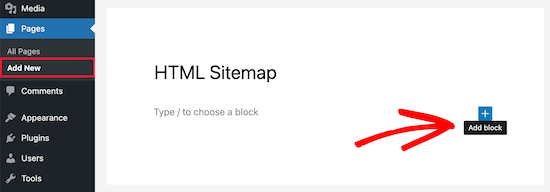
Once the plugin is activated, you can open an existing page, or create a new HTML sitemap page by navigating to Pages » Add New.
Adding an HTML Sitemap With Simple Sitemap Using Blocks
This plugin has newly added Gutenberg blocks that you can use to simply add an HTML sitemap page.
All you need to do is click the ‘Plus’ icon, then select the ‘Simple Sitemap’ option.
Another block included with this plugin is the ‘Simple Sitemap Group’ that creates a branching visual sitemap. But, we’re going to use the ‘Simple Sitemap’ block for this tutorial.
Once you add the block, it will automatically create your HTML sitemap.
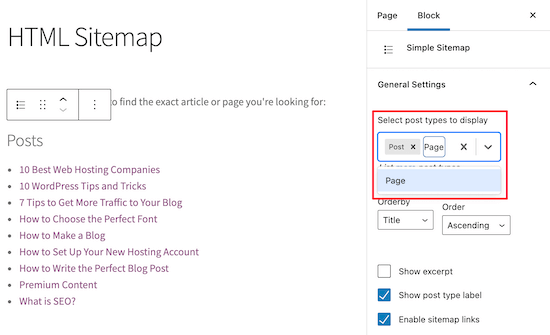
On the right-hand menu, you have customization options where you can choose to display ‘Posts’ or ‘Pages’, or both together.
In the box under ‘Select post types to display’, simply enter ‘Post’ or ‘Page’ to choose what you want to display.
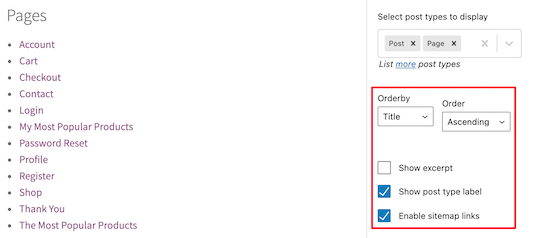
Next, you can change how the list displays by changing the ‘Orderby’ or ‘Order’ drop-downs.
You can also display the excerpt for the pages or posts listed, and enable or disable links. However, we’re going to keep the default plugin settings to keep our HTML sitemap simple and easy to browse.
Once you’ve finished customizing your HTML sitemap page, click ‘Publish’ or ‘Save’ if you’re updating an older page.
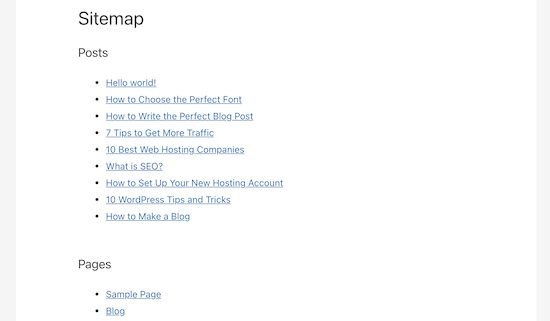
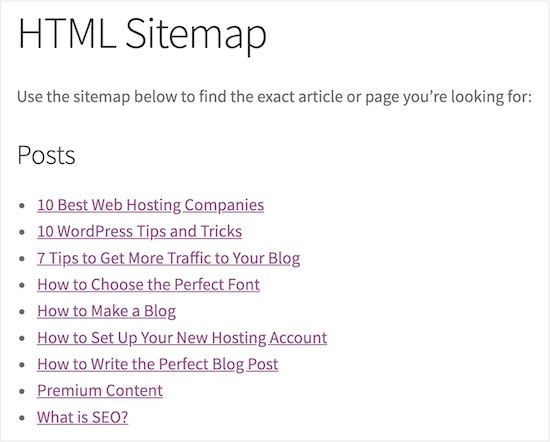
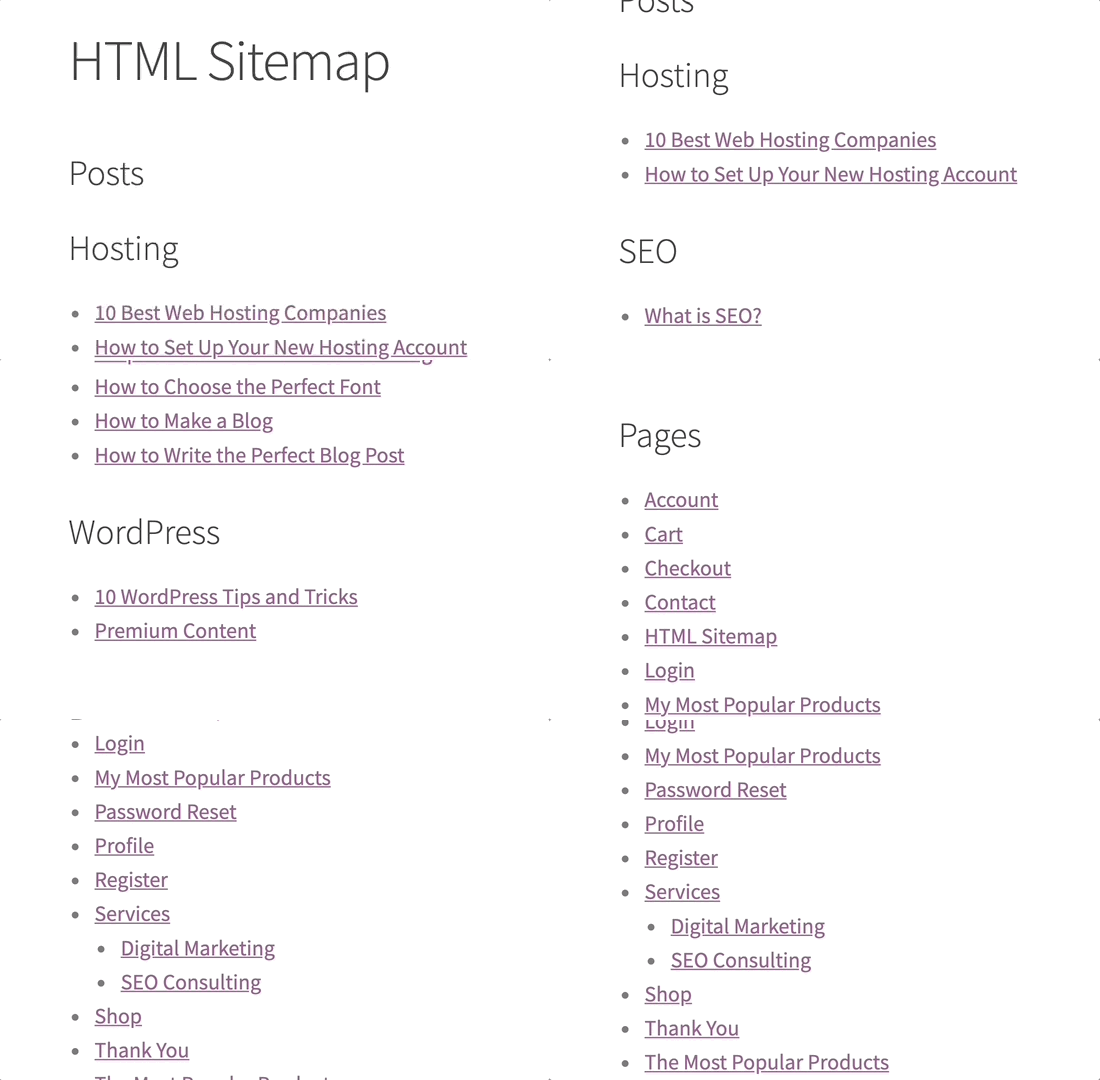
When your visitors go to your HTML sitemap, they’ll see a navigation page that looks similar to the one below.
Adding an HTML Sitemap With Simple Sitemap Using Shortcodes
Another way to add an HTML sitemap to WordPress is by using a shortcode. This gives you more control over the placement of your HTML sitemap and works for those who are using the classic editor.
Simply create a new page by navigating to Pages » Add New, then give your new page a name.
After that, click the ‘Plus’ icon to add a new block to your page.
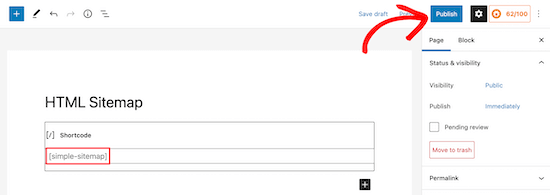
Then, type ‘shortcode’ into the search box and select the ‘Shortcode’ block.
After that, simply copy and paste one of the following shortcodes into the text editor. The first shortcode will list your posts by category, and the second shortcode will list your pages.
[simple-sitemap-group]

[simple-sitemap]
Once you’ve done that, click ‘Publish’ or ‘Update’ to save your changes.
In this case, you would want your HTML sitemap to show pages in the proper hierarchical order.
Here is how you can add an HTML Sitemap with only pages.
Simply add this shortcode to the page where you want to display your HTML sitemap. Follow the same steps above to add the shortcode to a new WordPress page.
[simple-sitemap]
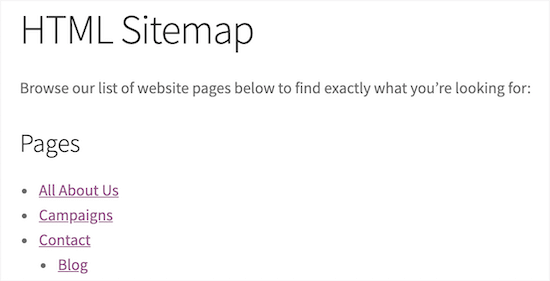
This is how it will display your HTML sitemap with all your WordPress pages listed in a hierarchical list.
Do you want to create a restaurant website with WordPress?
A restaurant website can help attract new customers and grow your business. It can also provide a better experience for your existing customers and keep them coming back to your restaurant, cafe, takeaway, or similar business.
In this article, we will show you how to create a restaurant website with WordPress.
Why Create a Restaurant Website?
A website is one of the best ways to market your restaurant to new customers and provide a better experience for your existing clients.
By creating an online presence for your restaurant, you can introduce your business to people who are looking for venues and food just like yours.
After a potential customer discovers your business, a professionally-designed and helpful restaurant website will tell them everything they need to know about your business. They can then decide whether your restaurant is right for them.
Even if you have lots of loyal customers and a positive reputation in the local area, a restaurant website can help you improve the customer experience.
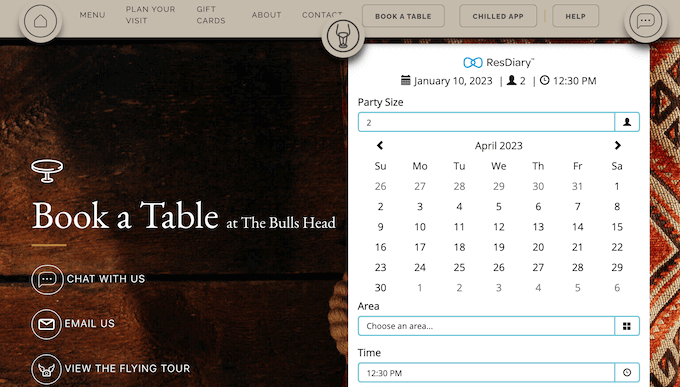
For example, it can allow customers to book a table online, send you questions using a convenient contact form, check out the latest menu, and much more.
In this way, a restaurant website can keep your customers happy, so they carry on visiting you for months, or even years to come.
That said, let’s see how you can easily create a restaurant website with WordPress.
Which Is the Best Website Builder for Your Restaurant?
There are many website builders that can help you create a restaurant website but we recommend using WordPress.
According to our blogging research statistics, WordPress is the most popular website platform in the world. It powers nearly 43% of all websites on the internet including many top restaurant websites.
WordPress is also open-source and free. For more on this topic, see our article on why WordPress is free.
However, it’s important to realize that there are two types of WordPress software, so you don’t choose the wrong one.
First, there is WordPress.com, which is a blog hosting platform. Then, there is WordPress.org which is also known as self-hosted WordPress.
For a restaurant website, we recommend using WordPress.org because it gives you complete ownership of your site and allows you to install third-party plugins, including plenty that are designed specifically for restaurant owners.
To learn more about why we recommend WordPress to all our readers, please see our complete WordPress review with pros and cons.
A domain name is your website’s address on the internet. This is what customers will type into their browsers to reach your website, such as justeat.com or tacobell.com.
Web hosting is where your website lives online. To help you out, we’ve hand-picked some of the best WordPress hosting that you can buy for a restaurant website.
Although the WordPress software is free, hosting and domain names are where the costs can really start to add up.
A domain name typically costs $14.99/year and hosting costs start from $7.99/month. This is a lot for restaurants that already have bills and expenses to pay.
Thankfully, Bluehost has offers a free domain name, and our readers can get 60% off on web hosting. Bluehost is one of the largest hosting companies in the world, and an official WordPress-recommended hosting partner.
They’re also offering our readers a free SSL certificate. If you want to accept payments online, then an SSL certificate will help keep the customer’s credit and debit card information safe.
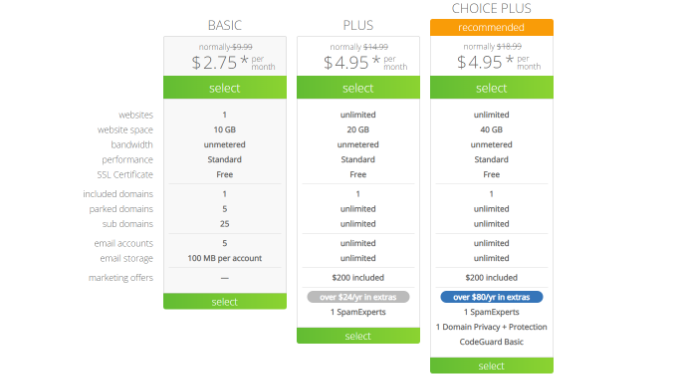
You can click the button below to get started for as little as $2.75 per month.
Once there, you will need to go to the Bluehost website in a new tab and click on the green ‘Get Started Now’ button.
This will bring you to a pricing page where you can choose a hosting plan for your website.
We recommend choosing a Basic or Plus plan, as they’re the most popular web hosting plans among our readers.
After selecting a plan, click on ‘Continue.’
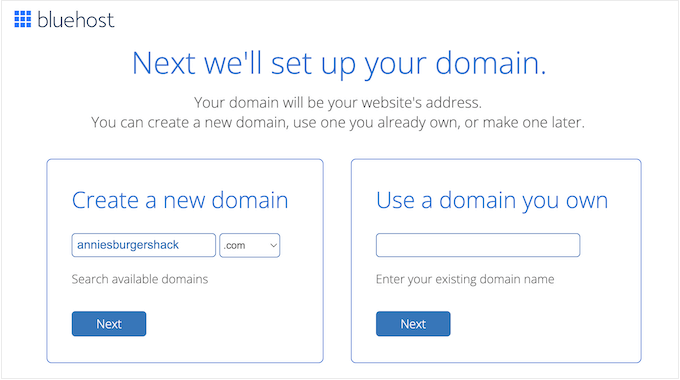
On the next screen, you’ll need to choose a domain name.
Ideally, the domain name will be easy to pronounce and spell, easy to remember, and related to your business. The name of your restaurant is a great place to start, but sometimes that domain may already be taken by another business.
In that case, you can try extending the domain name by adding your restaurant’s location, your own name, or the type of food you serve.
After choosing a name, click on the ‘Next’ button to continue.
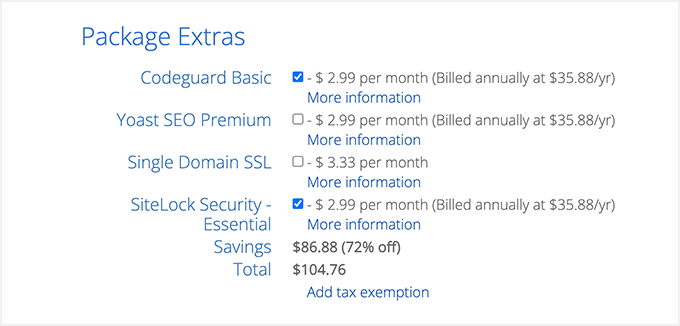
Now you’ll need to provide your account information such as your name and email address. After that, you’ll also see optional extras that you can purchase.
We generally don’t recommend purchasing these extras straight away, as you can always add them later on if you need them.
After that, simply type in your payment information to complete the purchase.
Once you’ve done that, you’ll get an email with instructions on how to login to your web hosting control panel. This is your hosting account dashboard where you can manage your restaurant website, including setting up email notifications and asking for WordPress support.
It’s also where you’ll install the WordPress software.
Step 2. Create a New WordPress Website
When you signup with Bluehost using our link, Bluehost installs WordPress on your domain name automatically.
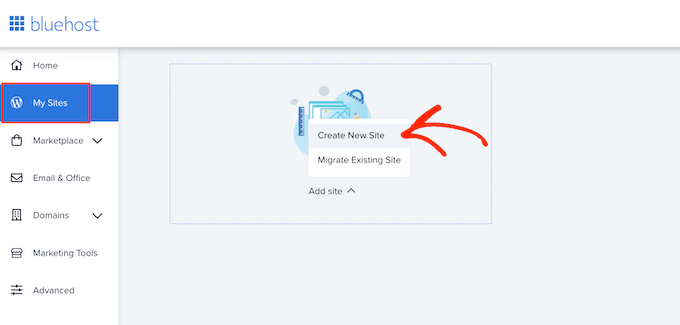
If you want to create a different WordPress website, then you can simply click on the ‘My Sites’ tab in the Bluehost dashboard.
Next, just click on the ‘Add Site’ button and select ‘Create New Site.’
The Bluehost wizard will now guide you through the setup process.
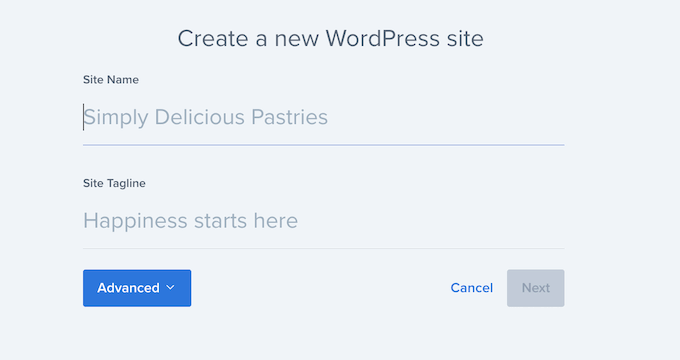
First, you’ll need to type in a site title and optional tagline.
Click on the ‘Next’ button to continue.
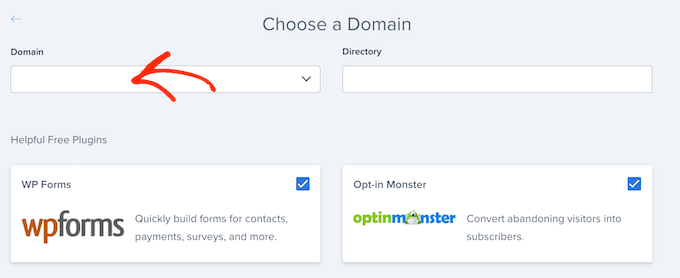
After that, Bluehost will ask you to select a domain name and path for your restaurant website. If you’ve already purchased a domain name, then you can simply select it from the dropdown menu.
If you don’t have a domain name then you can buy one by visiting the ‘Domains’ page inside the Bluehost dashboard.
After choosing a domain name, you can leave the directory path blank and let Bluehost fill it in for you. The installer will also show a few must-have WordPress plugins that you may want to install on your restaurant website including OptinMonster.
After that, click on the ‘Next’ button and the installer will set up your restaurant site.
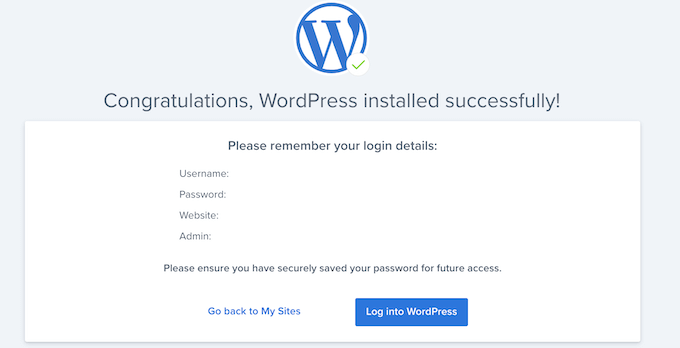
Once it’s finished, you’ll see a ‘WordPress installed successfully’ message with information about your new website. You can now go ahead and click on the ‘Log into WordPress’ button.
This will take you to your site’s admin area.
You can also log in to the WordPress dashboard by simply going to yoursite.com/wp-admin/ directly from your browser.
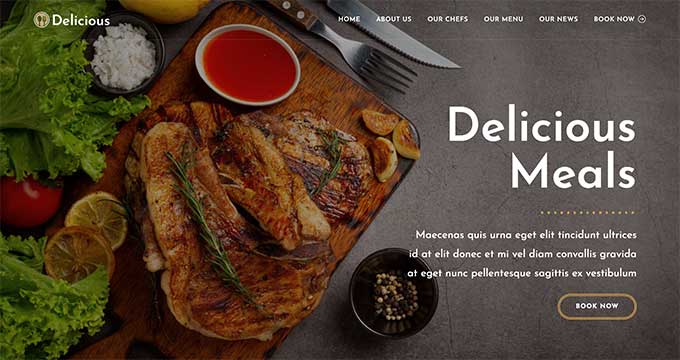
Your typical restaurant website needs special features, like the ability to show a menu, photos, location information, business hours, and more.
With that in mind, it makes sense to look for a theme that’s designed for the food or hospitality industry. To help you out, we’ve collected the best WordPress restaurant themes.
You can also use a website and landing page builder plugin such as SeedProd.
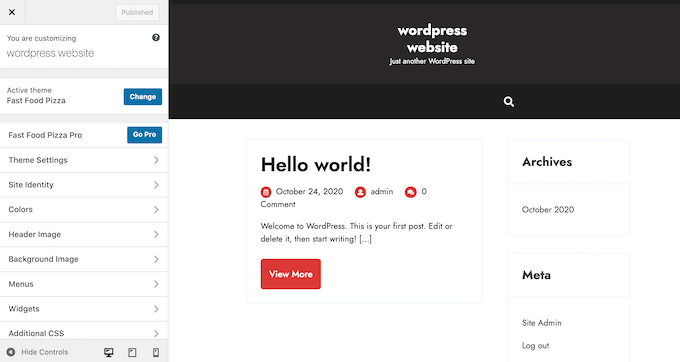
After installing your theme, you may want to customize it by going to Appearance » Customize in the WordPress dashboard.
This will launch the theme customizer where you can fine-tune the theme settings and see your changes in the live preview.
If you’re using one of the newer full site editing themes, then you’ll see the option for Appearance »Editor, which uses blocks similar to the content editor to customize your site.
Pro Tip: No matter what theme you’re using, neither the default WordPress customizer nor the full site editing offers a user-friendly drag and drop customization experience. For that reason, we recommend using a page builder like SeedProd to customize your theme.
Just remember that you can always return to this screen and continue customizing your theme. You can even completely change your WordPress theme at any point.
Step 4. Create a Custom Home Page
WordPress has two two default content types called posts and pages.
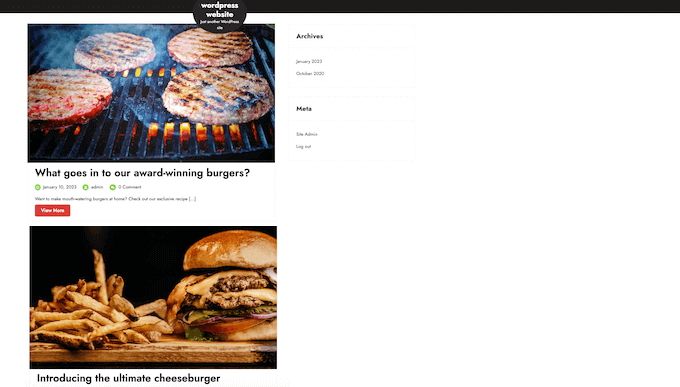
You’ll typically use posts to create articles and blogs. By default, the home page shows these posts in reverse chronological order, so the newest content appears at the top of the list.
You might use a blog to build a stronger relationship with their customers, improve your WordPress SEO, and get more traffic to your restaurant website. For example, you could write about recipes, share cooking tips, or blog about the latest restaurant industry news.
However, even if you plan to publish blog posts, you typically won’t show these on the home page. Instead, we recommend creating a custom home page that introduces your business to new visitors.
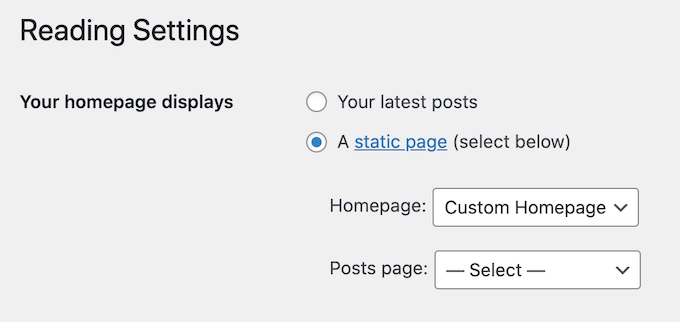
Once you’re happy with the page’s design, it’s time to set it as your home page. To do this, go to Settings » Reading in the WordPress dashboard.
Here, scroll to ‘Your homepage settings’ and select ‘A static page.’
Next, open the ‘Homepage’ dropdown and choose the page that you want to use.
Then, simply scroll to the bottom of the screen and click on ‘Save Changes.’ Now, if you visit your website you’ll see the new home page in action.
If you are going to write blogs, then make sure you create a separate blog page to display your posts. If you don’t, then customers will struggle to find your latest WordPress blogs.
Step 5. Create an Online Restaurant Menu
Even long-term, loyal customers may want to look at your menu from time to time. By publishing your menu online, customers can look at it any time of day or night.
Publishing a menu can also help convince new customers to visit your restaurant.
It is possible to upload PDF files to your WordPress website. However, downloading a PDF menu can be difficult depending on the customer’s data plan and internet connection, and they’re non-responsive so they can be hard to read on some devices.
Plus, if you add new dishes or change your pricing, then you’ll also need to upload a completely new PDF.
For that reason, we recommend using SeedProd to add an online menu to your WordPress website. SeedProd also allows you to create a mobile responsive menu that looks great on every device.
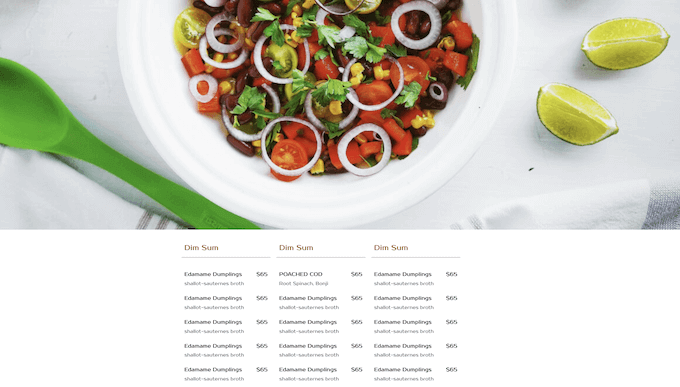
You can also easily update the menu as you add new dishes, change the prices, remove dishes, and more.
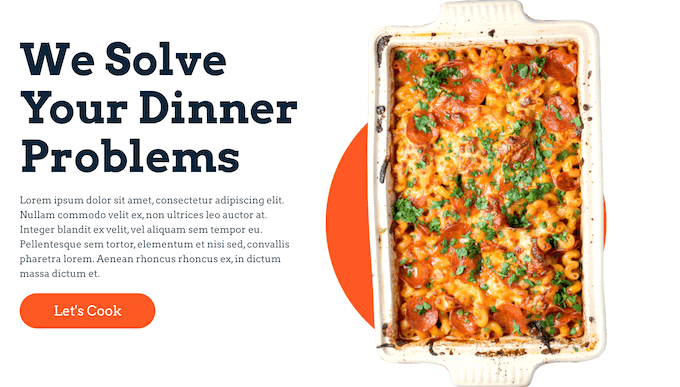
SeedProd even comes with a ‘Menu Sales Page’ template that’s perfect for creating a menu.
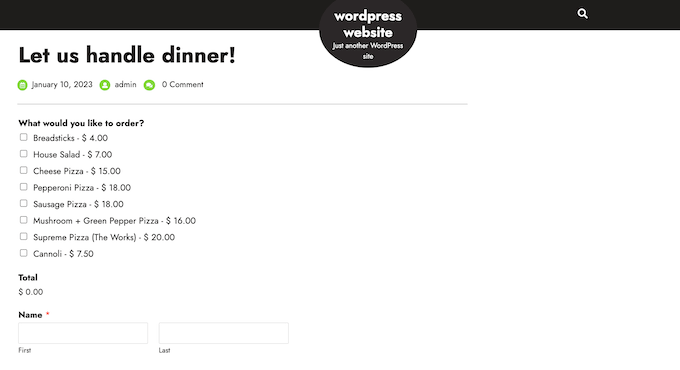
Many restaurants allow customers to order food online. For example, you might give customers the option to pre-order their meal or place an order for delivery.
It may sound technical, but you can easily add online food ordering to your website using the WPForms plugin.
WPForms is the best WordPress form builder that allows you to create online order forms for all kinds of products and services.
It even comes with a ready-made ‘Takeout Order Form’ that you can customize to suit your restaurant website.
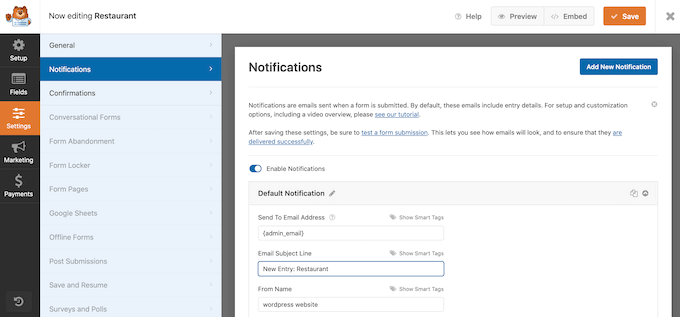
Every time someone completes the form, WPForms will notify you automatically so you can start working on that order straight away.
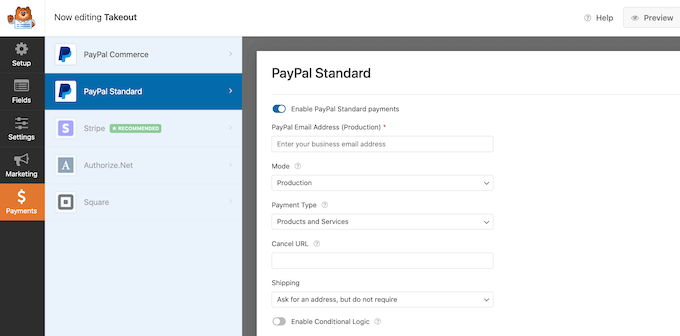
If you don’t want to accept cash on delivery, then WPForms supports all of the best payment gateways including PayPal and Stripe. This allows you to accept payments securely online, which is quick and convenient for your customers.
Today, most people expect to be able to book appointments through an automated system.
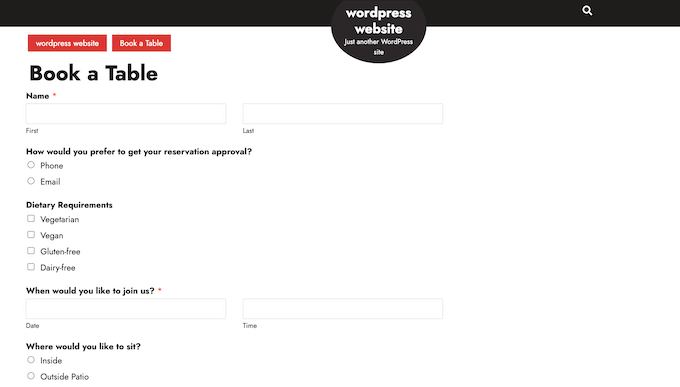
By adding a booking form to your restaurant website, you can accept reservations at any time of the day or night. You’ll never lose another customer just because you weren’t around to answer the phone.
Booking forms can also automate a lot of the booking process. This includes collecting payments and emailing your customers to remind them about their upcoming booking.
You can easily add a restaurant booking form to your website using WPForms. This plugin has a ready-made dinner reservation form template that you can customize for your restaurant.
WPForms also integrates with all of the top email marketing providers. This makes it easy to send reservation confirmation emails to your customers.
As their booking approaches, you can even send the customer a reminder email, ask them to share any dietary requirements, send a pre-order form, and more.
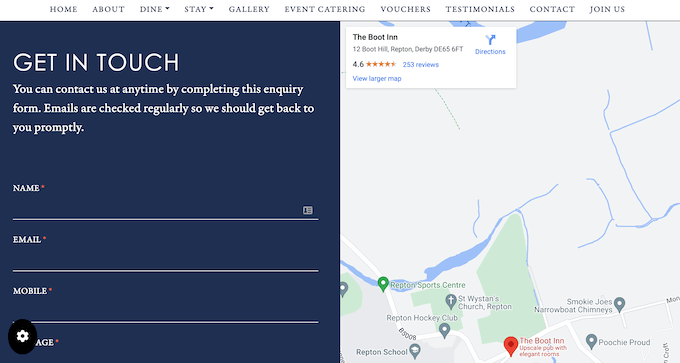
While visitors could ring your phone number or send a message to your business email address, we always recommend adding a contact form to your website.
Most of the best contact form plugins come with built-in spam protection, so you won’t get any contact form spam. A form will also collect consistent information from visitors, so you’ll have all the data you need to write a helpful reply.
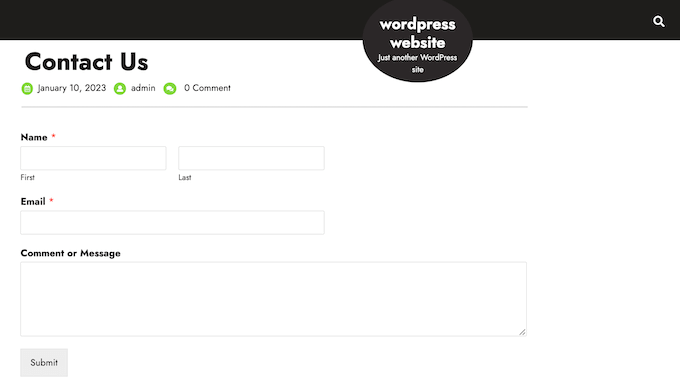
The easiest way to add a contact form to your WordPress website is by using the free WPForms plugin.
This free plugin comes with a built-in Simple Contact Form template that you can quickly customize using the drag and drop editor.
Then, simply add the form to any page, post, or widget-ready area using the ready-made WPForms block.
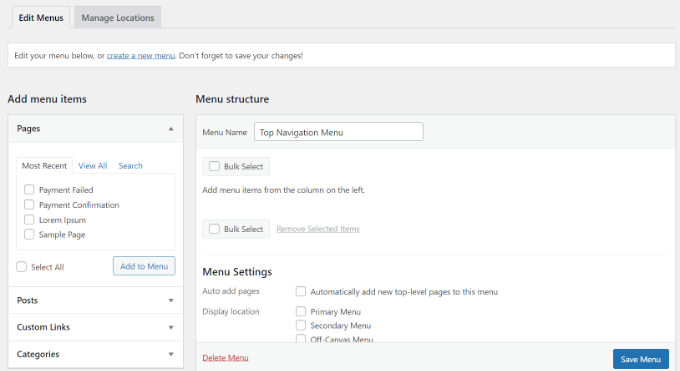
Once you’ve added some content to your restaurant website, you’ll want to help visitors find their way around those pages and posts by adding a navigation menu.
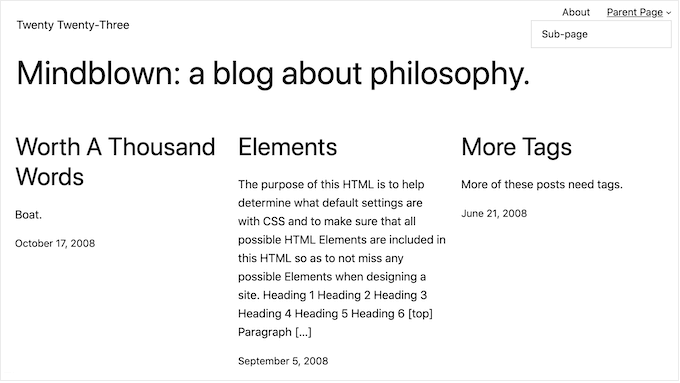
No matter what theme you’re using, WordPress makes it really easy to add menus and sub-menus to your restaurant website.
Step 10. Add Social Proof to Your Restaurant Website
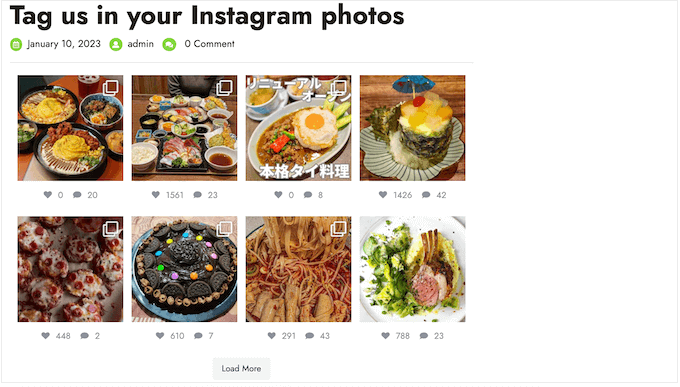
Social proof is one of the best ways to earn customer trust, and convince new people to visit your restaurant. After all, we’re more likely to try things that we see other people buying, using, or recommending.
Using this plugin, you can create a hashtag feed and show photos that customers have tagged your account in. This includes photos of your food, venue, and shots of customers having fun at your restaurant.
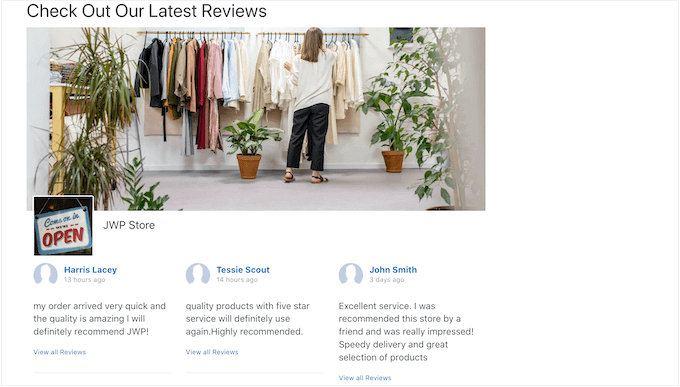
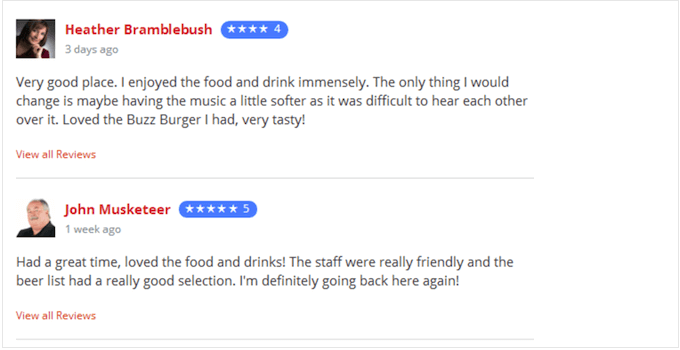
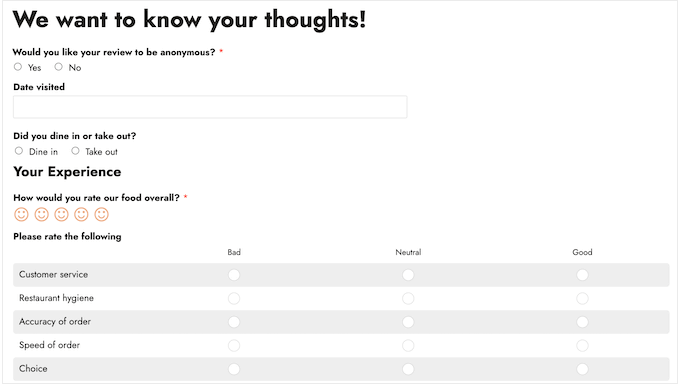
Customer reviews and testimonials can provide visitors with more information, and may even solve any question or worries customers have about visiting your restaurant.
If you want to show reviews from other platforms like Yelp or Google My Business, then there’s also plenty of customer review plugins for WordPress that you can use.
These plugins will collect reviews automatically and then organize them into a nice layout on your restaurant website.
We hope this tutorial helped you learn how to create a restaurant website with WordPress. You may also want to see our ultimate WordPress security guide and our expert pick of the must have WordPress plugins that you should install on all business sites.
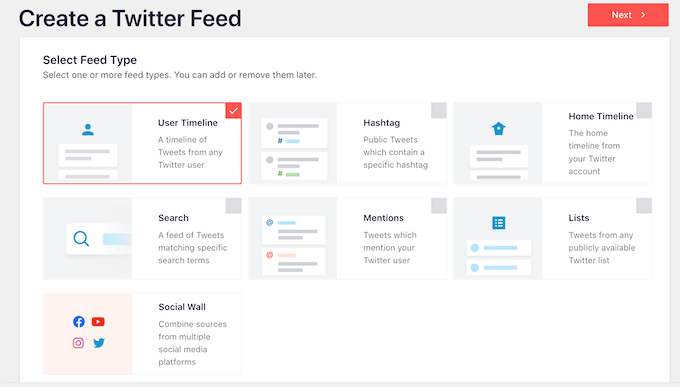
If you liked this article, then please subscribe to our YouTube Channel for WordPress video tutorials. You can also find us on Twitter and Facebook.
Are you looking for a way to keep spammers and scammers from stealing your WordPress blog posts using content scrapers?
It is very frustrating as a website owner to see that someone is stealing your content without permission, monetizing it, outranking you in Google, and stealing your audience.
In this article, we’ll cover what blog content scraping is, how you can reduce and prevent content scraping, and even how to take advantage of content scrapers for your own benefit.
What Is Blog Content Scraping in WordPress?
Blog content scraping is when content is taken from numerous sources and republished on another site. Usually, this is done automatically via your blog’s RSS feed.
Unfortunately, it is very easy and very common to have your WordPress blog content stolen in this way. If it’s happened to you, then you understand how stressful and frustrating it can be.
Sometimes your content will be simply copied and pasted directly to another website, including your formatting, images, videos, and more.
Other times, your content will be reposted with attribution and a link back to your website, but without your permission. Although this can help your SEO, you may want to keep your original content hosted on your site only.
Why Do Content Scrapers Steal Content?
Some of our users have asked us why scrapers are stealing content. Usually, the main motivation for content theft is to profit from your hard work:
Affiliate commission: Dishonest affiliate marketers may use your content to bring traffic to their site through search engines in order to promote their niche products.
Lead Generation: Lawyers and realtors may pay someone to add content and gain authority in their community, and not realize it is being scraped from other sources.
Advertising Revenue: Blog owners may scrape content to create a hub of knowledge in a certain niche ‘for the good of the community’ and then plaster the site with ads.
Is It Possible to Completely Prevent Content Scraping?
In this article, we’ll show you some steps you can take to reduce and prevent content scraping. But unfortunately, there is no way to completely stop a determined thief.
That’s why we finish this article with a section on how you can take advantage of content scrapers. While you can’t always stop a thief, you may be able to gain some traffic and revenue through the content they have stolen from you.
What Should You Do When You Discover Someone Has Scraped Your Content?
Since it’s not possible to completely stop scrapers, you may one day discover that someone is using content they stole from your blog. You may wonder what to do when that happens.
Here are a few approaches that people take when dealing with content scrapers:
Do Nothing: You can spend a lot of time fighting scrapers, so some popular bloggers decide to do nothing. Google already sees well-known sites as authorities, but that’s not true of smaller sites. So this approach is not always the best in our opinion.
Take Advantage: While we actively work at having content scraped from WPBeginner taken down, we also use a few techniques to get traffic and make money from scrapers. You can learn how in the ‘Take Advantage of Content Scrapers’ section below.
With that being said, let’s take a look at how to prevent blog scraping in WordPress. Since this is a comprehensive guide, we have included a table of contents for easier navigation.
1. Copyright or Trademark Your Blog’s Name and Logo
Trademark and copyright laws protect your intellectual property rights, brand, and business against many legal challenges. This includes illegal use of your copyrighted material or your brand’s name and logo.
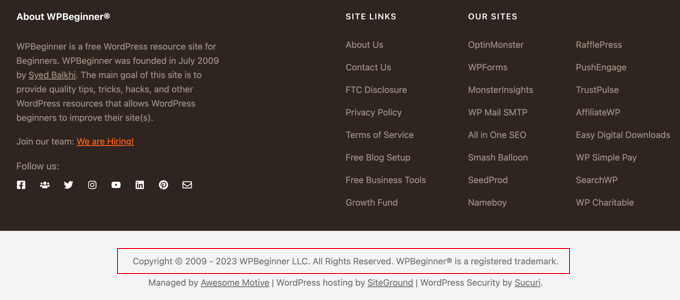
You should clearly display a copyright notice on your website. While your content is automatically covered by copyright laws, displaying a notice will let you know that your content is copyrighted and that they cannot use your protected properties for business.
This may discourage some users from stealing it. It will also help in the case that you do need to send a cease and desist letter or file a DCMA complaint to take down your stolen content.
You can also apply for copyright registration online. This process can be complicated, but luckily there are low-cost legal services that can help small businesses and individuals.
Since blog content scraping is usually done automatically via your blog’s RSS feed, let’s look at a few helpful changes you can make to your feed.
Don’t Include the Full Post Content in Your WordPress RSS Feed
You can include just a summary of each post in your RSS feed instead of the full content. This includes an excerpt as well as post metadata such as the date, author, and category.
There is certainly debate in the blogging community about whether to have full RSS feeds or summary feeds. We won’t get into that now except to say that one of the pros of having a summary only is that it helps prevent content scraping.
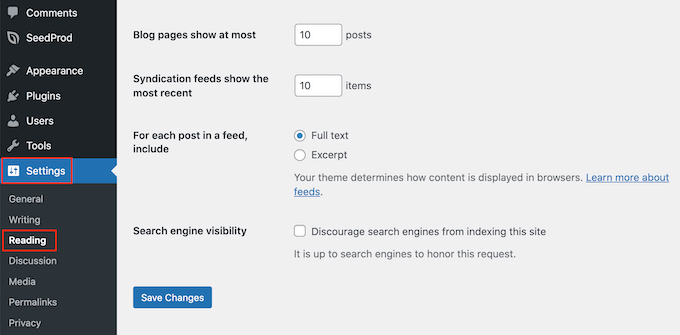
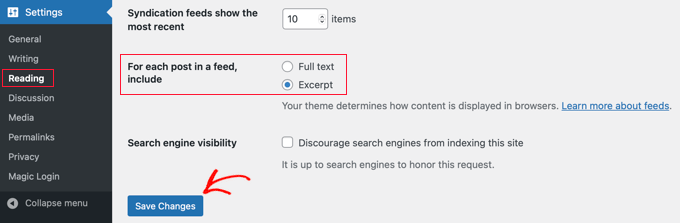
You can change the settings by going to Settings » Reading in your WordPress admin panel. You need to select the ‘Excerpt’ option, and then click the ‘Save Changes’ button.
Now the RSS feed will only show an excerpt of your article. If someone is stealing your content through your RSS feed, then they will only get the summary, not the full post.
optimize your WordPress RSS feed to protect your content, get more backlinks, increase your web traffic, and more. One of the best ways is to
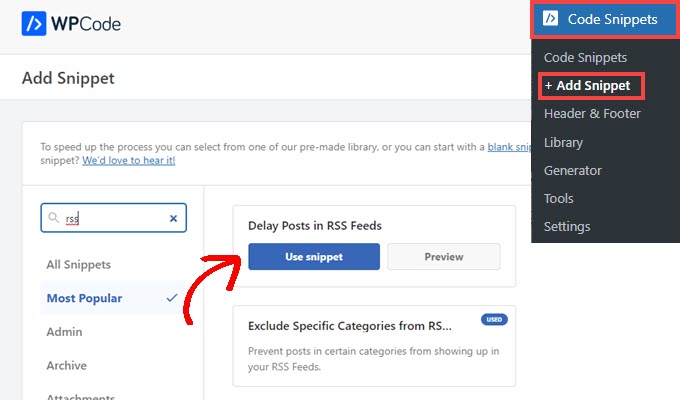
delay posts from appearing in the RSS feed.
The benefit is that when you delay posts from appearing in your RSS feed, you give the search engines time to crawl and index your content before it appears elsewhere, such as on scraper’s websites. The search engines will then see your site as the authority.
The safest and easiest way to do this is using WPCode because it has a recipe that automatically adds the correct custom code to WordPress.
In the early days of blogging, trackbacks and pingbacks were introduced as a way for blogs to notify each other about links. When someone links to a post on your blog, their website will automatically send a ping to yours.
This pingback will then appear in your blog’s comment moderation queue with a link to their website. If you approve it, then they get a backlink and mention from your site.
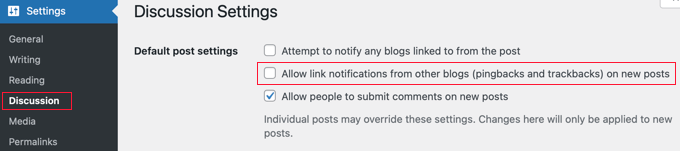
This gives the spammer an incentive to scrape your site and send trackbacks. Luckily, you can disable trackbacks and pingbacks to give scrapers one less reason to steal your content.
4. Block the Scraper’s Access to Your WordPress Website
One way to stop scrapers from stealing your content is to take away their access to your website. You can do this manually by blocking their IP address, but most users will find it easier to use a security plugin such as a web application firewall.
Block the Scraper Using a Security Plugin (Recommended)
Blocking scrapers manually is tricky and a lot of work. Especially since many hacking attempts and attacks are made using a wide range of random IP addresses from all over the world. It’s almost impossible to keep up with all those random IP addresses.
That’s why you need a Web Application Firewall (WAF) such as WordFence or Securi. These act as a shield between your website and all incoming traffic by monitoring your website traffic and blocking common security threats before they reach your WordPress site.
For the WPBeginner website, we use Sucuri. It is a website security service that protects your website against such attacks using a website application firewall.
Basically, all your website traffic goes through the security service’s servers where it is examined for suspicious activity. They automatically block suspicious IP addresses from reaching your website altogether. See how Sucuri helped us block 450,000 WordPress attacks in 3 months.
Manually Block or Redirect the Scraper’s IP Address
Advanced users may also wish to manually block a scraper’s IP address. This is more work, but you can specifically target the scraper’s address once you learn it. Web developer Jeff Star suggests this approach when he wrote about how he handles content scrapers.
Note: Adding code to website files can be dangerous. Even a small mistake can cause major errors on your site. That’s why we only recommend this method for advanced users.
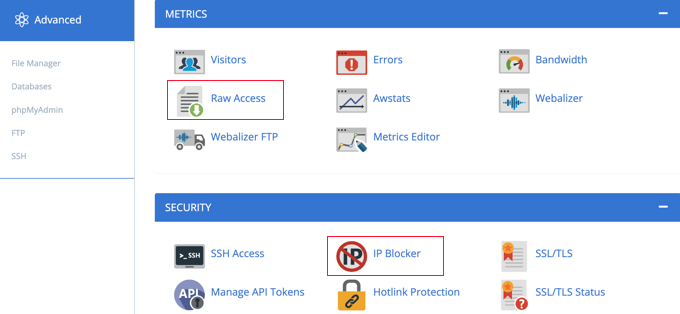
You can find the scraper’s IP address by visiting ‘Raw Access Logs’ in the cPanel dashboard of your WordPress hosting account. You need to look for IP addresses with an unusually high number of requests and keep a record of them, say by copying them into a separate text file.
Tip: You need to make sure that you don’t end up blocking yourself, legit users, or search engines from accessing your website. Copy a suspicious-looking IP address and use online IP lookup tools to find out more about it.
Once you are confident that the IP address belongs to a scraper, you can block it using the cPanel ‘IP Blocker’ tool, or by adding code like this in your root .htaccess file:
Deny from 123.456.789
Make sure you replace the IP address in the code with the one you want to block. You can block multiple IP addresses by entering them on the same line separated by spaces.
Instead of simply blocking the scrapers, Jeff suggests you could send them dummy RSS feeds instead. You could create feeds full of Lorem Ipsum and annoying images, or even send them right back to their own website, causing an infinite loop and crashing their server.
To redirect them to a dummy feed, you will need to add code like this to your .htaccess file:
It’s not just your written content that you need to protect. You should also prevent image theft in WordPress.
Like text, there is no way to completely stop people from stealing your images, but there are plenty of ways to discourage image theft on a WordPress website.
For example, you can disable hotlinking of your WordPress images. This will mean that if someone scrapes your content, their images will not load on their site.
While most scrapers use automatic tools, some content thieves may try to manually copy all or part of your content.
One way to make this more difficult is to prevent them from copying and pasting your text. You can do this by making it harder for them to select the text on your website.
However, this will not completely protect your content. Remember, tech-savvy users can still view the source code or use the Inspect tool to copy anything they want. Also, this method will not work with all web browsers.
Also, keep in mind that not everyone copying your text will be a content thief. For instance, some people may want to copy the title to share your post on social media.
That’s why we recommend you only use this method if you feel it’s truly needed for your site.
7. Take Advantage of Content Scrapers
As your blog gets larger, it is almost impossible to stop or keep track of all content scrapers. We still send out DMCA complaints. However, we know that there are tons of other sites that are stealing our content that we just cannot keep up with.
Instead, our approach is to try to take advantage of content scapers. It’s not so bad when you see that you’re making money from your stolen content, or receiving a lot of traffic from a scraper’s website.
Make Internal Linking a Habit to Gain Traffic and Backlinks from Scrapers
But there is a second benefit when it comes to scraping. Internal links will get you valuable backlinks from the people who are stealing your content. Search engines like Google use backlinks as a ranking signal, so the additional backlinks are good for your SEO.
Lastly, these internal links allow you to steal the scraper’s audience. Talented bloggers place links on interesting keywords, making it tempting for users to click. Visitors to the scraper’s website will also click the links, which will lead them straight back to your own website.
Auto Link Keywords With Affiliate Links to Make Money from Scrapers
If you make money on your website from affiliate marketing, then we recommend enabling auto-linking in your RSS feeds. This will help you maximize your earnings from readers who only read your website via RSS readers.
Even better, it will help you make money from the sites that are stealing your content.
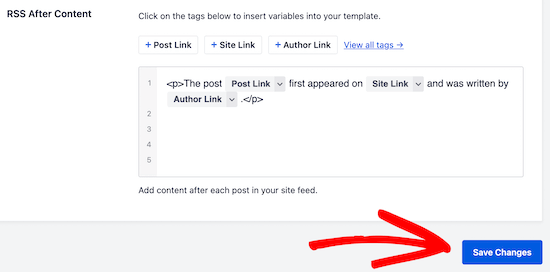
You can use the All in One SEO plugin to add custom items to your RSS footer. For example, you can add a banner that promotes your own products, services, or content.
The best part is that those banners will appear on the scraper’s website as well.
In our case, we always add a little disclaimer at the bottom of posts in our RSS feeds. By doing this, we get a backlink to the original article from the scraper’s site.
This lets Google and other search engines know we are the authority. It also lets their users know that the site is stealing our content.