Do you want to install template kits in WordPress?
Designing a website can take a lot of time and effort, especially if you don’t have any previous experience. Thankfully, template kits allow you to apply a professional design across your entire WordPress website with the click of a button.
In this article, we will show you how you can easily install website template kits in WordPress.

Why Install Template Kits in WordPress?
WordPress template kits are a collection of pre-designed templates, layouts, and other elements that allow you to create a professional-looking website without having to write code.
Template kits are designed to be used together, so you can simply install a kit and use the same design across your entire site.
A good template kit has designs for all the most common pages including an about page, a contact page, and a custom home page. They may also provide templates for areas that appear across multiple pages, such as a header and footer template.
There are some template kits that you can customize to suit any kind of website, similar to multi-purpose WordPress themes. Other templates are designed for a specific industry, such as fashion, venture marketing, and tech blogging kits.
No matter what template kit you use, with the right page builder plugin you can customize it to perfectly suit your business and branding.
With that being said, let’s see how you can design a beautiful website fast, by installing template kits in WordPress.
How to Choose the Best WordPress Template Kits
Template kits have many names, as some companies call them website kits, website templates, or WordPress starter templates. No matter what the name, the best place to find template kits is by installing a drag-and-drop page builder plugin.
SeedProd is the best page builder plugin with over 1 million users. It allows you to create a complete WordPress website without having to write a single line of code.
SeedProd comes with 90 ready-made blocks that you can add to any page, and over 180 templates that you can use to create landing pages, sales pages, and more.
SeedProd also has a growing library of professional website kits that you can add to your site with a single click. After choosing a kit, you can customize every part of the design using SeedProd’s drag-and-drop editor.
Since it’s the fastest and easiest method, in this guide we’ll show you how to install template kits using SeedProd.
Step 1. Install a WordPress Page Builder Plugin
First, you need to install and activate the SeedProd plugin. For more details, see our step-by-step guide on how to install a WordPress plugin.
Note: There is also a free version of SeedProd that allows you to create beautiful coming soon pages, maintenance pages, and more no matter what your budget. However, in this guide, we’ll be using the premium plugin as it has lots of different template kits. Just be aware that you’ll need a Pro plan or higher to use the template kits.
Upon activation, head over to SeedProd » Settings and enter your license key.
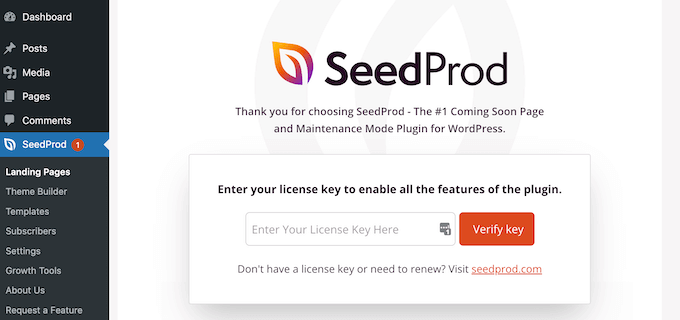
You can find this information under your account on the SeedProd website. After entering the license key, click on the ‘Verify Key’ button.
With your license key active, you’re ready to install a template kit.
Step 2. Choose a WordPress Template Kit
SeedProd’s site kits work seamlessly with its WordPress theme builder, so head over to SeedProd » Theme Builder to get started. Here, click on the Theme Template Kits button.
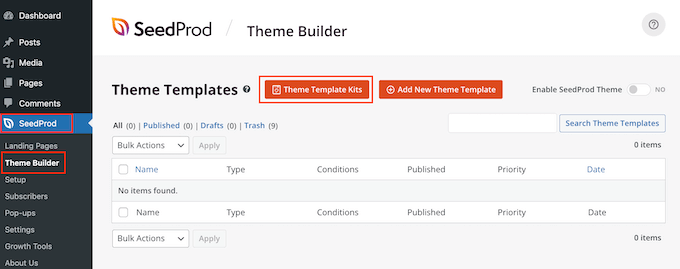
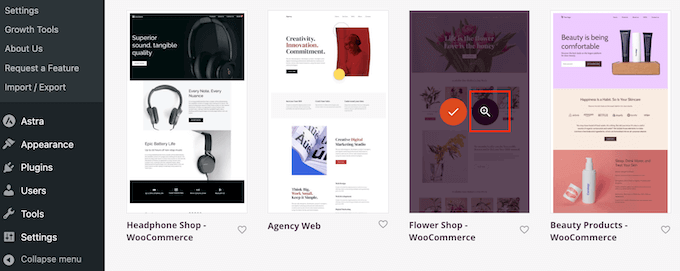
You’ll now see SeedProd’s website kit library.
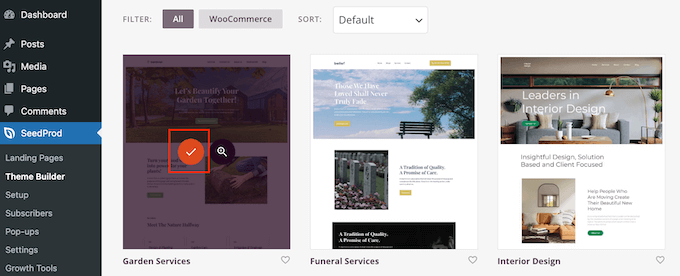
To take a closer look at any template, simply hover your mouse over it and then click on the magnifying glass icon when it appears.
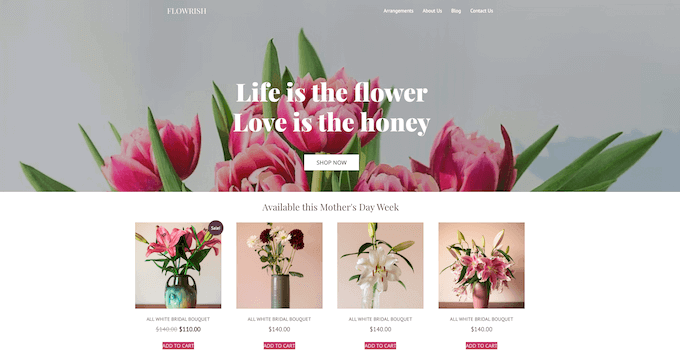
This opens the template kit in a new tab.
Since it’s a complete website kit, you can see more pages and designs by clicking on the different links, buttons, and menu items.
SeedProd has template kits for different industries and niches like restaurant websites, travel blogs, marketing consultancies, and more.
When you find a template kit you want to use, simply hover over it and then click on the checkmark icon when it appears.
SeedProd will now add all the different templates to the WordPress dashboard.
To take a look, go to SeedProd » Theme Builder. You may see slightly different options depending on the kit you’re using.
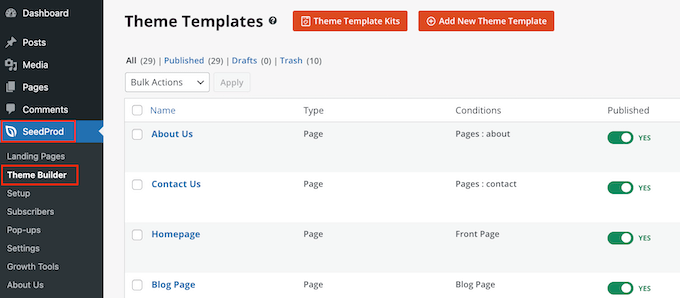
SeedProd’s templates are disabled by default, so they won’t immediately change how your site looks by overriding your current WordPress theme.
Step 3. Customize Your Template Kit in WordPress
Before making the kit live, you need to replace the demo content. You may also want to change the kit’s branding to better match your own business. For example, you can add custom fonts, change the colors, add your own logo, and more.
The templates you see may vary depending on the kit. However, most kits have a header and footer template, so we’ll show you how to customize these templates as an example.
How to Customize a Header Template Kit in WordPress
The header is the first thing visitors see when they arrive at your site. With that in mind, it should introduce your brand and provide easy access to your site’s most important content.
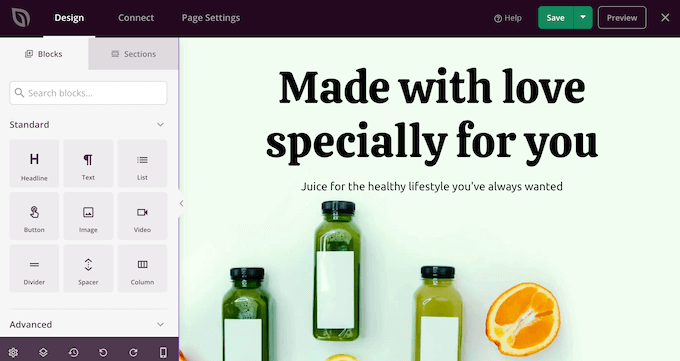
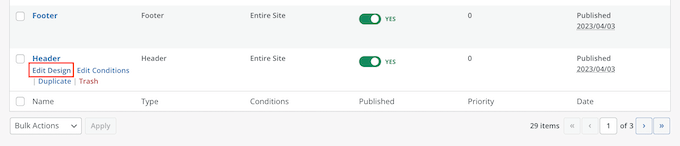
To customize the header template, simply hover over it and then click on ‘Edit Design.’
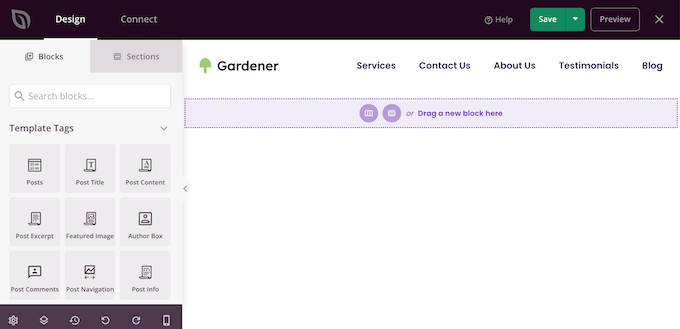
This loads the SeedProd editor, with the header template to the right of the screen.
On the left-hand side, you’ll see a menu with different options.
Most header templates come with a placeholder logo, so let’s start by replacing it. Simply click to select the placeholder logo and the left-hand menu will show all the settings you can use to customize the block.
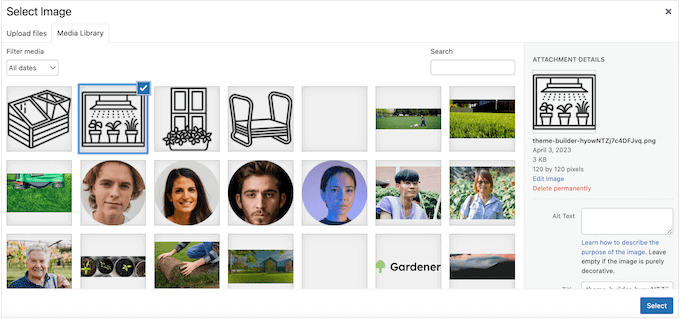
Simply hover over the image in the left-hand menu and then click on the Select Image button when it appears.
Most template kits come with alternative logos and images that you can add to your WordPress website.
You can choose one of these images from the WordPress media library or upload a new file from your computer.
After replacing the logo, you can change its alignment and size, add image alt text, and more using the settings in the left-hand menu.
When you’re happy with how the logo looks, it’s a good idea to update the menu.
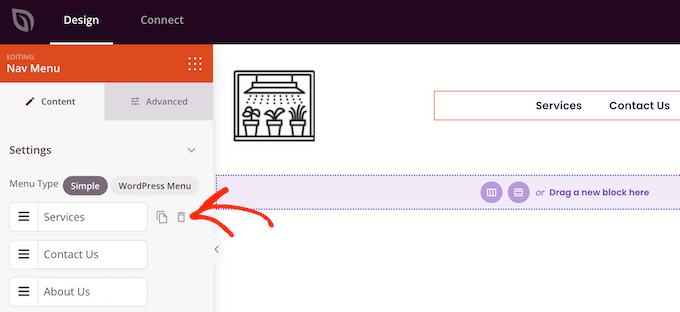
Most header templates come with a placeholder menu that you can easily customize by adding your own text and links. To get started, click to select the Nav Menu block.
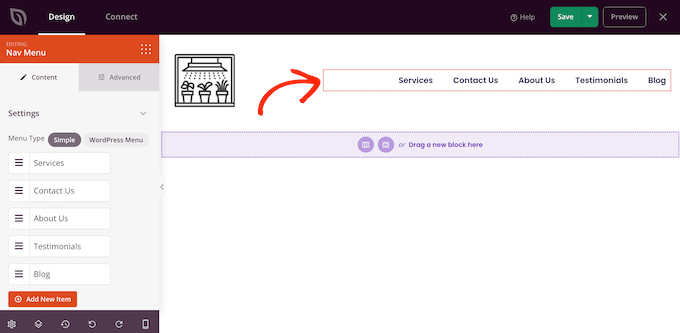
You can either build a menu in SeedProd, or you can display any navigation menu you’ve created in the WordPress dashboard.
To build a new menu using SeedProd, simply hover your mouse over any menu item that you want to delete. Then, click on the trash can icon when it appears.
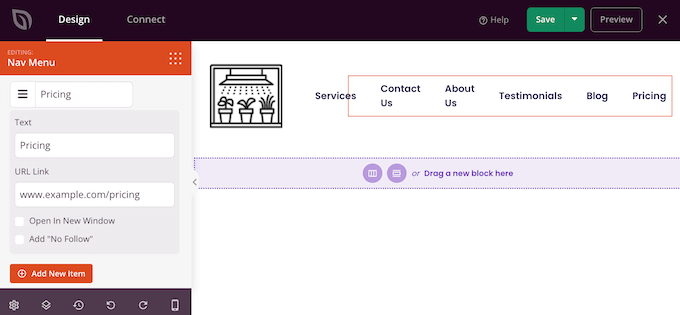
To add a new item to the menu, click on the ‘Add New Item’ button, which creates a new placeholder item.
Next, simply click on the item to expand it.
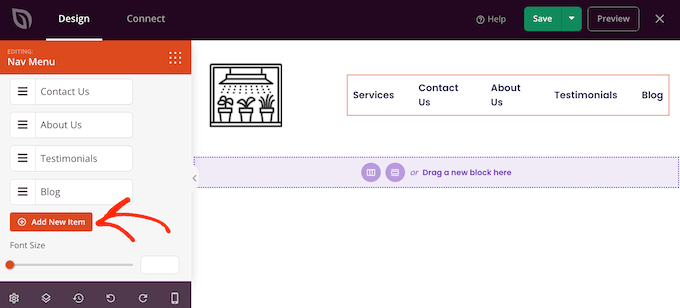
You’ll now see some new settings where you can type in the text and link you want to use.
You can also set the link to open in a new tab, or you can mark it as no follow.
Simply repeat these steps to add more items to the menu. You can also rearrange items in the menu using drag and drop.
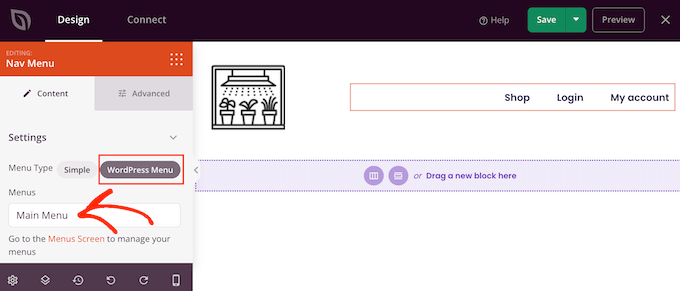
Another option is to simply display a menu you’ve already created in the WordPress dashboard. To do this, click on ‘WordPress Menu’ and choose a menu from the dropdown.
After making these changes, you may want to add more content to the header. For example, you might encourage visitors to follow you on social media by adding ‘like’ and ‘share’ buttons to the header.
In the left-hand menu, simply find the block you want to add and then drag it onto your layout.
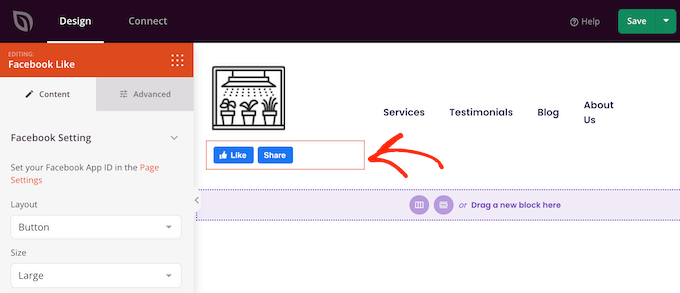
You can then customize the block using the settings in the left-hand menu.
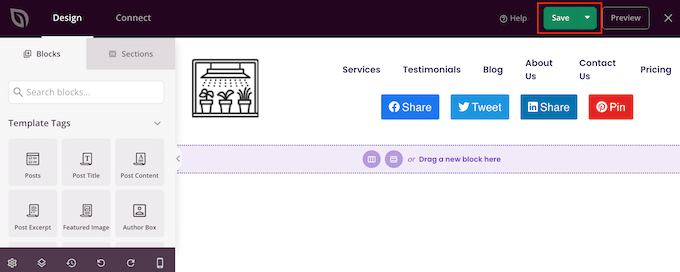
When you’re happy with how the header template looks, click on ‘Save’ to store your settings.
How to Customize the Footer Template in WordPress
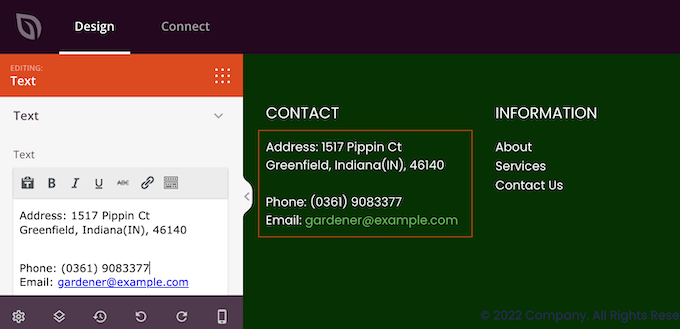
The footer is the perfect place to add useful information such as a dynamic copyright date or your phone number. You can also link to important content like your contact form, blog, and social media profiles.
With that in mind, most SeedProd template kits come with a footer template. To edit this template go to SeedProd » Theme Builder and then hover over the ‘footer’ template. When the ‘Edit Design’ link appears, give it a click.
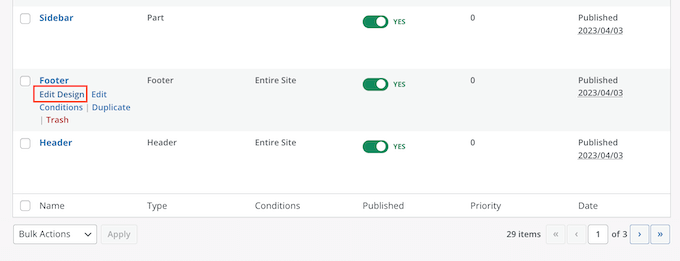
This opens the footer template in the SeedProd editor. You can now delete unwanted blocks, replace the placeholder content, and add more blocks following the exact same process described above.
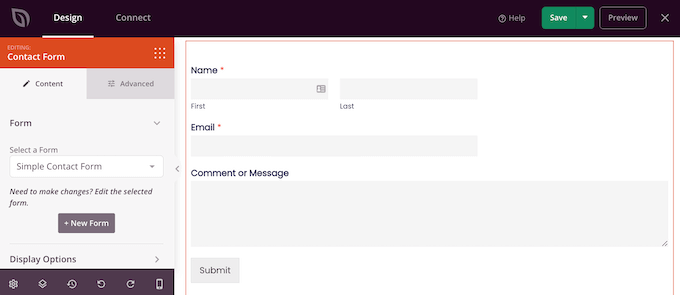
Many business owners use the footer to show their contact information, such as their business email address. However, if you’re using WPForms then you can easily add a contact form to your website’s footer. This allows people to contact you from any page or post.
If you’re looking for more ideas, then you can see our checklist of things to add to the footer of your WordPress website.
Most footer templates come with placeholder text that you can replace with your own content. Simply click to select each text box and then type your messaging into the small text editor that appears.
The editor has all the standard formatting options, so you can highlight important text or add links that will appear across your WordPress blog or website.
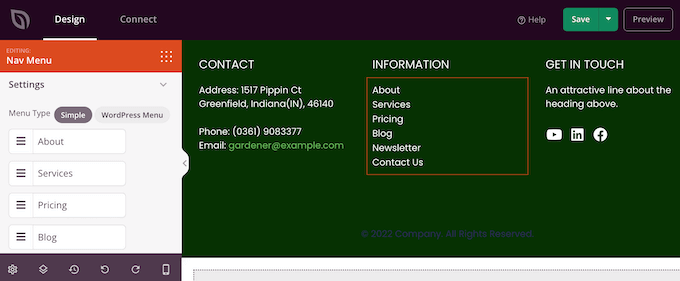
Many footer templates come with a ready-made Nav Menu block that contains some placeholder links.
You can replace these dummy menu items with links to your own content by following the same process described above. For example, you might include links to your site’s privacy policy, blog, online store, and other important content.
When you’re happy with how the footer looks, click on the Save button to store your changes.
Step 4. Edit Your Global Template Kit Settings
Often, you’ll want to change the template’s default fonts, backgrounds, colors, and more to match your branding. Instead of making these changes to each template, you can save time by editing the kit’s Global CSS settings.
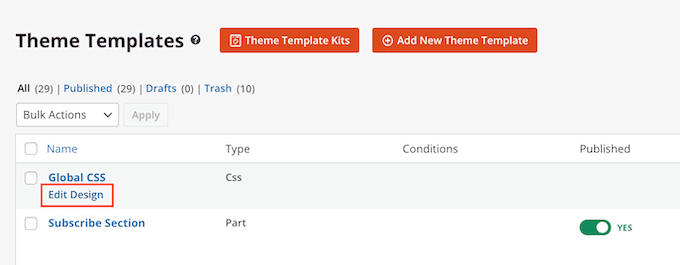
In your WordPress dashboard, go to SeedProd » Theme Builder and hover over the Global CSS template. You can then click on the ‘Edit Design’ link when it appears.
In the left-hand menu, SeedProd lists all the different elements you can change, such as the fonts, forms, layout, and more.
To see what changes you can make, simply click any option.
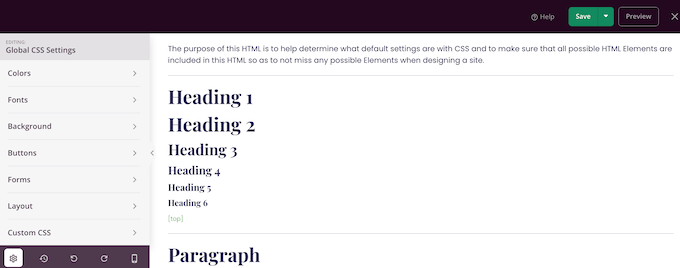
You can now adjust its settings. For example, you can change the colors used for the kit’s headers, paragraph text, links, and more.
SeedProd will automatically apply these changes across the entire template kit.
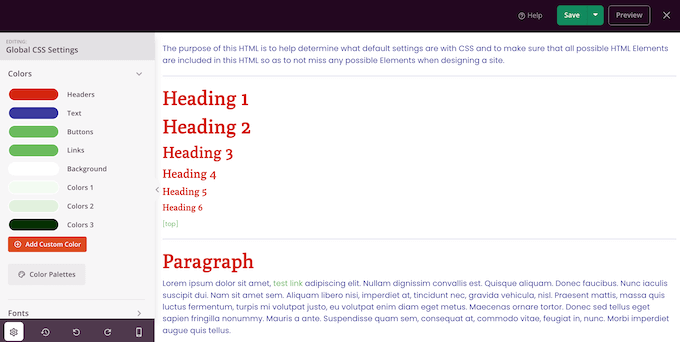
When you’re happy with the changes you’ve made, click on the ‘Save’ button.
Step 5. Enabling Your SeedProd Template Kit
You can now customize every SeedProd template by following the same process described above. When you’re happy with how the templates are set up, it’s time to make the kit live.
In the WordPress dashboard, go to SeedProd » Theme Builder and click on the ‘Enable SeedProd Theme’ toggle so that it shows ‘Yes.’
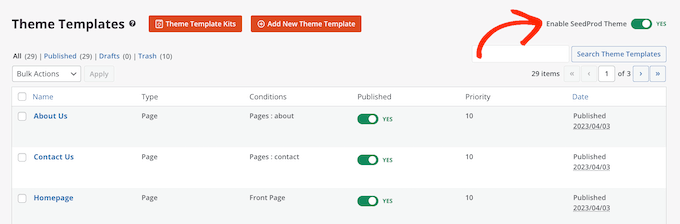
Now, if you visit your WordPress website you’ll see the new design live.
We hope this article helped you install template kits in WordPress. You may also want to see our guide on how to choose the best web design software, or see our expert pick of the must-have WordPress plugins.
If you liked this article, then please subscribe to our YouTube Channel for WordPress video tutorials. You can also find us on Twitter and Facebook.
The post How to Install Template Kits in WordPress (Step-by-Step) first appeared on WPBeginner.
May 03, 2023 at 02:57PM