Certified WordPress Developer and SEO Specialist with 10+ years of experience on Fiverr. I provide expert solutions for WordPress error fixing, debugging, speed optimization, and security hardening. Services include hacked site recovery, malware removal, on-page SEO optimization, and full customization to ensure your website runs fast, secure, and ranks higher on Google.
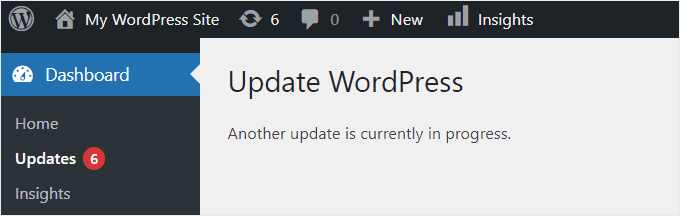
Do you want to fix the ‘another update is currently in progress’ error?
This error stops you from updating WordPress. Normally, it should automatically go away. But if it doesn’t, then you’ll need to fix it manually.
In this article, we’ll show you how to fix the ‘another update is currently in progress’ error in WordPress, step by step.
Why Does the ‘Another Update is Currently in Progress’ Error Occur?
This message usually appears when a core WordPress update is running in the background, and a user tries to start another update process.
During the core update process, WordPress automatically sets an update lock on your WordPress database. This database lock prevents you from running simultaneous updates on your website, which could cause WordPress errors or destroy important data.
This message is set to automatically disappear in 15 minutes or when the update process has finished. However, if you are stuck on this message, then you’ll need to remove it manually.
With that said, let’s take a look at how you can fix the ‘another update is currently in progress’ error in WordPress.
Fixing the ‘Another Update in Progress’ Error in WordPress
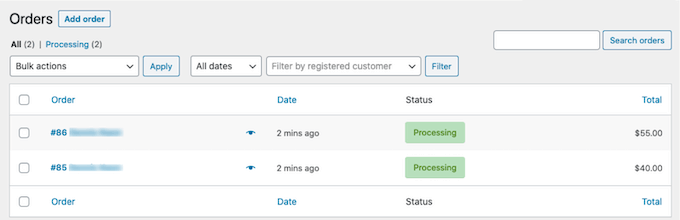
When you’re experiencing the another update in process error, you need to delete the ‘core_updater.lock’ file from your WordPress database. The easiest way to do this is by using phpMyAdmin.
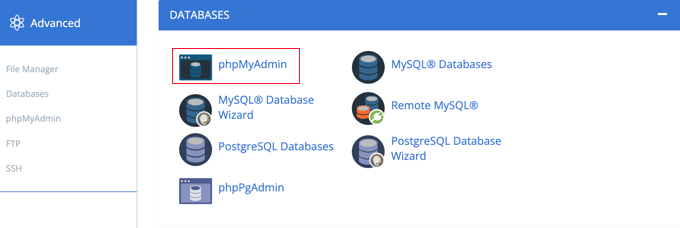
First, you need to log in to the cPanel dashboard of your WordPress hosting account. We’re using Bluehost, so your screen may look a bit different if you’re using another hosting company.
From your Bluehost dashboard, you’ll need to click on the Advanced tab on the left. Next, navigate to the ‘Databases’ section and click on the ‘phpMyAdmin’ icon. If you don’t see a phpMyAdmin option in your hosting dashboard, you should contact your hosting company’s support for help.
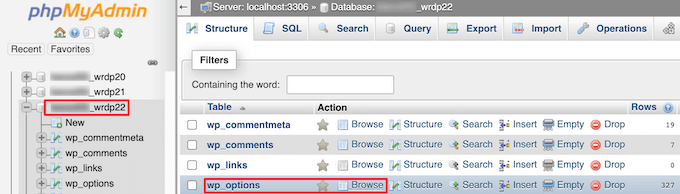
This will launch the phpMyAdmin app, where you need to select your WordPress database. Once you click your database, it will display all of the tables inside the database.
Then, you need to click the ‘Browse’ button next to the WordPress options tables (wp_options).
This brings up all of the rows inside the options table.
You need to find the row with the option name ‘core_updater.lock’ and click on the delete button next to it.
Now, phpMyAdmin will automatically delete the row from your database.
When you go back to your WordPress website, the another update in process error will be gone, and you can continue updating your site.
If you’re still seeing other errors, then you can see our beginner’s guide on troubleshooting WordPress errors to get more help.
We hope this article helped you learn how to fix the ‘another update is currently in progress’ error in WordPress. You may also want to see our guide on how to choose the best web design software and our expert picks of the best live chat software for small businesses.
If you liked this article, then please subscribe to our YouTube Channel for WordPress video tutorials. You can also find us on Twitter and Facebook.
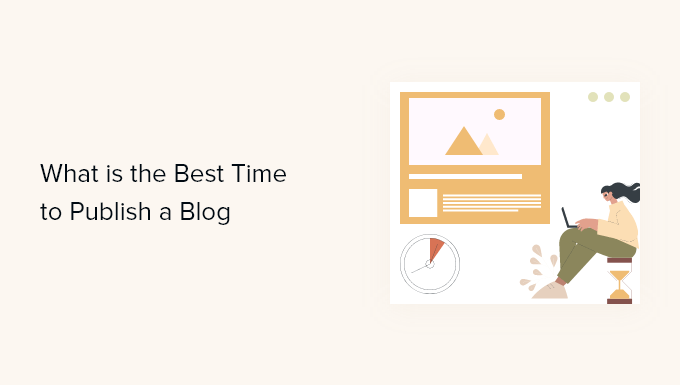
Are you looking for the best time to publish your articles to get the most engagement?
Finding the right publishing time could help you attract more visitors, get more comments, social shares, and backlinks. It can also help you see when your audience is most active, and increase your chances of going viral.
In this article, we’ll share what is the best time to publish a blog post, and how you can test it for your website.
The Best Time to Publish Blog Posts
If you’ve just started a new blog, then you are probably looking for ways to attract more people to read your content.
While there are many ways to increase your blog traffic, you might be wondering, can publishing content at a specific time and date can help you get more visitors?
Over the years, many studies have been done to find the perfect time to publish a blog post. For instance, one study found that 70% of people read blogs in the morning, and that the average best time to publish blog posts for maximum traffic is Monday around 11 am EST.
However, another study that analyzed millions of blog posts found that there’s no difference in the number of shares or traffic on different days of the week.
After analyzing all the different studies, we found the key takeaway is that the best time to publish blog posts is different for every website.
One blog might get the most traffic by publishing on Mondays at 11 am, while another might get more views by publishing on Saturday nights.
It all depends on your audience.
You cannot pick a single day of the week to publish all your content and hope to get more engagement based on a study. That’s because most of the studies provide a generalized view across multiple industries.
It’s better to do your own testing and find out what time and day works the best for your website. You can test different days and times to see when you get the most traffic, social shares, and comments.
The good news is that it’s quite easy to test publishing times in WordPress.
Let’s take a look how you can find the best publishing time for your blog posts in WordPress.
How to Test Best Publishing Time in WordPress
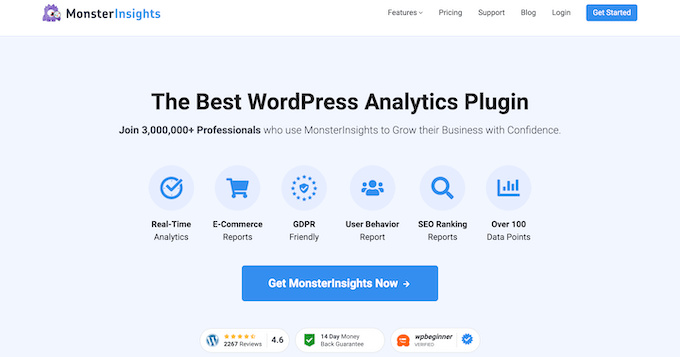
The easiest way to uncover the best time to publish blog posts in WordPress is by using MonsterInsights.
Using MonsterInsights, you can test the best publication time through their custom dimensions feature which tracks realtime visitors data.
Let’s look at both ways you can test the best time to publish blog posts.
1. Setting Up Publication Time Analytics
By default, Google Analytics does not track your blog post publication times. However, you can use MonsterInsights to add this tracking by using a custom dimension.
Custom dimensions help track additional data like popular authors, popular post type, and best publication time in Google Analytics.
The best part about using MonsterInsights is that you don’t have to touch a single line of code to add custom dimension tracking on your website.
Note: You’ll need the MonsterInsights Pro version because it includes the Custom Dimensions addon. Plus, you also get other advanced tracking features and dashboard reports including realtime reports.
First, you’ll need to install and activate the MonsterInsights plugin. If you need help, then please see our guide on how to install a WordPress plugin.
Upon activation, you’ll be taken to Insights from your WordPress dashboard, and you’ll see the welcome screen for MonsterInsights. Go ahead and click the ‘Launch the Wizard’ button to add Google Analytics to your site.
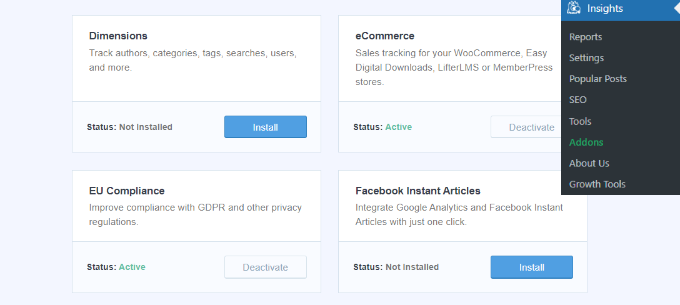
Next, you can head over to Insights » Addons from your WordPress dashboard and then scroll down to the ‘Dimensions’ addon. After that, click the ‘Install’ button, and the addon will automatically activate.
You’ll see the Status change from ‘Not Installed’ to ‘Active.’
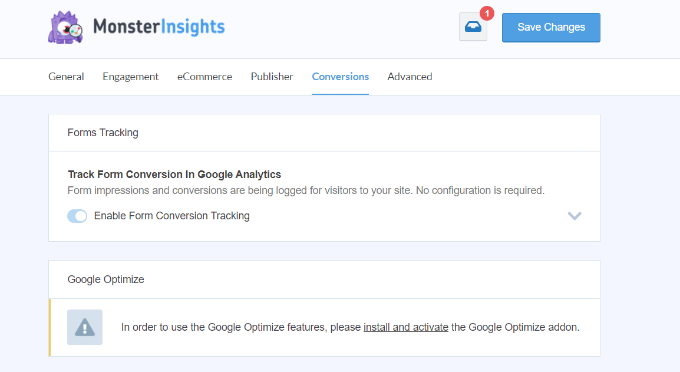
Once the addon is active, you can go to Insights » Settings.
Then, navigate to the ‘Conversions’ tab.
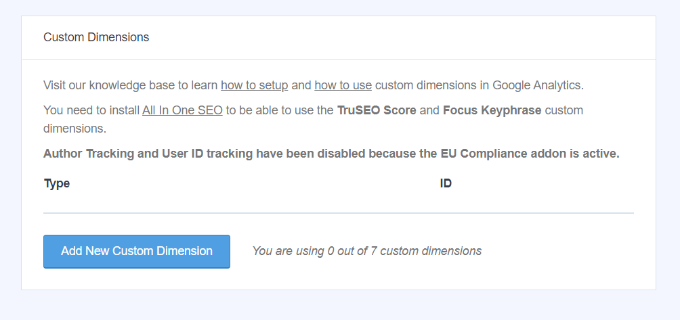
Next, scroll down to the ‘Custom Dimensions’ section.
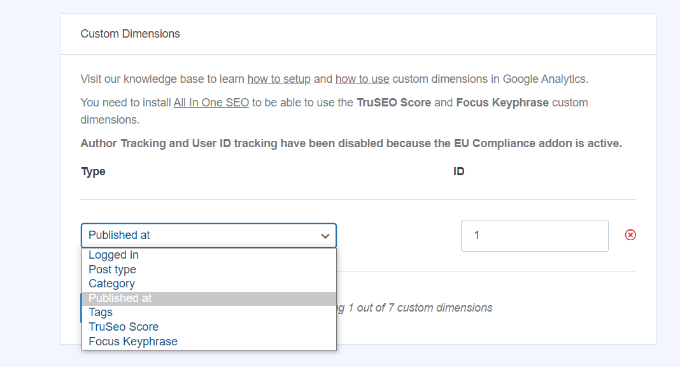
Here you’ll need to click the ‘Add New Custom Dimension’ button to get started adding the publication time tracking.
After that, simply select the ‘Published at’ dimension from the dropdown menu.
Don’t forget to save your changes when you’re done.
You’ll now need to add to custom dimensions in Google Analytics.
We’ll show you how to create dimensions in the older versions of Google Analytics (called Universal Analytics) and the new Google Analytics 4 version.
Add Custom Dimensions in Universal Analytics
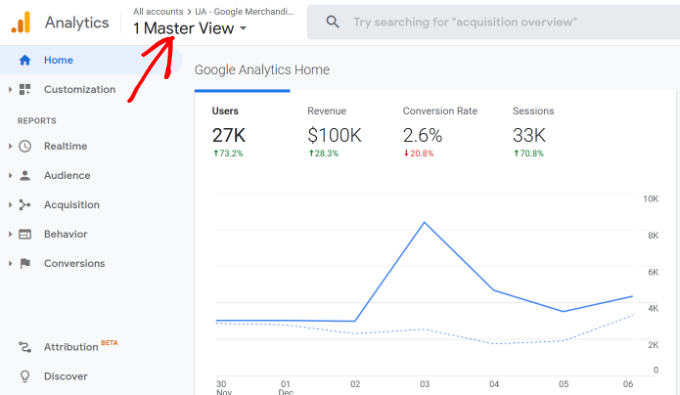
First, you’ll need to visit the Google Analytics website and login to your account. Simply choose your website property from the menu at the top.
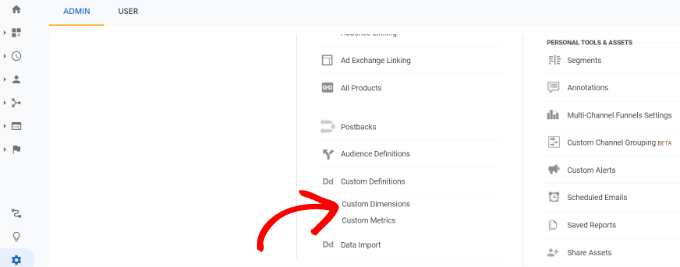
After that, navigate to the Admin page.
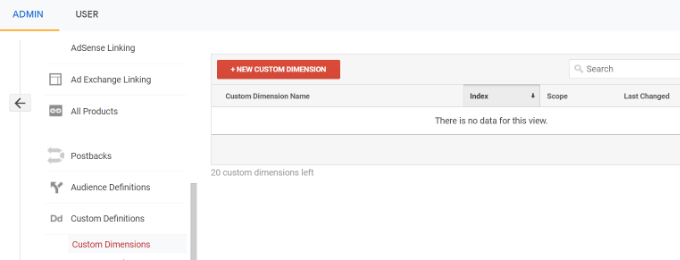
Then click the ‘Create Definitions’ and ‘Custom Dimensions’ options under the Property column.
Next, you can click the ‘+ New Custom Dimension’ button.
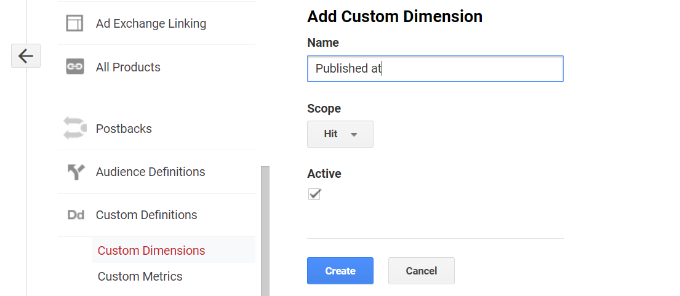
Enter a name for your custom dimension on the next screen.
Then click the ‘Create’ button.
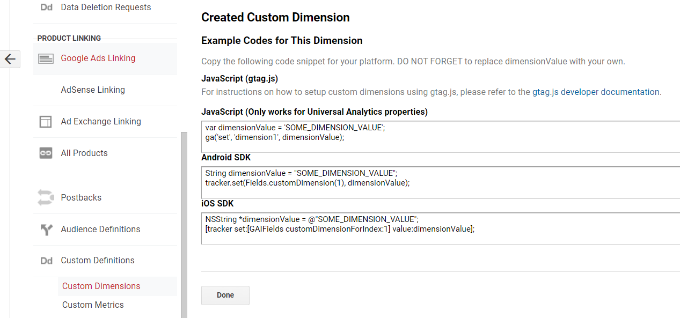
You’ll now see codes for your custom dimensions.
Simply click the ‘Done’ button at the bottom.
Your custom dimension will now be created in Google Analytics.
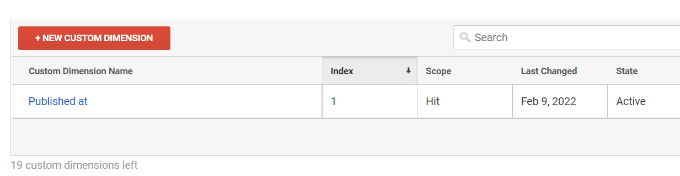
Just make sure that the Index number in Google Analytics matches the custom dimensions ID in MonsterInsights. If this is the first custom dimension you’re setting up, they will both automatically be ‘1’, so there’s no need to adjust it.
Add Custom Dimensions in Google Analytics 4
To set up custom dimensions in Google Analytics 4 version, go ahead and login to your account.
After that, you’ll need to go to Configure from the menu on your left.
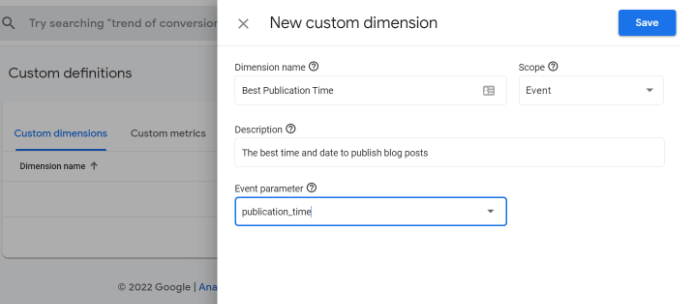
Next, head over to the ‘Custom definitions’ option from the left menu and then click the ‘Create custom definition’ button.
Now, you’ll need to enter details about your new custom dimension. Simply enter a name for the dimension and add a description for your own reference. We’ll call the new custom dimension ‘Best Publication Time’.
When selecting the Scope, go ahead and choose ‘Event’ from the dropdown menu. Lastly, enter an event parameter that you want the dimension to use and show in the reports, like ‘publication_time’.
After entering these details, don’t forget to click the ‘Save’ button when you’re done.
You’ve successfully created a custom dimension in Google Analytics to record the best publication time on your website.
Now you can go ahead and view the best publication times on your site and see when you get the most traffic.
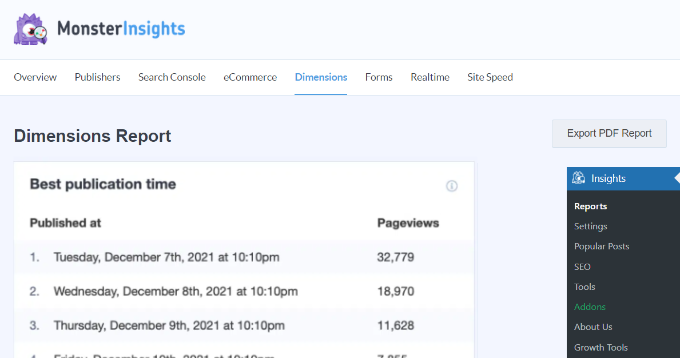
With MonsterInsights, you can view the Dimensions report inside your WordPress dashboard. Simply head over to Insights » Reports from your WordPress dashboard and then go to the ‘Dimensions’ report.
Using the data from the stats dashboard, you can see the pageviews at different dates and times. Go ahead and schedule your blog posts at the best publication time and boost your blog traffic.
2. Monitor Realtime Visitors for Best Publishing Time
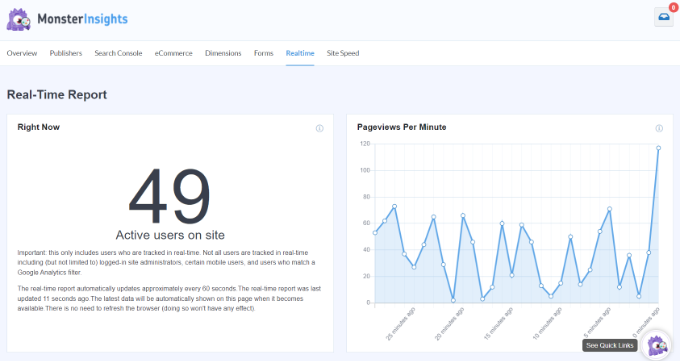
You can also view the Realtime report in MonsterInsights to see how many visitors you get immediately after publishing and promoting a blog post.
Simply go to Insights » Reports and then navigate to the ‘Realtime’ report to view the report.
Next, you can monitor the report after you publish a post and share it with your readers. This will help you uncover the best time to publish a blog post.
Publishing your blog posts at the right time isn’t the only way to boost your traffic. If your blog posts are properly optimized for search engines, then they’ll continue to get more traffic over time, long after they’re published. Over time, this will get you more traffic than publishing on a certain day or time.
Another proven way to get more traffic to your new blog posts is by using push notifications. It’s a top 10 traffic source on WPBeginner. Here’s how to add push notifications in WordPress.
Are you looking for some of the best Facebook tips and tutorials for your WordPress site?
Facebook is one of the largest social media websites in the world. No website owner can afford to ignore the potential of Facebook for the success of their business.
In this article, we highlight some of the best Facebook tips and tutorials that you can use to improve your WordPress site and grow your following.
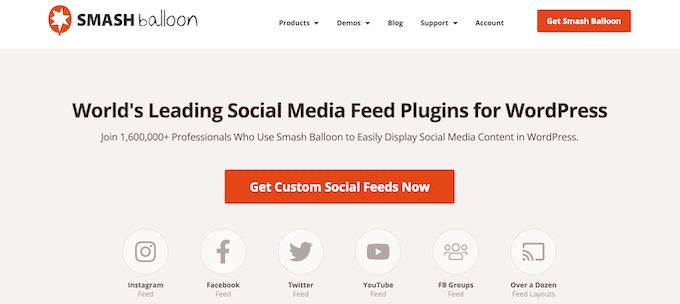
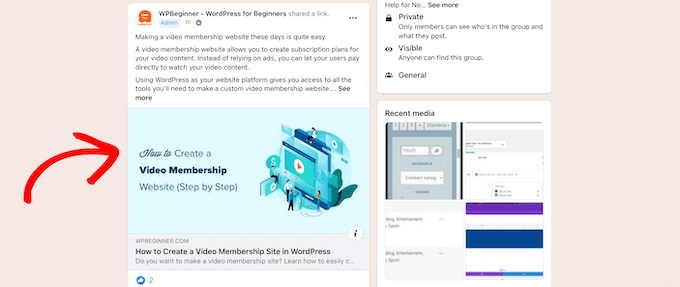
1. Create a Custom Facebook Feed in WordPress
Creating a custom Facebook feed on your website lets you display posts from your Facebook page and Facebook groups to improve engagement.
By adding a custom Facebook feed to WordPress, you can show your Facebook page updates to your website visitors and get more followers.
It can also act as a form of social proof and improve the time your visitors spend on your website. Plus, it’s a great time saver since it automatically adds fresh content to your website directly from Facebook.
The plugin is very easy to use, lets you completely customize how your Facebook feed displays, and you can even add a social wall with multiple social networks.
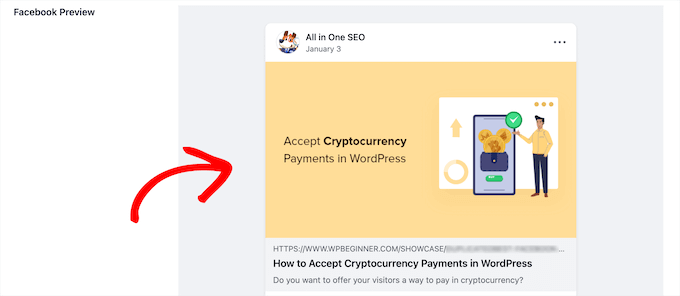
Open Graph metadata helps Facebook and other social media websites get metadata about the content you share.
Facebook will automatically display your article title, description, and image when shared on social media. But you can edit this information so that Facebook will display exactly what you want.
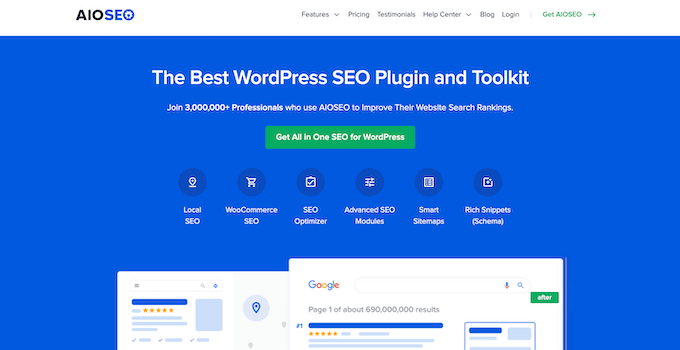
The easiest way to add Facebook open graph metadata is by using the AIOSEO plugin. It’s the best WordPress SEO plugin in the market used by over 3 million websites.
With this plugin, you can easily improve your WordPress SEO to get more traffic and control how your content displays across Facebook and other networks.
Beneath your post editor you’ll have an option to choose a post thumbnail and create a new title and description.
By adding your WooCommerce store to Facebook, you can send more traffic to your online store and make more sales.
This lets you reach your followers in new ways without any additional promotion. For example, your Facebook followers might not know about your online store, so it lets you expose them to your products.
To do this, we recommend using the Facebook for WooCommerce plugin. It lets you easily connect your existing WooCommerce store to your Facebook business page, so your followers can start buying products.
When someone purchases a product from your Facebook store, you can easily manage the order from WooCommerce.
It’s like Zapier for WordPress and helps you connect your WordPress website with thousands of different apps like Facebook.
There’s a free version available that gives you 1,000 free credits to use with Facebook. After you’ve used those credits, then you’ll need to upgrade your account to continue posting automatically.
By adding your Facebook timeline to WordPress, you can show your users real time updates and help grow your social media following.
If you have an active community on Facebook, then you can bring this to life on your website. You can display your whole Facebook timeline with likes, comments, and more.
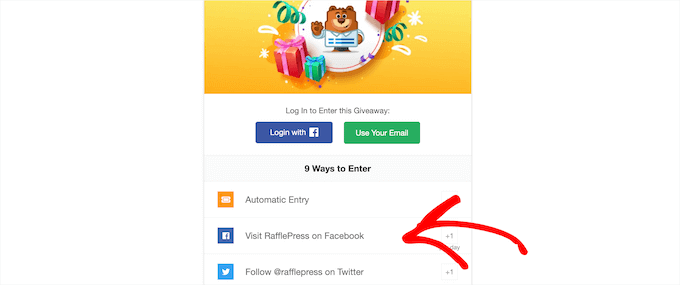
You can easily create your giveaways and contests with the drag and drop builder or start with the library of pre-built viral templates.
It comes with social media integrations, including Facebook, Twitter, and Instagram. Plus, there’s built in 1-click fraud protection to ensure all of the actions your followers take are genuine.
Facebook videos are an incredible way to engage with your audience and build your brand. Users are likely to spend more time on your website when you add video content, so this gives you more time to build a connection.
However, with recent changes made by Facebook, you can no longer simply copy and paste a code snippet to embed the video in your website.