Do you want to block WordPress referrer spam in Google Analytics?
Referrer spam sends misleading data to your website to pollute your website’s analytics reports with spam links.
In this article, we’ll show you how to block WordPress referrer spam in Google Analytics effectively.
What is Referrer Spam in WordPress and How Does It Affect Google Analytics?
Referrer spam in WordPress is a common spamming technique where fake traffic data is sent to a WordPress website.
This spam technique aims to pollute a website’s analytics data with spam URLs, keywords, and domain names.
It affects your Google Analytics reports as this data appears under Referral data and may affect your website’s overall page views, bounce rates, and session reports.
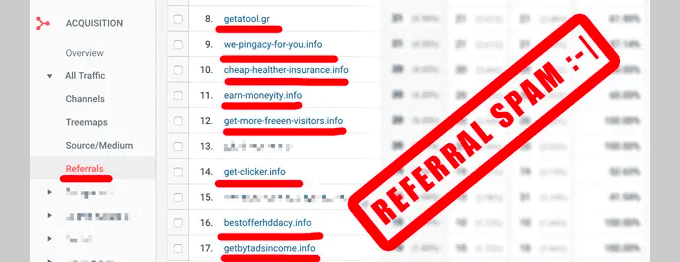
If you are seeing many suspicious-looking domains in your Referral reports, then they are most likely spam referrers.
Blocking these spam referrals will improve your Google Analytics reports and ensure that your data is not polluted by spam requests.
That being said, let’s take a look at how to easily block referrer spam in Google Analytics on a WordPress website.
It blocks most common website threats including referrer spam before they even reach your website.
Sucuri also comes with website monitoring, malware scanner, integrity check, and dozens of security features. This protects your website against hacking, malware, and brute force attacks.
Manually Blocking Referrer Spam in Google Analytics With a Plugin
If you are not using Sucuri, then you can use this method to check referral traffic and block them.
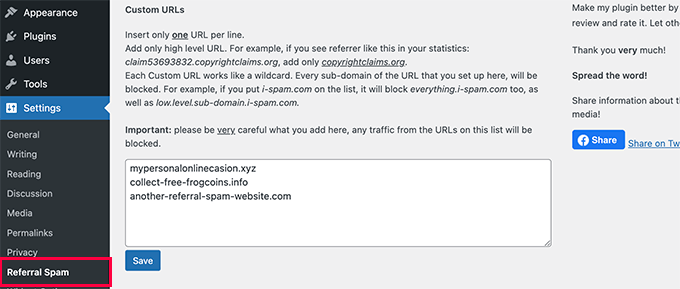
Upon activation, you need to visit the Settings » Referral Spam page to review plugin settings.
The plugin uses a referral spam blacklist published by Matomo (Formerly Piwik, an open source analytics software).
You can also enter any suspicious domains that are already spamming your Google Analytics reports.
Don’t forget to click on the Save button to store your settings.
Be careful when adding domains in the plugin settings, as it will block all traffic from that domain name, including sub-domains.
3. Filter Out Ghost Referrers in Google Analytics
The first two techniques mentioned above will block referrer traffic that arrives at your website.
However, spammers may sometimes not send referral requests to your website. Instead, they would target your Google Analytics tracking code to trick it into recording a spam request.
These attempts will bypass filters on your website and may still appear in your Google Analytics reports.
You can filter these ghost referral spam in your Google Analytics account.
1. Block Unwanted Referrals in GA4
If your website is using Google Analytics 4 (GA4), then you can use the following method to remove unwanted referrals.
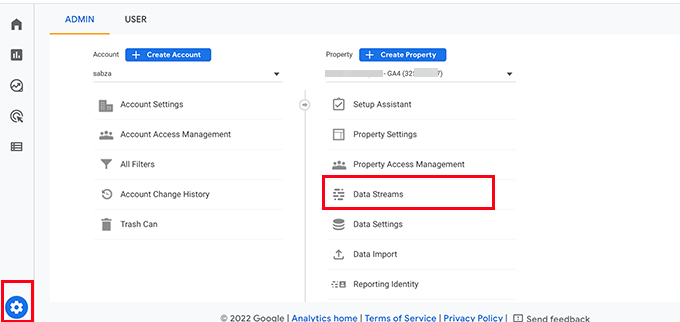
Simply log in to your Google Analytics dashboard and switch to the Admin view.
From here, under the Property column, select the Data Streams option. This will bring the Data Streams connected to your Google Analytics property.
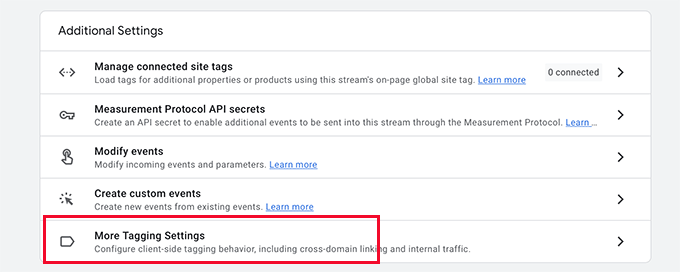
After selecting your data stream you’ll see different settings. Simply scroll down to the Advanced Settings section and then click on the ‘More Tagging Settings’ tab.
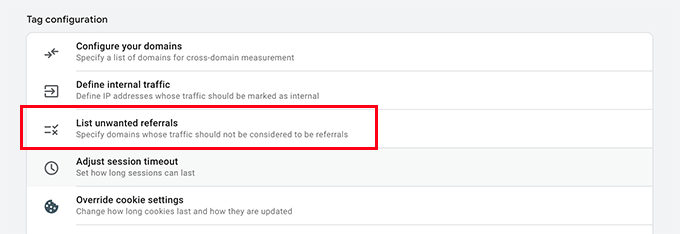
Next, click on the ‘List Unwanted Referrals tab.
This will bring you to the configuration screen.
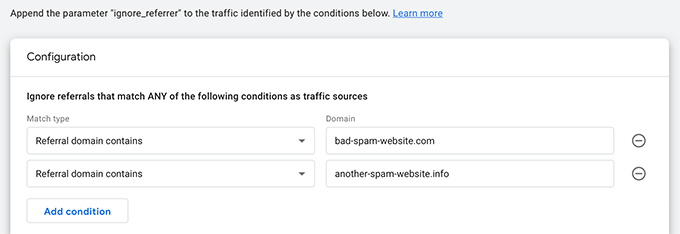
Under Match Type, choose ‘Referral domain contains’, and then add the domain you want to block next to it.
Click on the Add condition button to add another domain if needed.
Once finished, click on the Save button at the top right corner of the screen to save your settings.
Google Analytics will now exclude these referrals from your reports.
2. Block Unwanted Referrers in Older Google Analytics
If you are still using older Google Analytics account that uses the Universal Analytics (UA Tracking) code, then you can use this method.
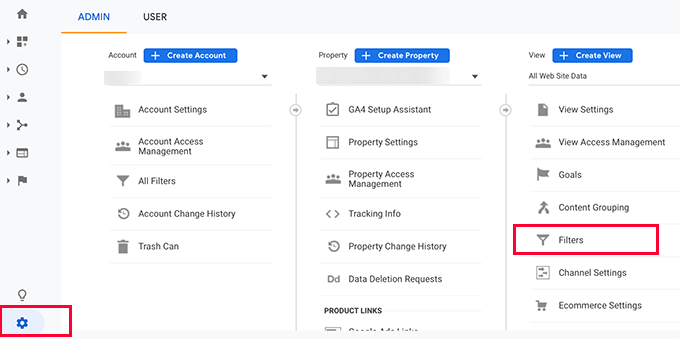
Simply switch to the Admin view under your Google Analytics account.
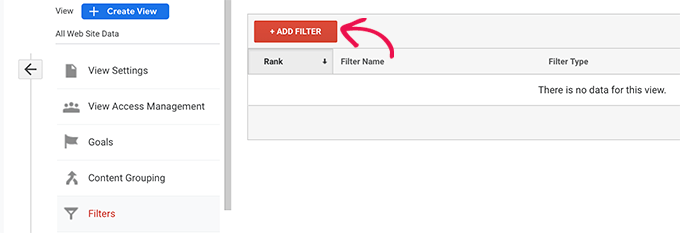
From here, you need to click on the Filters option under the ‘View’ column.
This will bring up the Filters screen. Go ahead and click on the Add Filter button.
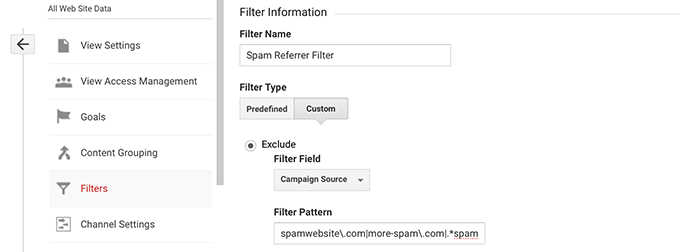
On the next screen, you can configure your filter settings.
First, you need to switch the Filter Type to ‘Custom’ and choose the ‘Exclude’ method.
After that, click on the ‘Filter Field’ drop-down and select the ‘Campaign Source’ option (this is where your filter will look for the match).
Lastly, add the domains that you want to block under the Filter pattern box in the following Regex Expression format.
Notice how the domain name and extension are separated by a backslash and a dot (\.), and each domain name is separated by a pipe sign (|).
The last domain in the list has a dot and asterisk (.*) before the domain name. This asterisk blocks not only the domain name but also all its subdomains.
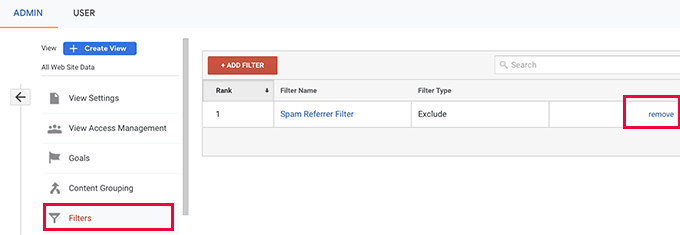
Go ahead and click on the Save button to store your filter settings.
Google Analytics will now remove these spam referrers from your reports.
Filters don’t affect on how Google Analytics collects data on your website. They just customize reports you view in your Google Analytics dashboard.
If you need to, you can always return to the filters screen to edit or delete a filter.
We hope this article helped you learn how to block referrer spam in Google Analytics effectively. You may also want to see our ultimate conversion tracking guide for beginners or how to properly setup eCommerce tracking on your website.
If you liked this article, then please subscribe to our YouTube Channel for WordPress video tutorials. You can also find us on Twitter and Facebook.
Are you looking for easy ways to manage, track, and control file downloads on your WordPress site?
A WordPress file download manager can help you easily manage downloads, track analytics, and control permissions on file downloads. With the right tools, you can even sell file downloads and make money.
In this article, we will show you how to easily manage, track, and control file downloads in WordPress.
Why Manage, Track, and Control File Downloads in WordPress?
There are many reasons why you would want to manage, track, and/or control your file downloads in WordPress.
For example, you may to restrict certain files based on user roles or only give access to paying customers, or you might simply want to track how many people are downloading free files on your site.
In this article, we’re going to take you through 4 different methods. Just click on the links to jump straight to the method you want to use:
Method 1. Tracking File Downloads in WordPress Using MonsterInsights
You may not be concerned about managing or controlling downloads if you offer them for free on your WordPress website.
However, it is still best practice to at least track file downloads.
This lets you discover which of your free downloads are the most popular and where to invest your resources when creating new content.
Unfortunately, Google Analytics doesn’t automatically support file download tracking. The good news is that you can track downloads using MonsterInsights, the best Google Analytics plugin for WordPress.
You will then need to connect WordPress to your Google Analytics account, which is super easy using MonsterInsights. If you need help, then follow the instructions in our guide on installing Google Analytics in WordPress.
Note: File download tracking is also available in the free version of MonsterInsights and lets you see the reports inside Google Analytics. However, you’ll need the Pro version to see advanced reports inside your WordPress dashboard.
Once you have set up the plugin, there is no need to do any further configuration. It will automatically start tracking your file downloads as events.
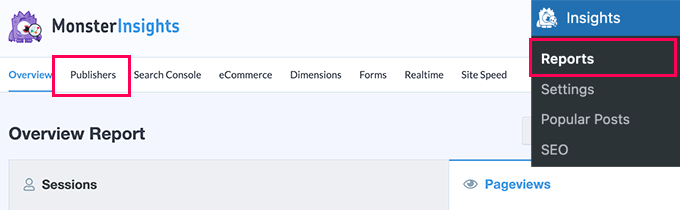
To see statistics about your downloads, just go to the Insights » Reports page and switch to the Publishers tab:
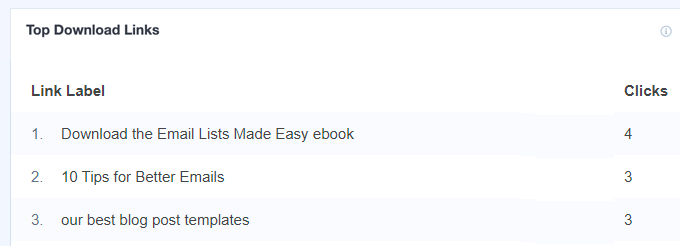
Scroll down, and you’ll see your top download links.
These will be listed along with their anchor text:
If you have more than one link to a specific file, then those links will be listed separately here. This is useful if you want to find out exactly how users are downloading files.
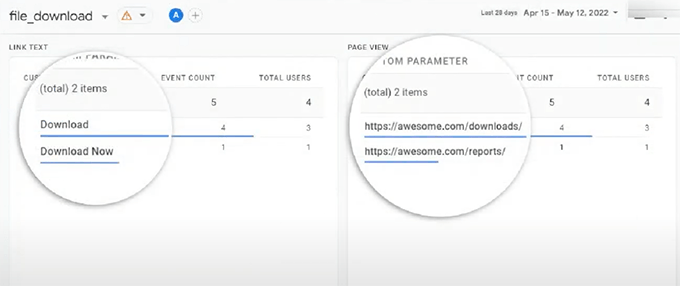
What if you want a report of which files are the most popular, regardless of the links used? Simply click the ‘View All Download Links Report’ button.
This will take you straight into Google Analytics, where you will see a report with the URLs of your downloaded files:
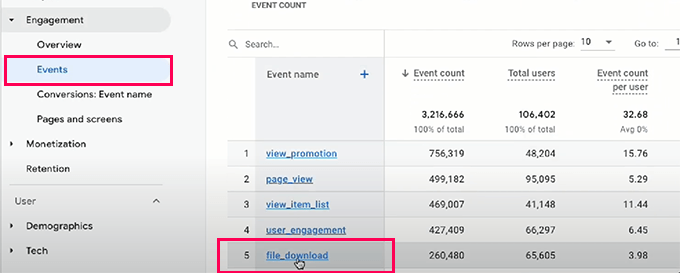
You can also manually navigate to your file download report in Google Analytics GA4.
Simply log in to your Google Analytics account and then click on the Reports » Engagement » Events tab.
From here, click on the ‘file_download’ link under the ‘Event name’ column to view your file downloads report.
By default, MonsterInsights tracks downloads for all common file types including documents (.doc and .docx), spreadsheets (.xls and .xlsx), presentations (.ppt and .pptx), PDFs, and zip files.
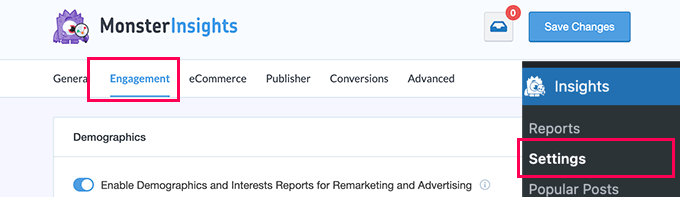
If you want to track other file types, then that’s easy to do as well. Simply go to Insights » Settings page and then switch to the Engagement tab:
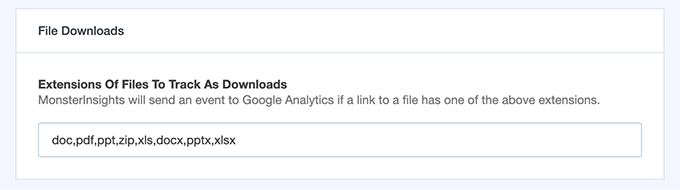
Now, scroll down to the File Downloads section.
Here you’ll see a list of file extensions currently being tracked:
Simply type in any additional file extensions you want to track. Just make sure you put a comma between them.
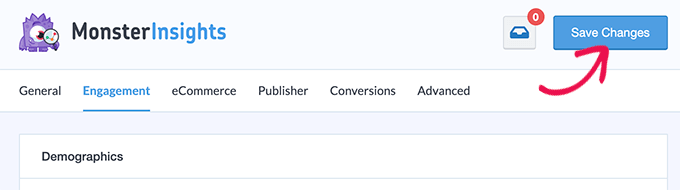
Once you’re done, don’t forget to click the Save Changes button at the top to save your settings.
MonsterInsights will now start tracking all files ending with the file extensions you added in settings.
Even if you choose another solution below for managing and controlling file download access, we recommend always installing MonsterInsights alongside it. Doing so will help you see the right stats, which you need for growing your business.
Method 2. Controlling File Downloads in WordPress Using MemberPress
If you want to sell online courses or access to downloadable files, then a great way to control and manage file downloads is to use MemberPress.
It is the best WordPress membership plugin that lets you lock premium content on your site so that it’s only available to registered users or paying members.
MemberPress has an addon called MemberPress Downloads that lets you track each file that your members download. The addon also lets you upload multiple files, tag, categorize, and list them easily.
Aside from files, you can protect other content on your site as well. This is a great option if you are building courses or premium content library that you only want members to be able to access.
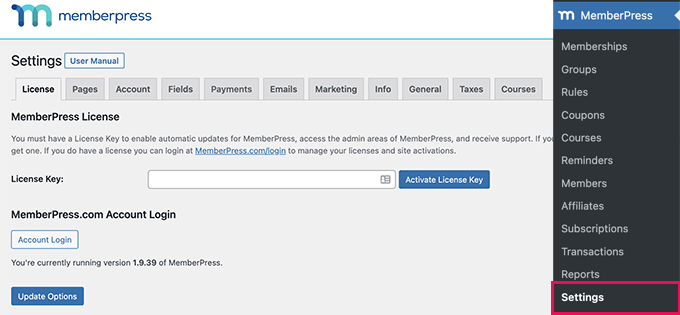
Upon activation, enter your license key into the MemberPress » Settings » License page in the WordPress admin area. You will find this information under your account on the MemberPress website.
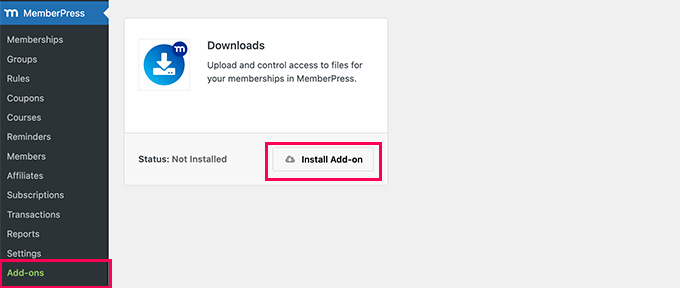
Next, go to the MemberPress » Add-ons page.
Here, you simply need to find the Downloads add-on. Go ahead and click the ‘Install Add-on’ button to add it to your site:
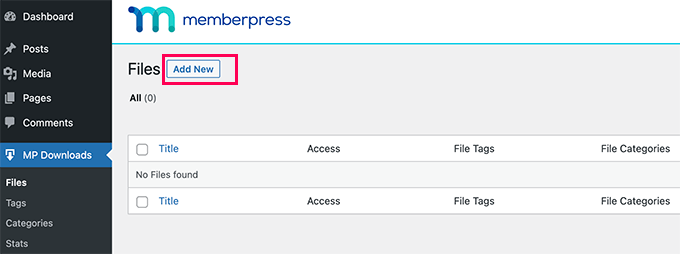
Now, you just need to go to the MP Downloads » Files page.
From here, click the ‘Add New’ button to create a new download.
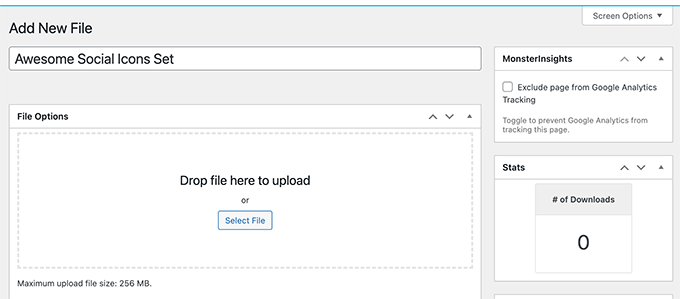
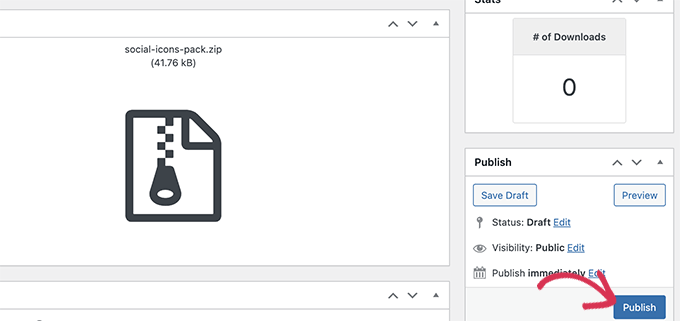
On the next screen, first, you need to enter a title for your download.
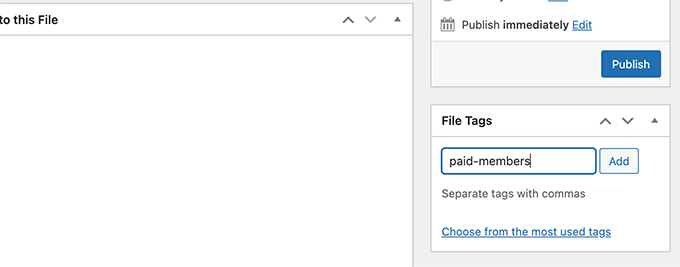
Once you’ve done that, upload the file you want to use. You can also choose additional options on this page, such as adding categories or tags to your download.
We’re going to give our file the tag ‘paid-members’ so that this file and others can be easily protected by a MemberPress rule.
When you’re ready, click the Publish button to make your downloadable file live.
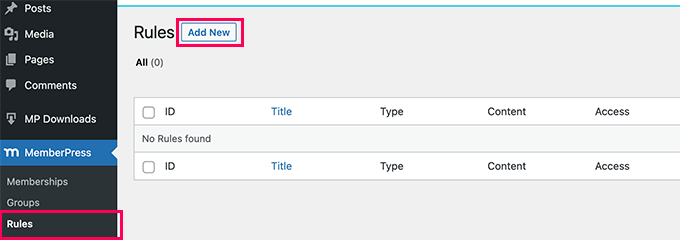
If you don’t already have a rule defining conditions that must be matched to access files with this tag, simply create one under MemberPress » Rules.
Just click the ‘Add New’ button to create a new rule:
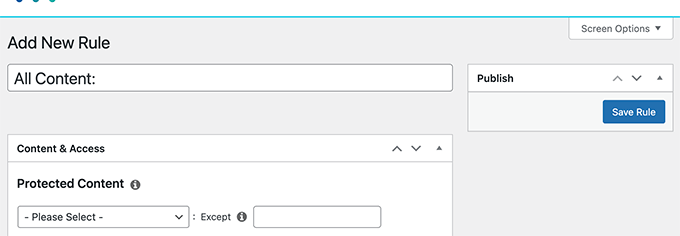
You will then see the page for adding a new rule.
From here, you can customize the new rule for the tag.
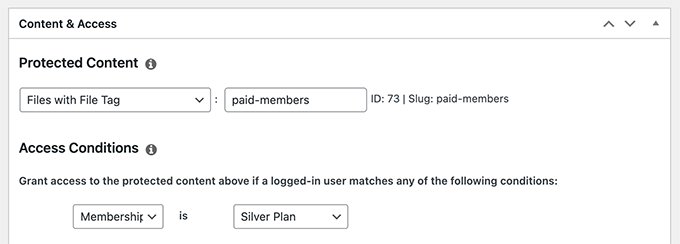
In the ‘Content & Access’ section, click on the dropdown below Protected Content.
Select ‘Files with File Tag,’ and in the box next to it, type and select the tag you’re using:
Then, under ‘Access Conditions,’ click the dropdown. Simply select ‘Membership’ and then the name of the appropriate membership level.
If you haven’t yet set up any memberships, then you can go ahead and do so under MemberPress » Memberships.
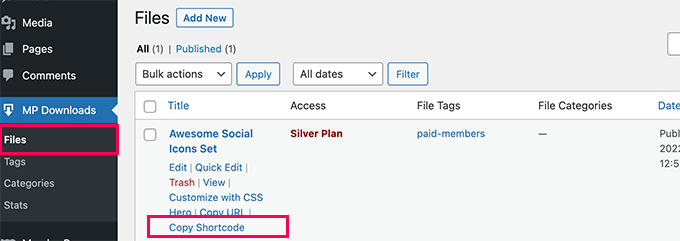
Now, go to the MP Downloads » Files page again. You will see your file listed here. It should have the correct access type based on its tag.
Click the ‘Copy Shortcode’ link to get the shortcode for this file.
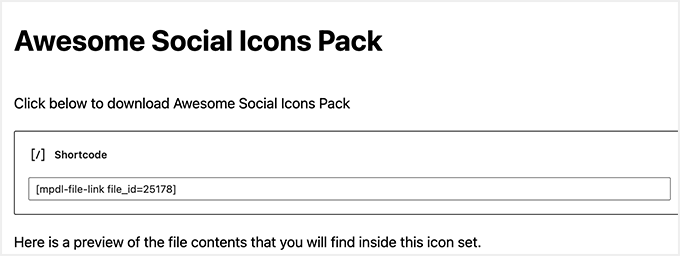
Next, paste this shortcode into any post or page on your WordPress site.
You can also create a new page just for your file download.
First, go to Pages » Add New in your WordPress admin. Then, go ahead and paste your shortcode into your page. WordPress will automatically create a shortcode block for you if you’re using the block editor.
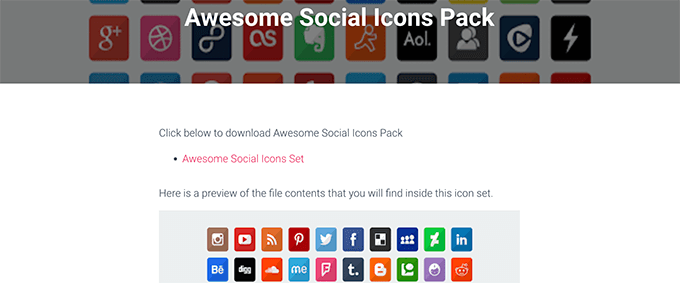
Once you’ve added all the content you want on your page, simply click the ‘Publish’ button to put it live on your site.
Remember to protect your page using MemberPress rules if you want both the page and the file to only be accessible to members.
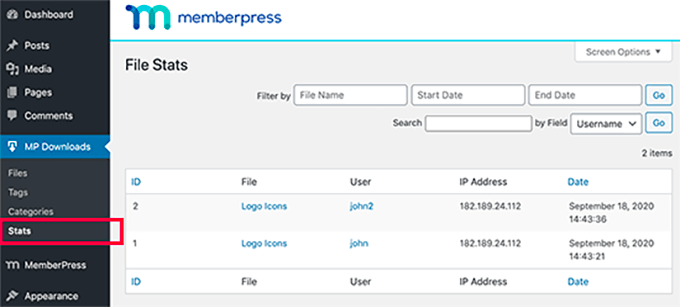
You can view your download stats by visiting the MP Downloads » Stats page.
You will see the list of users who downloaded the file with a time stamp.
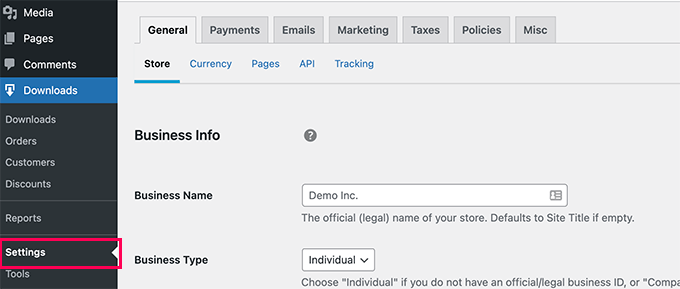
Upon activation, you need to visit the Downloads » Settings page to configure the plugin. You’ll start by providing your business details and choosing a currency.
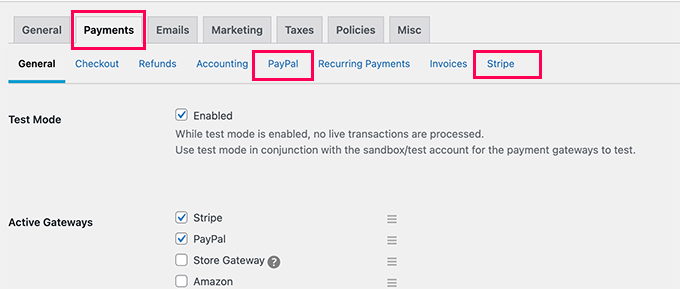
Next, switch to the ‘Payments’ tab to configure a payment gateway.
Easy Digital Downloads supports PayPal and Stripe out of the box. You can download extensions to add support for more payment gateways if needed.
After that, just switch to the tab for the gateway you’re using and enter your account details.
After setting up payments, you can start adding your file downloads.
Simply go to the Downloads page and click on the ‘Add New’ button at the top.
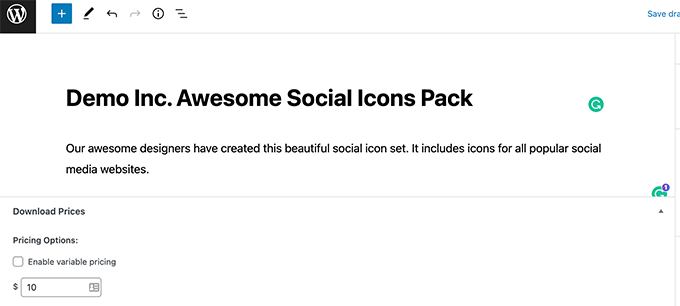
On the next page, go ahead and provide the title and description for your download.
Below that, add pricing for your digital download. If you want to offer a download for free, then simply enter $0 under ‘Pricing Options.’
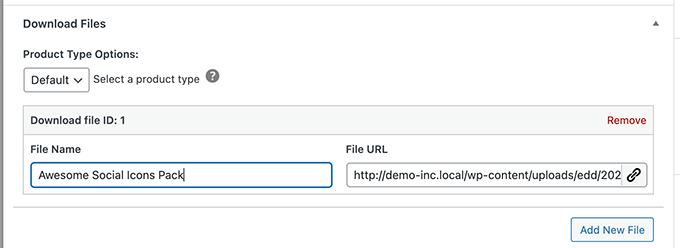
After that, scroll down to the ‘Download Files’ section.
From here, you can add a title for your file download, and then either select the file from your media library or upload the file from your computer.
Next, you can add categories or tags for your file download, add images, set download limits, and more.
Finally, click the ‘Publish’ button to make your download live on your website.
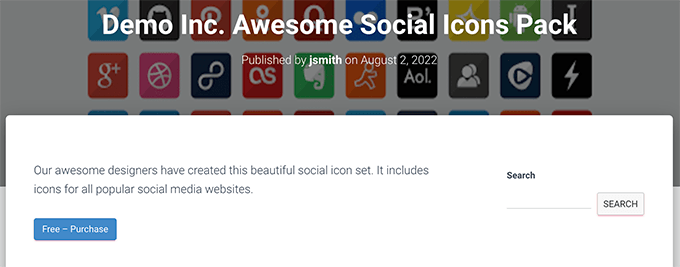
You can now preview or visit your file download page to see it in action.
Your users will be able to add the download to their cart and continue shopping or complete their purchase.
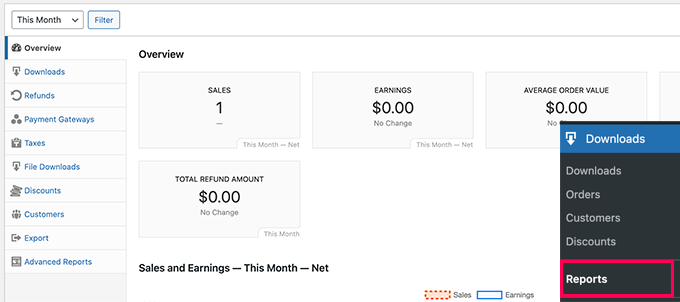
You will be able to track and manage everything using Easy Digital Downloads reporting.
Viewing Advanced Reports for Easy Digital Downloads
Easy Digital Downloads doesn’t come with advanced reporting features in the core software.
It is perfect for users who want to sell file downloads or make an online store.
WooCommerce can be used to sell both digital downloads and physical goods. You can also use it as your WordPress download manager to offer free downloads. It lets you easily track customers, manage downloads, and view stats.
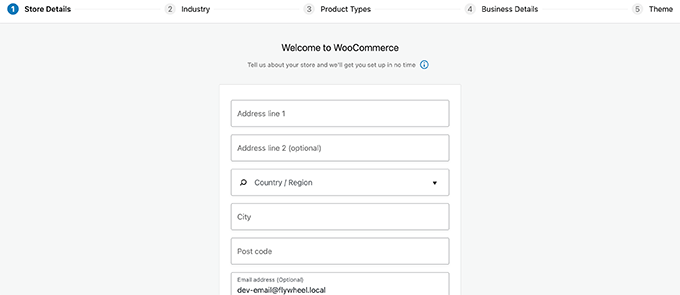
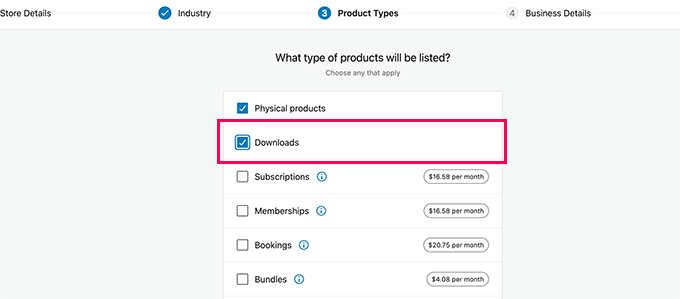
Upon activation, you should see the WooCommerce setup wizard. You can start by providing your store details and then follow on-screen instructions.
On the ‘Product Types’ screen, you need to select Downloads as one of the product types that you’ll be selling in your store.
Once you finish the setup process, you will see your WooCommerce store’s dashboard.
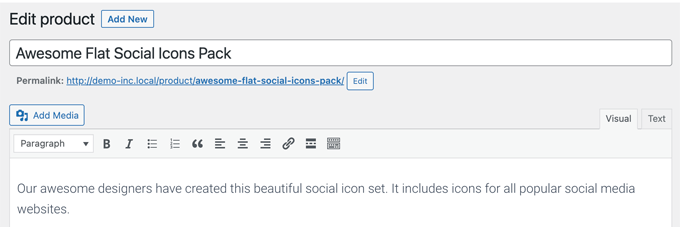
Go to the Products » Add New page to add your first file download.
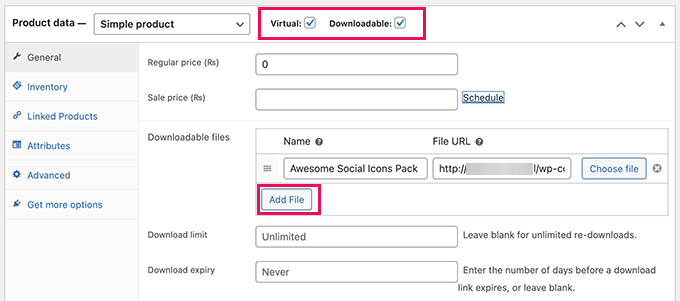
Go ahead and give your new product a title and a description. After that, scroll down to the ‘Product data’ section.
Here, you need to check the ‘Virtual’ and ‘Downloadable’ checkboxes to indicate that the product is a digital download.
Virtual products are products that don’t require shipping and can be delivered online, such as memberships, subscriptions, digital passes, and more. Similarly, Downloadables are products that users can download on their computers.
You also need to enter the price. If you’re creating a free download, you need to put 0 here.
After that, click on the ‘Add File’ button to upload the file for your digital download.
If you want, you can also fill out other options on the page. For example, you can add product images, add a short description, select a product category, and more.
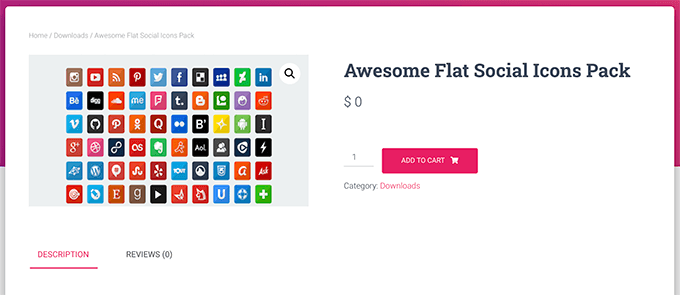
Once satisfied, click the ‘Publish’ button near the top of the page to make your product available.
Your users can now go to the product page and add the product to their cart. If it is a free product, then they will be able to check out without adding payment information. Otherwise, they can pay as normal.
After checkout, the user will be given instructions about how to download the file to their computer.
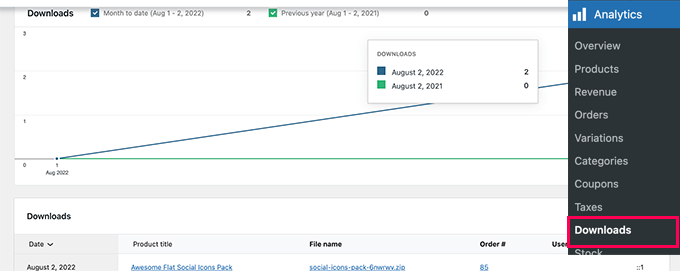
Tracking File Downloads in WooCommerce
To view how your file downloads are doing, just go to Analytics » Downloads in your WordPress dashboard. From here, you will see an overview of file downloads with a list of popular downloads below.
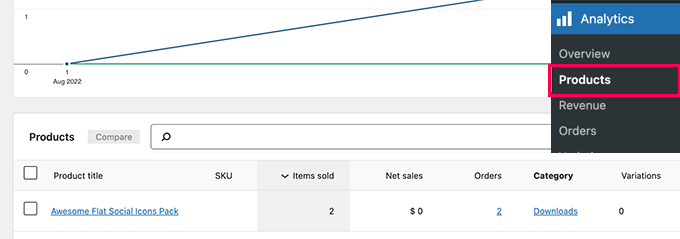
You can also switch to different pages under ‘Analytics’ to see how your store is doing.
For instance, you can see your top products/downloads under the ‘Products’ page.
Bonus: Tracking Conversions For Your File Downloads in WordPress
You may have noticed that three of the platforms we mentioned come with only basic reporting features.
For instance, they can show you the number of downloads, customers, and the files they bought. However, they will not show you what led a customer to conversion.
This information is significant as it tells you what’s working on your website and helps you make decisions for your business’s growth.
We hope this article helped you learn how to manage, track, and control file downloads in WordPress. You may also want to see our tips on the best email marketing services to sell your digital downloads better.
If you liked this article, then please subscribe to our YouTube Channel for WordPress video tutorials. You can also find us on Twitter and Facebook.
Do you want to add a short product description in WooCommerce?
An engaging and helpful short product description can make shoppers want to learn more about your products and help you get more sales.
In this article, we will show you how you can add a short product description in your WooCommerce store.
Why Add a Short Product Description in WooCommerce?
Similar to a post excerpt, short product descriptions can make shoppers interested in learning more about a product.
Most WooCommerce WordPress themes show the description directly beneath the product’s price on the individual product pages.
Since it’s one of the first things shoppers will see, this description is perfect for sharing important information about a product such as its size, or the material it’s made from.
This can help shoppers quickly decide whether they want to learn more about the product by scrolling to its full description or checking out its product image gallery. In other words, an engaging description can act as a sales pitch for the rest of your product page.
With that in mind, let’s see how you can add a short product description in WooCommerce.
How to Add a Short Product Description in WooCommerce
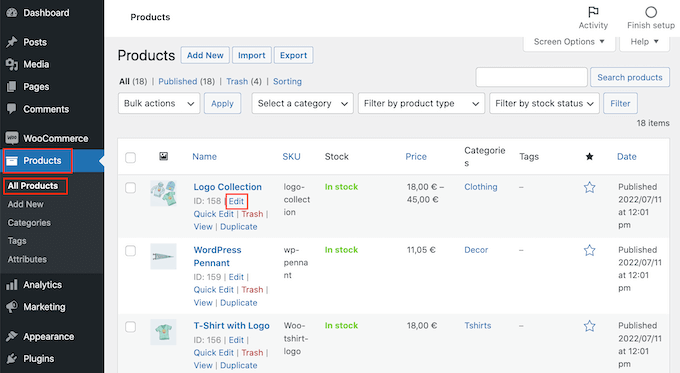
To create a short description, go to Products » All Products in your WordPress dashboard.
Then, find the product where you want to add a short description and click on its ‘Edit’ link.
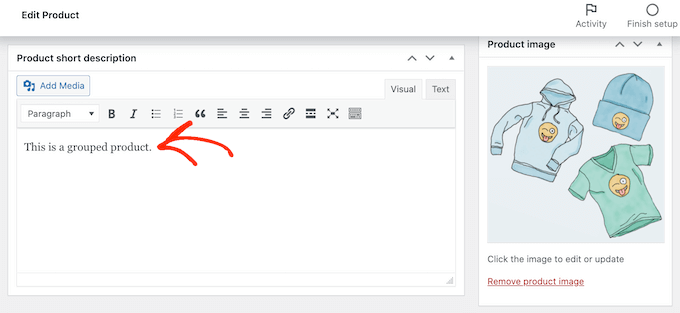
Once you’ve done that, scroll to the ‘Product short description’ box.
You can now type a description into the text area.
When you’re happy with the information you’ve entered, simply update or publish the product page as normal.
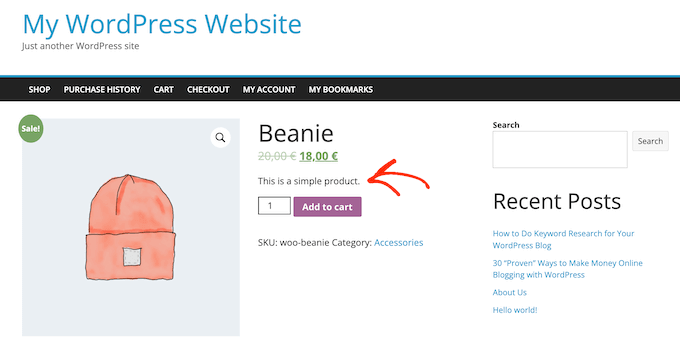
Now if you visit this product page on your website, you’ll see the short description towards the top of the screen.
Most themes will show this description directly beneath the product’s price and the ‘Add to cart’ button. You may see something different depending on your WordPress theme, but usually it will be shown towards the top of the page.
How to Show Short Product Descriptions on Your Main Store Page
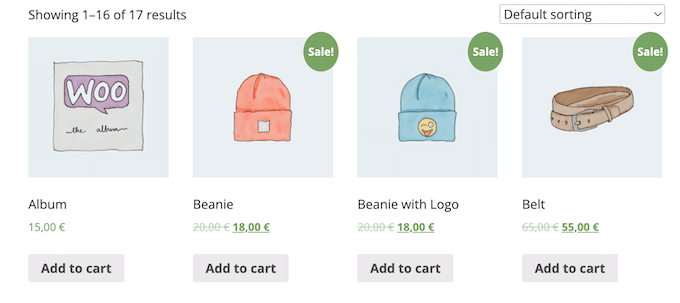
By default, most WooCommerce themes will show the short description on the individual product pages only.
Typically, they don’t show the description on the product category pages or the main store page, as you can see in the following image.
However, sometimes you may want to show this information on the main store and category pages. This can help customers spot products they want to learn more about by visiting the full product page.
To show the short description on the main store page and product category pages, you’ll need to add some code to your website.
You’ll need to copy/paste the following in the WPCode plugin (recommended) or in your theme’s functions.php file:
add_action( 'woocommerce_after_shop_loop_item', 'woo_show_excerpt_shop_page', 5 );
function woo_show_excerpt_shop_page() {
        global $product;

        echo $product->post->post_excerpt;
}
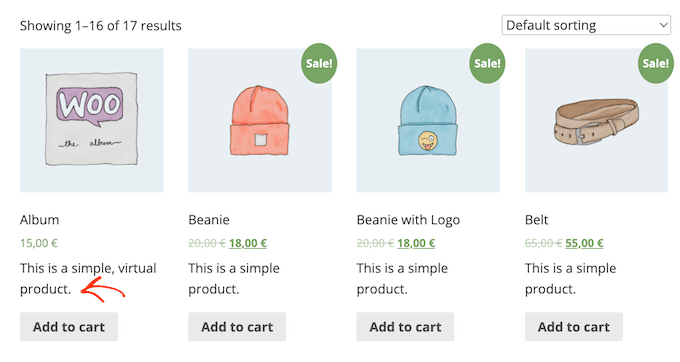
Now, the main store and product category pages will show the short descriptions for your different products.
Most WooCommerce themes will display this information between the product’s price and the ‘Add to cart’ button. You can see this in the following image.
Just be aware that having too many words on your store and product category pages can make your site look cluttered and confusing.
If you don’t like the way a particular short product description looks, then you can always change it by following the same process described above.
How to Show Short Descriptions in a Custom WooCommerce Theme (Advanced)
If you are unhappy with how the description looks on your product page, then you can use a page builder plugin to create a custom WordPress theme for your online store.
SeedProd is the best landing page builder and theme builder for WordPress and allows you to build your own WooCommerce theme without having to write a single line of code. In this way, you can control exactly where the short product description appears on your product pages.
The free version of SeedProd is available on WordPress.org, but we will be using the Pro version of the plugin because it comes with the theme builder and ready-made WooCommerce blocks. These blocks include a ‘Short Description’ block.
In this section, we’ll show you how to create a completely custom Single Product layout for your WooCommerce store.
You will need to repeat this process and create a unique layout for every page of your online store. For example, you’ll use SeedProd to create a design for your store’s homepage and archive page.
This gives you complete control over your entire store’s layout. This makes it a powerful and flexible option for anyone who is looking to design a totally custom WooCommerce store.
You can find this information under your account on the SeedProd website and in the purchase confirmation email that you got when you bought SeedProd.
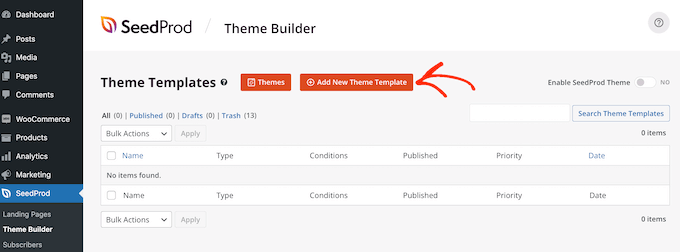
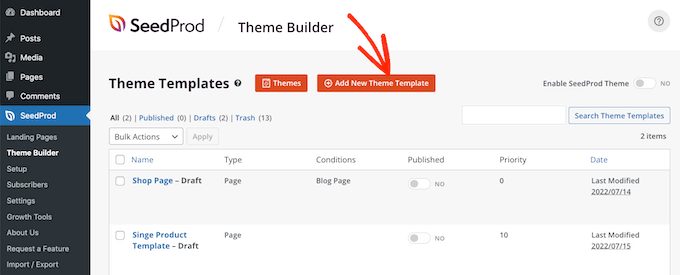
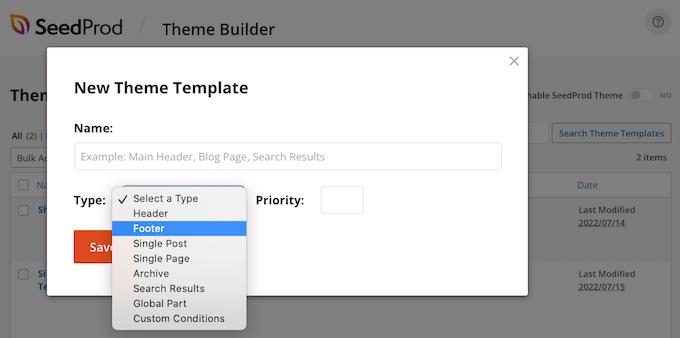
After typing in your key, go to SeedProd » Theme Builder. Here, you will click on the ‘Add New Theme Template’ button.
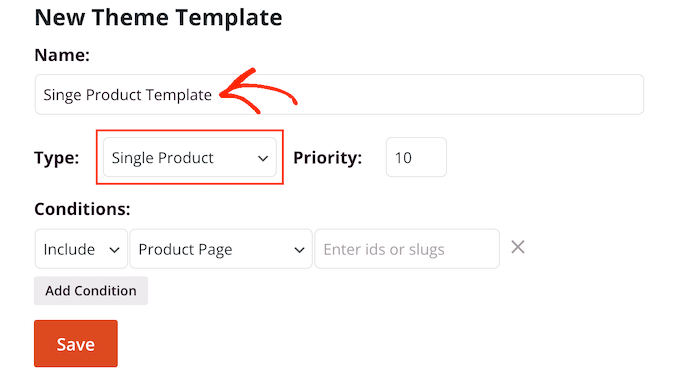
In the popup that appears, type in a name for your product page design into the ‘Name’ field and open the ‘Type’ dropdown and click on ‘Single Product.’
Once you’ve done that, click on the ‘Save’ button. Doing so will load the drag-and-drop SeedProd page builder.
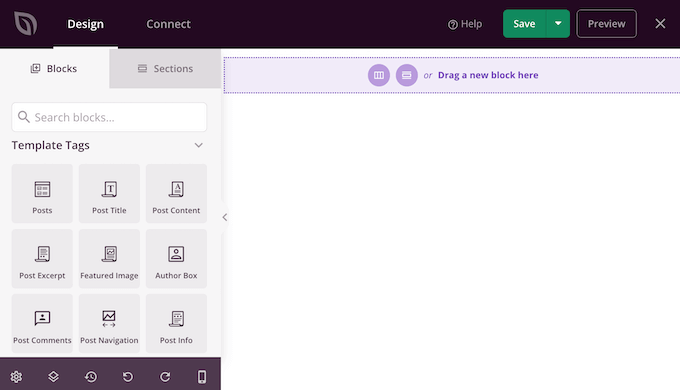
SeedProd shows a live preview of your product page on the right side of the page. This will be blank to begin with.
The left side shows a menu of the different blocks and sections that you can add to your custom WooCommerce product page.
SeedProd comes with lots of ready-made blocks including some special WooCommerce blocks. You can build a completely custom product page within minutes using these ready-made blocks.
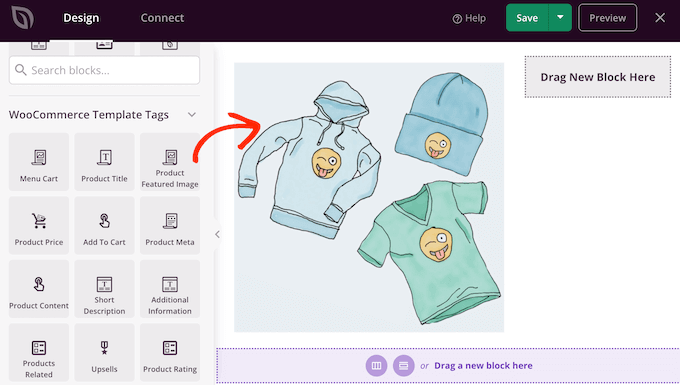
Since we’re using a blank template, you’ll be adding all of the WooCommerce product page elements yourself. These include the ‘Product Featured Image’ and ‘Product Title’ as well as the ‘Short Description.’
In addition to those, you can also use SeedProd blocks like spacers, columns, and dividers to give your WooCommerce page a nice structure and organized layout.
Next, find WooCommerce Template Tags in the left-hand menu and choose a block to add. You simply need to drag one into the SeedProd builder to enable it.
If any block needs additional customization, you can click on it in the SeedProd editor. The left-hand menu will now update to show all the settings that you can use to customize the selected block.
For example, if you click on a ‘Product Title’ block then you’ll be able to change the size of the font, the text alignment, and more.
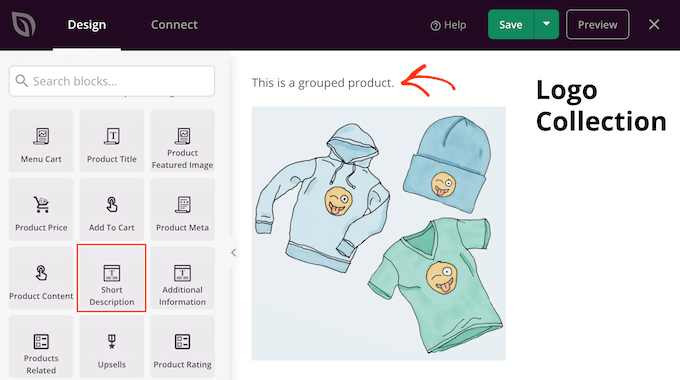
To add a short description to your design, simply find the ‘Short Description’ block in the left-hand menu.
Then, simply drag and drop this block anywhere onto your design.
As you’re building your product page, you can move blocks around your layout by dragging and dropping them. This makes it easy to create a WooCommerce product page with a totally custom layout in SeedProd.
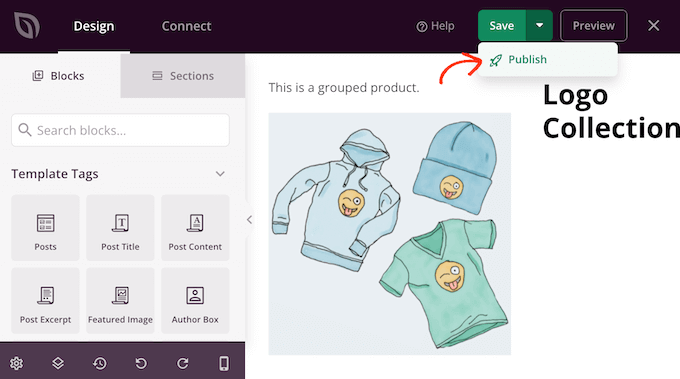
When you’re happy with your WooCommerce product page’s design, you can click on the ‘Save’ button in the upper-right corner.
Finally, you can click the ‘Publish’ button for your WooCommerce product page to go live.
You’ve now created a completely custom product page design for your online store.
You can now create a template for all the different WooCommerce pages by following the same process described above. If you’re unsure what design to create next, then simply click on the Add New Theme Template button.
In the popup that appears, click on the ‘Type’ dropdown menu.
You will now see a list of all the different templates that you need to create such as header, footer, and single post.
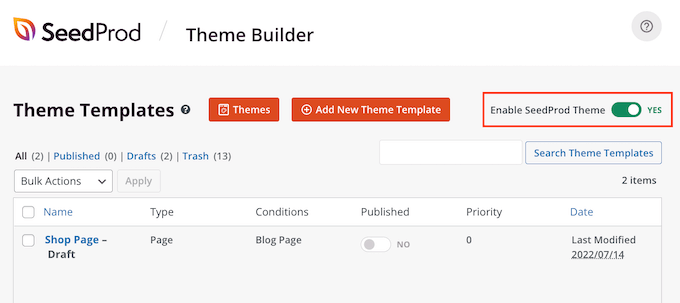
After creating a design for each of these content types, you’re ready to make your custom theme live.
Simply head over to SeedProd » Theme Builder, and then click on the ‘Enable SeedProd’ slider to turn it from ‘no’ (grey) to ‘yes’ (green).