Monday, September 26, 2022

What’s Coming in WordPress 6.1 (Features and Screenshots)

WordPress 6.1 Beta arrived a few days ago, and it is expected to be released on November 1st, 2022. It will be the last major release of 2022 and will come with many new features and improvements.

We have been closely monitoring the development and trying out new features on our test sites.

In this article, we’ll give you a sneak peek into what’s coming in WordPress 6.1 with features and screenshots.

Preview of the upcoming WordPress 6.1 release

Note: You can try out the beta version on your computer or on a staging environment by using the WordPress Beta Tester plugin. Please keep in mind that some of the features in beta may not make it into the final release.

New Default Theme:  Twenty Twenty-Three

As per the WordPress tradition, the last release of the year will ship with a new default theme called Twenty Twenty-Three.

Twenty Twenty-Three new default theme in WordPress 6.1

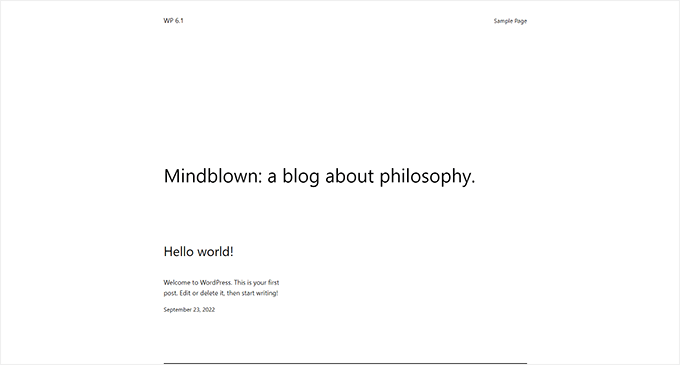
Featuring a minimalist style, Twenty Twenty-Three is a block theme with full site editing capabilities.

It will come with ten style variations that users can choose inside the Site Editor.

Twenty Twenty-Three styles

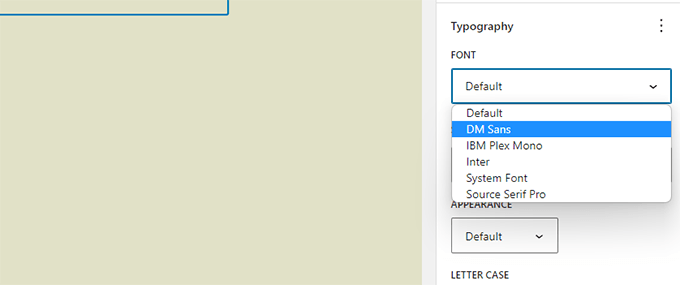
It will also ship with four fonts that are used in different styles. You can also select these fonts when writing posts and pages.

Twenty Twenty-Three

Overall, Twenty Twenty-Three provides a beautiful canvas to create a website using the design tools available in the site editor.

Block Editor Improvements

WordPress users spend most of their time creating posts and pages for their websites using the block editor.

Each WordPress release comes with a ton of improvements to the editor. WordPress 6.1 will include changes introduced in the Gutenberg (code name for the block editor project) releases from 13.1 to 14.1.

The major focus during these Gutenberg releases was to bring consistency to the availability of design tools for different blocks.

Following are some of the more noticeable changes in the block editor

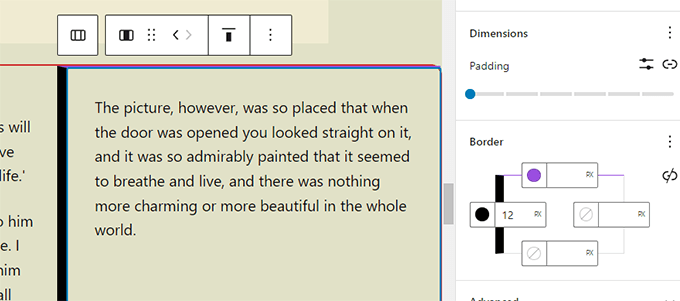
Dimensions in More Blocks

WordPresss 6.1 will bring dimensions to more blocks like Paragraph, List, Columns, Table, and more.

Dimensions under block tools

This will allow users to set padding and margin for more blocks and have a much finer control over the design and layout.

It will also help users visualize the changes when adjusting padding and margins for a block.

Visualize padding and margin adjustments

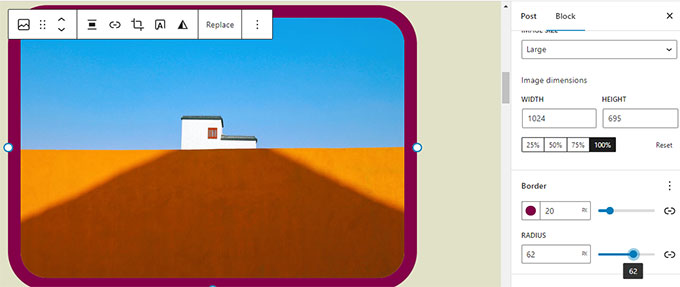
Improved Border Options

With WordPress 6.1, users can add borders to more blocks. They will also be able to adjust the top, right, bottom, and left borders separately.

Advanced border controls for more blocks

The image block, which previously only allowed you to select border radius, will now also allow you to add actual borders.

Image border

Featured Image in Cover Block

Our users often ask about the difference between featured image and cover block in WordPress. Many users wanted to use the cover block as featured image for their site.

WordPress 6.1 will allow users to select their featured image for a cover block. Users can then just set the featured image and it will start appearing inside the cover.

Featured image in cover block

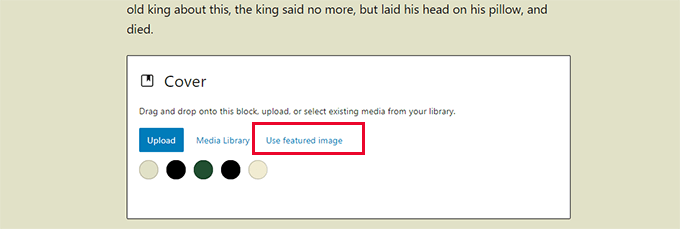
Using cover will allow users to display featured images anywhere they want.

Note: Depending on your theme, if this option is not used correctly, then your featured image may appear twice on the screen.

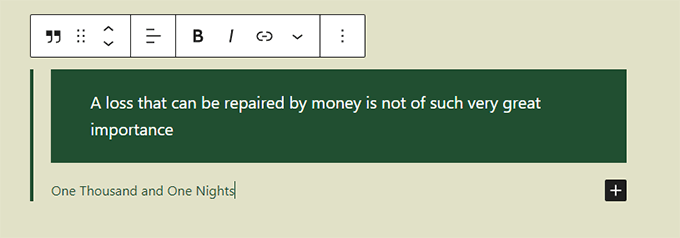
Quote and List Blocks with Inner Blocks

Ever wanted to move an item up or down in a bulleted list without actually editing it?

WordPress 6.1 will introduce inner blocks for List and Quote blocks.

For instance, items in a list block will be their own blocks. This would allow you to simply move them up and down without editing.

Move list items up and down

Similarly, when using the Quote block, users can style quote and cite blocks differently.

Quote block

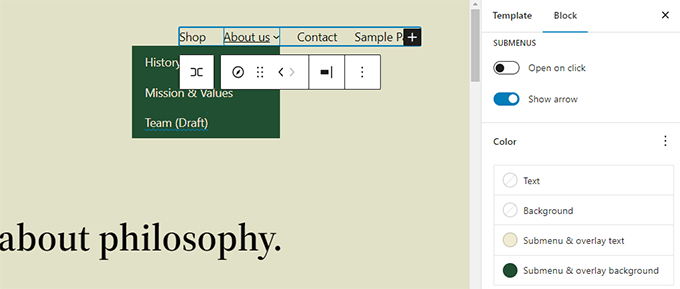
Improved Navigation Block

WordPress 6.1 comes with an improved navigation block that allows you to easily create and select a menu from the block settings.

Navigation menu improved

Users will also be able to use design tools for submenus and style them differently than the parent menu item.

Submenu colors

Editor Design Enhancements

WordPress 6.1 will also come with several changes to the Editor screen design. These changes will improve the user experience on the block editor screen.

Following are some of those enhancements:

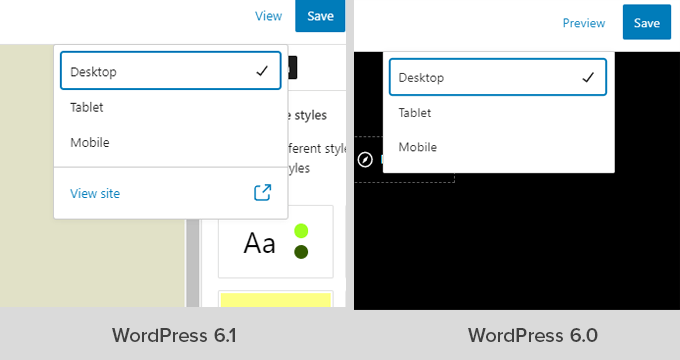
Preview Button is Now Labeled View

The Preview button is now called View.

View button

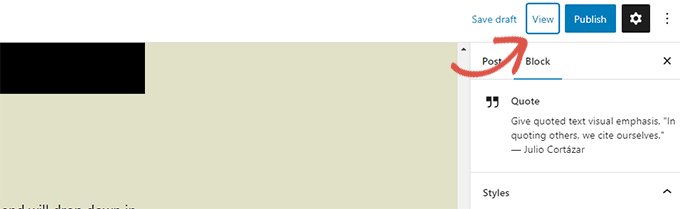
In Site Editor, the View button now also includes a link to simply view your website in a new tab.

View site preview

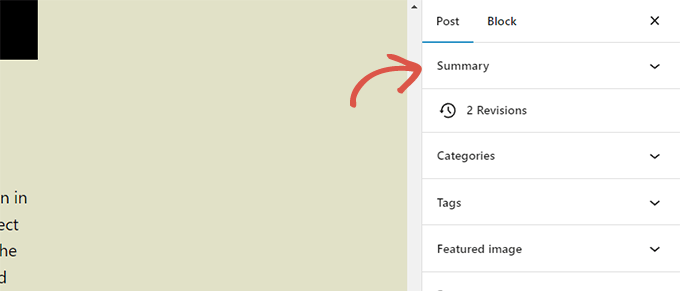
Status & Visibility Panel is now Called Summary

The status and visibility panel under the Post settings will be renamed Summary.

Summary panel

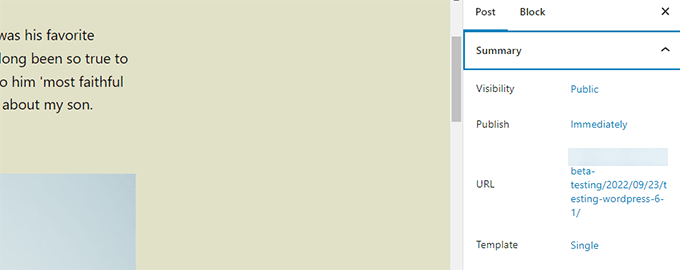
Permalink and Template Options Under Summary Panel

Permalink and Template options has their own panels under Post settings. With WordPress 6.1 these panels are merged under the Summary panel.

Missing panels in WordPress 6.1

Just click to expand the Summary panel, and you’ll find the option to change ‘URL’ (permalink) and choose template.

Moved items

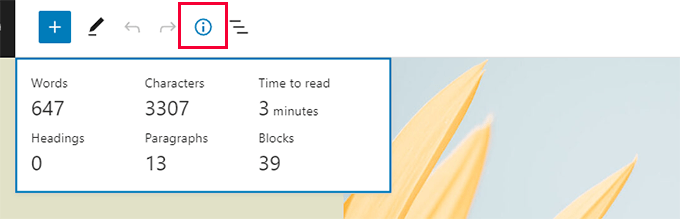
Improved Information Panel

In WordPress 6.1, the information popover will also display the time to read information.

Improved information panel

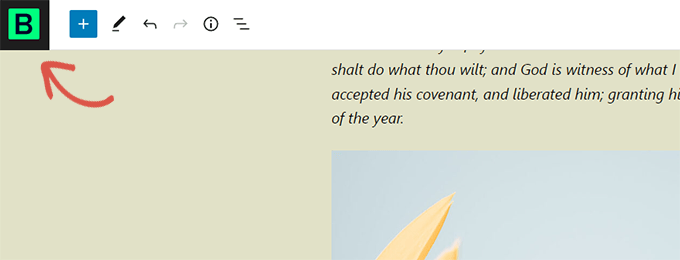
Site Icon will Replace the WordPress Logo

If you have set the site icon for your website, then it will be used as the View Posts button in the top left corner of the screen.

Site icon will be used as logo on editor screen

New Preferences Options

The preferences panel now includes two new options.

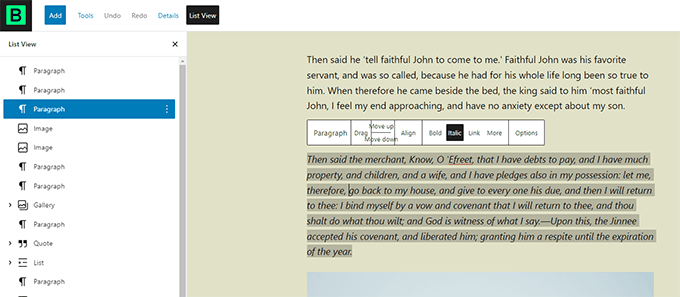
First, there is ‘Always open list view’ which allows you to display list view when editing posts.

New preferences option

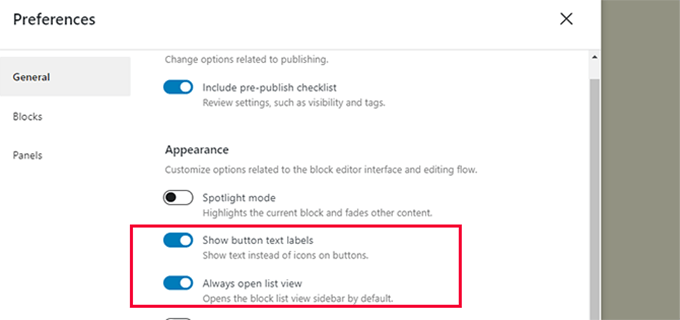
The second new option is to ‘Show button text labels’, which shows text instead of icons on buttons.

Buttons and icons replaced with text labels

Create More Templates in Site Editor

In the classic WordPress themes, users could create templates using template hierarchy and extend their WordPress theme by writing code.

With WordPress 6.1, users will be able to do the same using the block editor and without writing code.

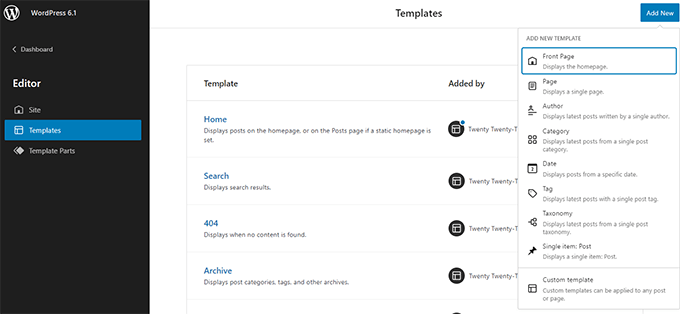
The upcoming release will unlock the following templates regardless of which block theme you are using.

  • Single page
  • Single post
  • Indivdual term in a taxonomy
  • Individual category
  • Custom template (can be used for any post or page)

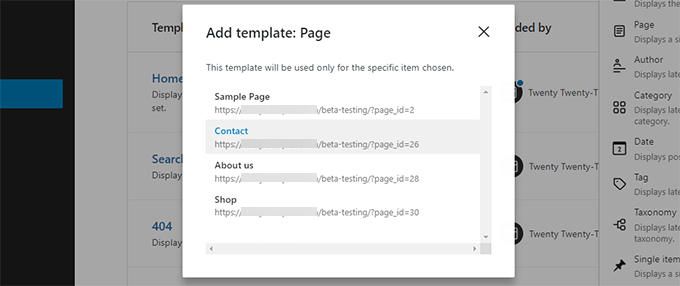
Simply go to Appearance » Editor and then select templates from the left sidebar. After that click on the Add New button to see the available options.

Site editor now has more templates

If you choose a template that can be applied to an individual item, then you will see a popup.

From here, you can choose the item where you want the new template to be used.

Create template for a single item

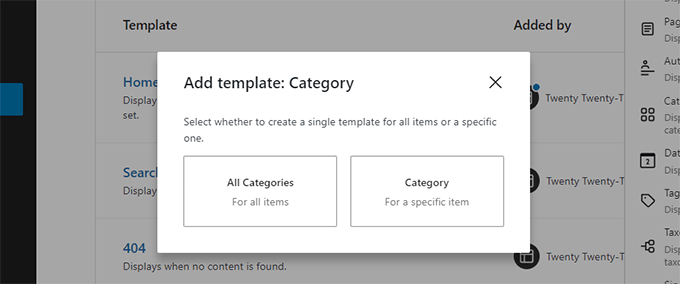
For instance, if you choose the Category template, then you’ll see a popup.

Now you can select if you want to apply your new template for all categories or a specific category.

Create template for single category

Quickly Search and Use Template Parts

WordPress 6.1 will also make it easier to quickly search and use template parts.

For instance, if your theme has multiple header template parts, then you can quickly find and apply one of them.

Replace template part

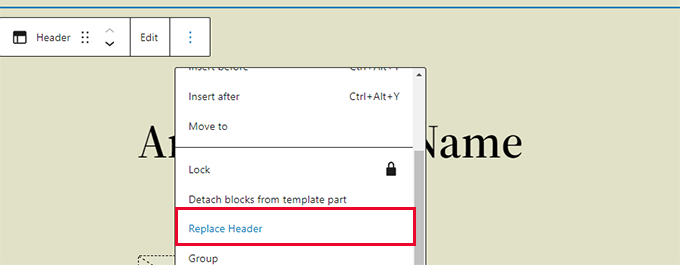
Simply select click on the template part options and select Replace.

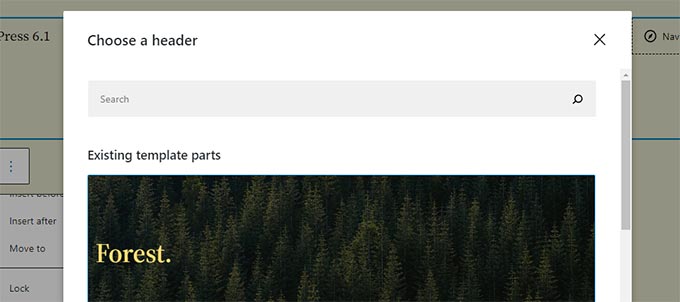
This will bring up a modal popup where you can look for available template parts that you can use.

Select a template part

Under The Hood Improvements

  • Classic themes can now use template parts (Details)
  • Fluid typography allows theme developers to dynamically adjust font sizes. (Details)
  • Post types can now have their own starter patterns (Details).
  • Filters to hook into theme.json data (Details)

Overall, WordPress 6.1 beta contains more than 350 enhancements and 350 bug fixes for the block editor, this also includes 250+ tickets for the core.

We hope this article provided you a glimpse of what’s coming in WordPress 6.1.

Comment below to let us know what features you find interesting and what you’d look to see in a future WordPress release!

If you liked this article, then please subscribe to our YouTube Channel for WordPress video tutorials. You can also find us on Twitter and Facebook.

The post What’s Coming in WordPress 6.1 (Features and Screenshots) first appeared on WPBeginner.


September 26, 2022 at 03:17PM

Sunday, September 25, 2022

How to Add Title and NoFollow to Insert Link Popup in WordPress

Do you want to add a title or nofollow tag to your WordPress links?

By default, WordPress doesn’t provide a way of adding title and nofollow attributes when creating links with the WordPress block editor.

In this article, we’ll show you how to add options for title and nofollow attributes to the Insert Link popup in WordPress.

How to Add Title and NoFollow to Insert Link Popup in WordPress

Why Add Title and NoFollow Attributes to Links in WordPress?

When writing content, you can add links to interconnect your posts and pages and refer to articles on other sites. These links will tell visitors to your WordPress website where they can find more information on a topic.

It’s helpful to give your links a title. This will appear when someone points their mouse cursor over a link.

A Link With a Title

This can be reassuring to your readers because it makes it clear where the link leads. It also improves your site’s SEO.

SEO experts also recommend that you use a nofollow attribute when linking to external websites. This attribute tells search engines that they can crawl these links, but not pass on any link authority to these websites.

However, when you click the Insert Link icon in WordPress, there are no options to add a link title or to make the link nofollow. The popup only lets you add the Link URL and gives an option to open the link in a new window.

By Default, WordPress Does Not Allow You to Add Title and NoFollow Attributes

With that being said, let’s take a look at how to easily add title and nofollow options to the Insert Link popup on your WordPress blog.

How to Add Title and NoFollow to Insert Link Popup in WordPress

The first thing you need to do is install the free All in One SEO Lite plugin. For more details, see our step by step guide on how to install a WordPress plugin.

All in One SEO (AIOSEO) is the best WordPress SEO plugin and helps you improve your website SEO. You just need the free version to add extra attributes to the Add Link popup, but AIOSEO Pro offers even more features to help you rank better in search engine results pages.

Upon activation, you need to configure the plugin using the AIOSEO setup wizard. For detailed instructions, see our ultimate guide on how to set up All in One SEO for WordPress.

Once you’ve done that, the plugin will automatically add extra attributes to the Insert Link popup.

These include a title field and options to add nofollow, sponsored, and UGC (user-generated content) tags.

AIOSEO Adds NoFollow and Title Attributes to the Insert Link Popup

To add the link title, just type it into the ‘Add title attribute to link’ field. When when you save the link, AIOSEO will apply the title and any attributes you toggle on.

We hope this tutorial helped you learn how to add title and nofollow options to the Insert Link popup in WordPress. You may also want to learn how to speed up your WordPress performance or check out our list of must-have plugins to grow your site.

If you liked this article, then please subscribe to our YouTube Channel for WordPress video tutorials. You can also find us on Twitter and Facebook.

The post How to Add Title and NoFollow to Insert Link Popup in WordPress first appeared on WPBeginner.


September 25, 2022 at 06:26PM

Saturday, September 24, 2022

How to Sell Group Memberships in WordPress for Corporate Teams

Do you want to sell group memberships for corporate teams?

Normally, membership websites only allow you to sell single user subscriptions. But what if you wanted to sell group memberships, so businesses can easily add their team members to the same account?

In this article, we will show you how to easily sell group memberships in WordPress for corporate teams.

How to sell group memberships in WordPress for corporate teams

Why Create Group Memberships in WordPress?

Selling membership subscriptions is a popular way to make money online blogging with WordPress. However, businesses may want to buy memberships for multiple people at once, such as an entire team or department.

Creating group memberships in WordPress makes it easier for companies to purchase your product licenses in bulk. It also allows the account administrator to easily add or remove licenses as needed.

Group memberships aren’t just useful for corporate teams. Volunteer groups and nonprofit organizations, church groups, or even families may find it easier to buy a group membership rather than multiple individual subscriptions.

You could also create this type of account to help teachers set up a virtual classroom for a group of students.

You may even allow members to re-sell your subscriptions. For instance, let’s say you run a membership site with healthy eating plans and online yoga classes.

Personal trainers or health and fitness experts could buy a corporate membership from your site and then sell access to their own clients.

That being said, let’s take a look at how to sell group memberships in a WordPress website.

Setting Up Group Memberships in WordPress for Corporate Teams

For this guide, we’ll be using MemberPress. It is the best WordPress membership plugin on the market and allows you to easily sell online subscriptions on your website.

First, you need to install and activate the MemberPress plugin. For more details, see our step by step guide on how to install a WordPress plugin.

Note: You will need a MemberPress Plus account or higher in order to install the Corporate Accounts add-on.

Upon activation, you’ll need to visit the MemberPress » Settings » License page in the WordPress admin area and enter your license key.

Adding the MemberPress license key

You’ll find this information under your account on the MemberPress website. It’s also in the email you got when you purchased MemberPress.

After entering this information, click on ‘Activate License Key.’

Next, you need to set up at least one payment gateway so you can easily accept credit card payments for your group memberships.

MemberPress Pro supports PayPal, Stripe, and Authorize.net. To add one of these payment gateways, simply click on ‘Add Payment Method’ and chose a payment method from the ‘Gateway’ dropdown.

Configuring a Stripe payment gateway

MemberPress will now show all the settings you need to configure before you can use this payment gateway.

Each gateway has different settings, for example in the following image we’re adding PayPal payment to WordPress.

Configuring a PayPal gateway

After adding one or more gateways, it’s time to enable the corporate membership features.

To do that, go to MemberPress » Add-ons and click on the ‘Install Add-on’ button next to the Corporate Accounts add-on.

The MemberPress Corporate Accounts add-on

Now it’s time to create a corporate membership level by going to the MemberPress » Memberships page.

Here, click on ‘Add New.’

Creating a new membership subscription

To start, type a title for your corporate membership plan.

You can then set a price by typing into the ‘Price’ field.

Adding a price to a corporate group membership

Next, use the ‘Billing Type’ dropdown to create the billing cycle, for example you might charge a one-time fee for lifetime access or create a recurring monthly subscription.

In the following image, we’re charging $100 every 6 months.

Creating a recurring group membership for corporate teams

Next, you need to scroll to the Membership Options area and click on the ‘Advanced’ tab. Here, check the box next to ‘Subscribers to this Membership are Corporate Accounts.’

After that, you will see a new field where you can set the maximum number of sub-accounts that the account owner can add to this subscription.

Anyone who purchases a corporate membership subscription will see a new ‘Sub Accounts’ link on their Account page.

How to add sub-accounts to a corporate membership

If they click the link, then they’ll see how many sub-accounts they have left to use.

They can add people to their account by typing in information such as the person’s first name, last name, and email address.

Adding a sub-account to a group team membership

By default, members can create an unlimited number of sub-accounts.

However, you’ll typically want to limit the number of sub-accounts to stop people from adding hundreds or even thousands of people to the same account.

To set a limit, type a number into the ‘Max Sub-Accounts’ field.

Setting a maximum sub-accounts for corporate group memberships

There are some more settings that you can use to further customize the membership level. However, this is enough to create a basic corporate membership subscription.

When you’re happy with how the plan is set up, go ahead and click on the ‘Publish’ button.

Publishing a corporate team membership level using MemberPress

Restricting Content for the Corporate Team Members to Access

The next step is restricting your content so only people with the right subscription can access it. You do this by creating membership rules.

For example, you might lock all child pages of a ‘Corporate Membership’ parent page, or restrict access to all posts that have the ‘corporate’ category or tag.

To create a rule, go to MemberPress » Rules in your WordPress dashboard. Then, simply click the ‘Add New’ button.

Creating a new content dripping rule

The ‘Content & Access’ section allows you to restrict access in lots of different ways.

For example, you might make a single page members-only.

Restricting access to content on your WordPress website

You can also restrict access to entire groups of content.

In this example, we’re going to restrict access to all content that has the ‘Corporate’ tag.

To do this, open the ‘Protected Content’ dropdown and choose ‘All Content Tagged.’ Then, type ‘Corporate’ into the field next to it.

Creating a content restriction rule using MemberPress

After that, open the ‘Access Conditions’ dropdown and select ‘Membership.’

You can then open the second dropdown and choose the corporate membership level you created earlier.

Restricting access to content using MemberPress levels

There are lots of other settings that you can try, including showing a preview to non-members. For example, you might show the post excerpt to people who don’t have a corporate membership. This can encourage visitors to buy a subscription so they can read the entire post.

To learn more about creating advanced membership rules, please see our ultimate guide to creating a WordPress membership site.

When you’re happy with how the rule is set up, scroll to the top of the screen and click on ‘Save Rule.’ You can create more content restriction rules, simply by repeating the same process described above.

We hope this article helped you learn how to sell group memberships in WordPress for corporate teams. You may also want to see our guide on how to create an email newsletter and our expert pick of the best business phone services for small businesses.

If you liked this article, then please subscribe to our YouTube Channel for WordPress video tutorials. You can also find us on Twitter and Facebook.

The post How to Sell Group Memberships in WordPress for Corporate Teams first appeared on WPBeginner.


September 24, 2022 at 03:52PM

Friday, September 23, 2022

How to Find Which Files to Edit in WordPress Theme

We are often asked about how to find which files to edit in a WordPress theme.

WordPress themes consist of several different files. Sometimes it may be hard for beginners to figure out which files they should edit to make certain changes in their theme.

In this article, we’ll show an easy and quick way to figure out which files to edit in your WordPress theme.

Finding which WordPress theme file to edit

Understanding WordPress Theme Template Files

WordPress themes consist of several files. These include template files, custom template tags and functions, template parts, images, JavaScript, and CSS files.

All the top WordPress themes follow the official best practices. This means they use the standard file and template structure to organize all the code.

For instance, all WordPress themes have archive.php, single.php, functions.php, and other files.

Each of these files is used as a template to display a particular area of your WordPress website. For example, single.php is used to display single posts and page.php template is used to display a single page.

Understanding the WordPress template hierarchy gives you a better understanding of how WordPress works.

If you ever need to add code to your WordPress theme, then it also helps you figure out which files you may need to edit.

For more details, see our complete cheat sheet for the WordPress template hierarchy for beginners.

That being said, let’s take a look at how to easily find which files to edit in WordPress theme.

Finding Template Files to Edit in WordPress Theme

First thing you need to do is install and activate the What The File plugin. For more details, see our step by step guide on how to install a WordPress plugin.

The plugin works out of the box, and there are no settings for you to configure.

Upon activation, you need to visit the front end your website and you will notice a new ‘What The File’ menu in WordPress admin bar.

What the file menu

Now you need to just take your mouse over to the menu item, and it will display a drop-down menu listing the template files used to display this page.

Clicking on the file name will take you to the default WordPress file editor where you can edit that particular file.

WordPress theme file editor

However, we do not recommend using WordPress file editor to edit theme files because there is no undo option.

If you accidentally lock yourself out of your website, then you would have to use an FTP client to fix it. That’s why we recommend using a FTP client or the File Manager app in your WordPress hosting control panel.

You can edit theme files using any plain text editor like Notepad.

Making direct changes to your WordPress theme is also a bad idea. Those changes will disappear when you update your theme.

If you are just adding some CSS, then you can add it as custom CSS in WordPress. For all other changes to your theme files, you should create a child theme.

The ‘What The File plugin’ can help you locate the theme files that you need to copy and edit in your child theme.

Note: The menu item added by the plugin in the admin bar will be visible to all logged-in users, and it has a link to an external site. You should only use this plugin in the development environment such as a staging site.

We hope this article helped you find which files to edit in your WordPress theme.

You may also want to see our WordPress theme development cheat sheet or take a look at WordPress generated CSS classes that you can use to style your themes.

If you liked this article, then please subscribe to our YouTube Channel for WordPress video tutorials. You can also find us on Twitter and Facebook.

The post How to Find Which Files to Edit in WordPress Theme first appeared on WPBeginner.


September 23, 2022 at 08:36PM